Table of Contents
MikroTik: Setting Up a Sonar Controlled DHCP Server
 Updated
by Kristen Fiddes
Updated
by Kristen Fiddes
Read Time: 7 mins
Initial Setup
Adding IP Addresses and Pools to the MikroTik
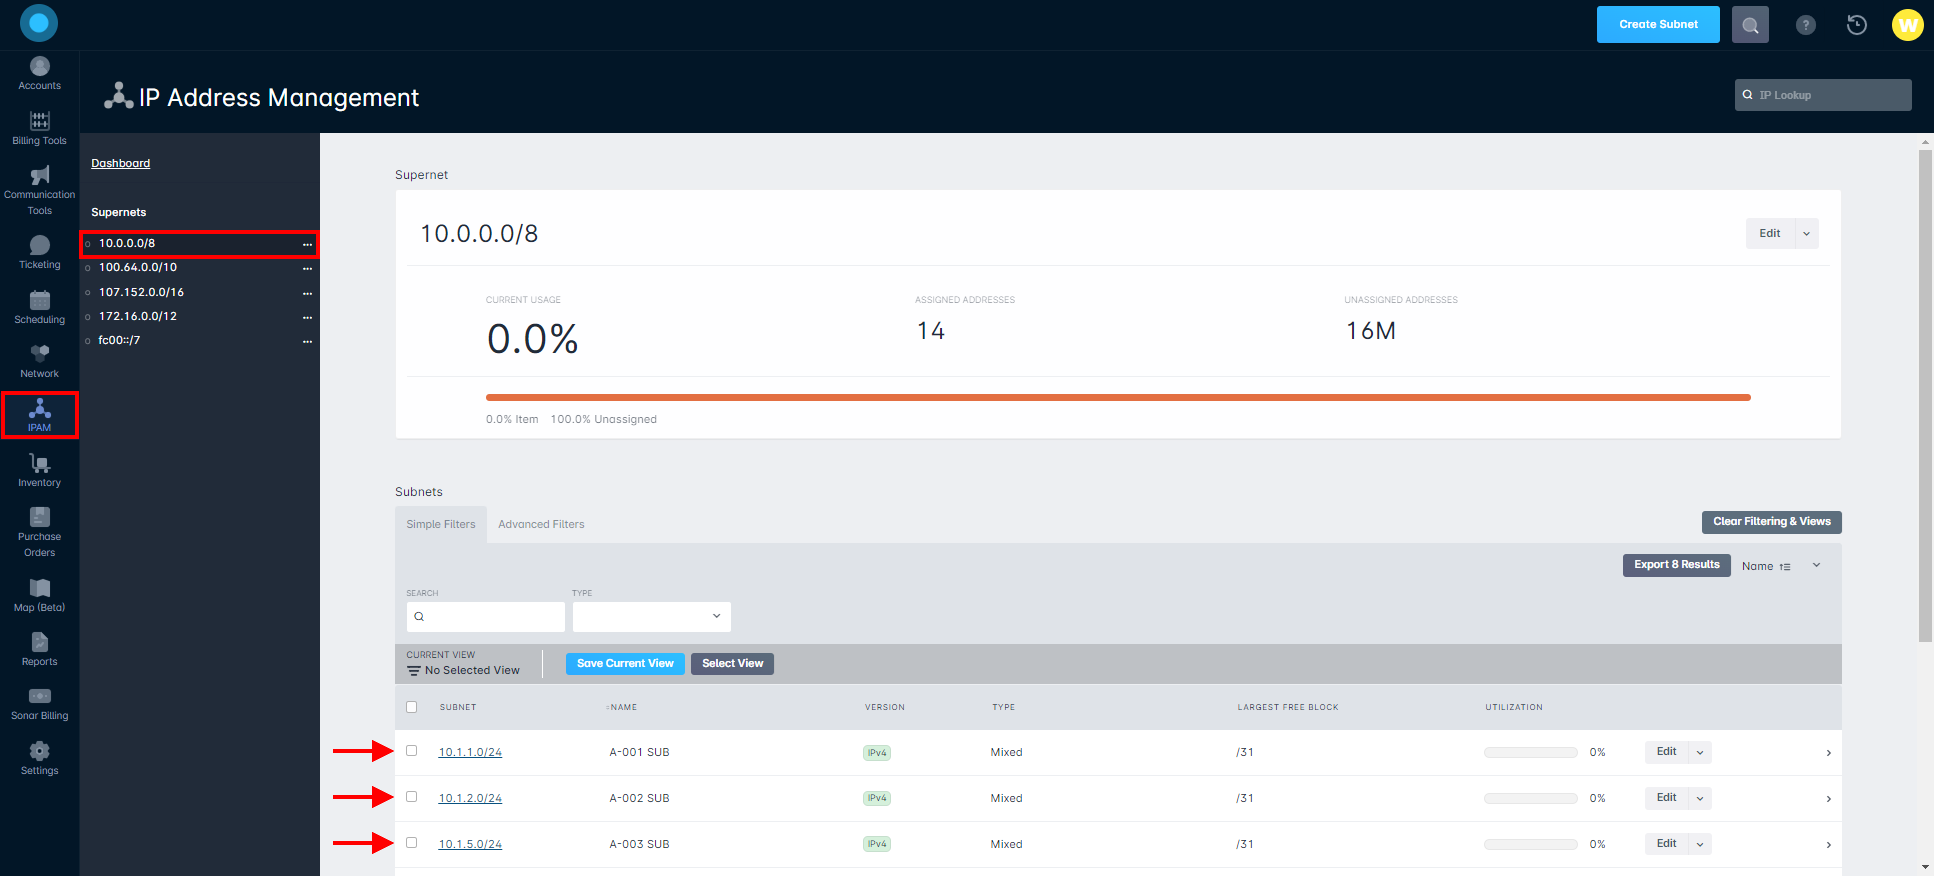
If you are already running a production network, you can skip ahead to step 3. If this is a brand new network setup, if you have not already done so, you should begin with IPAM: General Overview. Once you have completed IPAM setup, here are the steps to build these networks in your MikroTik:
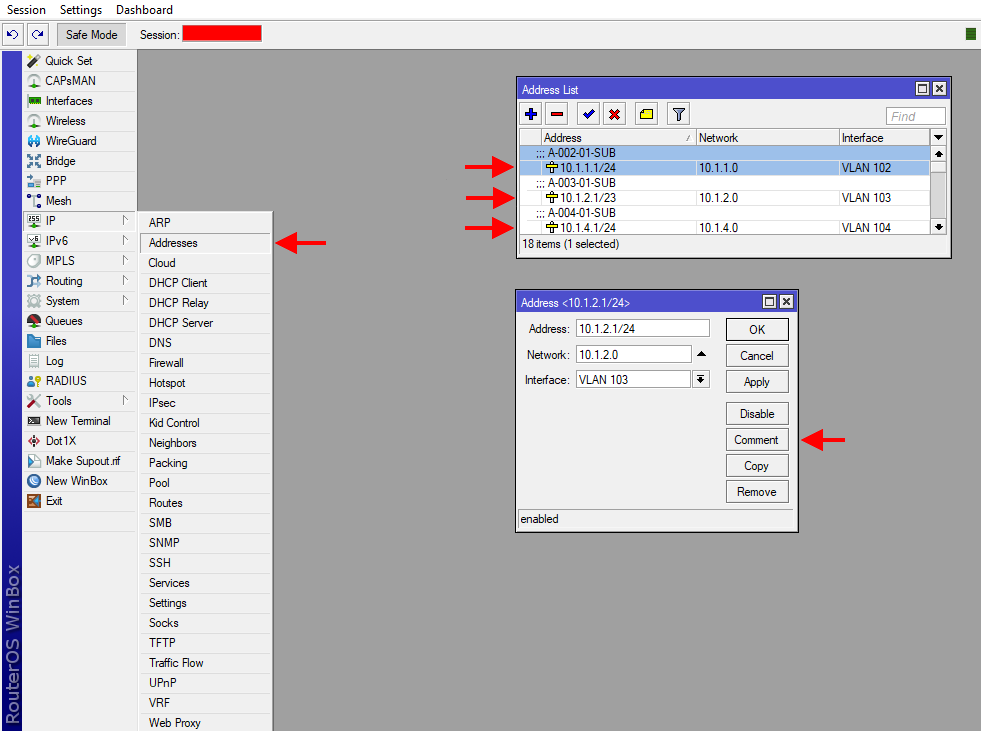
- Add the subnets built out in IPAM to the MikroTik under IP > Addresses. Make sure you assign the interface to the proper interface that goes out to the devices that will request from this address list. It is also best practice to comment the name of the subnet here.
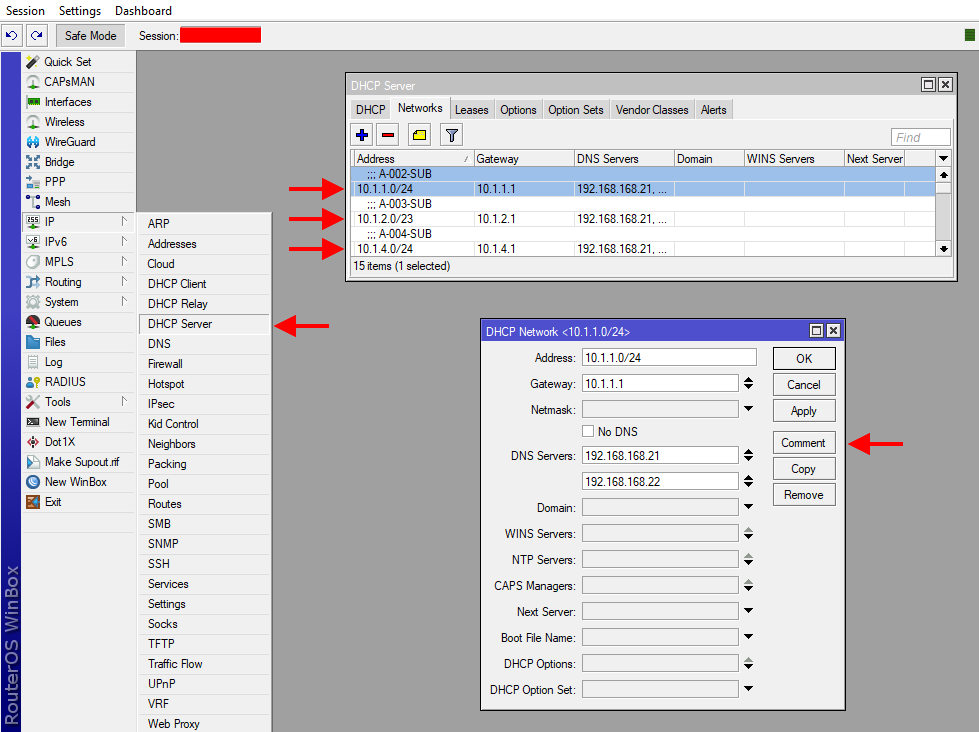
- Next, navigate to IP > DHCP Server and add the subnets from IPAM to the networks tab. You will also want to make sure that you set your internal DNS servers here. Similar to step one, it is best practice to comment the name of the subnet here.
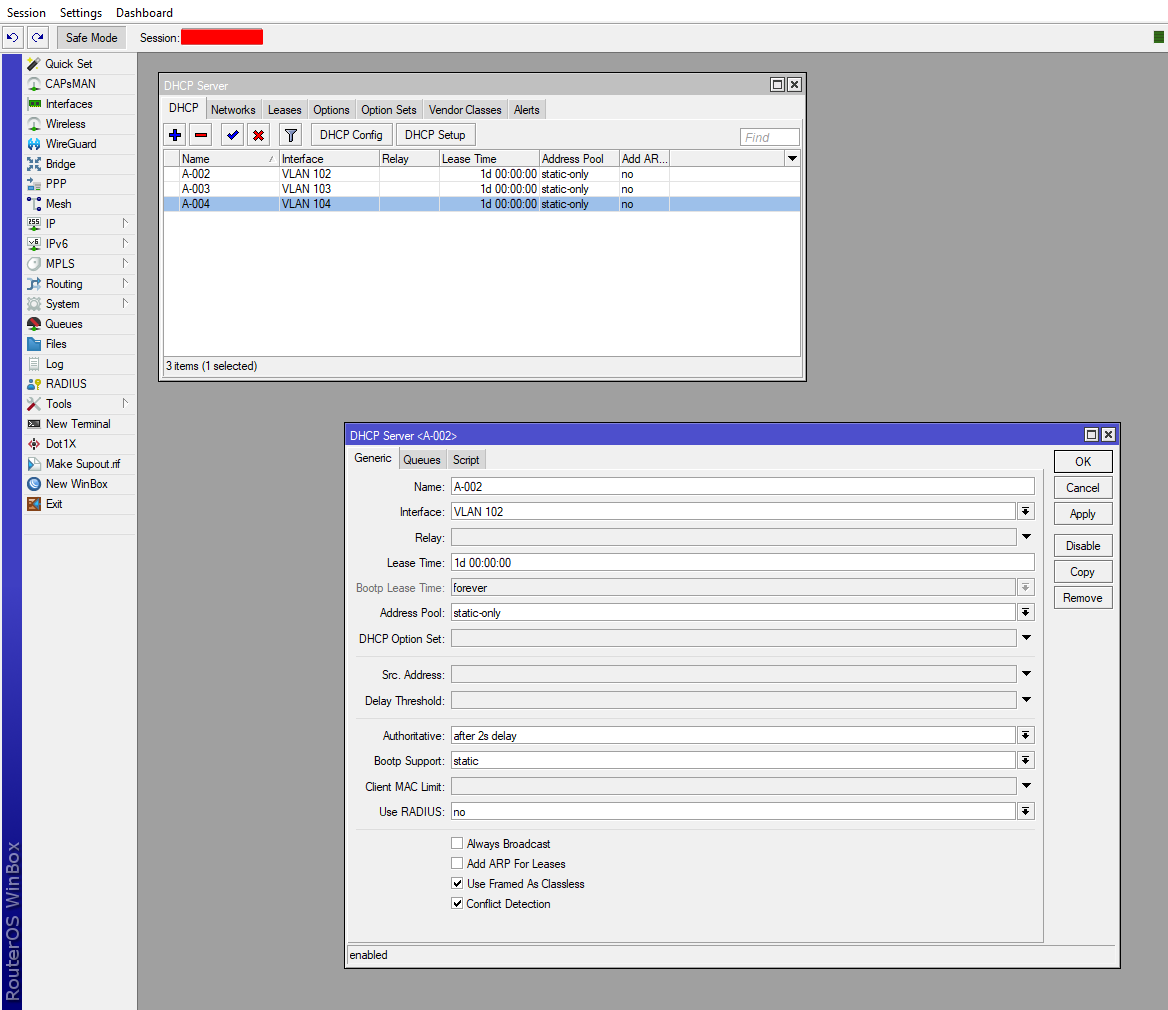
- Lastly, navigate to the DHCP tab and add the pools built out in Sonars IPAM to the MikroTik. In this case, the "Address Pool" will be set to static only because Sonar will be submitting from the pools in its IPAM to the MikroTik in the form of a static lease. Leaving this as static only ensures that no IPs are assigned from these subnets unless the assignments exist in Sonar. Here you will want to select the same interfaces for each DHCP Server the same as you set them in step 1.
Preparing the MikroTik for Sonar Integration
The first step to preparing the MikroTik for integration is to build a user within the MikroTik that Sonar can use to authenticate. Here are the steps to create and secure a user for Sonar access:
Creating the Sonar User in the Mikrotik
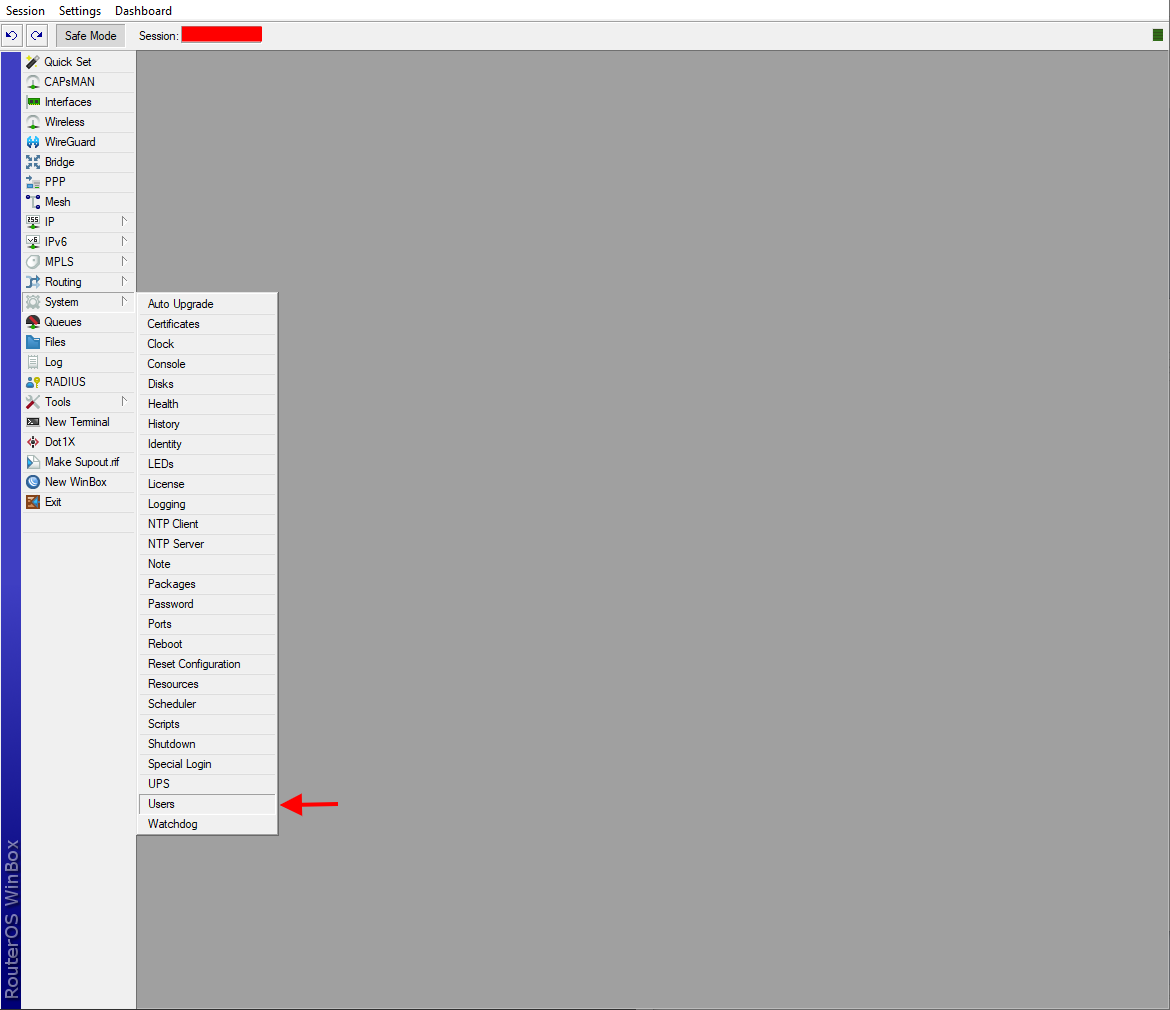
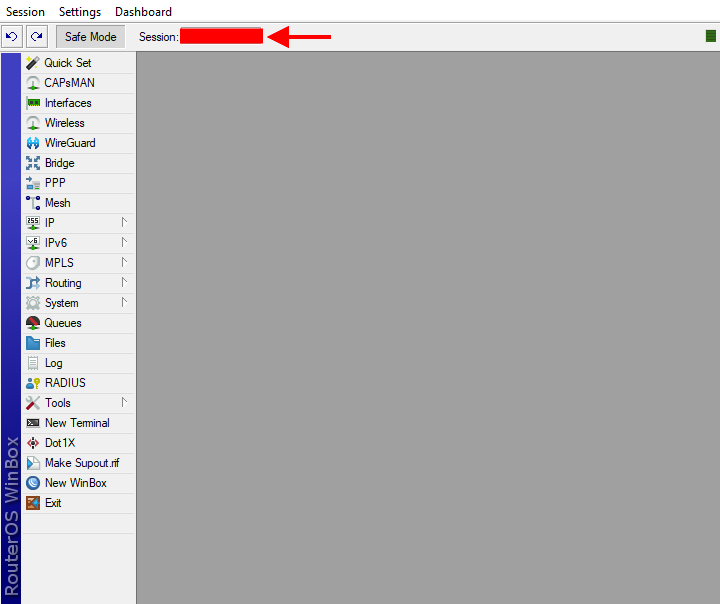
- Winbox into the MikroTik you would like to integrate and Navigate to System > Users
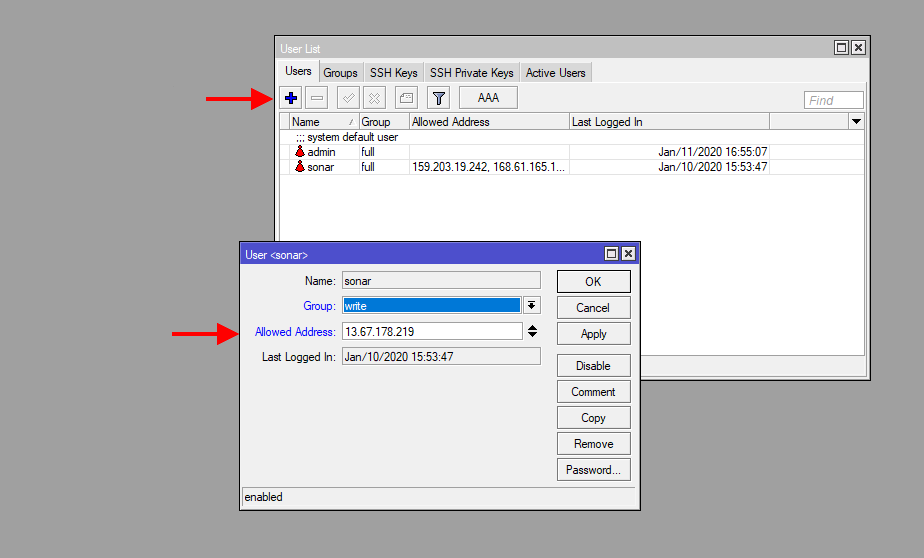
- From the User List > Users tab, click the blue plus icon to create a new user, create a username and password and store this sign-in info temporarily to the side so that we can add it to the Sonar instance shortly. You will also want to set the group to "write" and set the allowed Address to the IP address for your Sonar instance.
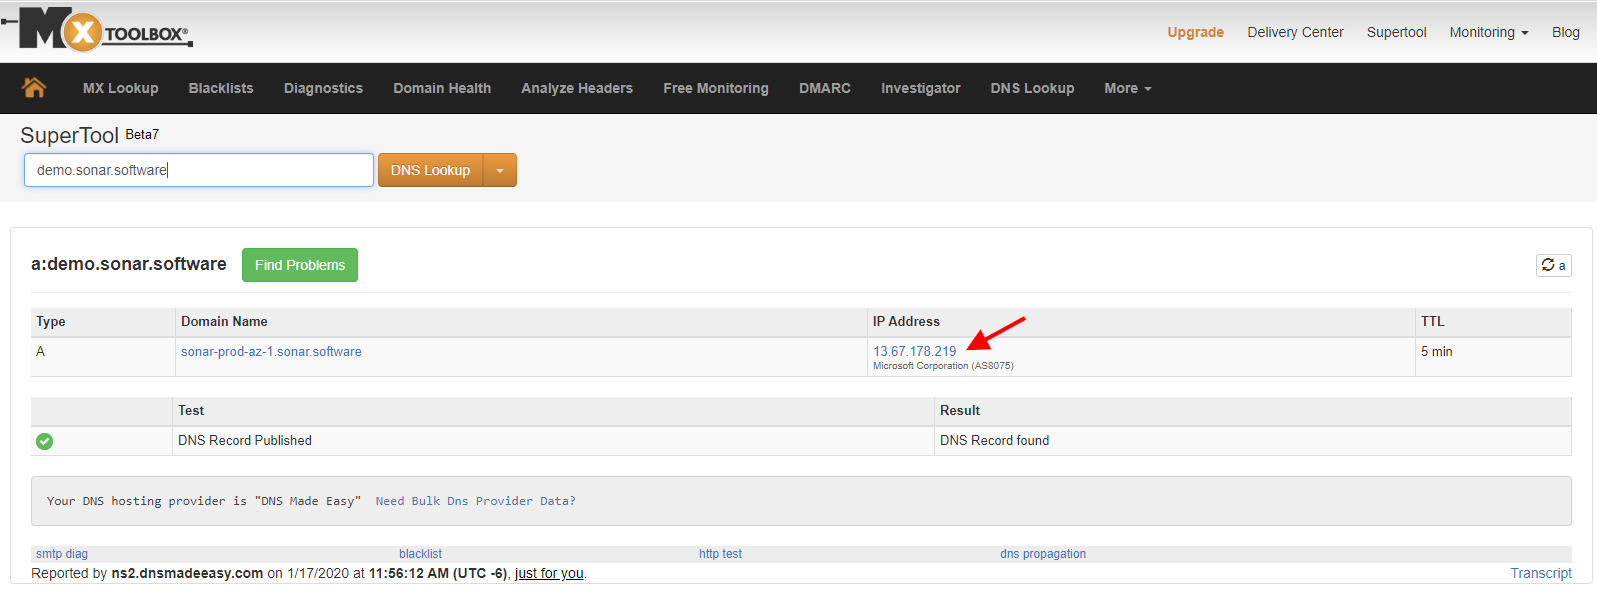
- For Sonar Legacy, this address can be looked up by typing your instance URL into https://mxtoolbox.com/DNSLookup.aspx.
- For Sonar V2, you need one of the following IP Addresses:
52.158.209.86for US and international users,20.104.33.4for Canada Data Center users.
- For Sonar Legacy, this address can be looked up by typing your instance URL into https://mxtoolbox.com/DNSLookup.aspx.
Next, API-SSL services need to be enabled on your MikroTik server. In most cases, you're able to use a self-signed certificate created right on the MikroTik itself following these steps:
Creating the SSL Certificate
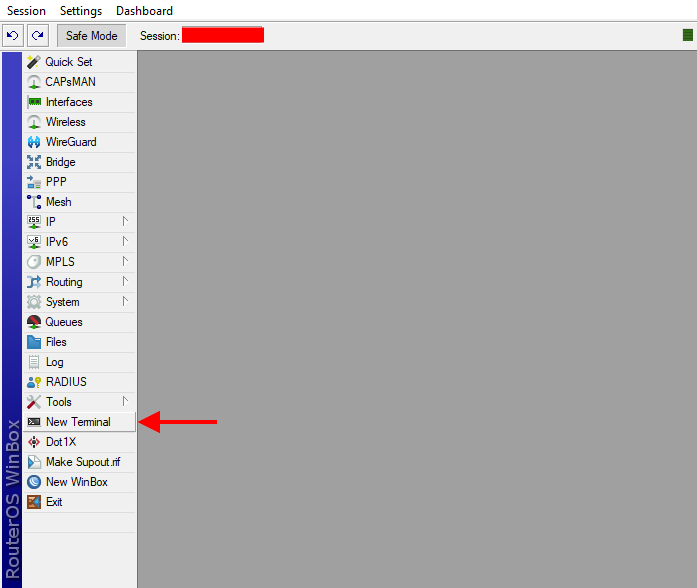
- From a Winbox session of the MikroTik you'd like to generate the certificate for, open a new terminal session:
- Make the certificate template with the following commands in the MikroTik terminal:
/certificate

add name=ca-template common-name=myCa key-usage=key-cert-sign,crl-sign - Sign the certificate and add a CRL URL. For this example, use the IP address of the Sonar Instance as CRL URL. This address is currently the same for all instances and is 52.158.209.86 (replace with your instance's URL if you're still on Sonar V1):
sign ca-template ca-crl-host=52.158.209.86 name=myCa
For V2 instances located in Canada, users will instead use the Canadian Data Center IP of 20.104.33.4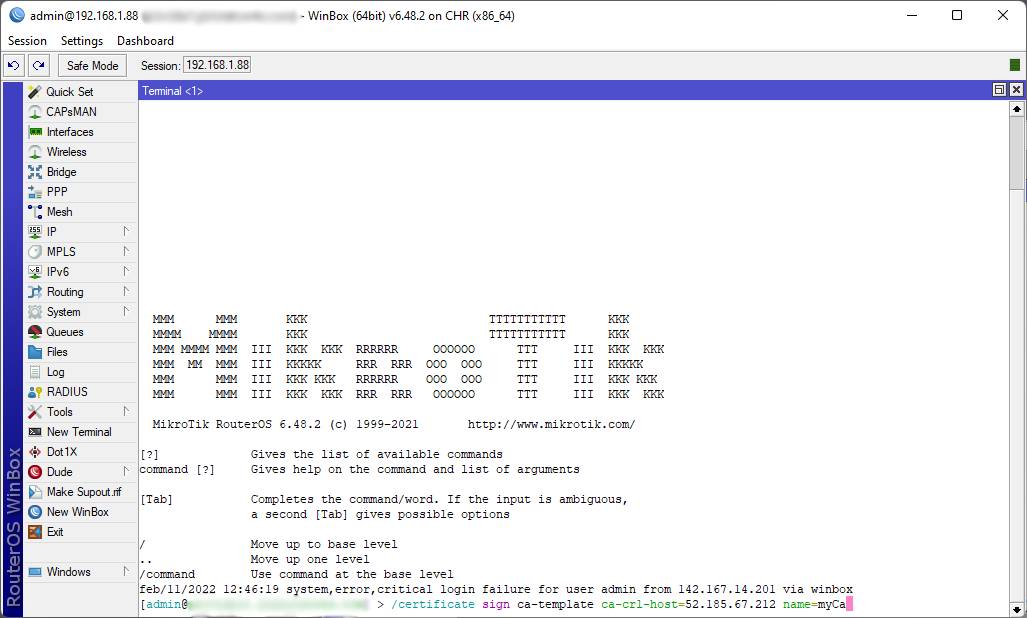 If signing certificates on mipbe-CPU based devices(RB7xx, RB2011, RB9xx) then this process might take a while depending on the key size of a specific certificate. With values 4k and higher, it might take a substantial time to sign this specific certificate.Templates are automatically removed after signing the certificate.
 - If the generated certificate does not have
Tflag, then you need to set it as trusted before using it:set myCa trusted=yes
Enable API-SSL Services
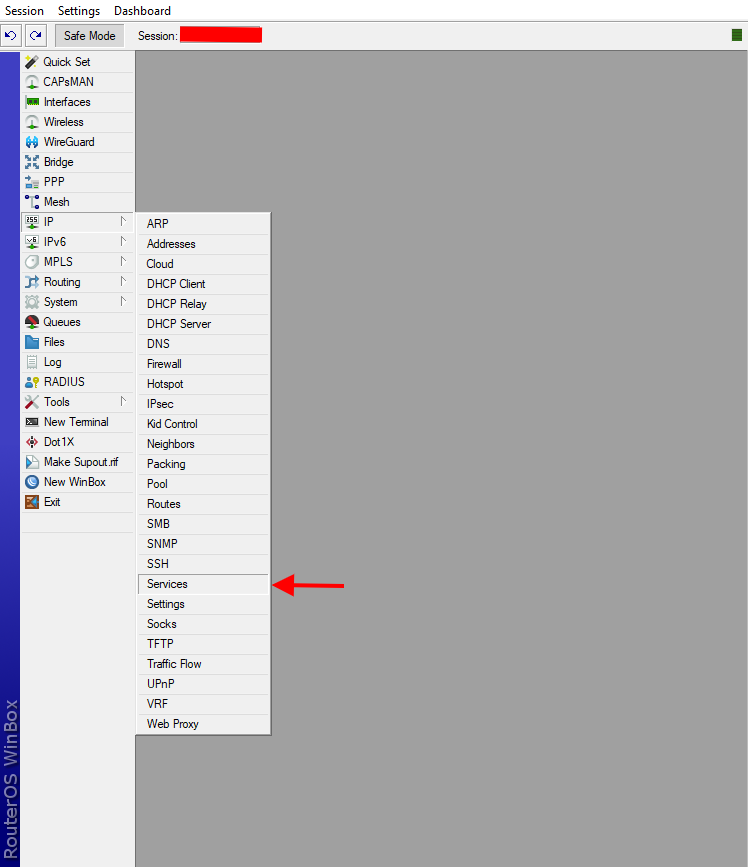
- In your Winbox session, navigate to IP > Services
- Highlight the "
api-ssl" service and click the blue checkbox to enable, then double-click the service to edit. Select whichever port you want to use to access the service, add your instance IP address from Step 2 of this guide in the "Available From:" box, then select your certificate from the dropdown, then click "OK".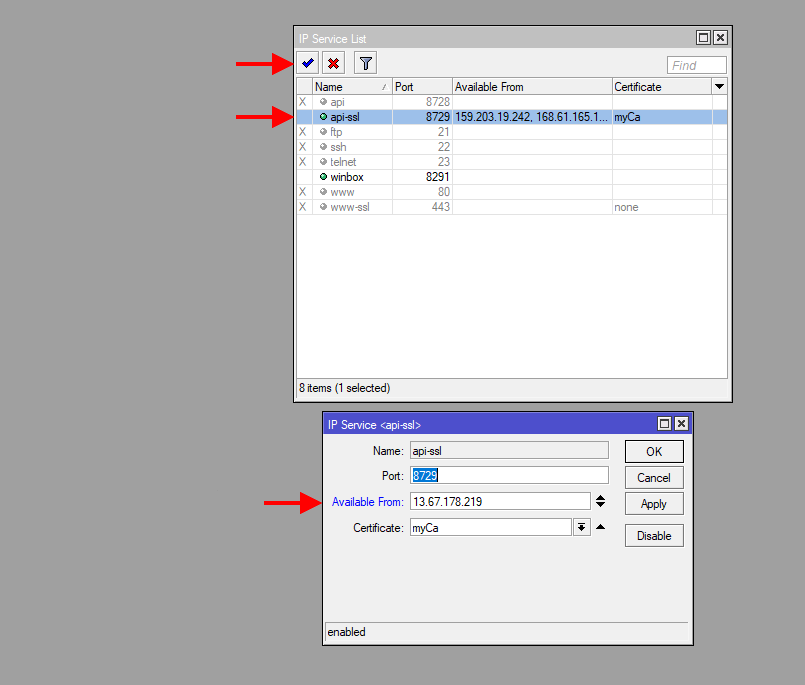
Adding the MikroTik to the Sonar Application Firewall
Next, we will add the MikroTik to allow it past the Application Firewall. If you have chosen not to enable the Application Firewall, you can skip ahead to Adding the MikroTik as a DHCP Server in Sonar.
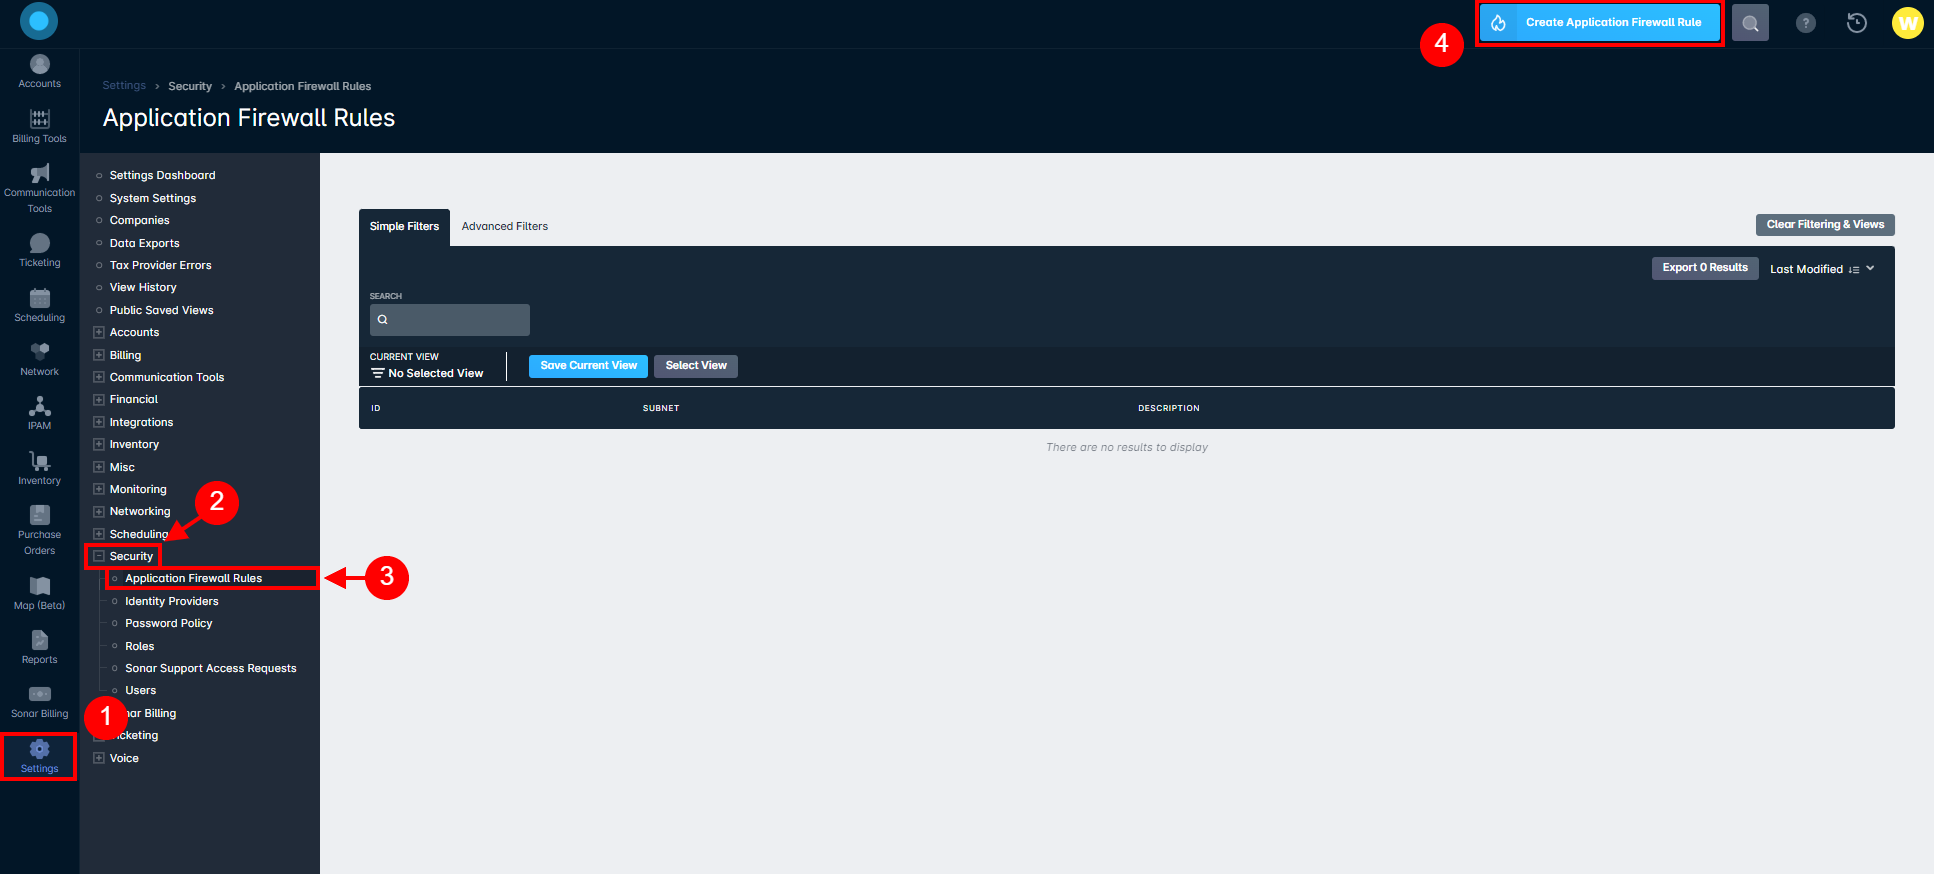
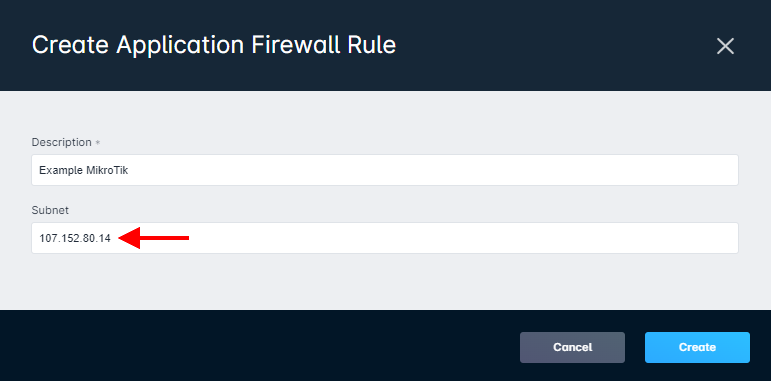
- Get the WAN IP Address from your MikroTik and in Sonar, under Settings > Security > Application Firewall Rules, then click the blue "Create" button in the top right. In this form, create a new firewall rule, adding the WAN IP address under the Subnet field. General best practice would be to name the Description the same name as the device name in the MikroTik.
Adding the MikroTik as a DHCP Server in Sonar
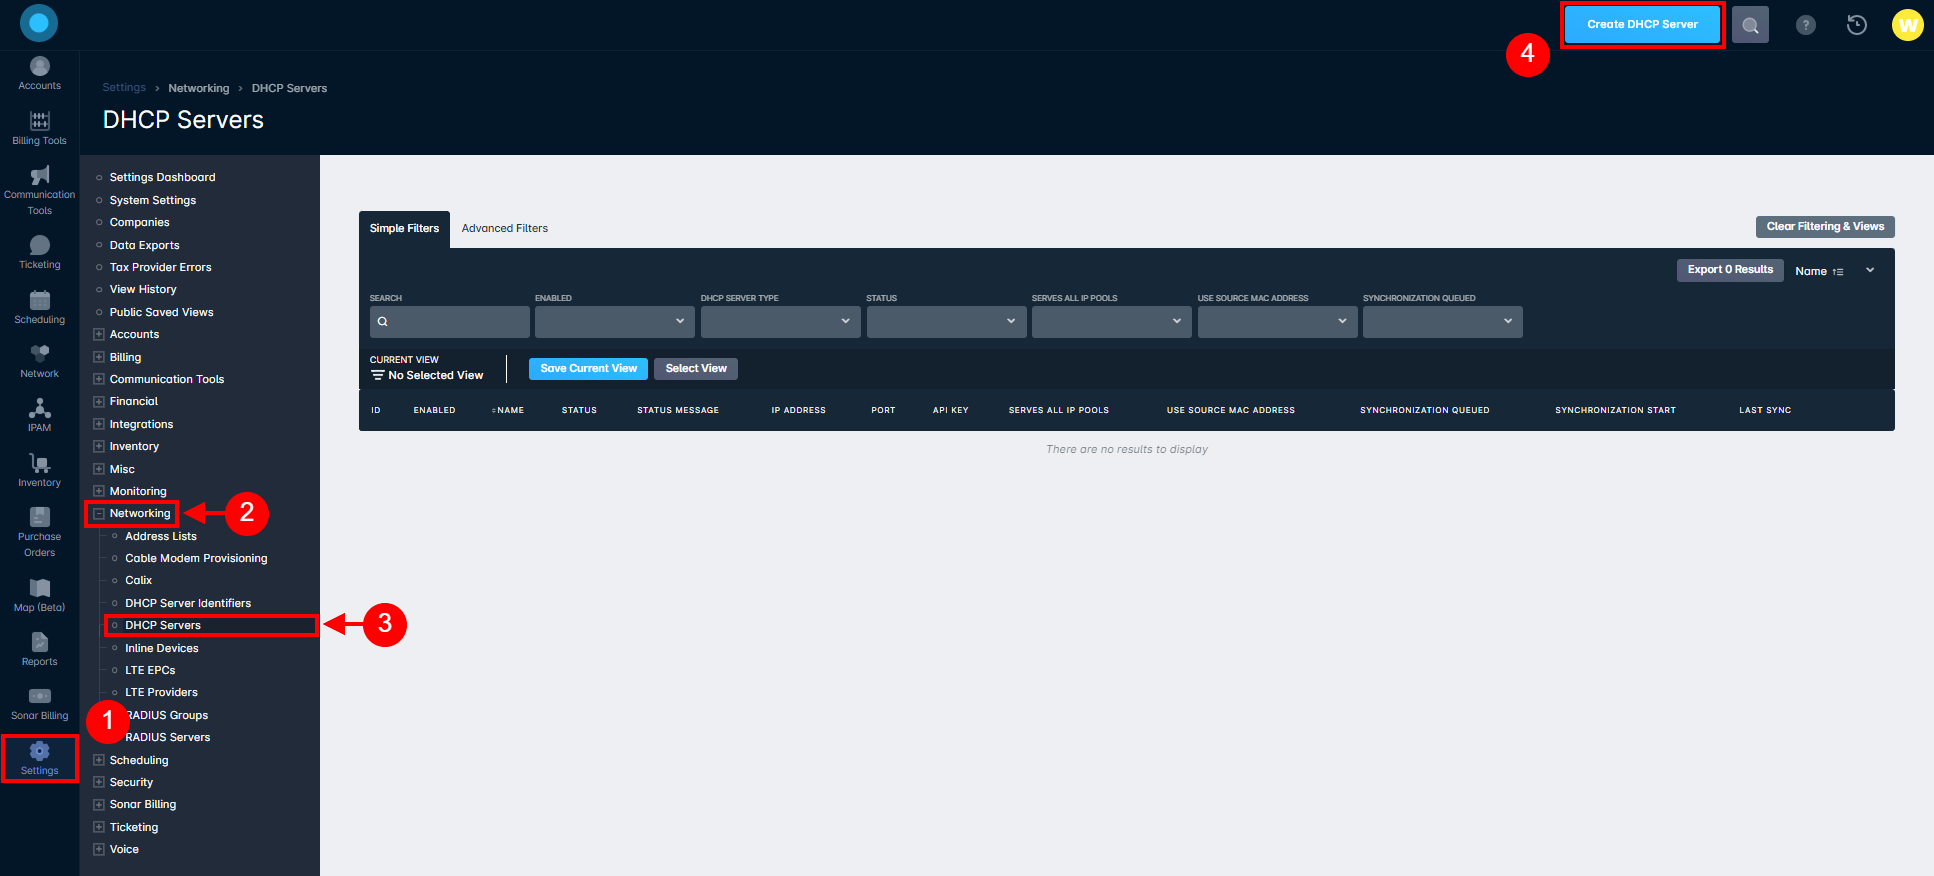
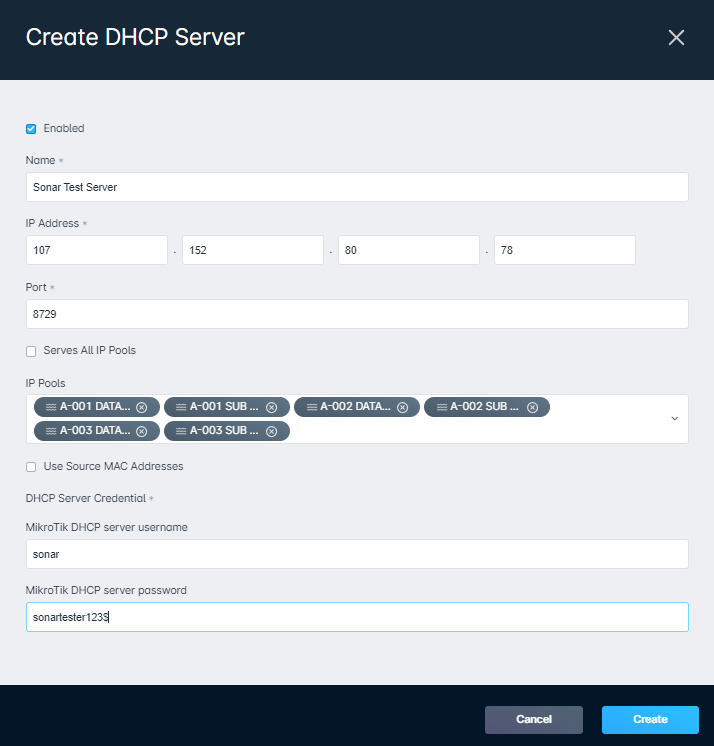
- Within your Sonar instance, navigate to Settings → Networking → DHCP Servers, then click the blue "Create" button in the top right.
- Fill in the Name, IP Address, Port, MikroTik DHCP server username, and MikroTik DHCP server password. The Name can be anything you want it to be, but the general best practice would be to copy the name directly from the MikroTik stored under System > Identity to avoid any possible confusion. The IP Address will usually be the same IP Address that you would use to access via Winbox unless you are using a port forward to allow multiple privately addressed devices to talk to Sonar through a single public IP. The port needs to match the same port you set to the "api-ssl" service in step 11 and the username and password will need to match what was entered in step 5. Set the IP Pools based on which pools you have built. If you have not yet built these, here is the guide to set these up: IPAM: Setup, Policy, & Best Practices. You will also see a checkbox that says "Use Source MAC Addresses". If this is selected, it will force the MikroTik to use the MAC address of a DHCP relay rather than the MAC address of the requesting device.
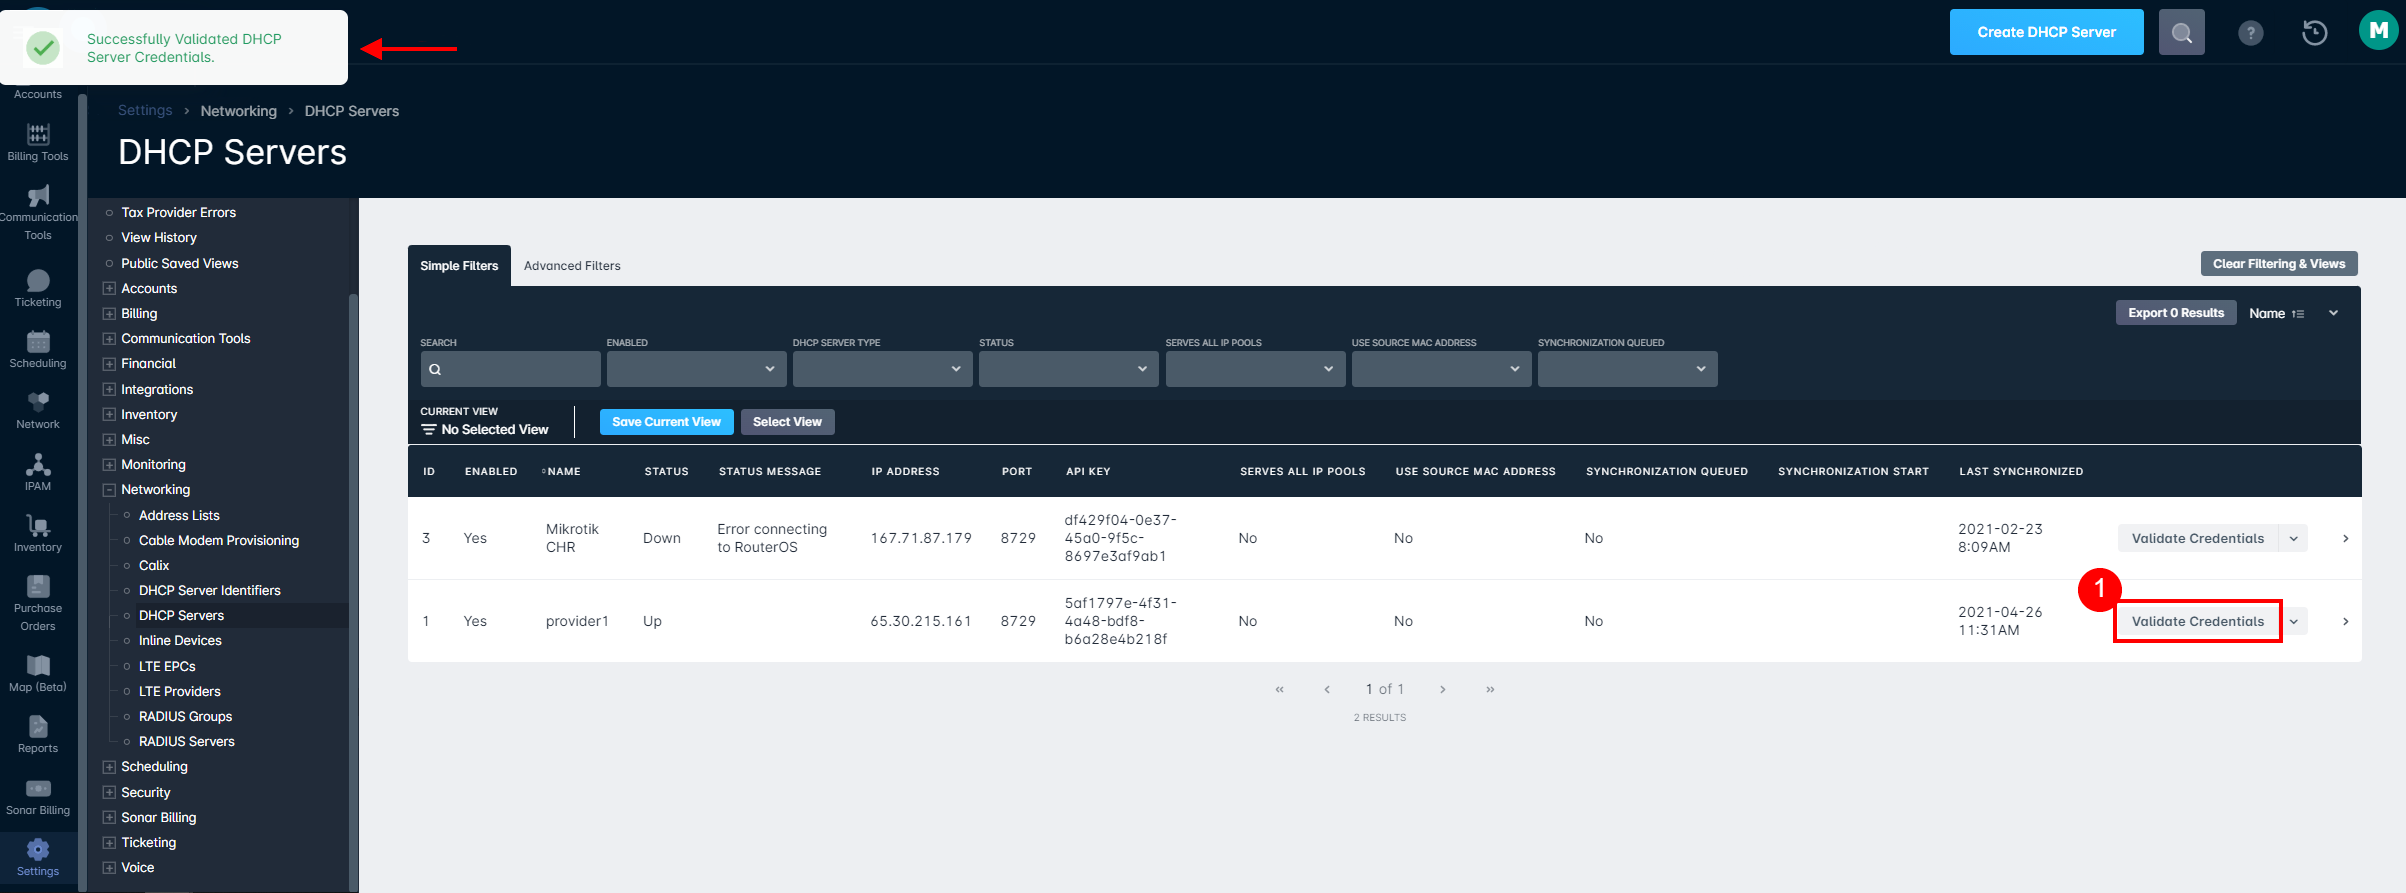
- Finally, on the current page in Sonar, click the "Validate Credentials" button to test that the link between Sonar and your DHCP server is functioning correctly. If you see the "Successfully Validated DHCP Server Credentials" in the top-left corner, everything is working correctly, and you can send a Synchronize command from the drop-down to the right of the DHCP Servers table.
Using DHCP Server Identifiers
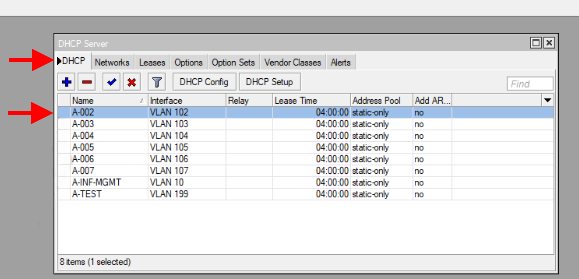
A DHCP server identifier is a method of grouping together multiple pools into a single identifier. The implementation of this identifier will differ from server to server - for example, if you are using a MikroTik DHCP server, the DHCP server identifier is the same as the name of a DHCP server defined under IP -> DHCP Server -> DHCP tab. As per the image below, A-002, A-003, etc. would be the name of your DHCP identifiers in Sonar:
The sole purpose of this function is to allow you to bind specific IP pools to specific servers/identifiers within the remote DHCP server. For example, if you run 192.168.100.0/24 on VLAN 100 and 10.0.0.0/8 on VLAN 12, you can use DHCP server identifiers in Sonar to ensure that leases for these pools are written to dedicated servers for those interfaces in your DHCP server.
If a pool does not have a DHCP server identifier associated with it in Sonar, Sonar will use whatever the default behavior of your DHCP server is when writing the lease. In MikroTik for example, this is to write it all DHCP servers.
When creating a DHCP server identifier in Sonar, give it a name and select the pools that should be part of it. Changes made will be applied to all applicable DHCP servers in real-time.
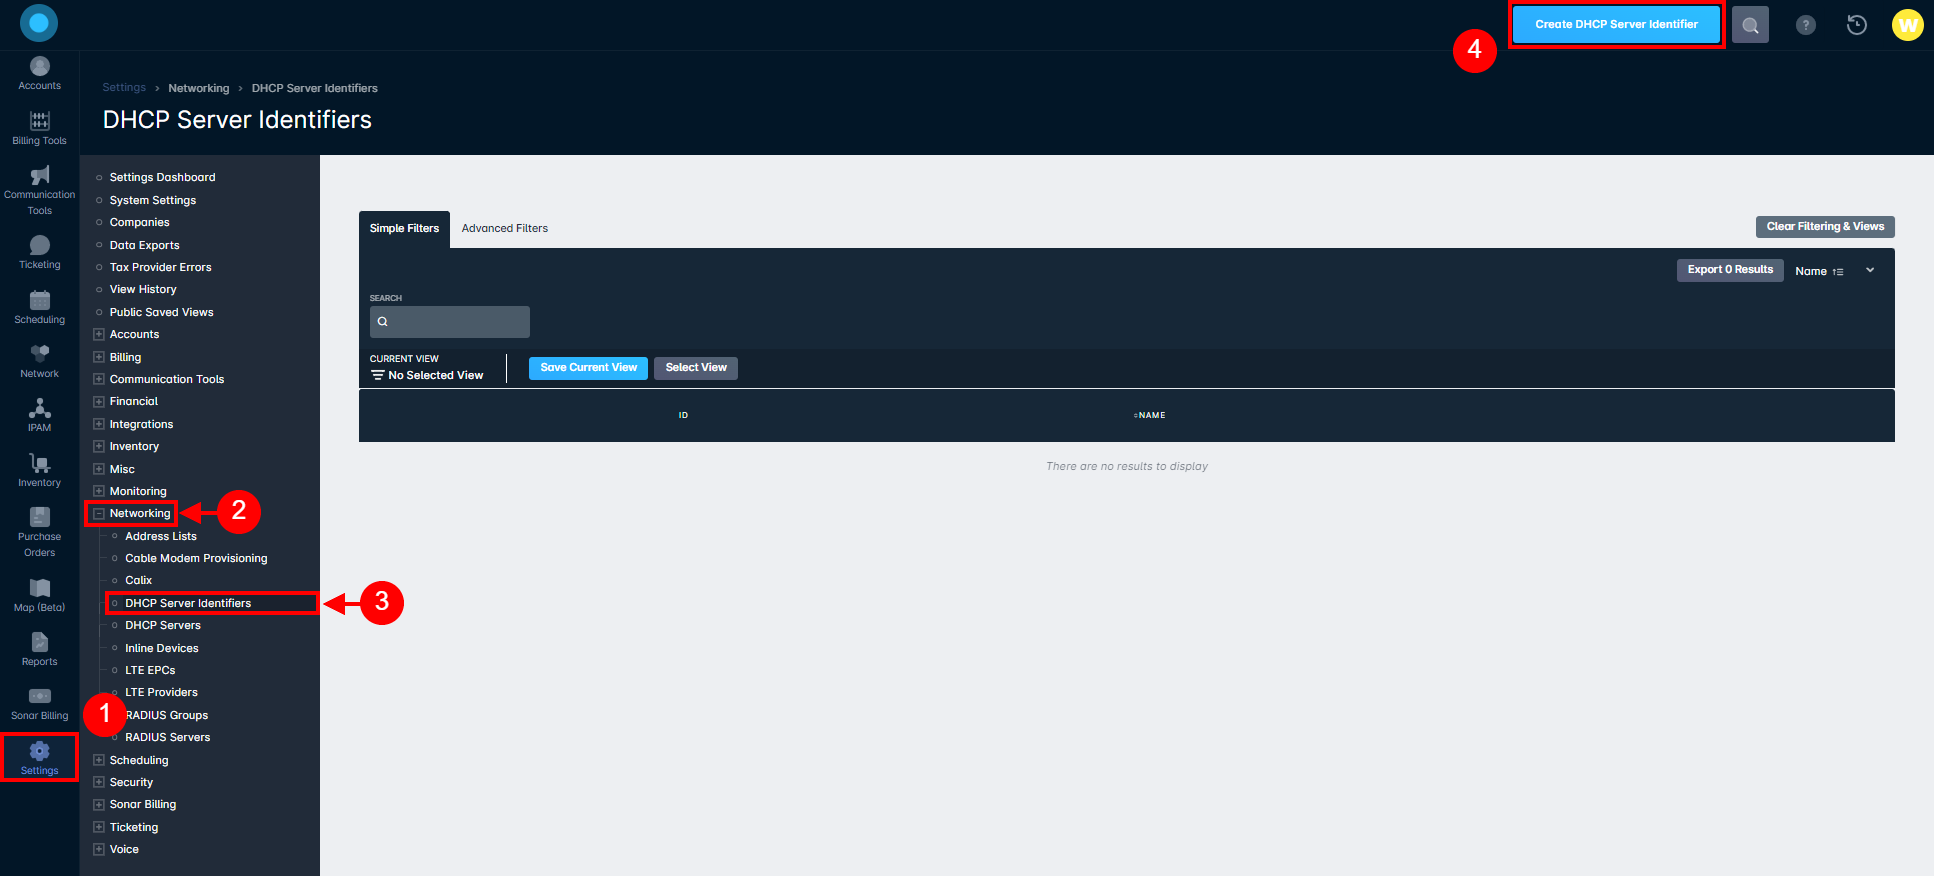
To add a DHCP Server Identifier, follow the below steps:
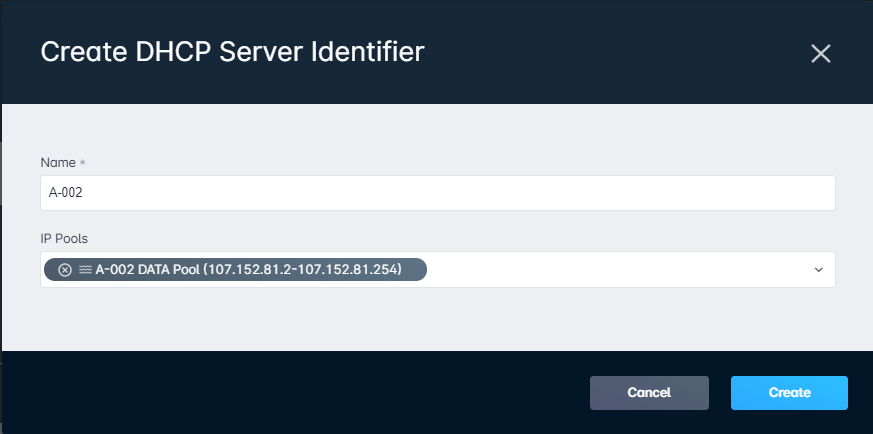
- Click on Settings -> Networking -> DHCP Server Identifiers then click the "Create DHCP Server Identifier"
- In the modal that appears, enter a name and select an IP Pool, then click "Create":