Table of Contents
Building a Data Service
 Updated
by Mitchell Paul-Soumis
Updated
by Mitchell Paul-Soumis
Read Time: 6 mins
In Sonar, we define a Data Service as a recurring service designed to deliver an internet connection to your customer. The differences between a data service and a standard recurring service were briefly touched on in the Services: Overview article, and in this article, the differences will be further elaborated.
When you create a data service, it becomes available for use with taxation, rate limiting, RADIUS Groups, Address Lists, and is part of the dataset generated in the FCC Form 477 report for calculating deployment data and reported speeds.
Data Service Creation
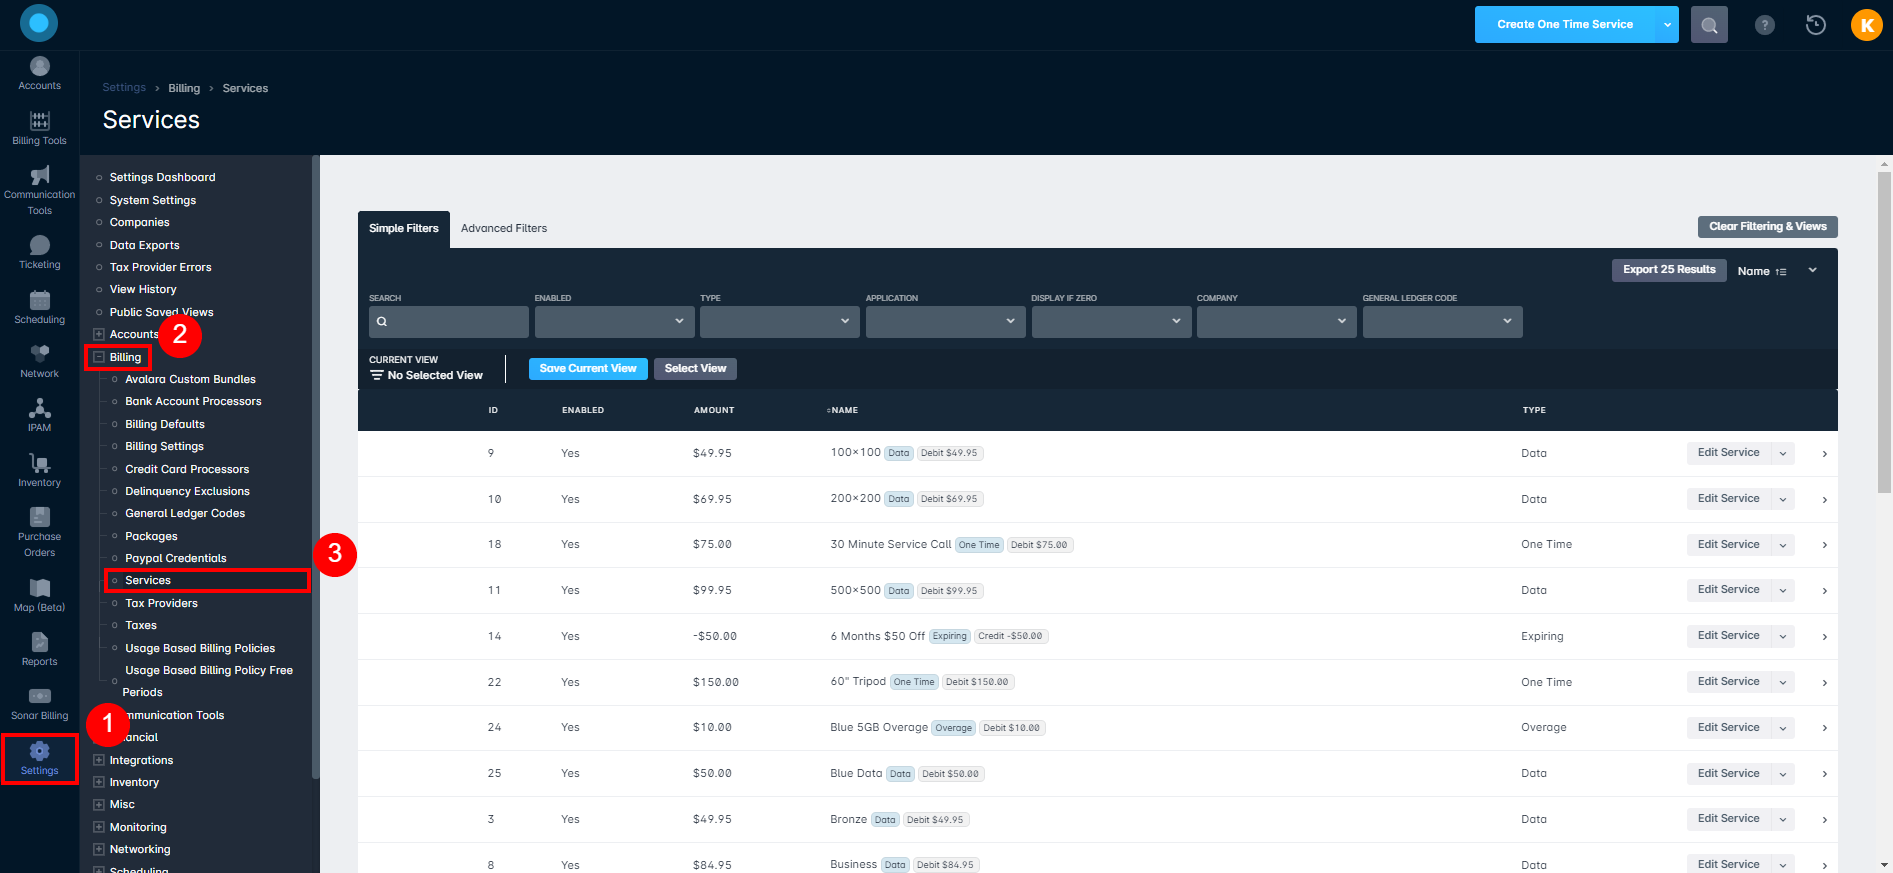
Data service creation is similar to the creation of any other service - the first step is to go to Settings, expand the Billing section, then select Services:
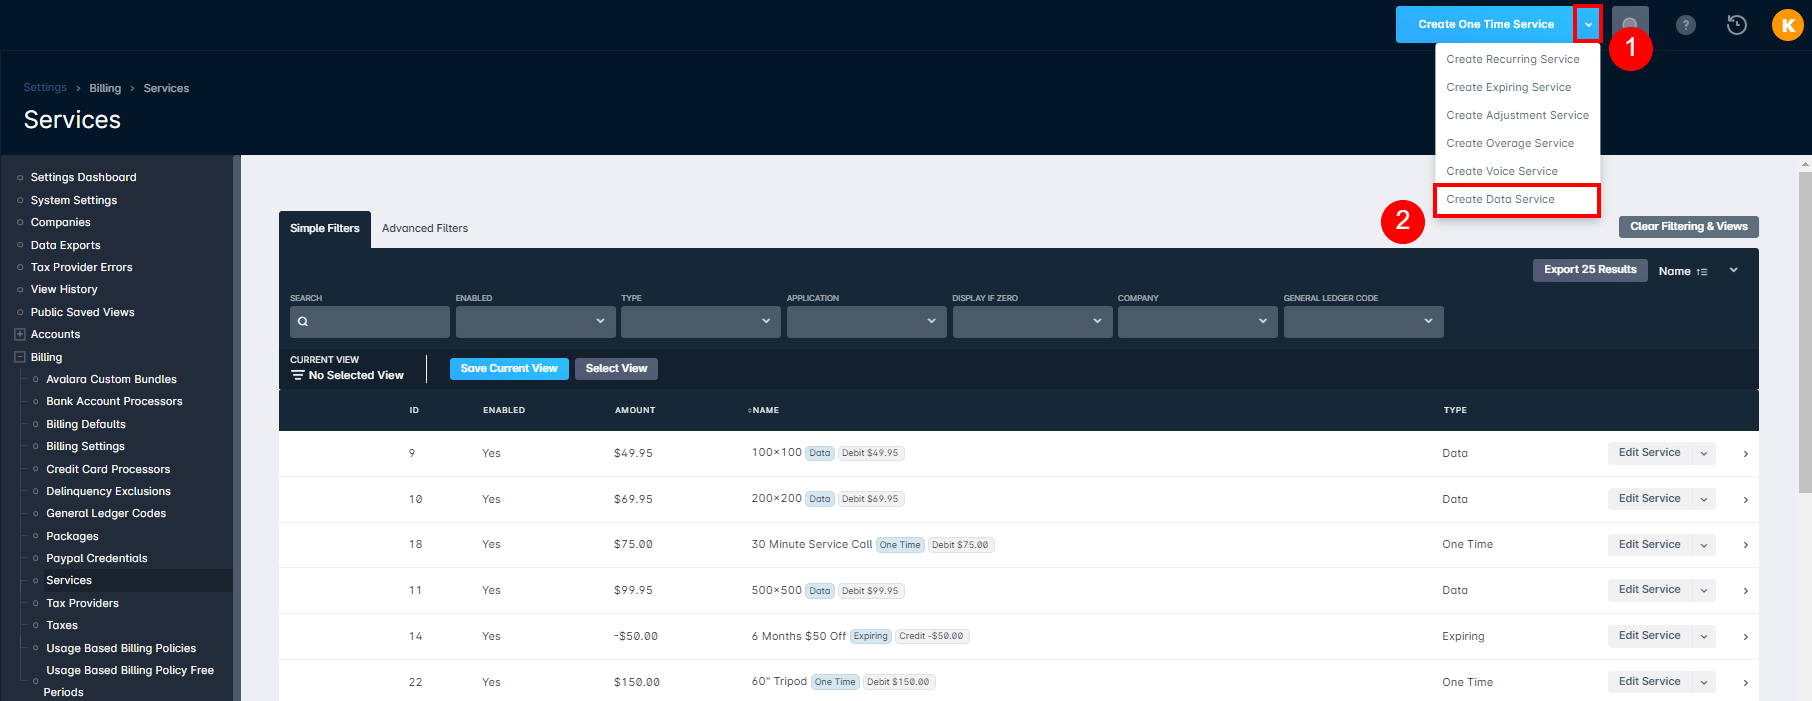
Next, click on the dropdown next to the "Create One Time Transaction" button, and select "Create Data Service" from the list:
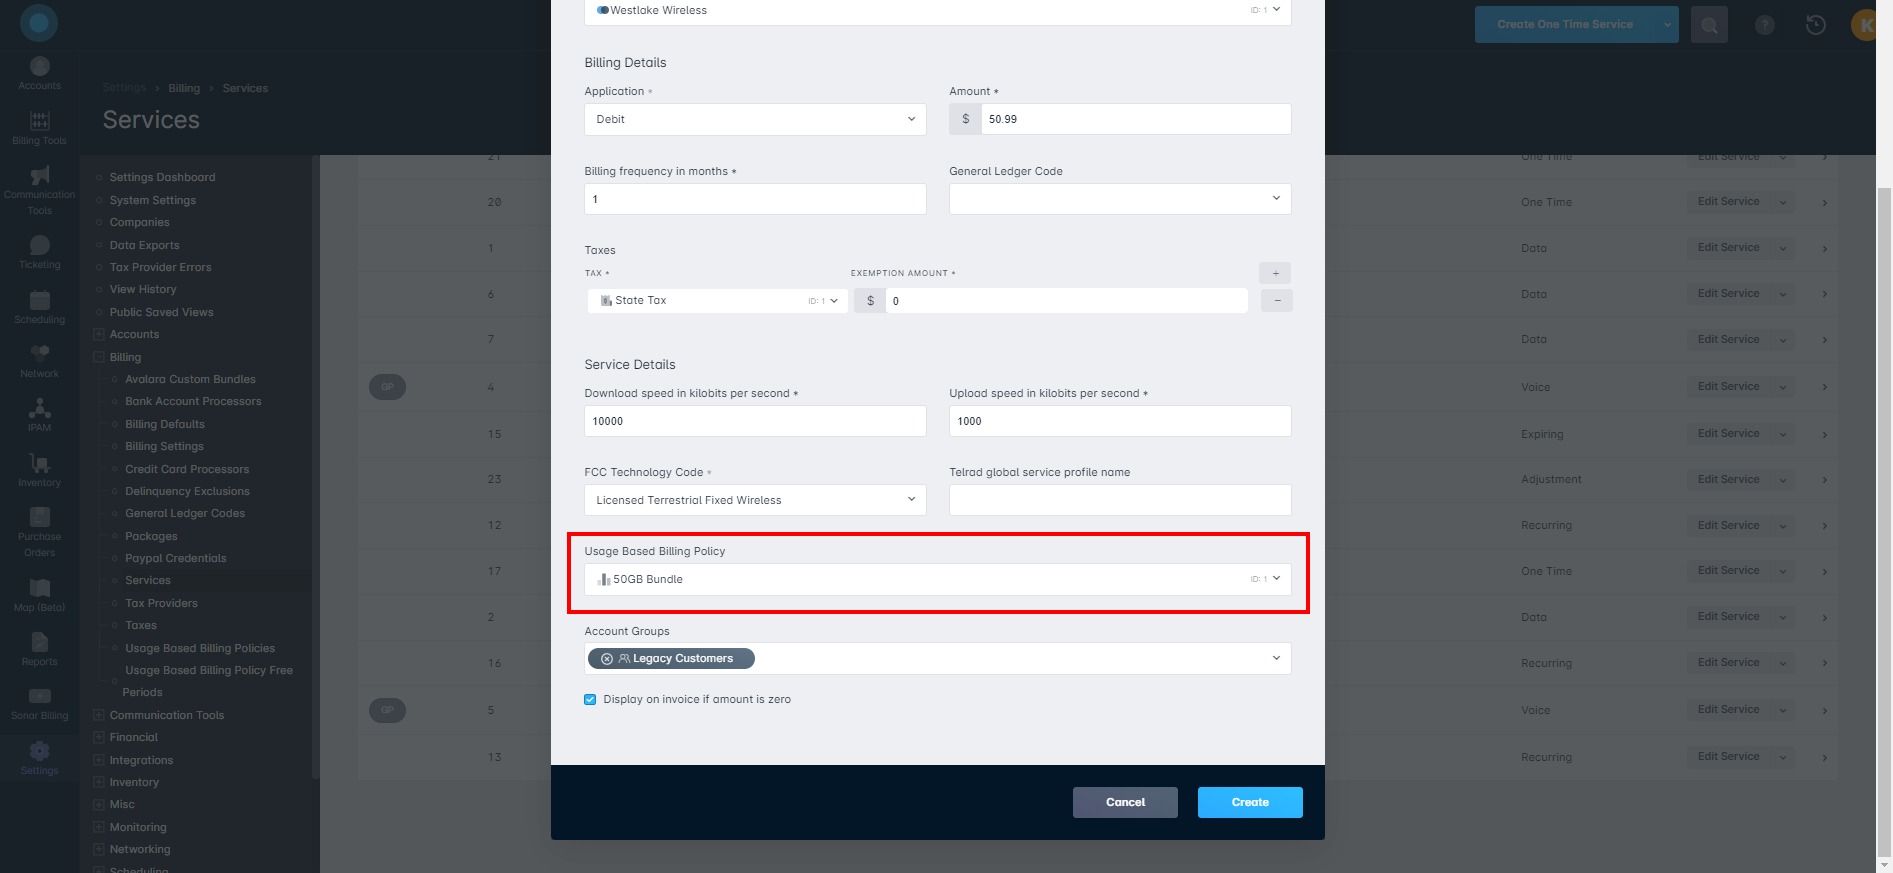
This will open the "Create Data Service" modal, where you'll fill out the information for the new data service:
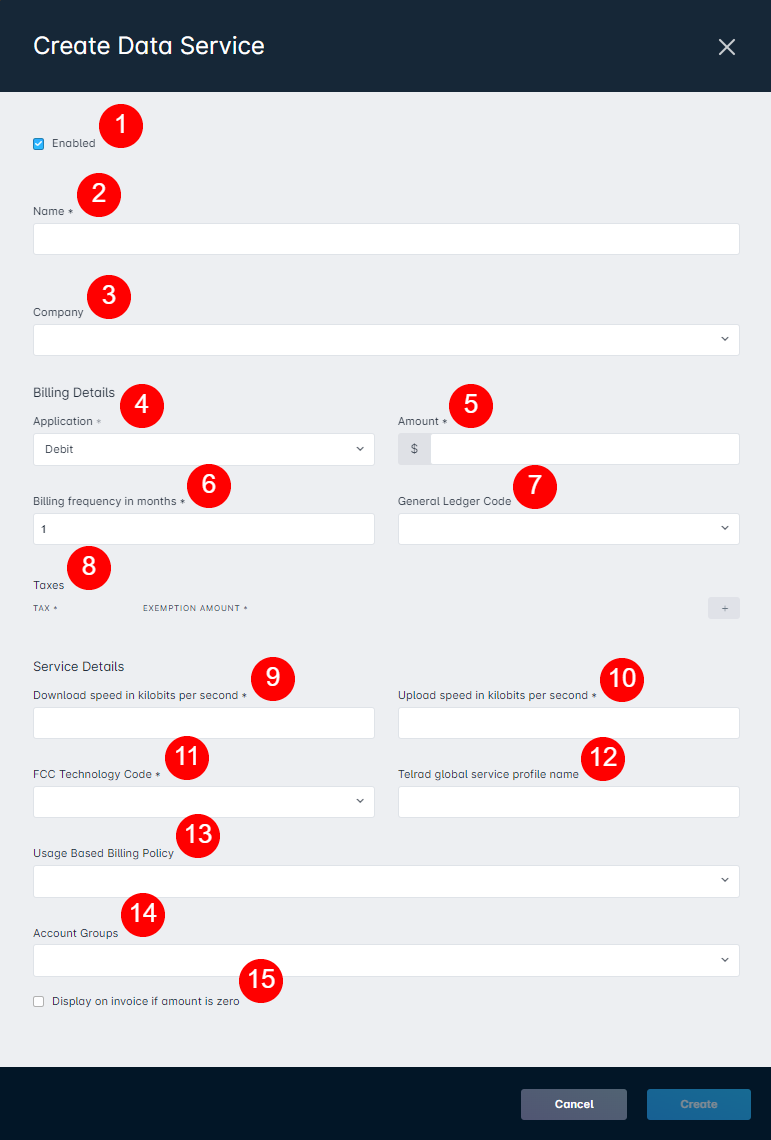
- The Enabled checkbox allows you to select whether or not this service can be assigned to customer accounts. Typically, a service would be disabled when legacy customers retain the service until they switch, but new activations can't subscribe to the service.
- The Name field is a descriptive field for the service. This is frequently a short referenced name and the speed, such as "Gold - 100 Mbps".
- The Company dropdown allows you to select a specific company in your instance to restrict this service to. If no company is selected, all companies in your instance will be able to assign this service to customers.
- The Application dropdown allows you to select whether the amount of this service will be applied as a debit, or as a credit. For most data services, it will be applied as a debit (a charge).
- The Amount field allows you to set the recurring amount for this service - this will be charged based on the "Billing Frequency in months" section.
- The Billing frequency in months field allows you to set how frequently this service will be billed - a value of "1" means the service will be billed monthly, while a value of "3" means it will be billed once every 3 months. For more information on multi-month billing, refer to this article.
- The General Ledger Code dropdown allows you to map a General Ledger Code to this service for use with reporting. For more information on General Ledger Codes, refer to this article.
- The Taxes section allows you to tax this service when billing is run in your instance. An article on how taxes work in Sonar can be found here.
- The Download speed in kilobits per second field allows you to set the advertised download speed for this service. This field is used to generate accurate data for your FCC Form 477 Report.
- The Upload speed in kilobits per second field allows you to set the advertised upload speed for this service. This field is used to generate accurate data for your FCC Form 477 Report.
- The FCC Technology Code dropdown allows you to set how the data service is being transmitted to the customer. This field is used to generate accurate data for your FCC Form 477 Report, and the following options can be selected:
- Asymmetric xDSL
- Cable Modem
- Copper Wireline
- Electric Power Line
- Fiber Optic
- Licensed Terrestrial Fixed Wireless
- Non-geostationary Satellite
- Other
- Satellite
- Symmetric xDSL
- Unlicensed Terrestrial Fixed Wireless
- The Telrad global service profile name field is used in conjunction with your Telrad LTE Cloud Controller if LTE service is being used to deliver this data service. Otherwise, this is left empty.
- The Usage Based Billing Policy dropdown allows you to select the policy to associate with this data service. Having a usage based billing policy on your data service will implement bandwidth restrictions during your customer's service period. More information on implementing usage limits is included in the similarly titled section below, and a deeper dive into the topic can also be found in the Usage Based Billing Policies: Overview and Usage article.
- The Account Groups dropdown allows you to restrict the data service being created to specific customer account groups within your instance. Leaving this selection empty will allow customers from any account group to subscribe to the service.
- The checkbox alongside Display on invoice is amount is zero allows you to determine if the service will still be reflected on customer invoices in the event it's billed at $0.
Data Service Creation Example
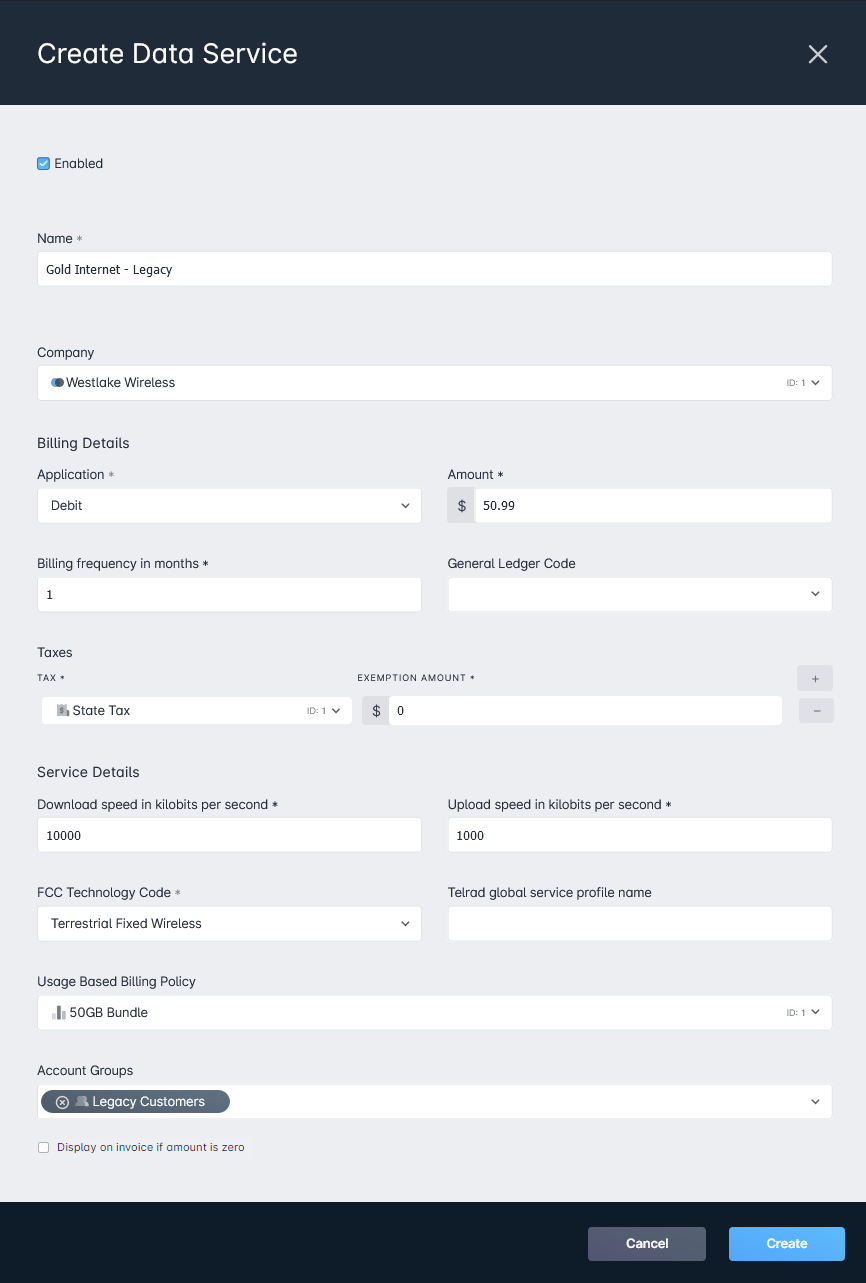
In this example data service, we're creating a new service titled Gold Internet - Legacy. This service will provide a data service to customers that are part of the "Legacy Equipment" account group. Additionally, this created data service will only be available to the Westlake Wireless company in this instance.
Moving on to the Billing Details, we've set the Application to be a Debit, and this service will be charged to the customer on a monthly basis, at a rate of $50.99, which will have the Geographical Tax for Colorado State applied to it.
Rounding out the data service creation, we reach the Service Details. In this example, we're creating a Terrestrial Fixed Wireless (also known as point-to-point or point-to-multipoint wireless) with a download speed of 10 megabits per second, and an upload speed of 1 megabit per second, and this is what will be reported in the FCC Form 477 report.
Implementing Speed Restrictions
We have documentation discussing the implementation of speed restrictions available here for Address Lists and here for RADIUS Groups.
Implementing Usage Limits
Implementing Usage Based Billing, and by association Usage Based Billing policies on your services is as easy as selecting the billing policy you created on the Usage Based Billing Policy settings page. Once added under the Service, it will begin to take effect immediately, adding the restriction to any customers on the service.
Enforcing Usage Limits
Enforcing your configured Usage Based Billing Policy requires the configuration of multiple components within Sonar.
- Some device or integration to measure data usage, which we've described briefly here | Data Usage Available Methods
- Some method of restricting access to your network once the allotted data usage has been consumed, which we cover in some detail with a Mikrotik in this article | MikroTik: Controlling Access
Once these components are configured in your instance, data usage will begin to be monitored on the user's account as well as viewable in their customer portal.
Tracking Data Usage
Data usage can be tracked and managed a few different ways:
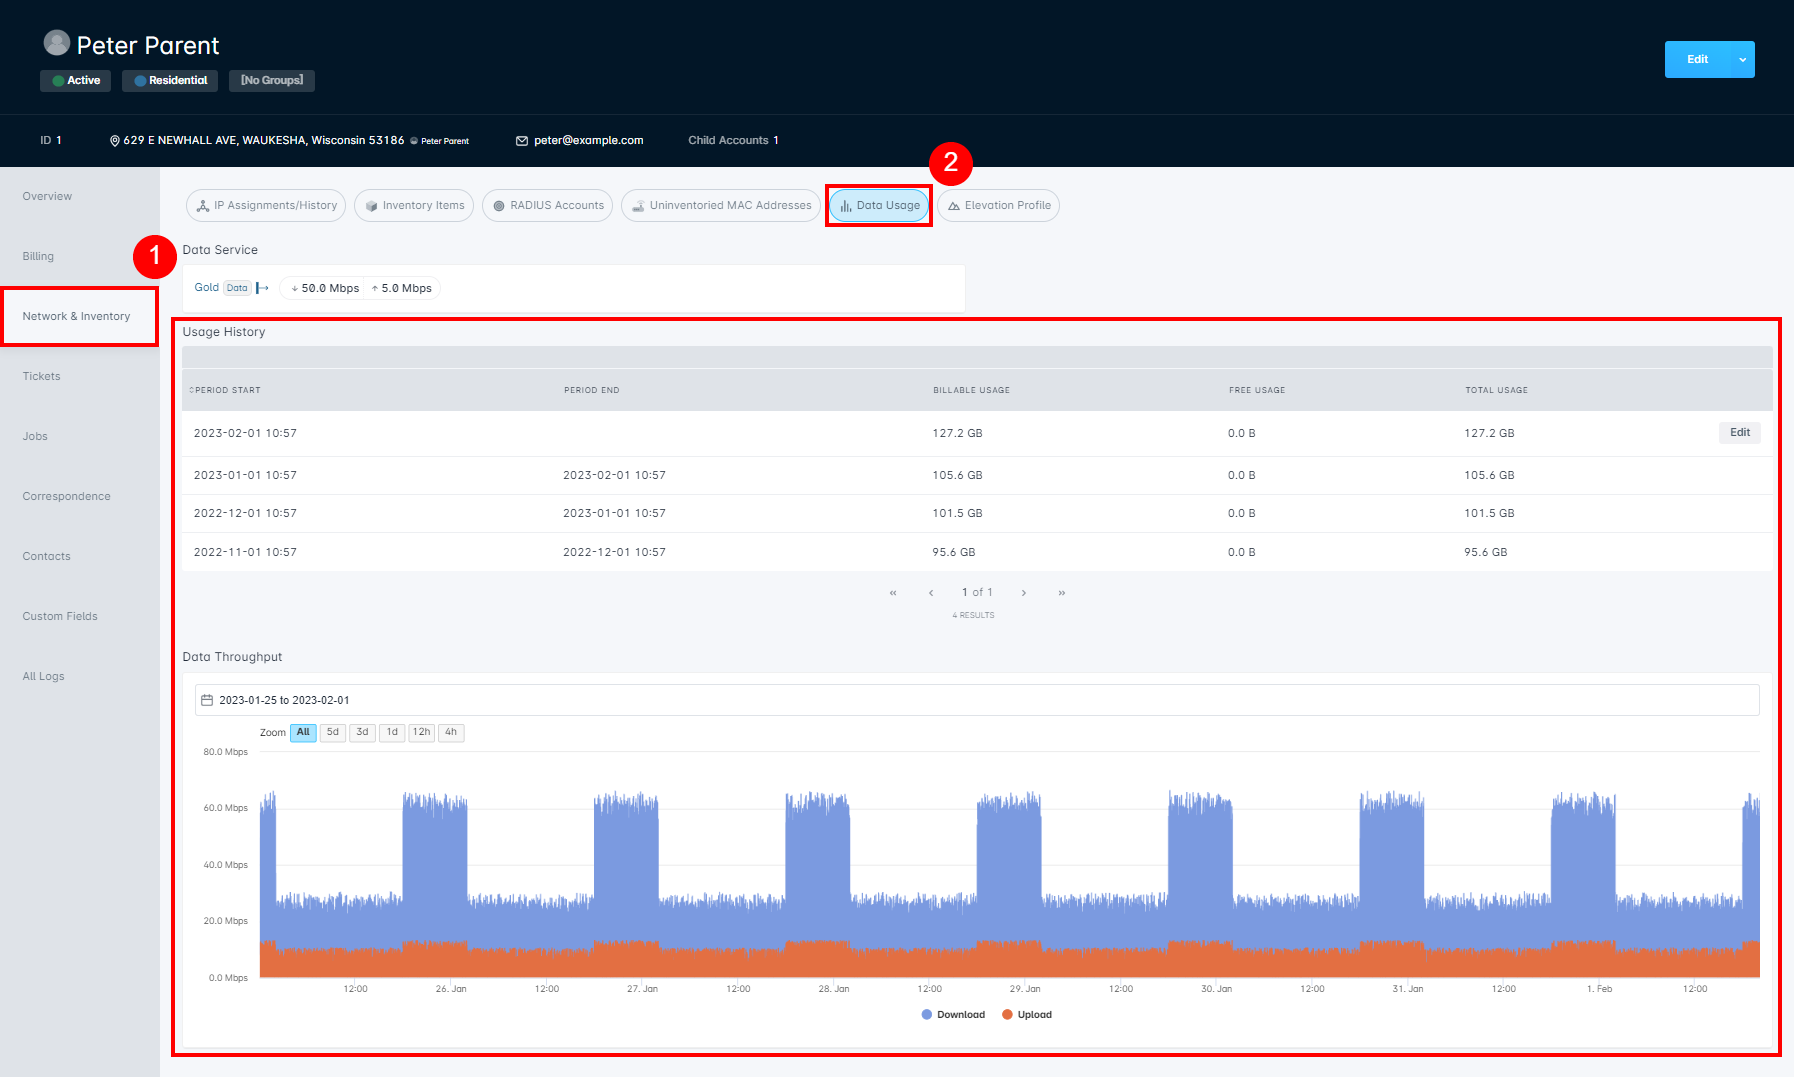
- From the Account Management dashboard, by clicking on the Network and Inventory tab, followed by the Data Usage sub-tab:
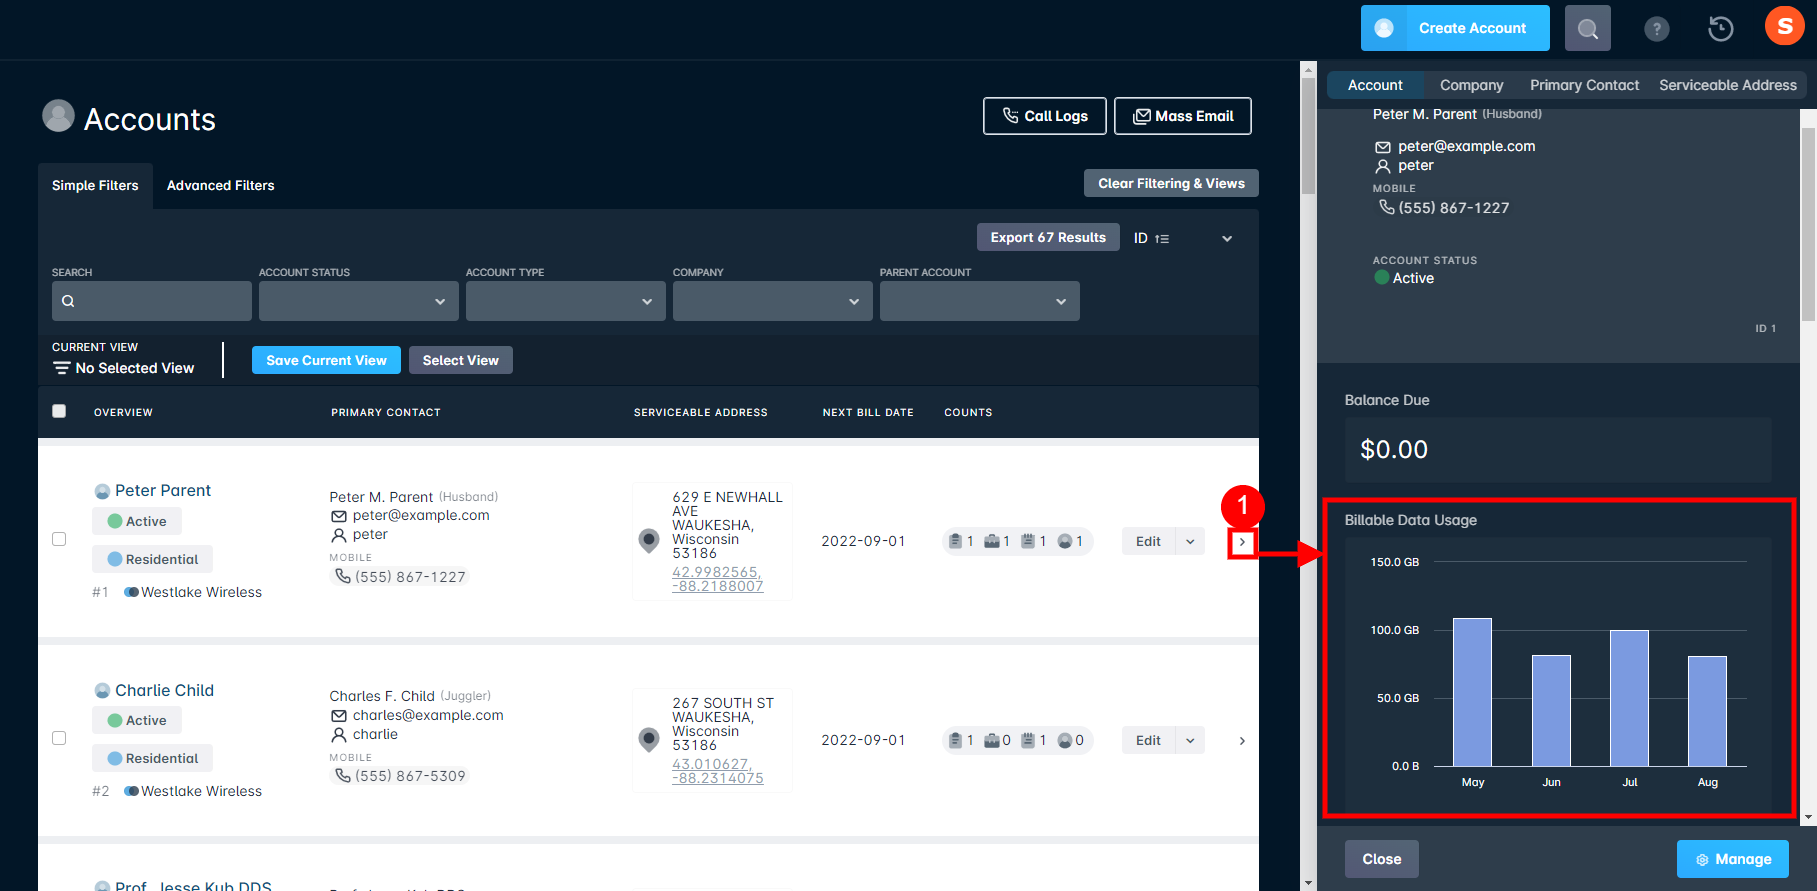
- From the sidebar that appears in the accounts list view, accessible by clicking on the caret (>) on the right of the account information row:
The customer can also track their own data usage by logging in to the Customer Portal. If you've enabled the ability to purchase additional usage during the month, this can also be accomplished through the user interface in the Customer Portal.