Table of Contents
Setting Up a DHCP Batcher
Read Time: 8 mins
For more information on DHCP Delivery in Sonar V2, please refer to this article: DHCP Delivery
What is a DHCP Batcher Used for?
The DHCP Batcher is a tool that allows DHCP requests to be batched and sent into Sonar as soft assignments on an Account. When a DHCP lease is either created or expired, a script within the DHCP server is fired to send the MAC Address and IP Address to the DHCP Batcher. The batcher then delivers this information to Sonar and if a matching MAC address is found on an account within Sonar, the IP address that was given by the DHCP server will be assigned to that inventory item on the account.
The batcher also allows for Option 82 assignments to be added to the account in Sonar. This means if a customer router is plugged in to an option 82 capable CPE, the IP address given to that new router can be mapped to the account where the CPE is assigned, even if Sonar has no knowledge of the customer router MAC address. This is useful because this means you can apply shaping or access limits to customer routers, without needing to get the MAC addresses for these routers added into Sonar every time a customer gets a new router.
Below we will detail simplified instructions for installation and setup on an Ubuntu-based VM.
Installation and Setup
Installing on an Ubuntu-based VM/Server
For the purposes of this guide, we will be installing on 64-bit Ubuntu 16.04 Server. If you have no virtual machine stacks in your local network sites, the batcher can be installed on a cloud-hosted VM, similar to the customer portal. Once you have a machine with Ubuntu 16.04 installed, SSH into the server and follow these steps:
- From your home directory, clone the DHCP Batcher repository into this machine
cd ~
sudo git clone https://github.com/sonarsoftware/dhcp_batcher
- Enter the directory you checked out
sudo cd dhcp_batcher
- Modify the owner of the installation file
sudo chmod +x install-ubuntu.sh
- Run the installation file
sudo ./install-ubuntu.sh
Configuration
Linking the batcher to Sonar
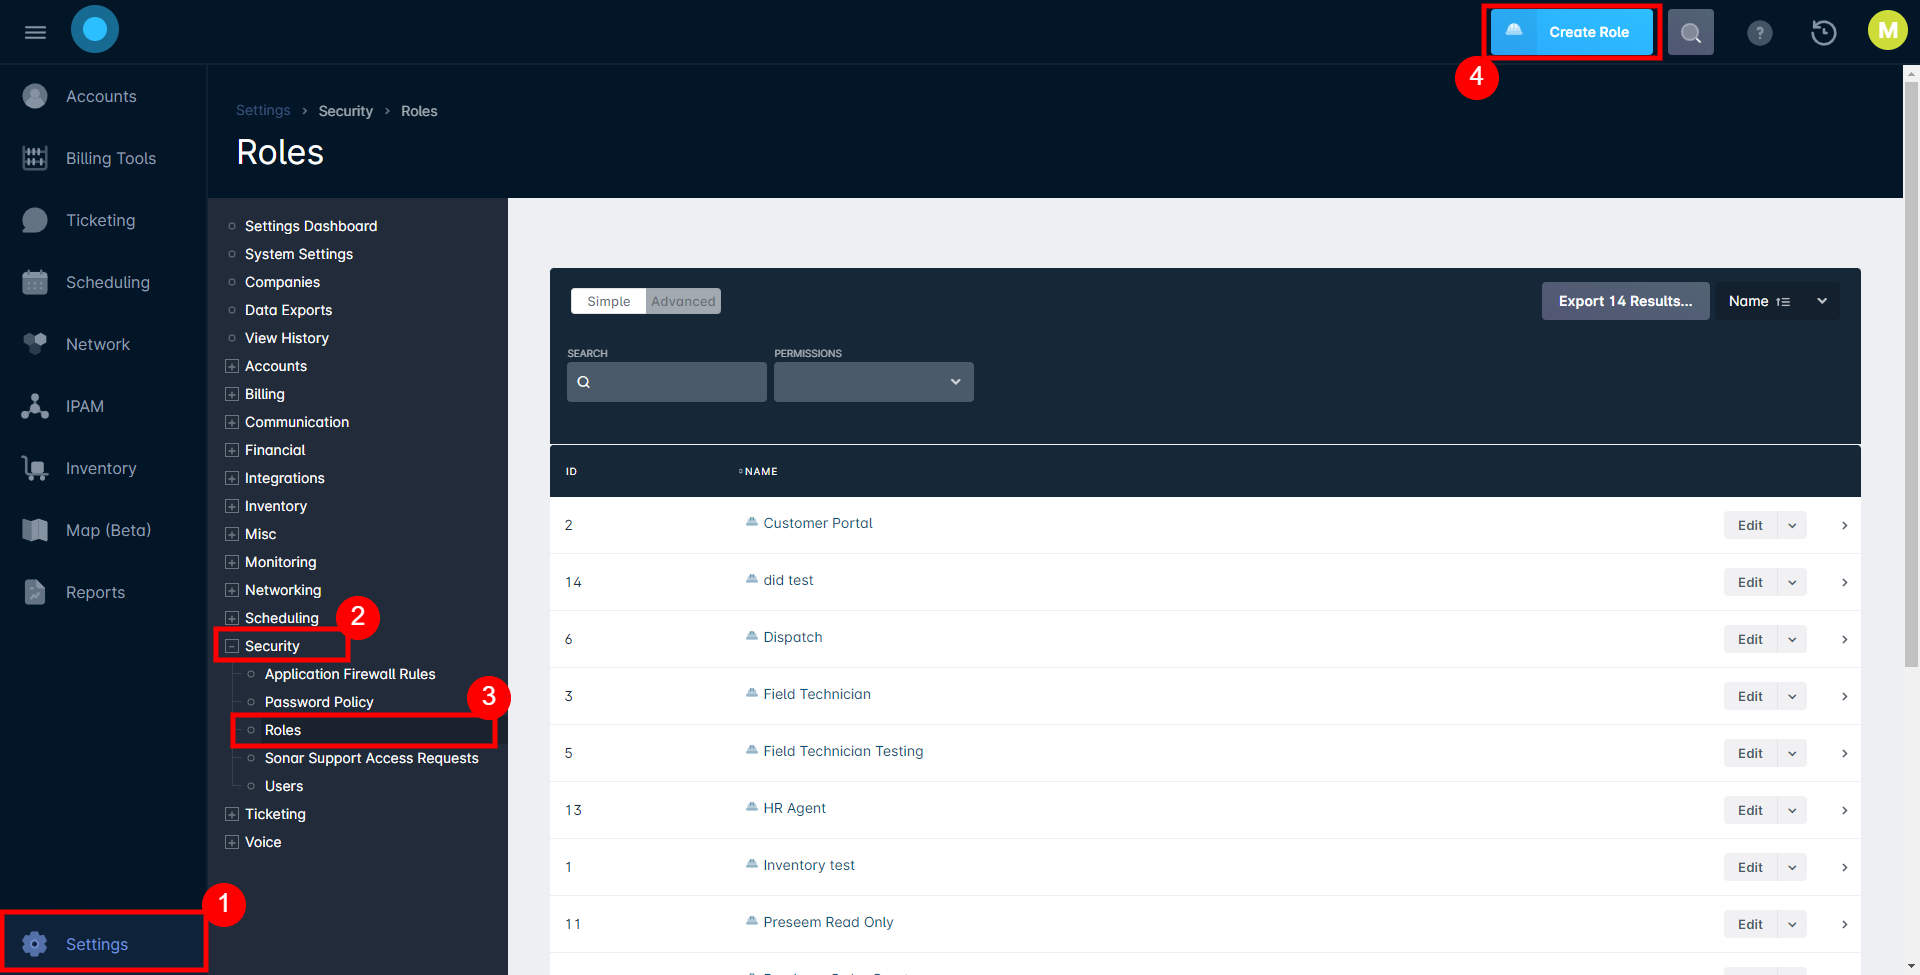
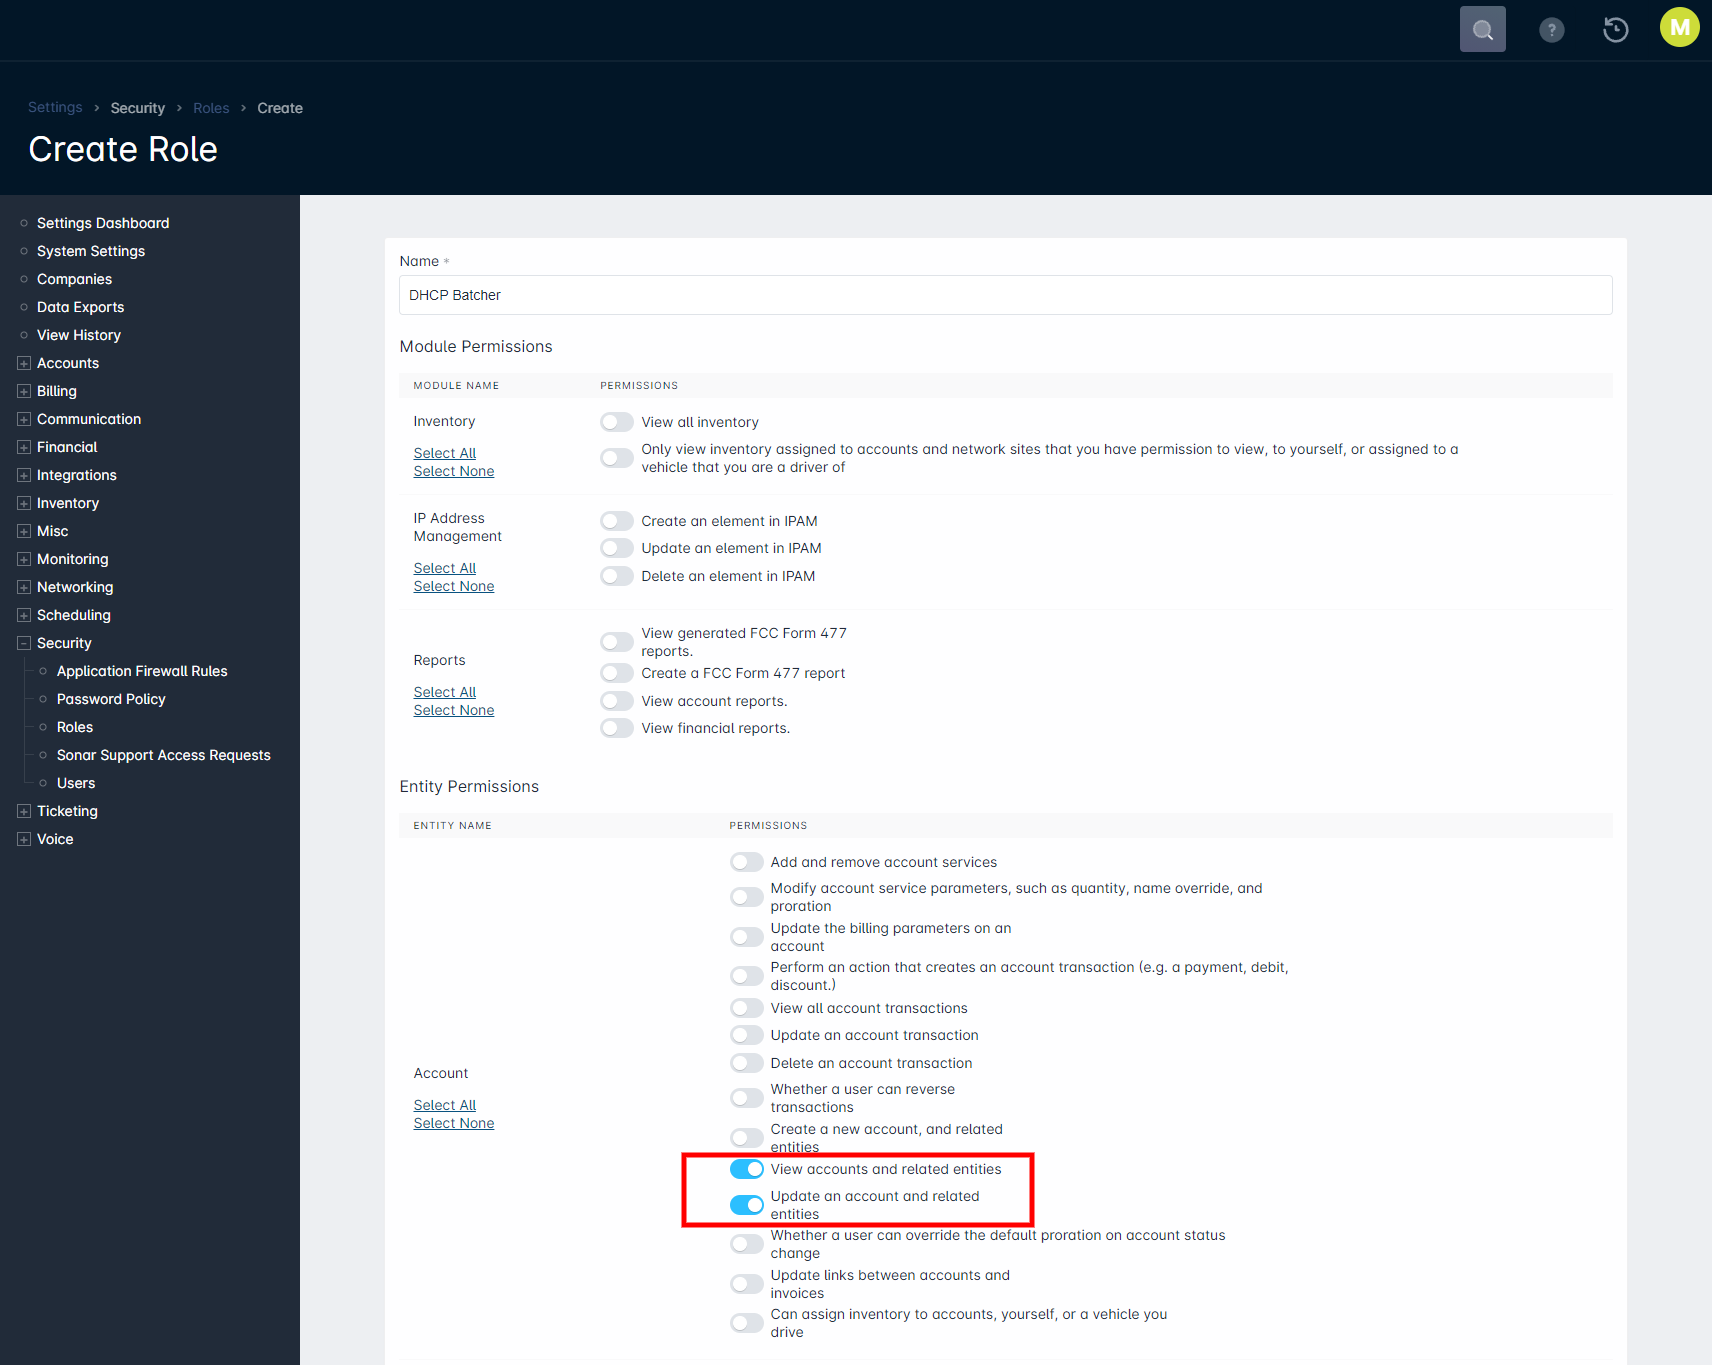
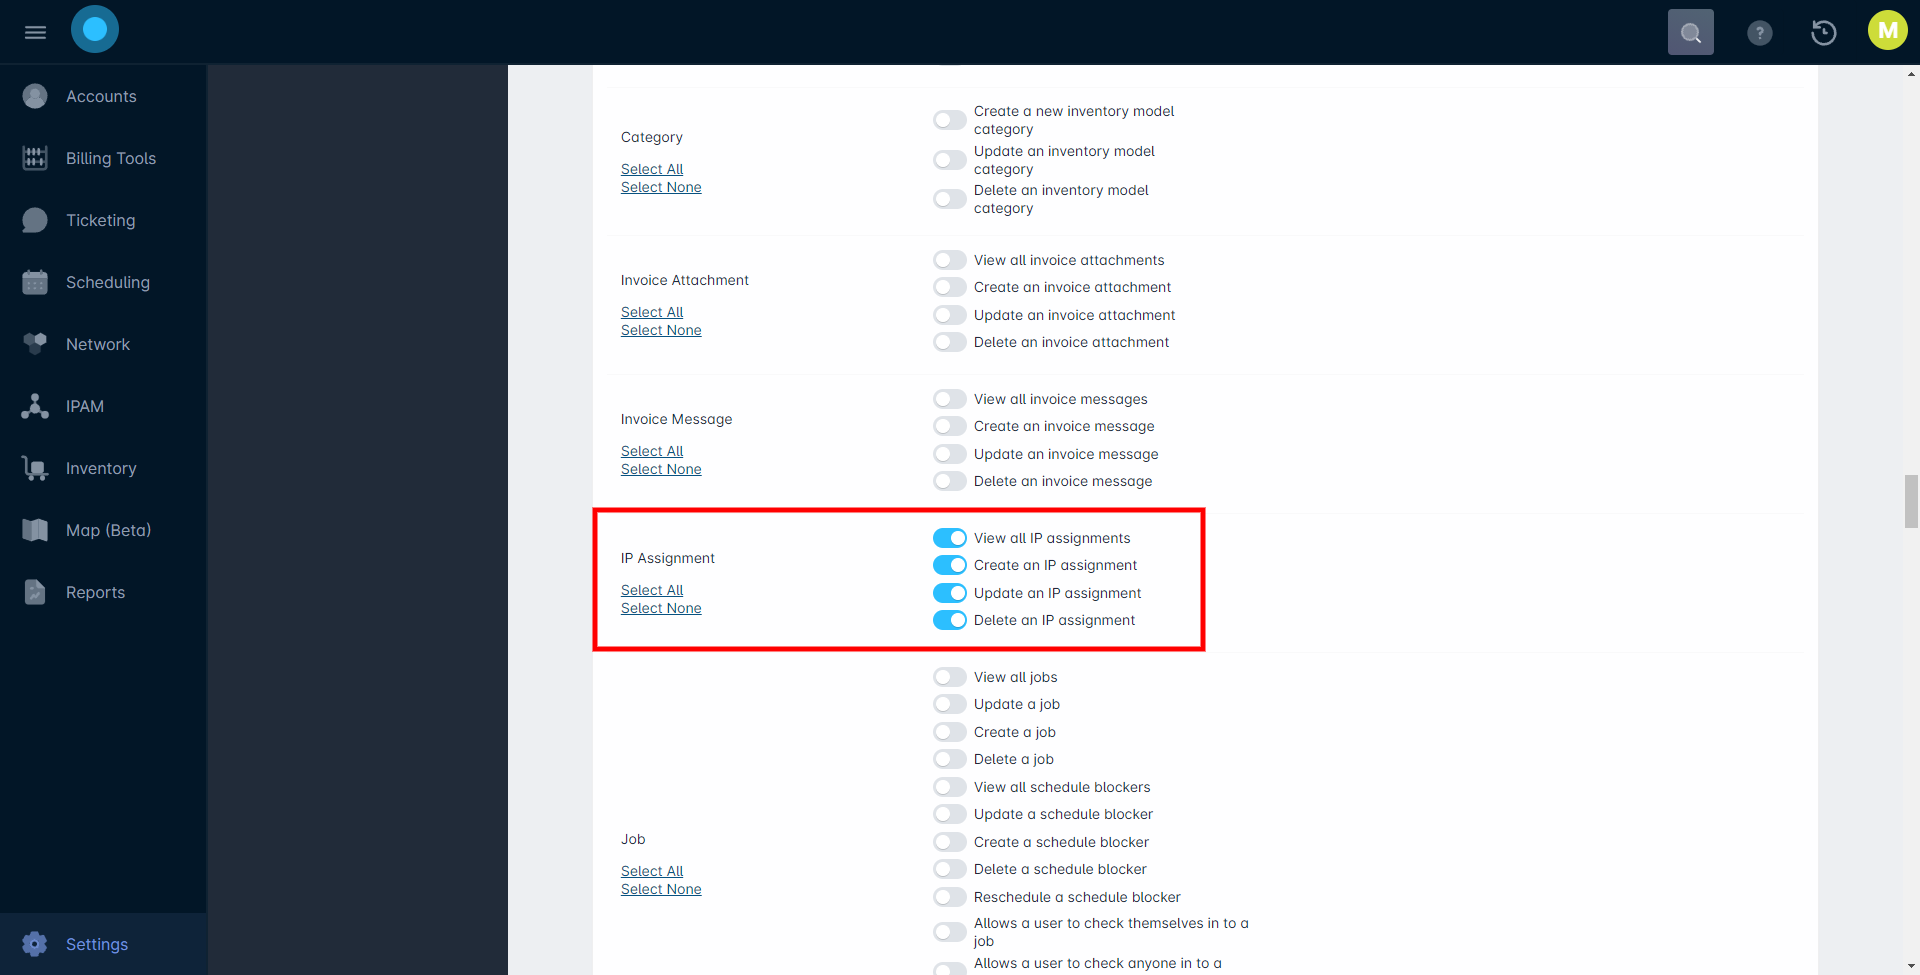
- In your Sonar instance, under Settings > Security > Roles, Create a "DHCP Batcher" Role. This user should have Account "View accounts and related entities", "Update an account and related entities", as well as IP Assignment "View all IP assignments", "Create an IP assignment", "Update an IP assignment", "Delete an IP assignment", and "View all Ticket Groups" permissions.
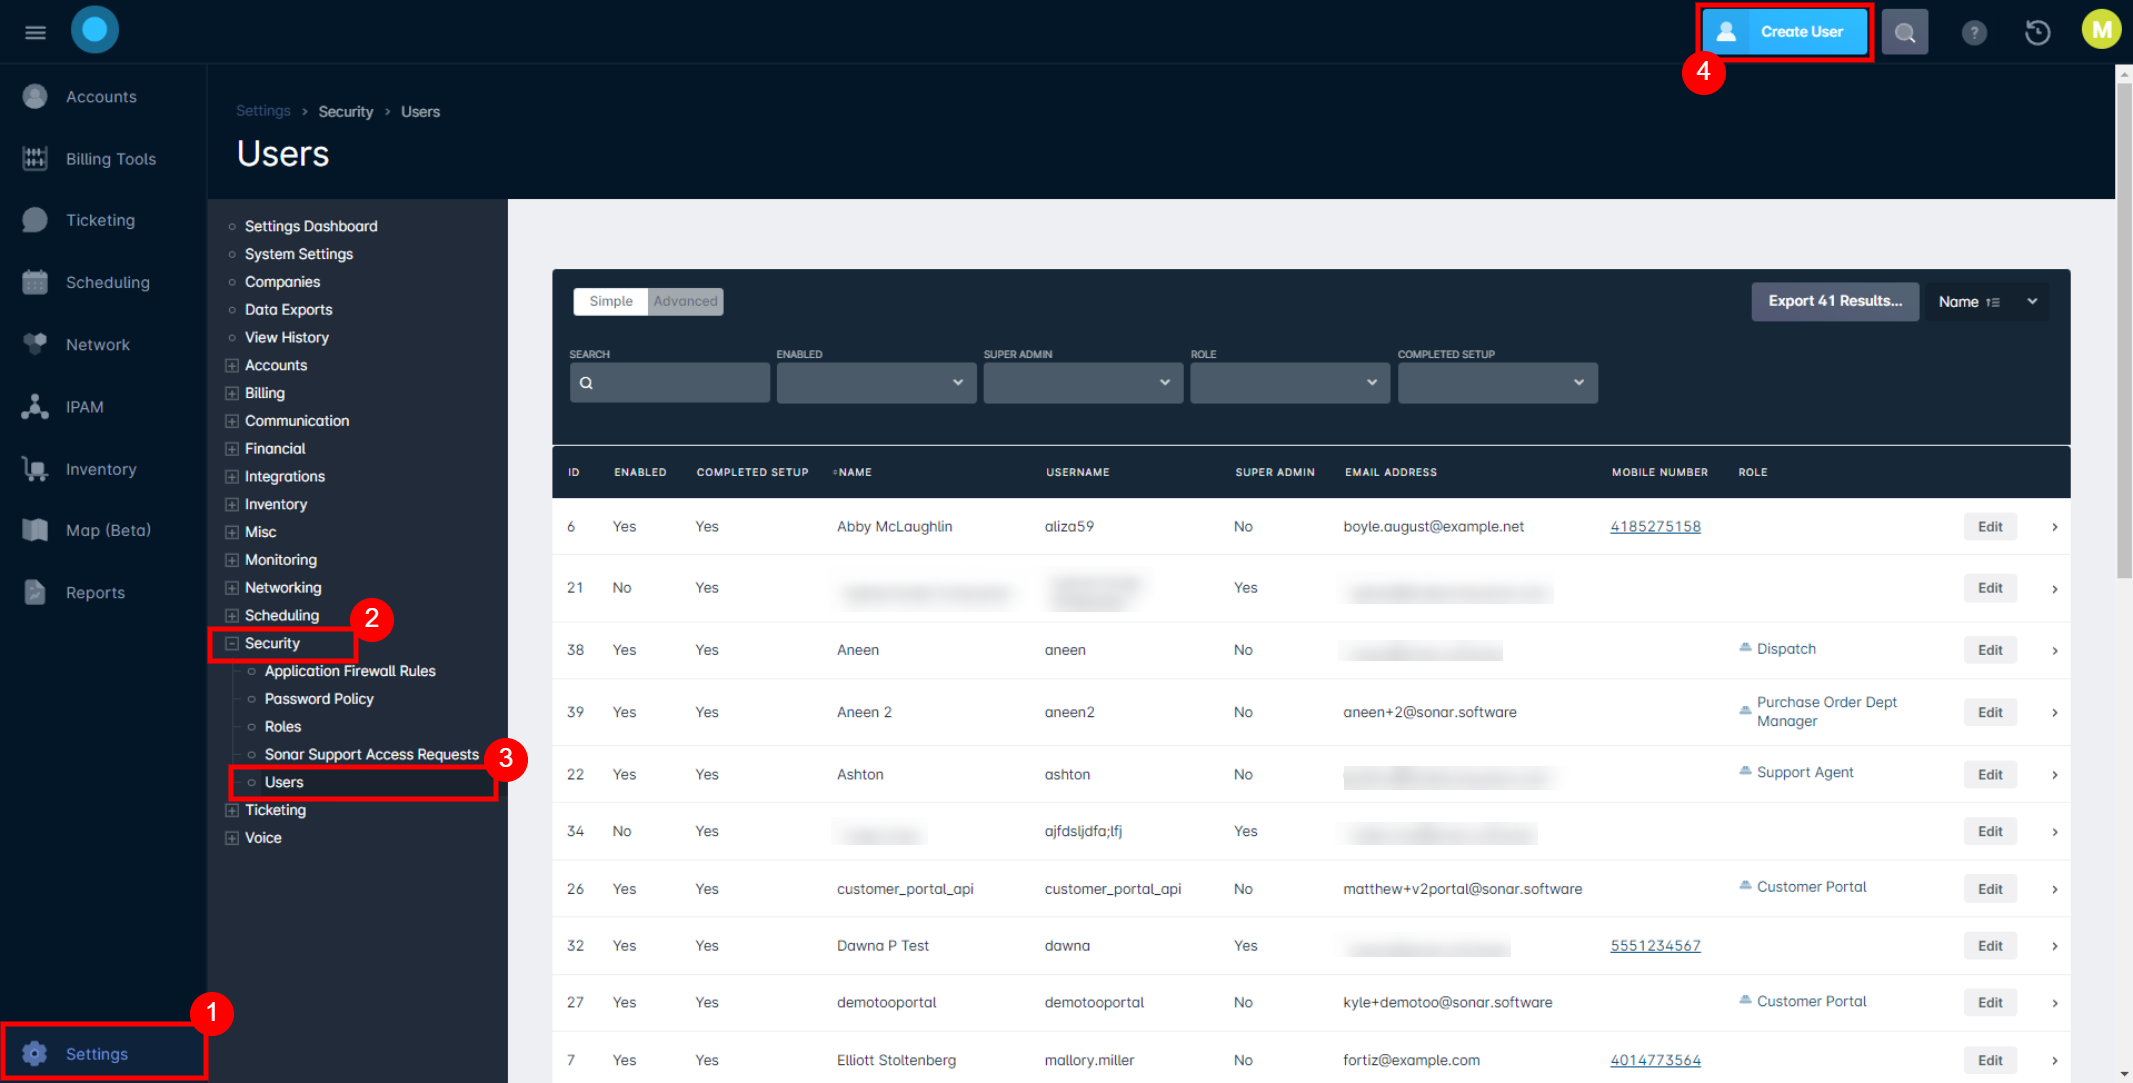
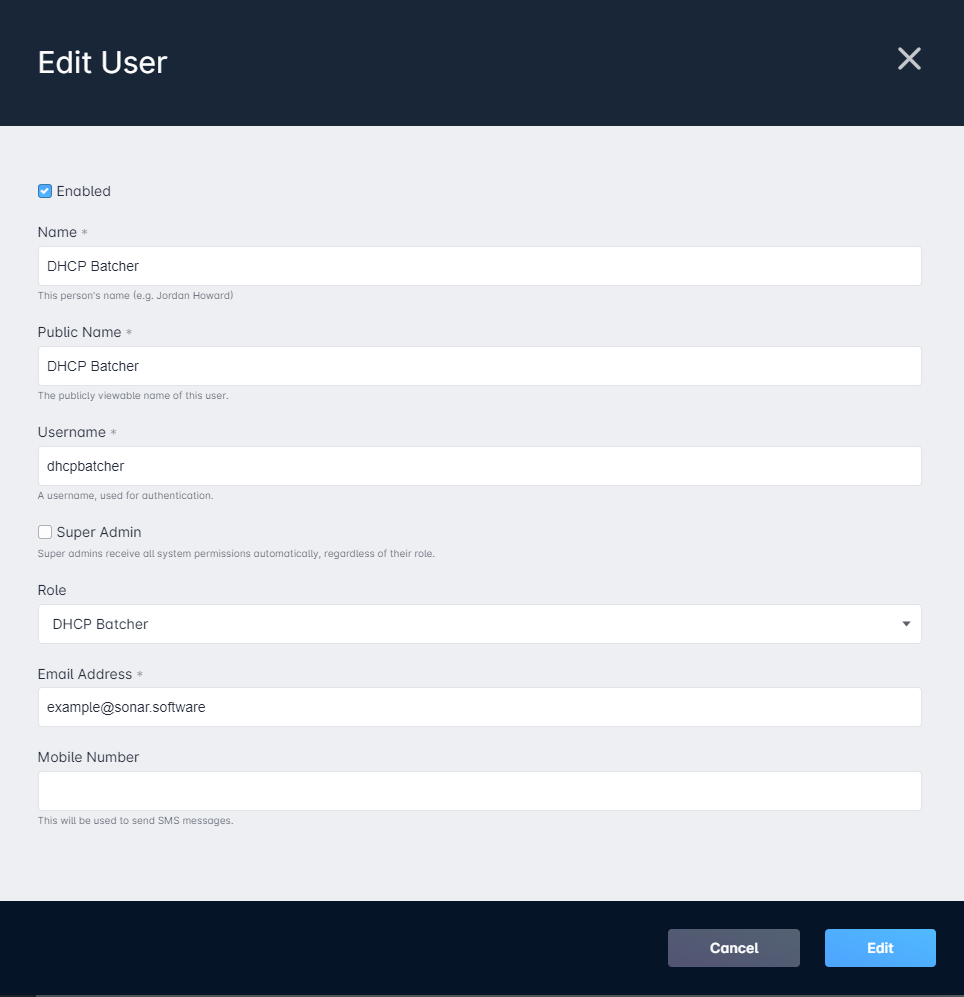
- Create a new user in Sonar under Settings > Security > Users, Create a "DHCP Batcher" user. Make sure that you set the role to the "DHCP Batcher" role we just created.
- From the SSH session for your DHCP Batcher, run the following command
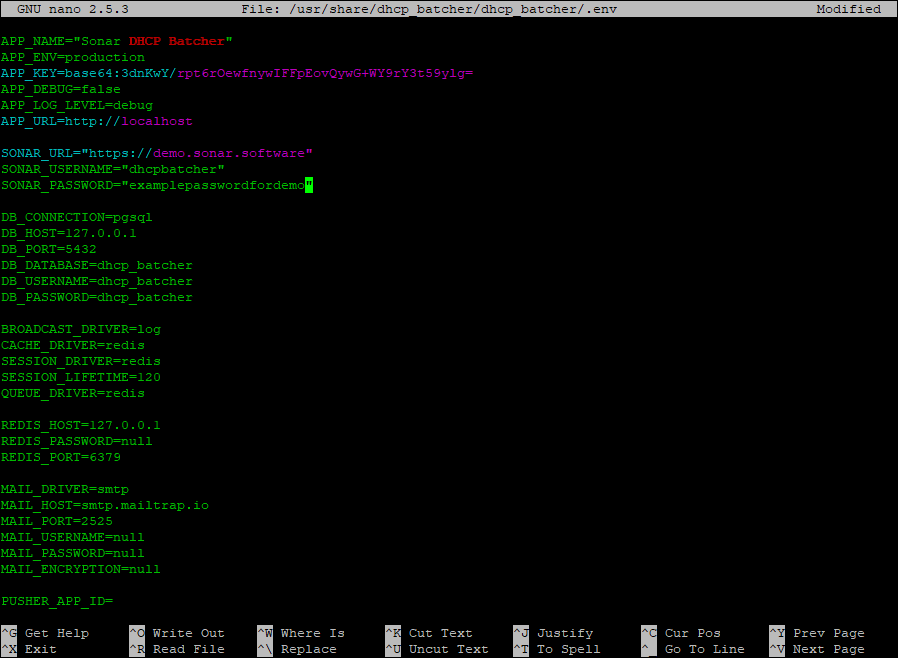
sudo nano /usr/share/dhcp_batcher/dhcp_batcher/.env
From within the file update the "SONAR_URL", "SONAR_USERNAME", and "SONAR_PASSWORD". The URL should be the full URL to your Sonar instance (ex: https://demo.sonar.software). The username and password should be for the user we just set up in step 2. Once you have these filled out correctly, press ctrl+x, then 'y' to exit and save changes.
- Clear the old settings cache, then reload php, and finally test that your user can talk to Sonar
sudo /usr/bin/php /usr/share/dhcp_batcher/dhcp_batcher/artisan config:cache
sudo systemctl reload php7.0-fpm
sudo /usr/bin/php /usr/share/dhcp_batcher/dhcp_batcher/artisan sonar:test

Enabling SSL
This step is not required but is highly recommended if your DHCP batcher is going to live on a Public IP address. A guide to setup SSL with a Let's Encrypt certificate can be found HERE.
Enabling Auto Updates
Run the following steps to enable your batcher to automatically upgrade at midnight if there is a new version:
- Copy the cron script to the proper directory
sudo cp /usr/share/dhcp_batcher/conf/auto_upgrades /etc/cron.d
- Update the owner of the newly copied file
sudo chmod 644 /etc/cron.d/auto_upgrades
Linking the Batcher to the DHCP Server
- Create an initial user, replacing test@example.com with your email address:
sudo php /usr/share/dhcp_batcher/dhcp_batcher/artisan make:user test@example.com
You will receive a username and password. Write these down so that we can use them to log in to the DHCP Batcher website.

If you lose your password, you can run the following command to get a new password, again replacing test@example.com with the email address you used above:
sudo php /usr/share/dhcp_batcher/dhcp_batcher/artisan reset test@example.com

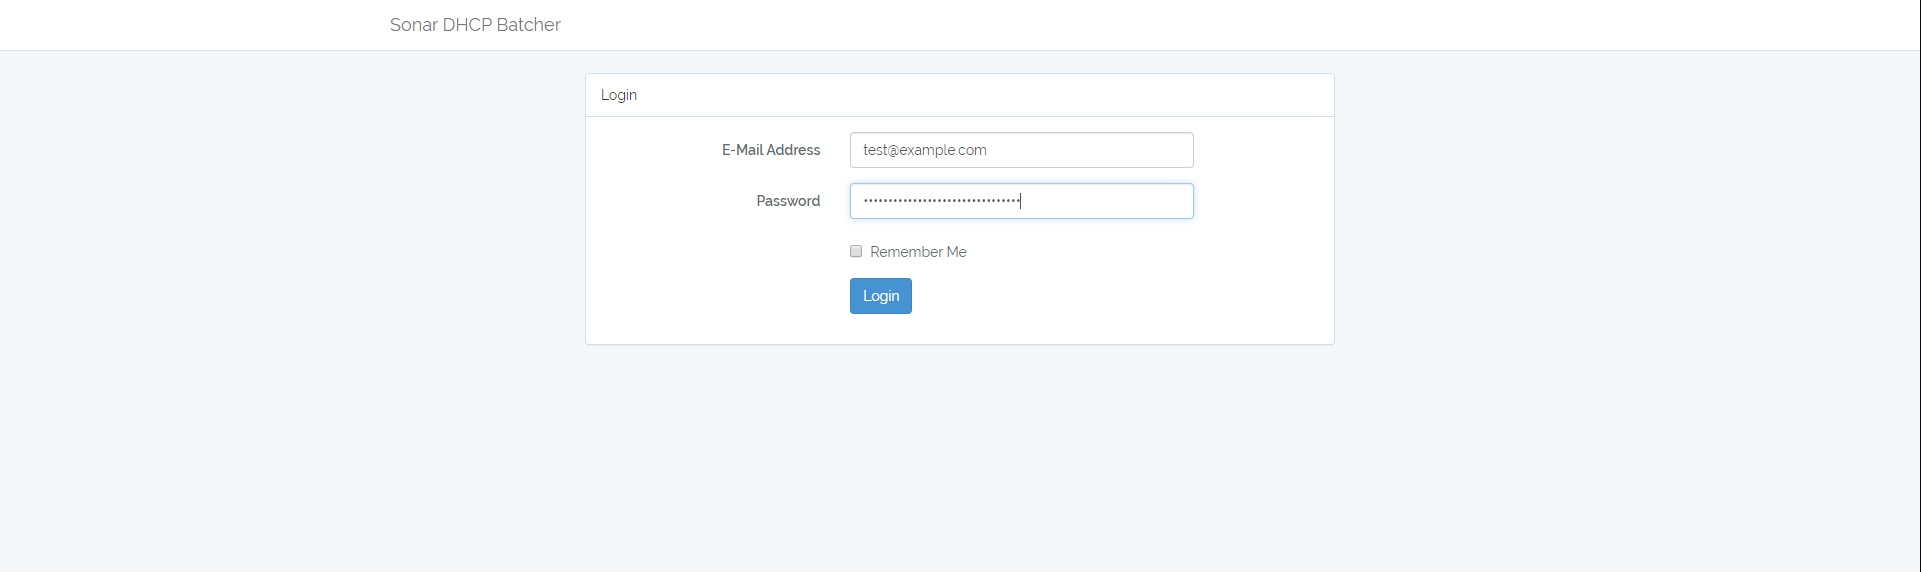
- In a web browser, navigate to the IP/ URL of your DHCP Batcher and log in using the credentials created in step 1.
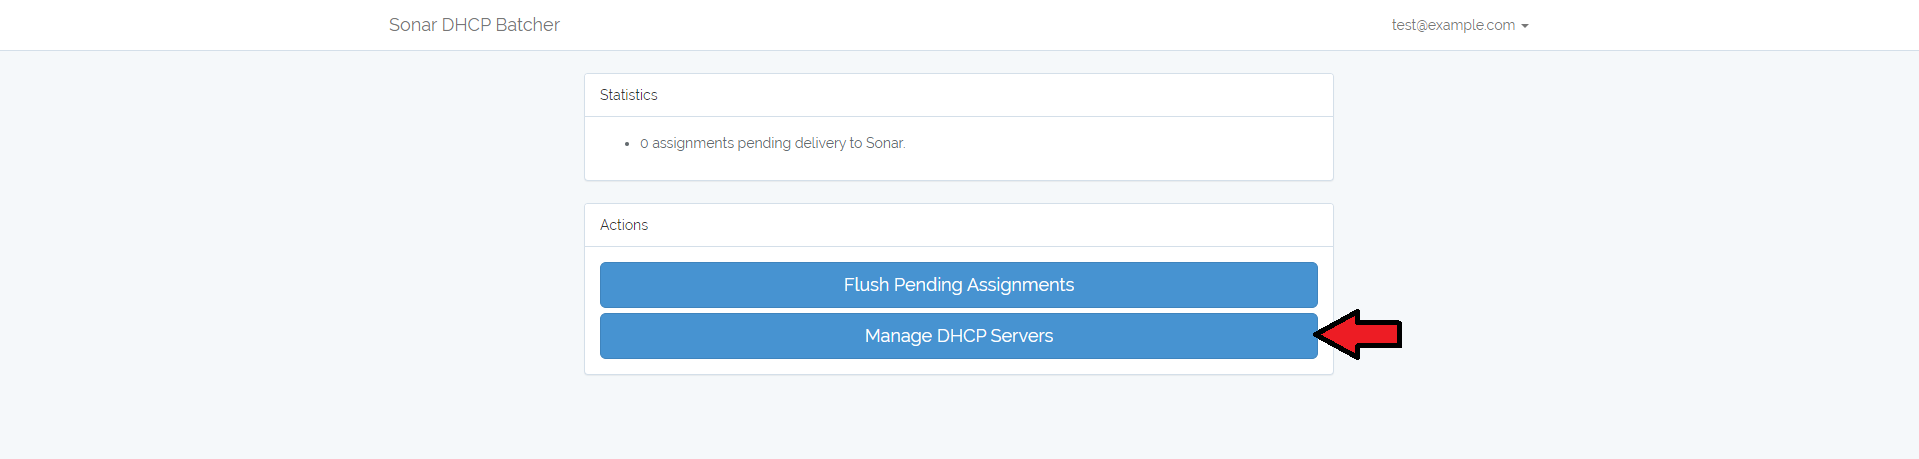
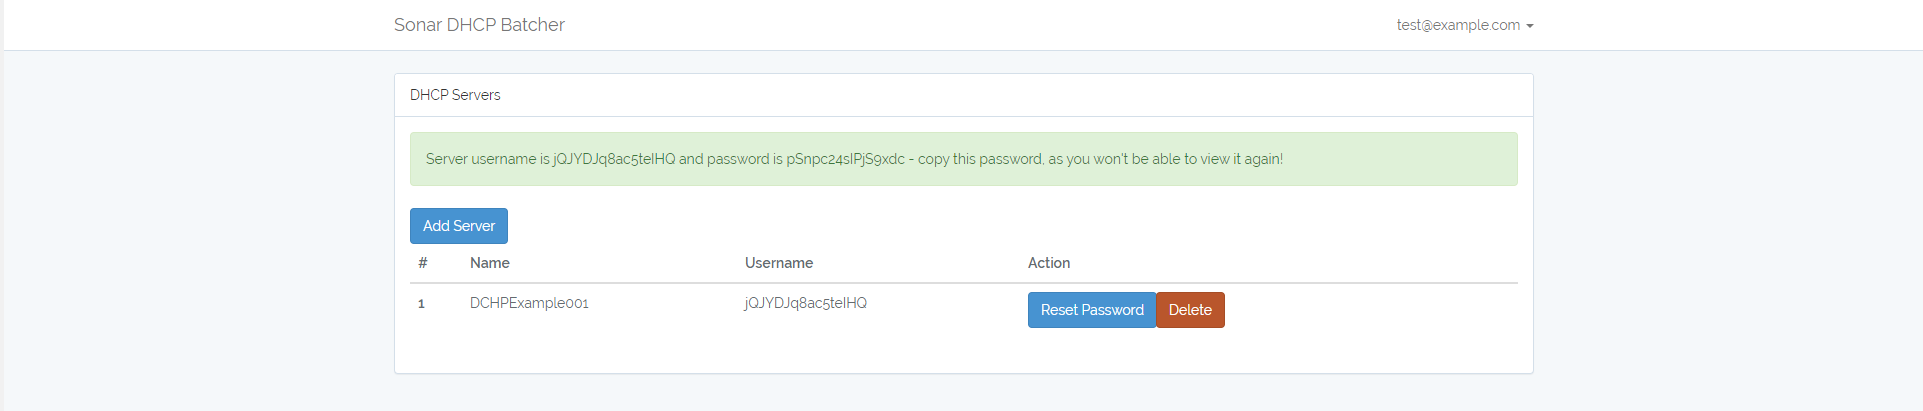
- Click "Manage DHCP Servers", then "Add Server". Enter the name of the DHCP Server that you would like to deliver leases from. The general best practice here would be to add the name exactly as the device name exists on that DHCP server. Once completed, copy the server username and password for use in the script that will be built in the DHCP server.


- Add the script to your DHCP server. This tool will work with any DHCP server that can create an HTTP request upon lease assignment or expiration. Below is an example script that you can use on a MikroTik DHCP server.
:global username "dhcp_batcher_username" #The username for this DHCP server setup in the batcher.
:global password "dhcp_batcher_password" #The password for this DHCP server setup in the batcher.
:global url "batcher.example.com" #The URL of your batcher, can also be an IP address.
:global mode "http" #This should be 'http' or 'https' depending on if your batcher is using SSL. The default is 'http'.

:if ($leaseBound = 0) do={
   /tool fetch url="$mode://$url/api/dhcp_assignments?ip_address=$leaseActIP&leased_mac_address=$leaseActMAC&expired=1" mode=$mode keep-result=no user=$username password=$password
} else={
   { :delay 1 };
   :local remoteID
   :set remoteID [/ip dhcp-server lease get [find where address=$leaseActIP] agent-remote-id]
   /tool fetch url="$mode://$url/api/dhcp_assignments?ip_address=$leaseActIP&leased_mac_address=$leaseActMAC&remote_id=$remoteID&expired=0" mode=$mode keep-result=no user=$username password=$password
};
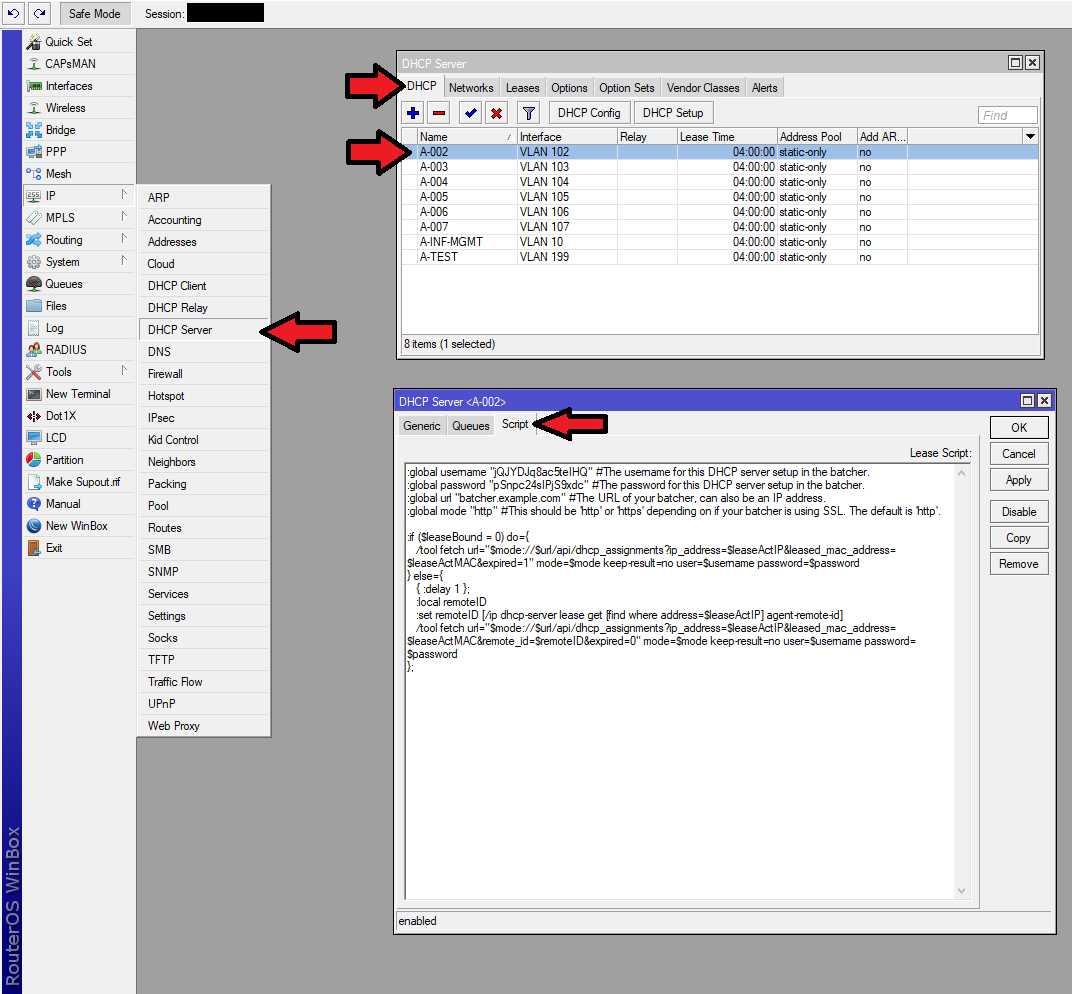
You would add this script in to the MikroTik under IP > DHCP Server > DHCP > Script. Below is an example of the script filled out with the values generated in step 3.
- Test the user by executing the following command directly from your MikroTik terminal. You must replace the $url, $mode, $username, and $password variables with valid information.
/tool fetch url="$mode://$url/api/dhcp_assignments\?ip_address=192.168.100.1&leased_mac_address=00:00:00:00:00:00&expired=0" mode=$mode keep-result=no user=$username password=$password
Here would be that code, but with the example information above filled in where required:
/tool fetch url="http://batcher.example.com/api/dhcp_assignments\?ip_address=100.64.0.104&leased_mac_address=F0:8A:6B:A0:5A:FA&expired=0" mode=http keep-result=no user=jQJYDJq8ac5telHQ password=pSnpc24sIPjS9xdc
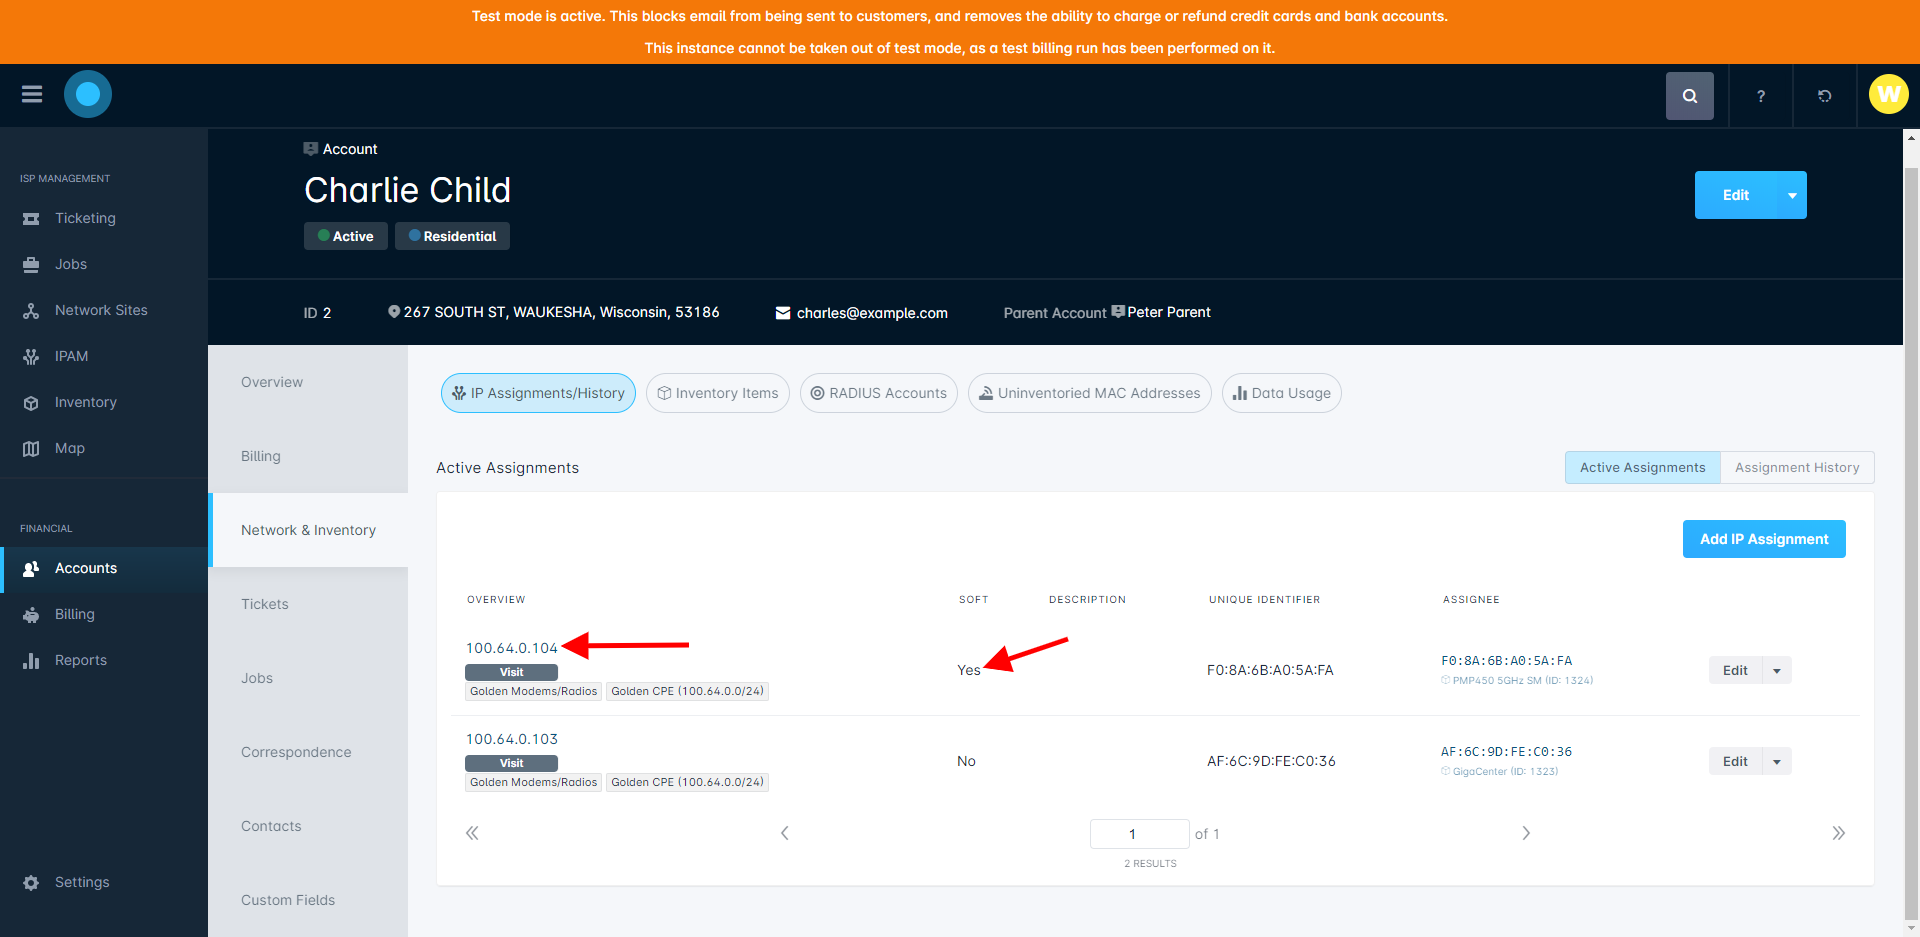
If your credentials have been properly entered you should see the IP address added to the account with that MAC address as a soft assignment:
Upgrading
You can upgrade by running the following command:
sudo php /usr/share/dhcp_batcher/dhcp_batcher/upgrade.php
You can also upgrade by checking out this repository and copying the files over the top.
If you don't use the upgrade script, it's important to run the following commands after copying the repository files over:
sudo /usr/bin/php /usr/share/dhcp_batcher/dhcp_batcher/artisan migrate --force
sudo /usr/bin/php /usr/share/dhcp_batcher/dhcp_batcher/artisan config:cache
sudo /usr/bin/php /usr/share/dhcp_batcher/dhcp_batcher/artisan route:cache
sudo systemctl reload php7.0-fpm
Troubleshooting
By default, the batcher will not log many errors. You can enable enhanced logging by setting APP_DEBUG to true in your .env file.
After modifying this file you will need to run this command:
sudo /usr/bin/php /usr/share/dhcp_batcher/dhcp_batcher/artisan config:cache
Any errors are logged to storage/logs/laravel.log.
You can view this in a standard installation by typing:
sudo tail -f /usr/share/dhcp_batcher/dhcp_batcher/storage/logs/laravel.log
Initiating some calls from your DHCP server will start to populate data here.