Notes and tasks are effective ways to equip users with pertinent information and to help ensure that any necessary actions are taken. Both of these features can be set up on multiple entities, such as accounts, network sites, and jobs, and are displayed in various areas within Sonar.
Notes
There are 3 different types of notes that you can create:
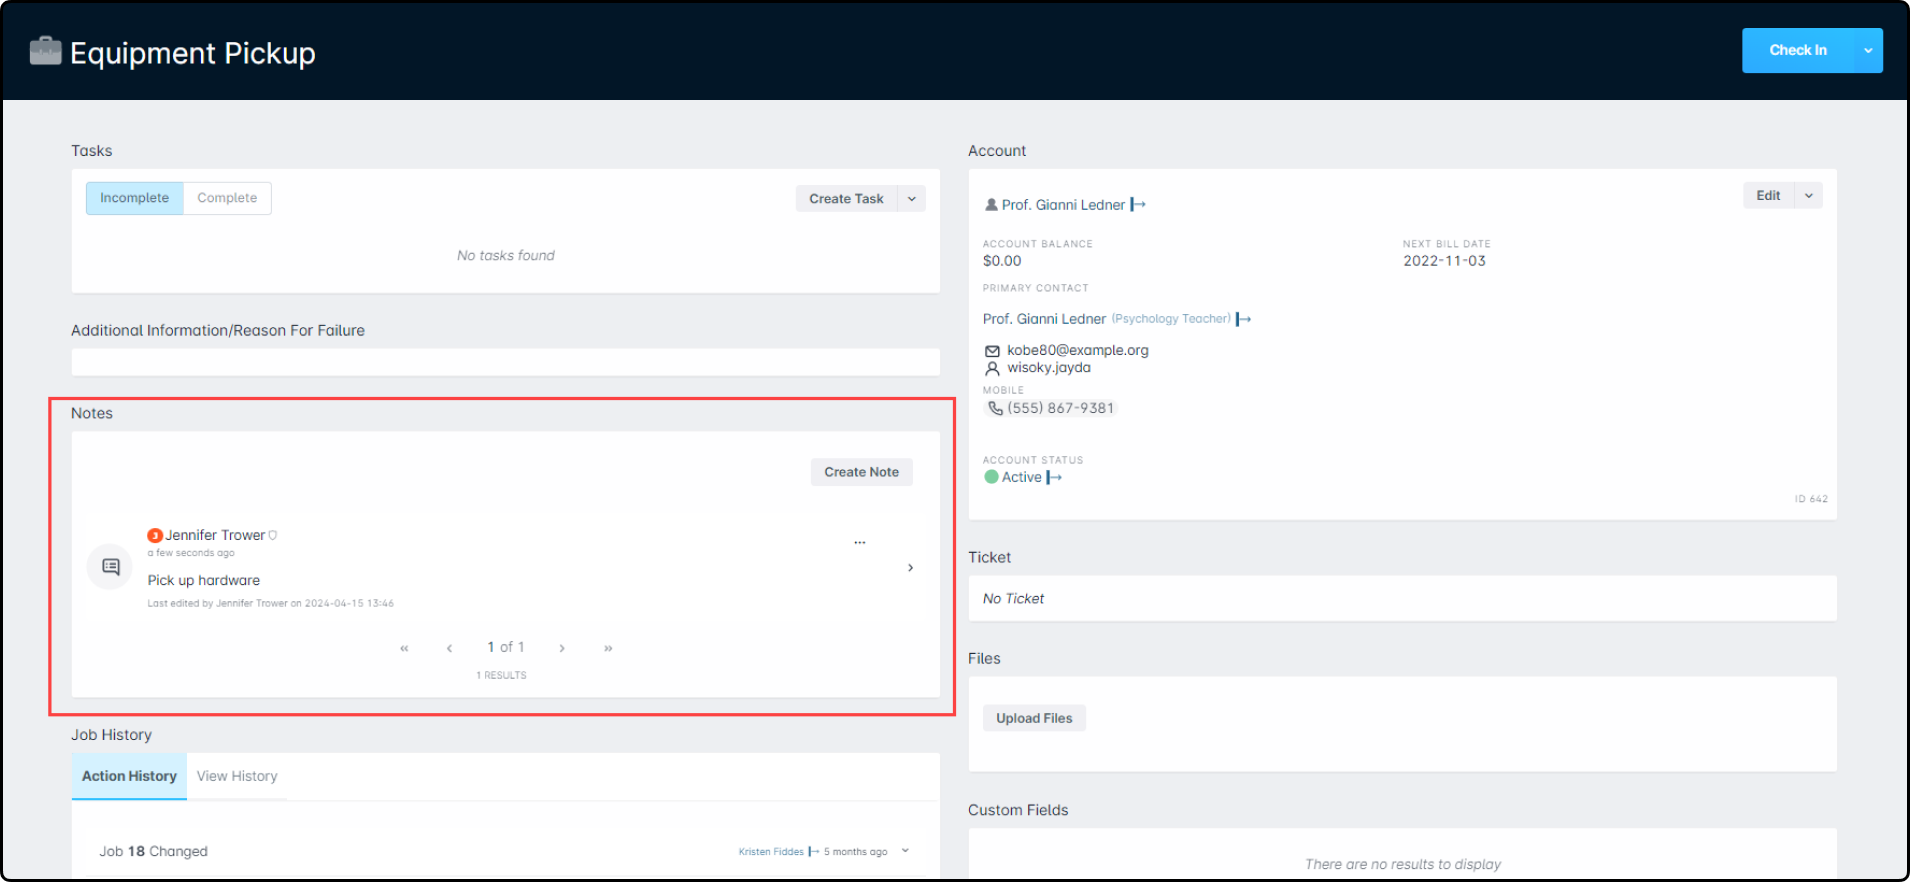
Normal: A normal note is not given a higher priority than the other types of notes. Once created, the note will remain visible in the Notes area for the entity it was created for. Normal notes are great for making sure that all users have any necessary or helpful information when dealing with a particular entity. Below is an example of a normal note on a scheduled job.
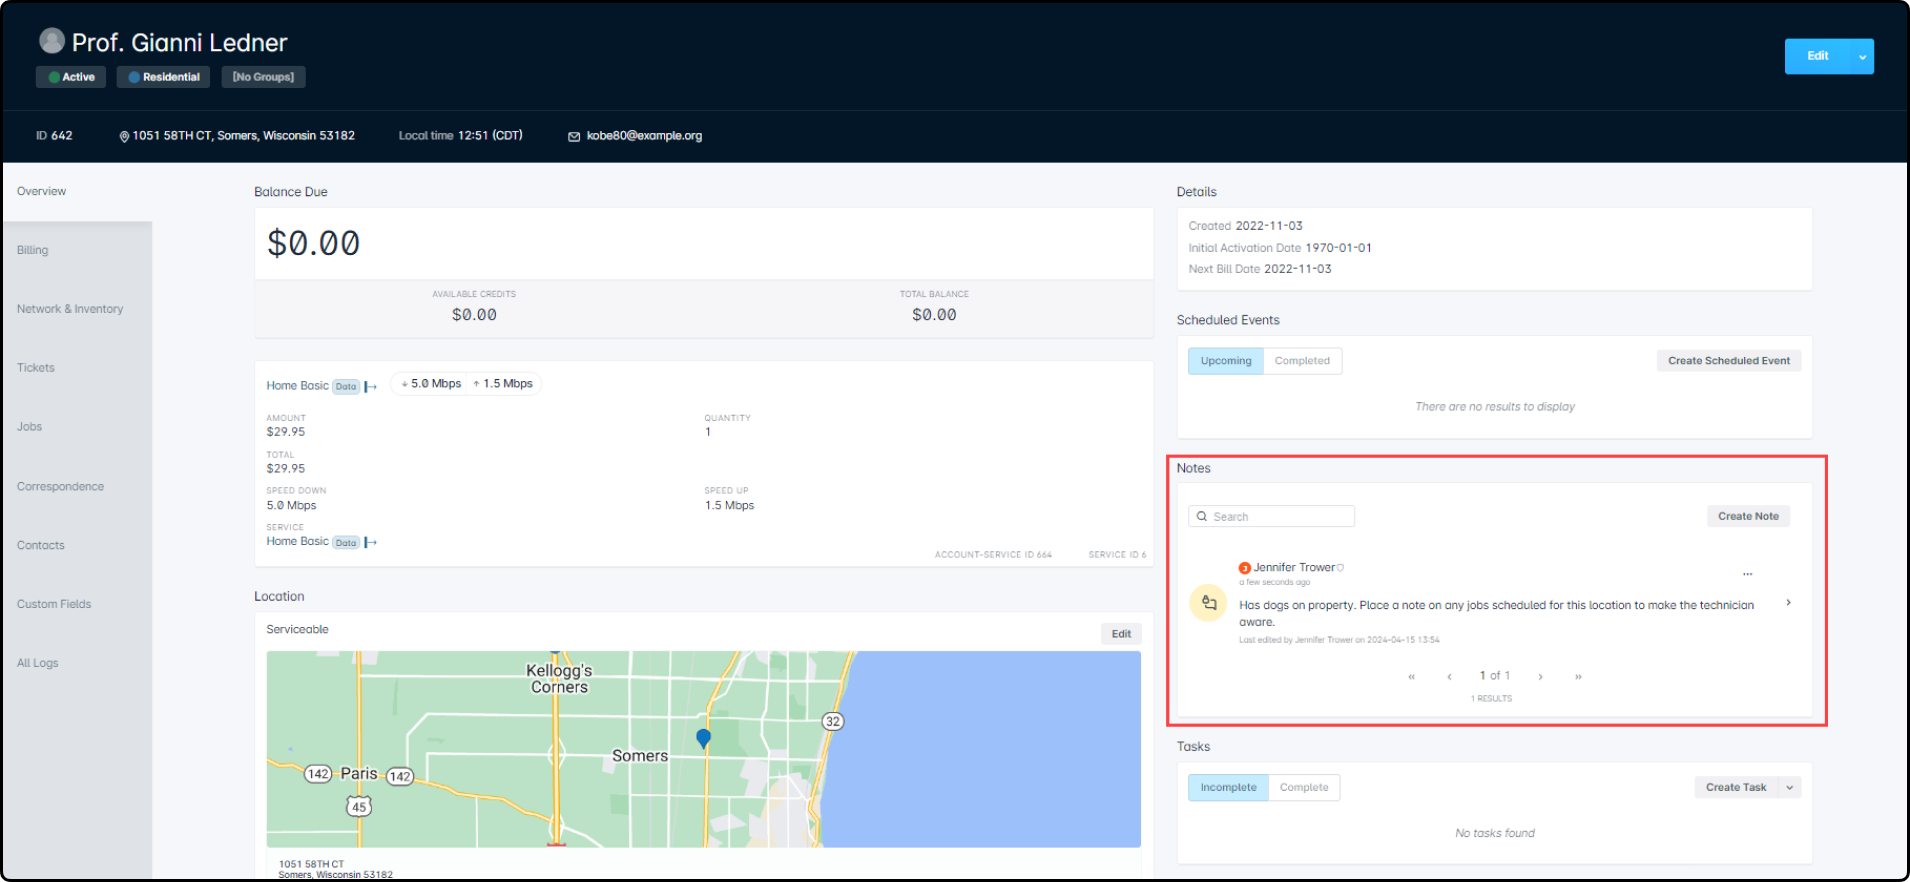
Sticky: Sticky notes are similar to normal notes, except that sticky notes will always be given a higher priority and therefore maintained as the first note in the list. These notes are useful for situations where you have potentially time-sensitive information that needs to be made available to all users viewing that entity, or information that needs to be found quickly. Below is an example of a sticky note on an account.
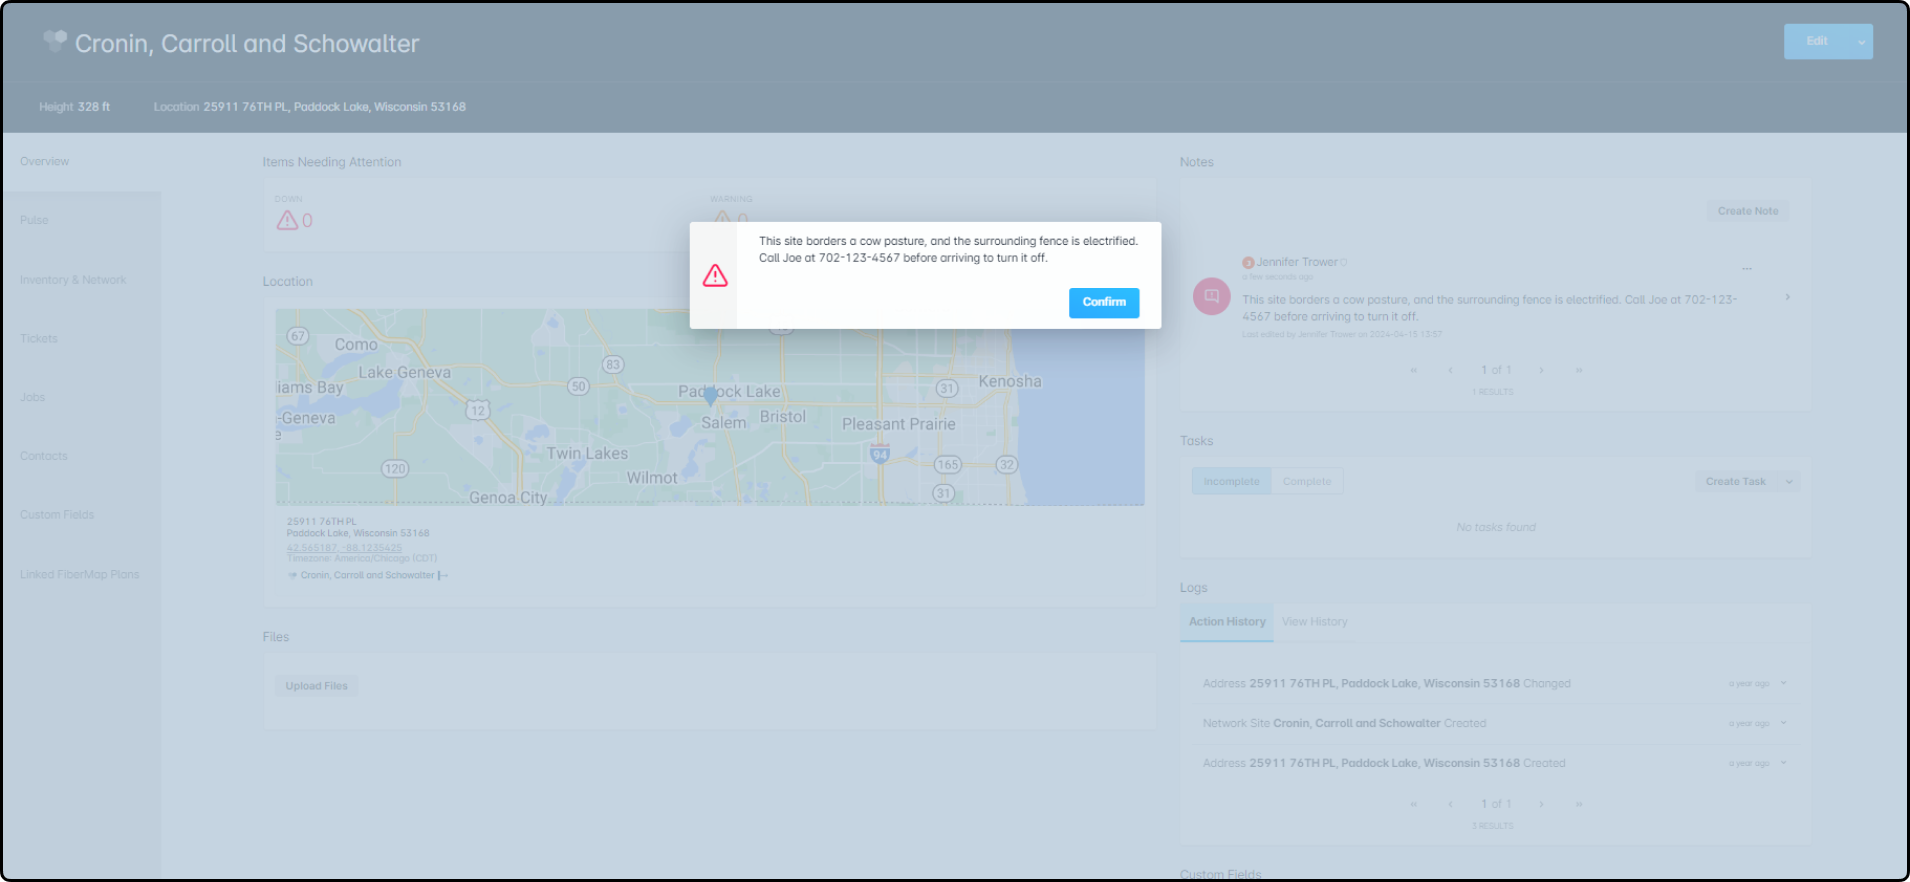
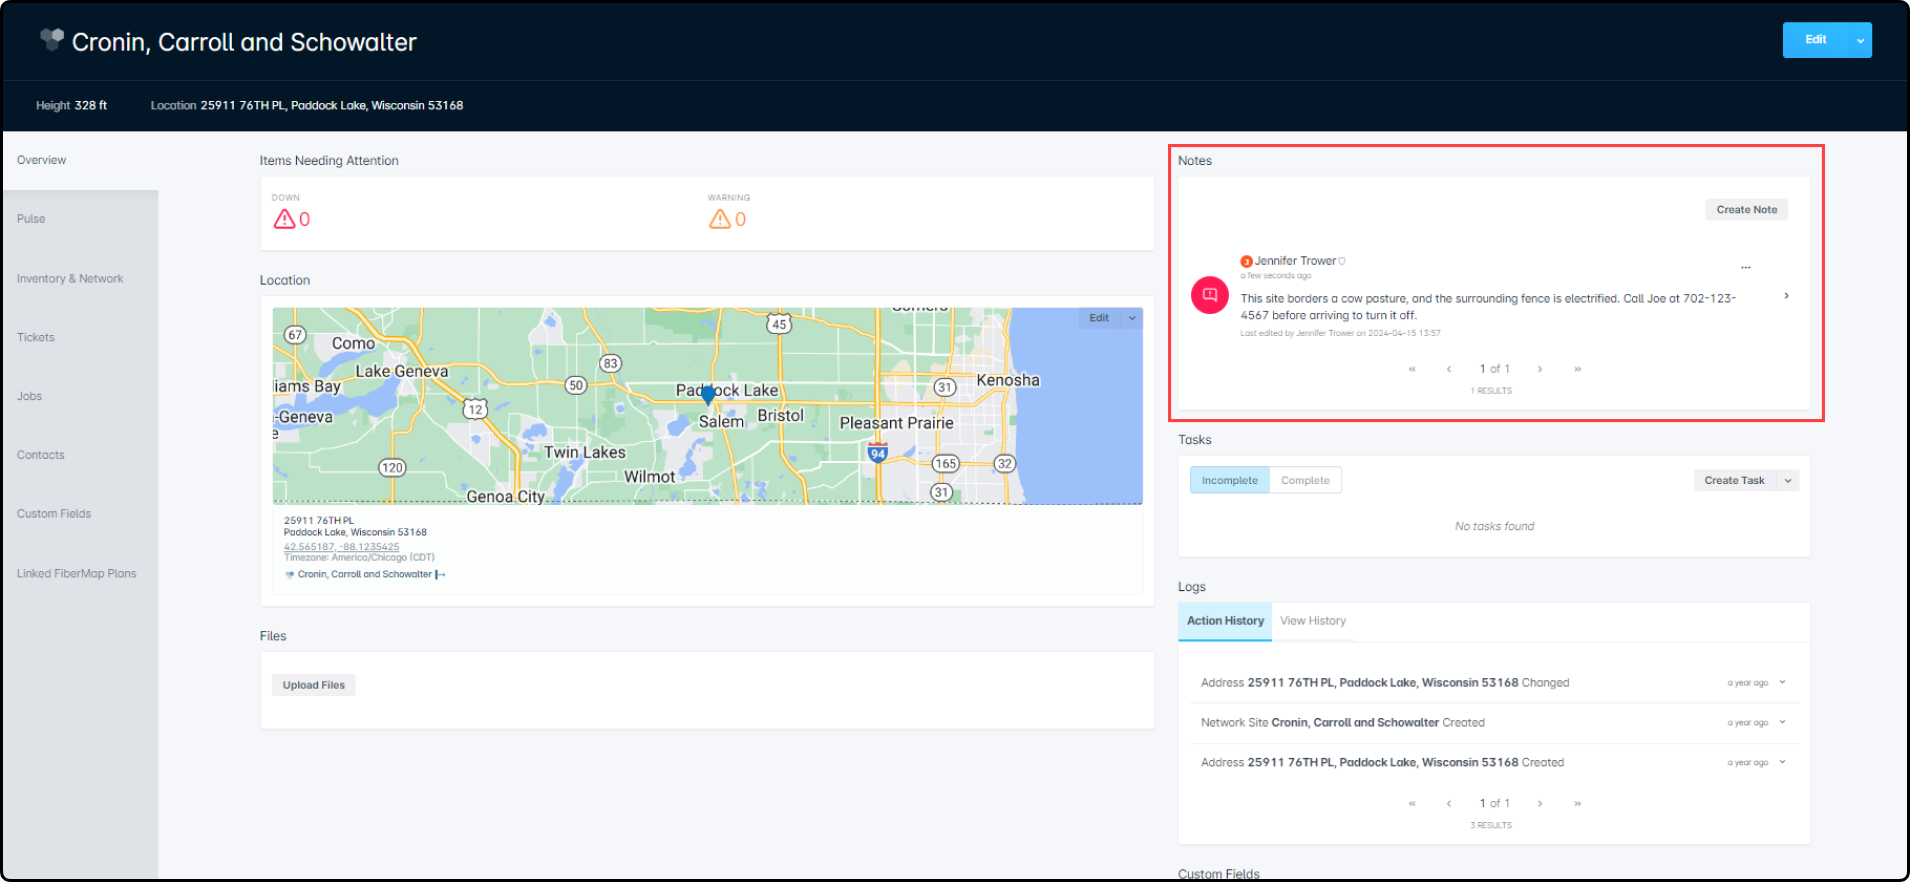
Sticky With Confirmation: A sticky with confirmation note functions the same as a sticky note, except there will be a pop-up window displayed anytime that particular page for the entity is loaded. The pop-up window requires user interaction, as the “Confirm” button must be clicked before the screen will be viewable. These types of notes are ideal for situations where you want to ensure a user has a particular piece of information before even navigating through the entity's page. They will have to dismiss the note before being able to continue on in the page. Below is an example of a sticky note with confirmation on a network site.Once the pop-up has been dismissed, the note will still be visible from within the Notes list.
Within Sonar's Field Tech Mobile App, notes that are sticky with confirmation will only pop up once for each user; once the user acknowledges and confirms that particular note, it won't pop up for that user again.
How To Use Notes
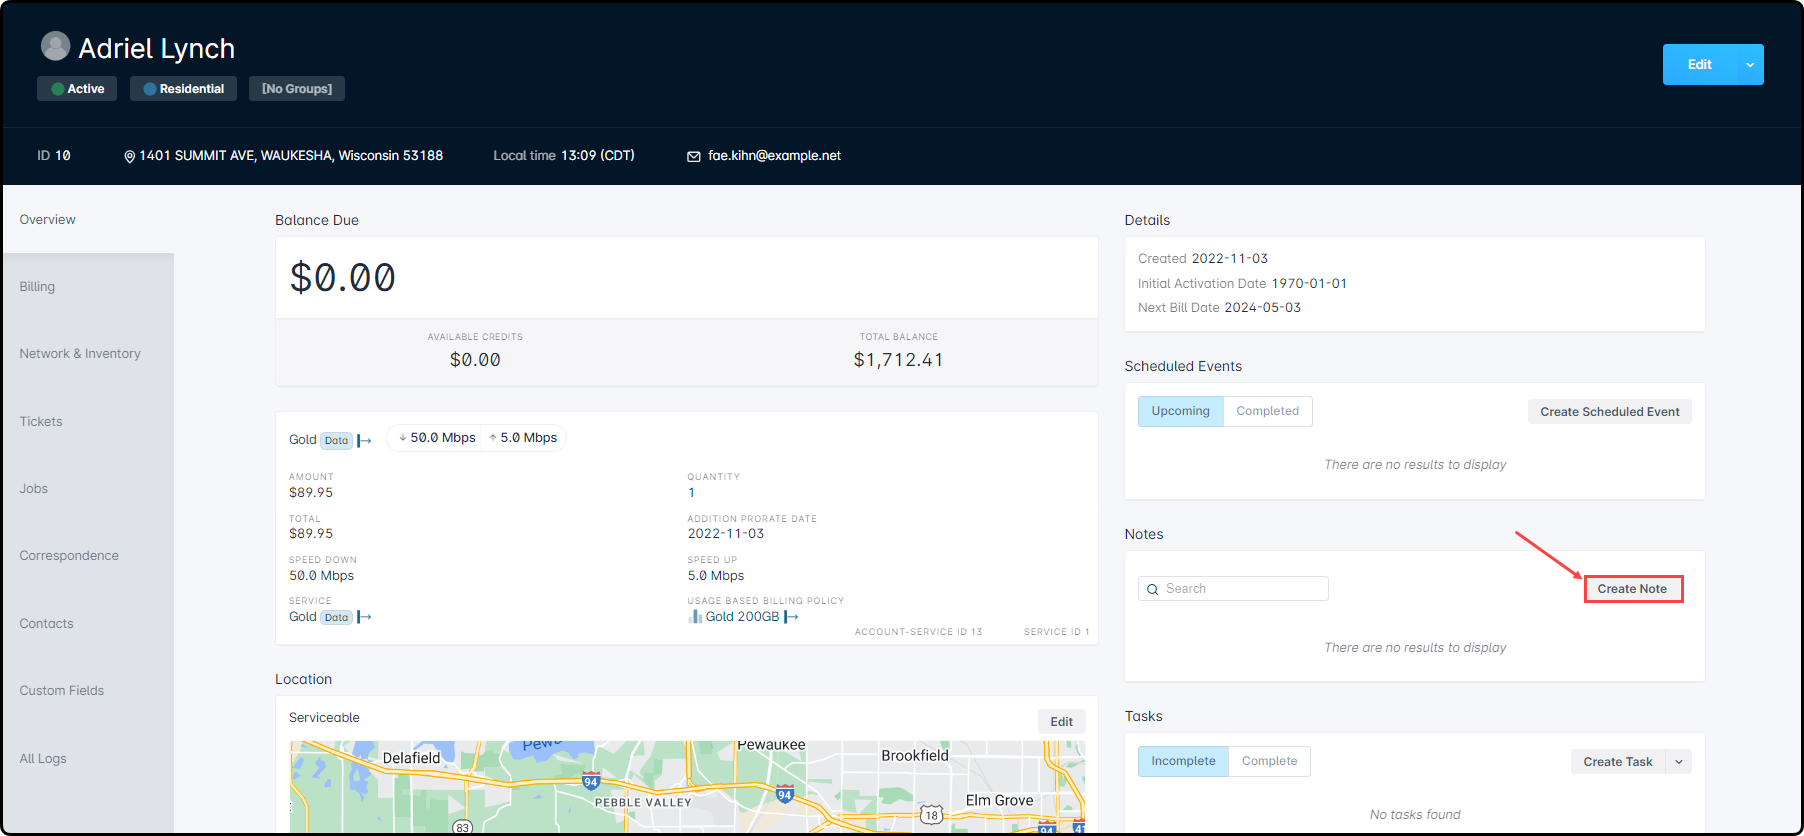
A note can be created wherever you see the “Create Note” button available.
Clicking “Create Note” will result in a Create Note modal appearing.
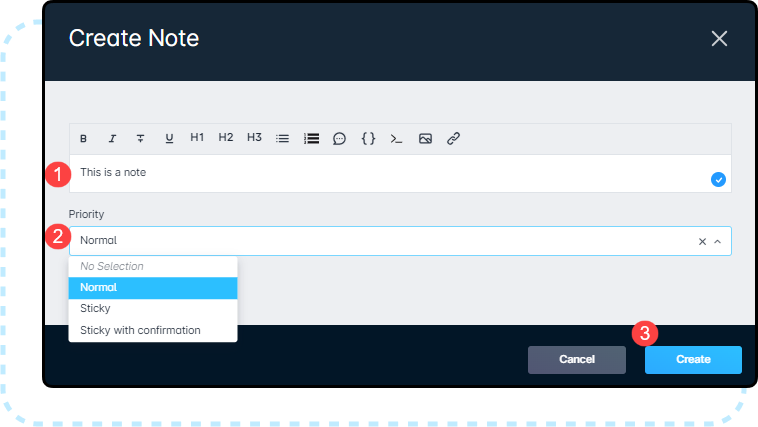
Input the note you wish to place on the entity.
The “Priority” field will populate after inserting the note, allowing you to select the type of note it will be.
Once you are finished with your note, click “Create”.
Once created, the note will live and be visible from the Notes section for that entity. If the note you created was of type sticky with confirmation, the auto pop-up window will appear the next time the page is loaded.
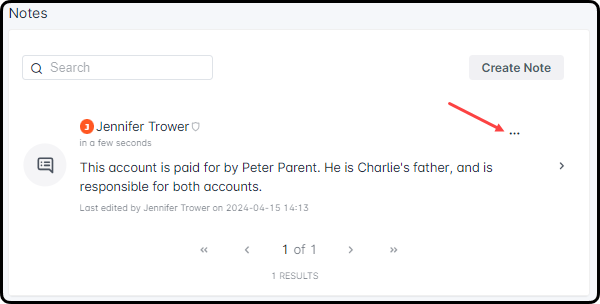
To edit or delete an existing note, click on the 3 dot menu next to the note. This menu will provide you with the option to delete or edit.
Clicking “Edit” will open the Edit Note modal, where you can edit the note type and the text displayed.
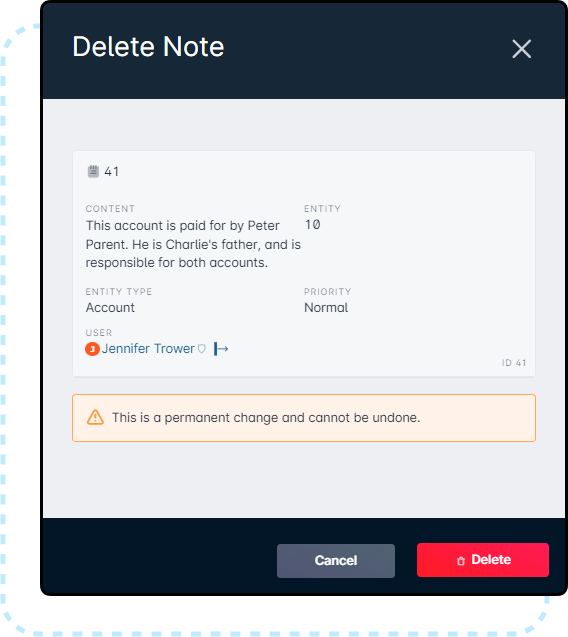
Clicking “Delete” will open a “Delete Note” modal, having you confirm that this is the action you want to take.
Example Use Cases
Below are some commonly used example cases of where Notes can be particularly useful within Sonar.
If a customer has any special arrangement(s) and/or discount(s) that other users should be aware of when viewing their account.
To track/make note of attempts made to contact a customer, so that other users can see this as well.
When a customer's payment has bounced or been declined, a transaction has been reversed, or a discount has been added.
If there is a particular employee that the customer should be forwarded to when they call in for support.
To share login credentials for particular equipment and/or software with other users.
To track when a customer is upgrading/downgrading their service, or will be moving into a vacation mode temporarily.
When there is a child account situation where the parent account handles all communications.
Tasks
Tasks can be used like a to-do list, for which you can also set due dates, and appear as either complete or incomplete in the Tasks section for the entity. By default, the “Incomplete” tab is selected and will display all incomplete tasks; toggling to the “Complete” option will display any completed tasks.
How To Use Tasks
When creating a task, you have the option to create individual tasks or to create tasks from an existing task template that you would have configured within your Sonar instance. Both methods are outlined below.
Creating Individual Tasks
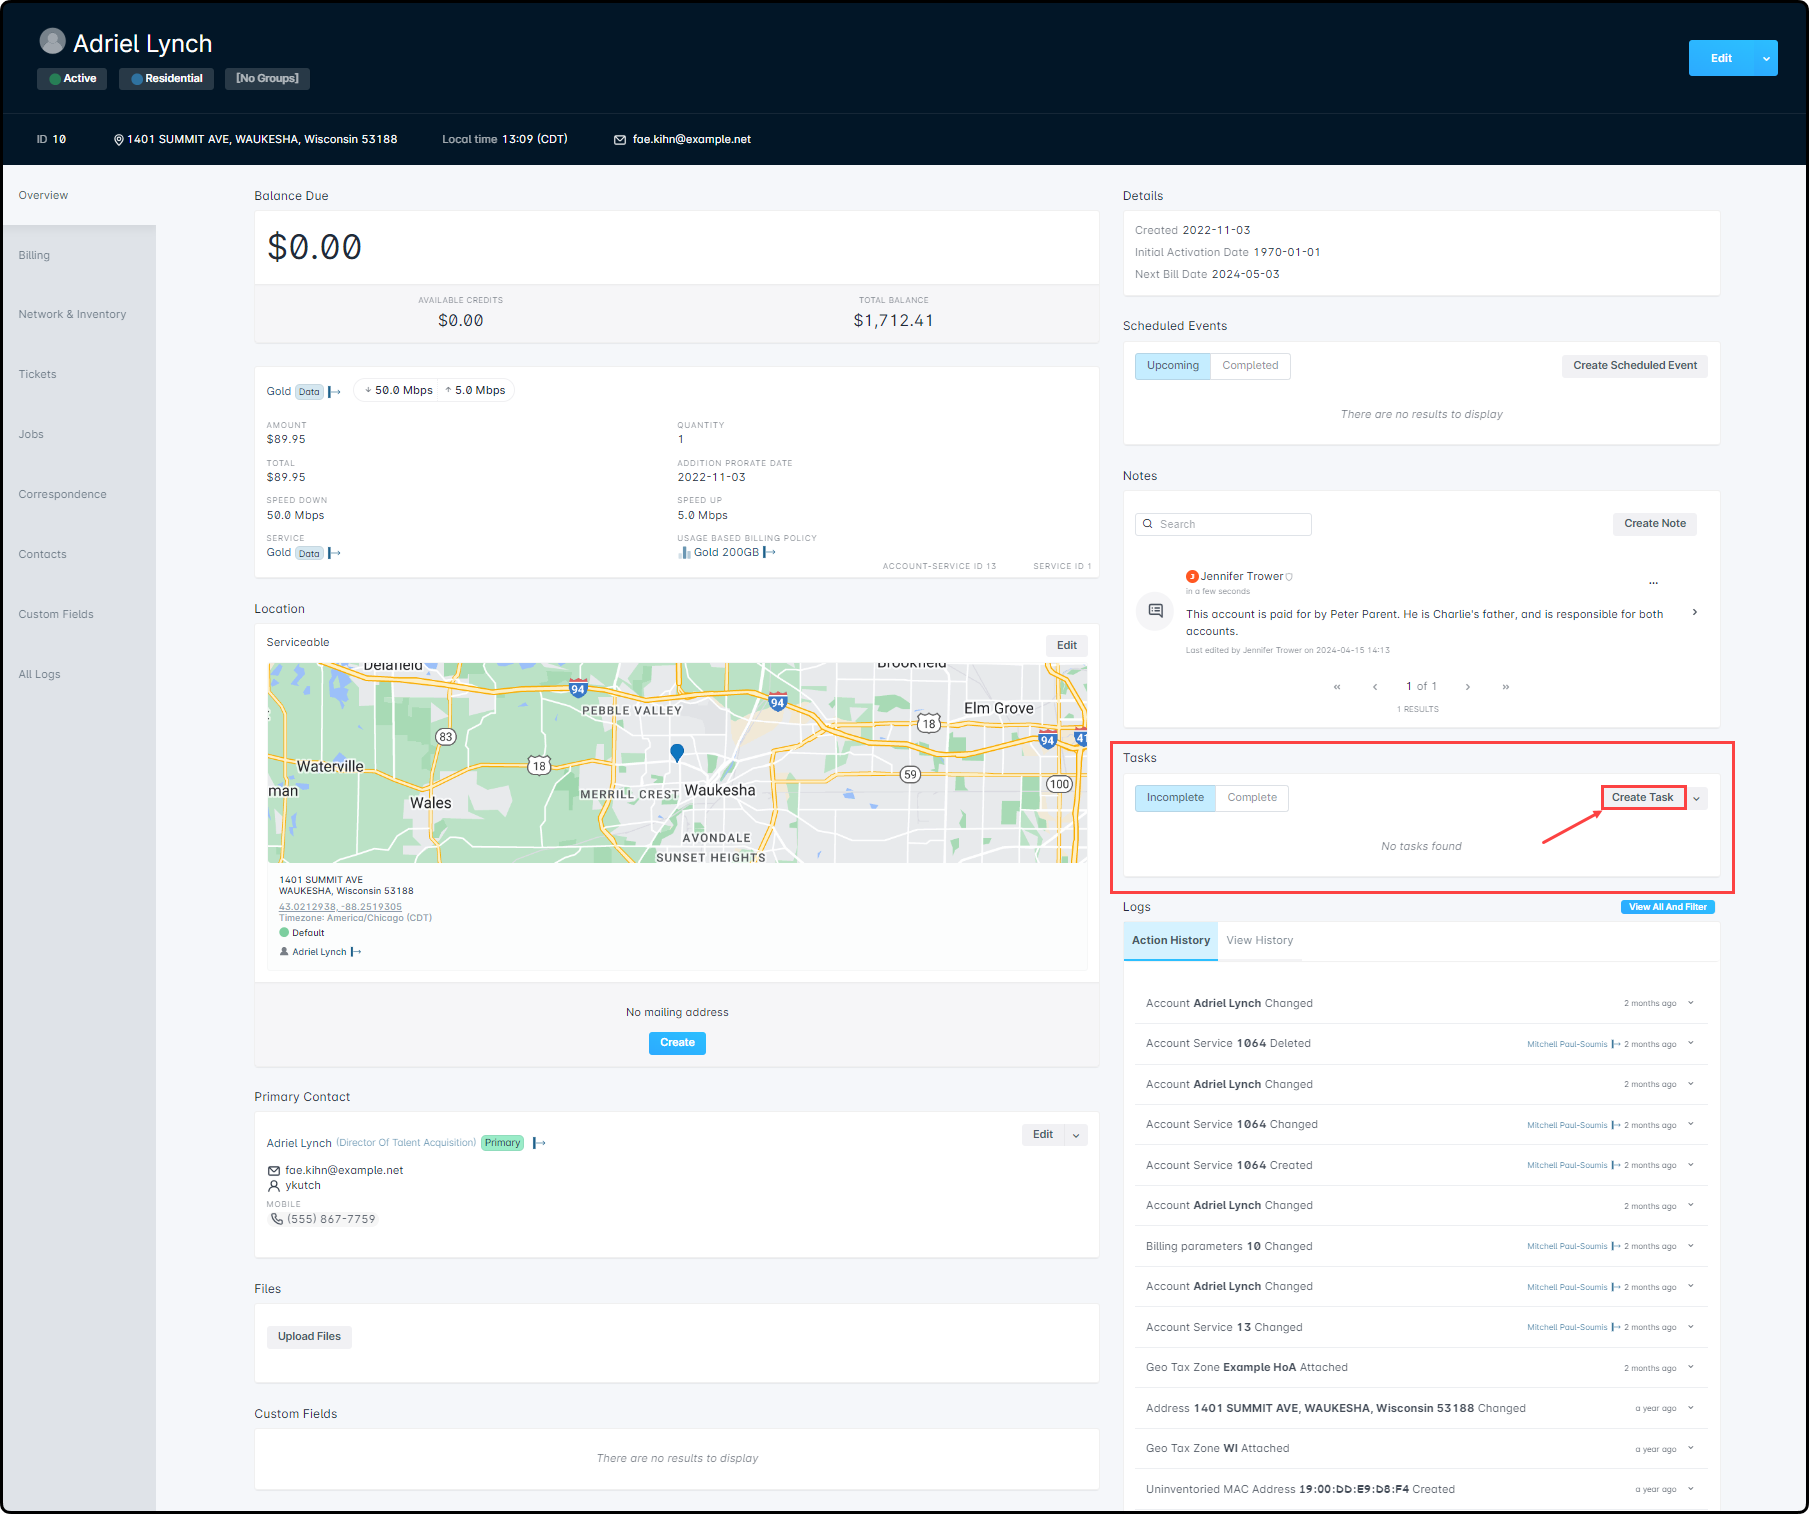
To create a new task, navigate to the entity's page that you want to set up the task for and select “Create Task”.
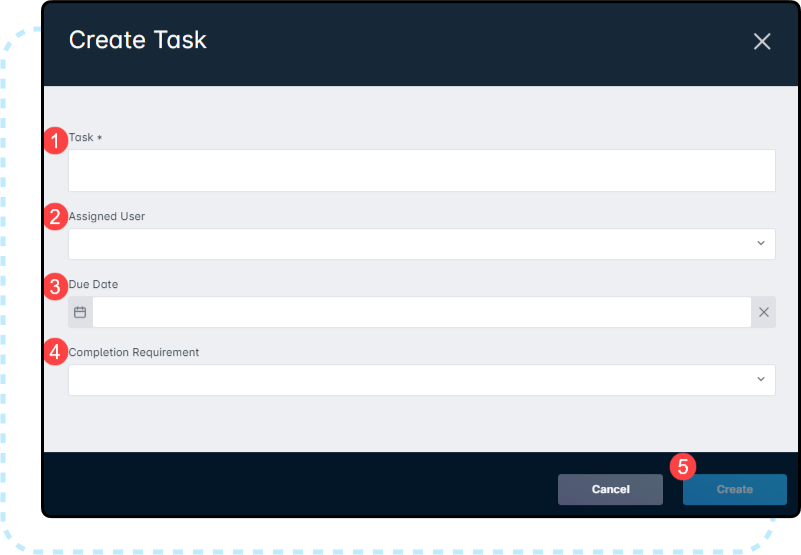
Clicking “Create Task” will open a Create Task modal, where you will fill out the information for this task.
Only the “Task” field is required.
Optionally, you can also assign a user to this task from the “User” dropdown menu.
Assign a due date through the “Due Date” date selector, or
Add completion requirements through the “Completion Requirement” dropdown menu.
Once you are done entering the information, click “Create”.
Completion Requirements
For each task, a completion requirement can also be set; if a completion requirement is in place for a task, it will prevent the task from being completed until the requirement is met.
There are 3 different types of completion requirements that can be added, which are outlined further below:
Attaching a File Completes the Task: Typically, this requirement will be used when you are looking to have your field techs upload a physical document or a device config file. For example, you could have your field techs upload the configuration file for a customer CPE anytime they perform an installation job. That way, if the device fails, you have the previous configuration ready to quickly upload into a replacement device.
Attaching an Image File Completes the Task: This requirement is typically used when you are looking to have your technicians provide photographic documentation for the work that was completed. An example of this might be requiring a picture from the device to the tower for all wireless installs, or a picture of the customer's router from behind for all residential installations to simplify future troubleshoots.
Providing the Configured Field Value Completes the Task: This completion requirement is only available for tasks that are part of a task template. Typically, this requirement is used when you are looking to have your technicians confirm a value for the sake of quality control. An example of this might be requiring technicians to record upload and download values from a local device after an installation or repair.
When using the “Providing the Configured Field Value Completes the Task” completion requirement, you must have an existing custom field for the same entity type that it will be applied to. For example, to use this completion requirement on an account, the custom field must also be associated with the Account entity.
Task templates can be configured within Sonar by navigating to Settings → Misc → Task Templates. For more information on how to set them up, refer to the Task Templates Overview & Use Cases article.
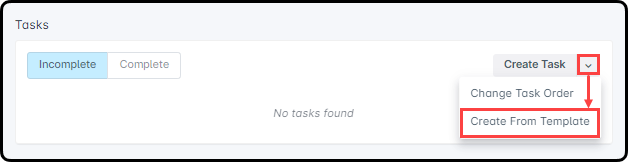
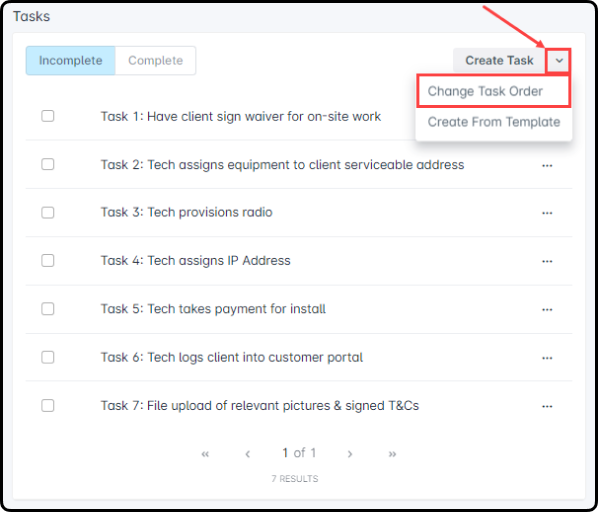
To create a new task from a template, navigate to the entity's page that you want to set up the task for and select the downward arrow next to “Create Task”. Click on the “Create From Template” option that appears.
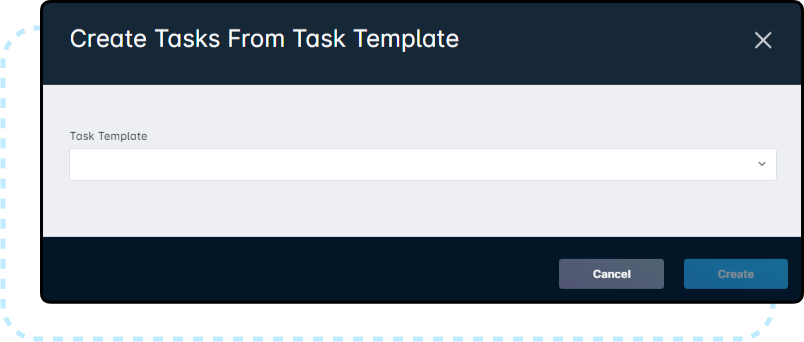
You will be presented with the Create Tasks From Task Template modal, where you will select the template that you wish to use from the dropdown provided. Any task templates that you have configured within your instance will be available from this list. Once you make your template selection, click “Create”.
Assigning Users & Setting Due Dates: When adding tasks from a template, the process to assign users and due dates is slightly different from when adding tasks individually. To assign a user or due date to individual tasks from the template, click the 3 dot menu next to the task once it's been created, and select the “Edit” option.
The Edit Task window will be displayed, where you can use the “User” and “Due Date” fields to assign a responsible user to the task and set a due date.
Re-Ordering the Task List
When you have multiple tasks added to an entity, there may be cases where the tasks should be performed in a specific order. You can accomplish enforcing a task order in a few different ways, some within Sonar and some externally. The easiest way within Sonar is to make use of the “Change Task Order” functionality:
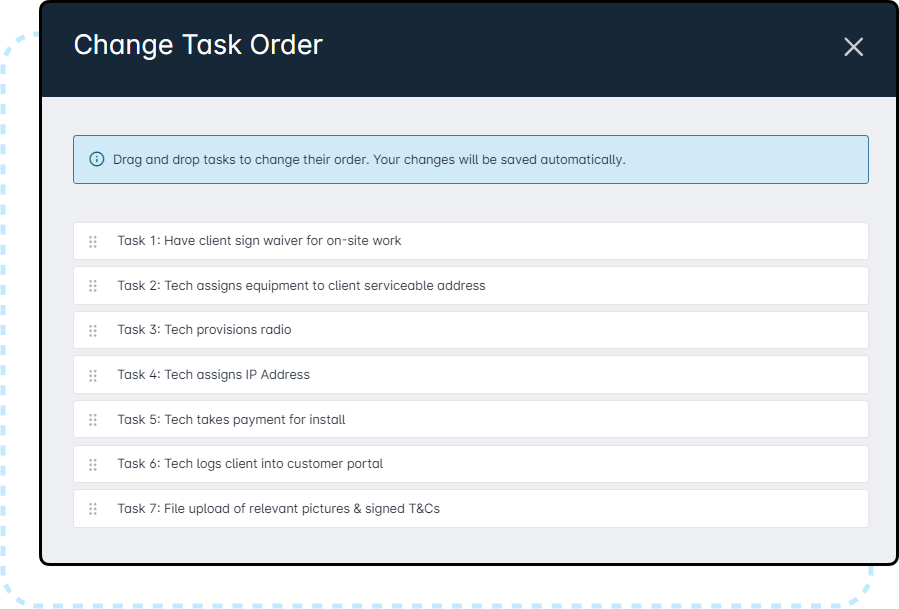
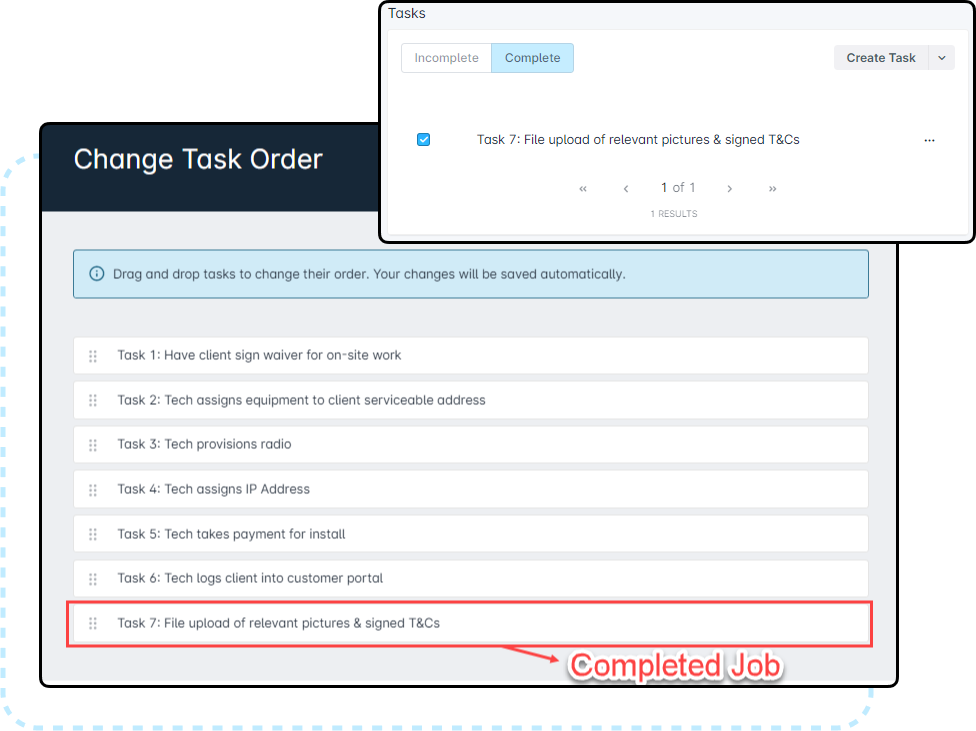
Using this option will open a new modal, displaying all tasks on the account:
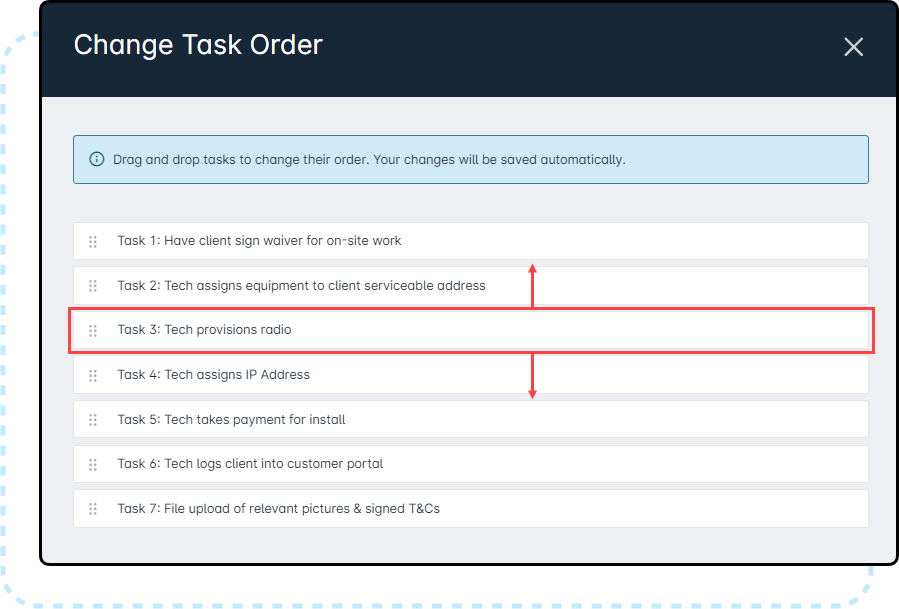
With this modal open, you can click, hold, and drag the tasks up and down on the list:
Completed tasks will also be displayed in this list. This is because when a task is completed on an entity, then marked incomplete, the order is retained.
Once the Tasks Have Been Created
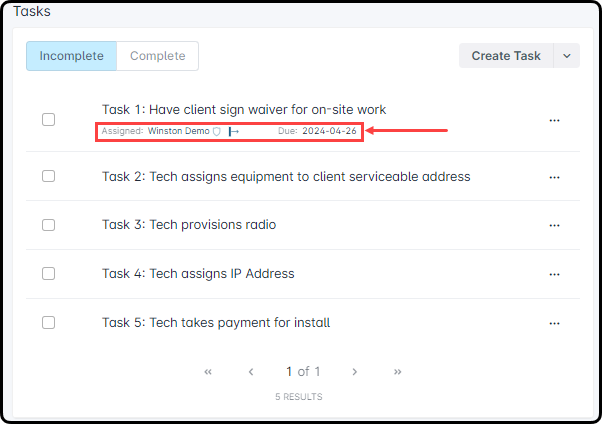
The task will now appear in the Tasks section for that entity, under the “Incomplete” toggle. If a user was assigned to the task or a due date was set, both will appear directly under the task as well.
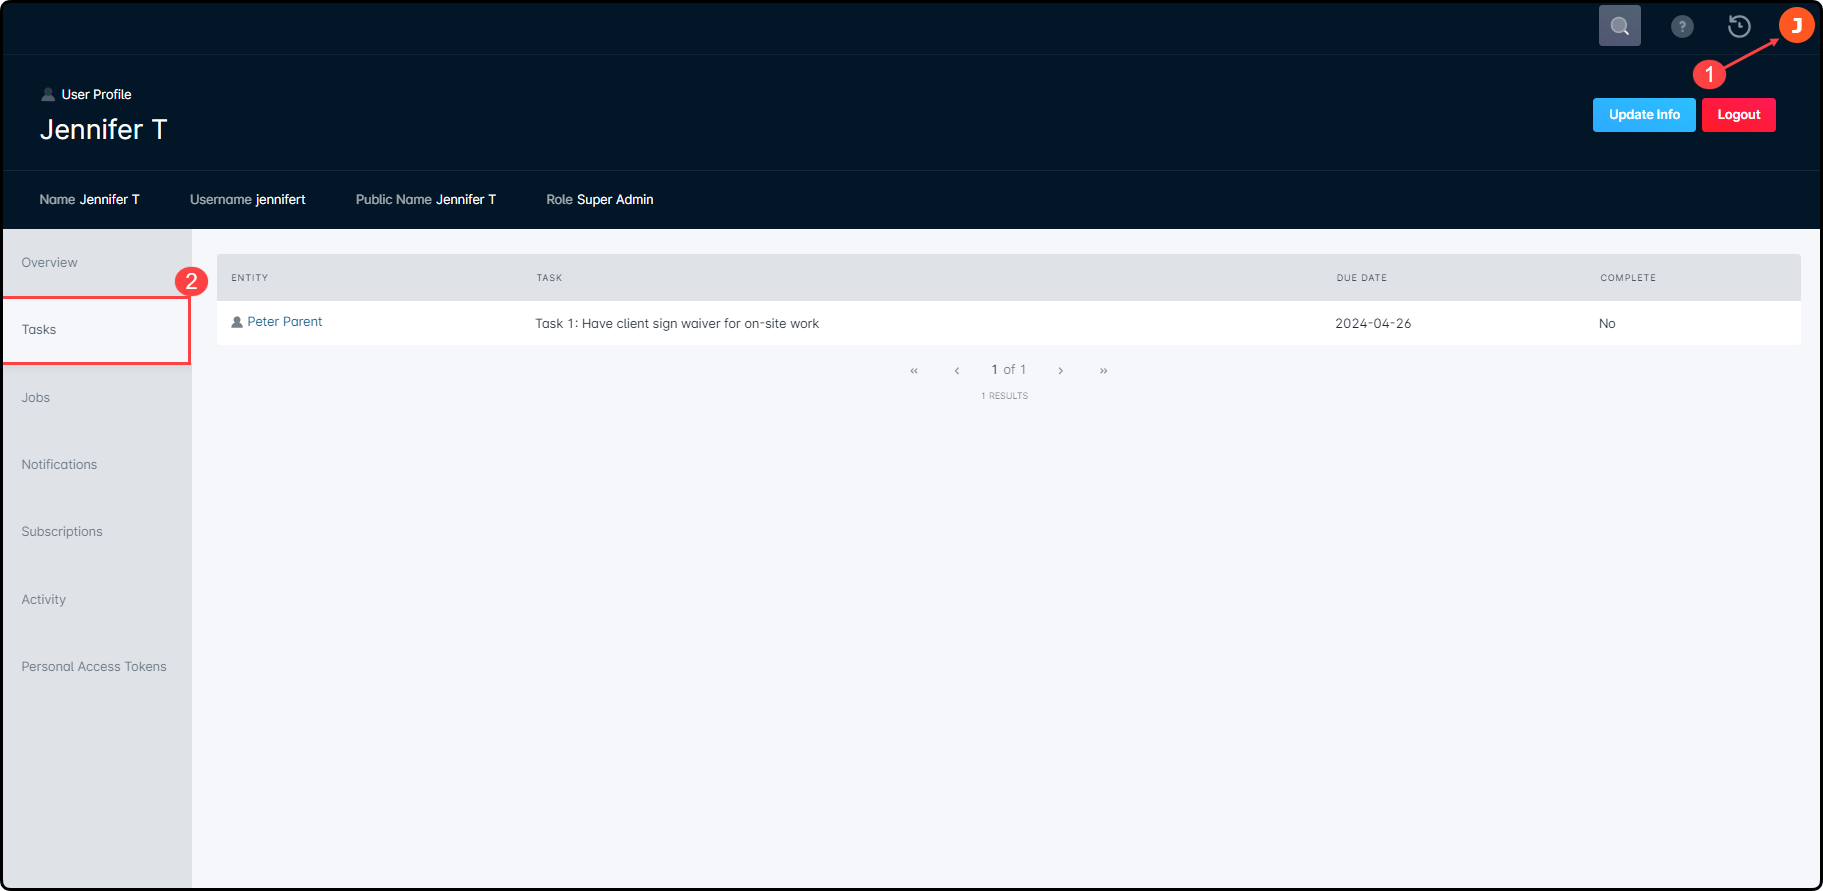
Assigning a user to a task will cause the task to be displayed under that particular user's profile within Sonar. For example, after we created a task and assigned ourselves to it, it now appears under Tasks within the “My Info” section of Sonar.
To navigate to this view, click on your avatar in the upper right-hand corner, then select the Tasks tab. Here you will find your tasked listed. Clicking the entity will open the entity's overview page.
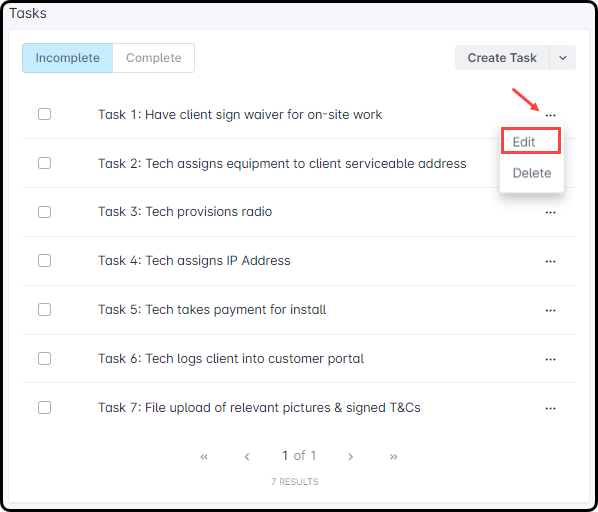
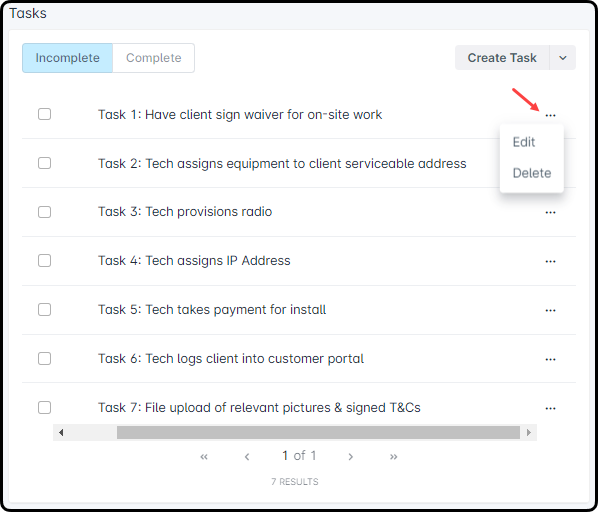
Once the task is created, you have the options to edit and/or delete it through clicking the 3 dot menu on the right-hand side of the task. Clicking “Edit” from the menu will open the Edit Task modal, where you can edit the task's details. Clicking “Delete” from this menu will bring up the Delete Task modal, where you can confirm your action.
The 3 dot menu might not be visible at first, but you can make it available by using the scroll bar and scrolling over to the right.
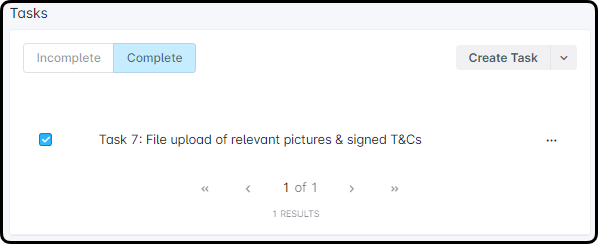
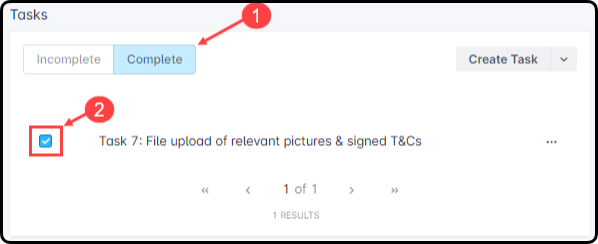
When you have completed the task, simply check off the box next to the task from the Tasks list. Doing so will move the task from the Incomplete tab to the Complete tab, and if it was assigned to a user, it will effectively be removed from that user's Tasks list as well.
Undoing a Completed Task
If a task was accidentally marked as completed but still needs to be taken care of, you can move the task back into the Incomplete tab.
This is only true for tasks without completion requirements, as tasks with completion requirements cannot be undone, however, you can still edit the task description, user assignment, and due date.
To undo a completed task, simply navigate into the Complete tab, locate the task, and uncheck the box. The task will now be moved back into the Incomplete list.
Example Use Cases
Below are some commonly used example cases of where Tasks can be particularly useful within Sonar.
When you or another user need to schedule a call with a customer to replace any of their equipment.
As a reminder to inform a customer about an ongoing or upcoming promotion.
To contact a customer in regard to upgrading their service.
To check up on an issue that a customer has reported and/or is being monitored.
When following up with a customer regarding a payment that has been bounced or declined.
To follow up with a customer regarding their delinquency.
 Updated
by Jennifer Trower
Updated
by Jennifer Trower
 Within Sonar's Field Tech Mobile App, notes that are sticky with confirmation will only pop up once for each user; once the user acknowledges and confirms that particular note, it won't pop up for that user again.