Table of Contents
Users: Overview
Read Time: 6 mins
If you are looking for information regarding the “User Profile” page (your personal user settings), please refer to the User Profile: Your Personal User Settings document here.
In Sonar, a user is defined as an individual who has access to the instance. The level of access they have to the instance, however, is determined by the role that is applied to the user. This article provides an overview of the users screen within Sonar, as well as how to create a new user, disable users, and some of our best practices around user creation.
The Users Screen
An overview of the available features and information contained within the "Users" screen is provided below:
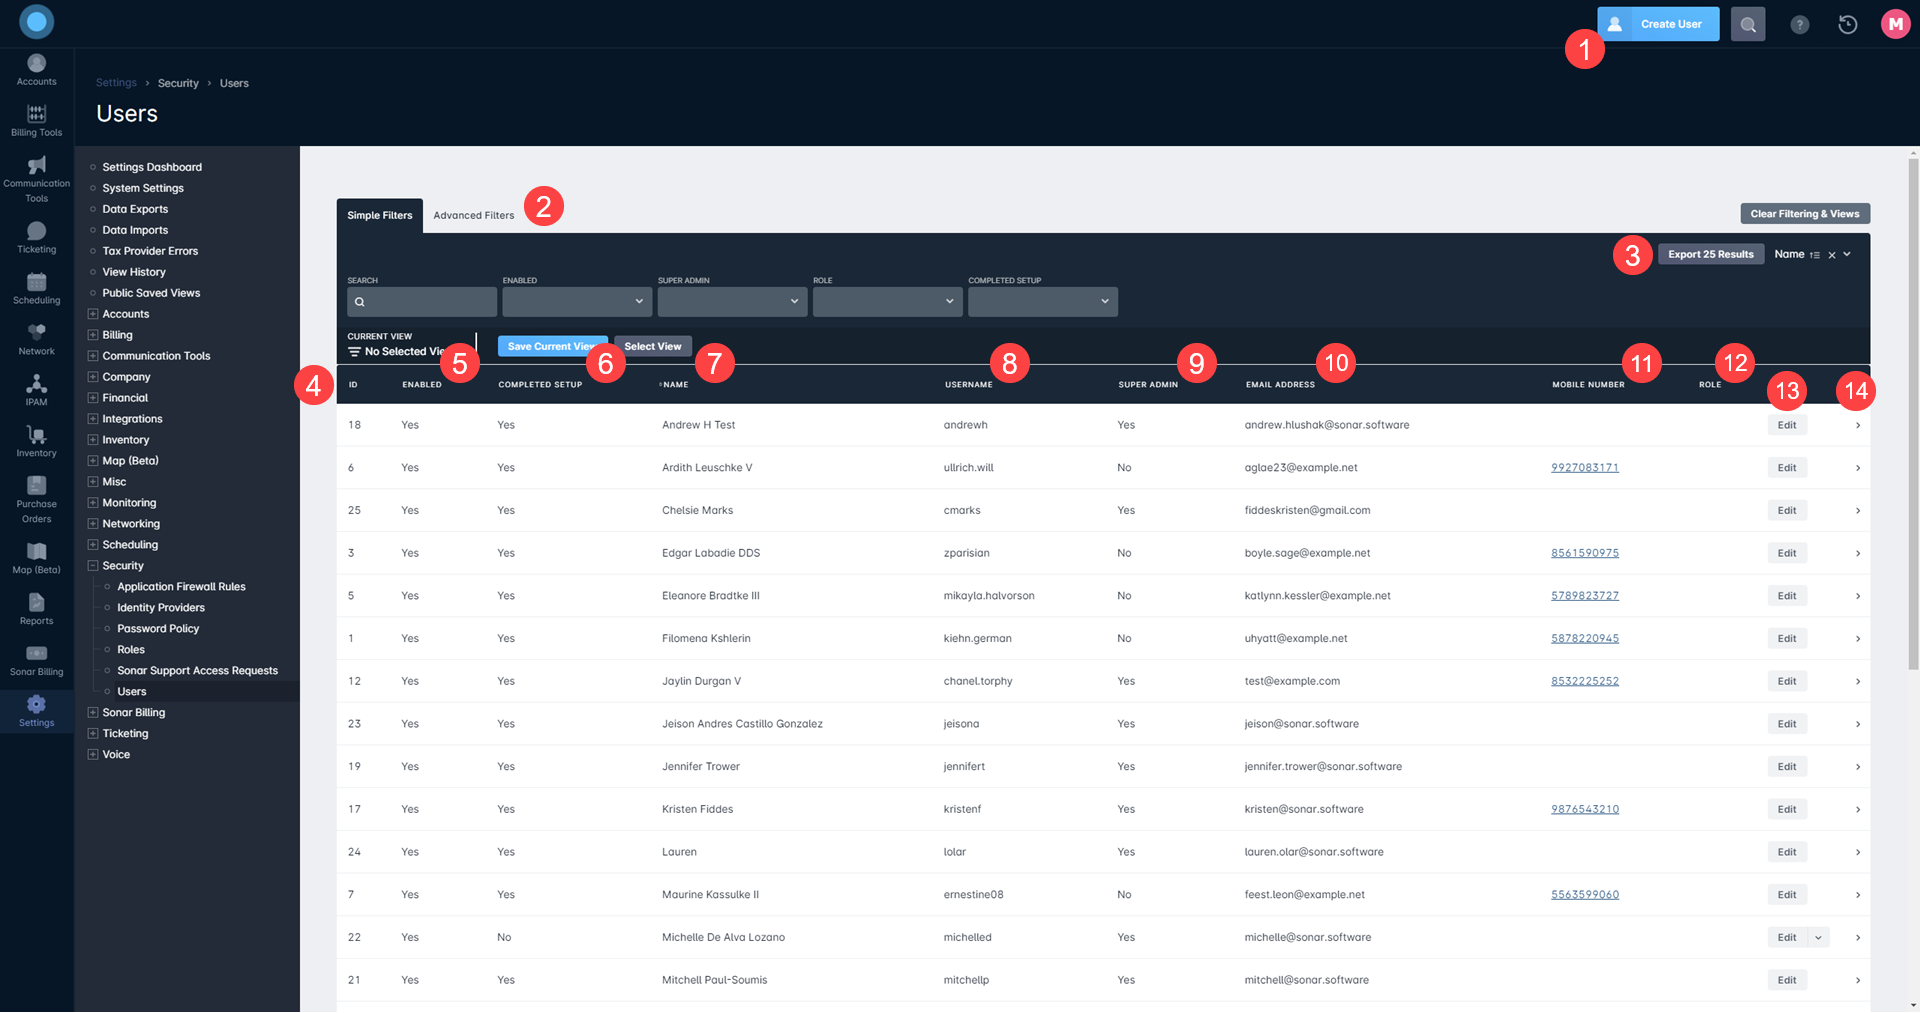
- Create User: clicking this button will open the Create User window, where you can fill out the required fields to create a new instance user.
- Filters: through the Simple/Advanced toggle, you can switch between simple filtering or advanced filtering, allowing you to narrow down the data that is presented within the "Users" table.
- Export: the option to export the User table data is available through this button, and can be downloaded in either JSON or CSV format.
- ID: the instance ID of the user.
- Enabled: reflects whether the user is currently active and has access to the Sonar instance.
- Completed Setup: this will indicate whether a user has completed the new user setup process or not.
- Name: the full name of the user.
- Username: the name that the individual will use when signing in to the Sonar instance.
- Super Admin: if the user is a super admin, a “Yes” will be displayed here, and it means that the user has all system permissions automatically; if this is “No”, the user must be assigned a role, which would then be displayed under the Role column (#12 below).
- Email Address: the email address for the user; this is the email that will be used to receive any email communication from Sonar, and also if a password reset is performed.
- Mobile Number: the mobile number for the user; click-to-call functionality is available for the mobile number from within the table.
- Role: the role of the user, which determines what set of permissions and level of access that the user has.
- Edit Menu: clicking this button will open the Edit User window, where you can update the user's information.
- Details Panel: clicking the arrow will open a sidebar panel where the details for the user can be viewed, including a log of activity for the user.
Creating New Users
To create a new user in Sonar:
- Navigate to Settings → Security → Users
- Click “Create User” (from the top-right of the Users screen)
- Complete the required fields in the Create User window
Expand this section for a more detailed look at the Create User window
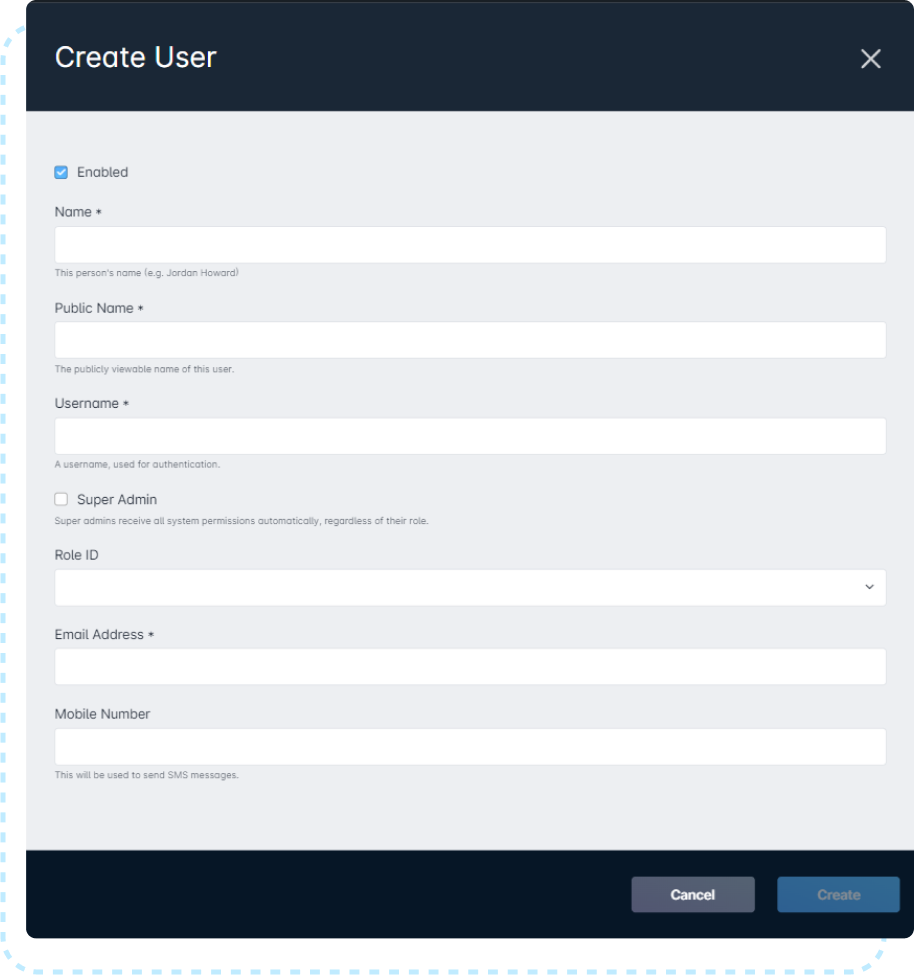
- Click “Create” (from within the Create User window)
As soon as you click “Create” in the above step, an email will automatically be sent out to the email address for the newly created user — this will happen regardless of the instance being in test or active mode. This email will contain a link for the user to create a password, and the user must perform this step to complete their user setup within the instance (to have the “Completed Setup” column reflect “Yes” in the Users table).
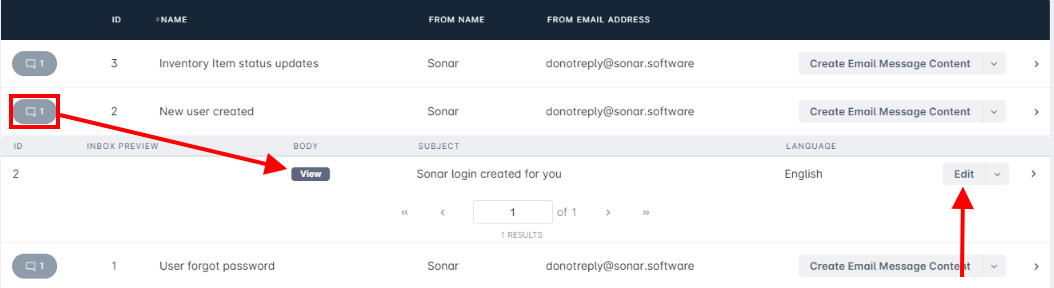
1. Navigate to Settings → Communication → Email Messages
2. Click the gray message bubble next to the “New user created” email within the table
3. From here, you can click “View” under the Body column to view the message content, or click the “Edit” button to open the Edit Email Message Content window.
Resending the User Creation Email
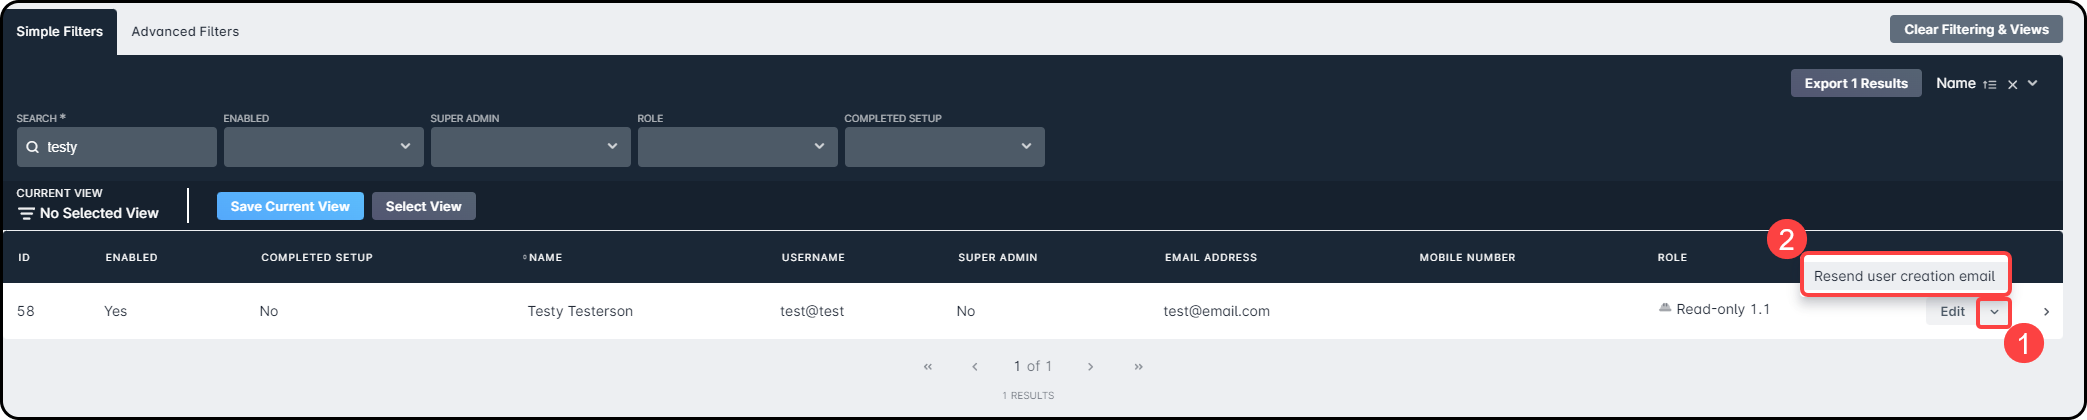
If the user definitely did not receive the initial user creation email, it can be resent to the individual using the steps below.
- Navigate to Settings → Security → Users
- Locate the user within the users table and click the downward arrow next to their associated “Edit” menu
- Click the “Resend User Creation Email” option that appears and confirm your action in the pop-up window that appears
- If you resend the email and then the 1st email arrives, the 1st email will contain a link, but it will no longer be valid — clicking on it will give a 404 error. The user must wait for the 2nd email to arrive.
It should be noted that Gmail and Yahoo both batch their emails together, so you should always scroll to the bottom (most recent) email. The user may have two emails arrive at the same time, but the 2nd email and link is what is needed.
Applying Roles to Users
If you need to apply a role to a user, after the initial creation process has occurred, you can do so by:
- Navigate to Settings → Security → Users
- Locate the user within the Users table and click their associated “Edit” button
- Within the Edit User window, make the desired selection for the user's Role fieldIf the user is currently a Super Admin, you will first need to uncheck the Super Admin box within the Edit User window — the Role field will appear once this is unchecked.
- Click “Save”
Disabling Users
The actual deletion of users within Sonar is not supported, as it goes against best practices to delete a user who has existed within the system. We provide the ability to disable a user instead. Disabling a user allows you to remove a user's access to the instance and also makes them unavailable from being selected as a user within the system. All the user's history and details will remain in the system for future reference if needed.
To disable a user:
- Navigate to Settings → Security → Users
- Locate the user from within the Users table and click their associated “Edit” button
- Uncheck the Enabled box from within the Edit User window
- Click “Save”