Table of Contents
The Map Interface: Overview
 Updated
by Mitchell Paul-Soumis
Updated
by Mitchell Paul-Soumis
Read Time: 8 mins
The Map interface in Sonar is designed to provide an easy-to-navigate visual representation of your accounts, Network Sites, and Inventory Locations. The visual representations displayed for each entity on the map are unique icons, with displayed accounts color-coded based on the account's type, as seen below:

The Map interface can be manipulated in several ways to enhance your experience. The map itself uses Google Maps to display the address information and can be zoomed in or zoomed out by scrolling your mouse wheel or by using the "+" and "-" buttons located in the bottom-right corner of the screen. Above the zoom level buttons, you'll note that you can seamlessly place the Pegman on the map to initiate Street View directly from the Sonar mapping interface.
Beyond the basic Google Maps manipulation, we have Sonar-specific functions. The Polygon tool allows you to corral a specific area of the map and examine only the accounts, network sites, and Inventory locations that fall within the polygon. You can access the polygon tool by clicking this icon:

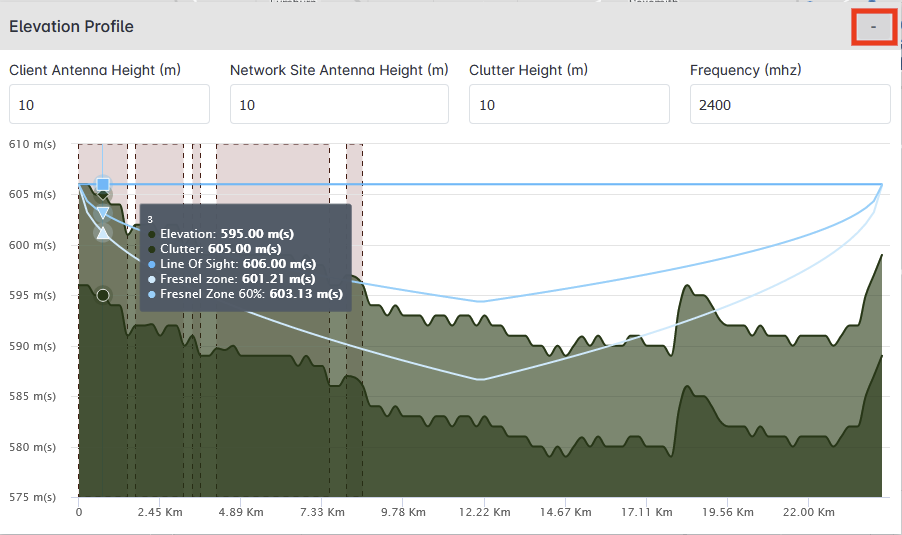
You can also manipulate the map in Sonar by using the Elevation tool, which will provide elevation details between any two points on the map:
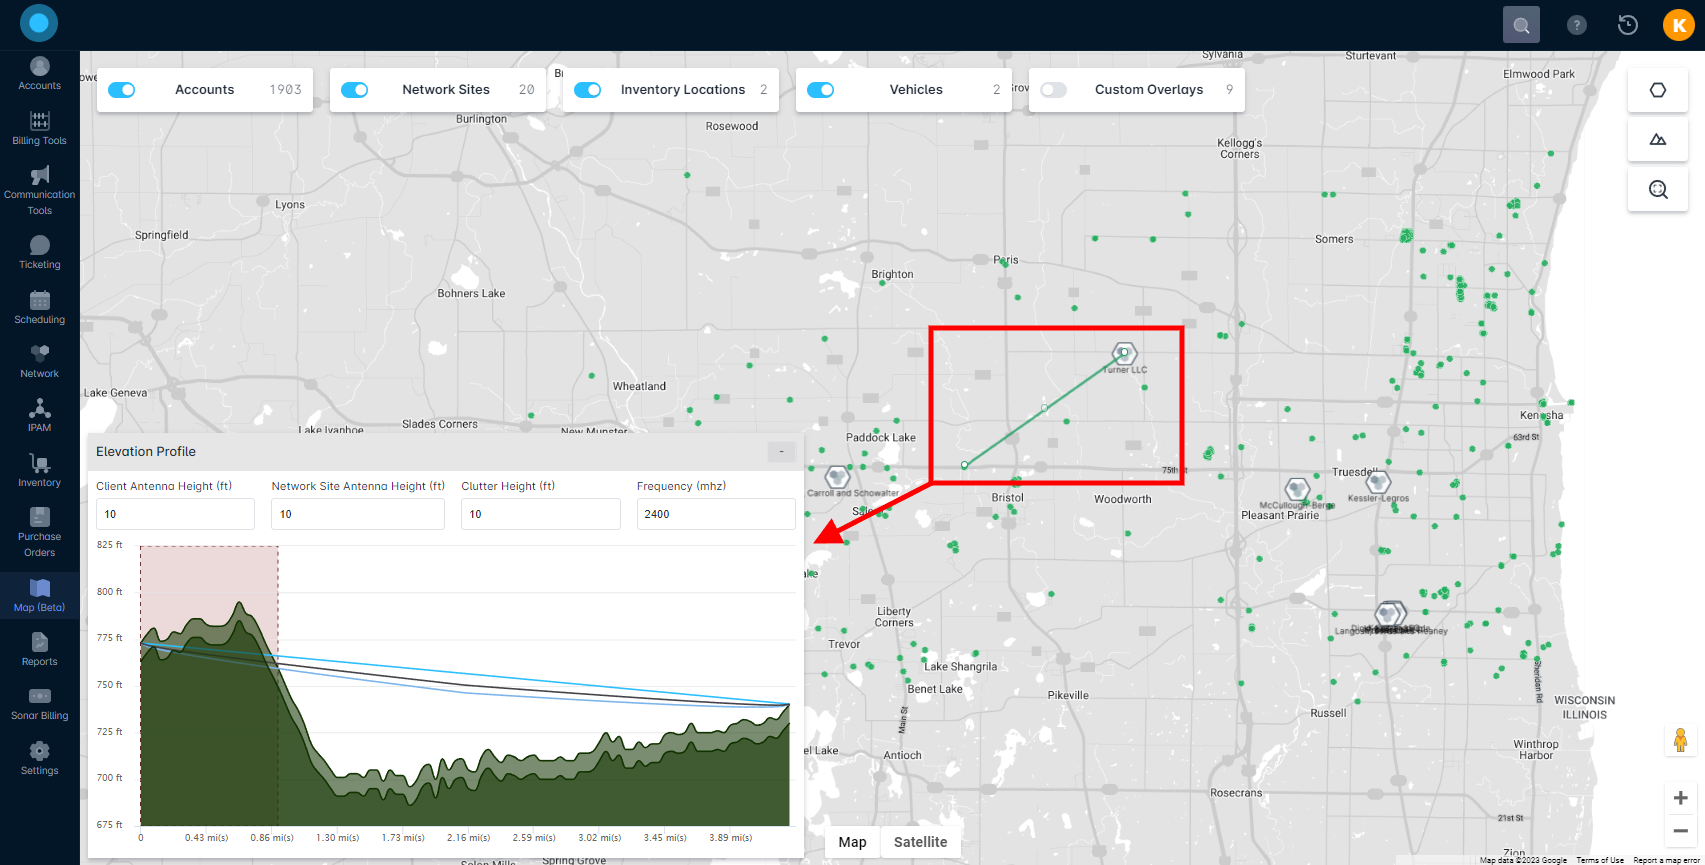
You can access the Elevation Profile tool by clicking this icon:

With the Elevation profile open, it can be minimized by clicking on the minimize button:
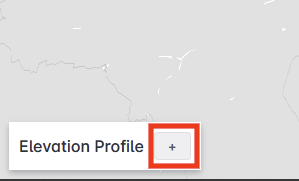
With the Elevation Tool minimized, it can be expanded again by clicking on the "+" button:
If you have zoomed in to a spot on the map and wish to return to the original boundaries, click on the magnifying icon:

Finally, you can manipulate the data points on the maps themselves by making use of the filters, which we'll explore in the next section.
Controlling your view
Filtering the map interface allows you to reduce the total number of points of data displayed on the map. This interface can be filtered using several methods, and we'll list each filter and its parameters.
Accounts Filter
The accounts filter allows you to customize the types of accounts which will be displayed on the map.
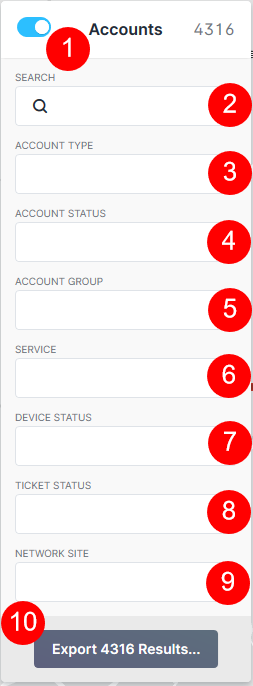
- The Account filter toggle, which allows you to completely disable the displaying of accounts on the map.
- The Search field, which allows you to search for specific accounts by name, related number (such as account ID or street number), or latitude/longitude.
- The Account Type dropdown, which allows you to see only the accounts with the selected account type(s).
- The Account Status dropdown, which allows you to display only accounts with the matching status(es).
- The Account Group dropdown, which allows you to selectively display accounts belonging to specific groups.
- The Service dropdown allows you to filter accounts by their services, displaying only accounts with the selected services on the map.
- The Device Status dropdown allows you to select a list of device statuses and only view accounts where an assigned inventory device is in the selected state(s).
- The Ticket Status dropdown allows you to view accounts on the map which have a ticket matching the selected status(es).
- The Network Site dropdown allows you to filter the accounts displayed on the map to those only associated with the selected Network Site(s).
- The Export button allows you to export your filtered list to a JSON, CSV, GeoJSON, or KML file.
Network Sites filter
The Network Sites filter allows you to limit the number of points on the map to only specific Network Sites.
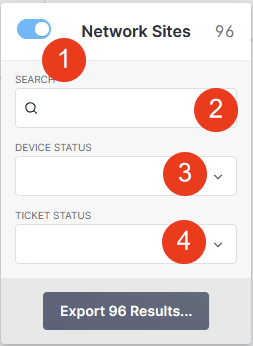
- The Network Sites toggle, which will prevent Network Sites from displaying on the map if this toggle is turned off.
- The Search field allows you to search your network sites using various keywords, including name and location.
- The Device Status dropdown allows you to filter Network Sites based on whether they have devices in a specific state.
- The Ticket Status dropdown allows you to view Network Sites on the map which have a ticket matching the selected status(es).
Inventory Locations filter
The Inventory Location filter allows you to filter the inventory locations on the map.
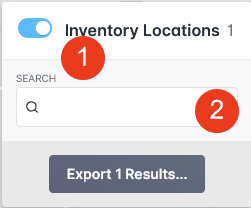
- The Inventory Location toggle, which will prevent Network Sites from displaying on the map if this toggle is turned off.
- The Search field allows you to search your Inventory Locations using various keywords, including name and location.
Vehicles filter
The Vehicles filter allows you to locate any vehicles set up with GPS tracking capabilities.
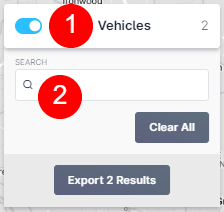
- The Vehicles toggle allows you to control whether you see the vehicle locations on the map.
- The Search field allows you to quickly locate a vehicle by typing in its name; doing so will remove all unrelated vehicles from the map view.
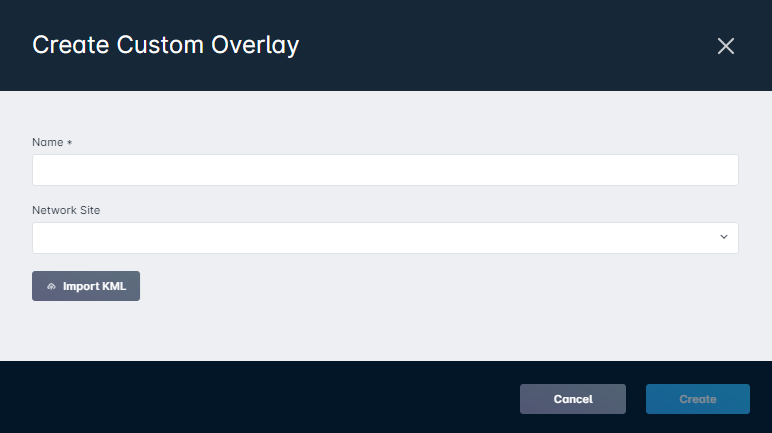
Custom Overlay filter
The Custom Overlay filter allows you to import a KML file and utilize it to reflect any custom boundary necessary to your instance.
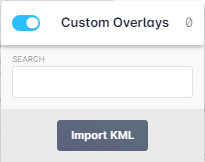
Clicking on Import KML will populate the following modal:
From here, you are able to associate a custom overlay with a specific network site; if this is done, the custom overlay will also be visible when navigating to a network site's page, as reflected in our Network Sites: Management View Overview article.
Once custom overlays have been added to your instance, they'll be visible in the map interface. The size of the overlay depends on how far you have to zoom in to be able to see the boundaries. In our example below, we can see the larger boundary as highlighted toward the bottom of the map, whereas the icon highlighted above it reflects a smaller boundary. In addition to using the "+" icon on the map itself, or using the scroll wheel on your mouse, you're able to quickly zoom into a custom overlay by clicking on the magnifying glass icon alongside an overlay name.
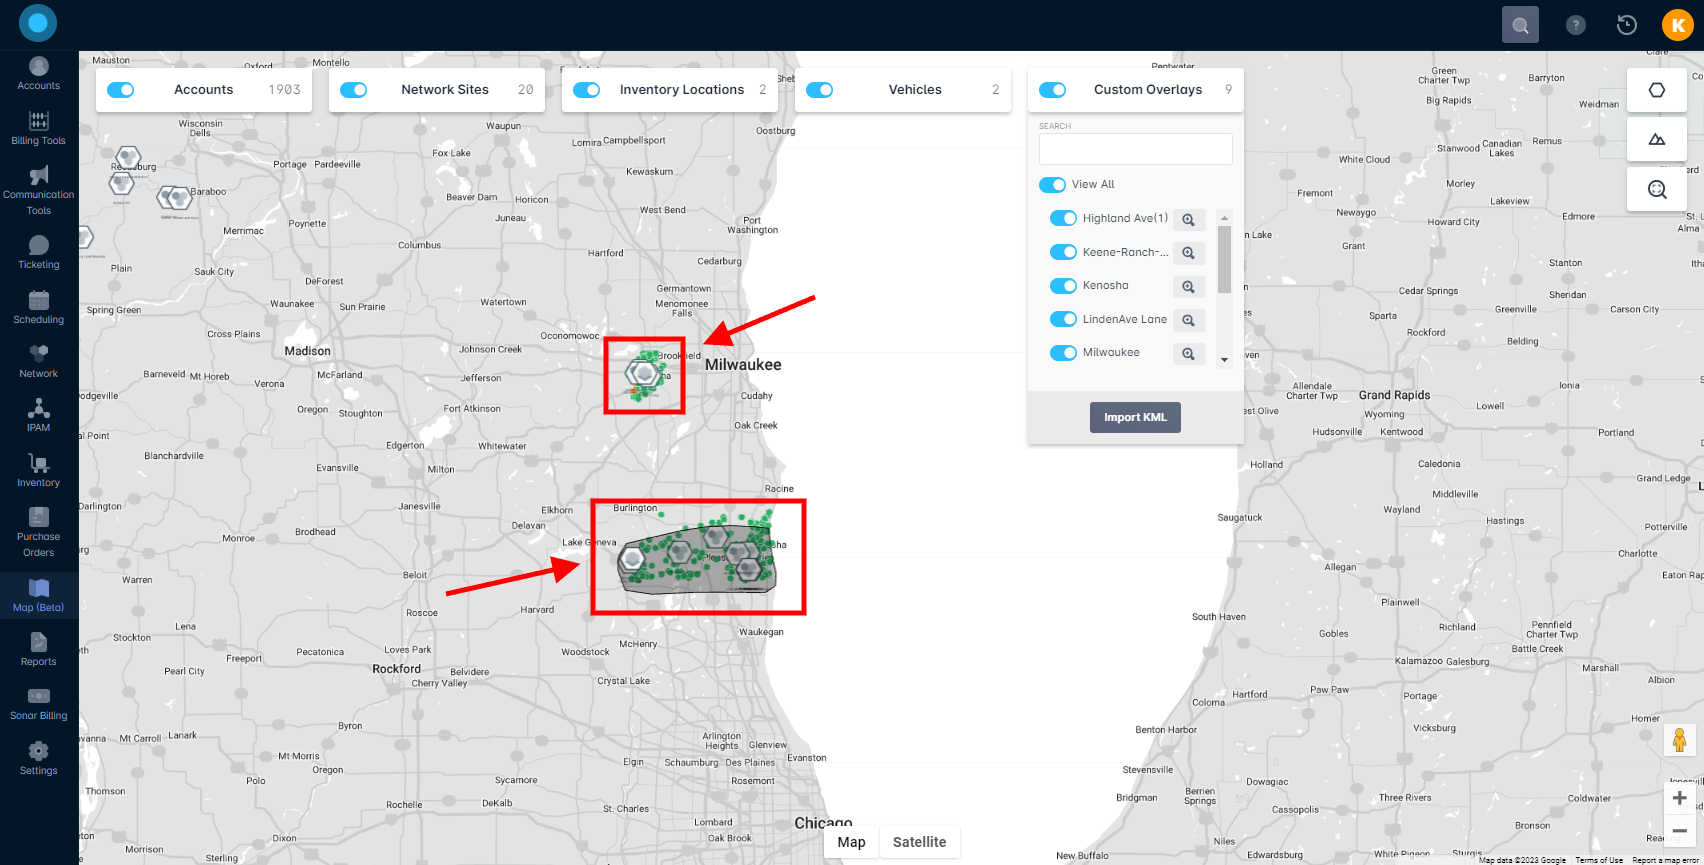
As seen in the above example, there are a number of toggles available for custom overlays. These allow you to enable all or none, or even just specific custom overlays, if necessary.
Additional Ways to Add Custom Overlays
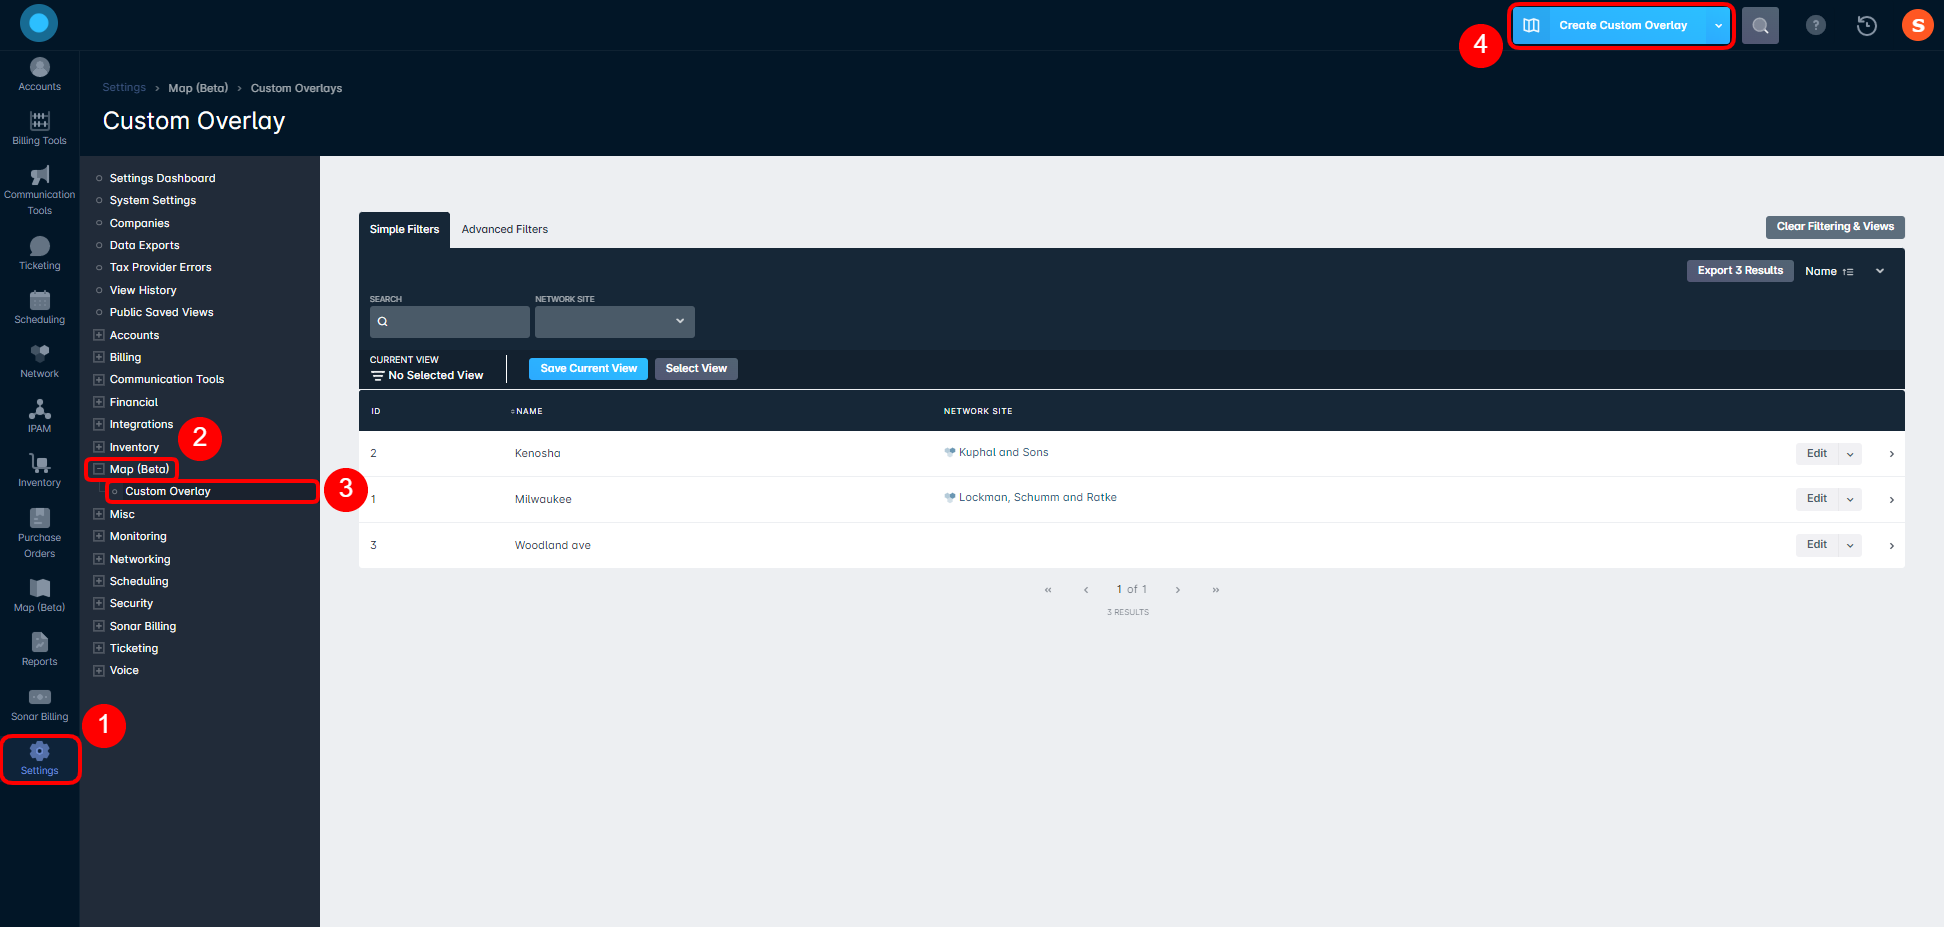
1. Navigate to Settings > Map (Beta) > Custom Overlay and click on Create Custom Overlay. This will populate the same creation modal reflected above.
2. Navigate to Network > Network Sites. Select a network site from the list and then click on Inventory & Network > Network Map. Expand Map Layers and then select Import KML. The modal that populates is the same, though the network site field will automatically be filled in with the site you are presently on, as reflected in our example below:

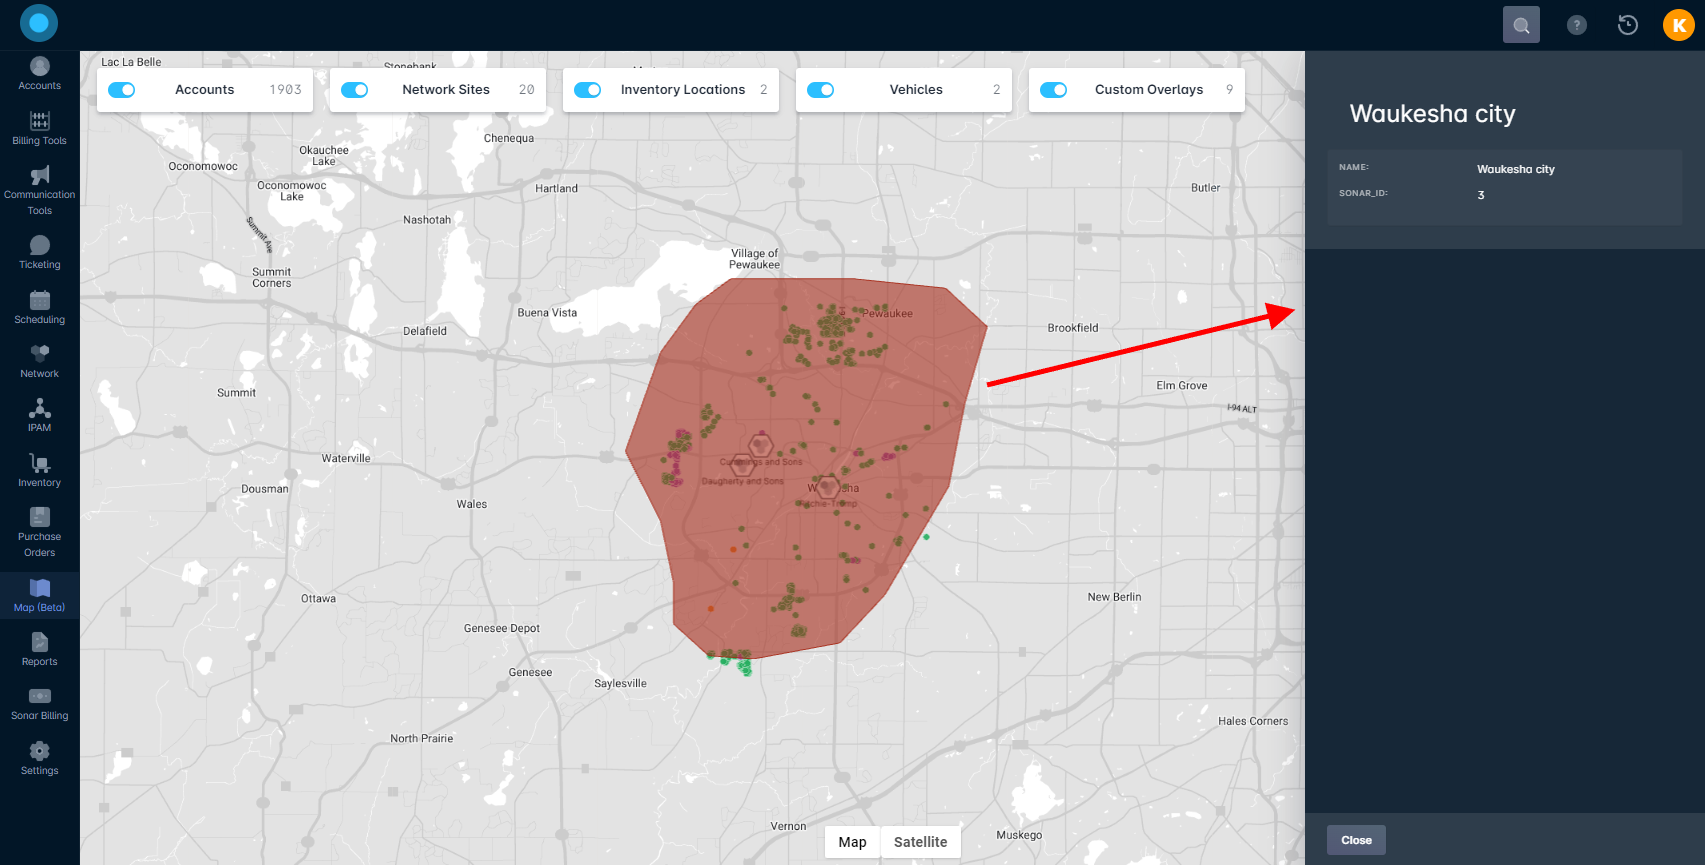
Clicking on a custom overlay will populate a sidebar menu that includes any details from the KML file:
"Points near your click" is another useful tool integrated with the map interface and custom overlays. By clicking on a network site, you're able to populate a new modal that lists any nearby network sites, custom overlays, and customer accounts. In the event that the custom overlay filter is not enabled, this feature will not be available.
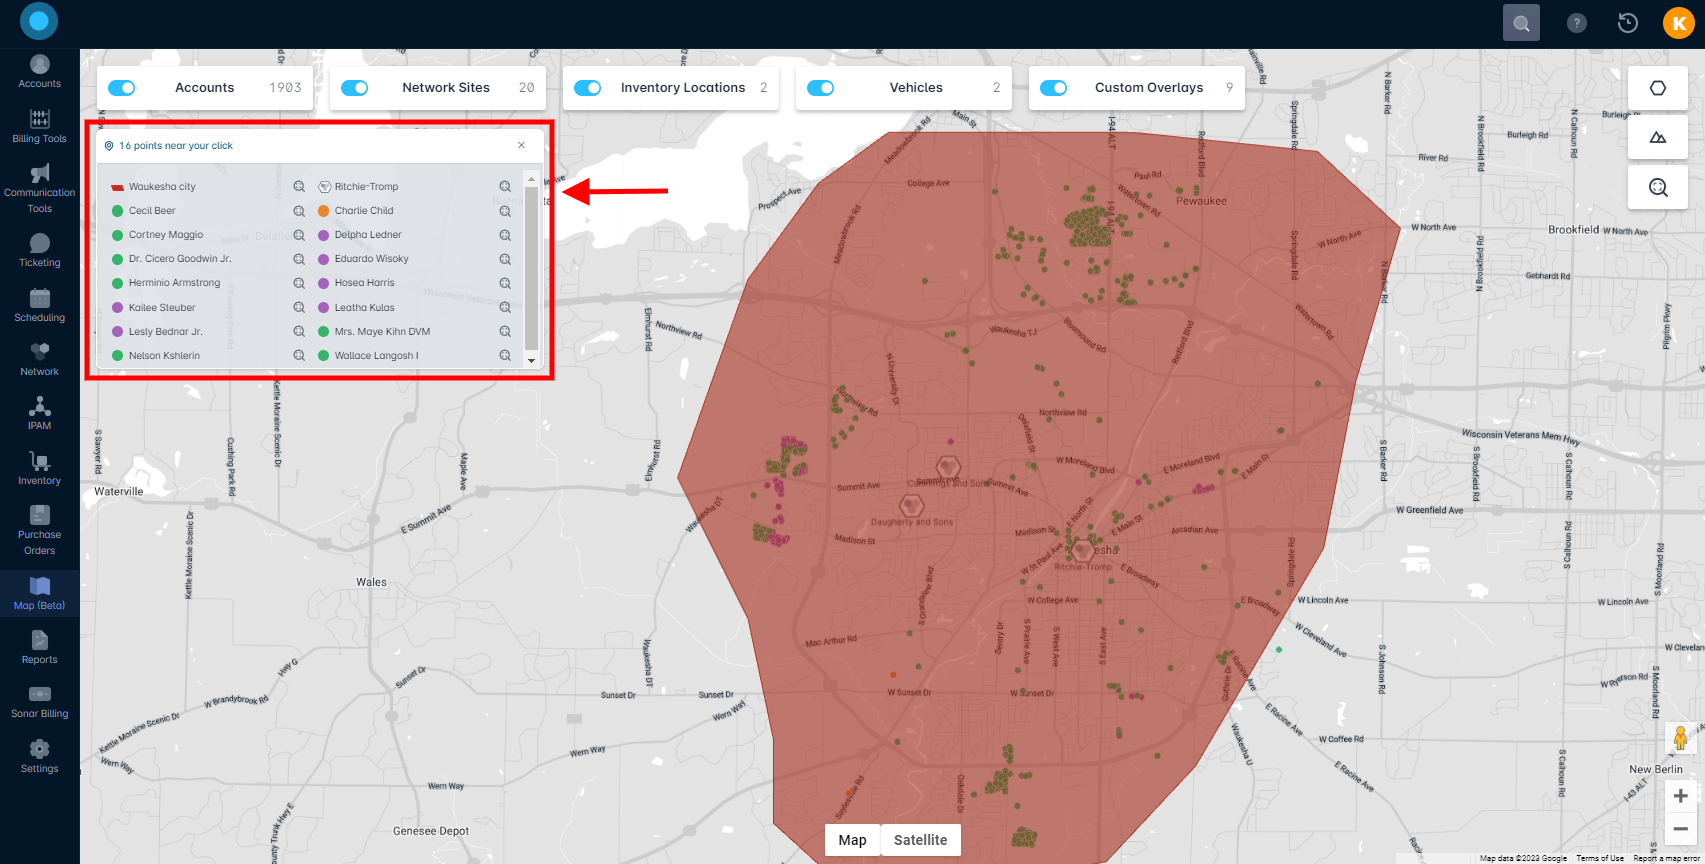
When this list is visible, you're able to dig into the association either by clicking on the item name to populate a sidebar menu specific to that line item. Additionally, you can zoom into the item location by clicking on the zoom icon to the right of the item, or highlight the item on the map by hovering your mouse over one of the listings.
Custom Overlay Permissions
Navigate to Settings > Security > Roles and either choose to edit an existing Role or create a new Role. With the next page populated, locate the permissions reflected in the screenshots below and enable whichever ones are applicable to that Role.

View all map overlays: This permission provides the ability to view map overlays within both the map interface, and the network map under a network site account. If this is not enabled, users will be unable to see the custom overlay filter and will also be unable to navigate to Settings > Map (Beta) > Custom Overlay.
Update a map overlay: If this permission is not enabled, users will be unable to edit existing custom overlays found when navigating to Settings > Map (Beta) > Custom Overlay.
Create a map overlay: If this permission is not enabled, users will be unable to add a custom overlay to the instance via any of the methods touched on above.
Delete a map overlay: If this permission is not enabled, users will be unable to delete existing custom overlays found when navigating to Settings > Map (Beta) > Custom Overlay.