Table of Contents
Setting Up Schedules General Overview
 Updated
by Mitchell Paul-Soumis
Updated
by Mitchell Paul-Soumis
Read Time: 8 mins
To better make use of the Scheduling module in Sonar, you must configure appropriate schedules for your technicians. Accessible from Settings → Scheduling, the features in this article allow you to configure where your technicians start their day, when they work, what they work on, and what areas they can work in.
Scheduling Addresses
Scheduling addresses allow you to define starting and ending locations for your technicians. Typically, this will be your office or their home, but you can use any address you like. Scheduled Addresses are available from Settings → Scheduling → Schedule Addresses.
Creating a Scheduled Address
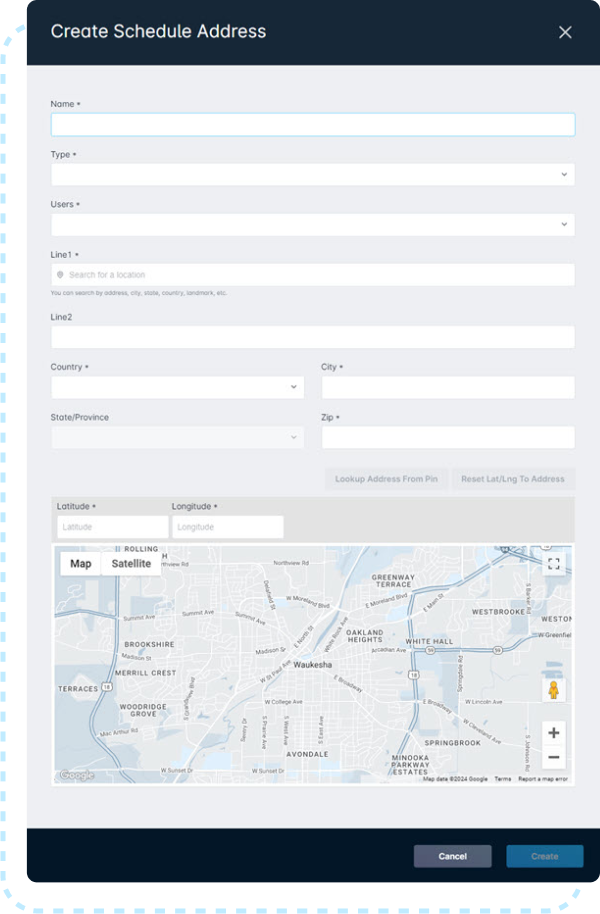
A Scheduled Address is created similarly to a serviceable address, requiring the street address followed by validation to generate a precise pin. The difference between Schedule Addresses is the inclusion of the “Type” and “Users” fields.
- The “Type” Field contains 3 selections, allowing you to define how this address will be treated for scheduling purposes
- Both the start and end point
- The ending point for the day
- The starting point for the day
- The “User” field allows you to determine which users the Scheduling Availability will apply to.
Start and End Point Interactions
The start and end point interact directly with the scheduling availabilities, being considered for travel time to their first job of the day, as well as from their last job of the day back to their end point. This automatic adjustment allows your dispatch team to better assign jobs, and, when combined with the other Scheduling configurations, create a realistic expectation of daily workloads and drive times.
In most cases, the start address will typically be your main office. However, if your technicians have a work truck and depart from their home address, then the starting address for that particular user can be updated to reflect that. Similarly, the end point on Schedule Addresses is used to identify the travel time required by the technician to end their day. In most cases, the endpoint is the main office, however, this can also be set to the home address of an individual user.
Schedule Availabilities
Configuring a well-defined Scheduling System allows you to set when your individual technicians are available, not only on a daily basis, but also on a minute-by-minute basis. This allows you to build multi-layered schedules that support different types of jobs at different times, as well as scheduling vacation times, and other unavailable events on a per day, week, month, or yearly basis.
Schedule Availabilities are available from Settings → Scheduling → Schedule Availabilities.
Creating an Availability
Creating a Scheduling Availability takes place in two parts:
- Creating the Schedule Container
- Adding Days of the week & Times of the day
Creating the Schedule Container
The purpose of this container is to group together users, job types and GeoFences with the purpose of applying availability or unavailability to these groups.
Below is a summary of each mandatory field and its purpose:

- Name: A descriptive name for the container. For example, Residential Installations or Bill's Schedule.
- Start Date: This field determines on which date this container should begin to be applied to the compound schedule.
- Infinite Repetitions | Repetitions: If infinite repetitions is enabled, this schedule repeats forever. If it is disabled, then this schedule will repeat the number of times defined in Repetitions. Repetitions determine how many occurrences of this Schedule Availability occur before stopping; starting from the entered Start Date.If the Infinite Repetitions check box is empty, then the Repetitions field becomes a mandatory field
- Weeks Between Repetitions: - This value defines the frequency of repetition. For example:
- If
weeksis set to 0, this schedule repeats every week. - If
weeksis set to 1, the schedule repeats every other week. - If
weeksis set to 3, then the schedule repeats one week out of every four.
- If
Below is a summary of each optional field in the creation process:
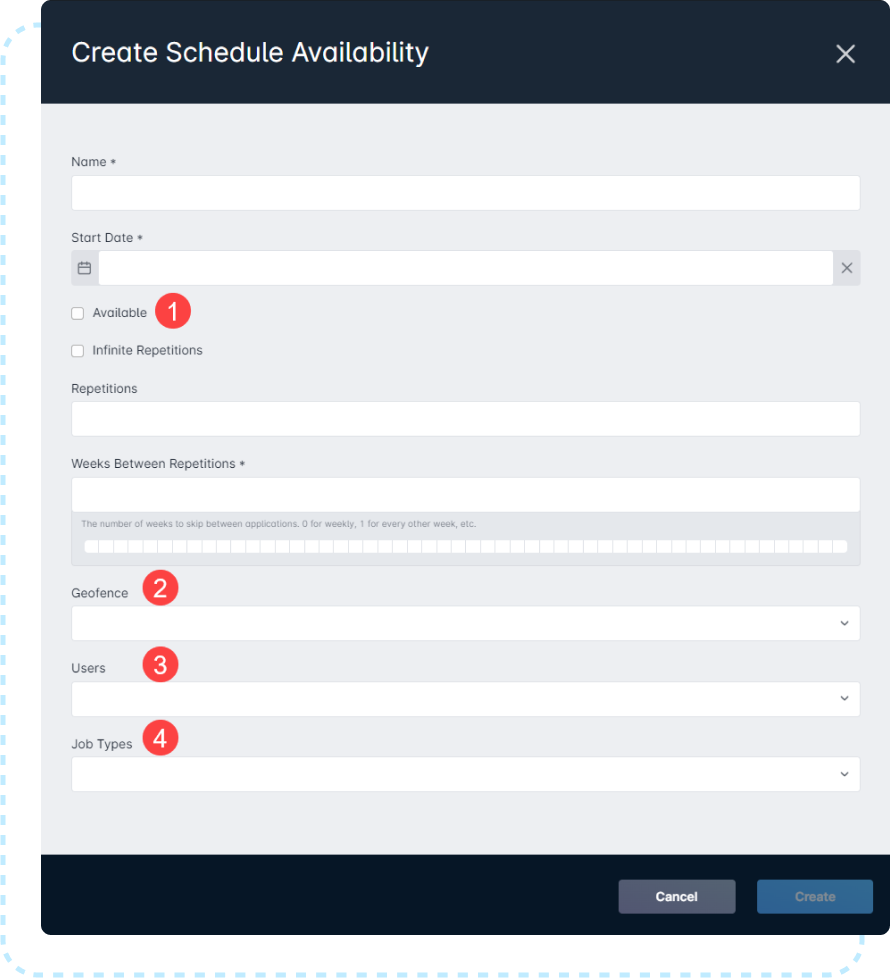
- Available: If this box is checked, it will add the listed users to the schedule during the days and times set. If the box remains unchecked, it will mark the selected users as unavailable during the set days and times.
- GeoFence: The GeoFence field allows you to selectively apply the Schedule Availability to jobs that fall under a specific GeoFence area.
- Users: Which users should have this schedule container applied to them.
- Job Types: Which job types are applied in this schedule container.
Filling the container with days and times
From Settings → Scheduling → Schedule Availabilities, select “Create Schedule Availability Day & Time” in the last column of any availability.
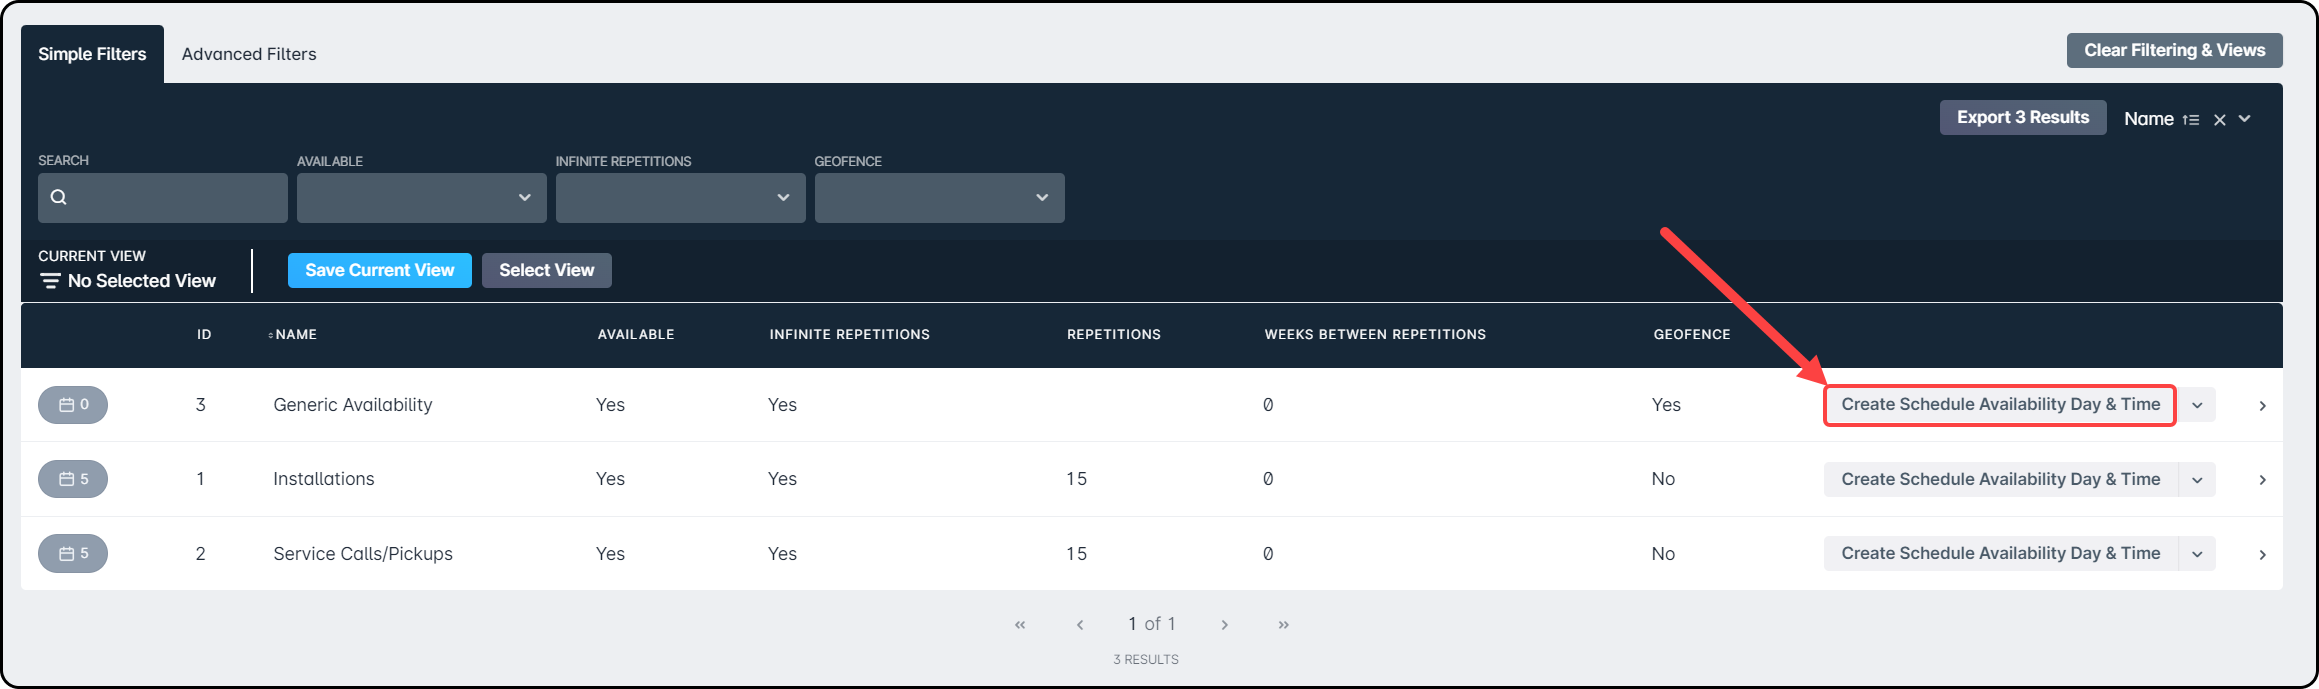
This button will open a modal that sets the Day of the Week that this Availability will be applied. Optionally, a time range can also be set, restricting the availability to only be applied between the set Start and End time.
All Day option must be selected, to add the Availability Day & Time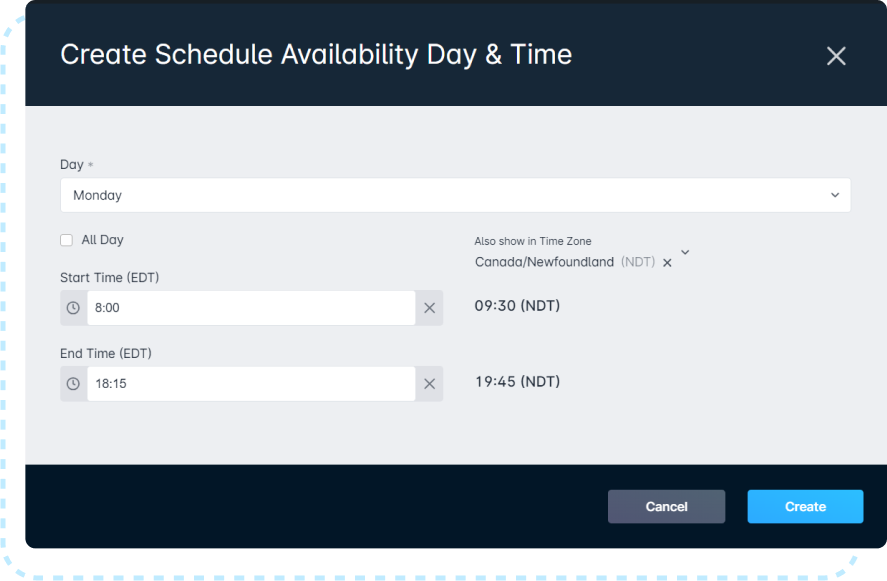
Schedule Blockers
Schedule Blockers are effectively the opposite side of Schedule Availability. Rather than determining days and times that the technicians can work, Schedule Blockers determine days and times that individual technicians aren't available to be scheduled for a job. A Scheduled Blocker is also created in a very similar way, providing nearly identical fields to the container seen in Schedule Availability. Similarities to the Schedule Availability section continue into creating specific days of the week and times of the day for each blocker.
Schedule Blockers are managed through Settings → Scheduling → Schedule Blockers.
Creating the Schedule Blocker container
Creation of the container starts by clicking on the “Create Schedule Blocker” button in the page header, then filling out the modal that appears.
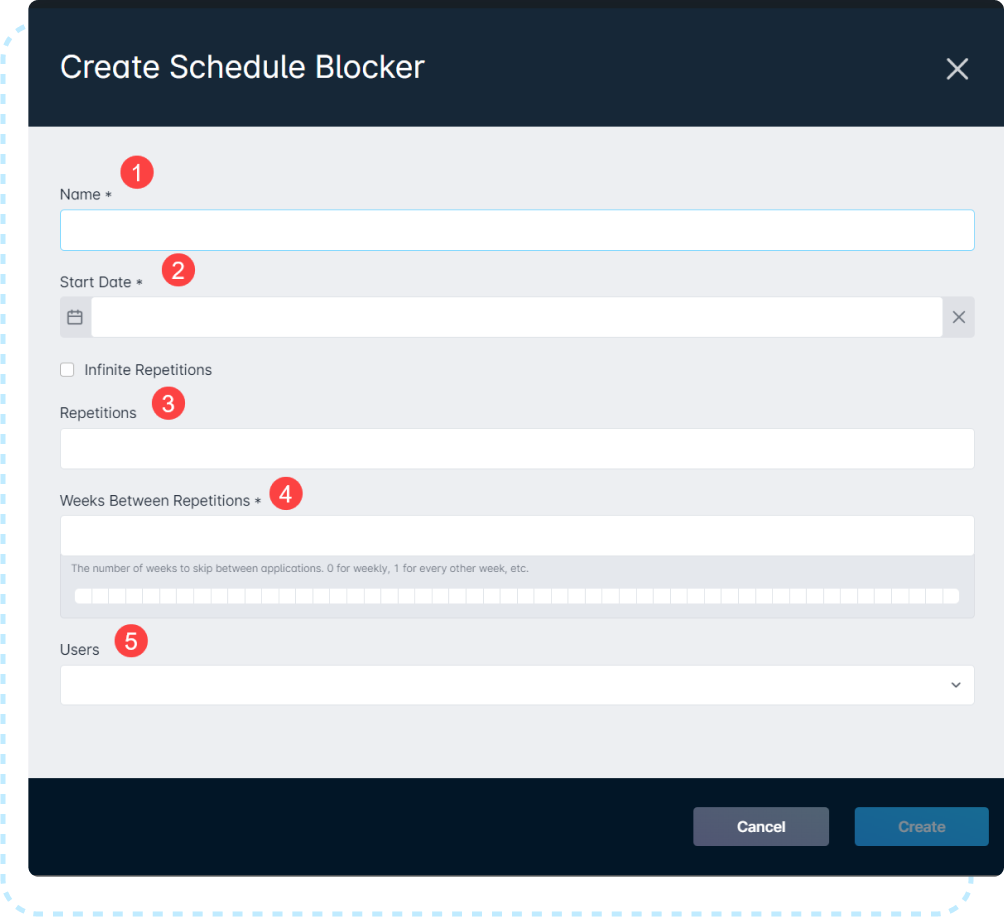
The required information to be filled out is below:
- Name: Some name for the blocker you'll be creating
- Start Date: The Start Date for the Schedule Blocker, and any days and times added will only apply after this date
- Infinite Repetitions | Repetitions: If infinite repetitions is enabled, this schedule repeats forever. If it is disabled, then this schedule will repeat the number of times defined in Repetitions. Repetitions determine how many occurrences of this Schedule Blocker occur before stopping; starting from the entered Start Date.
- Weeks Between Repetitions: This value defines the frequency of repetition. For example, if weeks is set to 0, this schedule repeats every week. If weeks is set to 1, the schedule repeats every other week. If weeks are set to 3, then the schedule repeats one week out of every four.
The following field is not mandatory but is highly recommended.
- Users: Selecting users on your instance will have this blocker apply to them on the selected Days and Times. Selecting no users will apply the blocker to no one.
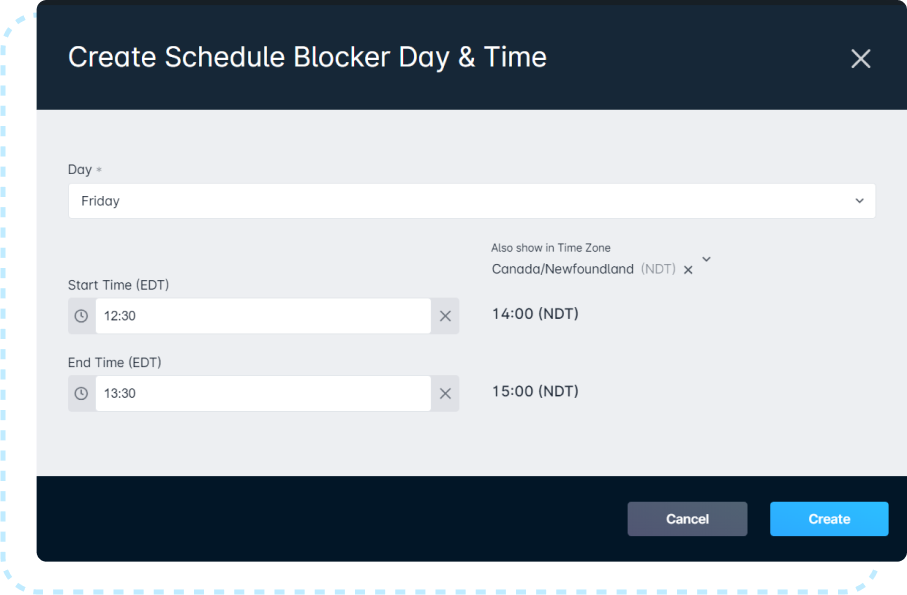
Filling the container with Days and Times

Unlike Schedule Availability, there's no option to make the blocker last all day. For something that lasts multiple hours, or all day, it's recommended to use Schedule Time Off.
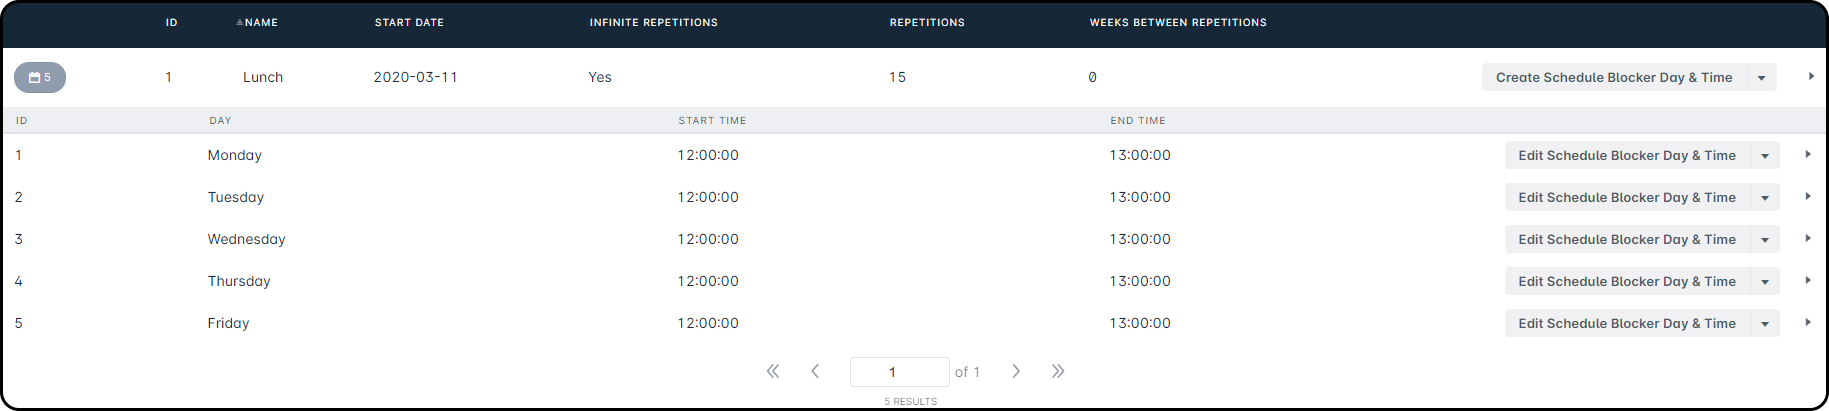
Common uses for Schedule Blockers
Schedule blockers are a way for you to define blocks of time on specific days, for specific users, that are blocked from having jobs scheduled in them. While you can define unavailable time in a schedule, this time is rigid and cannot be modified on the fly. Schedule blockers can be moved on a day by day basis.
Schedule Blockers are most commonly used for events that may interrupt the normal flow of the day on a predictable basis. The most common use for this section is to schedule out lunches for your technicians, as pictured below:
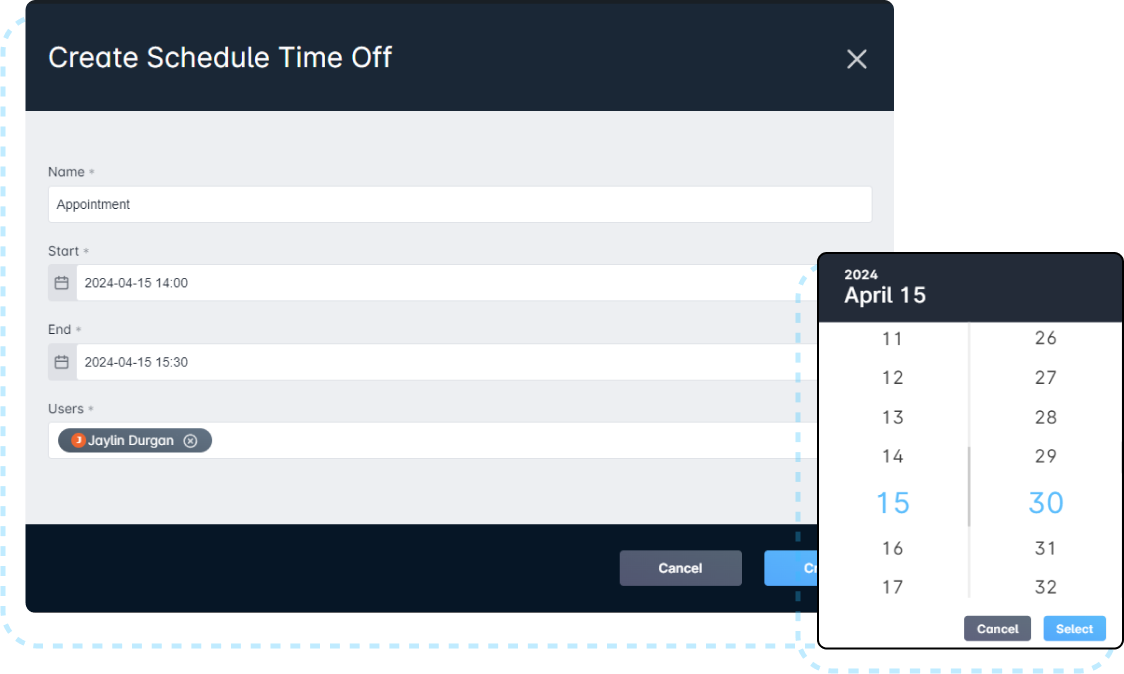
Schedule Time off
The Schedule Time off component complements both Schedule Blockers and Schedule Availability, designed to fill in the gap for unexpected interruptions. Activities such as vacation time-off, appointments, vehicle issues, or family emergencies would get entered as Schedule time-off to ensure no appointments are being assigned to this technician during a period of time when they're unavailable.
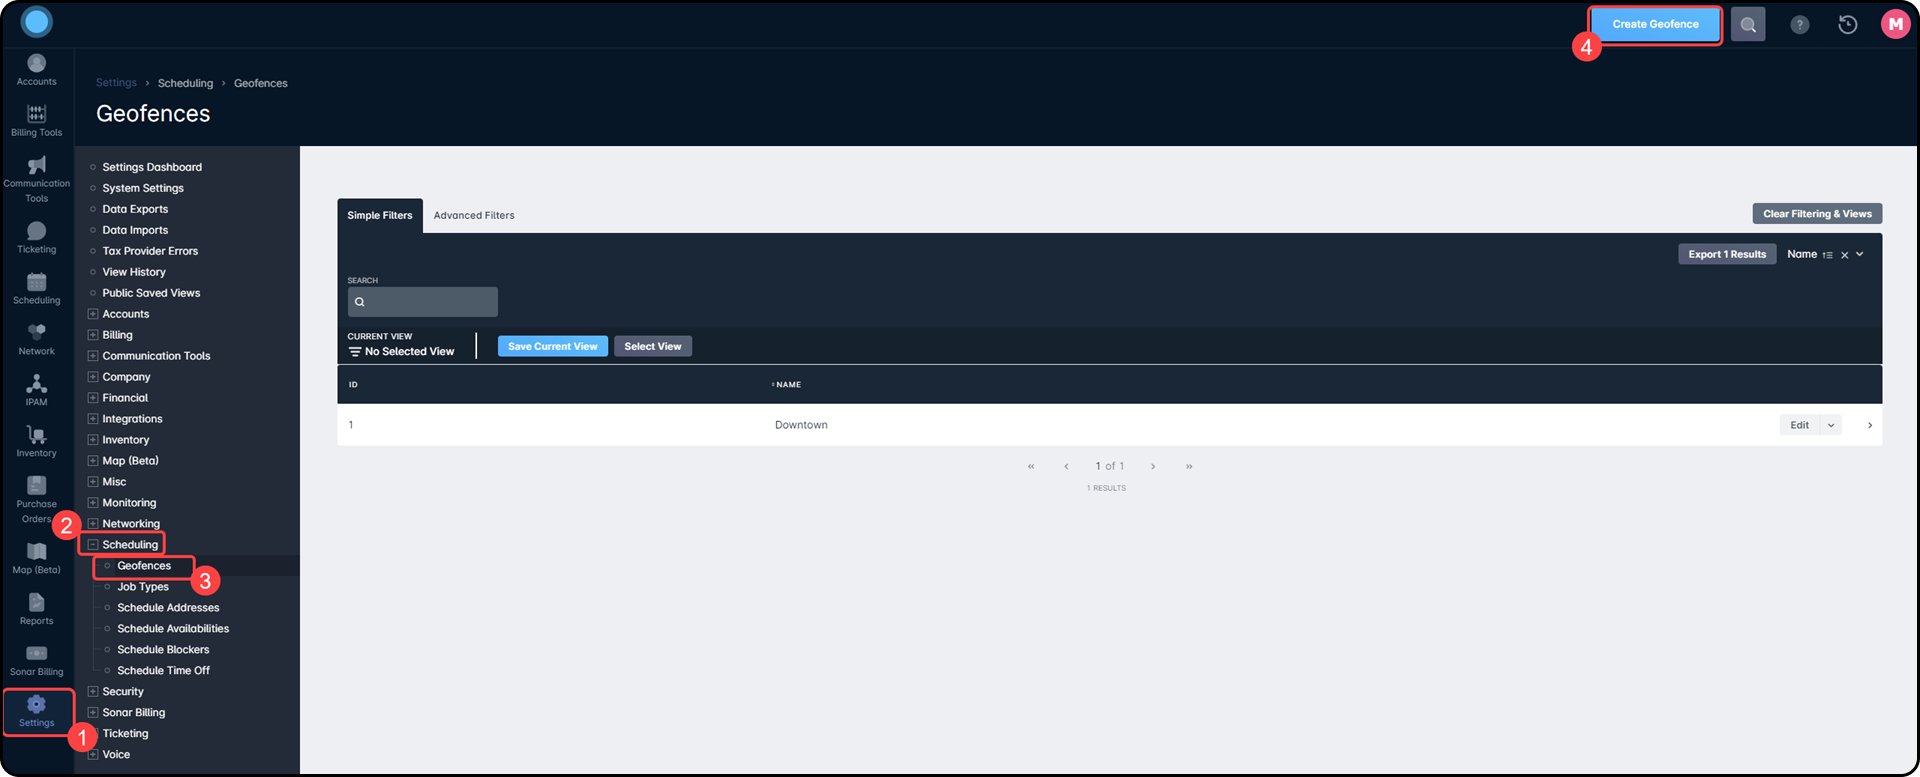
Geofences
Geofences are the final part of the Scheduling Setup and we touched on them briefly while covering the Schedule Availabilities. Creating a Geofence allows you to restrict your technicians to specific geographical areas, and we cover some examples of creating Geofences in an article dedicated to them over here.
Details
1. Click on Create Geofence in the upper-right corner
2. Once you've clicked on create, you'll be able to add new points to the map using the Create tool, or edit existing points with the Edit tool
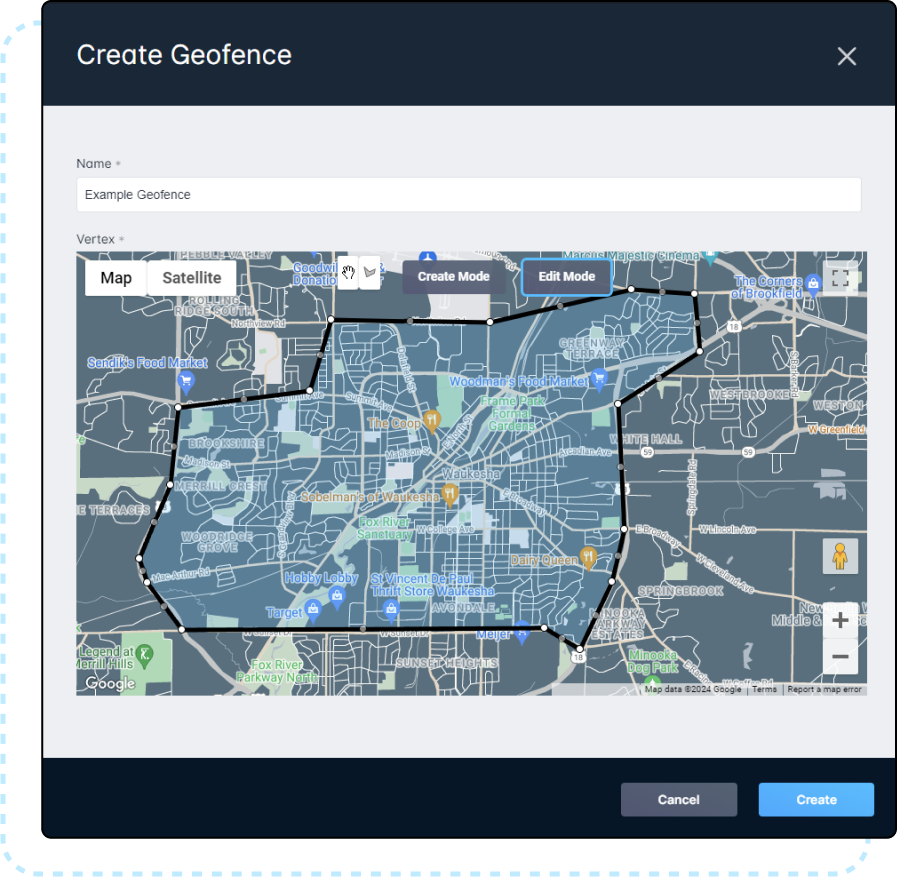
3. Once you create the Geofence, you can go back and apply it to a schedule availability