Getting Sonar ready to take payments from your customers is a straightforward process. In this article, we'll be going over the prerequisites for getting ready to bill your customers, and how to make sure your customers are billed successfully.
Before you can add payment methods to your customer accounts, you'll need to configure a payment processor for your instance. The process for adding a Payment Processor is detailed in the Setting up Bank Account & Credit Card Processors article and covers the requirements mandated by each processor. If you haven't started the process of adding a processor, please do so as soon as possible. The full process requires business verification on the processor's end and can take some time.
Fast Track: Adding a Payment Processor
Adding a payment processor is straightforward, once an account has been created on their end.
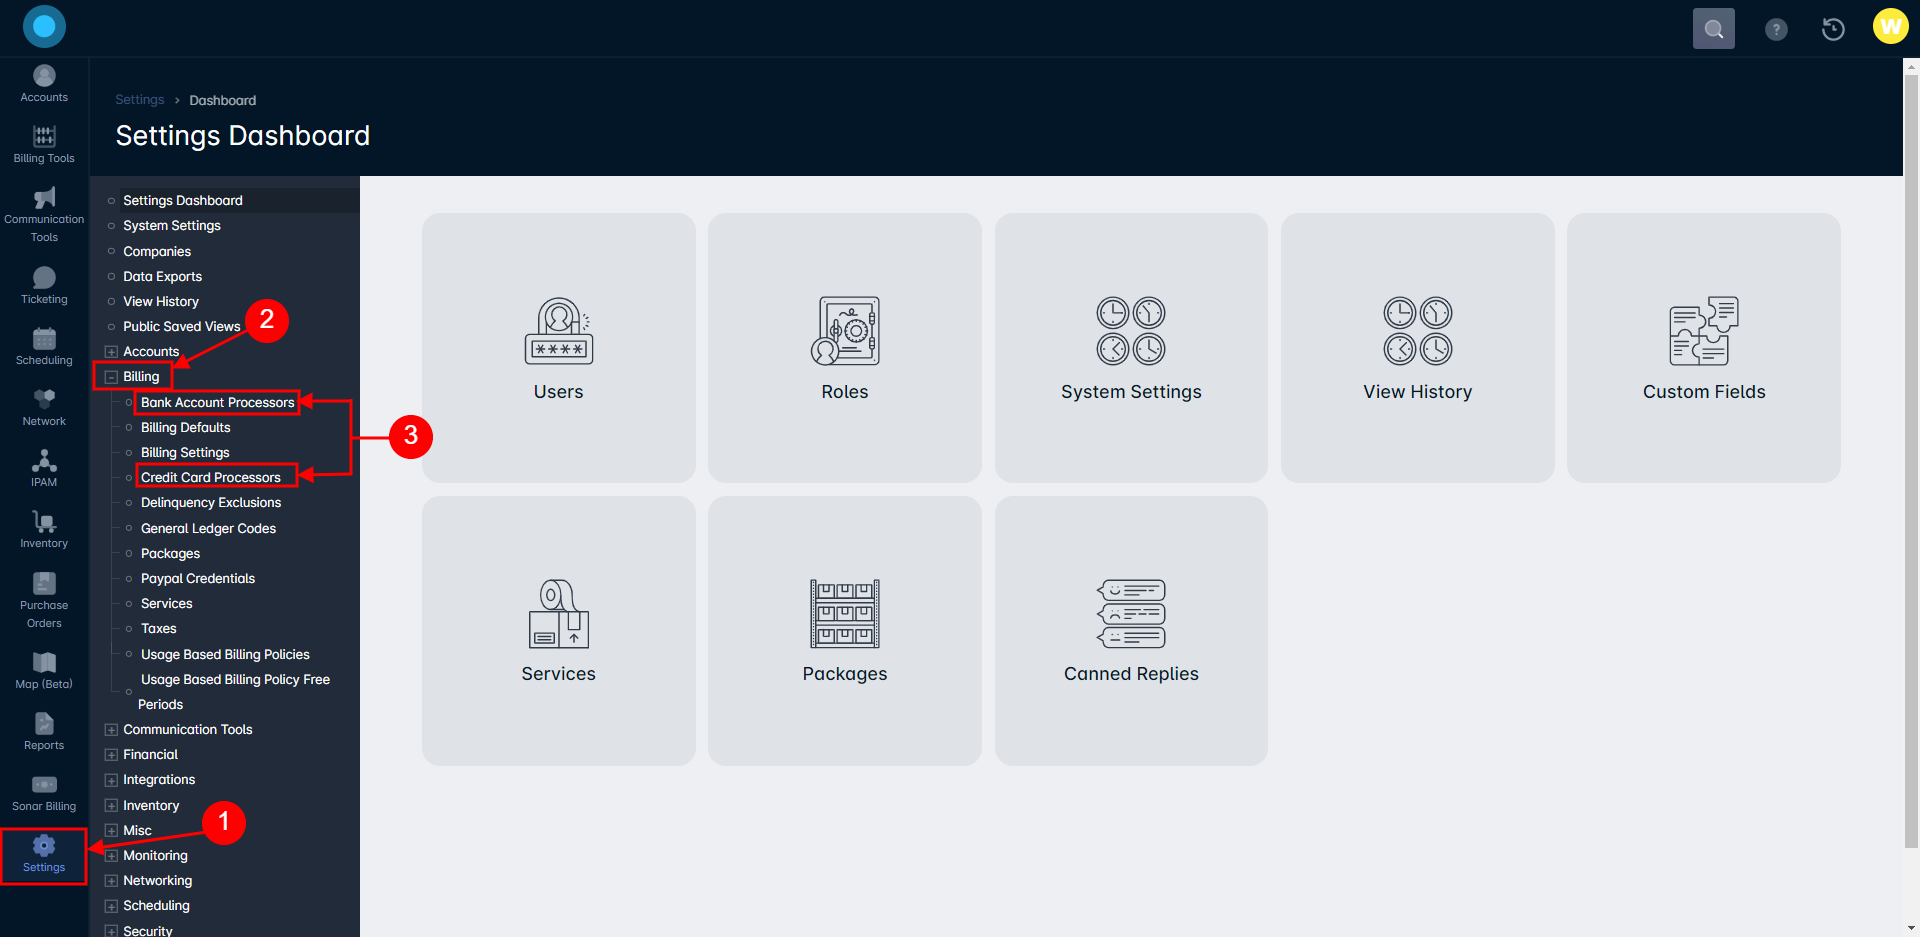
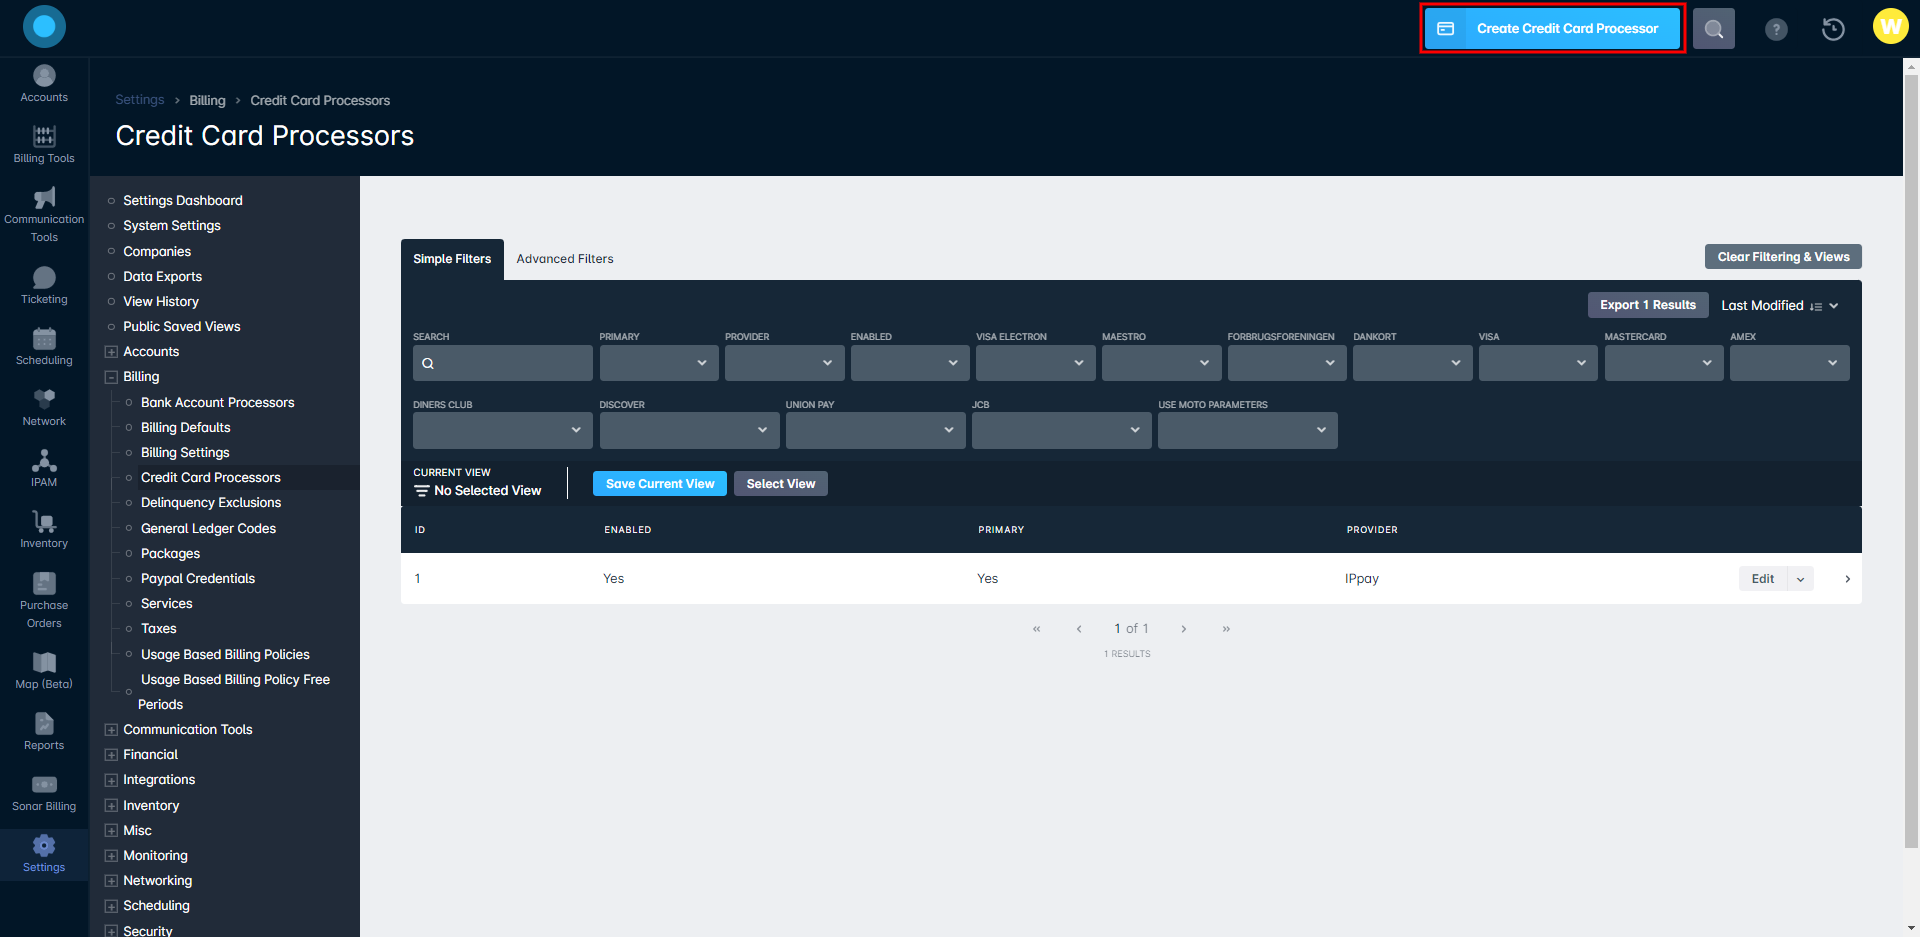
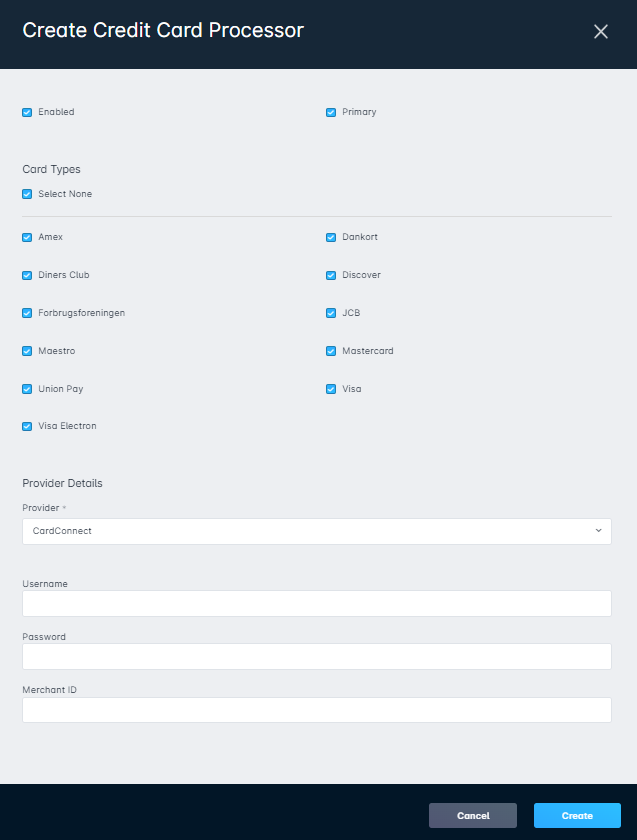
In Sonar, navigate to Settings > Billing and select either Bank Account or Credit Card Processors: Once in either of those areas, click on the "Create ____ Processor" button: Which will open the corresponding modal, where you'll select the processor and fill in the mandatory fields that appear: Example CardConnect
Adding the Payment Method
Once you've added your payment processor(s) for whichever payment methods you'll be accepting on customer accounts, the next step is adding these payment methods onto the customer's account:
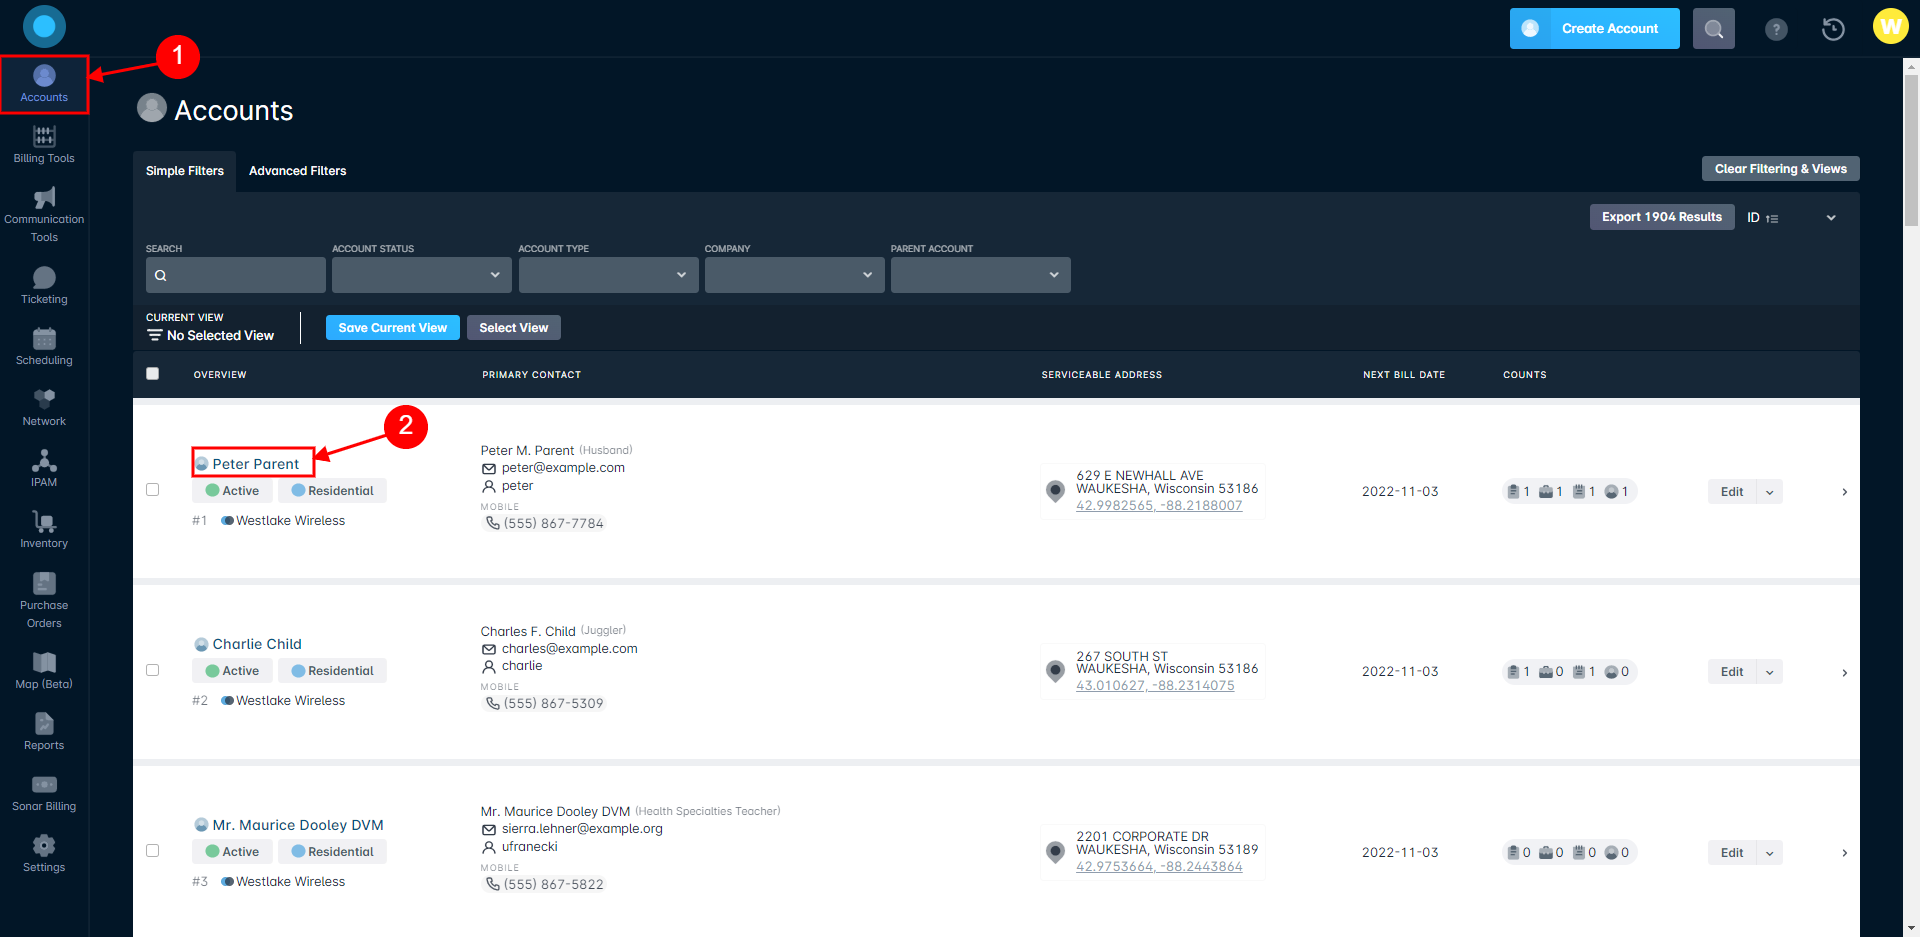
Navigate into the Account's Management View:
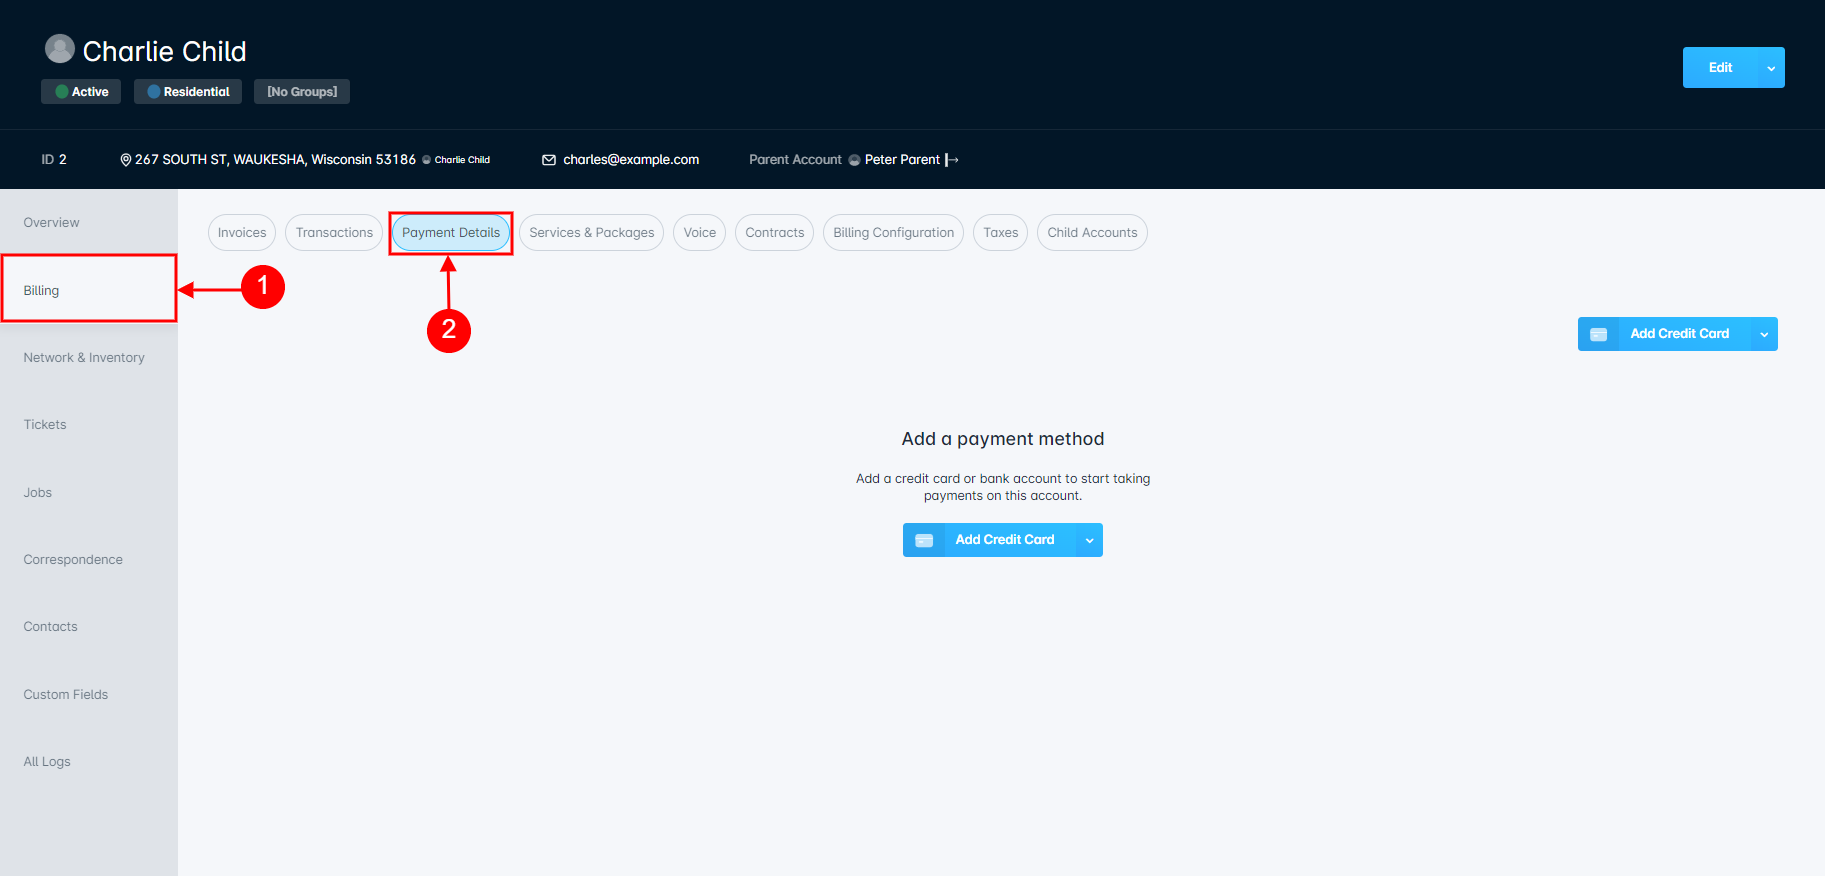
From the Account Management View, click on the Billing Tab, then the Payment Details pill:
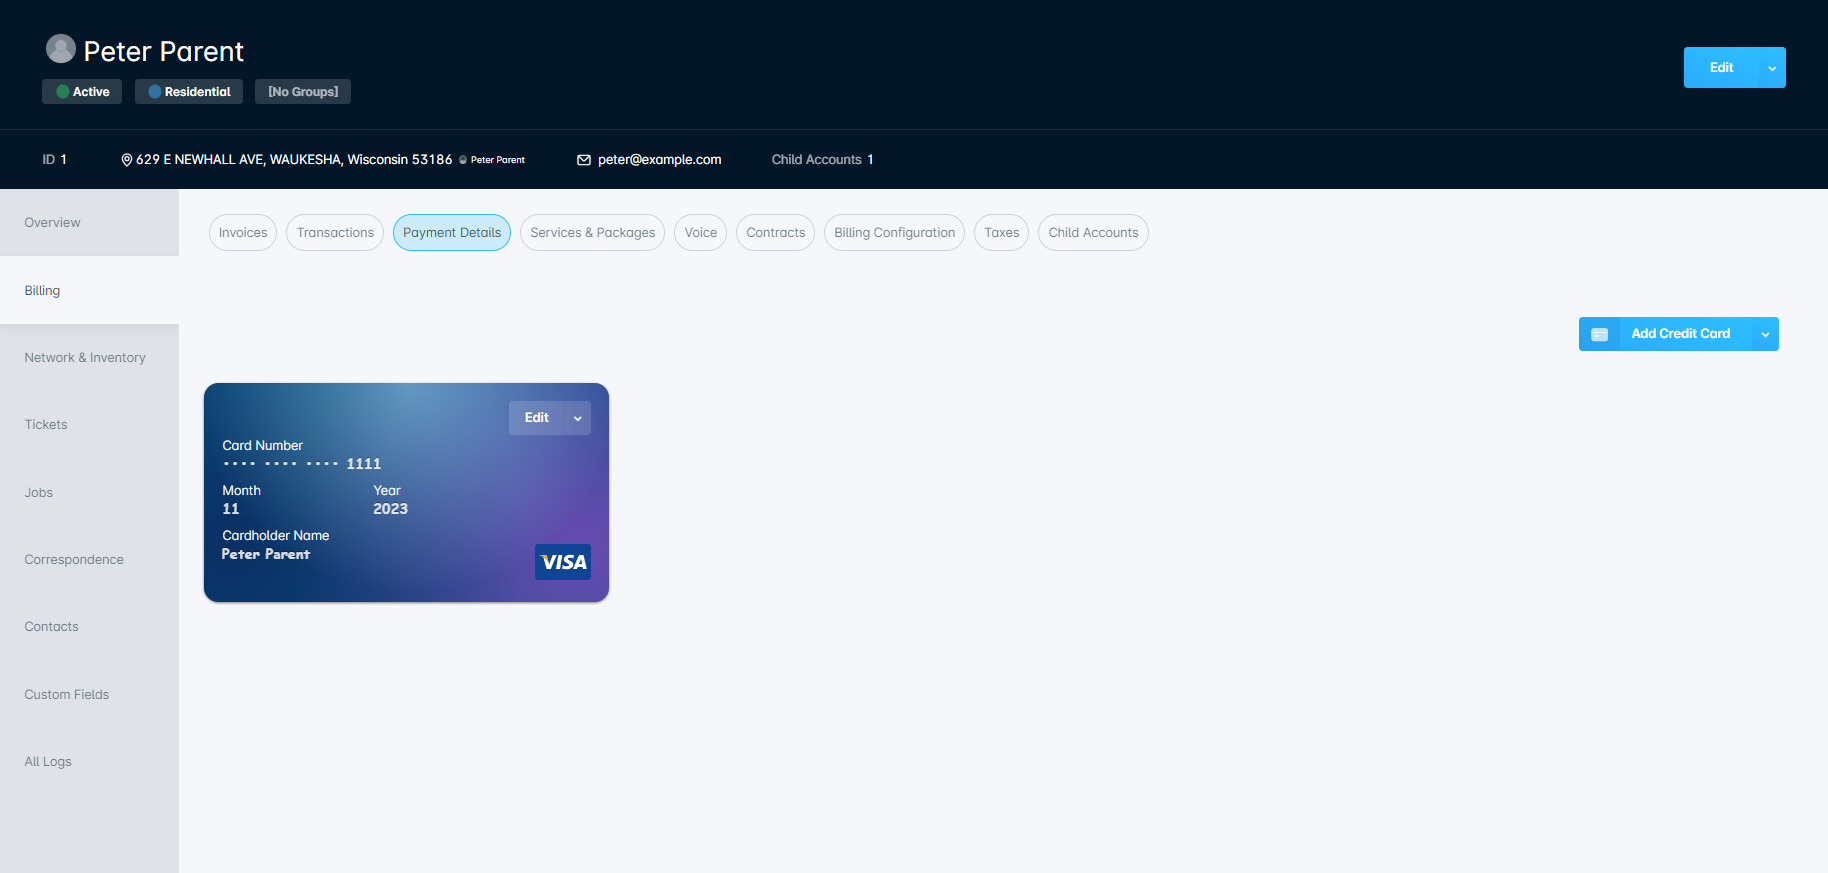
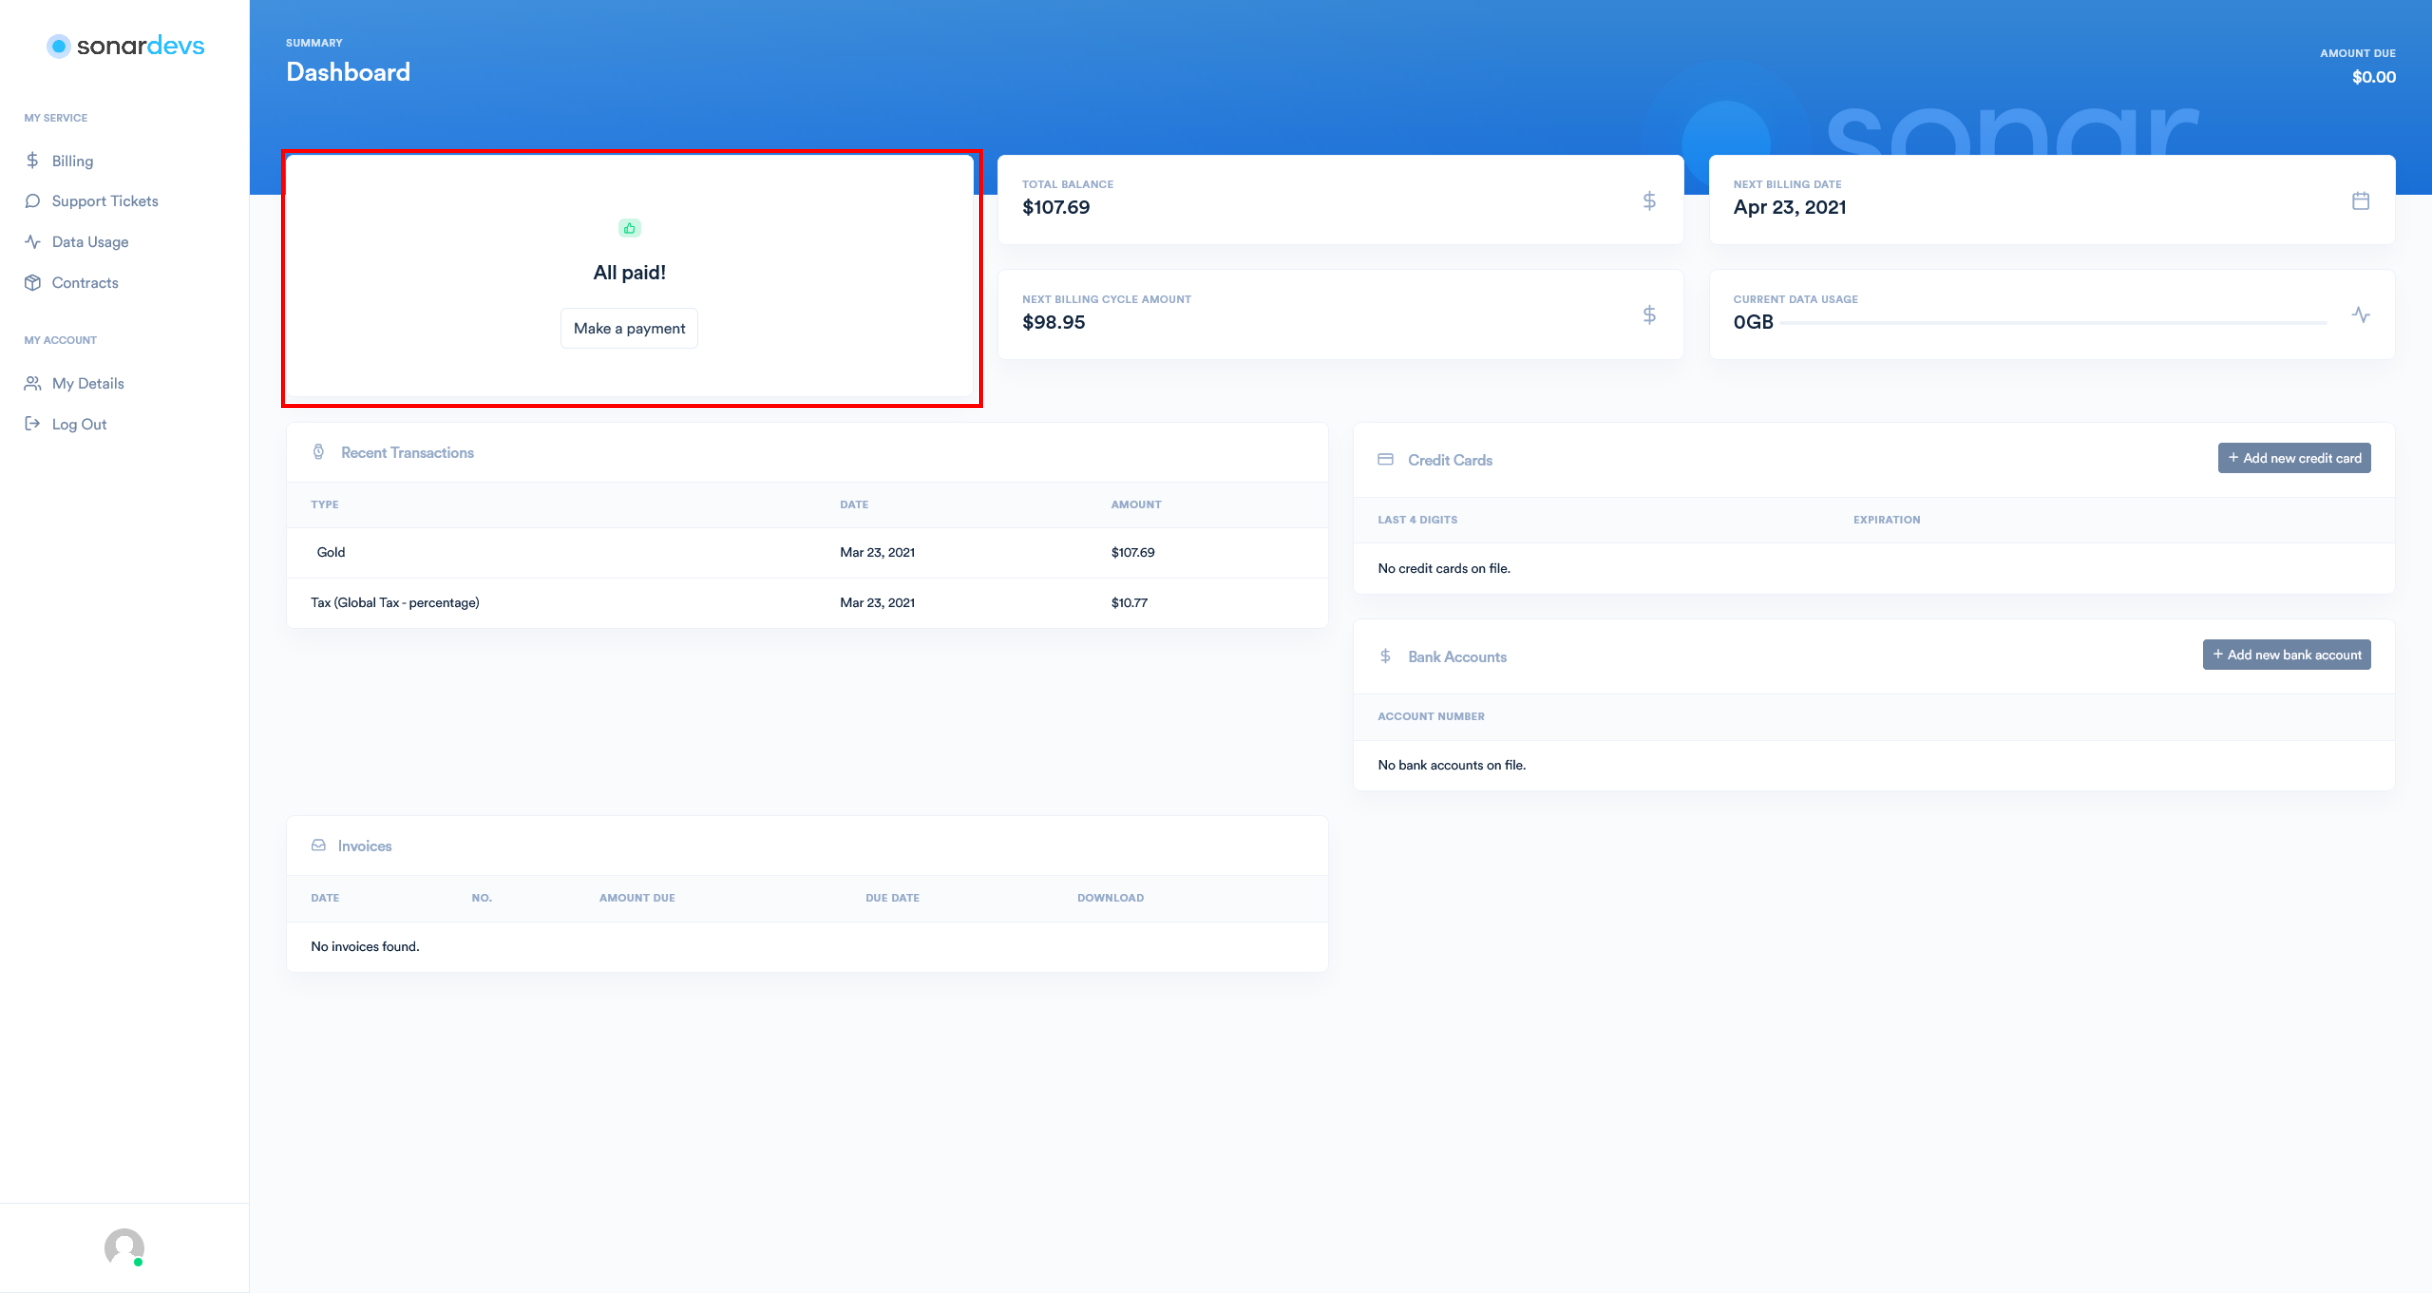
If you're on an account that currently has no payment method, your page will look identical to this one. An account that does have payment information will display the existing payment methods in the center, with only a single "Add Payment Method" button, seen below:
Credit Card
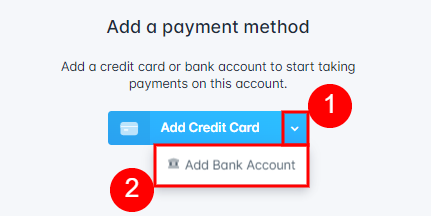
On this account, no payment method currently exists. As a result, we're able to use either button to add a new Payment Method. We'll start by adding a new Credit Card to the customer account:
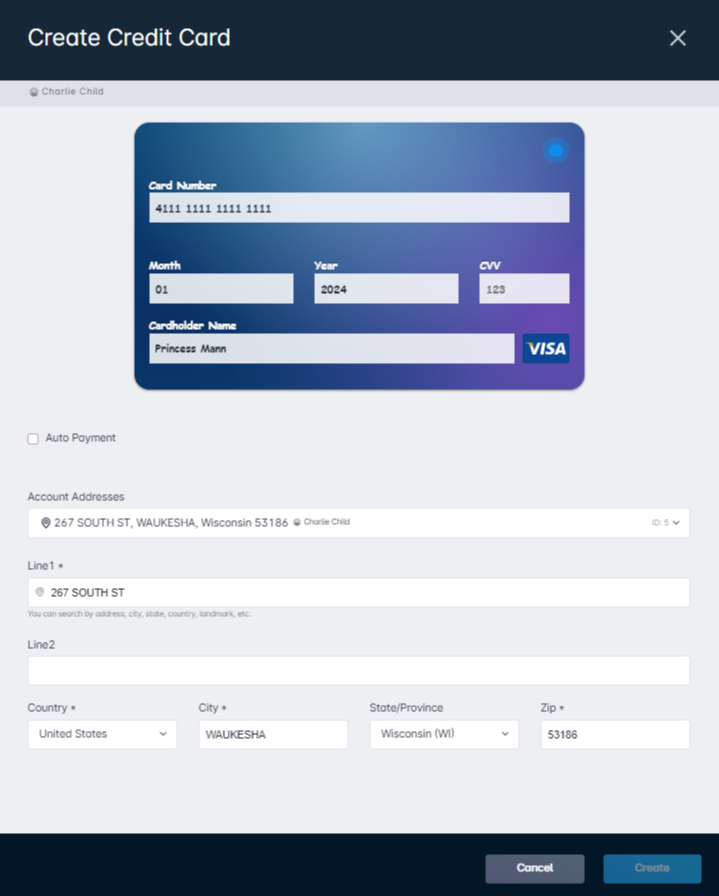
Before adding a Credit Card, you need to have a Payment Provider. This is because payment information isn't stored in Sonar - it's immediately tokenized against the payment provider and stored in a secure token format.
From either "Add Credit Card" button on this page, we'll open the "Create Credit Card" modal:
The Account Addresses field provides the ability to select between the physical or mailing address that is assigned to the account.
The numbers shown here are for test purposes only and do not represent a real credit card. Upon saving the card information, the numbers get encrypted and the card details tokenized.
Bank Account
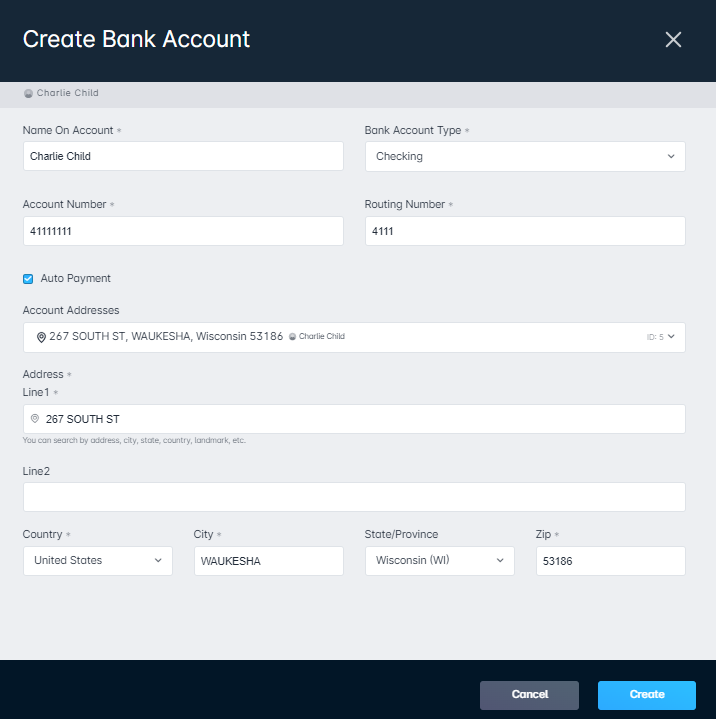
Adding a bank account is done in nearly the same way, however, you need to expand the drop-down in order to see the option to add a new bank account:
The Account Addresses field provides the ability to select between the physical or mailing address that is assigned to the account.
For Canadian Banking institutions, the Routing Number needs to be in the following format:
0XXXYYYYY where XXX represents the Institution Number and YYYYY represents the Transit Number
Making Payments
Making payments on the account is equally straightforward, and can be done in several ways:
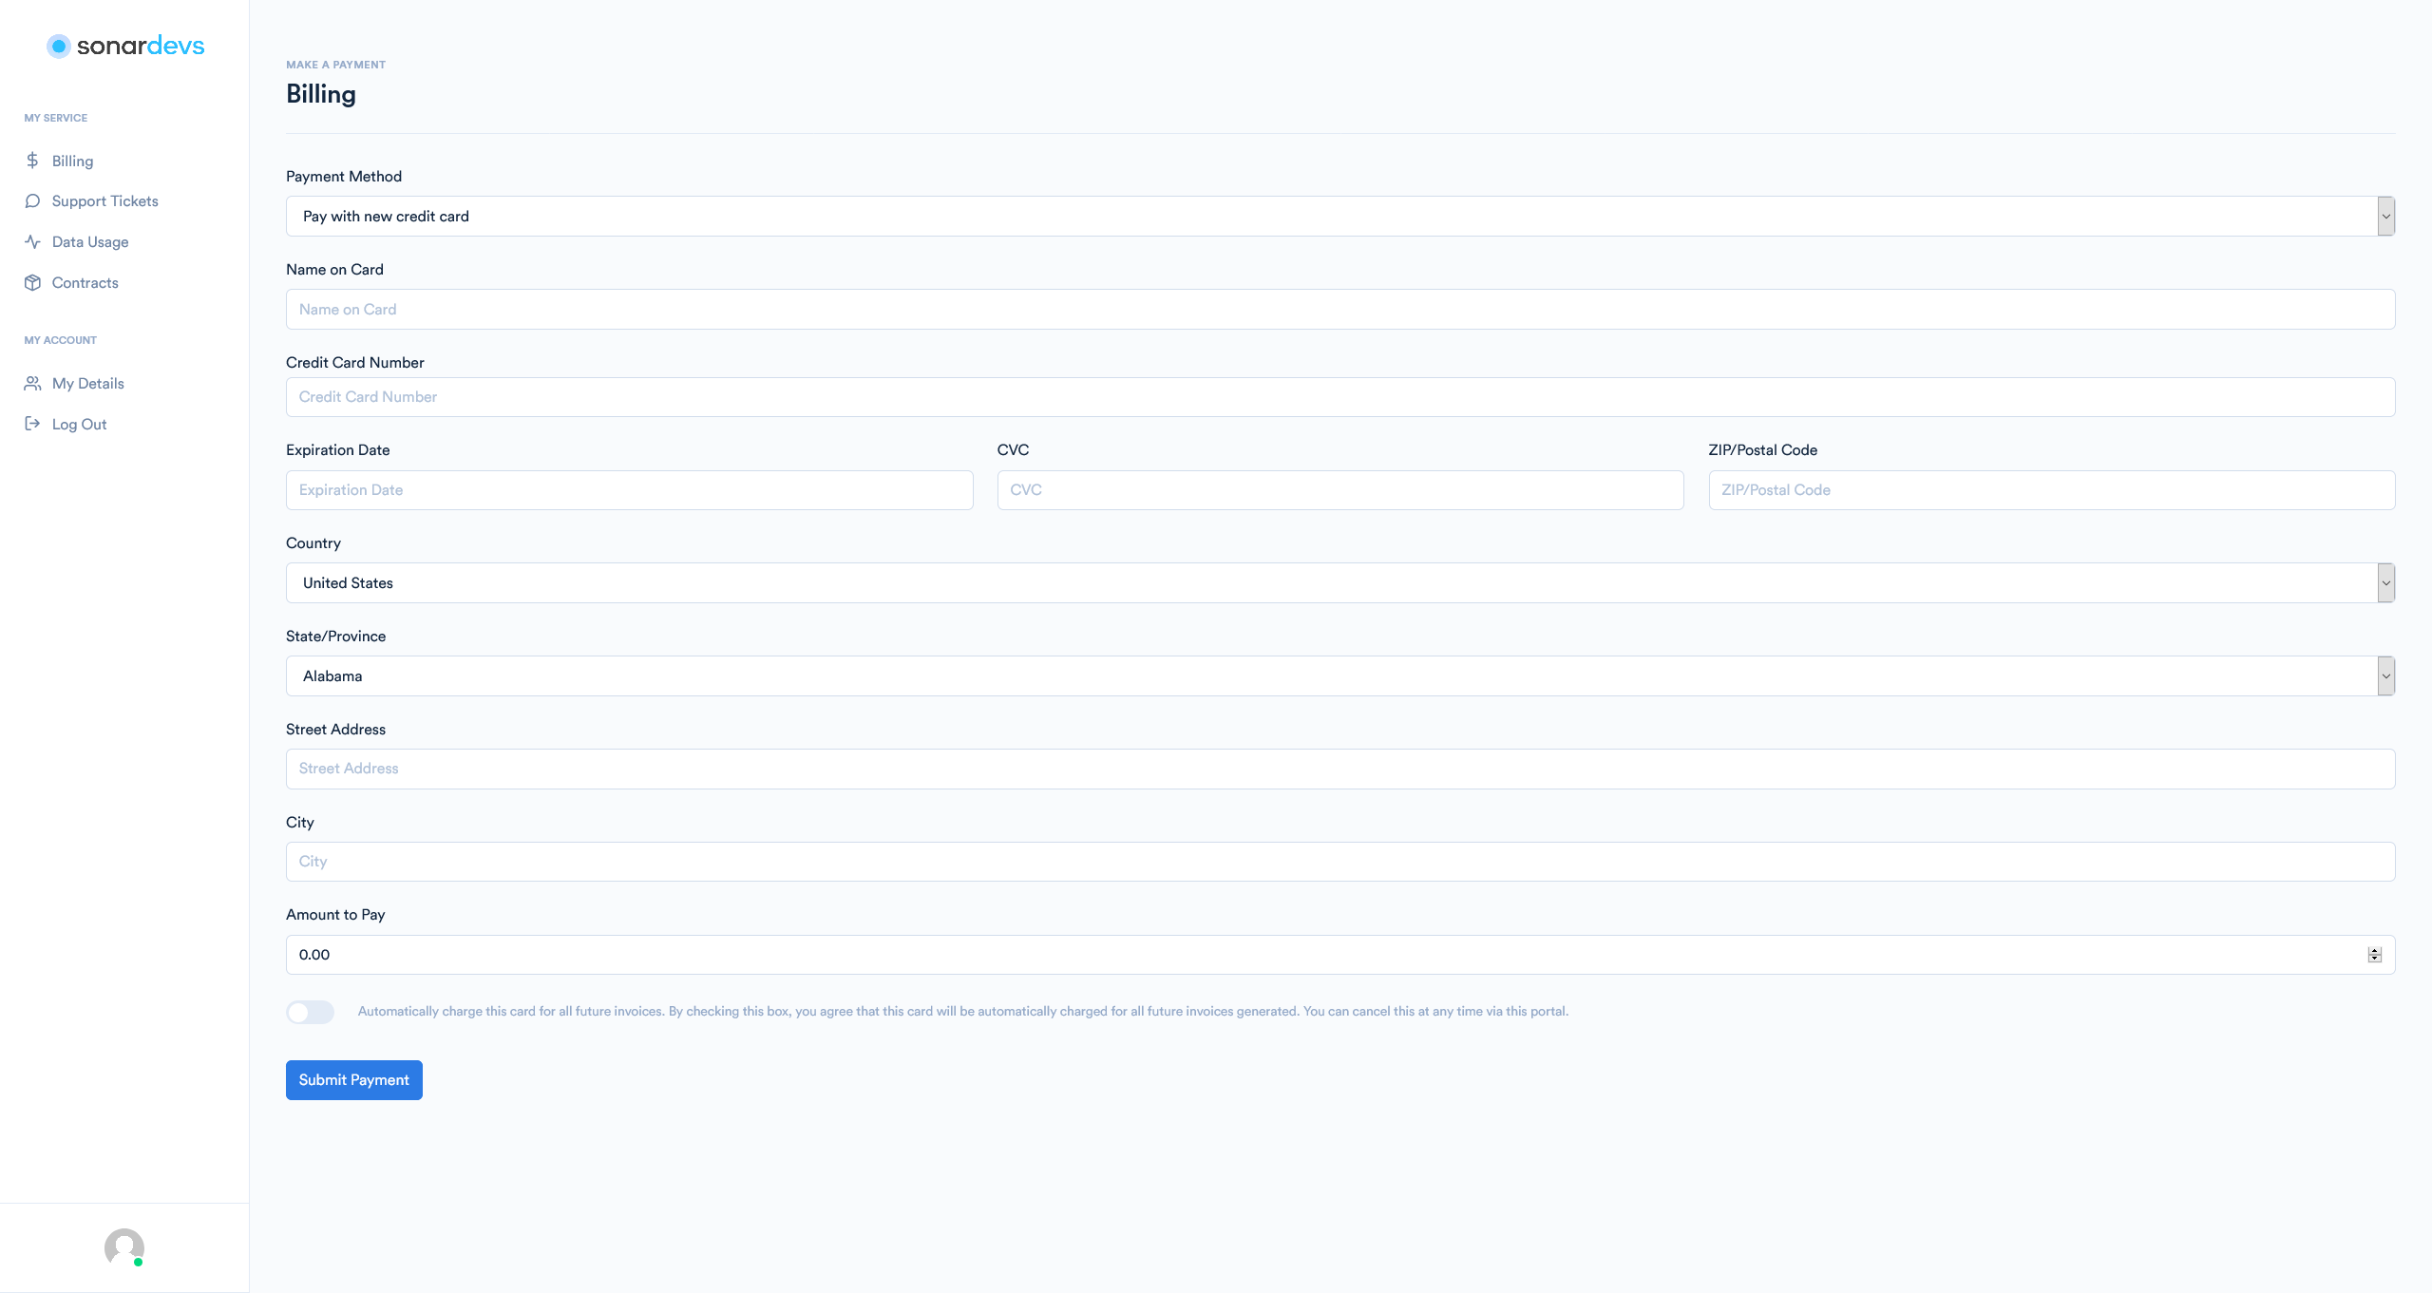
By configuring the Customer Portal on your instance and providing credentials to your customers, you allow them to make payments themselves:Adding a payment will prompt the customer to provide payment information unless one has already been added to their account:
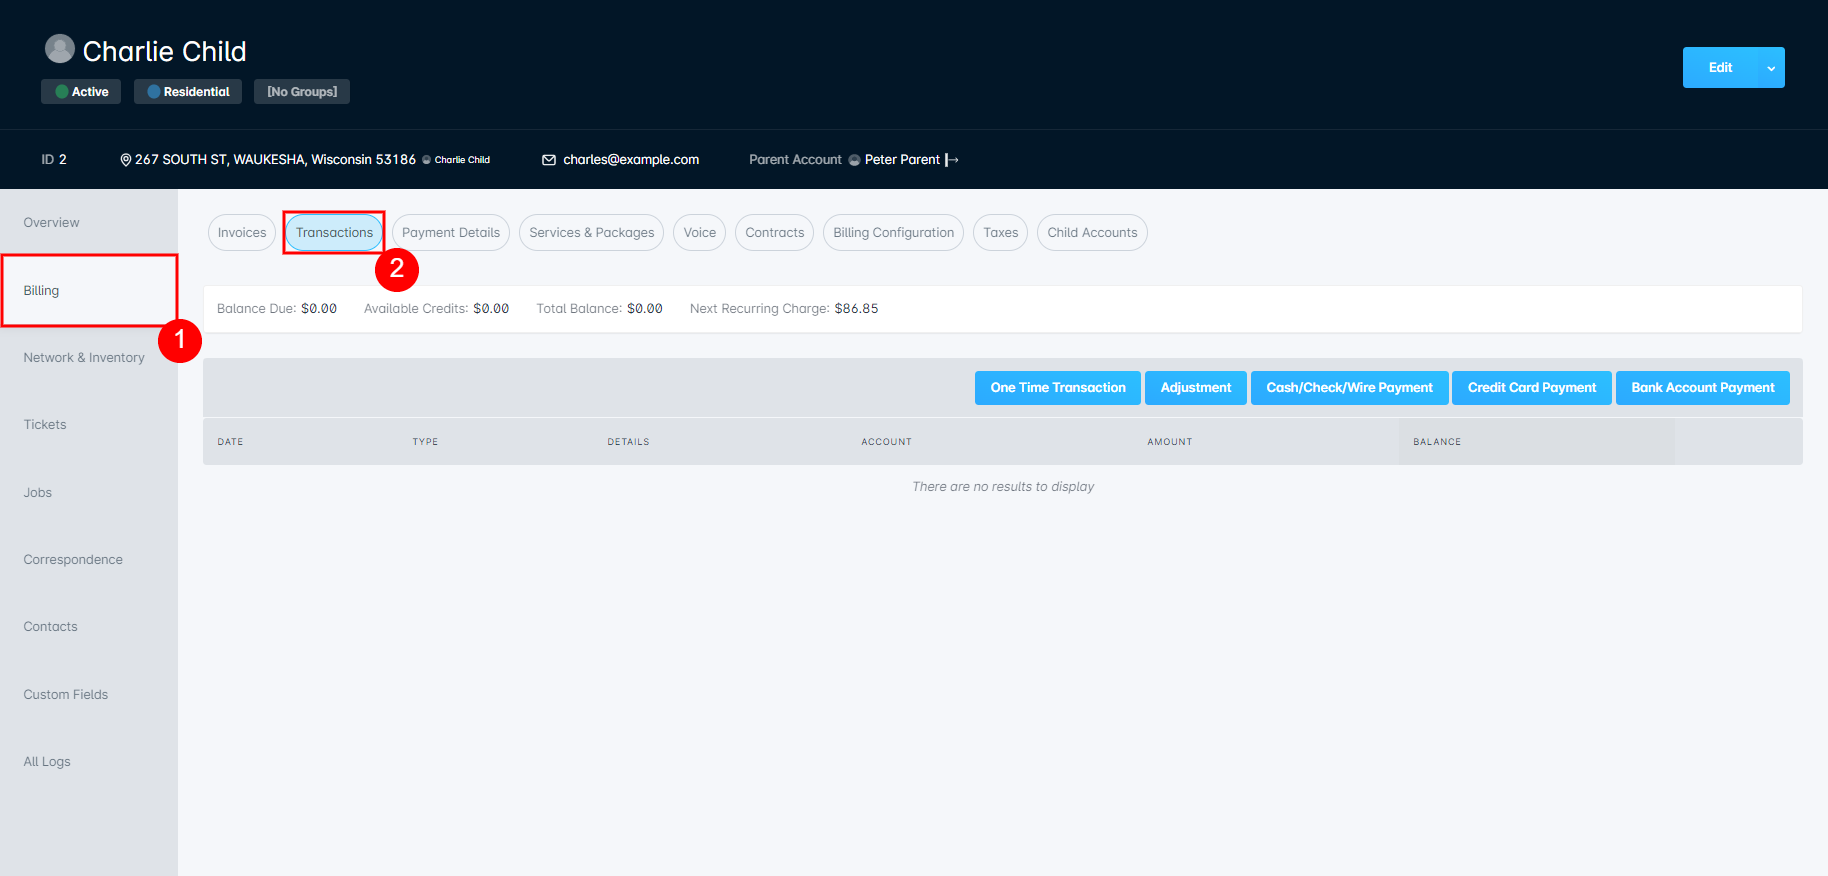
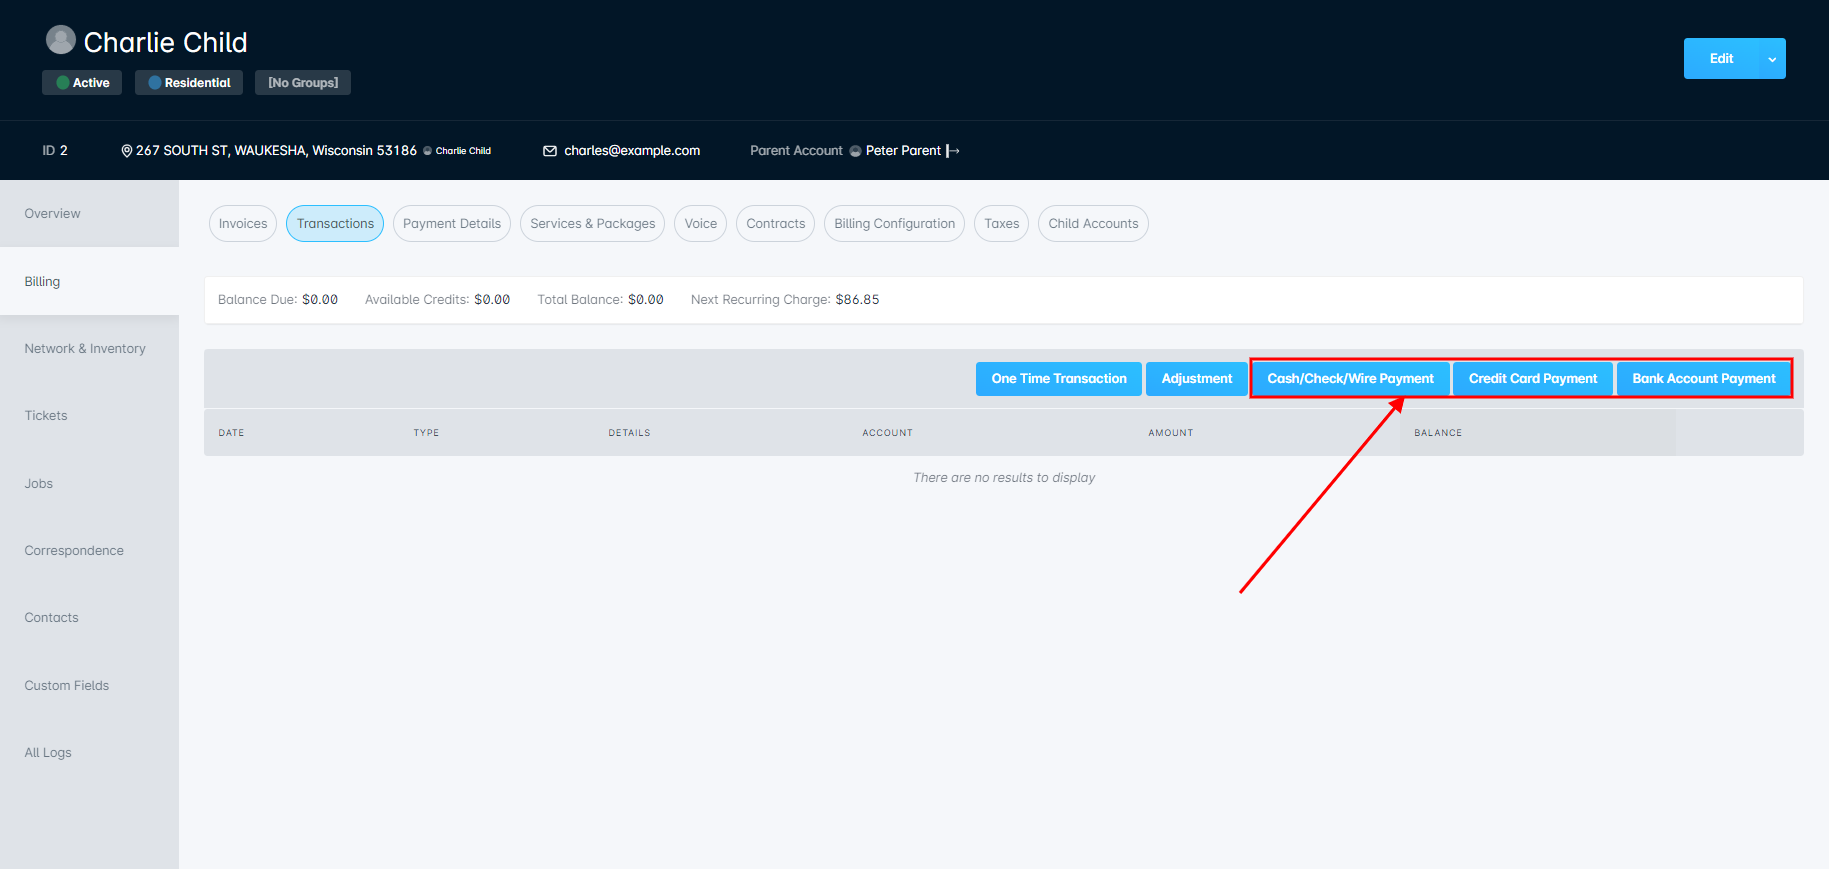
Taking payments directly through your instance is another way of approaching it. From any account, click on the Billing tab, followed by the Transactions pill:This page allows you to process a variety of transactions - adding one-time services, making adjustments to the account, or taking payments. Using services is covered within the Manual Transactions article. In order to take payments, select the appropriate payment method from the available options:Each of these buttons will open their respective modals, detailed in the fold below.What Each Payment Modal Looks Like
Cash/Check/Wire Payment:
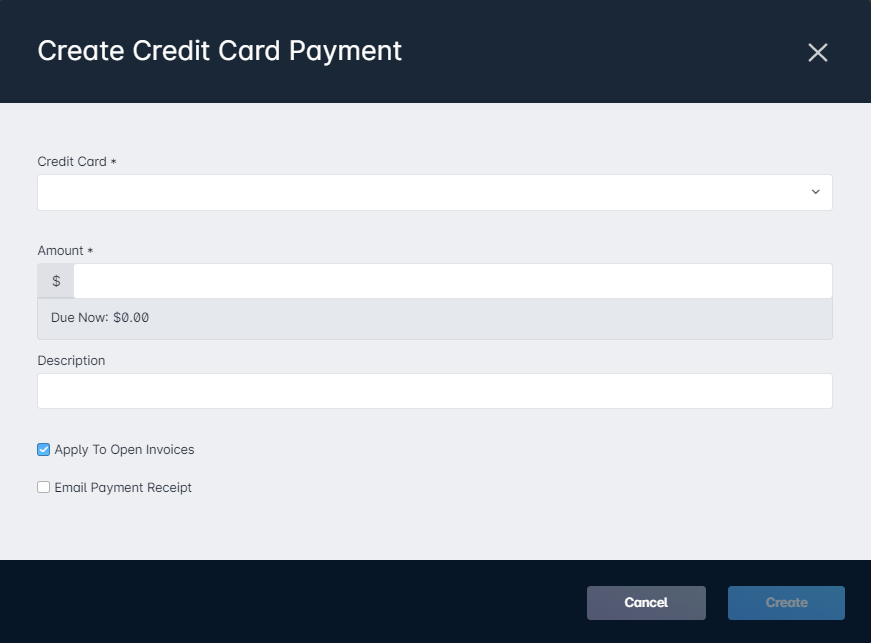
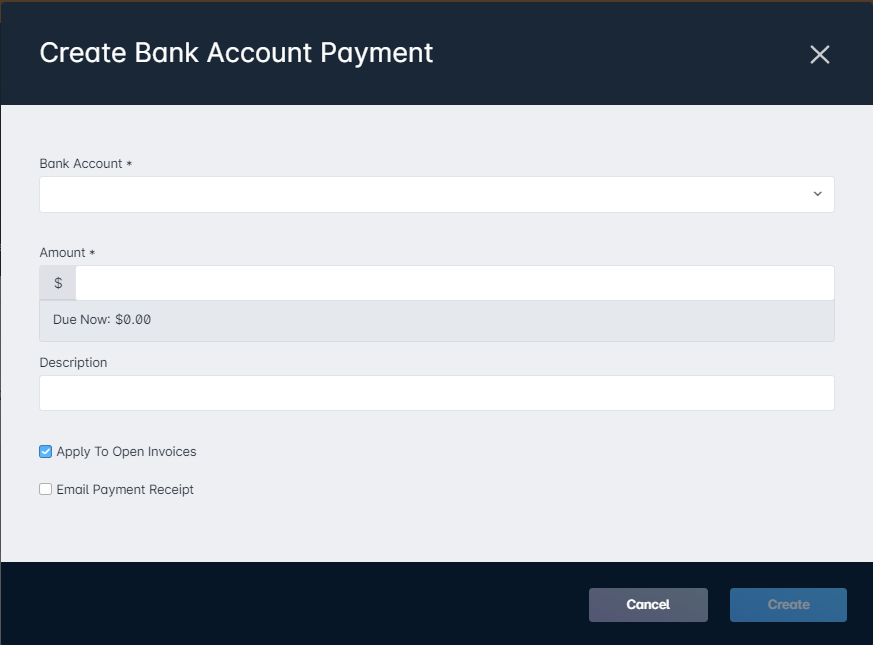
Credit Card Payment: Bank Account Payment:
When taking payment, you'll need to enter the following information in all cases:
The exact method the customer is using, either account or cash/check type
The amount of the payment
Whether or not the payment should be automatically applied to open invoices
If a payment receipt should be emailed to the customer once the payment is made. This email will be sent to the financial contact on the account
Each payment method added to the account can be used as an auto-pay method, which will automate the process of charging the payment method whenever an invoice is due.
 Updated
by Mitchell Ivany
Updated
by Mitchell Ivany


 When taking payment, you'll need to enter the following information in all cases: