In Sonar, a Geofence is a custom geographic work zone created on a map.
Geofences help control where technicians can be assigned jobs based on their schedule. They are useful when technicians should only work in certain areas on certain days or under specific conditions.
You might use a Geofence to:
Improve routing by keeping technicians assigned to specific service areas
Meet legal requirements for where a technician is allowed to work
Follow jurisdiction rules, such as state-specific training or certification requirements
In short, Geofences help ensure the right technicians are assigned to the correct locations.
Geofence Creation
To create a Geofence location, you'll need to follow the following steps:
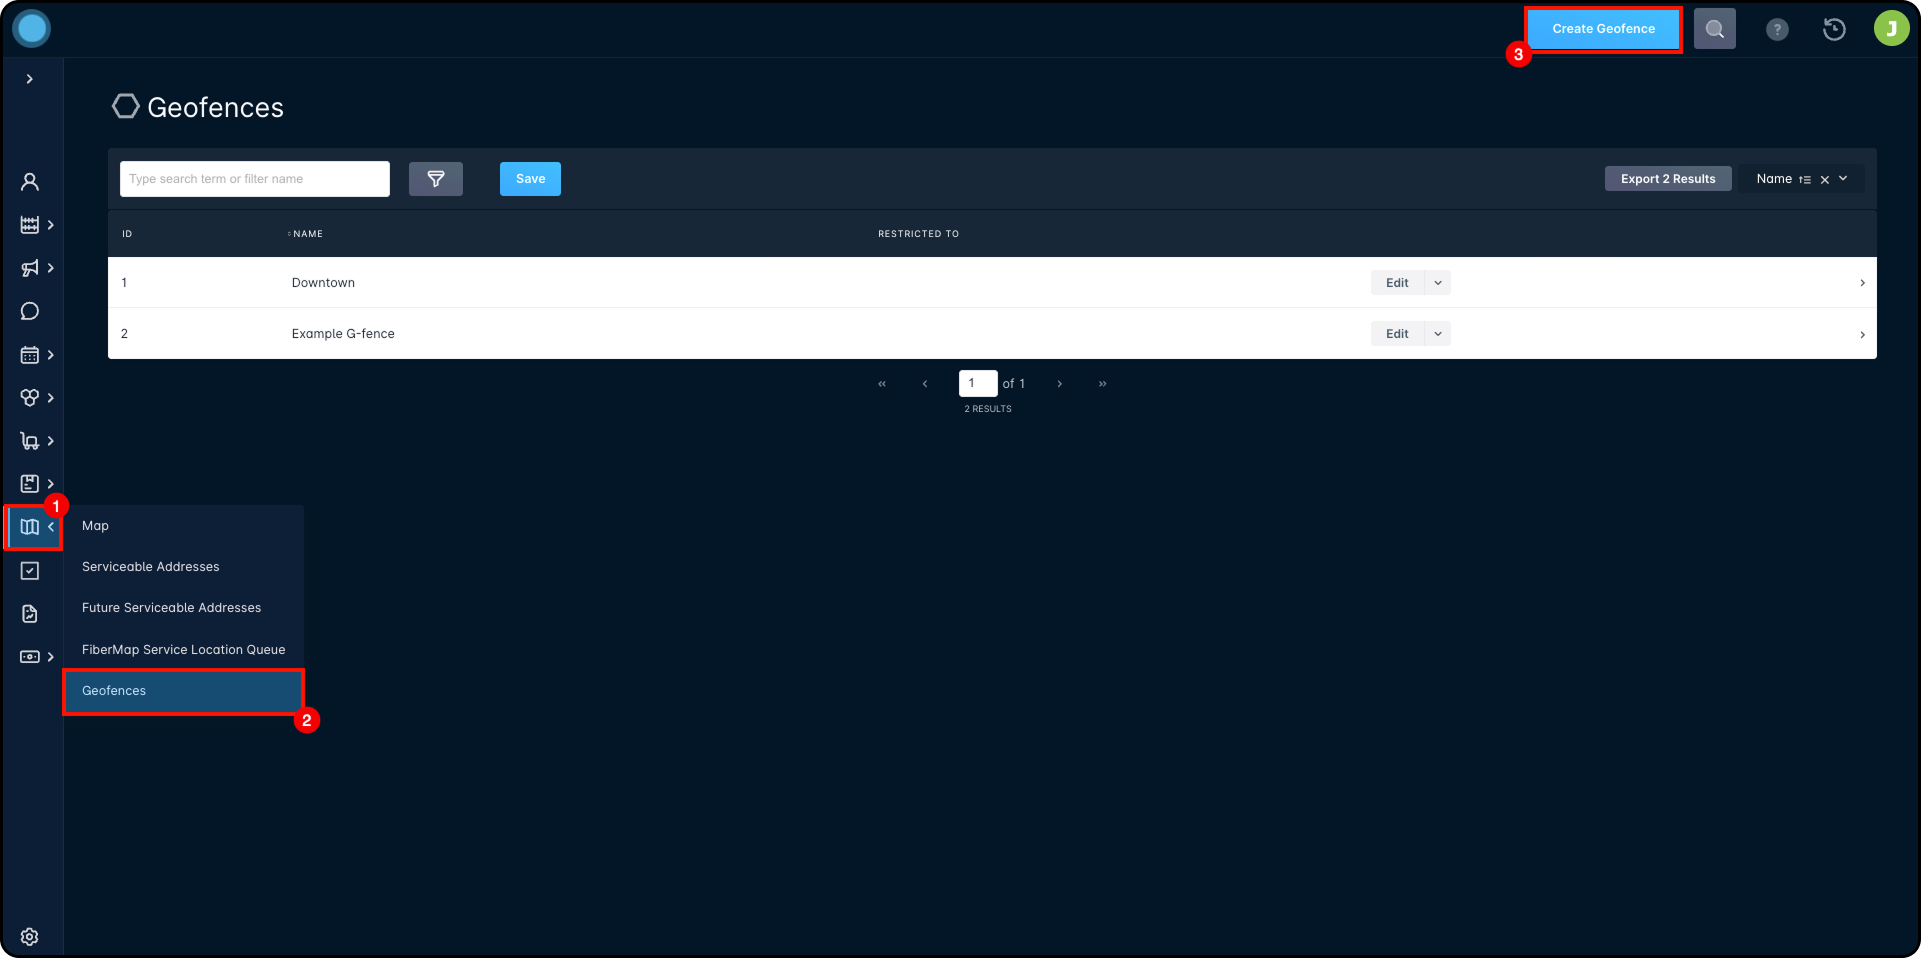
Go to Location Tools
Click on Geofences
Click on Create Geofence
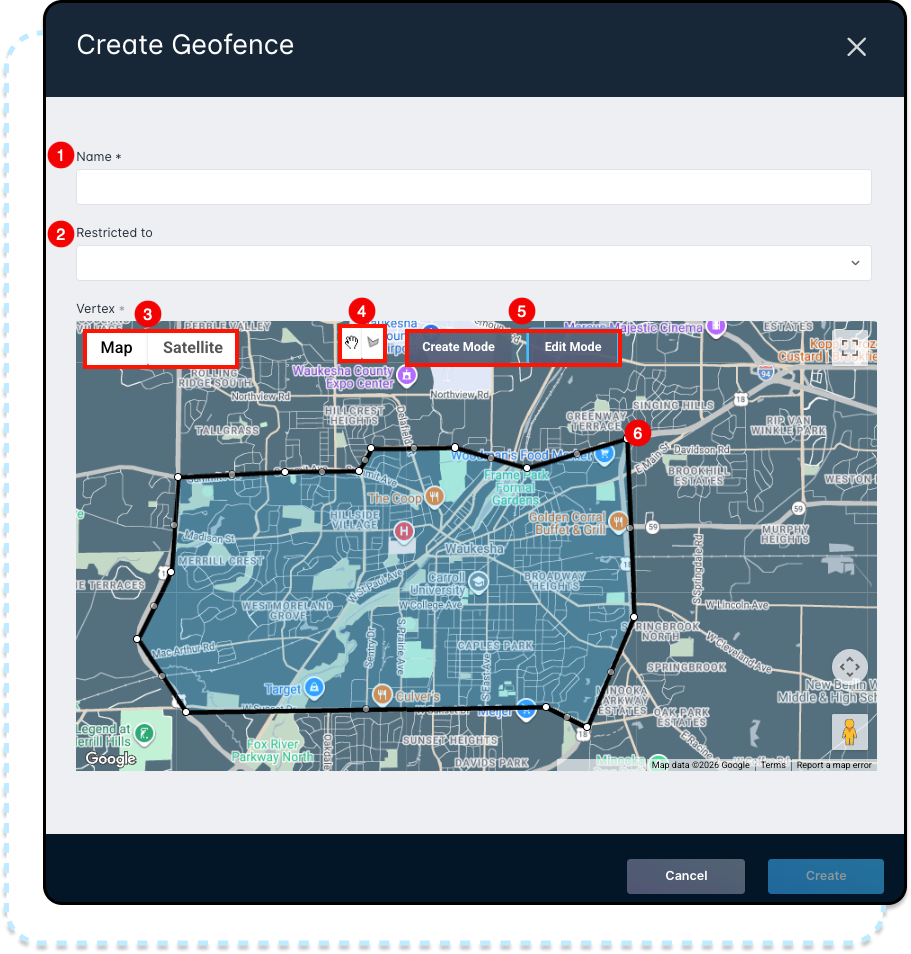
Once that's done, we have the creation modal itself:
Name: Enter a name for the Geofence. This name is used to identify it in the table and when assigning it to schedule availability.
Restricted to: Select who or what the Geofence should be restricted to, if applicable.
Map/Satellite View: Switch between the standard map view and satellite view.
Create/Edit switcher: Use this switcher to toggle between Create and Edit modes. Create lets you add points to the map and draw the Geofence boundary. Edit lets you adjust the boundary by moving or removing points.
Create Mode/Edit Mode Buttons: These buttons are another way to switch between Create and Edit modes. Use Create Mode to add points or Edit Mode to change an existing Geofence boundary.
Geofence Area This shows the drawn Geofence and the area it covers. You can add multiple areas to a single Geofence if needed. Once the Geofence has a name and at least one area defined, click Create to save it.
Applying it to existing Schedule Availabilities
The next step to applying your Geofence is adding it to a Schedule Availability to apply the geographical restrictions to specific technicians. In order to access the Schedule Availabilities, follow these steps:
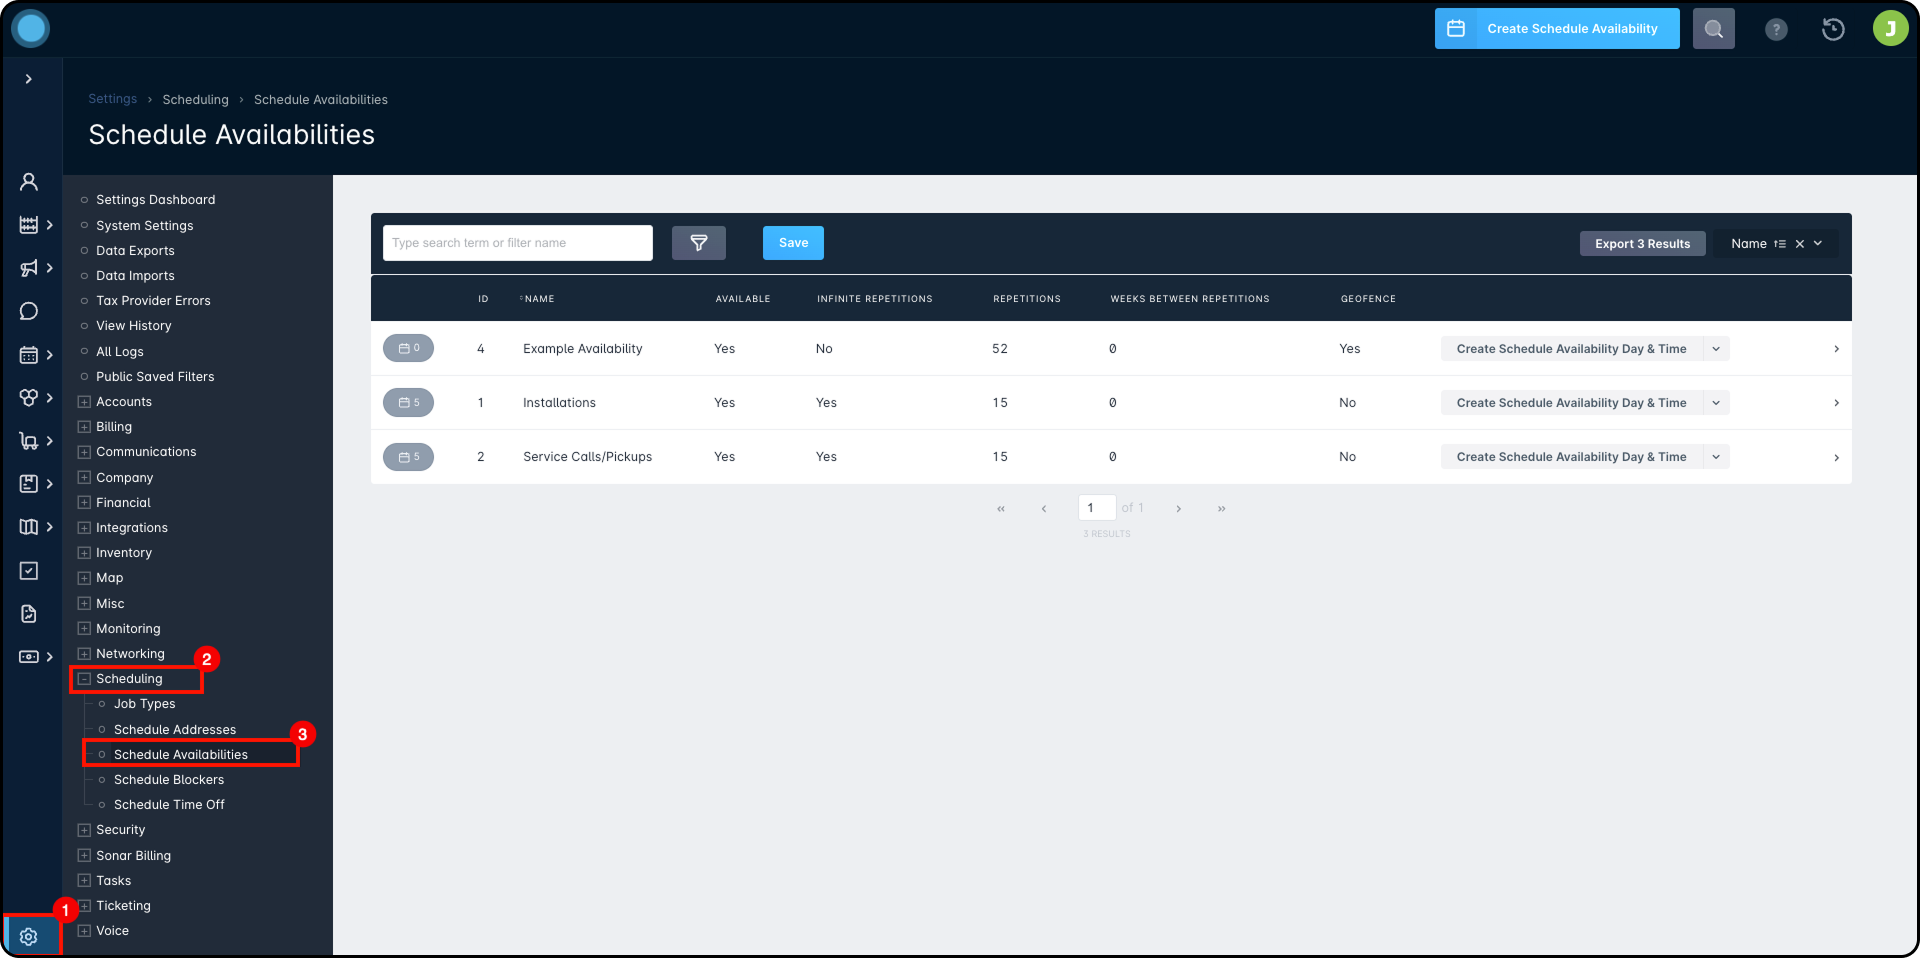
Click on Settings
Click on Scheduling
Click on Schedule AvailabilitiesDetails
This guide assumes you have already created a Schedule Availability. This process is covered in the Setting Up Schedules General Overview article, but a quick summary is included below.
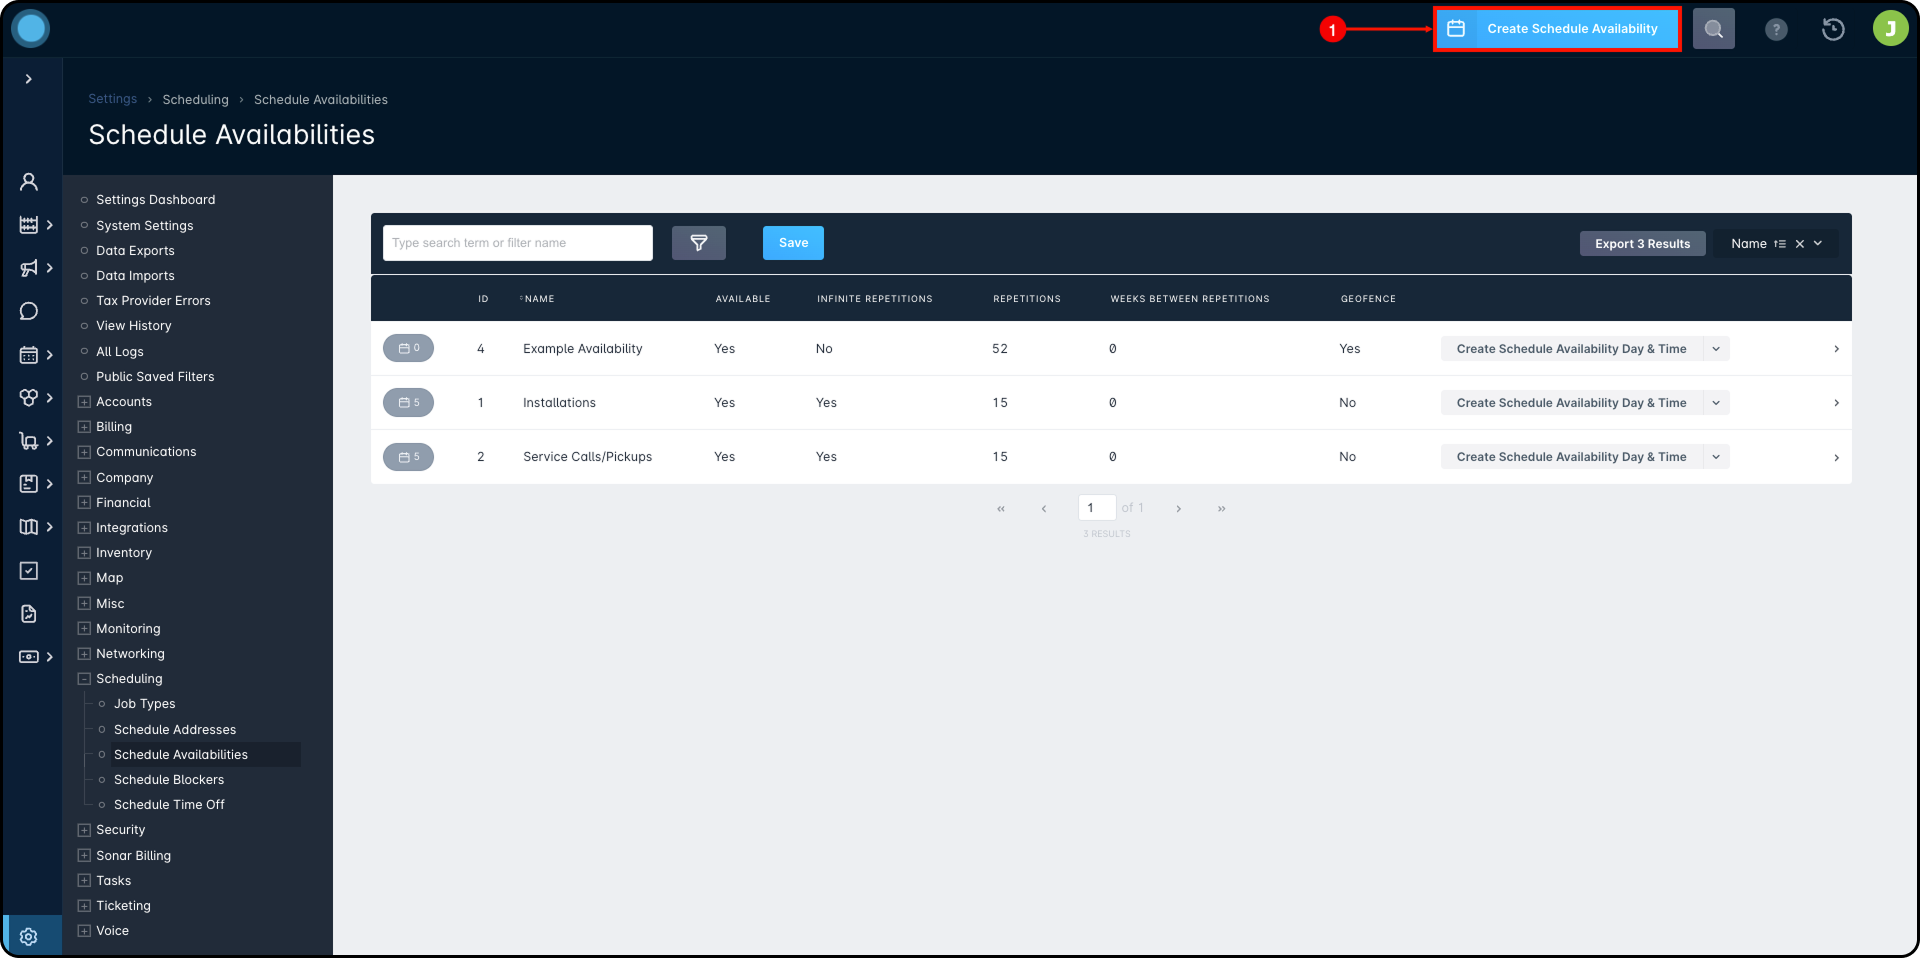
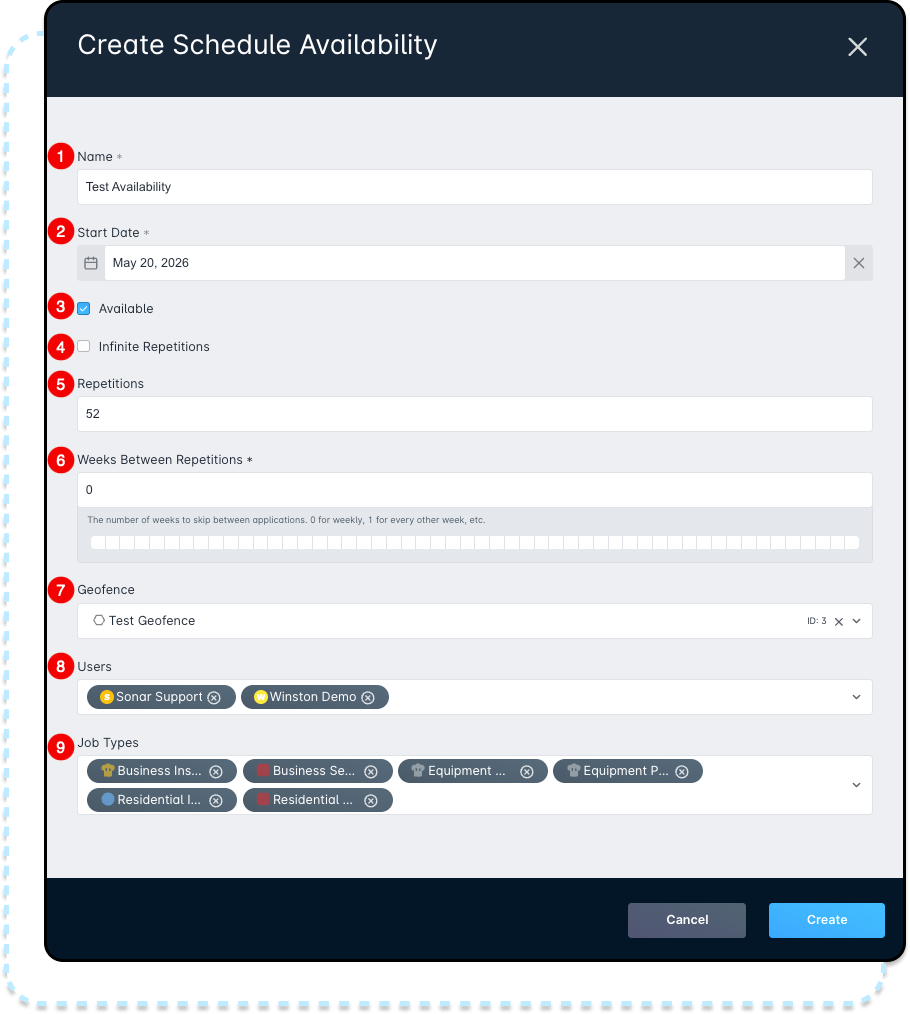
Step 1 - Click on Create Schedule Availability
Step 2 - Complete the fields to create the Schedule Availability
These fields are better defined in the Schedules Overview article linked above, but a quick definition follows:
1. Name: Enter a descriptive name for the schedule availability, such as Residential Installations or Bill’s Schedule. 2. Start Date: Choose the date this schedule availability should begin. 3. Available: Check this box to make the selected users available during the scheduled days and times. Leave it unchecked to mark them as unavailable. 4. Infinite Repetitions: Check this box if the schedule should repeat forever. 5. Repetitions: If infinite repetitions is not selected, enter how many times this schedule should repeat. occur before stopping; starting from the entered Start Date. 6. Weeks Between Repetitions: Set how often the schedule repeats. For example, 0 means every week, and 1 means every other week. 7. Geofence: Select a Geofence if this schedule should only apply to jobs within a specific service area. 8. Users: Choose which users this schedule availability applies to. 9. Job Types: Select the job types that apply to this schedule availability.
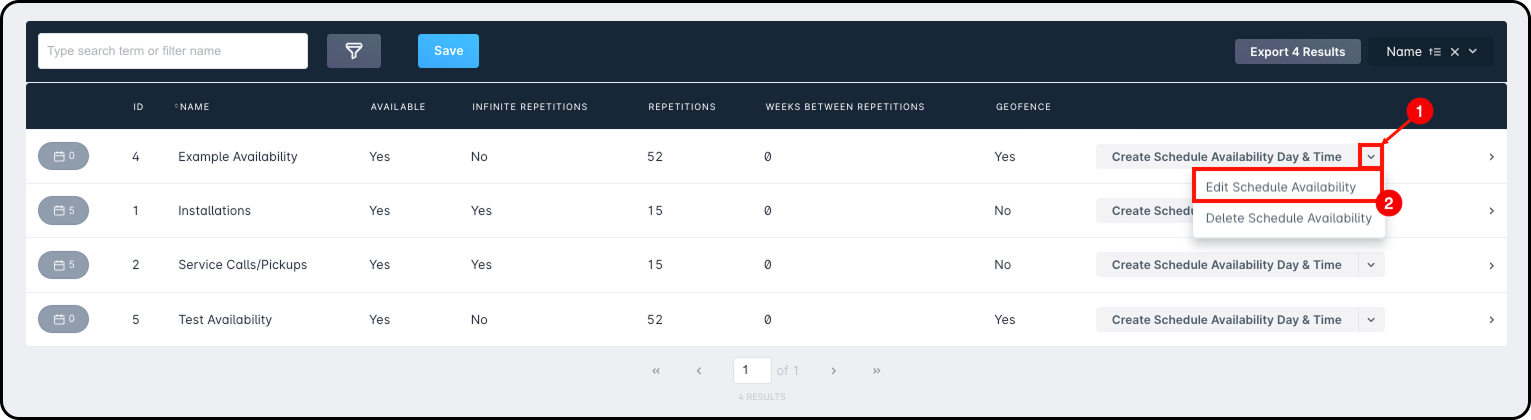
Expand the dropdown for the Schedule Availability you want to update, then select Edit Schedule Availability.
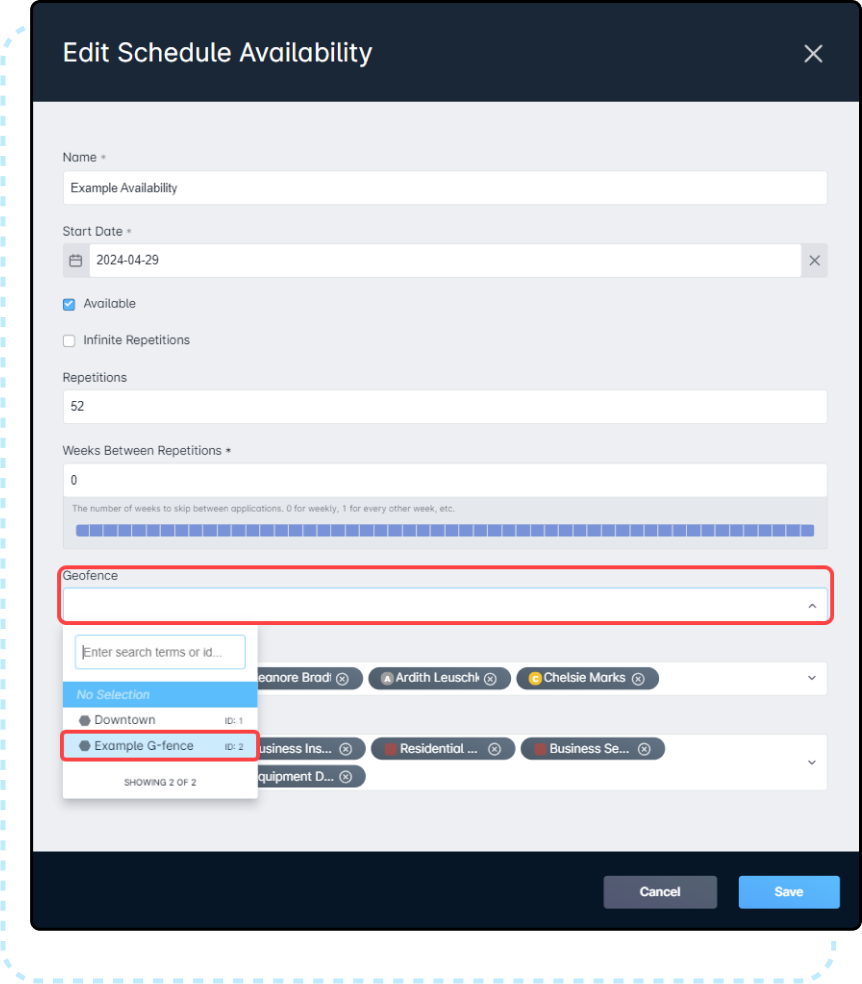
Expand the Geofences dropdown and choose the Geofence you want to apply.
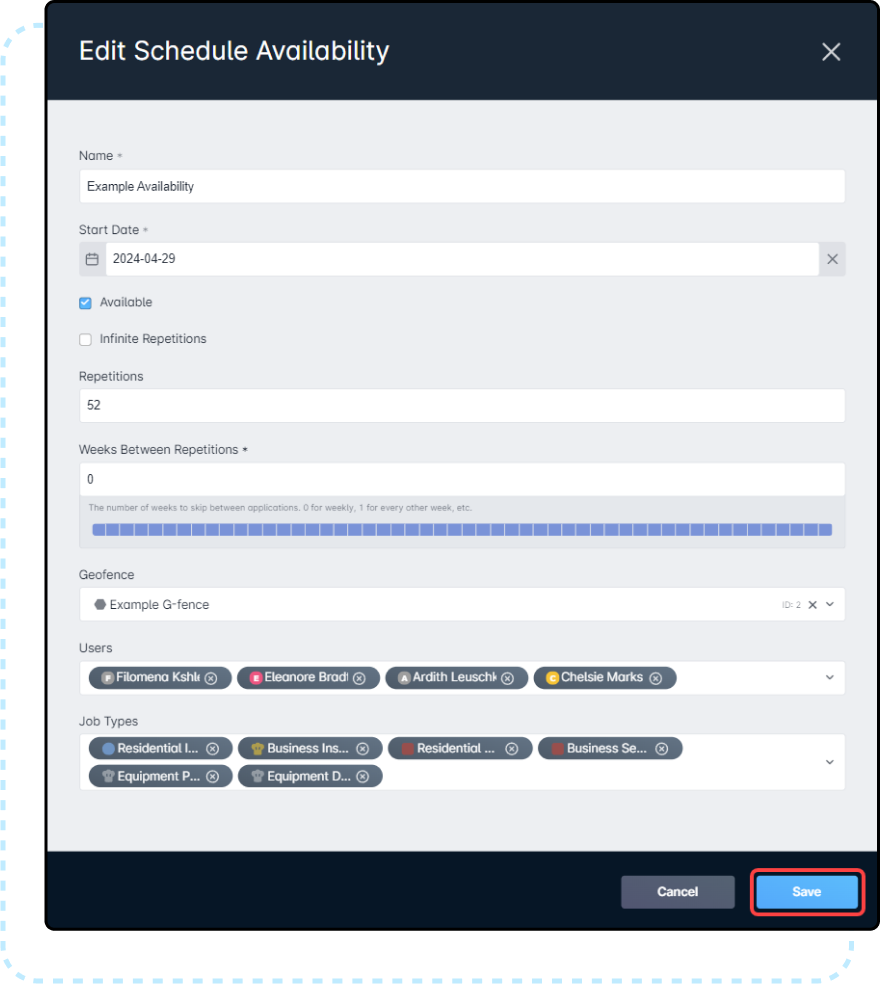
Click Save to apply the Geofence to the Schedule Availability.
The selected Geofence will now apply to the schedule for the listed technicians.
How to Tell if a Geofence is in Place
After a Geofence is created and applied to a schedule, it will affect the selected users and job types.
You can confirm a Geofence is in place in the following ways:
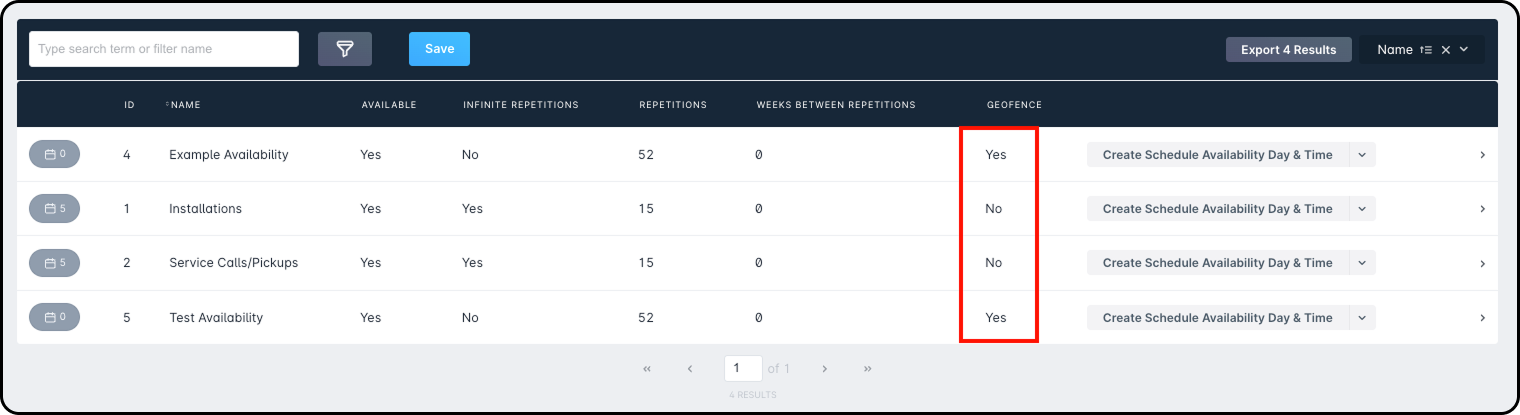
Schedule Availabilities page: Go to Scheduling → Schedule Availabilities. Each Schedule Availability will show whether a Geofence is applied under the Geofence column.
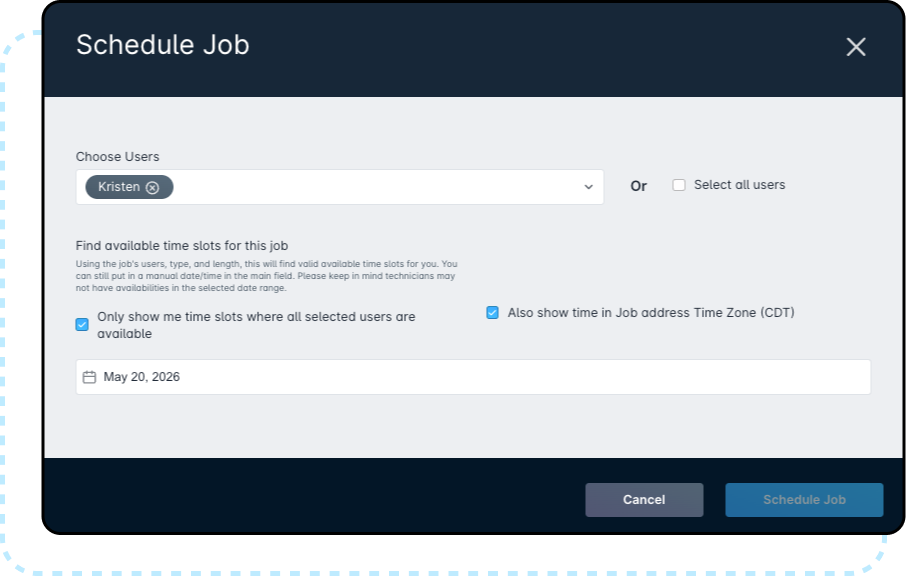
JobsTable: If the job is outside the technician’s Geofence, no availability will appear when you try to assign the job.
Dispatcher View: If the job is outside the technician’s Geofence, an Invalid tag will appear.In this case, you will not be able to save the schedule changes.
The technician’s schedule may also appear grayed out, which is another sign the job does not fit within their Geofence.
 Updated
by Mitchell Ivany
Updated
by Mitchell Ivany
 The technician’s schedule may also appear grayed out, which is another sign the job does not fit within their Geofence.