Table of Contents
Message Categories: Overview & Use Cases
 Updated
by Jennifer Trower
Updated
by Jennifer Trower
Read Time: 6 mins

Messaging Categories are used to ensure the appropriate account contacts are notified when sending out triggered messages from your Sonar instance. The way messaging categories function is by first being assigned to both triggered messages and account contacts; when the triggered message is sent out, it will only be received by account contacts who have been assigned the same message category as the triggered message.
For example, a 'Financial' message category would be used to ensure that any messages related to payments (i.e., when a payment is refunded, when an automatic payment fails, or when an invoice is due) are received by the contact responsible for the account's financial matters.
Creating a Message Category
To create a message category:
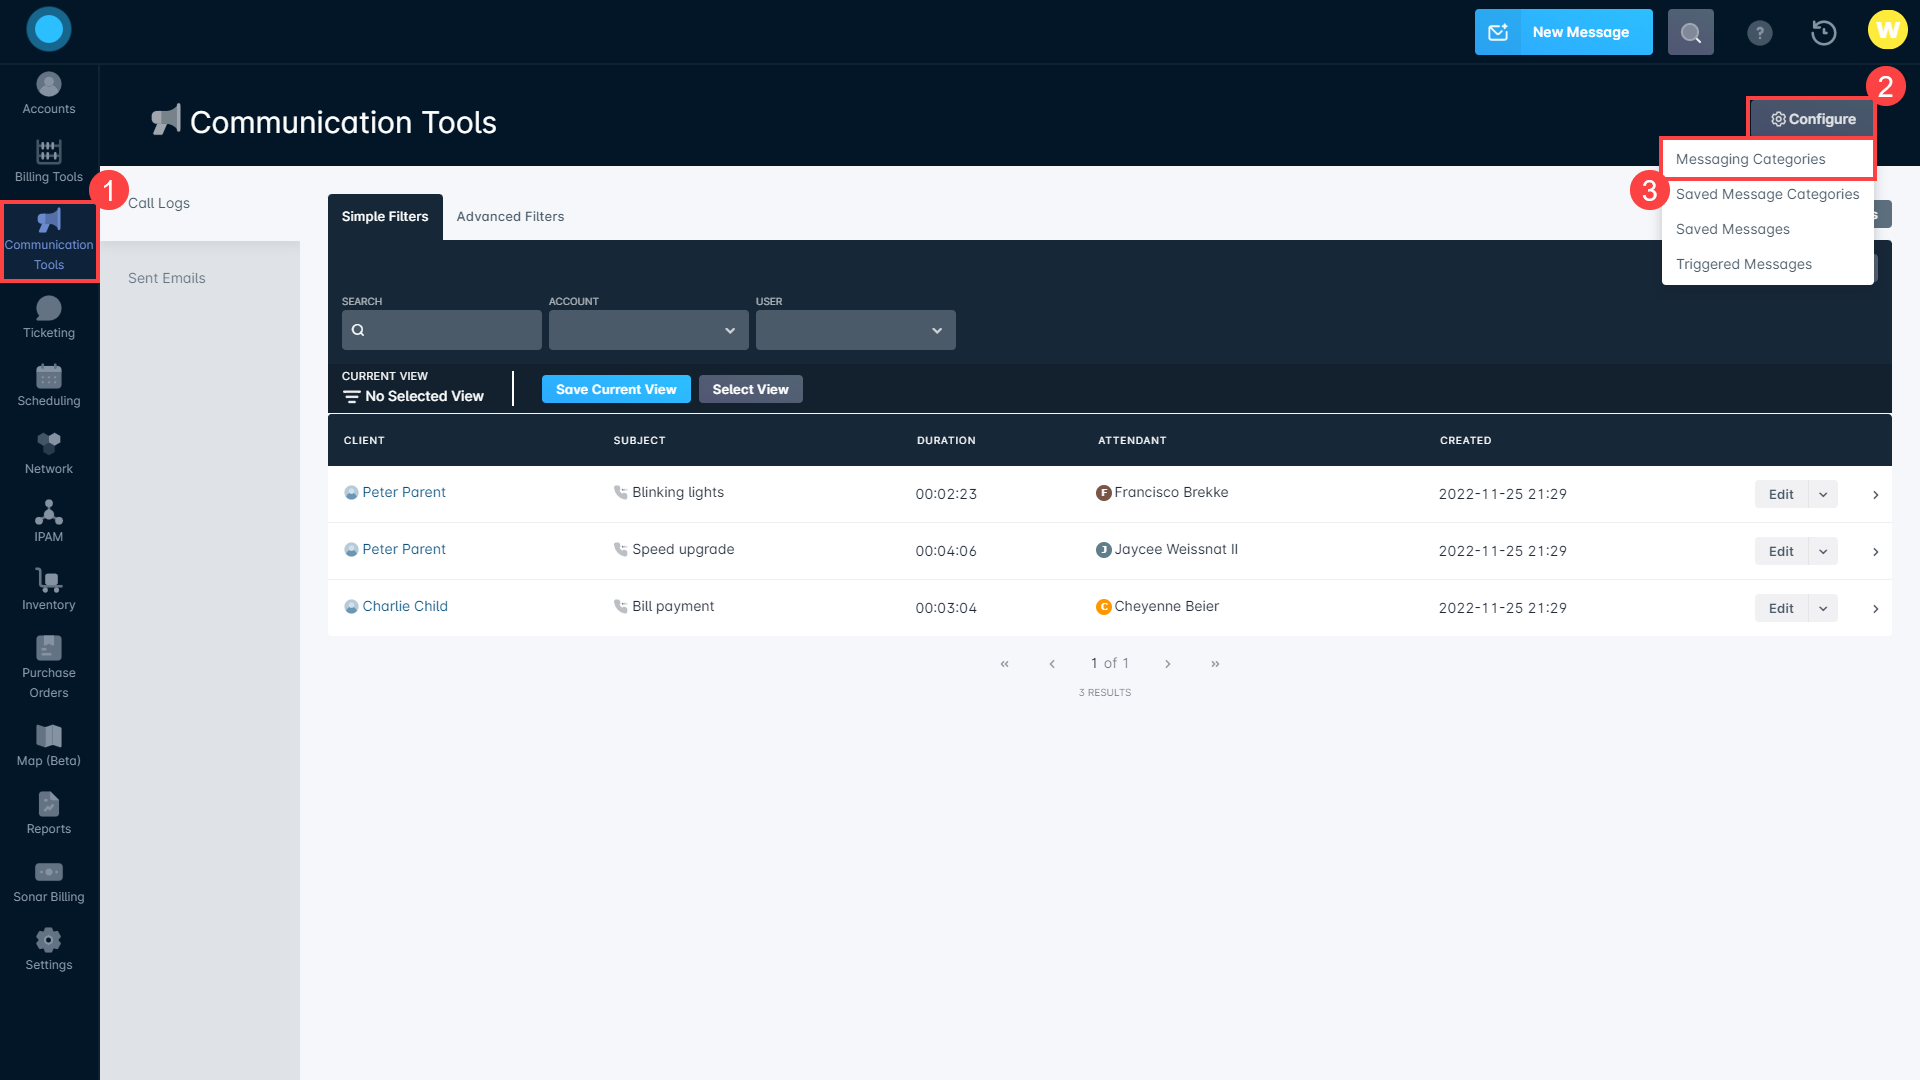
- Click on the “Communication Tools” module
- Click “Configure”
- Click “Messaging Categories” from the sub-menu:
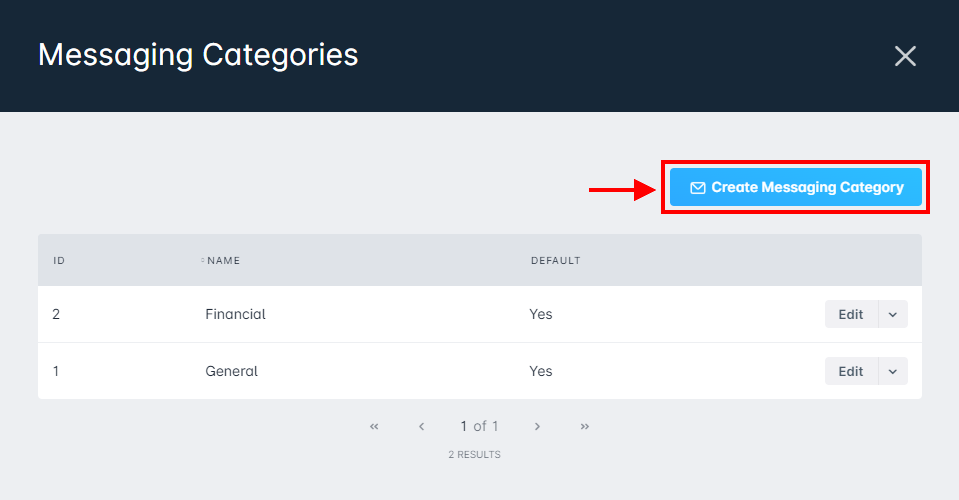
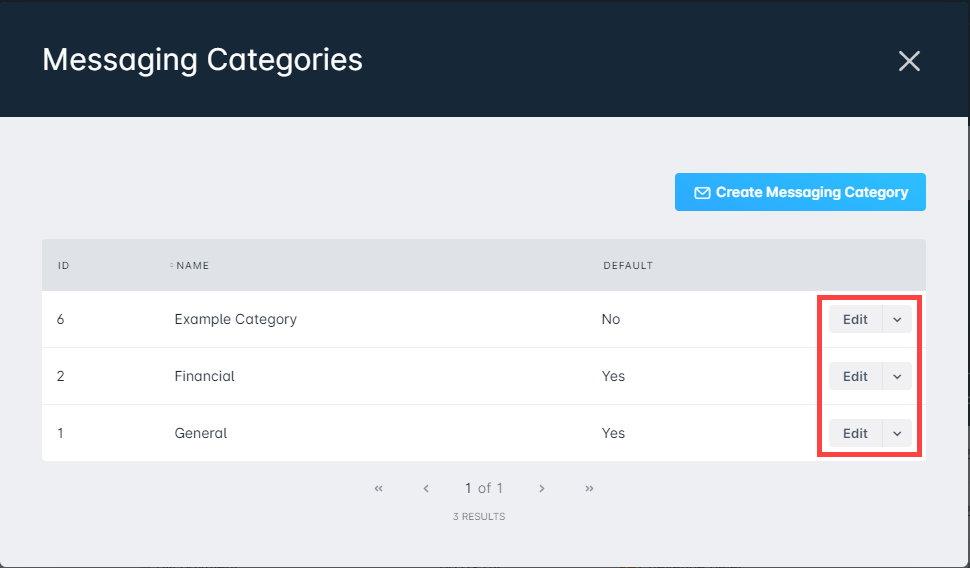
- In the “Messaging Categories” window that appears, click on “Create Messaging Category”:
- In the new window, fill in the category details:
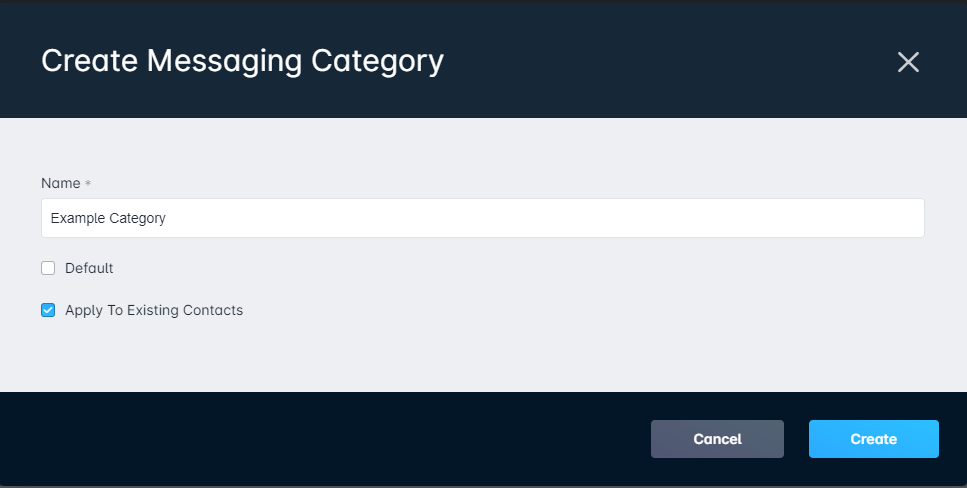
Click here for an overview of the fields within the Create Message Category window
Name: The name of the message category. Before creating message categories, you should have a relative idea of all the categories you plan on creating within your instance, based on the types of triggered messages you plan on sending out. This will help to ensure that the categories accurately align with the types of messages you will be sending and the type of contacts that will be receiving them.
Default: When this is checked, the message category will be automatically applied to any new contacts that are created. When creating a contact, the message category will be prepopulated in the Message Categories field of the Create Contact window, but can be removed, if needed.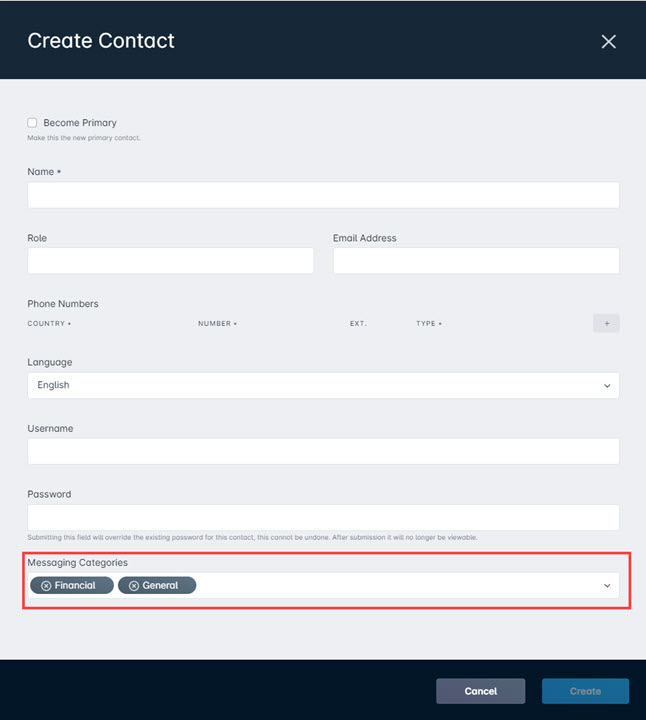
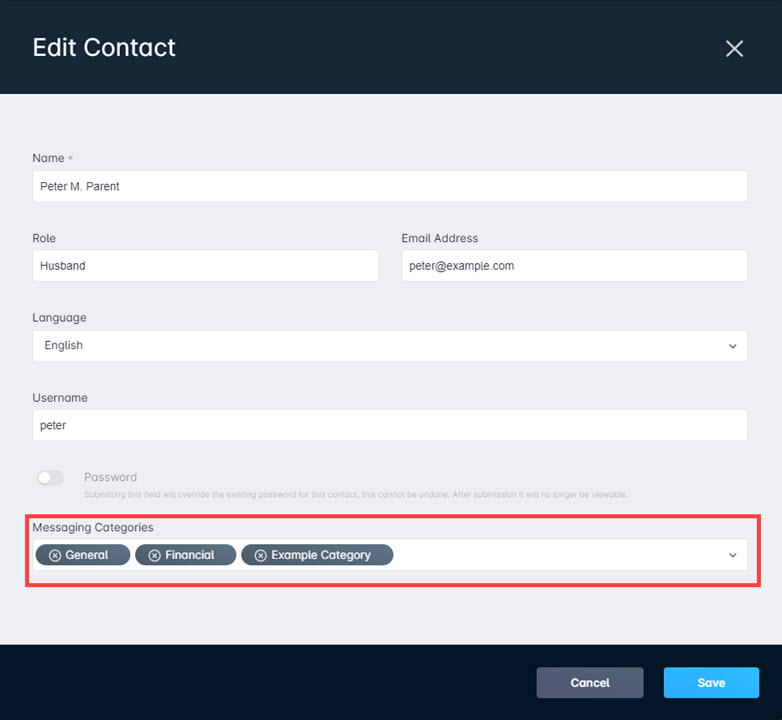
Apply To Existing Contacts: If this is checked, the message category will automatically be applied to all existing contacts. If needed, the message category can be removed from existing contacts by navigating to the Contacts tab of the associated account and clicking the "Edit" button next to the appropriate contact. From the Edit Contact window that appears, the message category can be removed by clicking the 'x'.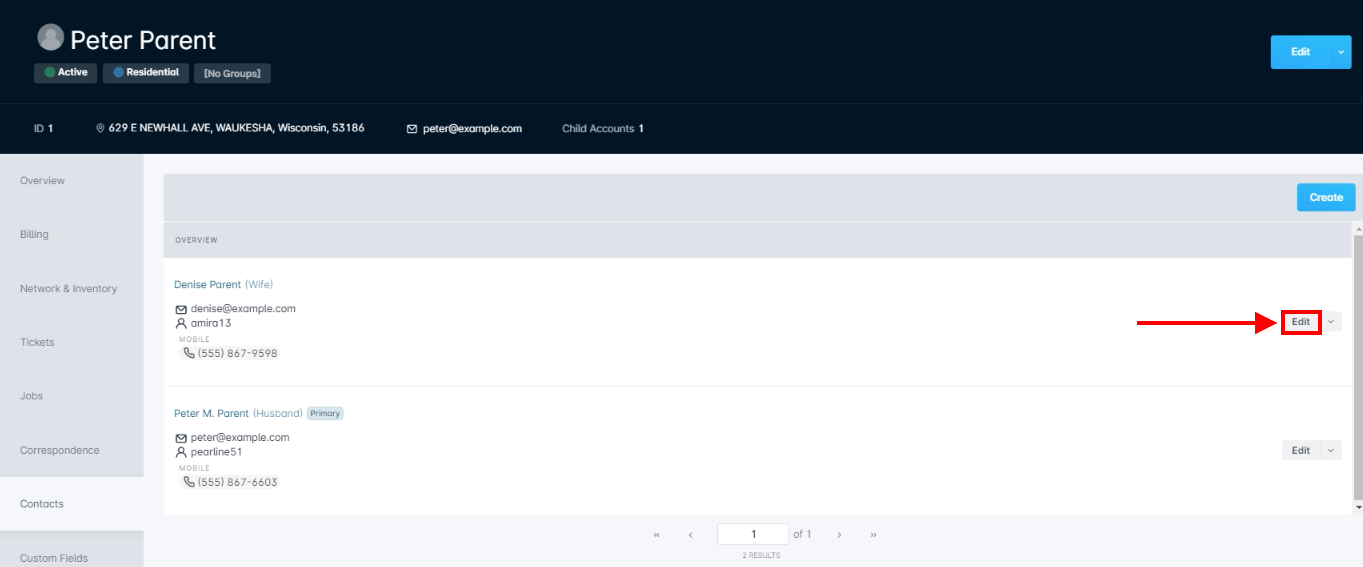
- Click “Create” – the message category will now appear in the table and can be edited or deleted through the “Edit” and downward arrow buttons to the right.
- Now that the message category is created, you'll need to apply it to your appropriate triggered messages and account contacts. Steps on how to do each of these are provided below.
Applying Message Categories to Triggered Messages
Messaging categories can be applied from the Triggered Messages screen in two different methods, both of which are listed below – click “Details” to see more information.
- During the triggered message creation process
Details
The below steps assume familiarity with the creation process for triggered messages. If you are unfamiliar with this process, please refer to the Triggered Messages: Setup article here.
1. Once you have completed the message setup, navigate to Communication Tools → Configuration → Triggered Messages
2. Click "Create Triggered Message"
3. From the Create Triggered Message window, select the desired message category from the "Messaging Categories" list
4. Complete the remaining required fields and click "Create" - Editing the triggered message, after it has already been created
Details
1. Navigate to Communication Tools → Configuration → Triggered Messages
2. Click "Edit" for the triggered message you wish to modify
3. From the Edit Triggered message window, select the desired message category from the "Messaging Categories" list
4. Click "Save"
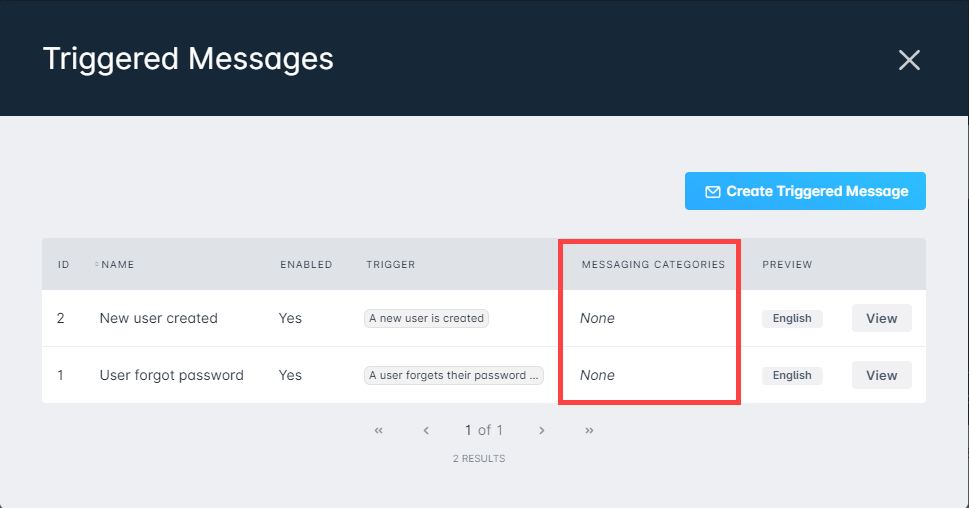
Once you have applied the message category to the triggered message, the category will be visible from the Messaging Categories column.
Applying Messaging Categories to Account Contacts
Messaging categories can be applied to contacts in a few different ways, all of which are described below – click “Details” to see more information.
- During the account creation process, when completing the Primary Contact information
Details
1. Navigate to the Accounts screen
2. Click "Create Account"
3. When completing the information for the Primary Contact (2nd step in Create Account window), select the desired messaging categories from the "Messaging Categories" list
4. Complete the rest of the required information and click "Create" - When creating a new account contact, from within the Contacts tab of an account
Details
1. Navigate to the appropriate account
2. Click into the Contacts tab
3. Click "Create"
4. Select the message categories from the "Messaging Categories" list
5. Complete the rest of the required fields and click "Create" - From the Contacts tab of an account, by editing the contact
Details
1. Navigate to the appropriate account
2. Click into the Contacts tab
3. Click "Edit" next to the appropriate contact
4. Select the message categories from the "Messaging Categories" list
5. Click "Save"
Example Use Cases
Below are some commonly used message categories, along with a description of their use:
Message Category | Use Case |
General | The general message category typically exists to catch most triggered messages that don’t fall into specific categories. |
Financial | Financial messages involve payment – typically used for invoicing and for notifying customers when payment is due, overdue, or failed. |
Outage Notifications | This message category is commonly used to notify individuals of upcoming maintenance to their network connection, or for notifying customers of outages caused by external factors as well. |
Promotional | Promotional can be used for contacting the customer(s) with details about the latest pricing promotions, events, or limited time offers. |
Service Related | The service related message category might be used for notifying customers of their usage stats as a warning, when a service call is scheduled, or when a service is added to the account or modified. |
Message Categories with Multiple Companies
When multiple companies are deployed in a shared Sonar instance, configuring your message settings becomes slightly more complex. Triggered Messages, Message Categories, and Account Contacts all need to be configured for flawless communication to occur. To set things up, do the following:
- Ensure each company added to your Sonar instance has a unique domainIf you plan to share domains between companies, you can still largely follow this section, as the logic applies regardless.
- Create your distinct, Company-specific Messaging Categories
- For example, you could create two new categories – one for company "A", and another for company "B".
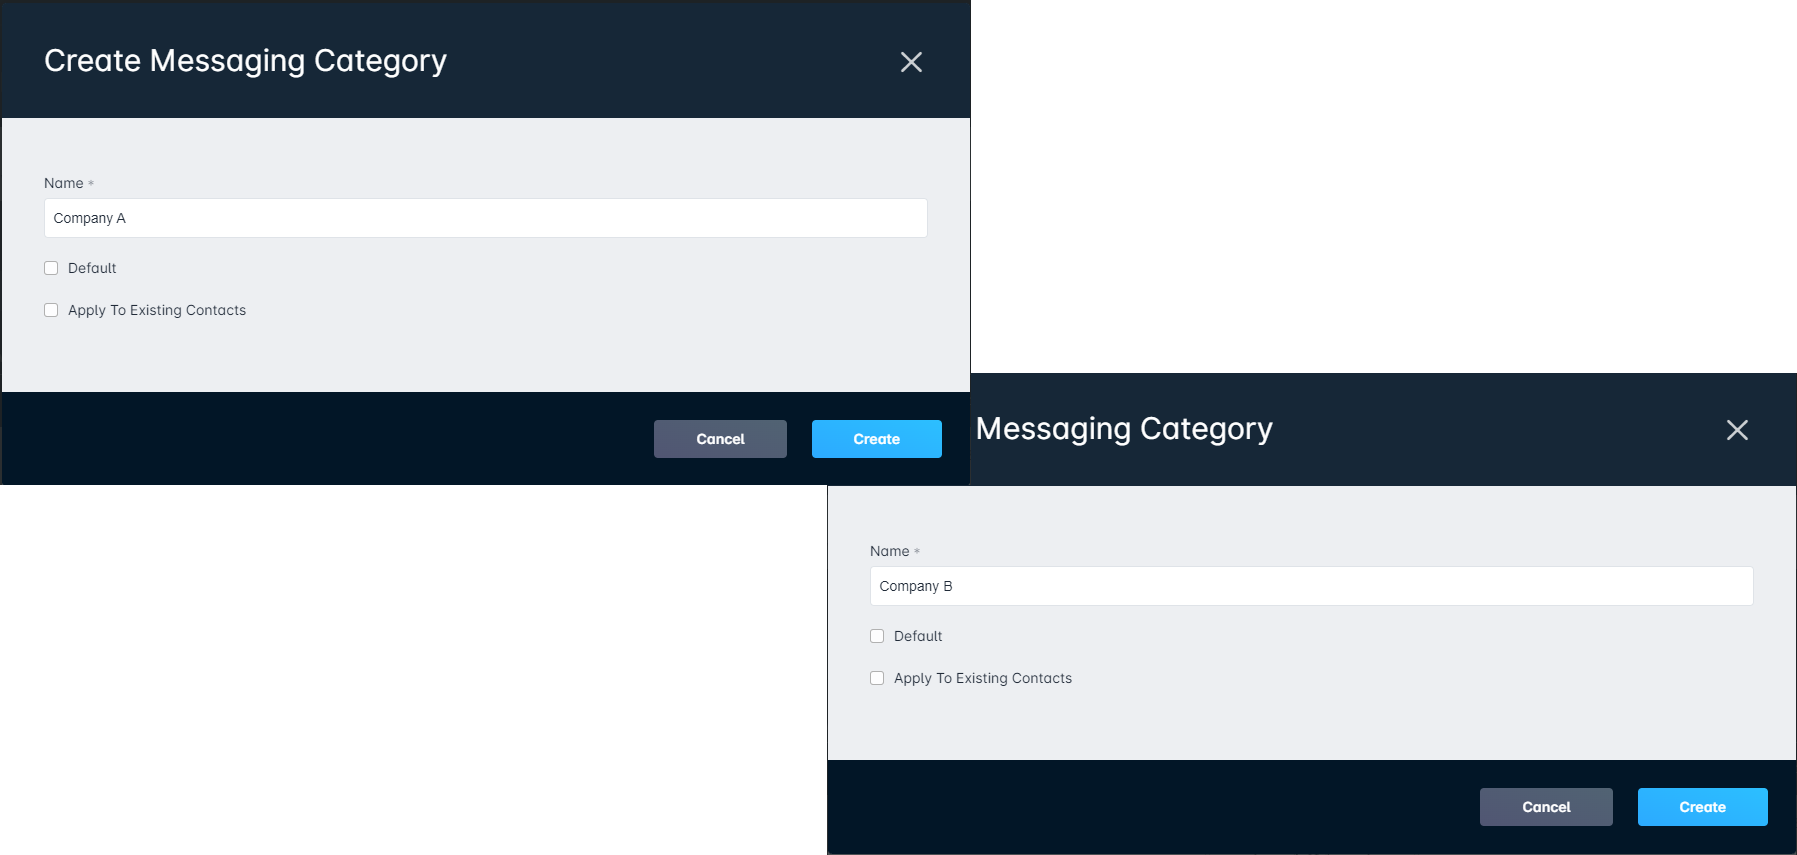
- For example, you could create two new categories – one for company "A", and another for company "B".
- Create your Triggered Message, assigning it to the company's Messaging Category, and Email Domain.
- For each company (and domain) in your instance, a copy of the triggered message will need to be created. For example, the first Triggered Message would be set to the "Company A" category and Email Domain. Then, duplicate the Triggered Message and set it to the "Company B" category and Email Domain.
- Ensure the Contact on each Customer Account has the Message Category applied to them, when relevant. When a customer account is created in your Sonar instance, they would be assigned a message category based on their assigned company.
- For example, a non-billing Contact on the account would not need to receive Company-specific billing emails
This allows your organization to send Triggered Messages using this category, enabling perfect, clear communication every time.