Table of Contents
Setup of Inventory: Manufacturers, Categories, and Assignees
 Updated
by Mitchell Ivany
Read Time: 6 mins
Inventory Model Categories
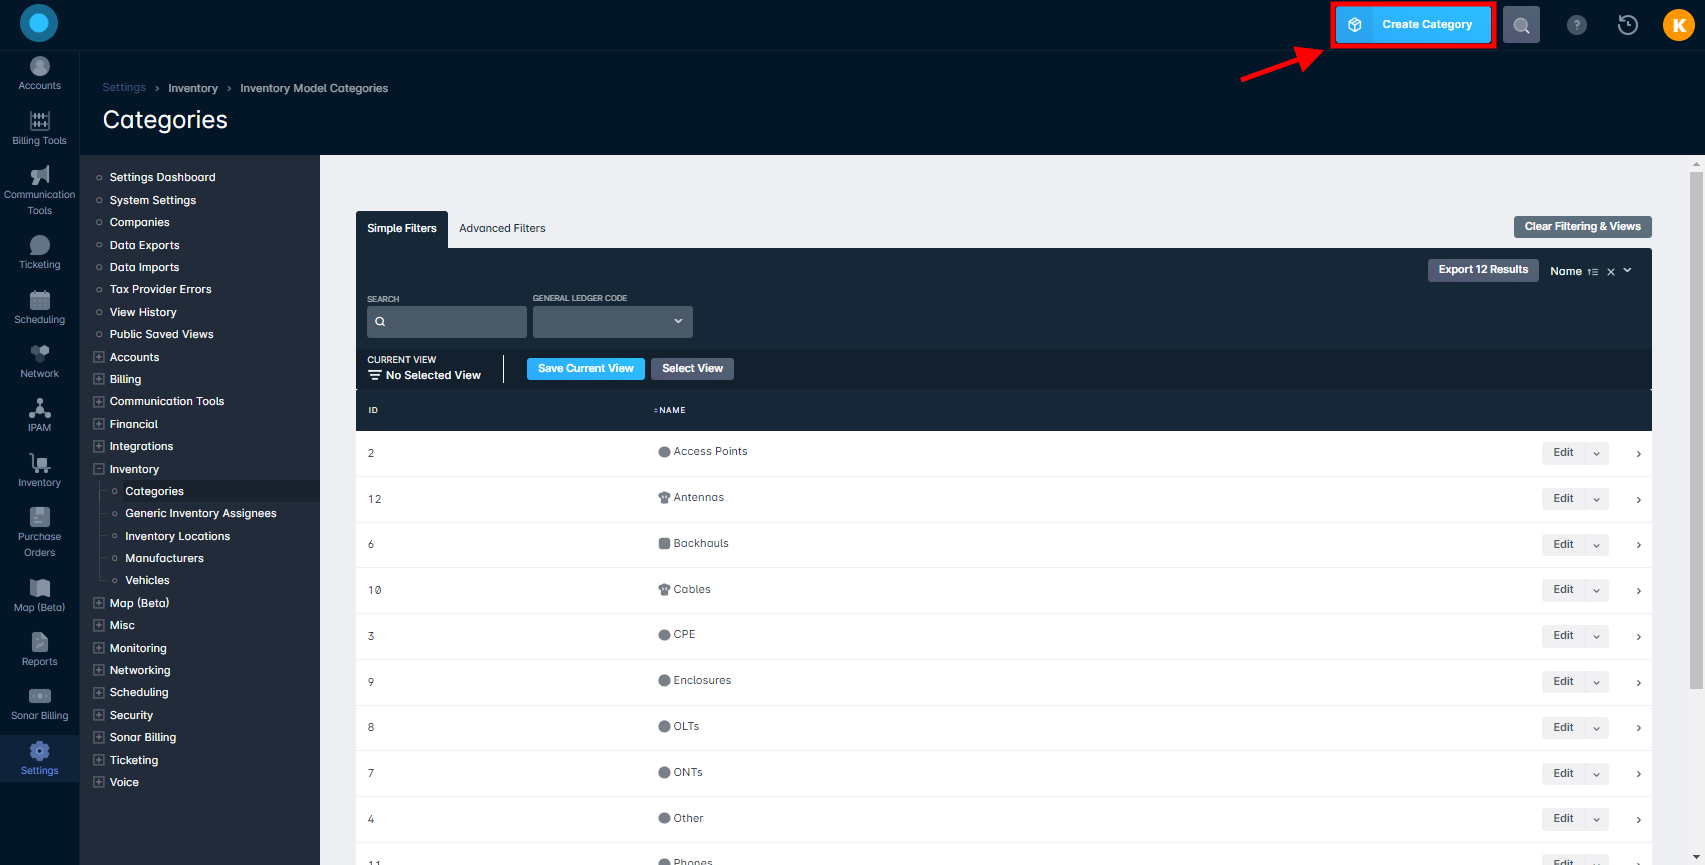
Sonar users can categorize their inventory in whichever way makes sense based on their business model. In the below example, the customer has categorized items according to their high-volume hardware, and has included a category for miscellaneous items called Other.
To add an inventory model category, follow these steps:
- Navigate to Settings → Inventory → Categories
- Click “Create Category” in the top-right corner
- Enter the name of the category you are trying to add (i.e., Non-CPE)
- Optionally, you can also add in a General Ledger Code that will be associated with this category
- Select an appropriate icon for the categoryIt is important to select an icon to represent the category of equipment you are adding into Sonar. This icon will appear in Pulse when monitoring your network. Pick an icon that will best depict each category of equipment.
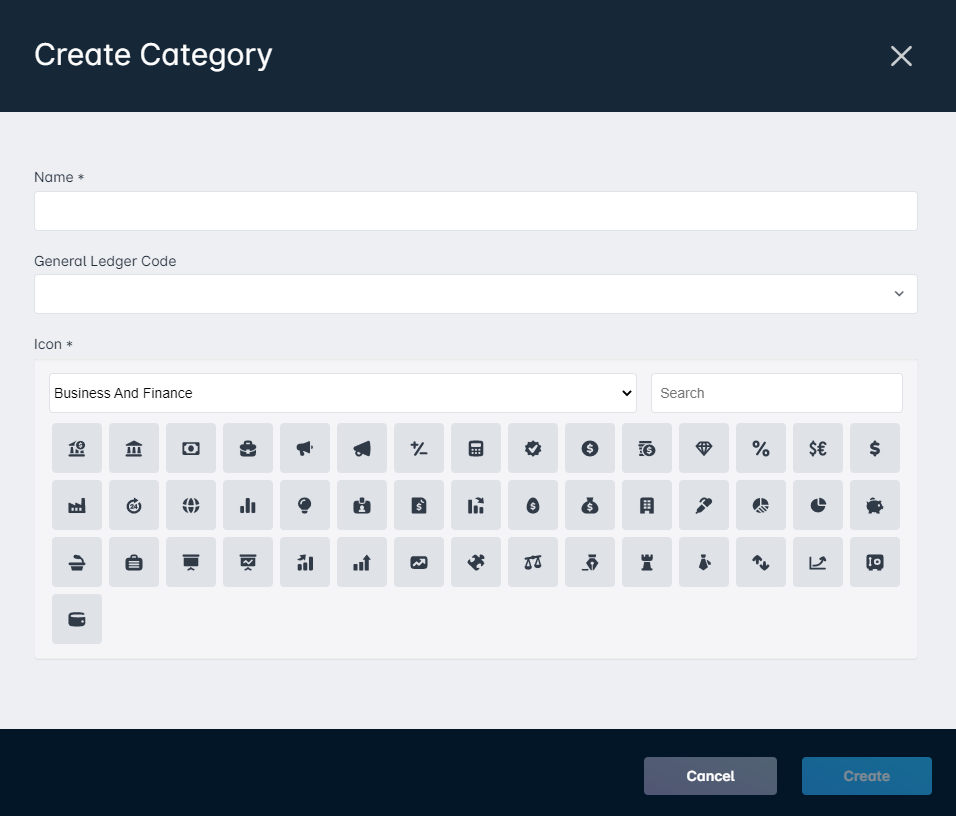 When choosing your category icon, use the drop-down to browse through different sets of icons, or use the search bar to quickly find a specific image.
 - Click "Create" from within the Create Category window – your new inventory category will now be displayed in the list within the Categories screen
Inventory Model Manufacturers
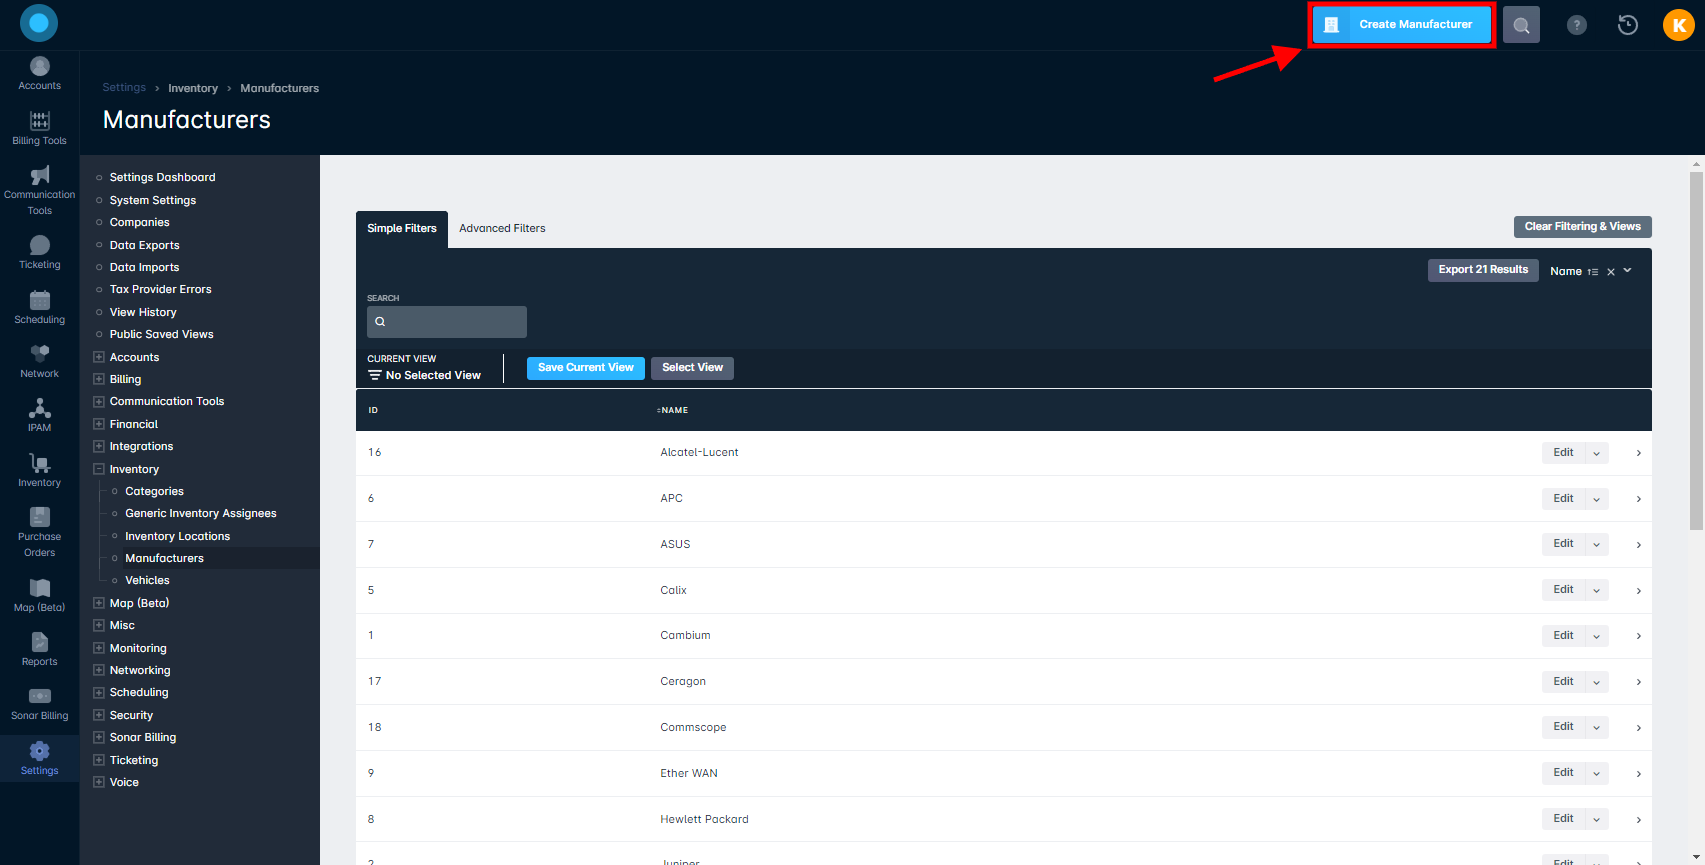
The Manufacturers screen allows the configuration of device manufacturers, further increasing the precision of categorization for hardware devices. Similar to Inventory Model Categories, the Manufacturers category is free-form, however, it should represent the hardware manufacturers for the equipment being used.
To add an inventory model manufacturer into Sonar, follow these steps:
- Navigate to Settings → Inventory → Manufacturers
- Click "Create Manufacturer" in the top-right corner
- From the Create Manufacturer window that appears, give the category an appropriate name (i.e., "Netgear" is used in the example below)
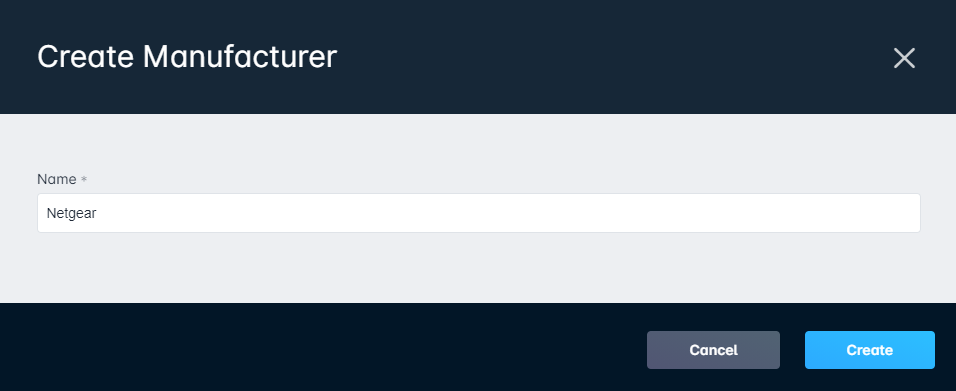
- Click "Create"
Assignees
An Assignee in Sonar is an entity that may have inventory items assigned to it. An assignee can be a person, a place, a vehicle, or a generic placeholder. Contrary to specific assignees, generic assignees need only be given a name before creation and would be best used when the assignee does not fit into one of the other specific inventory assignees - such as itemized buckets, contractors who don't have access to the instance as users, and non-addressed locations.
Generic Inventory Assignees
To create a generic inventory assignee:
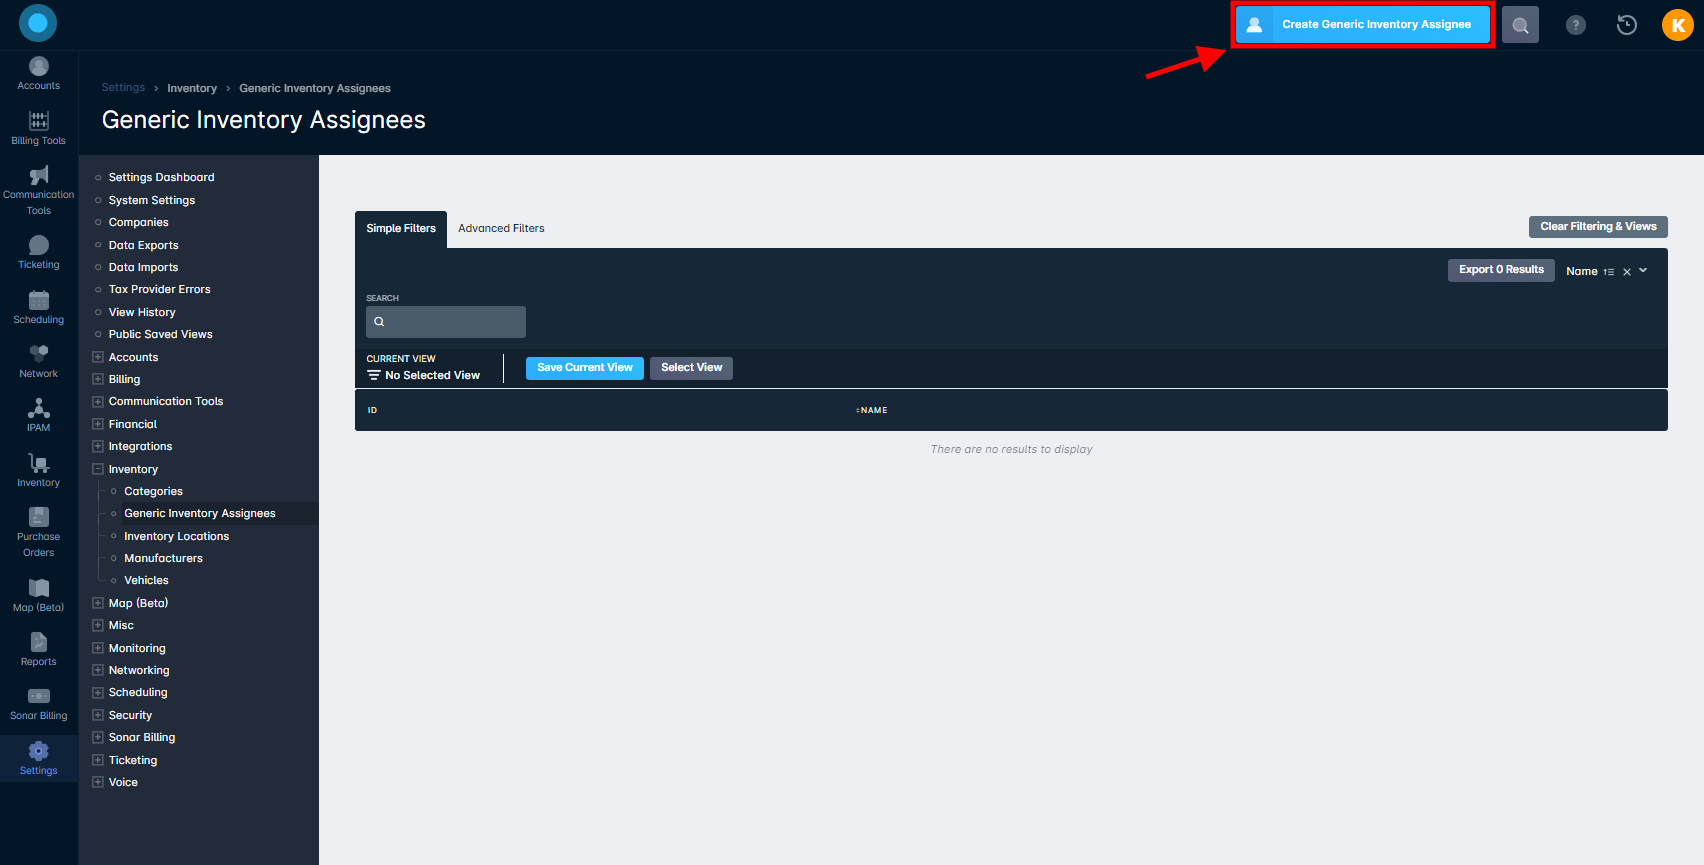
- Navigate to Settings → Inventory → Generic Inventory Assignees
- On the top right-hand corner, click "Create Generic Inventory Assignee"
- Enter the name you want the assignee to have (i.e., in the example below we have named it "Installer", which will be used to assign equipment to installers)
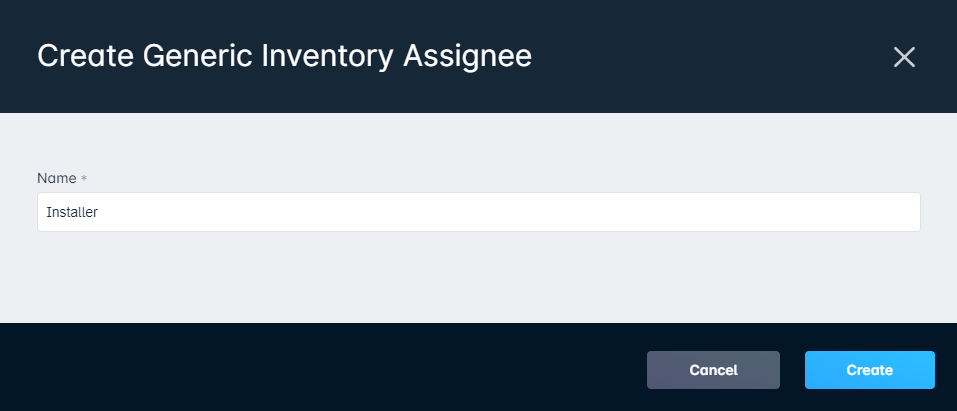
- Click "Create"This process can be repeated to create additional generic inventory assignees.
Inventory Locations
Inventory locations cover address-specific locations, used primarily for network sites or storage sites. The inventory locations require the same address validation as any other proper address within Sonar. Provide the street address and the maps integration will add the latitude and longitude for you, or enter the latitude/longitude coordinates and use the "Set Coordinates From Address" option to have the address filled in.
To create inventory locations in Sonar:
- Navigate to Settings → Inventory → Inventory Locations
- Click "Create Inventory Location" in the top-right corner
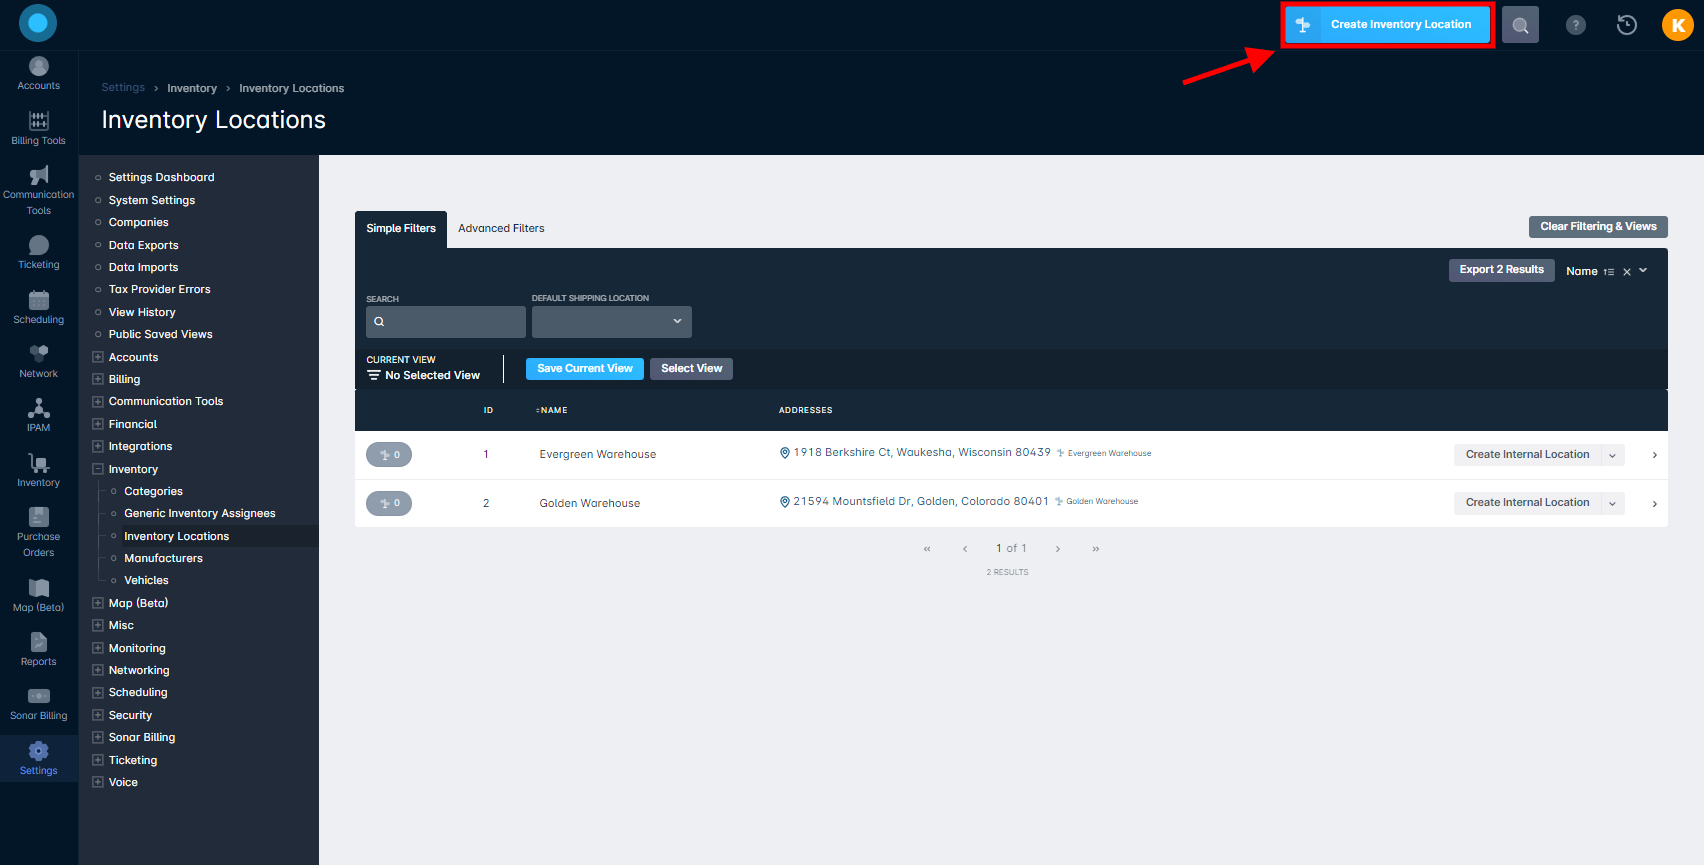
- Complete the fields within the Create Inventory Locations form, including:
- Name of location
- Address Line 1 (and optionally, Address Line 2)
- Country, City, State/Province, and Zip/Postal Code

- Click "Create"
Internal Inventory Locations
Additionally, you can create internal locations within each inventory location, allowing further precision when adding locations and tracking inventory.
To create an internal inventory location for an existing inventory location:
- Navigate to Settings → Inventory → Inventory Locations
- Locate the existing inventory location from the list and click "Create Internal Location"
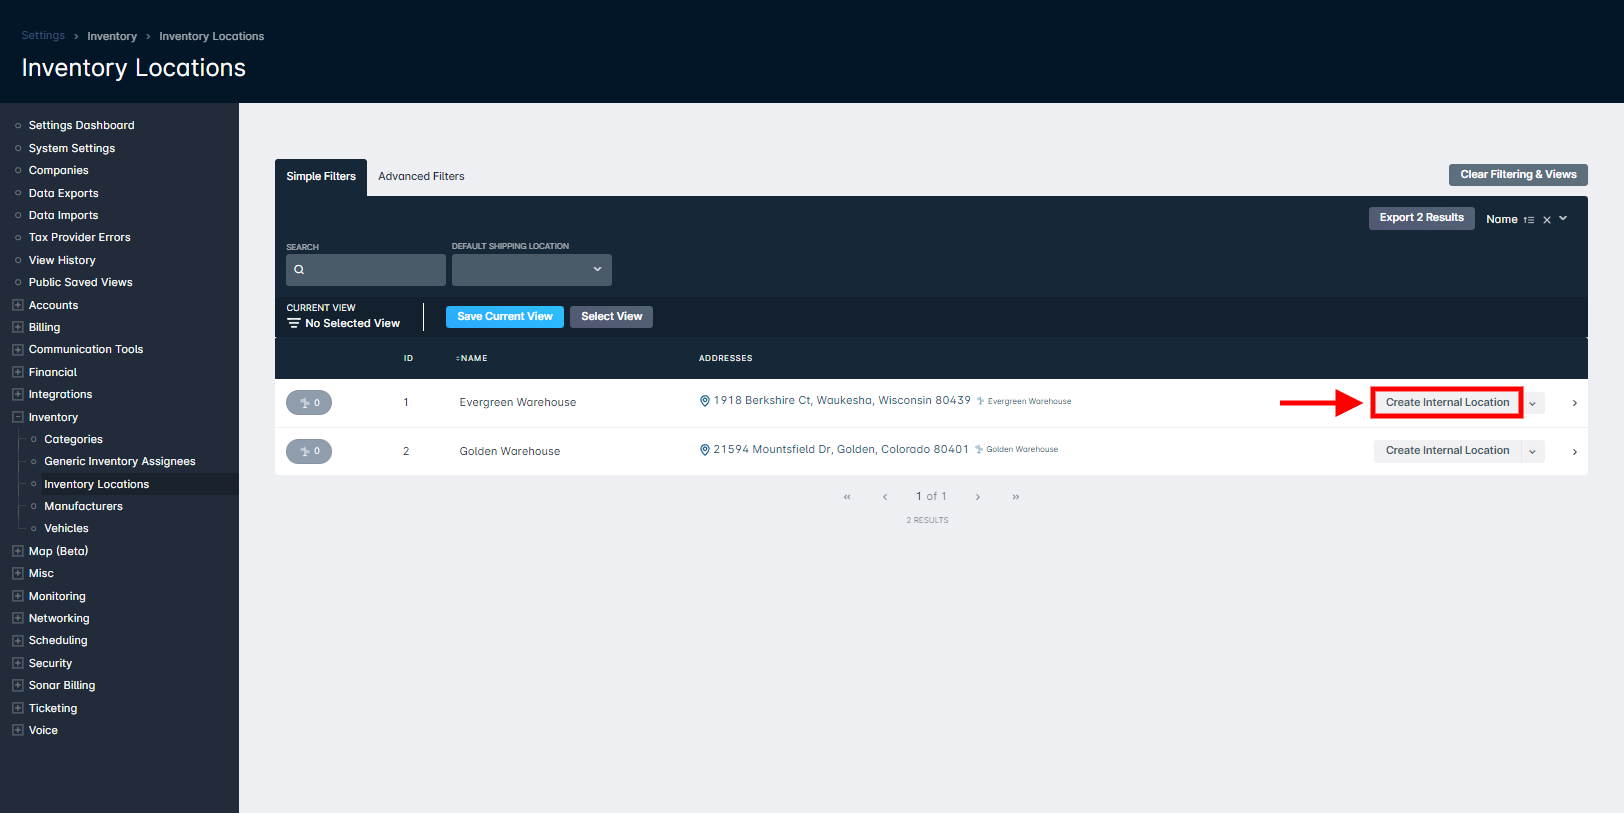
- Give the internal location a name (i.e., for this example, we are creating internal locations for aisles within the warehouse; you could also create an internal location for specific shelves, sections, or rooms, depending on how your inventory is stored)
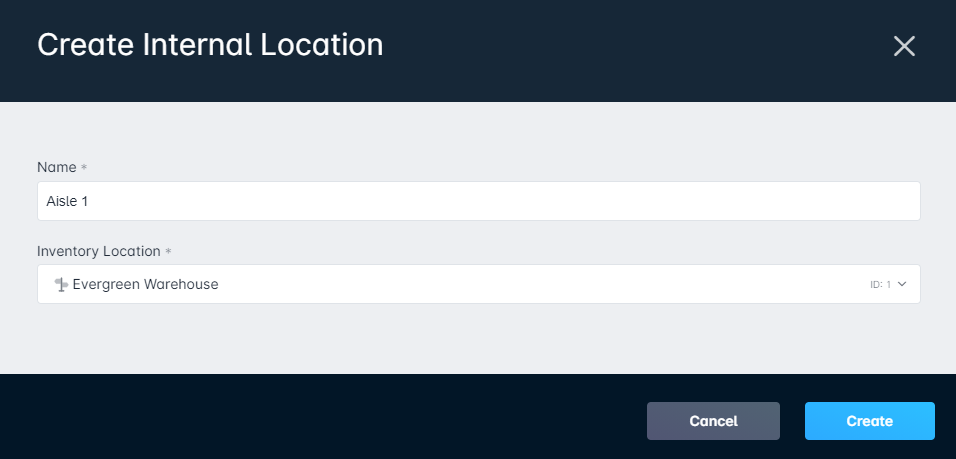
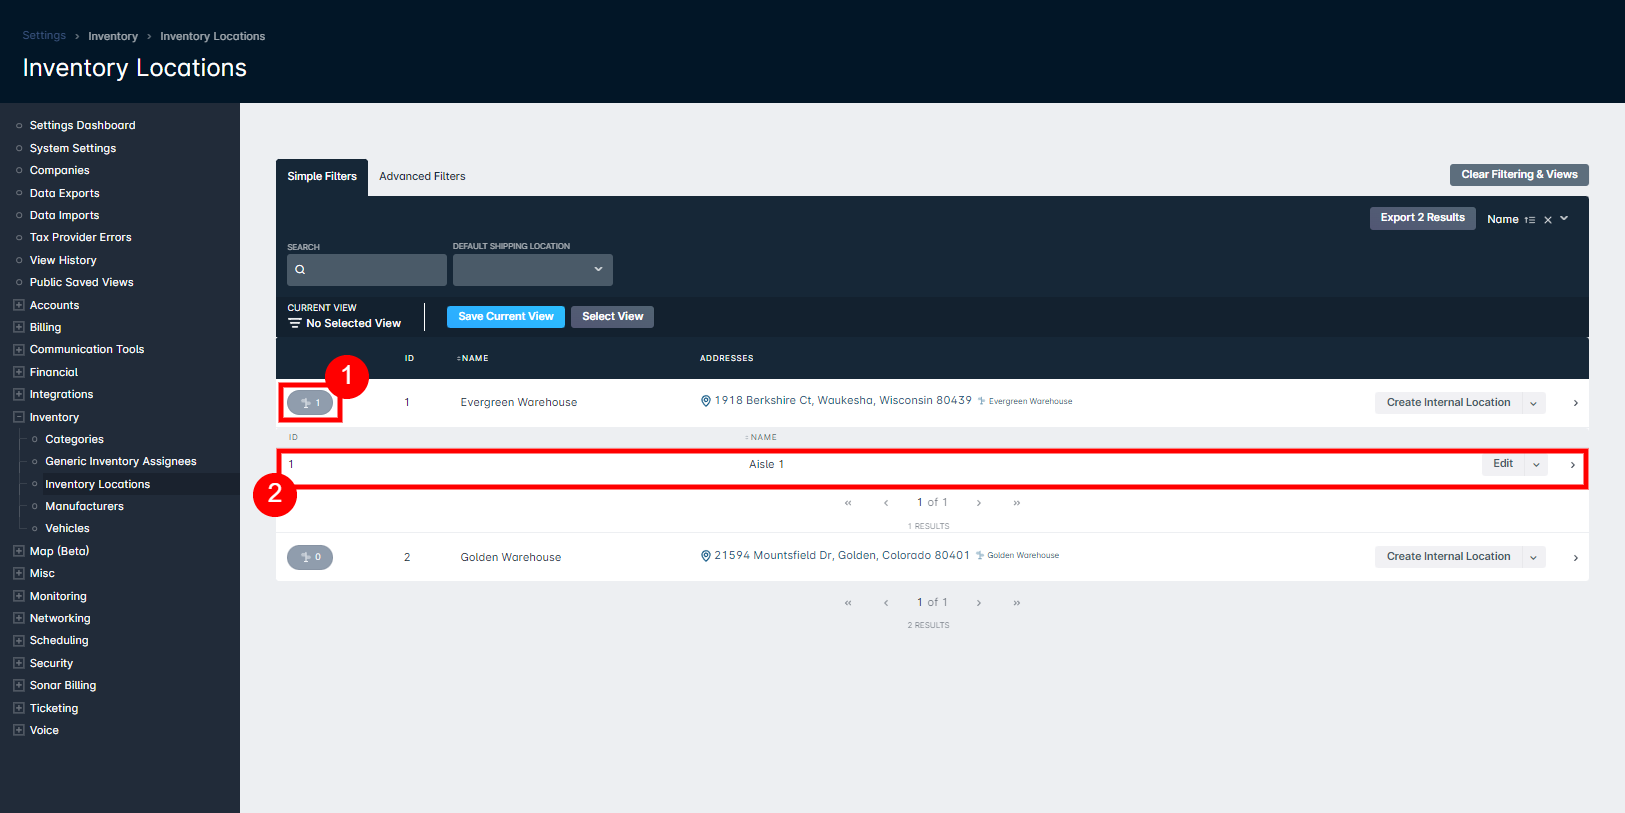
- Click "Create" – there will now be a number next to the inventory location (within the gray bubble) indicating how many internal locations exist for the inventory locationClick on the gray bubble next to the inventory location to view all internal locations that have been created. Once expanded, the ID and name of the internal location will be displayed, along with options to edit, delete, view details, and navigate into the management page for the internal location.
Vehicles
The Vehicles section allows the creation of tracked vehicles for use with mapping as well as inventory assignment. Vehicles can optionally have their make, model, year, and VIN added.
To add a vehicle as an assignee, follow the steps below:
- Navigate to Settings → Inventory → Vehicles
- Click "Create Vehicle" from the top-right corner
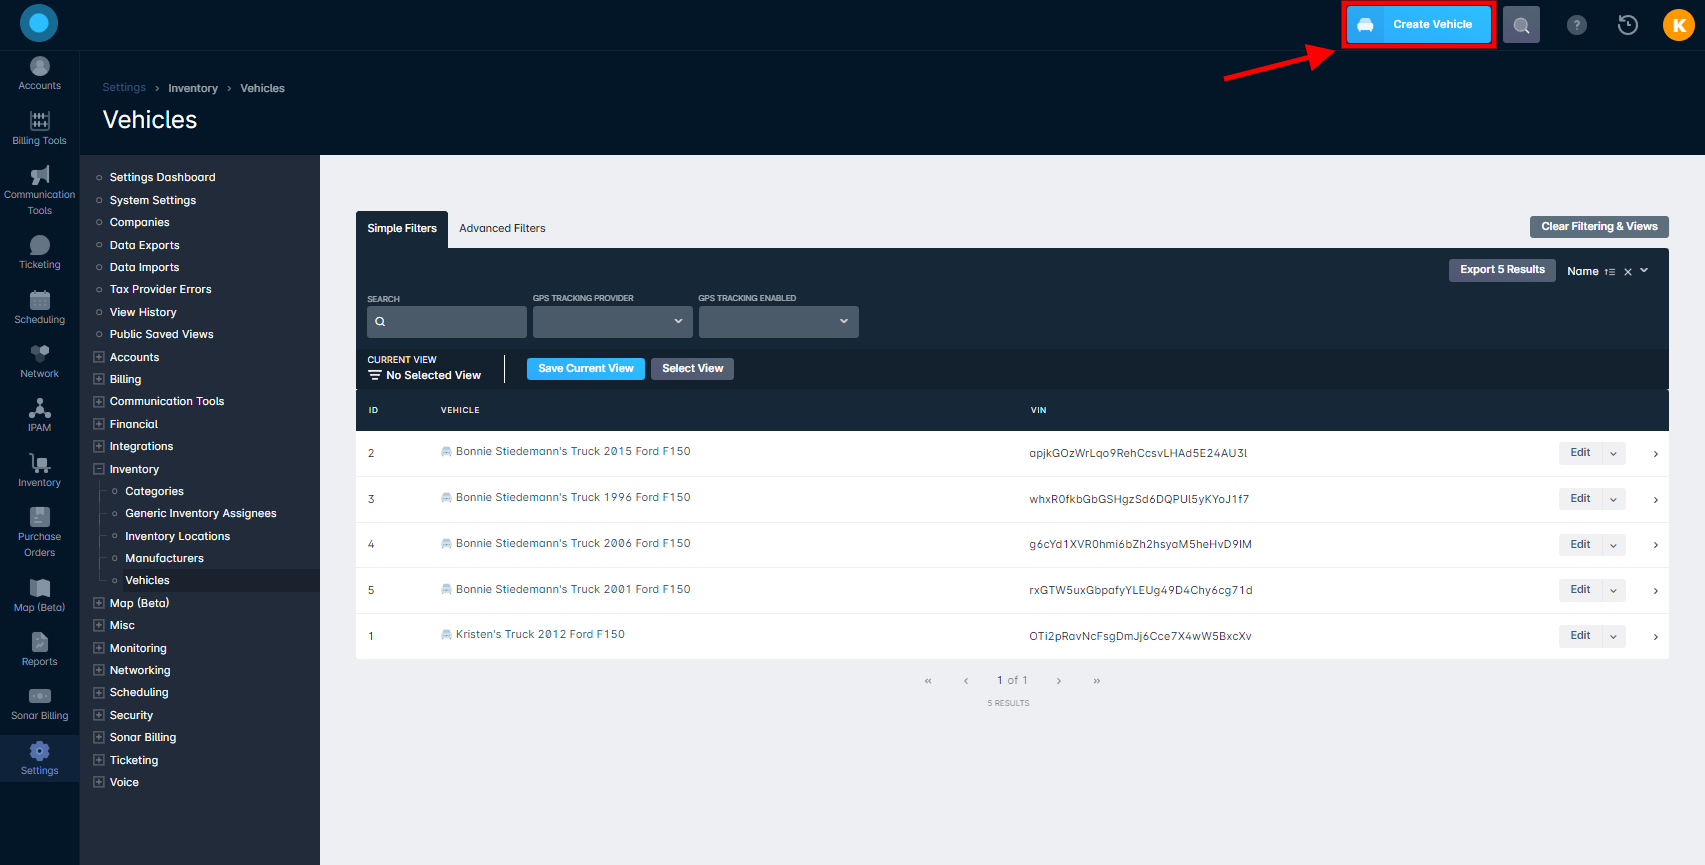
- From the Create Vehicle window that appears, fill out the necessary fields, including:
- Name – enter a generic name, such as 'Installation Truck' or 'Company Truck'
- Manufacturer (in the example below, we are using a Ford)
- Model (such as 'F150')
- Year of the vehicle
- The vehicle's VIN
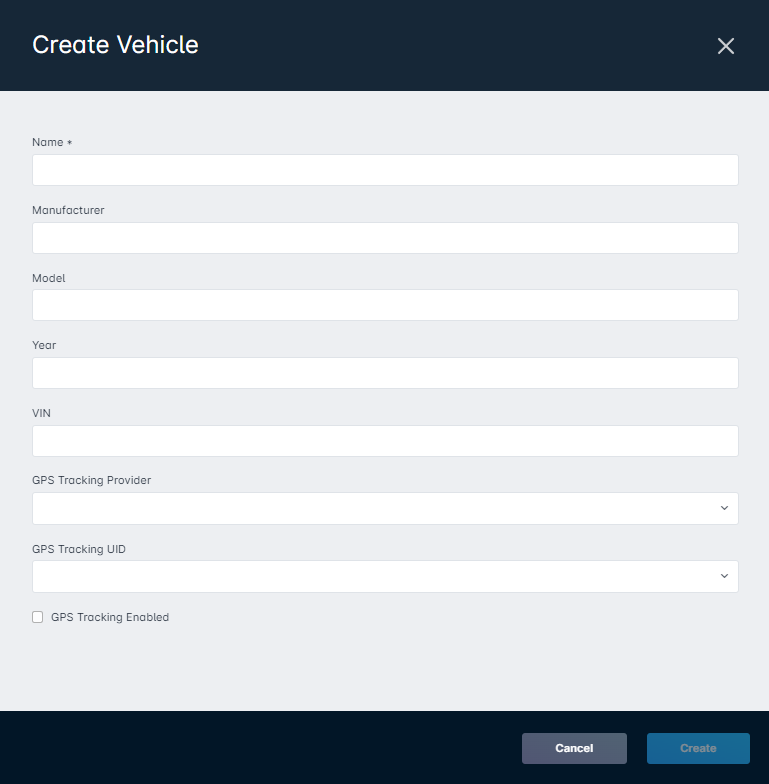 The last 3 fields relate to the GPS Tracking Provider integration, to read more on this feature, click here.
 - Click "Create"
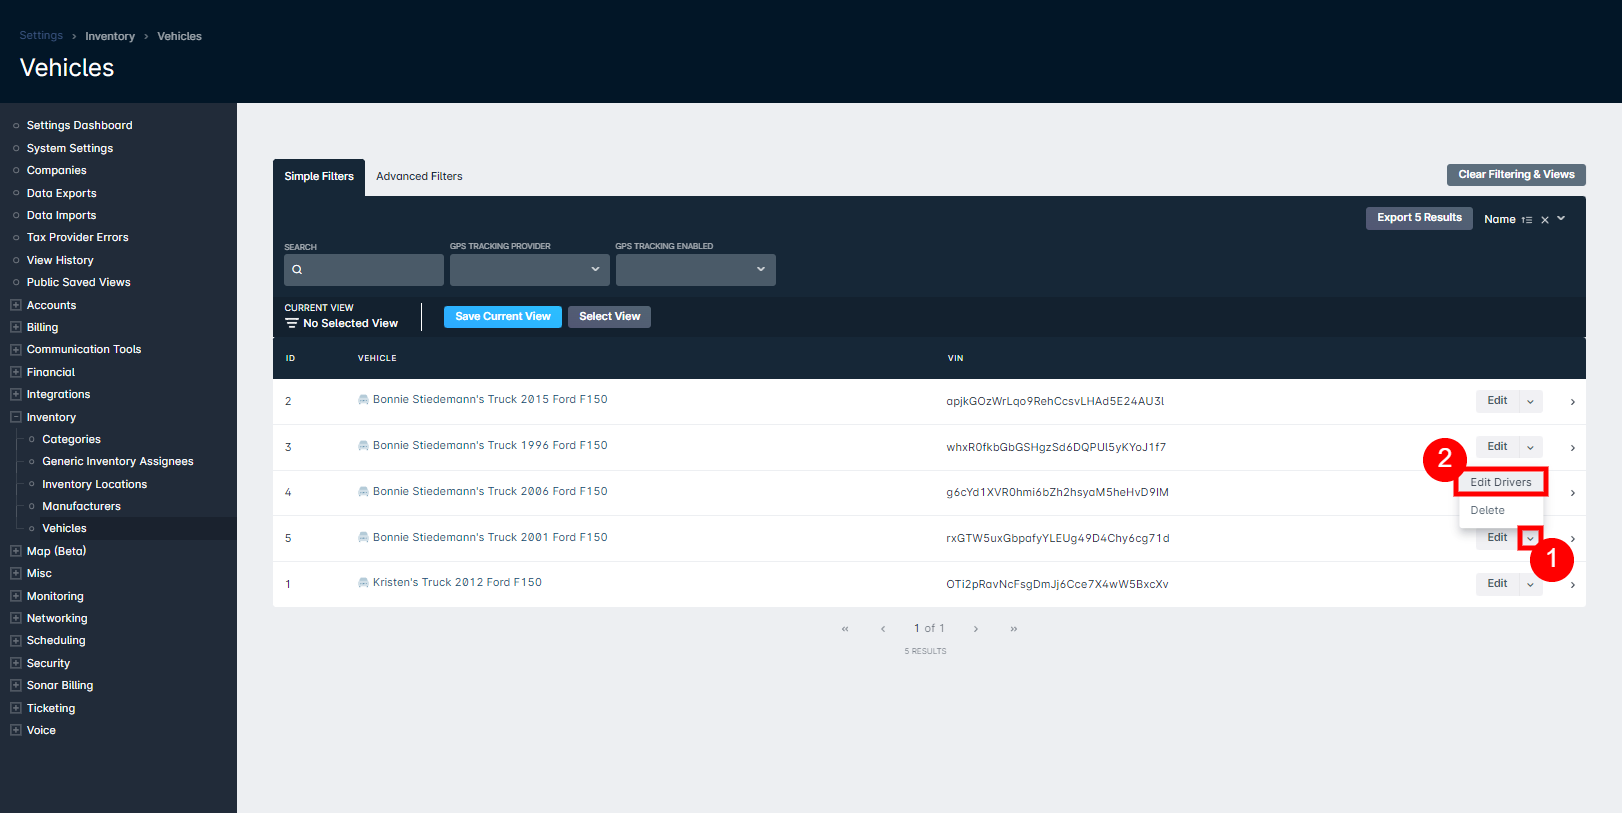
From the modal that appears, use the Users dropdown to select the user(s) you wish to add as a driver to the vehicle and click "Save".
Assignee Best Practices
Below are some best practices around utilizing the various assignee types. These tips will help enable users to take advantage of the power behind the inventory control module.
- A Custom assignee is a catch-all assignee that can be used when the assignee does not fit into one of the other five options.
- If you have installers or service technicians that share work vehicles, then assigning inventory to a Vehicle is a better option than assigning it to a user, as the inventory in the vehicle probably does not change depending on who is driving it. If your field technicians have specific vehicles, you may be better off assigning the inventory directly to a User, but it is mostly a matter of preference.

