Table of Contents
Scheduled Events: Overview & Use Cases
 Updated
by Mitchell Ivany
Updated
by Mitchell Ivany
Read Time: 7 mins

Scheduled events are automated actions that you can set up to modify an account on a future date. They are useful when an account change needs to happen outside business hours, and can also be used as an alternative to making a note to complete an account change at a later date. The scheduled events are configured individually per account, and once set up, are viewable from the Overview tab of an account.
By keeping this in mind, you can set expectations appropriately: events will always respect their minimum start time, but slight delays may occur under heavy demand.
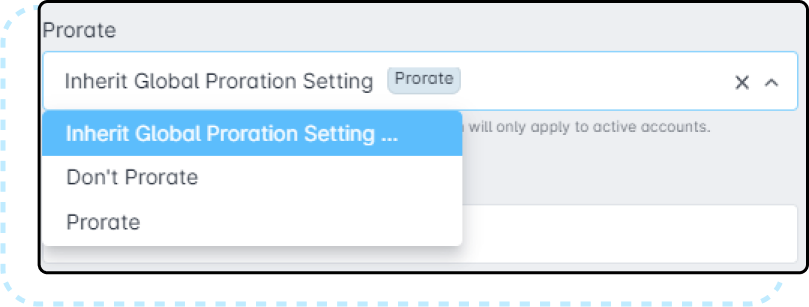
Scheduling service or account status changes can also be prorated, and the dropdown will default to using your instance's default settings. If you'd like to override these settings, expand the dropdown, and select whether to pro-rate the services.
How To Set Up A Scheduled Event
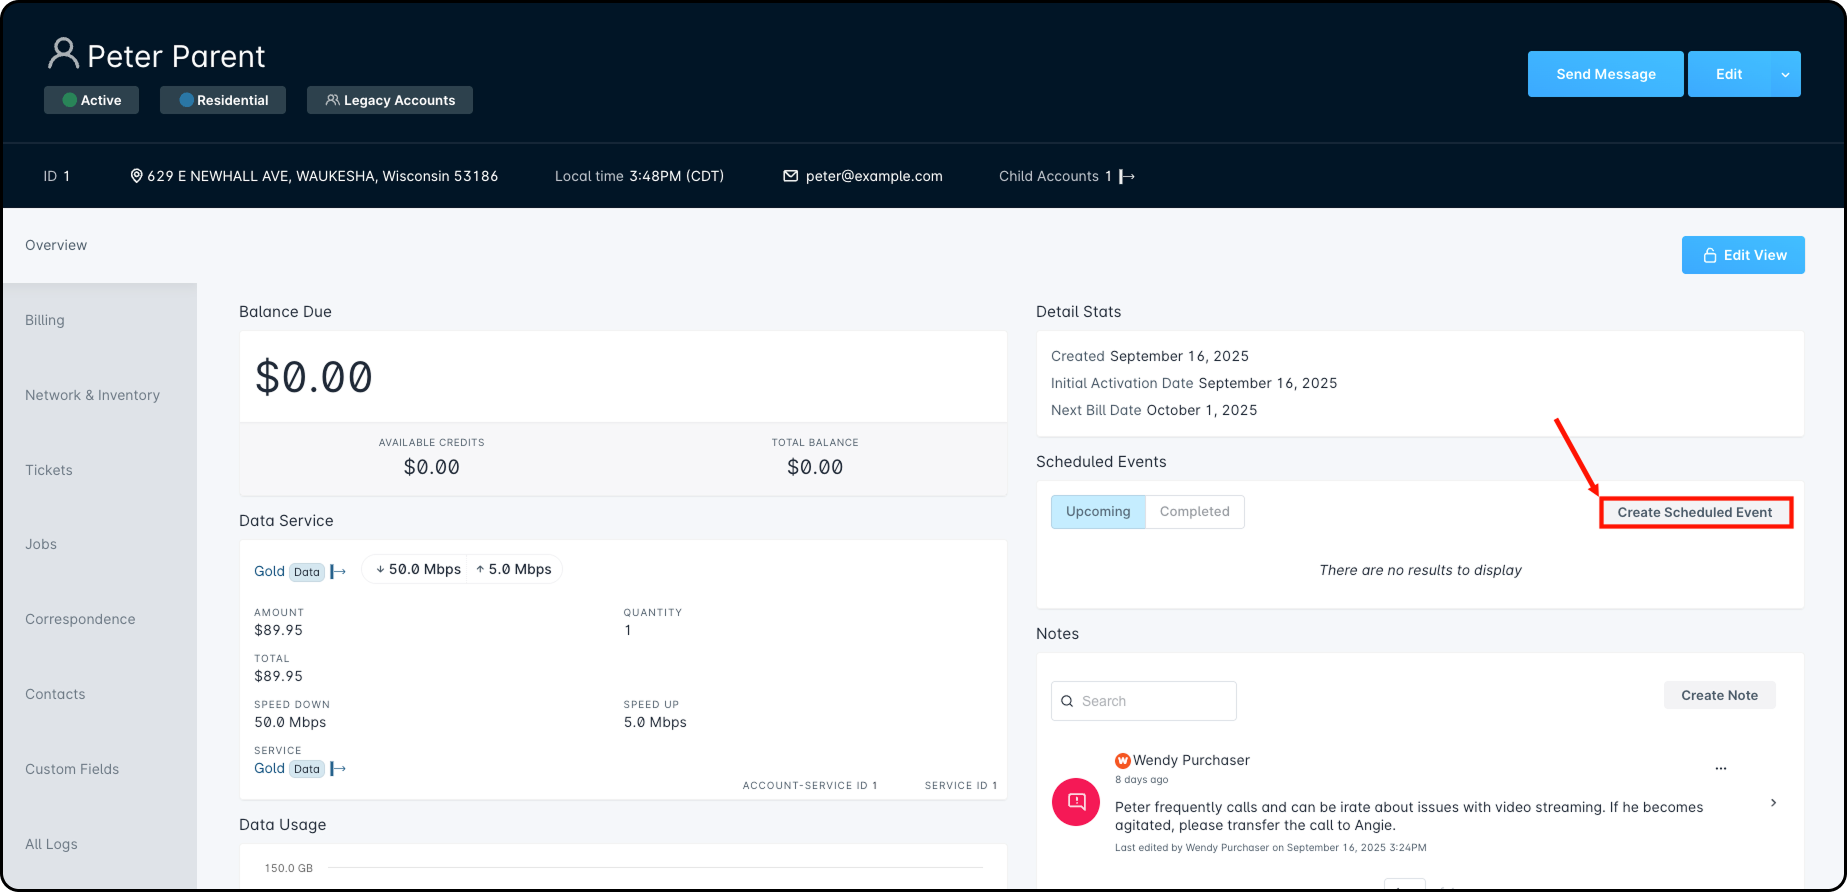
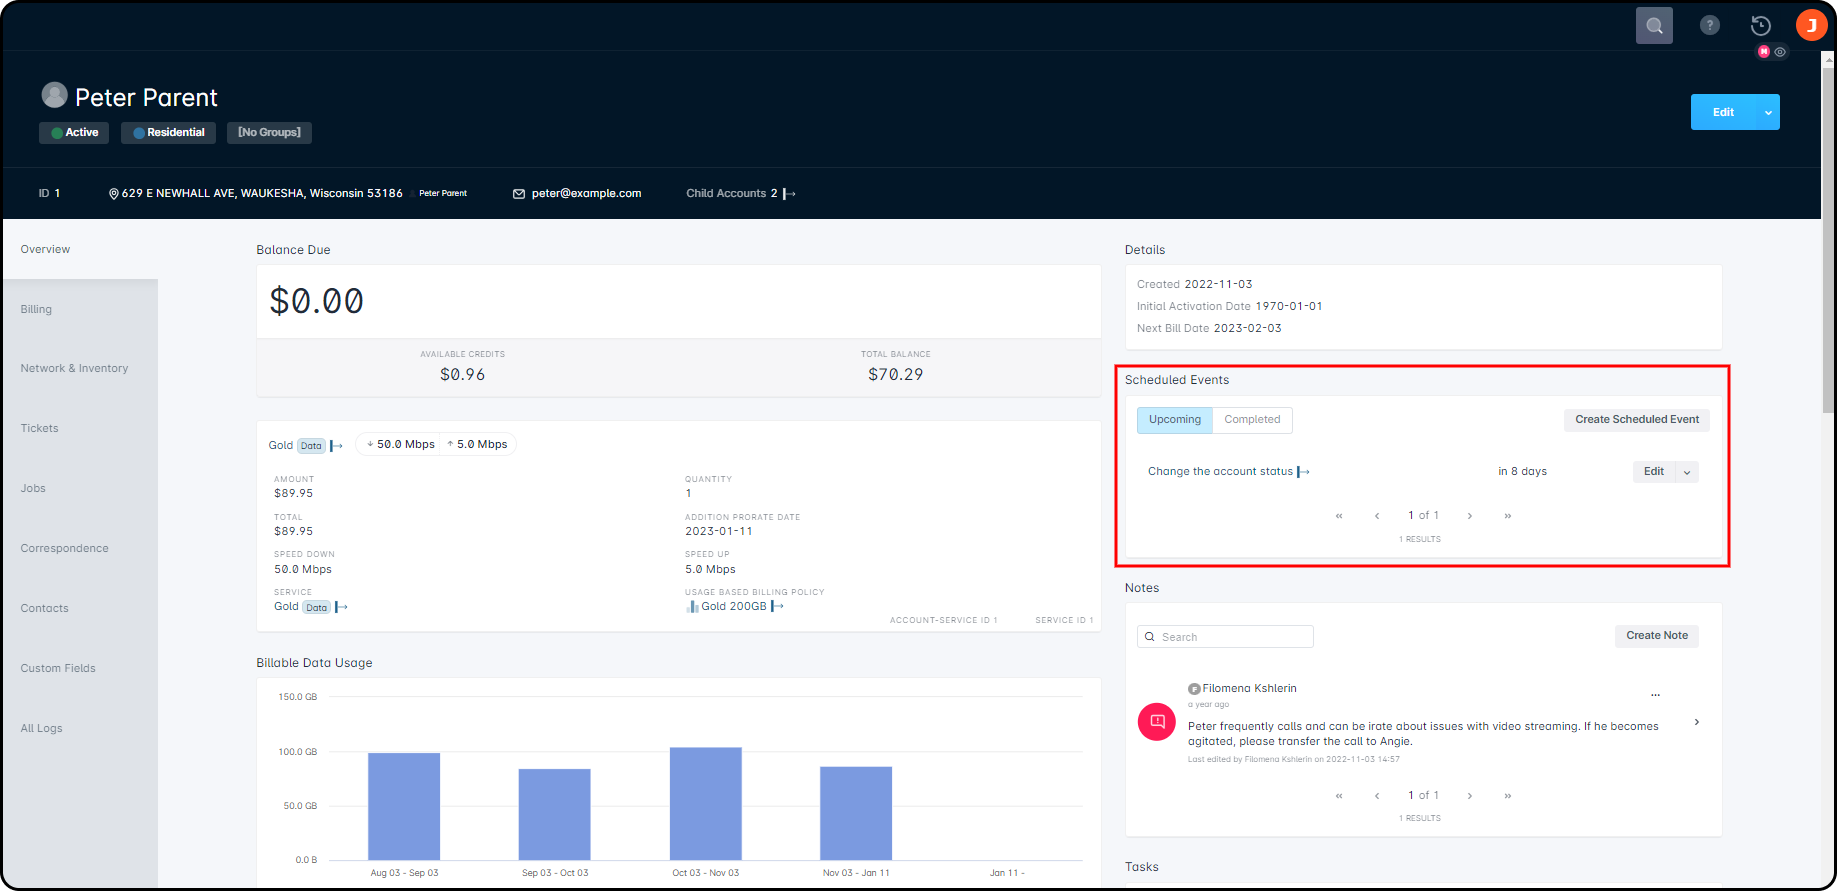
To set up a scheduled event, first, navigate to the account that you wish to set it up for. From the Overview tab of the account screen, you will see a Scheduled Event section on the right-hand side. Any upcoming scheduled events will appear here; otherwise, it will say “no results to display”. In this section, you will also find the Create Scheduled Event button, to set up a new scheduled event.
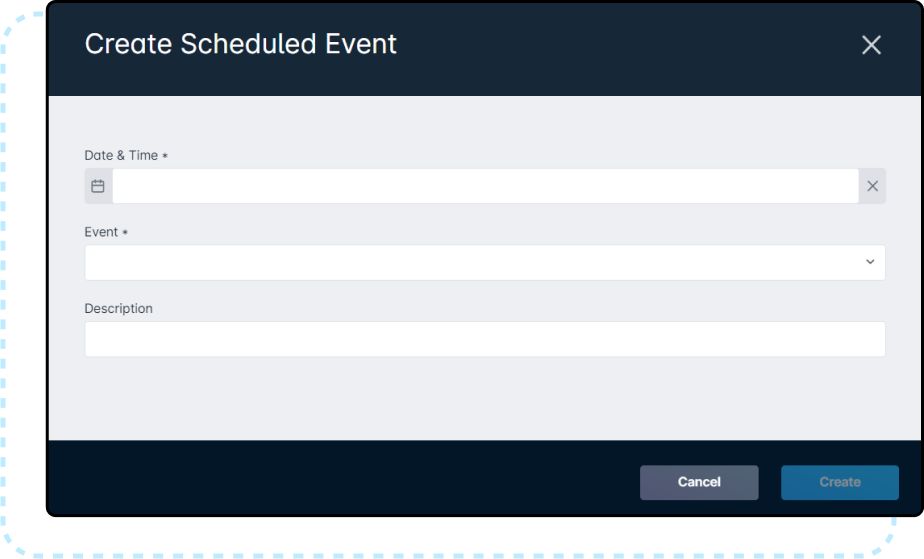
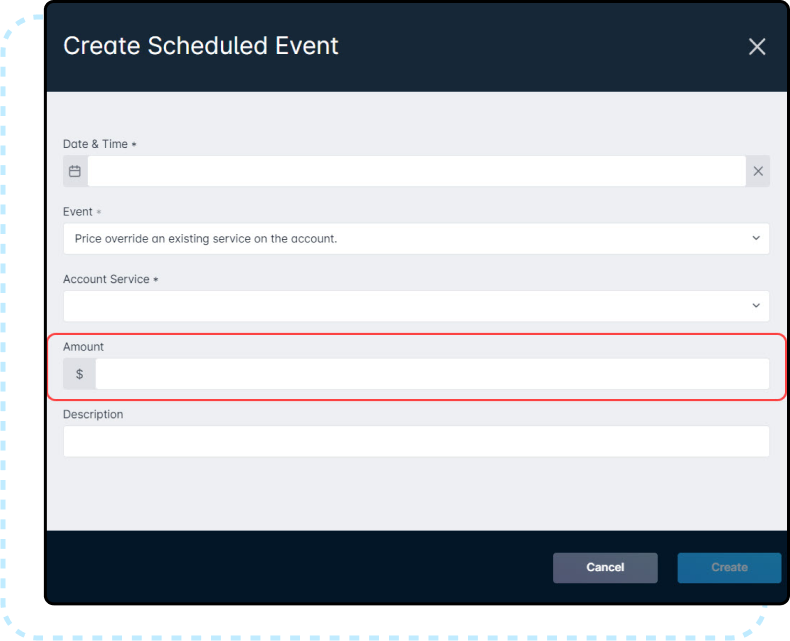
Clicking Create Scheduled Event will cause a pop-up window to appear, where you will define the event. This window will only have 3 fields displayed initially:
- Date & Time: This is where you will select the date and time that you want the scheduled event to occur. You will first select the date, and then the option for the time will appear directly after.For more information on how to use the Date/Time picker, please review this linked article.
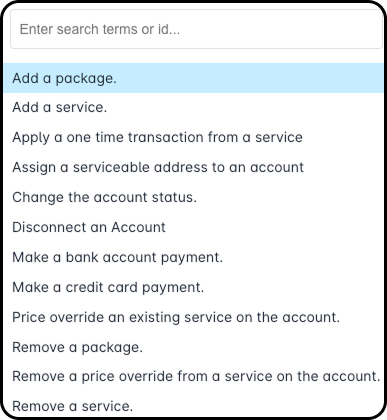
- Event: This is a drop-down list of predefined events, where you will need to select which event you would like to schedule. Depending on the event you choose, additional fields may appear and be required to fill out as well.Available options for the Event field are shown below.
- Description: This field is primarily for providing some information regarding the scheduled event that is set to happen. It can be used to provide details around why the event is happening and if it was requested, by whom, just so that when anyone else is viewing the account they can see any necessary information.
Once a scheduled event is created, it will appear on the right-hand side of the Overview tab in the account view. Clicking the event name opens a sidebar with key details, including the linked account, event type, description, date and time, and the assigned user. The system also shows when the event is scheduled, broken down into years, months, days, hours, and minutes, as well as how long ago past events occurred. For more precision, hovering over the event’s time counter will display the exact date and time of the event.
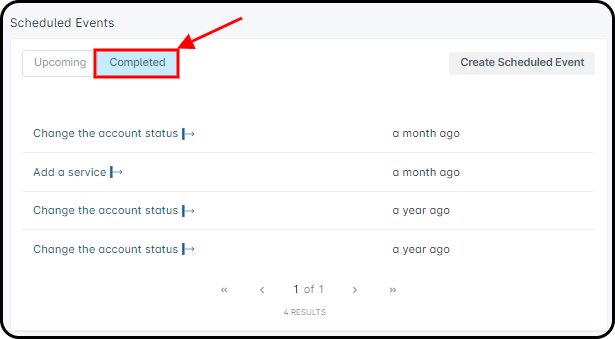
To view Completed Scheduled Events, click on the Completed tab.
Example #1: Adding A Service
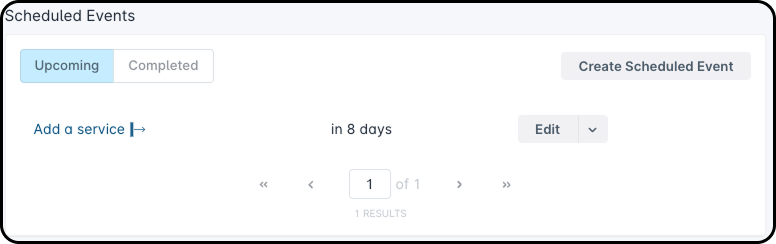
Using the “Add a service” Scheduled Event, you can automate placing a new Service on an Account, or, in the case of Data Services, automatically change the Service associated with the Subscriber. In this example, the Subscriber is requesting a service upgrade at the start of their next billing cycle that won't require technician intervention. These straightforward changes highlight the strengths of Scheduled Events.
The Scheduled Event for this subscriber, Anissa Mills, would look like this:
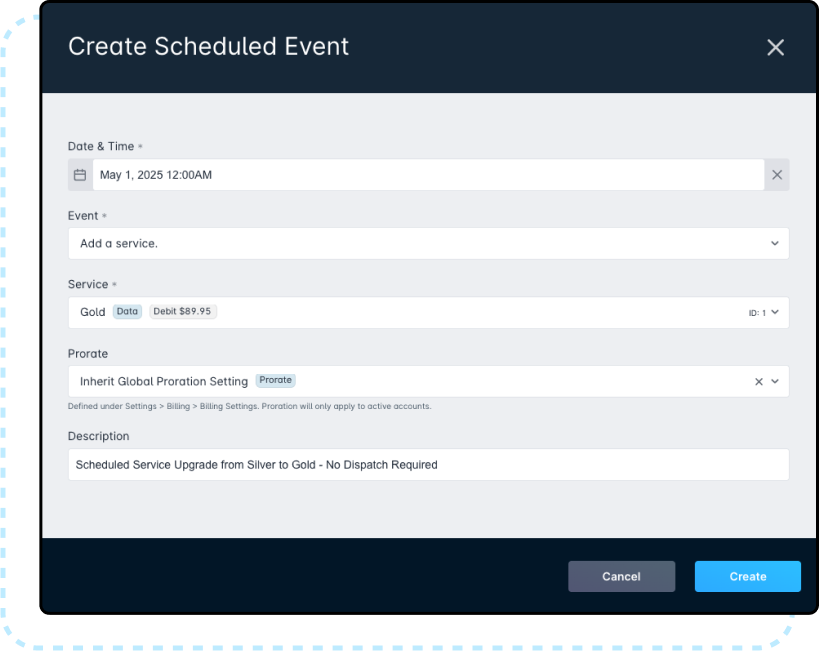
Since billing runs at 5 minutes past midnight within Sonar, scheduling the event for midnight on May 1st will allow it to take effect before billing runs, and before the subscriber's next billing cycle. On the scheduled day, Anissa's account will now have 2 actions take place automatically based on this scheduled event.
- The Silver Internet service will be removed.
- The Gold Internet service will be added.
Now that we have created the event, we will be able to view it, as well as any other scheduled events, from the right-hand side of the Account Overview screen.
Example #2: Change The Account Status
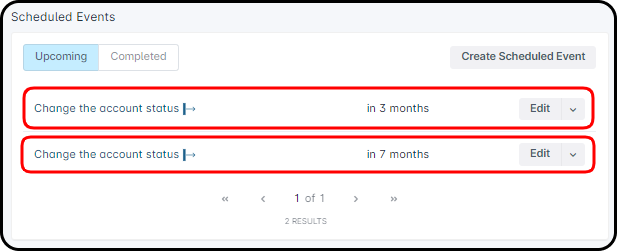
Victor Moen, a customer, calls in saying that he will be on vacation from March to July, and will therefore not be needing any services during this time. Instead of making a note to set their account to Inactive and also to change the status back to Active once they return, or having them call in again when they are back from their vacation, we can use scheduled events to automatically change Victor's account status.
First, we will need to create an event to change the account status to Inactive on March 1st.

Next, we will need to create an event to change the account status back to Active, for when Victor returns from vacation on July 1st.

Now, both scheduled events have been set up and Victor's account will change to the appropriate status during her vacation as well as return to Active once they're back.
Considerations when changing the account status
The above example for changing the account status works for most situations where customers are away for periods of time. However, if the account's billing parameters have the Day Billing Runs and Invoice Day as different values, this might cause an unexpected result in the case of prorating when the account is reactivated.
For example: We have an ISP that bills on the 20th of the month, but their invoice date is set for the 1st of the month because they bill in advance. If the customer's account was set to an Inactive status for this entire time, but then became active on the 25th of the month, then when billing runs on the 20th that means that billing didn't run on their account yet – therefore proration did not work as expected.
One solution for this would be to use a combination of a vacation status, scheduled events, and the Next Bill Date billing parameter for the account. Creating a vacation status for these customers and having them moved into that status, instead of just being moved into Inactive, helps to let you know that the customer is indeed returning and is not going to remain inactive. Then, using scheduled events, you would be able to set up 2 events to change the account status from Active to Vacation, and then from Vacation back to Active. Lastly, you would only need to change the Next Bill Date on the account's billing configuration. Doing this would make the disconnect process similar to the process below:
- Create a Vacation account status (if not already created)
- Create a Scheduled Event to change the customer's account status from Active to Vacation
- Create a Scheduled Event to change the customer's account status from Vacation to Active
- Change the Next Bill Date parameter to a future date beyond the date the customer is scheduled to be reactivated