Table of Contents
Setting up an Outbound Email Domain
 Updated
by Mitchell Ivany
Updated
by Mitchell Ivany
Read Time: 12 mins

Setting up Outbound Email Domain
If you are looking to set up an inbound mailbox, to receive incoming mail to your Sonar instance and use it with the ticketing module, please refer to the Inbound Mailboxes Example Build documentation here.
To enable the Sonar instance to send emails using the customer's domain, follow the steps within the communication module:
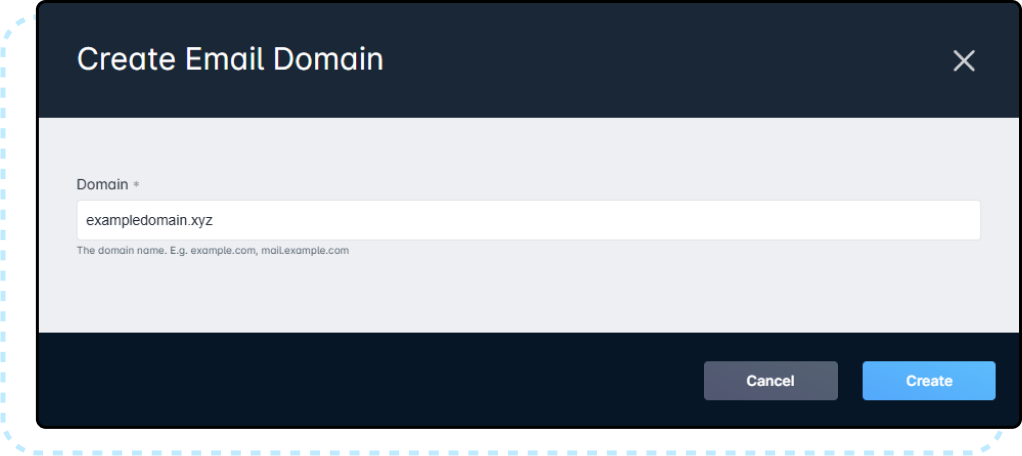
- Go to Settings → Communication → Email Domains and click the “Create Email Domain” button.
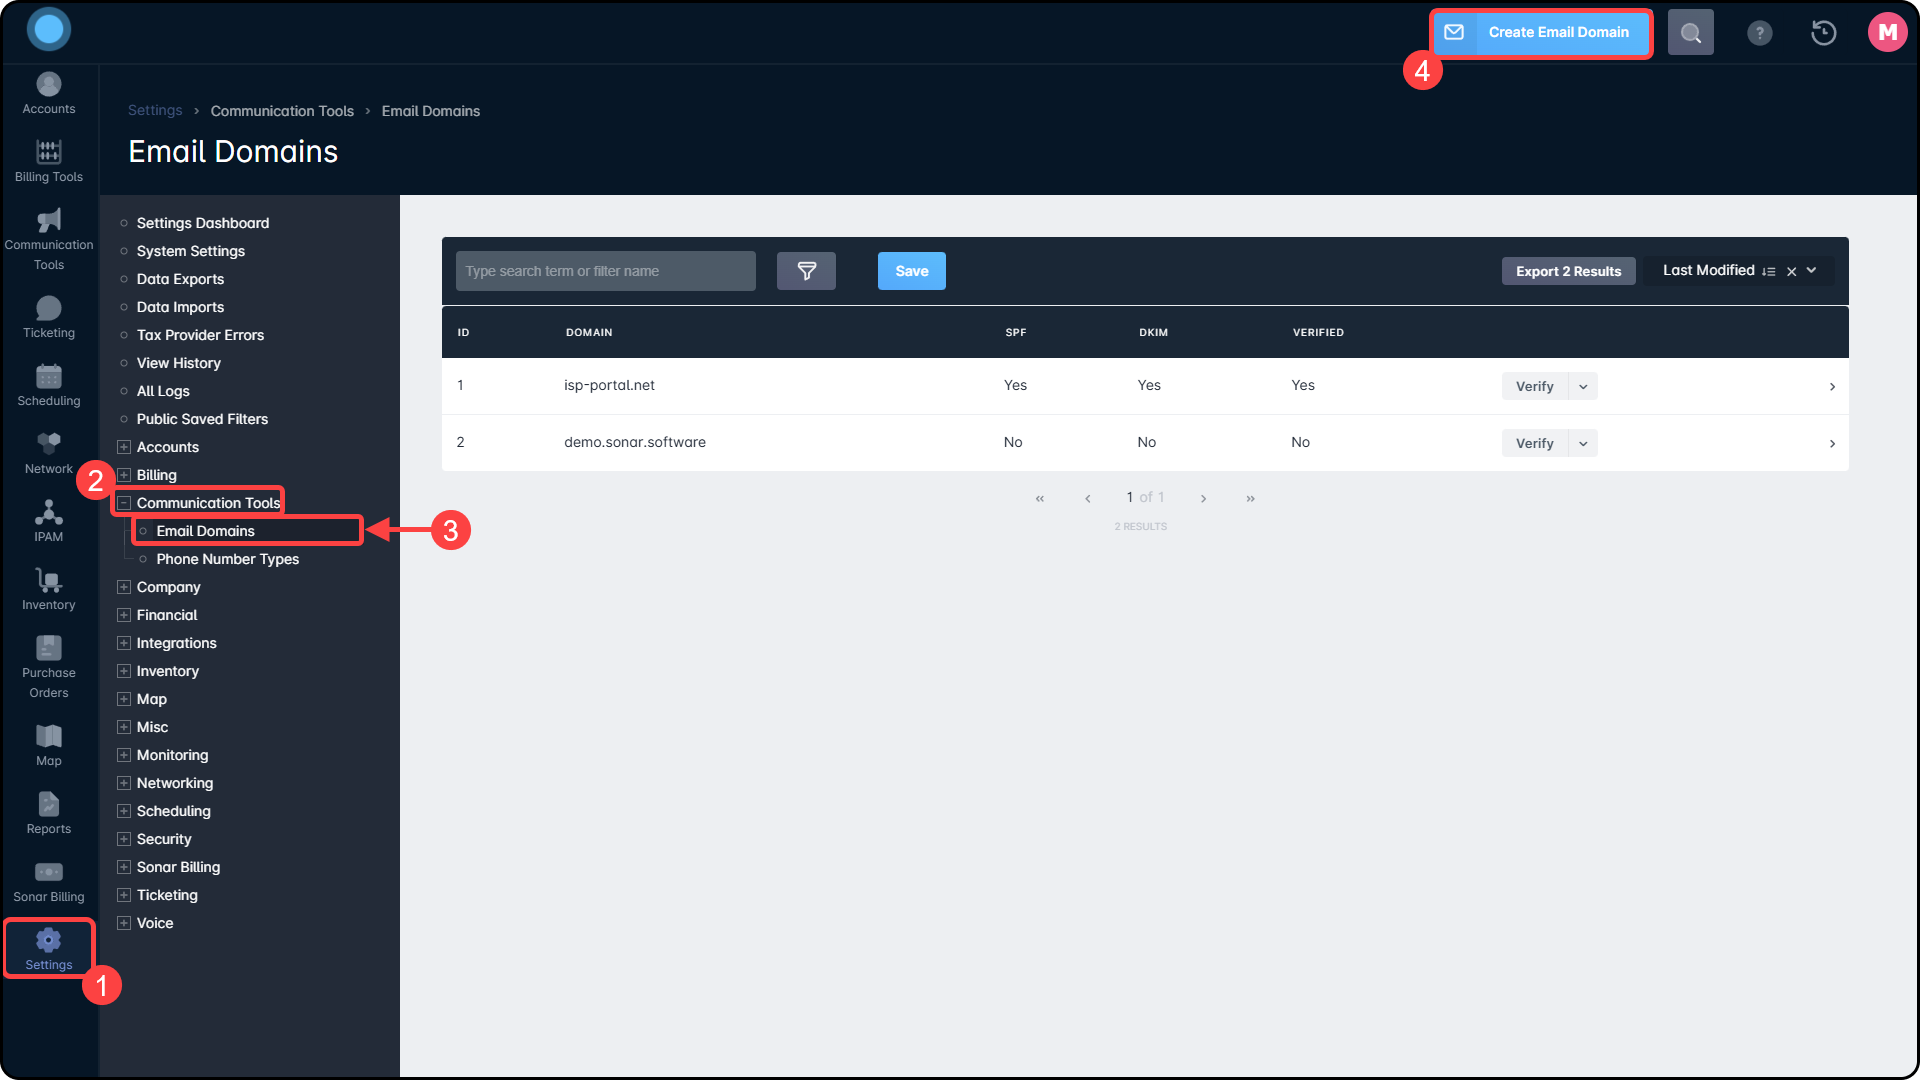
- Enter the domain you will use to send emails (i.e., example.com) and click “Create”
Create DNS RECORDS for SPF, DKIM, and DMARC
The next step is to create three new DNS records — an SPF record, a DKIM record, and a DMARC record. These allow Sonar to verify your domain and your control over said domain.
yourdomain.com' after the initial value — contact your domain provider for any specifics.Creating an SPF record
- If you have an existing SPF record for your domain, you need to append
include:spf.mandrillapp.comto it.For example, an SPF record with multiple domains might look like this:v=spf1 include:_spf.google.com include:spf.mandrillapp.com ?all - If you do not have an SPF record, you will need to create a new TXT record that includes
v=spf1 include:spf.mandrillapp.com ?all.
Creating a DKIM record
DKIM is a DNS-based email authentication mechanism that helps Mandrill more effectively send mail on your behalf by allowing receivers to verify that we have permission to send your email.
Creating CNAMEs for DKIM:
- Create One CNAME record with the name:
mte1._domainkey.yourdomain.com - Set the value to:
dkim1.mandrillapp.com- Update the
yourdomain.compart to your actual domain.
- Update the
- Create Another CNAME record, this time with the name:
mte2._domainkey.yourdomain.com - Set the value to:
dkim2.mandrillapp.com- Update the
yourdomain.compart to your actual domain.
- Update the
Adding the DKIM Record:
- Create a TXT record
- Enter the values for the following fields: Host: Enter the hostname for the TXT record. For Sonar, the host will be “
mandrill._domainkey”. - TXT Value: This record should contain the following data, provided below:
v=DKIM1; k=rsa; p=MIGfMA0GCSqGSIb3DQEBAQUAA4GNADCBiQKBgQCrLHiExVd55zd/IQ/J/mRwSRMAocV/hMB3jXwaHH36d9NaVynQFYV8NaWi69c1veUtRzGt7yAioXqLj7Z4TeEUoOLgrKsn8YnckGs9i3B3tVFB+Ch/4mPhXWiNfNdynHWBcPcbJ8kjEQ2U8y78dHZj1YeRXXVvWob2OaKynO8/lQIDAQAB;
v=DKIM1\; k=rsa\; p=MIGfMA0GCSqGSIb3DQEBAQUAA4GNADCBiQKBgQCrLHiExVd55zd/IQ/J/mRwSRMAocV/hMB3jXwaHH36d9NaVynQFYV8NaWi69c1veUtRzGt7yAioXqLj7Z4TeEUoOLgrKsn8YnckGs9i3B3tVFB+Ch/4mPhXWiNfNdynHWBcPcbJ8kjEQ2U8y78dHZj1YeRXXVvWob2OaKynO8/lQIDAQAB\;
Creating a DMARC record
A DMARC policy is an authentication protocol that can be added to your domain to help protect against fraud and increase deliverability. Beginning in 2024, Mandrill requires a minimum DMARC policy of “v=DMARC1; p=none” to be added to any sending domain. Read more about additional configurations available at dmarc.org.
To Enable DMARC:
- Create and save a TXT record in your DNS with a host of
_dmarc.yourdomain.comand a value ofv=DMARC1; p=none
If you need help creating these records, please contact support@sonar.software — we'd be glad to help!
Ownership Verification
The final step is to confirm ownership of your domain. This is done by having a Sonar team member review your SPF, DKIM, and DMARC records, ensuring that they're correct, and validating that you own the domain being registered.
- Click the “
Verify” button- The “
Verify” button will serve to review the SPF, DKIM, and DMARC records are in place before you request final verification. If this verification fails, try waiting a bit longer for the changes to propagate or review your DNS records.
- The “
- Select “Send Verification Email” from the dropdown for your domain
- Enter an email tied to the mailbox at the domain being verified.
- After submitting, you will receive an email within a few minutes at the email address you entered. Once you receive this email, forward it to verify@sonar.software, and it will be reviewed to complete the verification process.
Vendor-Specific Guides
Modifying DNS Records with GoDaddy
Details
2. Select your domain from the list.
3. Select ADD below the table of your existing DNS records
Add SPF Record
1. Choose TXT from the record options drop-down menu
2. Enter the values for the following fields:
i. Name/Host/Alias—Enter @ or leave blank. Other DNS records for your domain might indicate the correct entry.
ii. Time to Live (TTL)—Enter 3600 or leave the default.
iii. Value/Answer/Destination—Enter
v=spf1 include:spf.mandrillapp.com ?all3. Click Save to complete your updates.
Add DKIM Record
1. Choose TXT from the record options drop-down menu
2. Enter the values for the following fields:
i. Host: Enter the hostname for the TXT record. For Sonar, the host will be "
mandrill._domainkey".ii. TXT Value: The value you are setting as the destination of the Host. For Sonar, you can use the following value:
"
v=DKIM1; k=rsa; p=MIGfMA0GCSqGSIb3DQEBAQUAA4GNADCBiQKBgQCrLHiExVd55zd/IQ/J/mRwSRMAocV/hMB3jXwaHH36d9NaVynQFYV8NaWi69c1veUtRzGt7yAioXqLj7Z4TeEUoOLgrKsn8YnckGs9i3B3tVFB+Ch/4mPhXWiNfNdynHWBcPcbJ8kjEQ2U8y78dHZj1YeRXXVvWob2OaKynO8/lQIDAQAB;"iii. TTL: Determine how long the server should cache information. The default value can be used
3. Select Save to complete your updates
Add DMARC Record
1. Choose TXT from the record options drop-down menu
2. Enter the values for the following fields:
i. Host: Enter the hostname for the TXT record. For Sonar, the host will be "
_dmarc".ii. TXT Value: The value you are setting as the destination of the Host. For Sonar, you can use the following value:
"
v=DMARC1; p=none"iii. TTL: Determine how long the server should cache information. The default value can be used
3. Select Save to complete your updates
Modifying DNS Records with Wix
Details
1. Go to the Domains page
2. Click the Show More icon next to the relevant domain and select Manage DNS Records.
Add an SPF Record
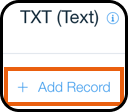
1. Click + Add Record in the TXT (Text) section:

2. Click the Host Name field and enter the hostname.
For Wix, the Host field is left blank for the Root domain
3. Click the Value field and enter the TXT value. For Sonar, enter
v=spf1 include:spf.mandrillapp.com ?all
4. Click SaveAdd a DKIM Record
1. Choose TXT from the record options drop-down menu
2. Enter the DKIM selector at the beginning of your domain name in the Host Name field.
3. Enter the DKIM signature in the Value field.
"
v=DKIM1; k=rsa; p=MIGfMA0GCSqGSIb3DQEBAQUAA4GNADCBiQKBgQCrLHiExVd55zd/IQ/J/mRwSRMAocV/hMB3jXwaHH36d9NaVynQFYV8NaWi69c1veUtRzGt7yAioXqLj7Z4TeEUoOLgrKsn8YnckGs9i3B3tVFB+Ch/4mPhXWiNfNdynHWBcPcbJ8kjEQ2U8y78dHZj1YeRXXVvWob2OaKynO8/lQIDAQAB;"4. Click Save
Add DMARC Record
1. Choose TXT from the record options drop-down menu

2. Enter the DMARC selector at the beginning of your domain name in the Host Name field "
_dmarc".3. Enter the DMARC signature in the Value field.
"
v=DMARC1; p=none"4. Click Save.
Modifying DNS Records with Rebel Domain Management
Details
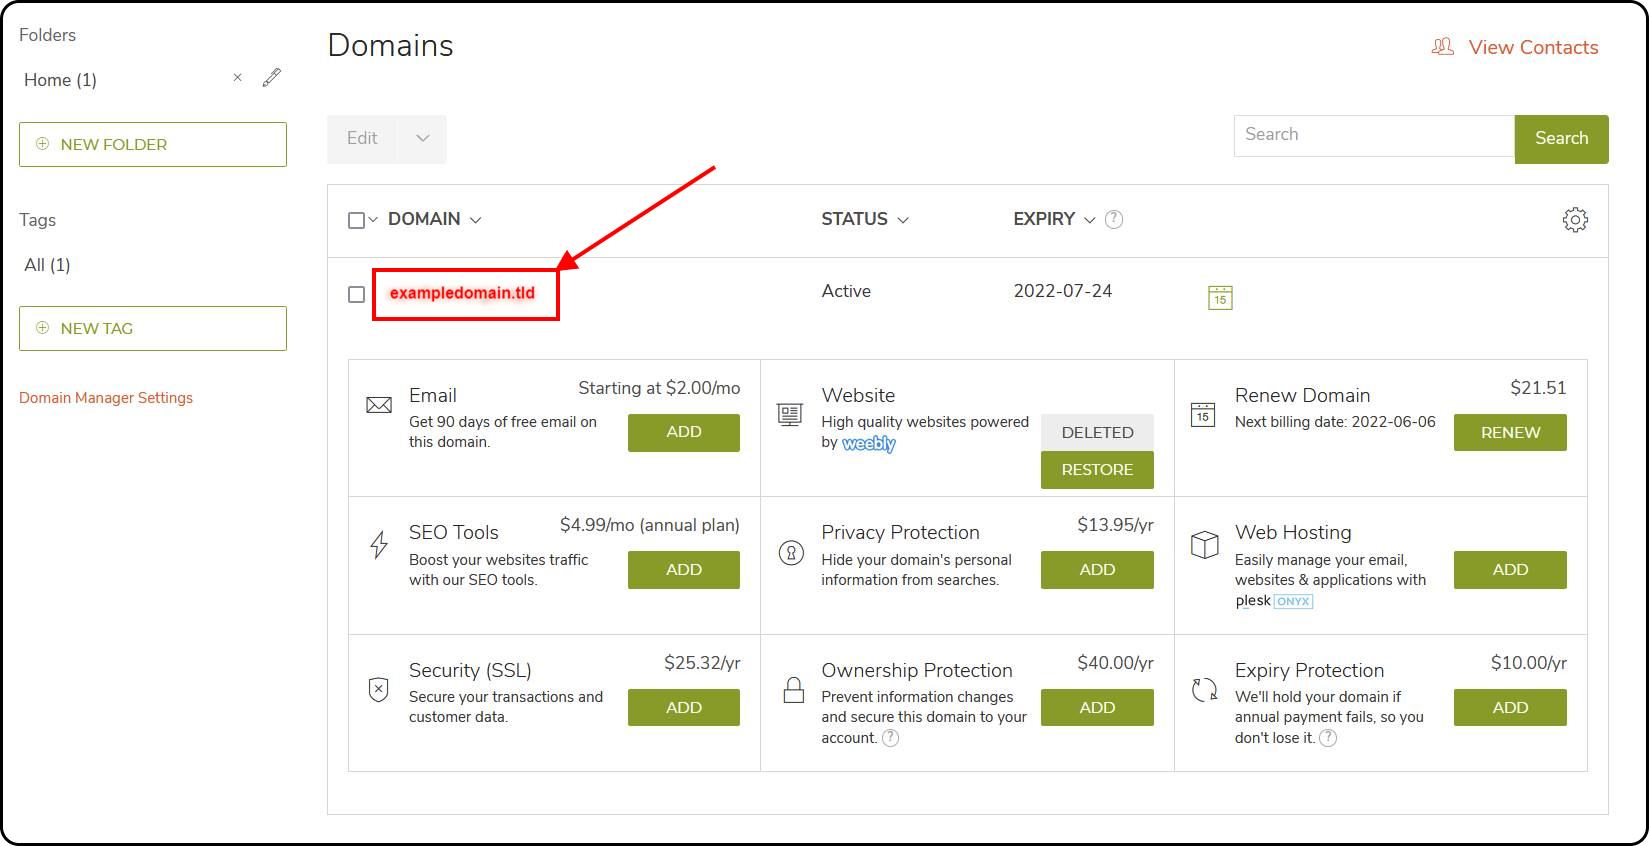
1) From your domain portfolio, click on the domain name you want to manage:
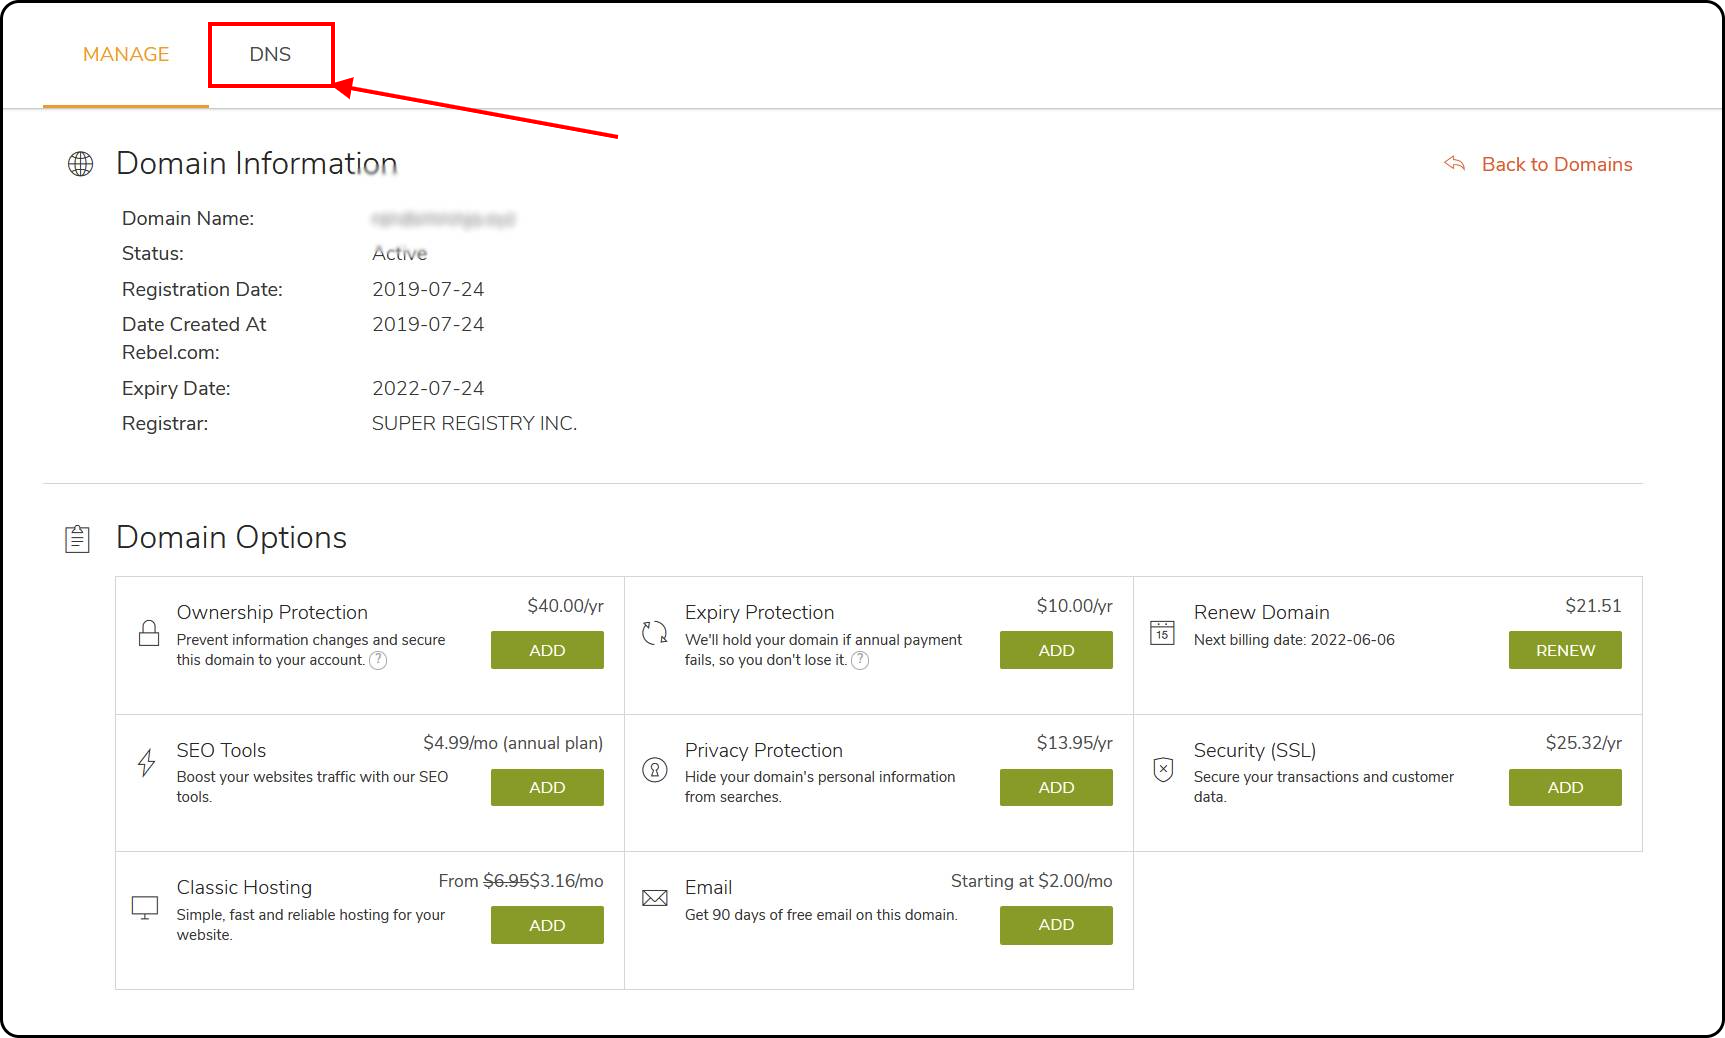
2) Click on the DNS tab:
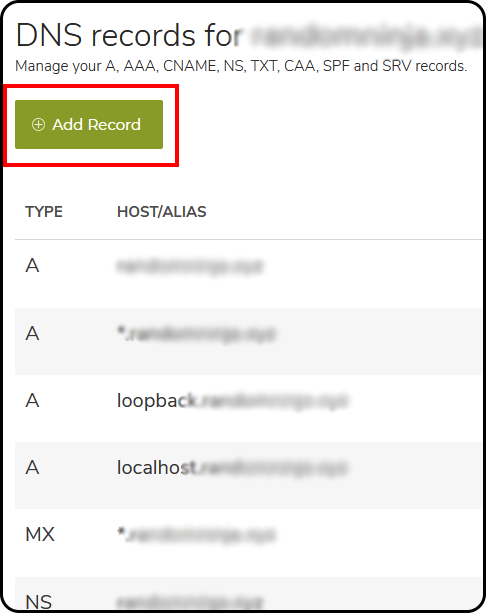
3) Click on Add Record. You'll need to create two distinct TXT records - one for the SPF record, the other for the DKIM record:
Adding the SPF Record:
1) From the "Add Record" window that appeared, select TXT from the Record Type dropdown, then fill the remaining fields with the following information:
a) Host: Enter the hostname for the TXT record. In this case, leave it blank unless you're verifying a sub-domain for mail instead of your top-level domain.
b) Record: For the record field, enter "
v=spf1 include:spf.mandrillapp.com ?all"c) TTL: Time to Live (TTL)—Enter 3600 or leave the default.
2) Click save.
Adding the DKIM Record:
1) From the "Add Record" window that appeared, select TXT from the Record Type dropdown, then fill in the remaining fields with the following information:
a) Host: Enter the hostname for the TXT record. For Sonar, the host will be "
mandrill._domainkey".b) Record: The value you are setting as the destination of the Host. For Sonar, you can use the following value:
"
v=DKIM1; k=rsa; p=MIGfMA0GCSqGSIb3DQEBAQUAA4GNADCBiQKBgQCrLHiExVd55zd/IQ/J/mRwSRMAocV/hMB3jXwaHH36d9NaVynQFYV8NaWi69c1veUtRzGt7yAioXqLj7Z4TeEUoOLgrKsn8YnckGs9i3B3tVFB+Ch/4mPhXWiNfNdynHWBcPcbJ8kjEQ2U8y78dHZj1YeRXXVvWob2OaKynO8/lQIDAQAB;"c) TTL: Time to Live (TTL)—Enter 3600 or leave the default.
2) Click save.
Adding the DMARC Record:
1) From the "Add Record" window that appeared, select TXT from the Record Type dropdown, then fill in the remaining fields with the following information:
a) Host: Enter the hostname for the TXT record. For Sonar, the host will be "
_dmarc".b) Record: The value you are setting as the destination of the Host. For Sonar, you can use the following value:
"
v=DMARC1; p=none"c) TTL: Time to Live (TTL)—Enter 3600 or leave the default.
2) Click save.
Modifying DNS Records with Google Domains
Details
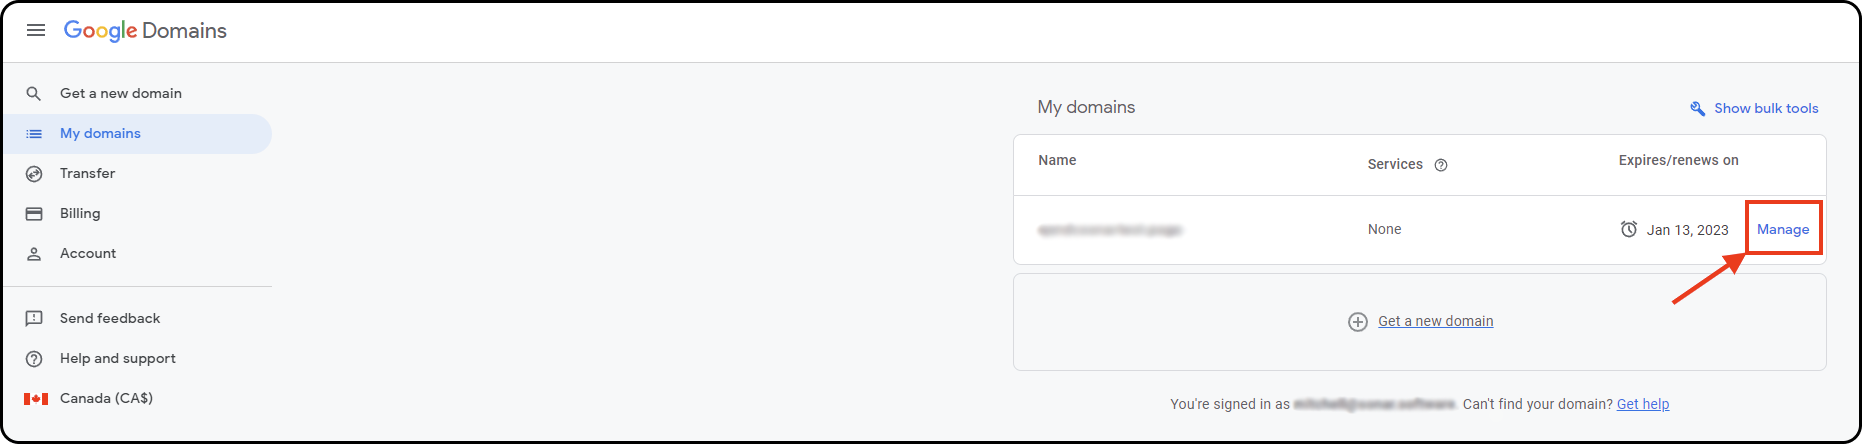
1) From the main Google Domains landing page ensure you're on the "My Domains" option, then click manage on the domain you'll be changing:
2) Select the "DNS" option from the navigation pane on the left-hand side, and you'll be able to manage the DNS records for your domain:
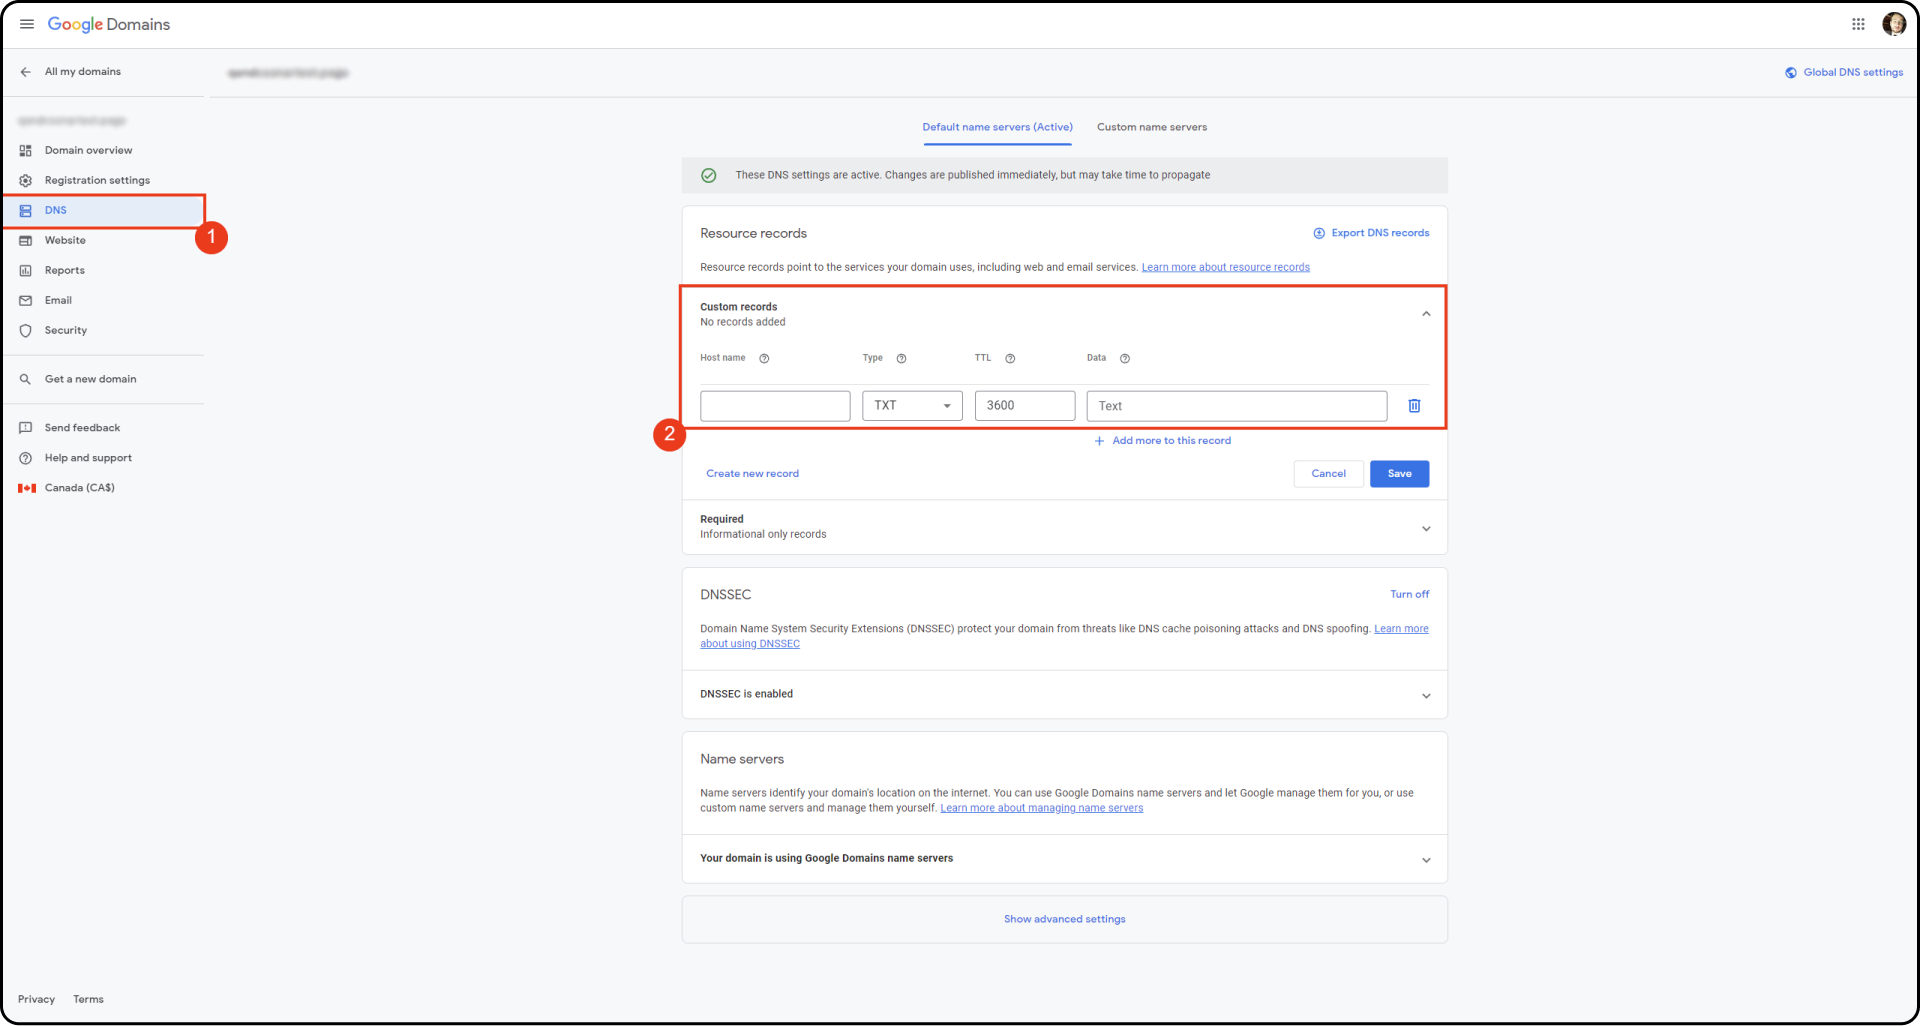
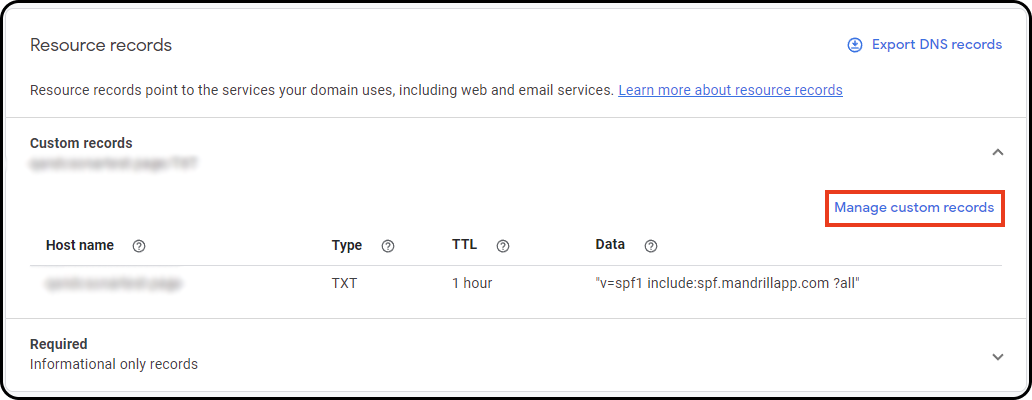
Do note that if you already have custom DNS settings saved on this domain, you'll need to click "Manage Custom Records" before you can add new records or make changes:
Setting the SPF record
1) In the custom records section, enter the following information:
a) Host Name: This section should be left blank so that the SPF record applies to the top-level domain.
b) Type: This field should be set to SPF.
c) TTL: TTL: Time to Live (TTL)—Enter 3600 or leave the default.
d) Data: This is where you'll add the SPF record. For Sonar, enter "
v=spf1 include:spf.mandrillapp.com ?all"2) Click Save
Setting the DKIM Record:
1) In the custom records section, enter the following information:
a) Host Name: For Sonar, the hostname field should read "
mandrill._domainkey"b) Type: This field should be set to TXT
c) TTL: TTL: Time to Live (TTL)—Enter 3600 or leave the default.
d) Data: This is where you'll enter the DKIM record value. For Sonar, enter "
v=DKIM1; k=rsa; p=MIGfMA0GCSqGSIb3DQEBAQUAA4GNADCBiQKBgQCrLHiExVd55zd/IQ/J/mRwSRMAocV/hMB3jXwaHH36d9NaVynQFYV8NaWi69c1veUtRzGt7yAioXqLj7Z4TeEUoOLgrKsn8YnckGs9i3B3tVFB+Ch/4mPhXWiNfNdynHWBcPcbJ8kjEQ2U8y78dHZj1YeRXXVvWob2OaKynO8/lQIDAQAB;"2) Click Save
Setting the DMARC Record:
1) In the custom records section, enter the following information:
a) Host Name: For Sonar, the hostname field should read "
_dmarc"b) Type: This field should be set to TXT
c) TTL: TTL: Time to Live (TTL)—Enter 3600 or leave the default.
d) Data: This is where you'll enter the DKIM record value. For Sonar, enter "
v=DMARC1; p=none"2) Click Save
Modifying DNS Records with Google Domains and Google Workspace
Details
First, confirm the Google Workspace DNS settings are present on your domain:
1) Select the domain you want to manage from the main Google Domains landing page:

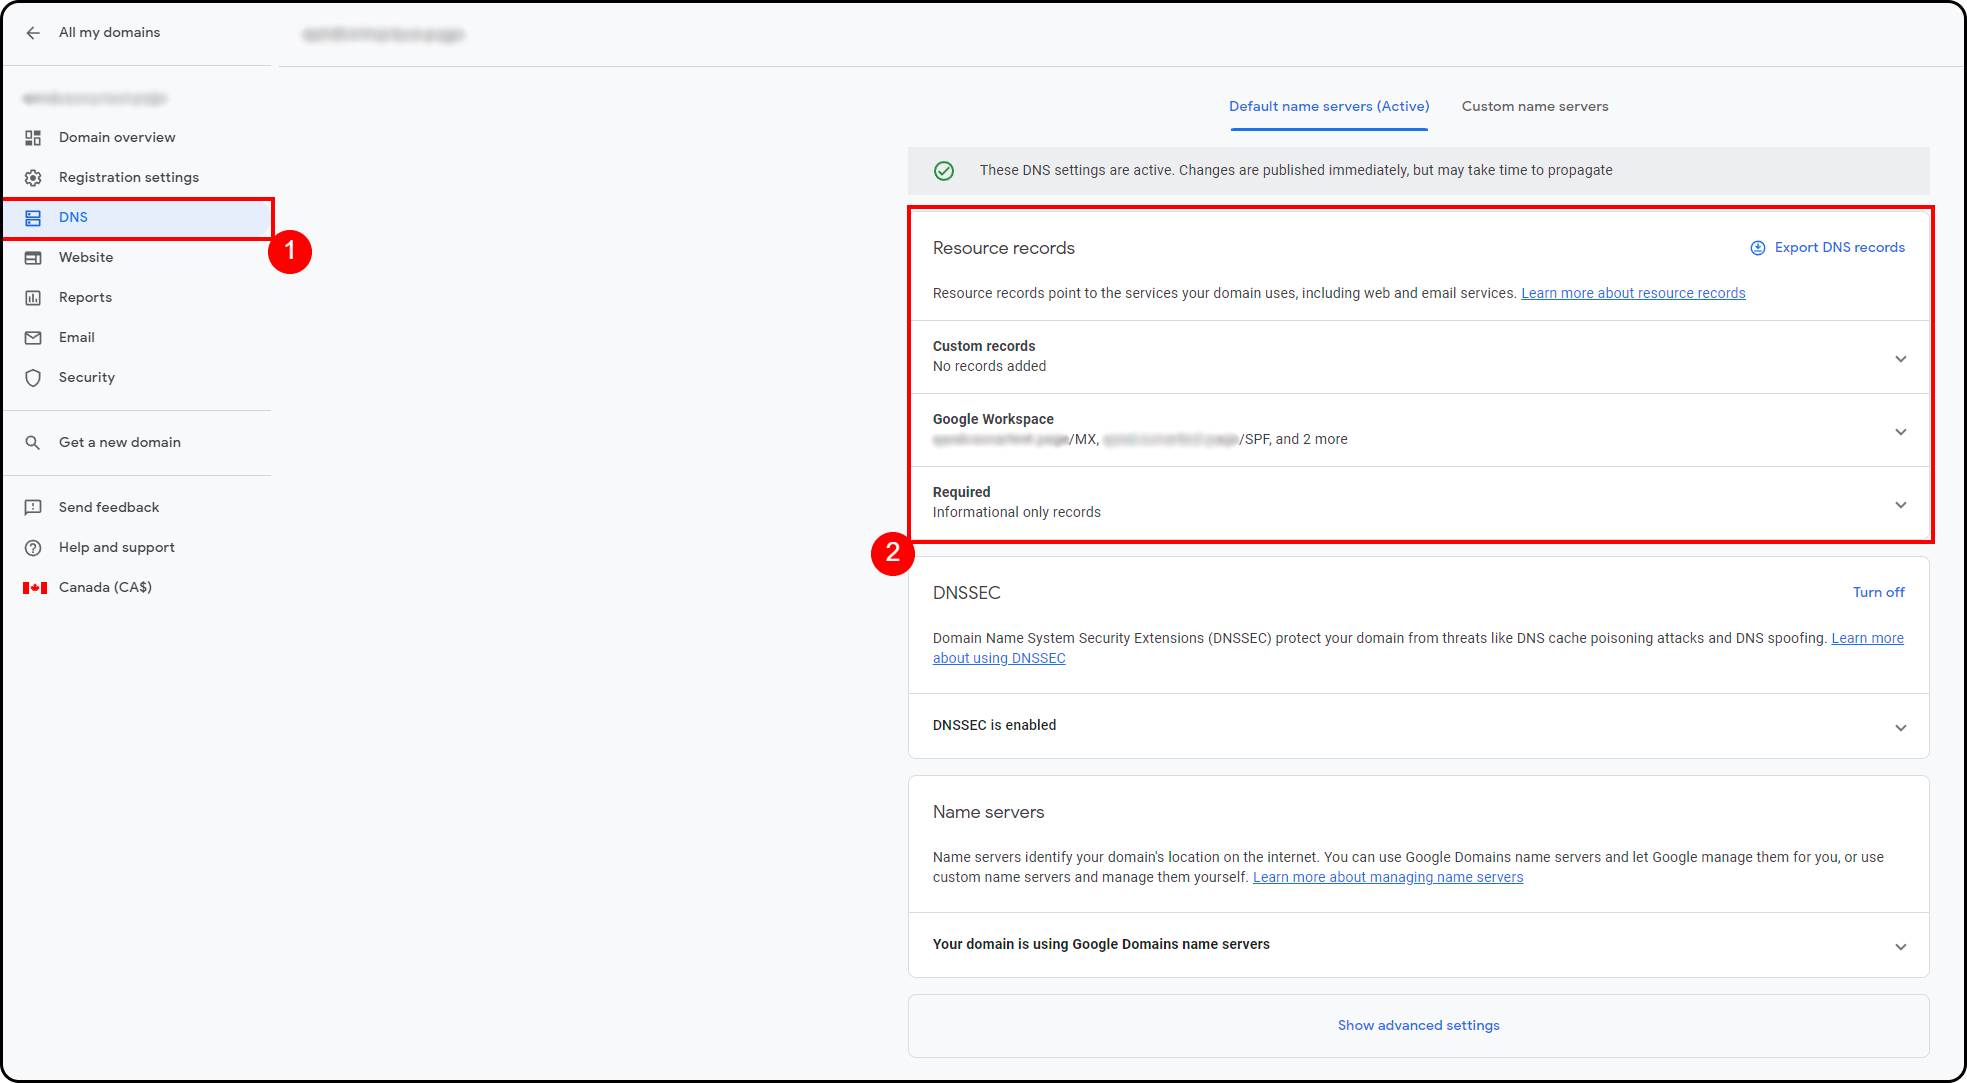
2) Navigate to the DNS section for the left-hand navigation menu, and verify that both "Custom Records" and "Google Workspace" appear:
3) Once confirmed, expand the "Google Workspace" header and copy the information listed for your domain:

4) Next, you'll need to add Custom Records that match both the existing Google Workspace records, and the expected Sonar records for domain verification:
a) MX Record: This should match the MX record listed under the Google Workspace header
b) SPF: This should contain the SPF records for Google and Sonar, "
v=spf1 include:_spf.google.com include:spf.mandrillapp.com ~all"c) TXT: This should contain the TXT version of the SPF records for Google and Sonar, "
v=spf1 include:_spf.google.com include:spf.mandrillapp.com ~all"d) TXT: The first DKIM record will be your Google DKIM, with a hostname value of "
google._domainkey" and a data value of "v=DKIM1; k=rsa; p=MIIBIjANBgkqhkiG9w0BAQEFAAOCAQ8AMIIBCgKCAQEAnBunPMqqvL2jwzncf99A0TkTnAfNkaRnQE+68Gq1t7WKG+JE5qf674Vf1JE79WMWSKWE2VaRJVSWopfgMN2hntEKGrST+0lAXcbPeRJYfP2sc7ZabnxkAYkpOUh63G2qz+8Dngjcj8LAEpT8NWT/SCmwJg7SbEBBS1ZQ9rjcKqZsxBPut8CmX+ody/Tfqo9A4" "CSzh/BfLBpsTma56eIsz3Dq/5pez2WICmsVhIn8GM/cu/5Ub91JjEb2Nph1b2MYZChkDDLWRDNvK6LRsYwwTa5aRowAOF39QTjZ0lFPCF0+p5ezOyxuThYSNmCscDjyoqz0+NaEBe63cjJk1q+wowIDAQAB"e) TXT: The second DKIM record will be for your Sonar domain verification and should have a hostname value of "
mandrill._domainkey" and a data value of "v=DKIM1; k=rsa; p=MIGfMA0GCSqGSIb3DQEBAQUAA4GNADCBiQKBgQCrLHiExVd55zd/IQ/J/mRwSRMAocV/hMB3jXwaHH36d9NaVynQFYV8NaWi69c1veUtRzGt7yAioXqLj7Z4TeEUoOLgrKsn8YnckGs9i3B3tVFB+Ch/4mPhXWiNfNdynHWBcPcbJ8kjEQ2U8y78dHZj1YeRXXVvWob2OaKynO8/lQIDAQAB;"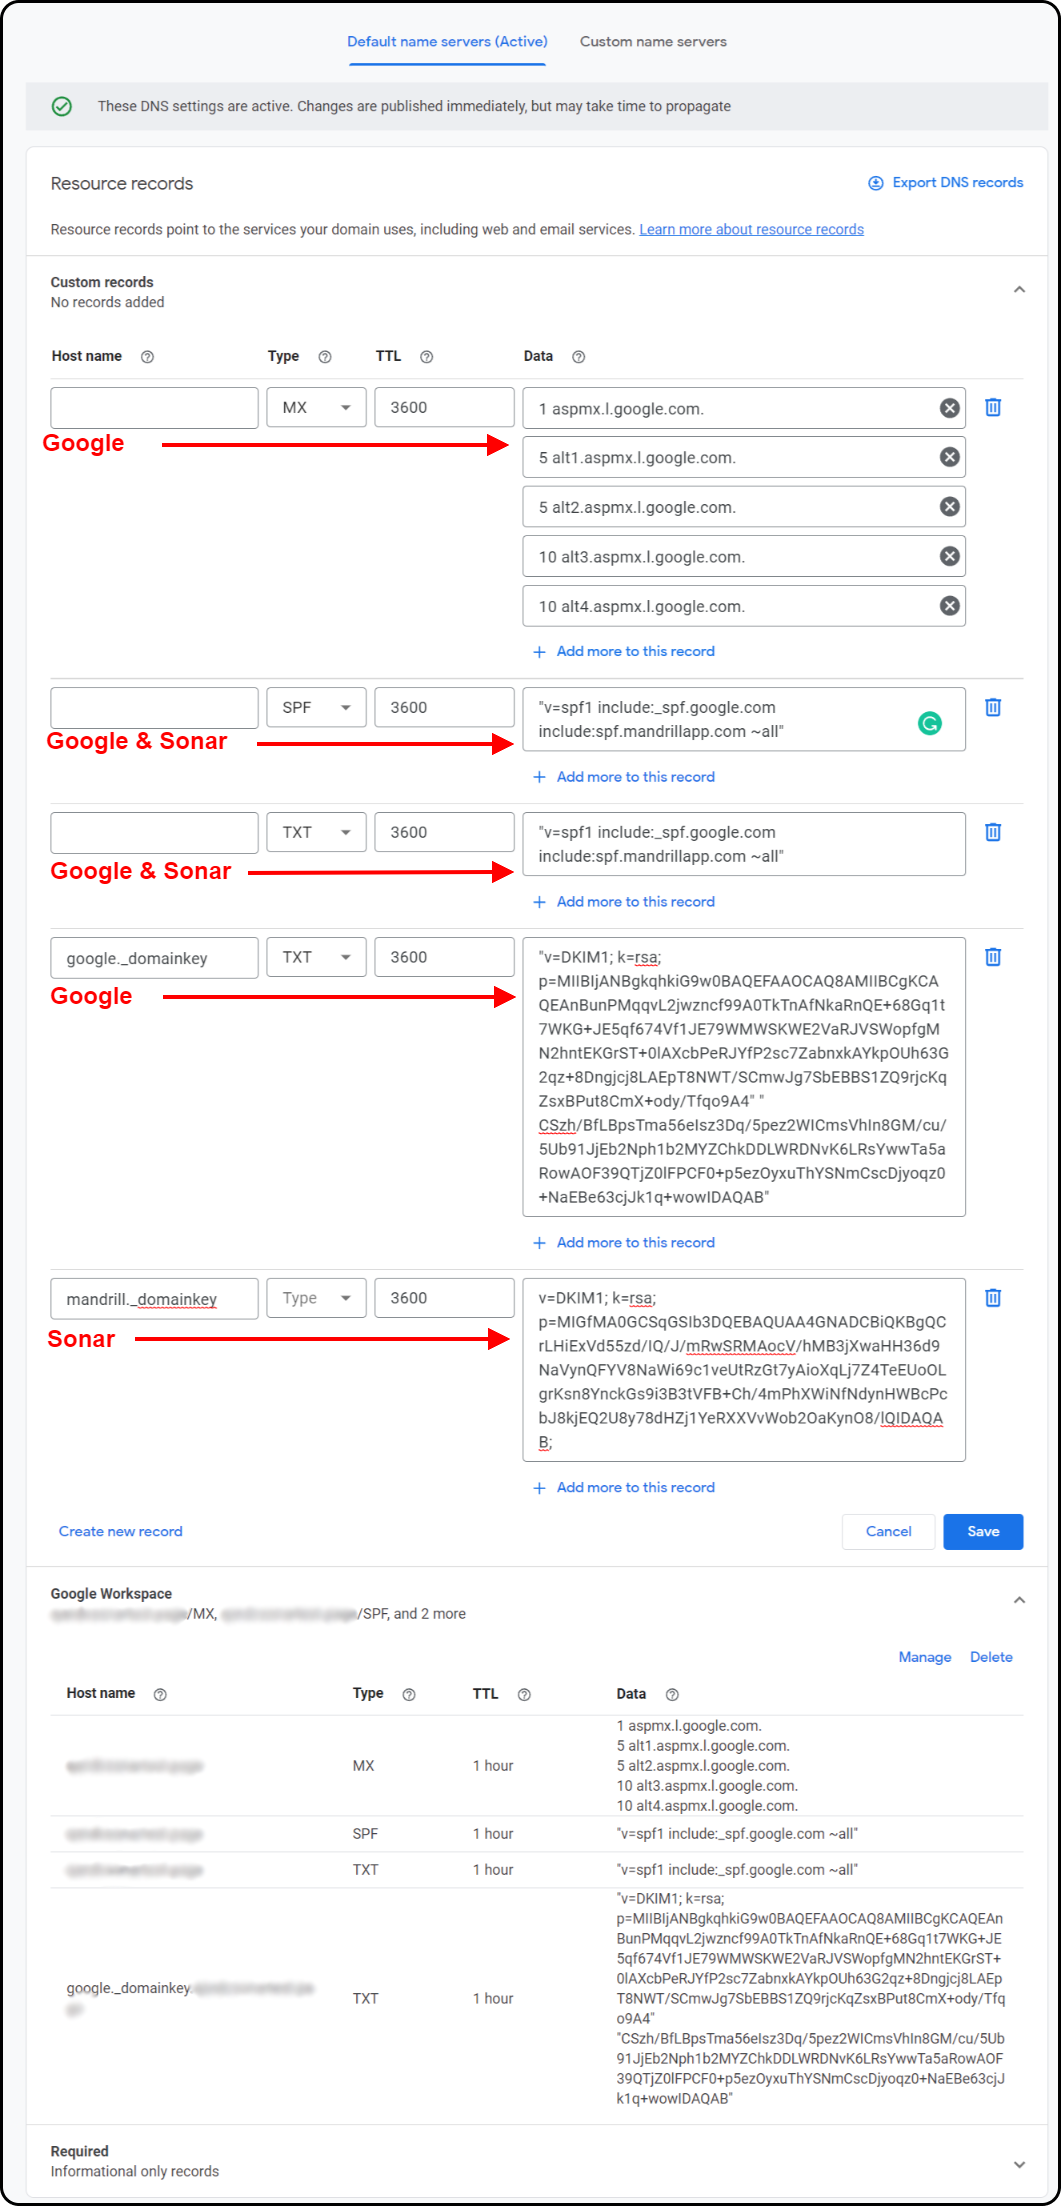
5) Click Save. You'll be notified in a pop-up that your Google Workspace records will be deleted or replaced:
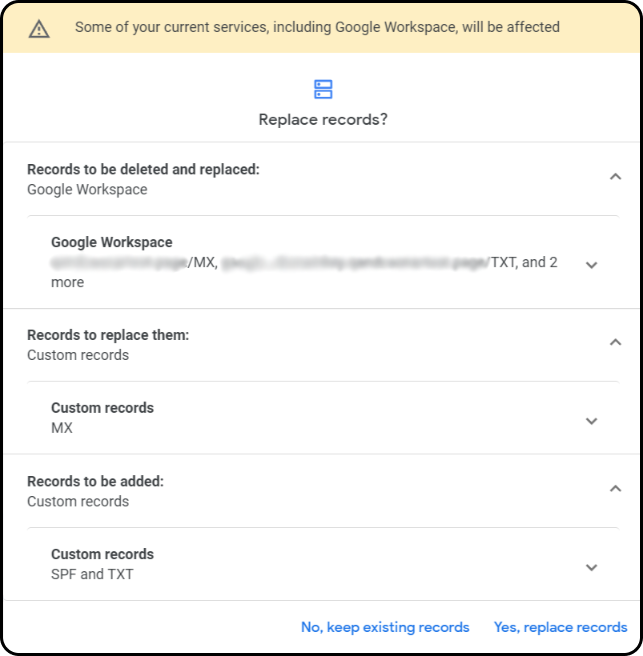
With the confirmation made, your DNS Records will now only show a listing for "Custom Records" with all DNS records contained within it, allowing you to use the domain for both Google Workspace and Sonar.