Table of Contents
How to: Setting Up a Company in Sonar
 Updated
by Mitchell Ivany
Updated
by Mitchell Ivany
Read Time: 7 mins

Company Creation During Initial Setup
When logging into your Sonar instance for the first time, you'll need to complete a series of pages designed to get your instance off the ground. These pages include parameters for your locale such as time zone, currency format, and date/time setting, as well as setting up your initial Billing Settings, which are covered in more detail within the Billing Settings article.
The final page of the instance setup relates to creating the company and has many of the same fields as the settings within the account:
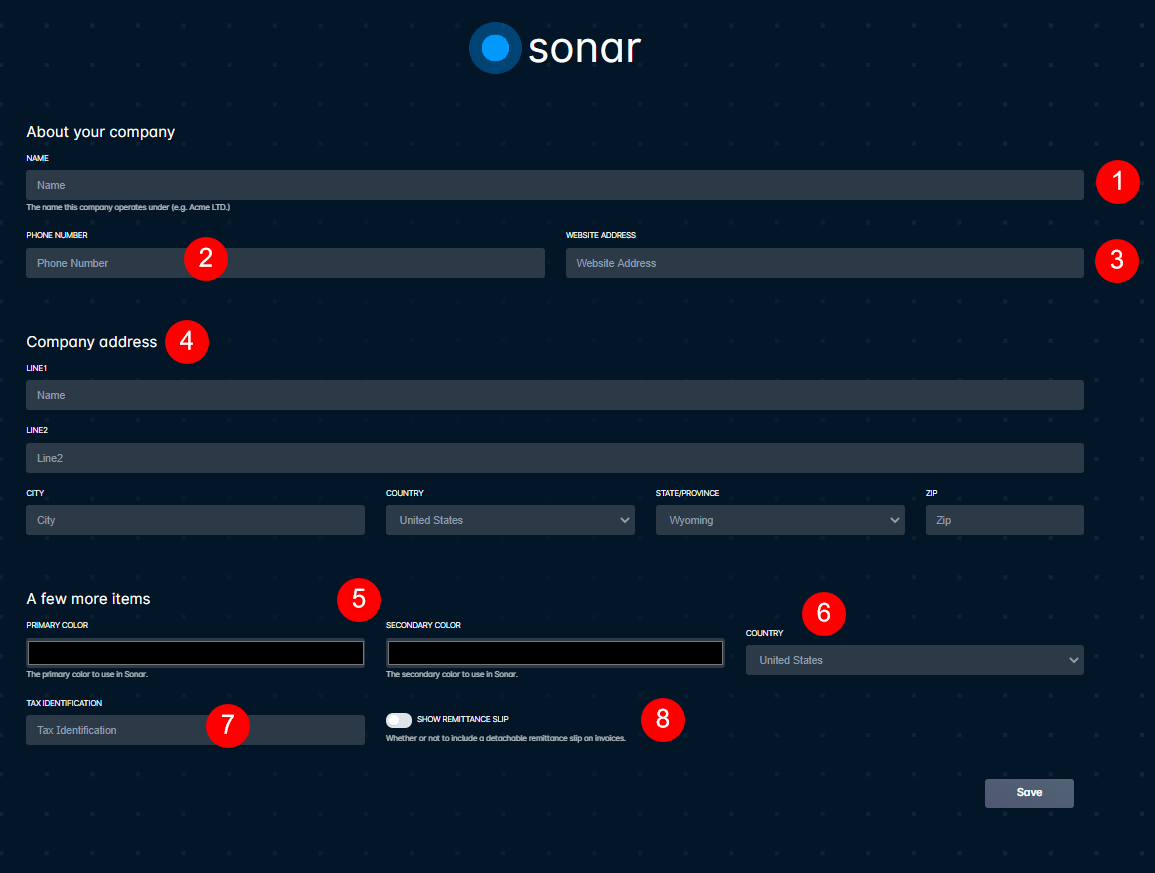
- The Name field allows you to enter the name your business operates underThis doesn't need to be your legal business entity, as that can be configured in a "Checks Payable To" field later.
- The Phone Number field is included on invoices generated by this instance and should represent a method your customers can use to contact you.
- The website address is included on invoices generated for customers on this instance and will be displayed along with the business name and phone number.
- The Company Address section is where you define the physical location of your business.
- The Primary and Secondary color fields are used to quickly identify the company at a glance, anywhere the company name is shown. These colors will be displayed as circles next to the company name. You can select them from a color picker, or enter their hexadecimal color codes.

- The Country dropdown configured here manages invoice configuration, rather than dealing with a physical address.
- Entering your Tax Identification number here will include this information on invoices generated for and sent to your customers.
- Enabling the "Show Remittance Slip" option will add a section to the bottom of the invoice sent to customers that can be detached and mailed along with a check, when such payment methods are accepted.
Adding a Company in a configured instance
A company can be disabled by navigating to: Settings > Companies > clicking "Edit" for the company, and then unchecking the Enabled checkbox.
Adding at least one company to Sonar is required in order to add and bill customers. However, additional Companies can be added as required. When adding a company, several pages need to be configured to make sure you can use this company with customer accounts.
- The Companies page
- Services
- Email Domains
Filling out the Company Information
Creating a company requires completion of the company information screen located under Settings -> Companies.
The Company information we'll be filling out in the following section will determine the information a customer will use to pay their bills, such as the physical location and payment entity for e-check and check payments, the basic company information such as the name, website URI, and phone number, and finally details such as the customer portal URL for online bill payments and customer account management gets configured here as well.
The company configuration contains only a few mandatory fields, however, we recommend filling out all applicable fields for your company being added to Sonar when possible.
Name, Website, and Default
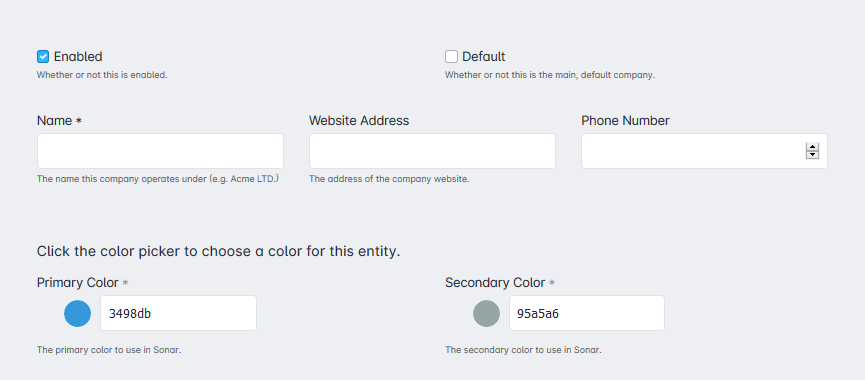
First, we have two checkboxes at the top of this section, labelled Enabled and Default.
- The Enabled checkbox determines whether or not new and existing customers can be assigned to this company within Sonar. If you add accounts to a company which is disabled afterwards, those accounts will remain under that company. This is useful when acquiring a new company and slowly migrating their customers over, as it leaves their perceived billing habits intact.
- The Default checkbox will make it so any new accounts added to your Sonar instance are automatically assigned to this company. If you currently have only one company, then you may want to use this option to simplify the account creation process.
The Primary Color and Secondary Color selectors are used to create a visual association with the company and can be selected by clicking on the color picker, or by typing in the hexadecimal color value in the text entry field. For example, in the Account List View, you may see accounts from multiple companies listed together - the colors are placed next to the company name, and allow you to differentiate at a glance:

Department Contact Information
Once you have created Departments within your instance, this section allows you to input the department's contact information, which will be used with the Outbound SMS feature.

Invoice Configuration
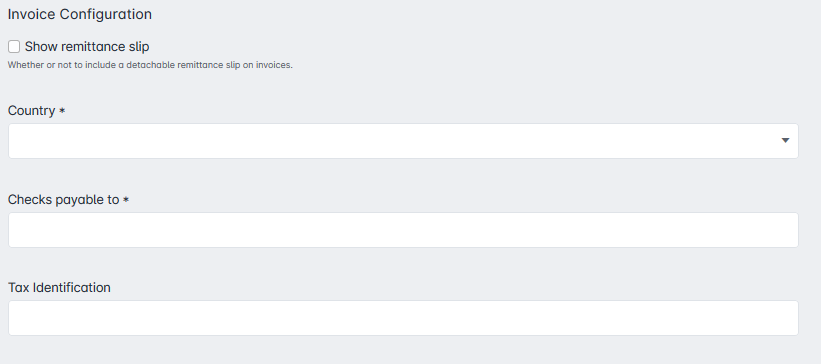
The Invoice configuration determines what is shown on customer invoices. The remittance slip is standard, attached to the invoice - displaying "Checks Payable to" and allowing your customer to enter the amount enclosed.
The "Checks Payable to" field allows you to modify the business name which appears on the invoice. This allows you to have a distinct company name in Sonar, while having the legal business name on the invoice.
If filled out, the Tax Identification filed will display your business' tax identification number on the invoice.
ISP Type

Although the ISP Type field is required when creating or editing a company, it is currently only used for the Avalara integration. If you are not using Avalara, this field can be used to make a selection that best represents the company being created.
Address Configuration
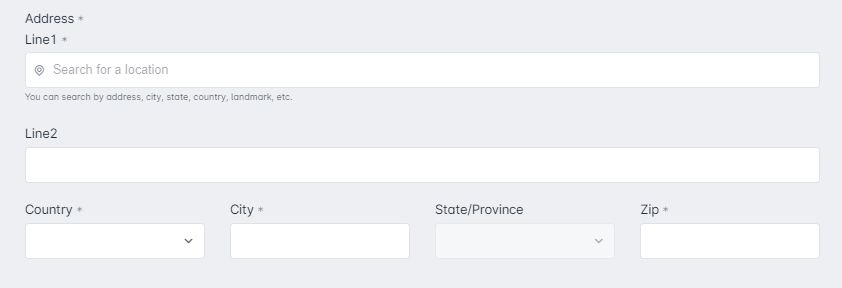
The address fields are where you enter the physical (or registered) location of the company being created, including any unit number. This information will be displayed on the invoice and on the remittance slip received by the customer.
Extra Configuration
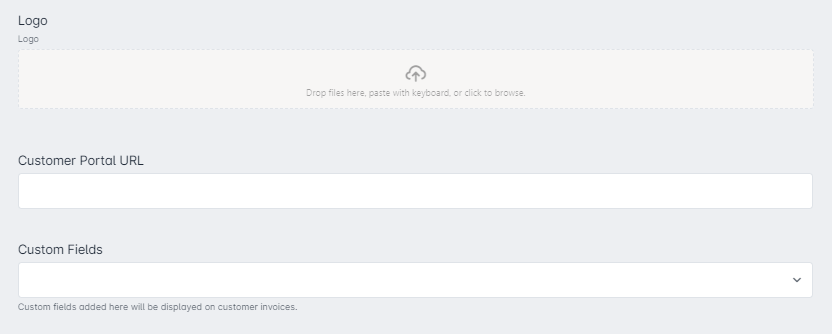
The Logo section allows you to customize the appearance of your business' logo as it appears on the invoice. The logo image must be under 2MB in order for the upload to succeed.
The Customer Portal URL configured here is used to complete the *|CUSTOMER_PORTAL_URL|* email variable
The Custom Fields section allows you to select any custom fields created for an account entity type and include their filled-out value at the bottom of the invoice. This field is commonly used for information that is federally mandated to be included on the invoice, such as a "Customer Reference Number".
Billing Communications Delay

Finally, the Billing Communications Delay section allows you to select a period of time which will prevent messages from being sent out to your customers. Simply click on the Start Time field and select the time in which you want the Billing delay to begin, then select the End Time. Once you have the period you want selected, click Save.
1. An account becomes delinquent
2. Billing runs successfully for an account
3. A credit card is expiring
4. A credit card or bank account payment is refunded
5. A late fee is applied to an account
6. An automatic payment fails or succeeds
7. An initial invoice is generated for a newly activated account
8. A receipt for payment
9. An invoice is manually emailed to a contact
We are currently evaluating additional triggers to include. If any of the triggers not currently covered by the Billing Communications Delay have potential to violate your region's regulations, disabling their use may be the best strategy for now.