Table of Contents
Print to Mail
 Updated
by Kristen Fiddes
Updated
by Kristen Fiddes
Read Time: 10 mins

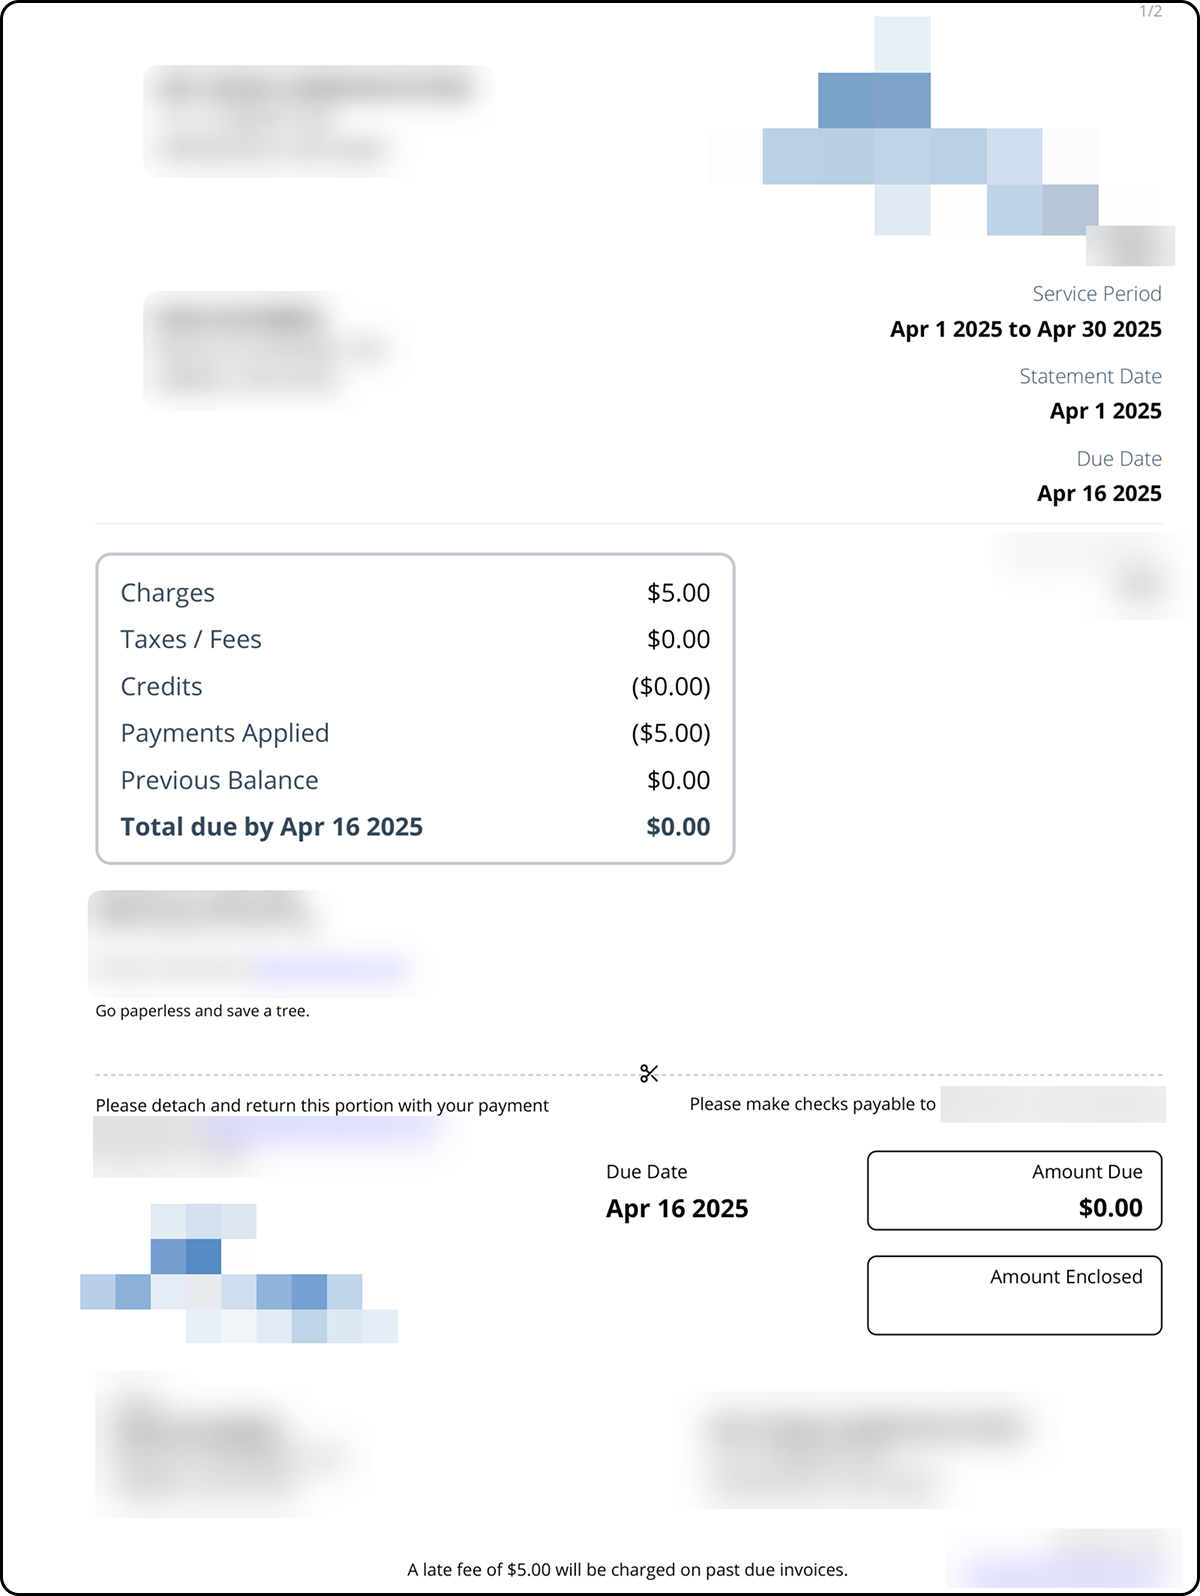
The Print to Mail feature provides the ability to have your automatically generated invoices printed and mailed to your customers, without requiring intervention from you or Sonar staff. Available directly from within your Sonar instance, you can enable or disable the feature in a few simple steps, as well as add funds to cover future invoice batches to be sent out. All invoices sent out include a return envelope, so customers can easily mail checks in, along with their remittance slips. Invoices sent through Print to Mail are printed and mailed from distribution centers located in Indiana and in Florida, then sent through USPS First-class letter mail service to your customers.
Only accounts with Print Invoice enabled will receive mailed invoices, to verify this setting please see below:
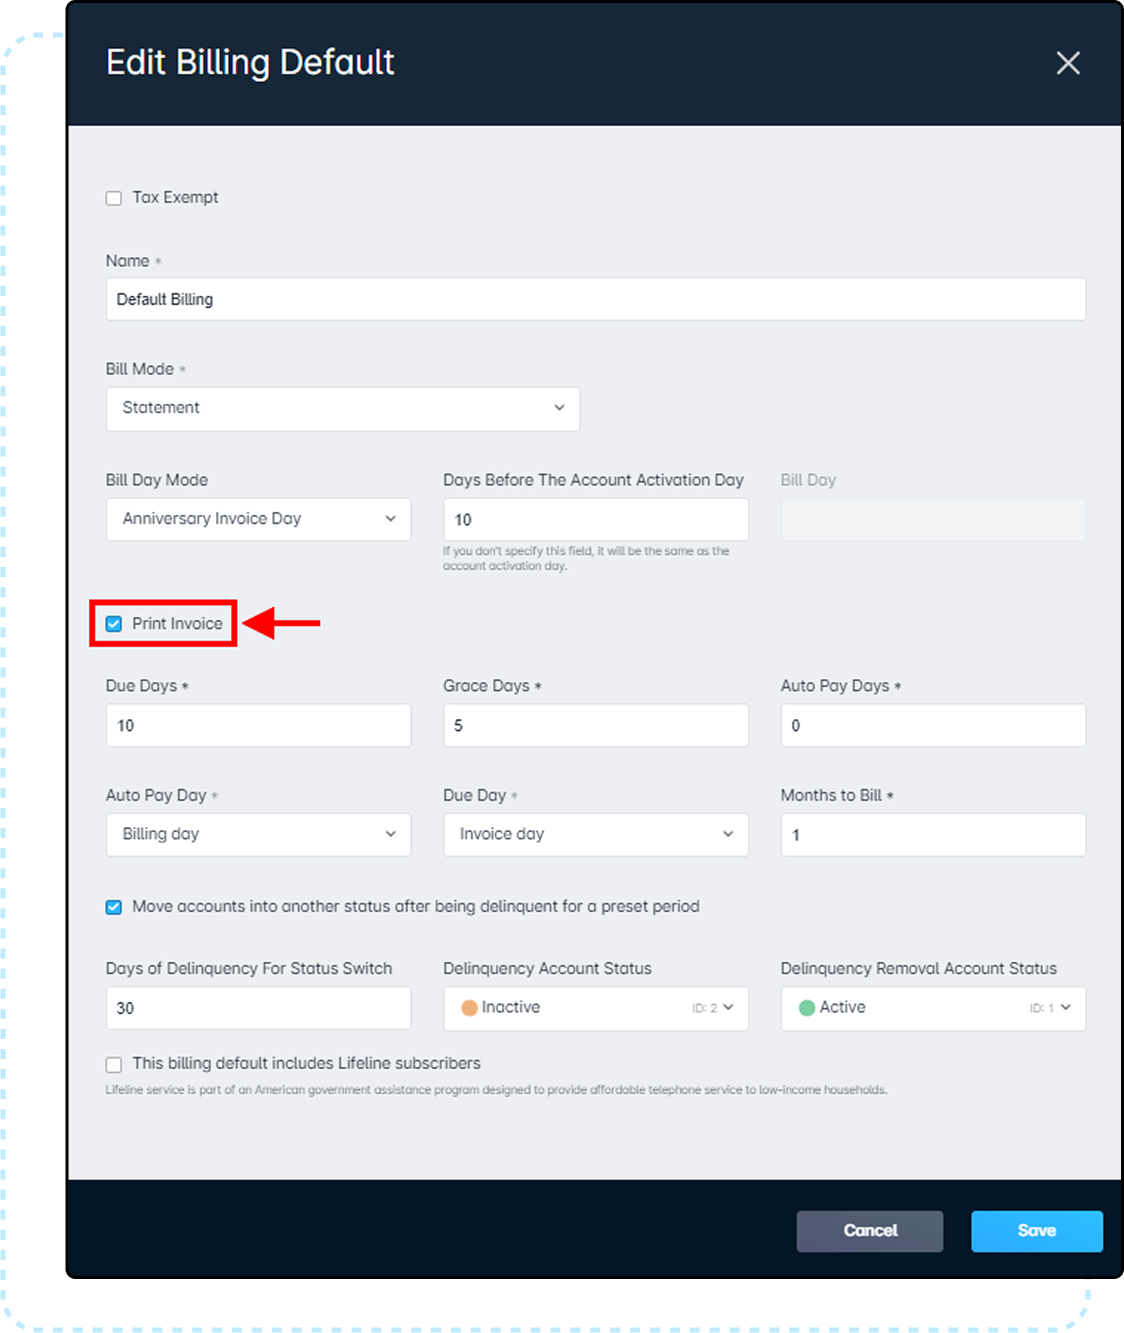
Billing Default
1. In your instance, navigate to Settings → Billing → Billing Defaults
2. Click on Edit alongside the default you want to edit/verify
3. In the newly populated modal, look for the Print Invoice box and make sure there's a checkmark present
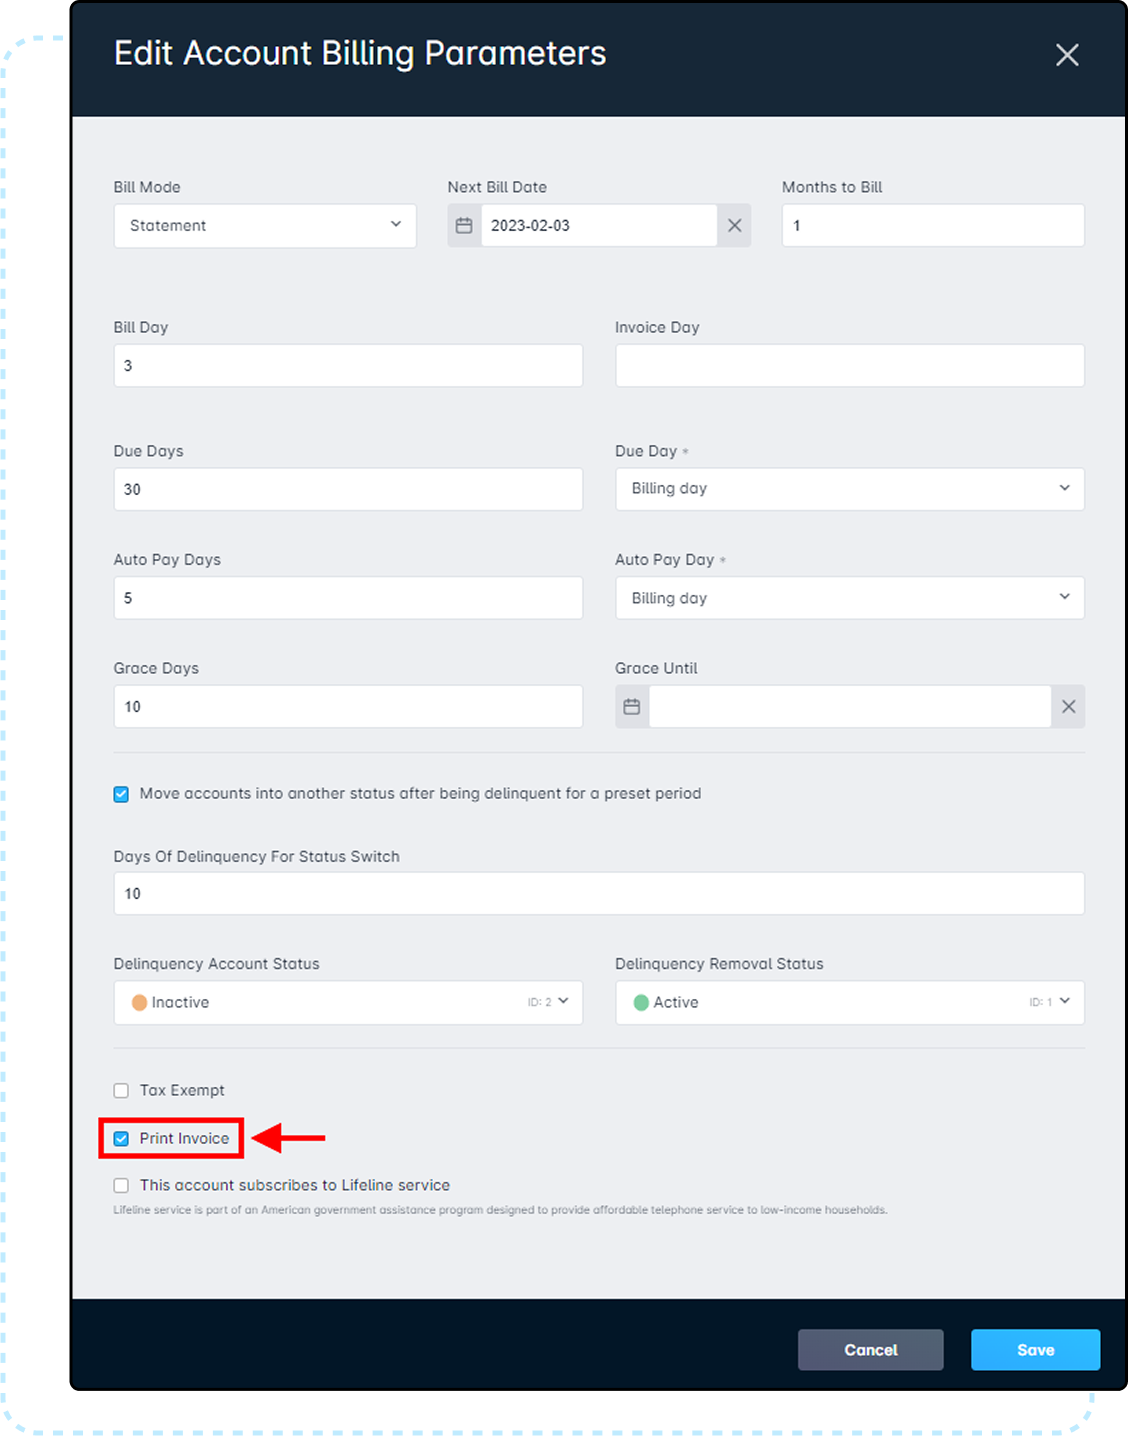
Account Billing Settings
1. In a customer's account, navigate to Billing → Billing Configuration
2. Click on Edit
3. Scroll to the bottom of the newly populated modal and look for the Print Invoice box and make sure there's a checkmark visible
If there are any customer mailing addresses located outside the two aforementioned regions, their invoices will automatically be excluded from any batches.
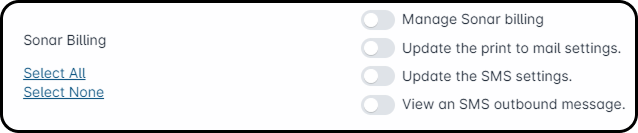
Permissions
To make use of the Print to Mail feature, the corresponding role permissions must be enabled first. Please take a moment to review these new permissions, and ensure that the relevant roles have them added before proceeding with any walkthrough steps below.
Navigate to Settings → Security → Roles and either choose to edit an existing Role or create a new Role. With the next page populated, locate the permissions reflected in the screenshots below and enable whichever ones are applicable to that Role.

Print to Mail Settings
To access the Print to Mail settings within your instance, navigate to Settings → Sonar Billing → Print to Mail. From here, you're able to enable and disable the feature, customize how you want the invoices to be printed and adjust the Low Funds Threshold. Below, we'll dig into the individual options.
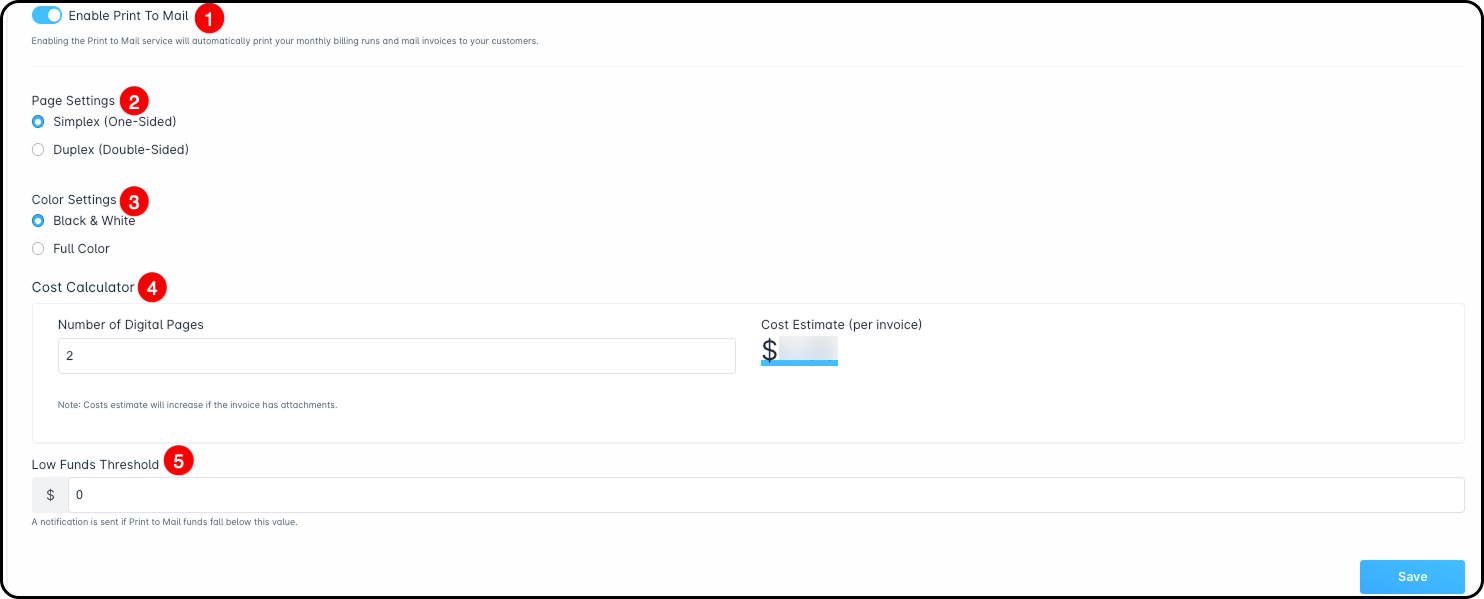
- The trigger here allows you to enable or disable the Print to Mail feature. When disabled, the options below the trigger will disappear and all paper invoices will need to be printed and mailed manually.
- Page Settings determine how you would like the invoice to be displayed for the customer, either with the information on one side (resulting in more pages) or on two sides.
- Color Settings provide an added layer to customizing how you want your paper invoices to be displayed to customers.Full Color and Duplex do have a higher price point.
- The Cost Calculator provides an estimation of the cost per invoice; as you toggle the Page Settings, Color Settings, and Numbers of Digital Pages, the Cost Estimate will change.The cost will be reflected in either USD or CAD and will vary depending on your business' country of operation. Do note, the cost displayed here is rounded up to the nearest full penny. If your print would end on a fraction of a cent, it will instead be rounded up.
- As invoice batches are paid for as they are sent out, the Low Funds Threshold allows you to be notified if the amount drops below a certain amount. In the event of this happening, an alert will be sent to those with the applicable notifications set.
Notifications
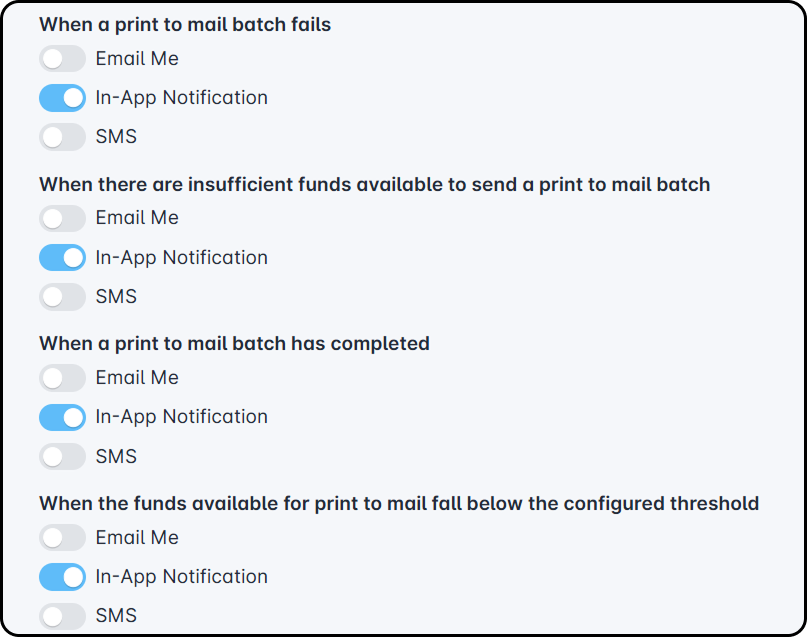
Print to Mail notifications ensure that you are informed if a specific criteria is met. The four notifications are as follows:
- When a print to mail batch fails.
- When there are insufficient funds available to send a print to mail batch.
- When a print to mail batch has completed.
- When the funds available for print to mail fall below the configured threshold.
To enable these for your user, navigate to your Notification Preferences.
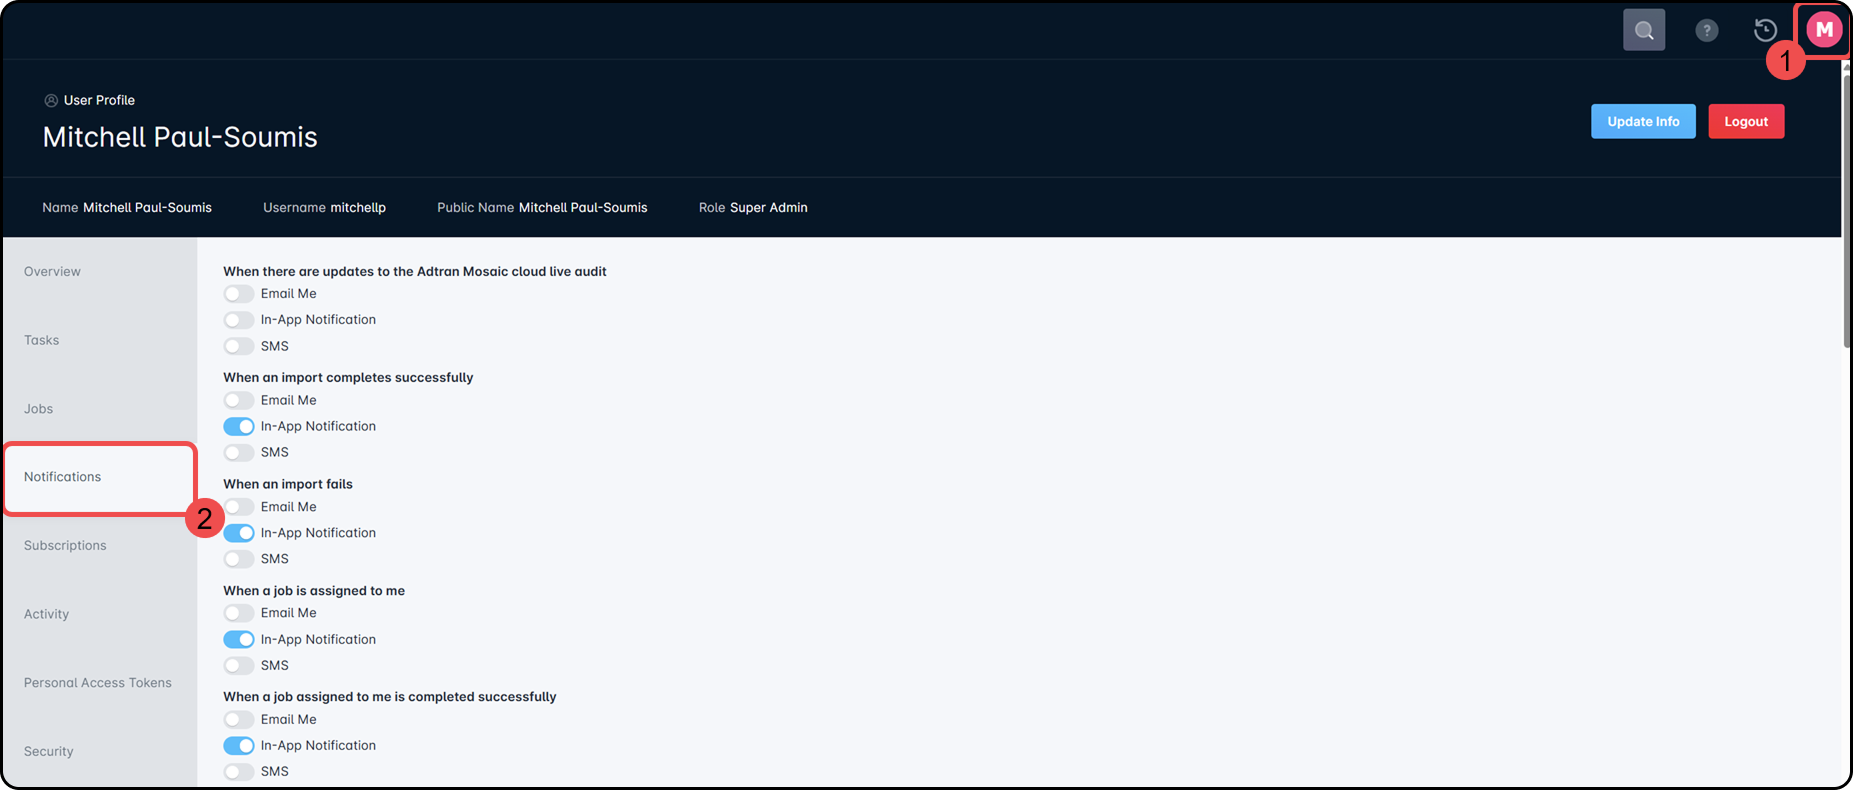
Once populated, locate the print to mail notifications and enable the trigger for Email Me and/or In-App Notification.
Sonar Billing
Sonar Billing offers more than access to the Print to Mail feature. From here, you're able to update your credit card information with Sonar, view previous transactions, access invoices for both your instance fees, and view your Print to Mail and SMS transactions.
Overview
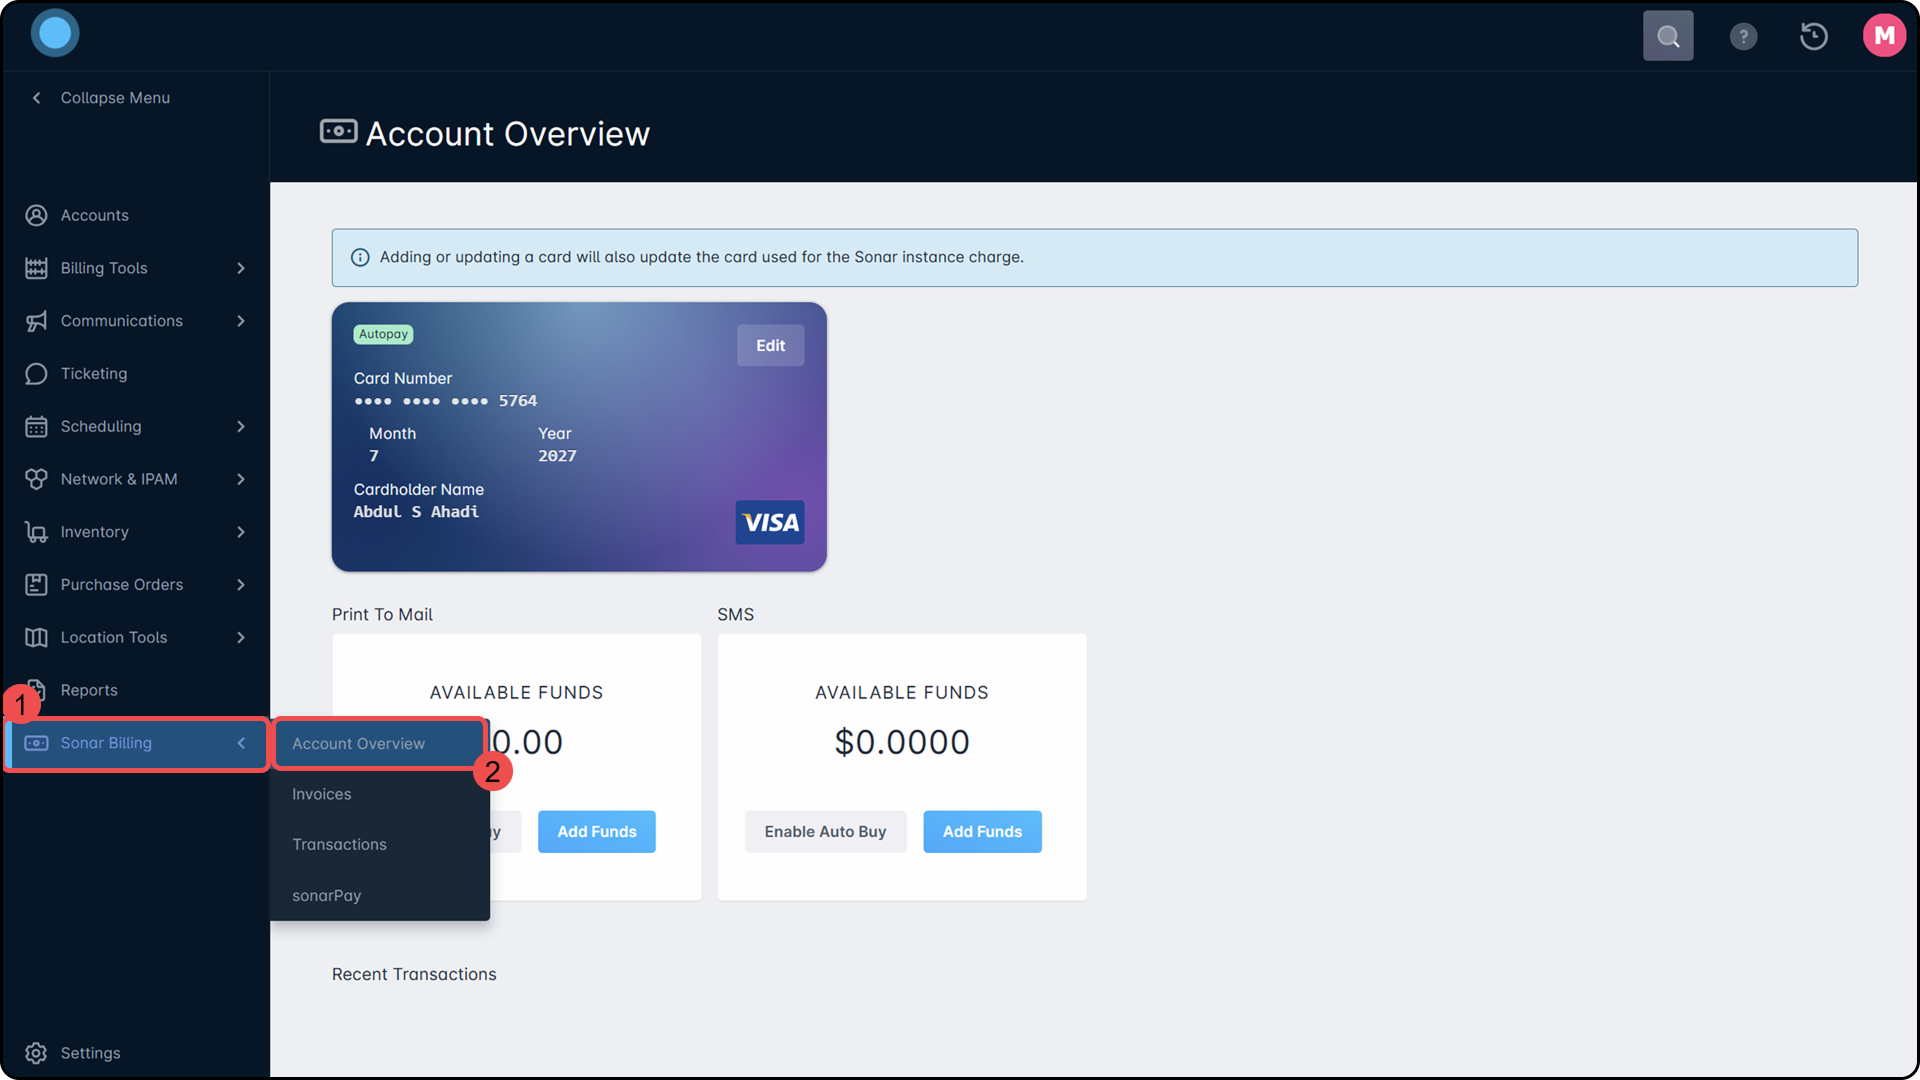
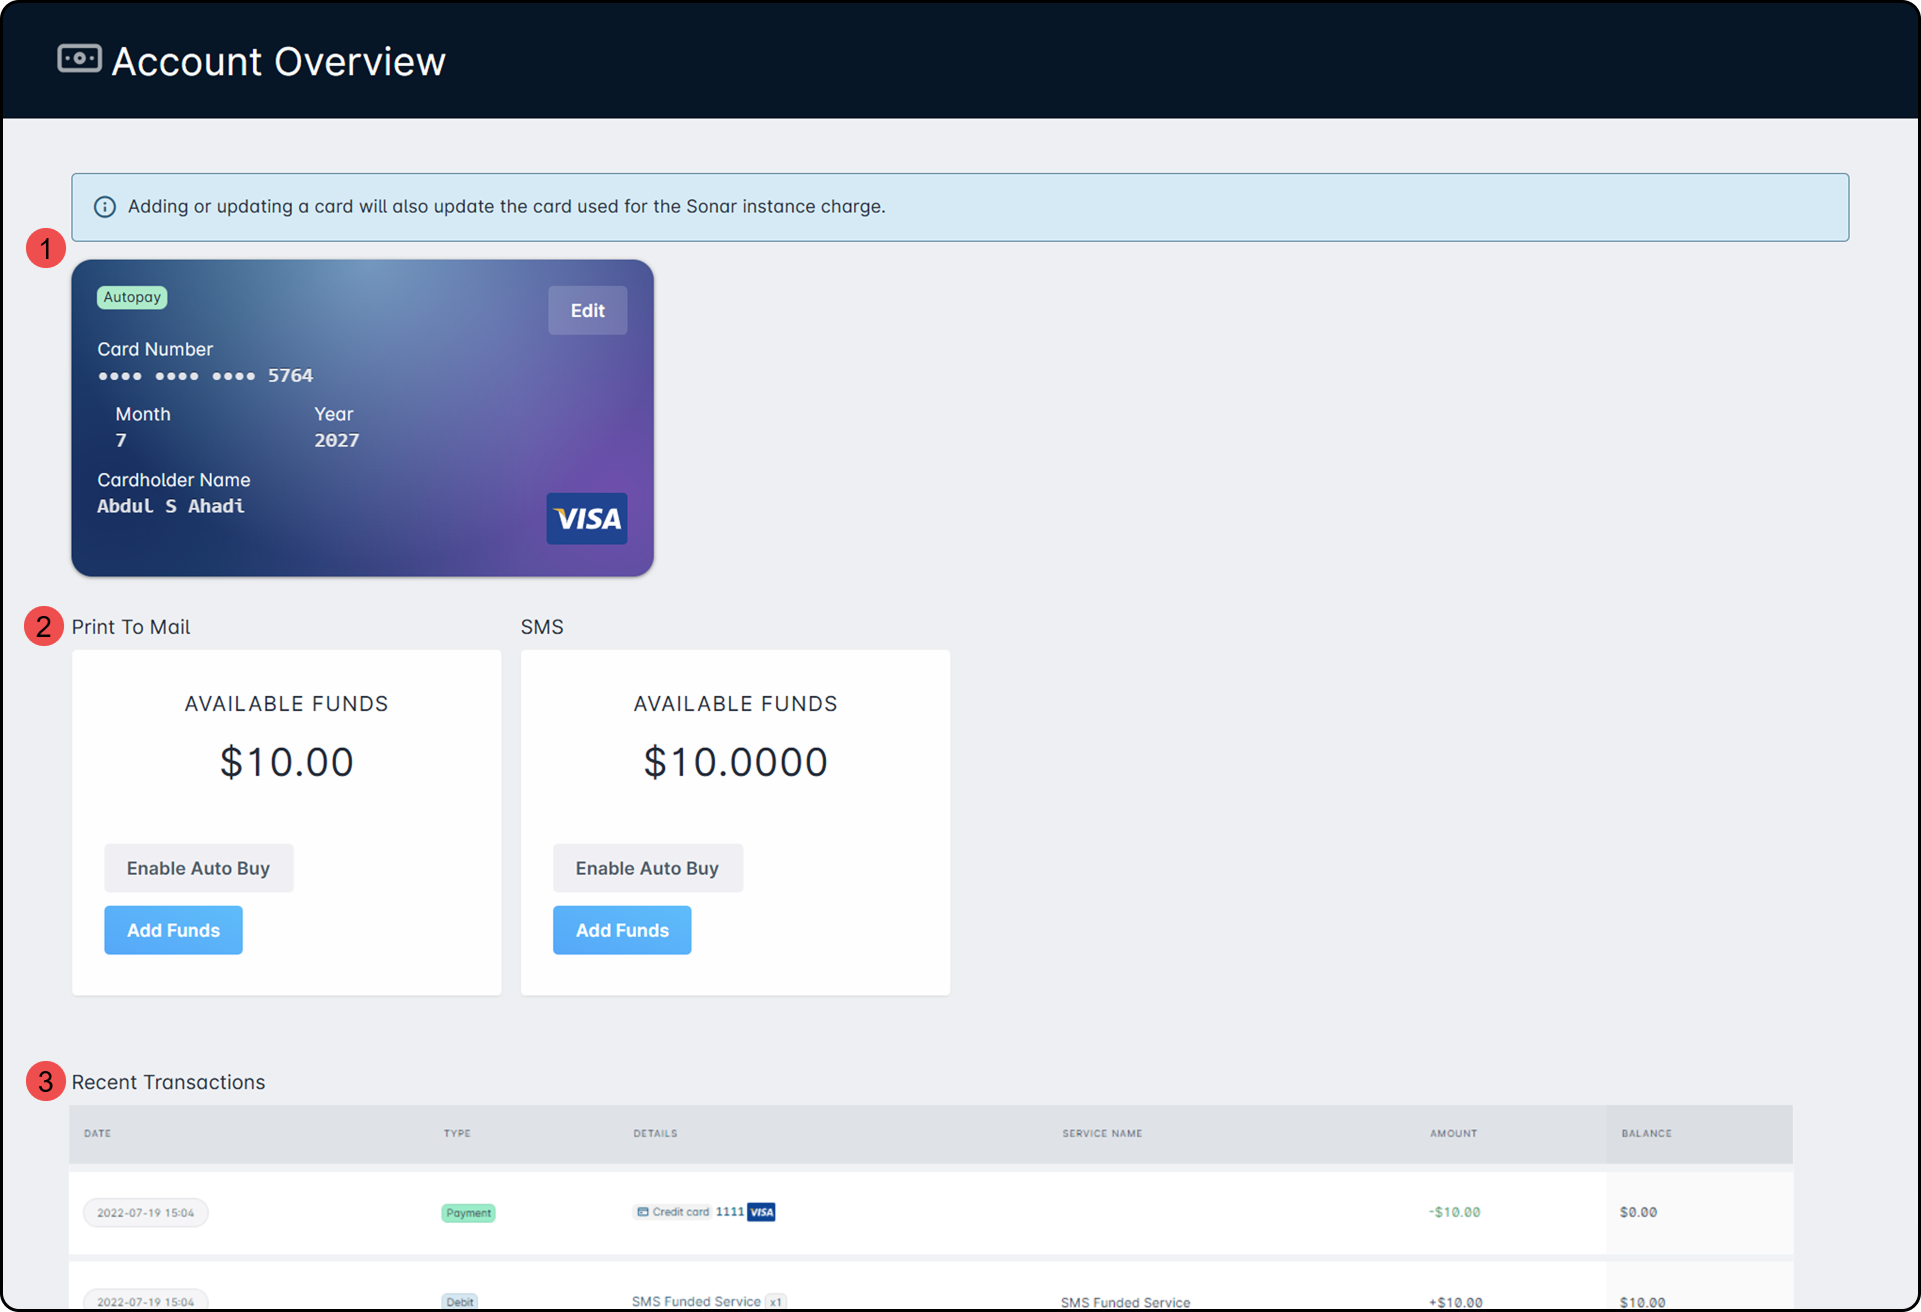
The information reflected on the Overview page of Your Sonar Account depends on a few variables:
- What displays underneath Payment Details depends on whether you've previously set a credit card to autopay for your instance fees, or if you've since added a card from the page shown in the screenshot below. If you have added a credit card through our team, but declined to set it to auto pay, the card will not display here. Without a credit card set to autopay, you are limited in some of the features of Print to Mail which we'll touch on below.
- The Print to Mail section reflects any available funds; this amount is separate from any upcoming instance fees.
- Recent Transactions provides a brief snapshot of the latest transactions regarding both your instance, Print to Mail and SMS. For a list of all transactions, you'd simply navigate to the Transactions header in the column to the left.
The charges for Print to Mail are applied as batches are processed. This means that there either needs to be funds available in your instance or have auto buy enabled; we'll touch on the latter option below. However, to add funds to your instance, you must have a credit card reflected under Your Sonar Account.
If there is not one already visible here, you would click Add Credit Card and input the applicable card details. Once added, the card is automatically set to Auto Pay. With a card added, you're able to select Add Funds and input the amount you wish to add in the new modal. Sonar will add the funds to your account immediately. The cost of these funds will be included in your regular invoice rather than being charged instantly.
How to Enable Auto Buy
Auto Buy works differently to Auto Pay; it is specific only to Print to Mail and/or SMS and means that as funds are needed to process batches or notifications. Sonar will add the funds to your account immediately. The cost of these funds will be included in your regular invoice rather than being charged instantly. Auto Buy can be enabled for just Print to Mail and not SMS, or vice versa. To enable Auto Buy, follow the steps below:
- Navigate to Sonar Billing using the menu options in the column to the left of your screen.
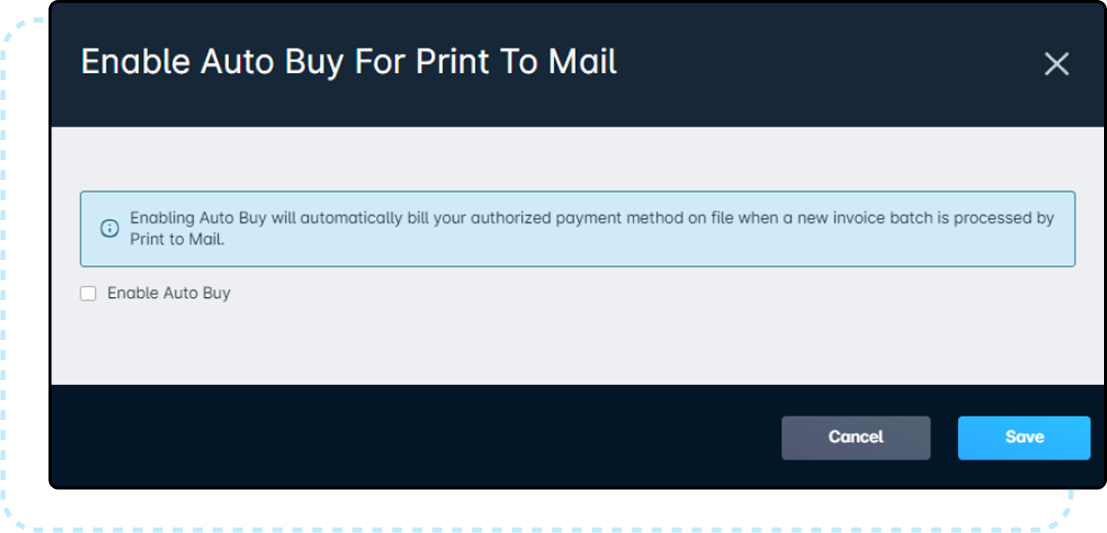
- Click the Enable Auto Buy button underneath the Print to Mail section.
- In the new modal that appears, add a checkmark alongside Enable Auto Buy and click Save.
Invoices
The invoices displayed here will be your instance invoices. Each line item displays the invoice number and some basic details about the invoice, such as the date and amount; you're able to save a further breakdown by clicking Download Invoice on the corresponding line item.

Transactions
The Transactions page provides a full view of all transactions processed for your instance and the Print to Mail feature. With each line item, you're able to identify the date the transaction took place, the transaction title and the total amount processed.
Print to Mail Batches
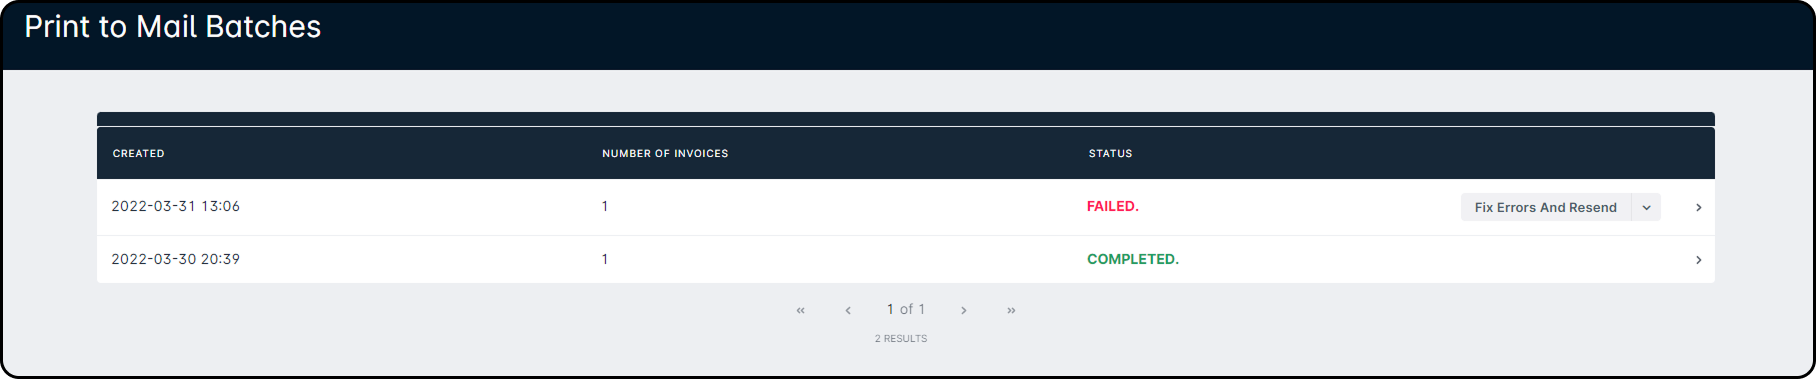
Billing Tools provide access to a subsection titled Print to Mail Batches that reflect all batches attempted so far; this will include those that are complete, still in progress, and any that have failed. For each batch item, you are able to click on the corresponding arrow to the far right and populate a side menu that details the cost of the batch along with its details e.g.,snagsnag duplex, full color or simplex, black & white. The side menu also provides historical information as to when the batch was moved to in progress, whether it failed at any point, and finally when it moved to a completed status.
Batches begin to process after a brief delay, which means that there is only a short window to cancel a batch if it is required. The only alternate time you're able to cancel a batch is if it fails, at which point you're able to either correct the error prompting the failure or cancel the batch altogether. If a batch moves into an "In Progress" status, this would indicate that the request has been received but has not yet been processed.
Failed Batches
If an address cannot be validated, the batch will fail to be sent out until the problem address is corrected. In this event, you can easily identify the affected batch by the red FAILED status.
To identify and correct any errors, follow the steps below:
- Click the button Fix Errors and Resend.
- In the newly populated window, you'll be provided a list of the addresses that require corrections. Once you've identified the error, click Update Address.
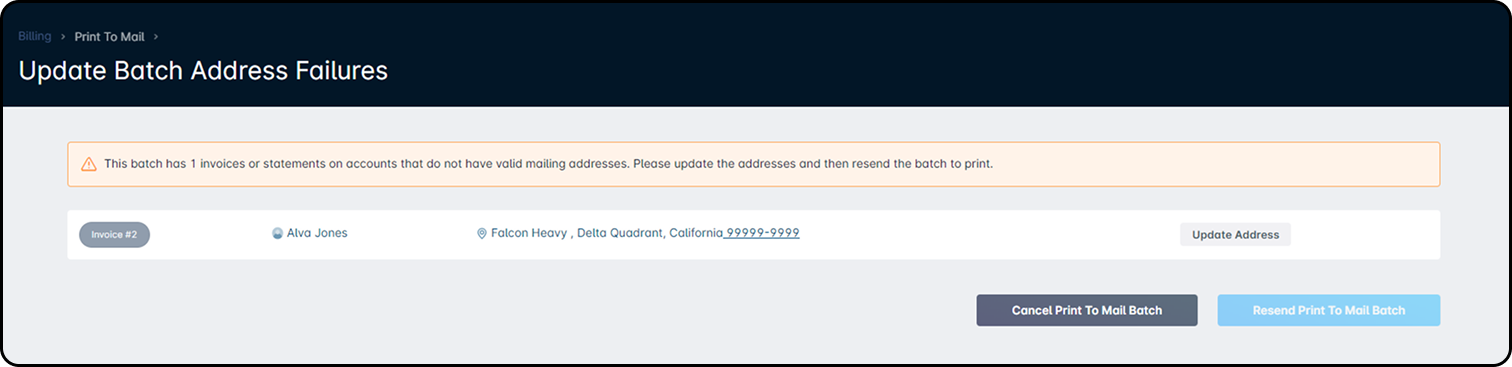
- Make any necessary adjustments in the next modal and once complete, click Resend Print to Mail Batch.
Alternatively, you are also able to cancel the Print to Mail Batch from the same screen shown above.
Insufficient Funds
If a batch were to fail due to insufficient funds, the status will reflect this specific error.

In this event, you would need to add additional funds before the outstanding batches can be sent. This can be done from the Sonar Billing page if there is an existing credit card. Alternatively, you can contact our Support team and request that they process a charge for a specified amount, which can then be completed by our Billing team.