While creating a job is covered in the article “Scheduling How-to: Create and Book a Job,” this documentation focuses on how to update jobs due to scheduling conflicts, job type changes, or customer-driven adjustments.
Permissions
Before getting started with the feature, your user roles will need to be adjusted to account for the permissions required to use the Edit Job feature.
If you're a Super Admin, you already have full access and no changes are needed. To learn more, see the Roles and Permissions article.
Go to Settings -> Security -> Roles. Edit an existing role or create a new one. On the next page, find the permissions shown in the images below and enable the ones that apply to that role.
Permission Details
1. View all jobs lets users access the Scheduling page and must be enabled for the other options to matter. 2. Update a job controls whether users can see the Edit Job option — this should also be enabled. 3. Reschedule a schedule blocker lets users move blockers like Lunch or Break. It isn’t required for this feature but can be useful to prevent jobs from overlapping with blockers.
Permission Details
1. “Update a job skipping validation” lets a user click Ignore Warning when an error appears while changing a scheduled job. It’s optional, but helpful for users who frequently manage the schedule.
How to Edit a Job
You can edit a job from several areas within your system:
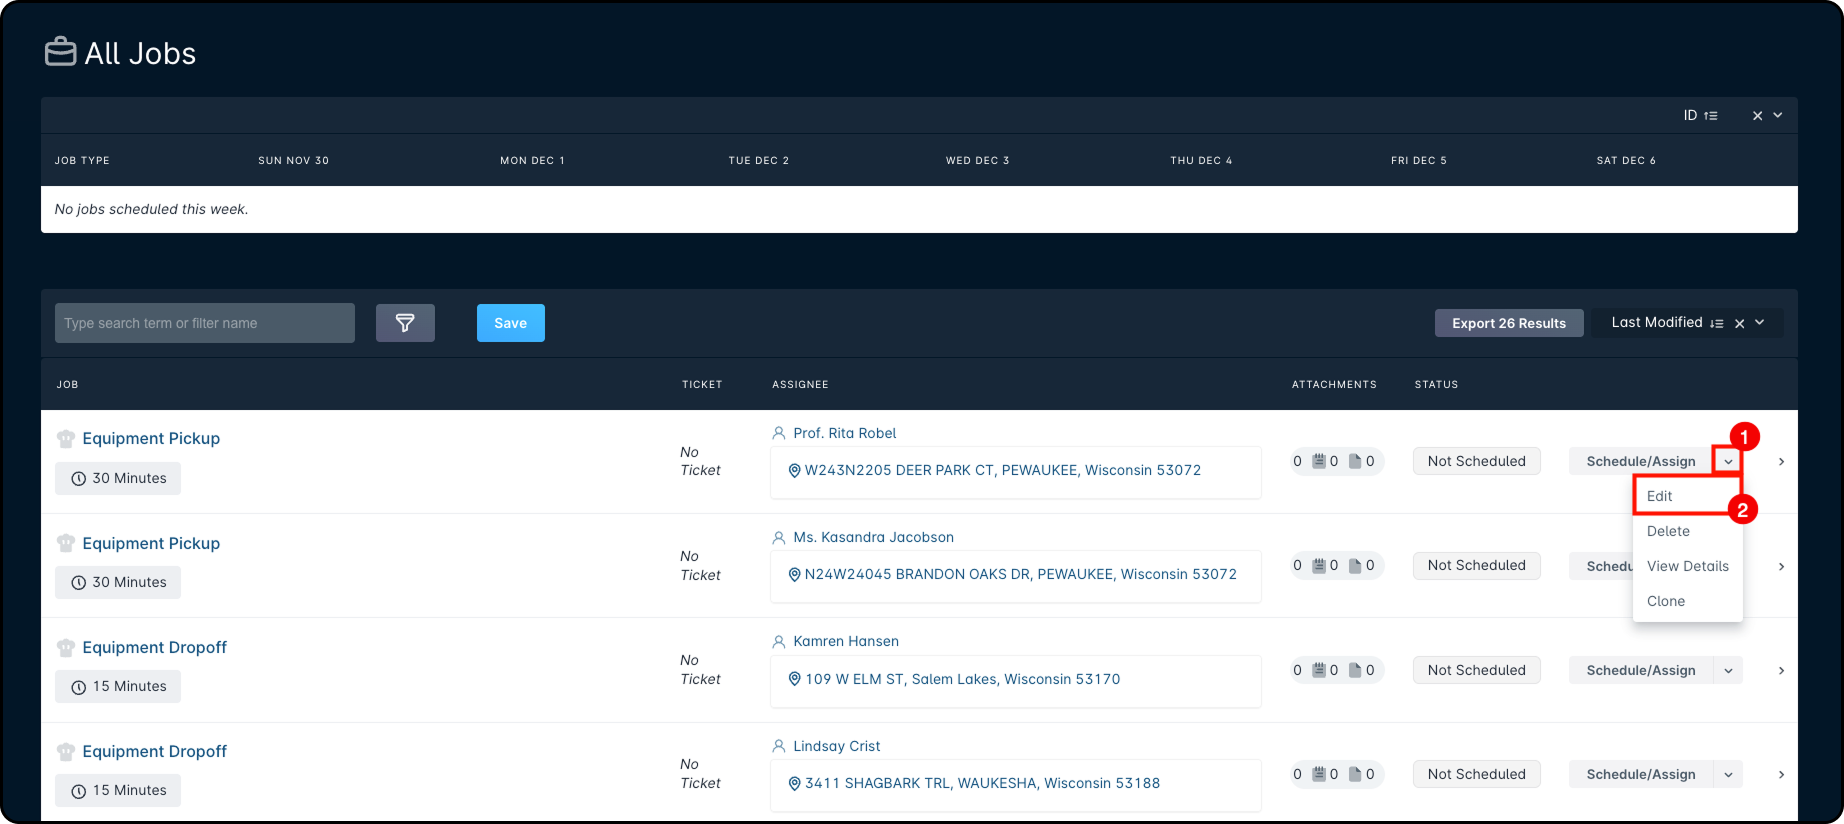
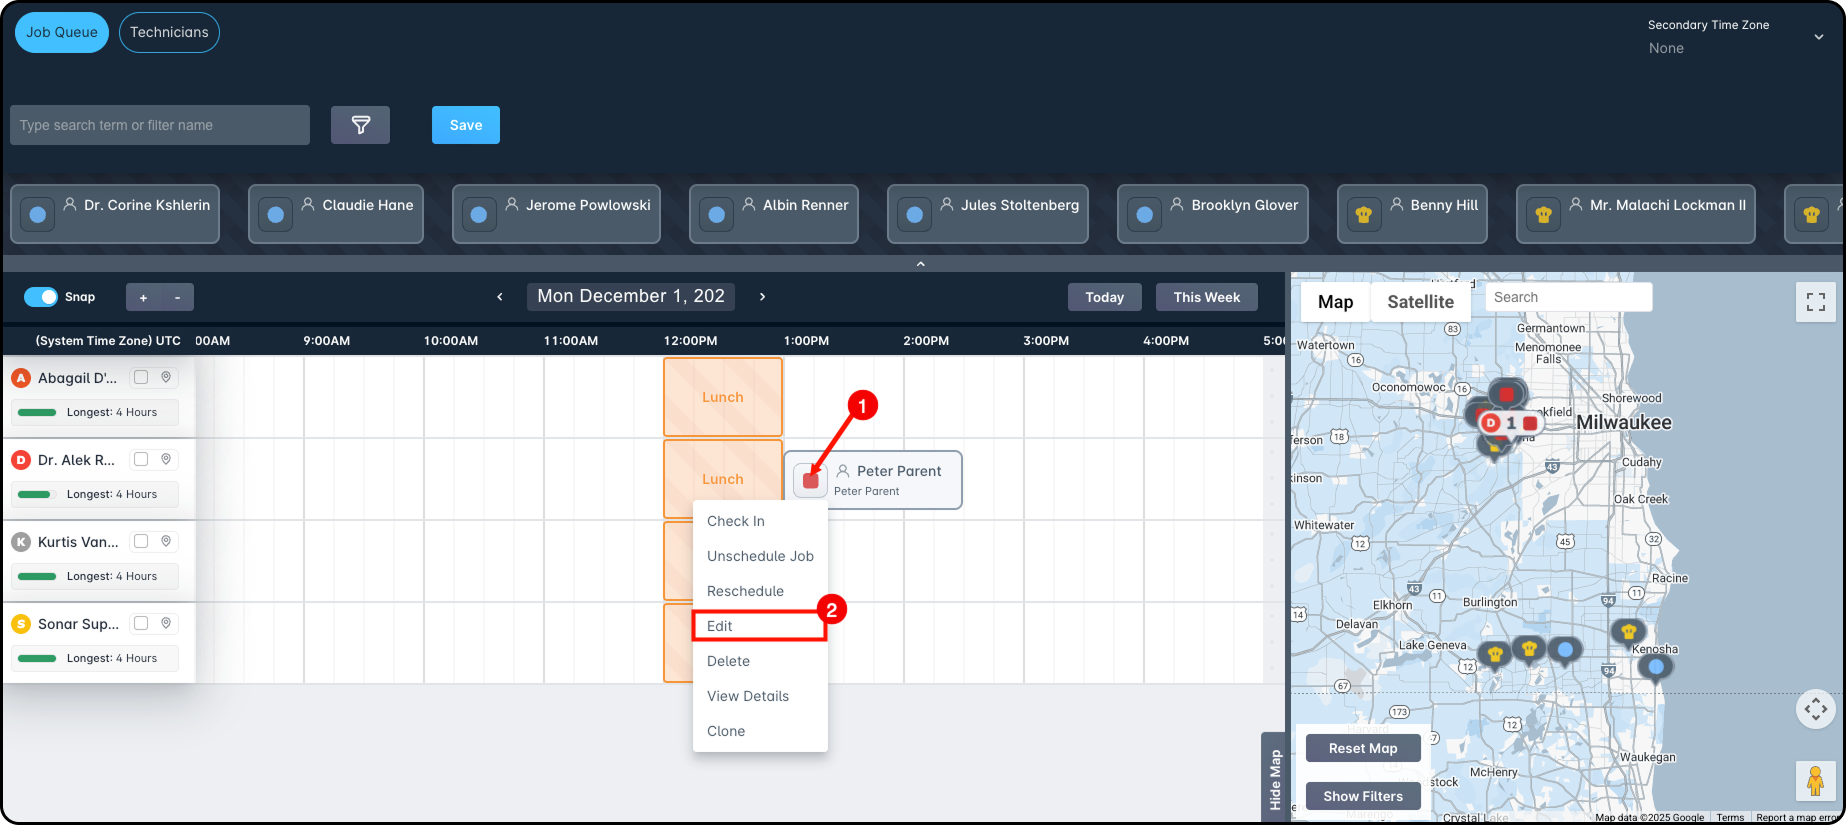
From a Scheduling page, whether in the Jobs Table or Dispatcher view. In the Jobs Table view, click the down arrow next to the action button and choose Edit from the menu that appears.In the Dispatcher view, click the job icon and choose Edit from the menu that appears.
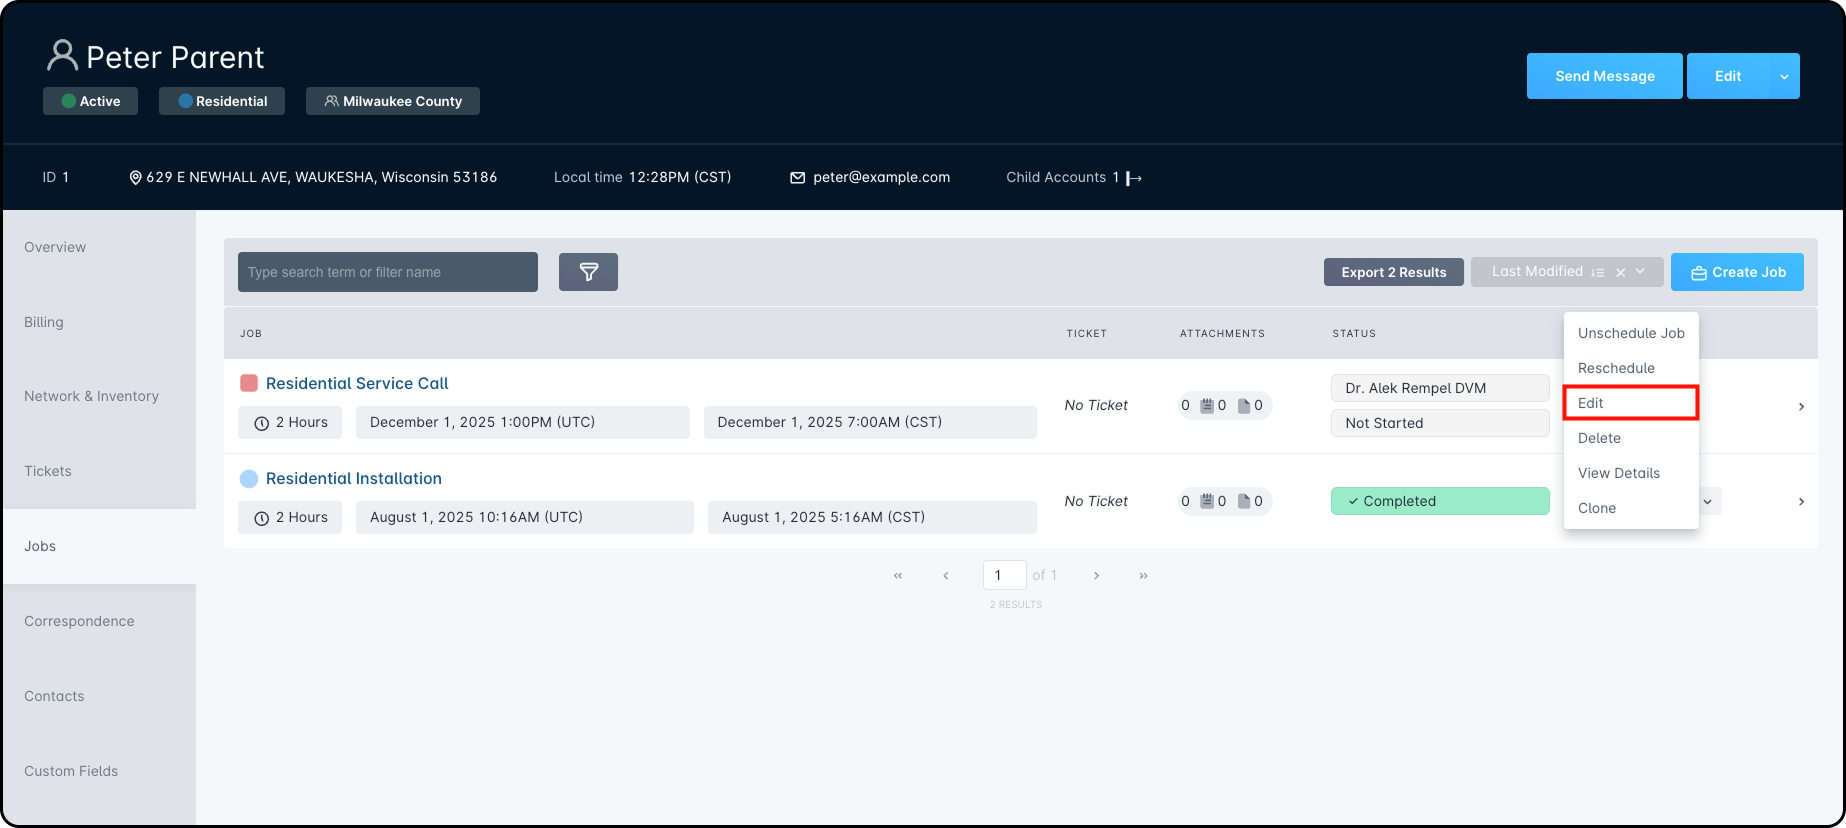
From within a customer account. Go to Jobs, click the down arrow next to the action button, and choose Edit from the menu:
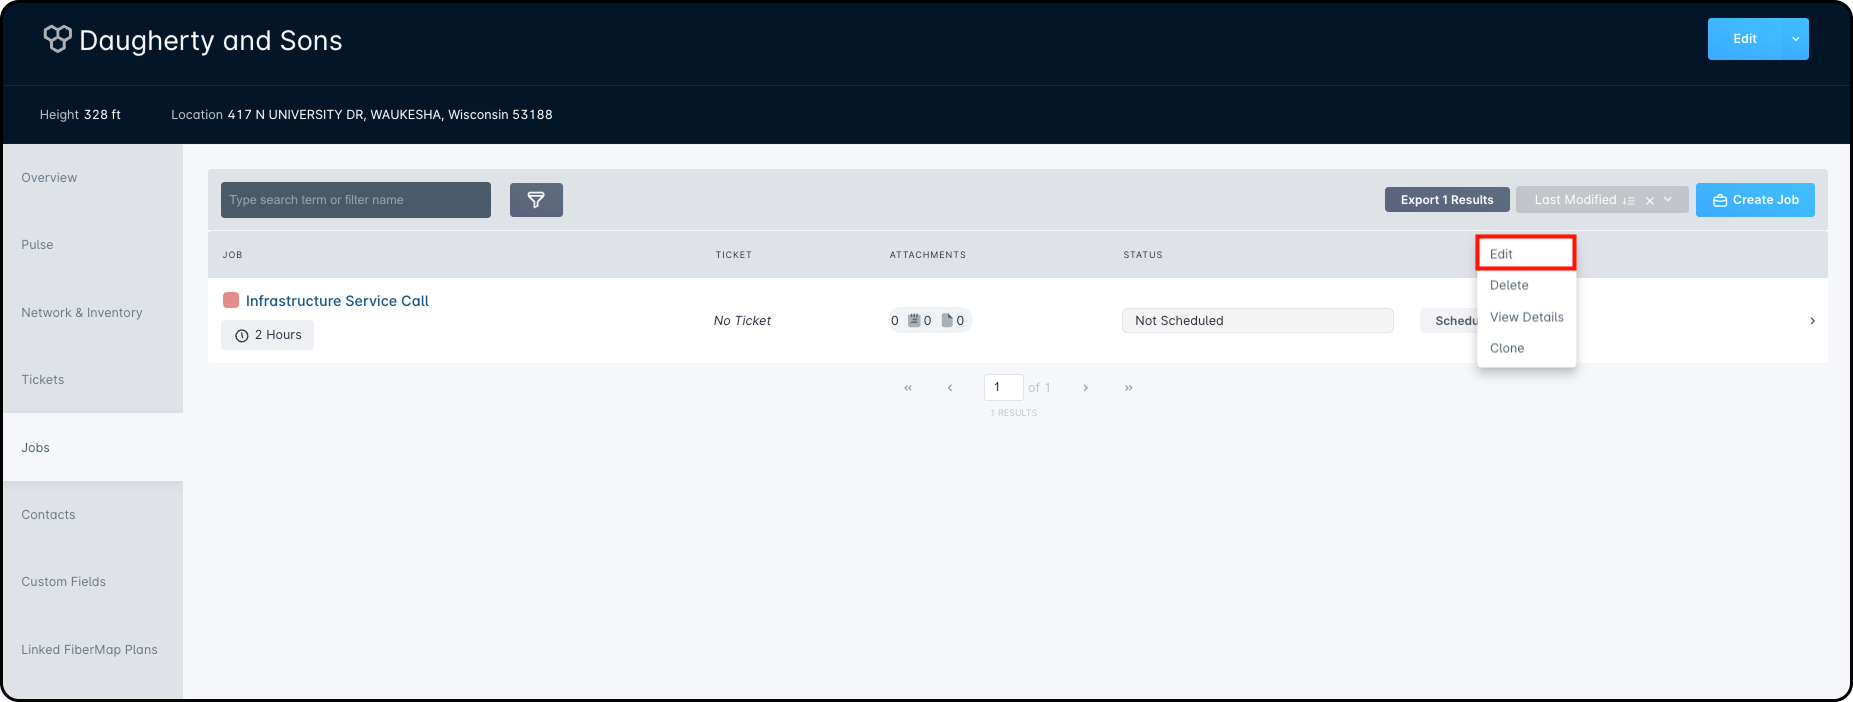
From within a network site account. Go to Jobs, click the downward arrow next to the action button, and select Edit from the menu:
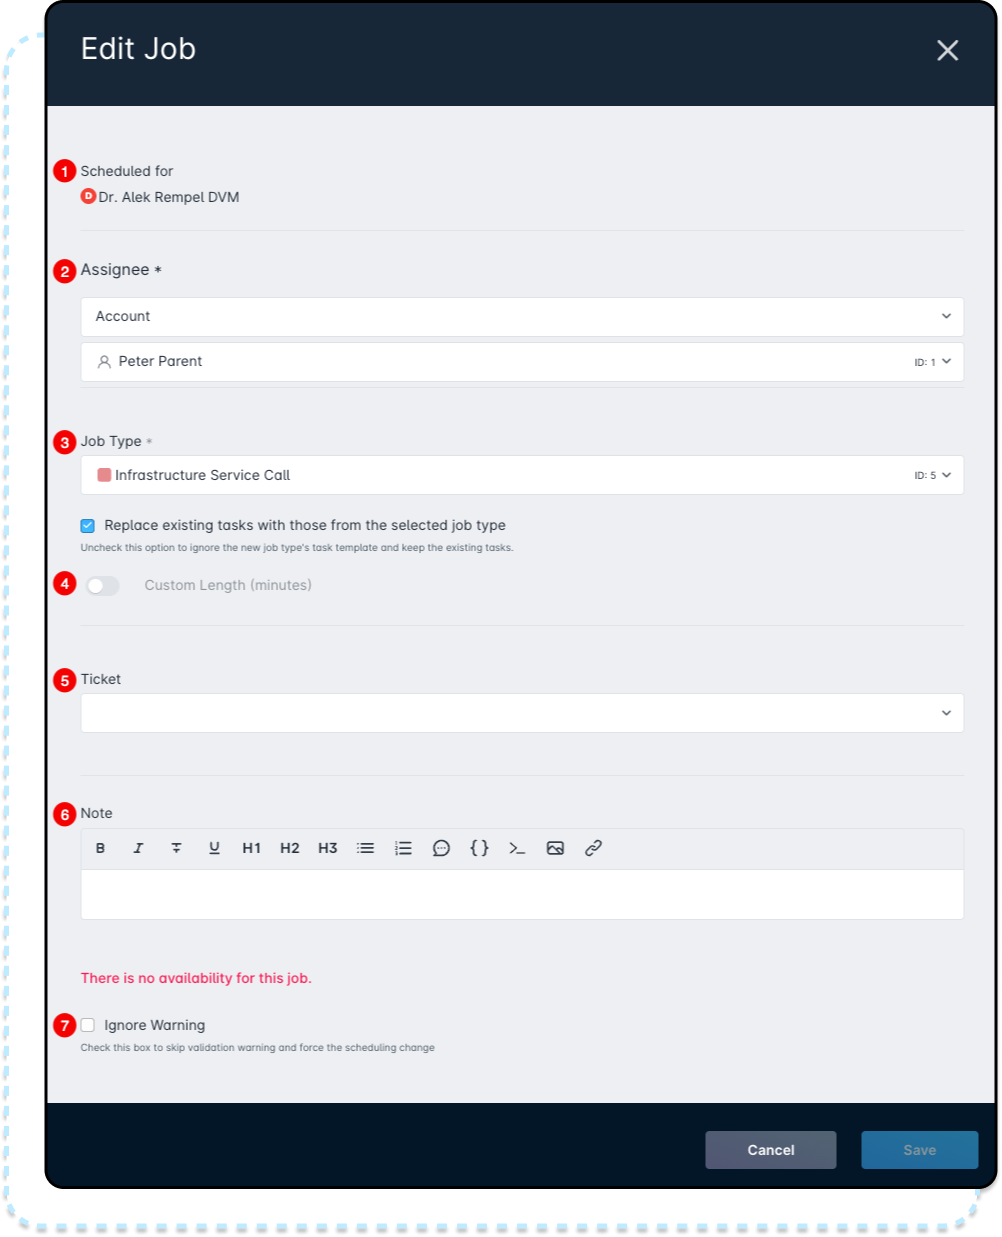
Selecting "Edit" alongside any job will open the following modal:
This section only appears if the job is already scheduled.
This field shows who or where the job is assigned.
This dropdown shows the current job type and lets you change it. If you choose a different type, the following checkbox appears:This checkbox lets you replace the job’s existing tasks with the default tasks for the new job type. You can uncheck it to keep current tasks, but be aware this may cause required tasks to be missed.
Tasks already marked Completed will stay completed even if the job type changes.
This toggle lets you adjust the job length.
This dropdown lets you change or add the associated ticket.
Use this field to explain why the job was edited (for example, job type was chosen incorrectly or the customer requested changes).
This checkbox lets you override any errors that appear when changing the job type. For example, if a technician only handles service visits and you switch the job to an installation, an error will appear—this checkbox will then allow you to override it.
This checkbox only appears for users with the Update a job skipping validation permission enabled.
Considerations for Scheduled Jobs
When editing the job type of a scheduled job, keep the following in mind:
Impact on technician schedules: Even if you can override availability, think about how the change affects the technician’s day. For example, a 90-minute job starting at 3 pm should finish by 5 pm. Changing it to a 180-minute job would push the end time to 6 pm. While schedules sometimes run long, it’s best to avoid creating conflicts when possible.
Conflicts with other jobs: If the change creates an overlap with another job, you’ll see an error.You can choose Ignore Warning, but doing so may cause the technician to miss the next customer’s expected arrival window. When possible, adjust the schedule instead of overriding.
“There is no availability for this job.” This may mean there isn’t enough time to complete the job, or that the technician is not included in the required Schedule Availability (for example, not trained for certain work). If you're unsure whether the technician can perform the job, check with your manager.
Learn more about Schedule Availabilities by clicking here.
Blocked by schedule blockers: You may see: “This job is blocked by the schedule blocker ‘XYZ’.” While you can ignore the warning, avoid overlapping blockers such as Lunch or Break, as these may be mandatory. Only use Ignore Warning if you plan to update the schedule afterward to prevent conflicts.
Example Use Case
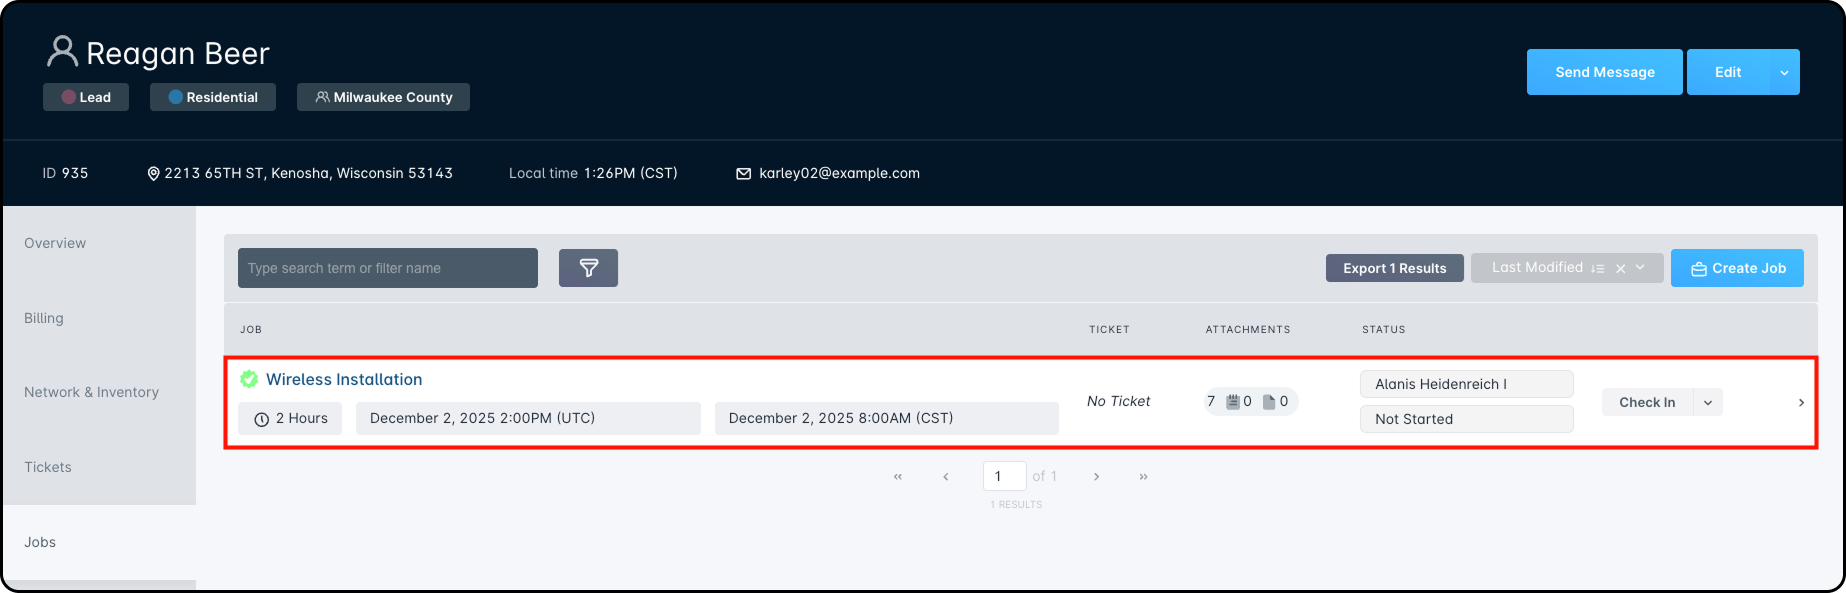
In our example, A potential customer, Raegan Beer, was originally booked for a Wireless Installation by the Sales team.
During the Dispatch team’s audit of upcoming jobs, they noticed that Raegan’s service address is actually in a Fiber service zone. Since Fiber Installations require different equipment (like a demarc box, fiber optic cable, and a fiber cleaver), the job type needs to be corrected to ensure the technician arrives properly prepared.
To update the job:
Click the down arrow next to the job’s action button and choose Edit.
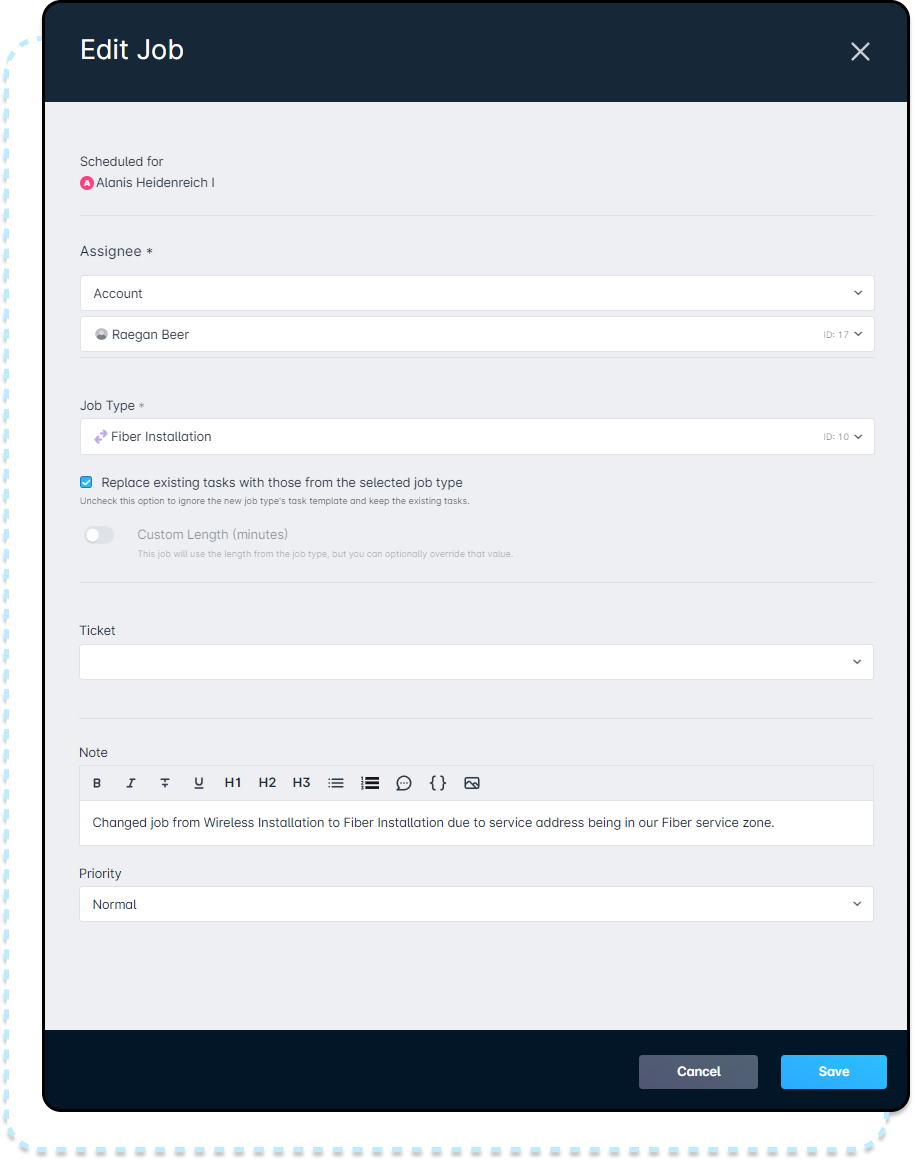
In the edit modal, open the Job Type dropdown and select Fiber Installation.
Because fiber and wireless installations differ significantly, make sure Replace existing tasks… is checked so the correct tasks are added.
Add a note explaining why the job type was changed to keep a clear record.
Click Save. In this example, the technician (Alanis) has Fiber Installation availability, so the job saves successfully.
If Alanis didn’t have the correct availability, you would see an error.
While you could select Ignore Warning, you should consider whether the technician is actually trained for that type of work. Even if you want to meet the customer’s installation timeframe, it’s important not to assign a job the technician isn’t qualified for—it could lead to wasted time and rescheduling.
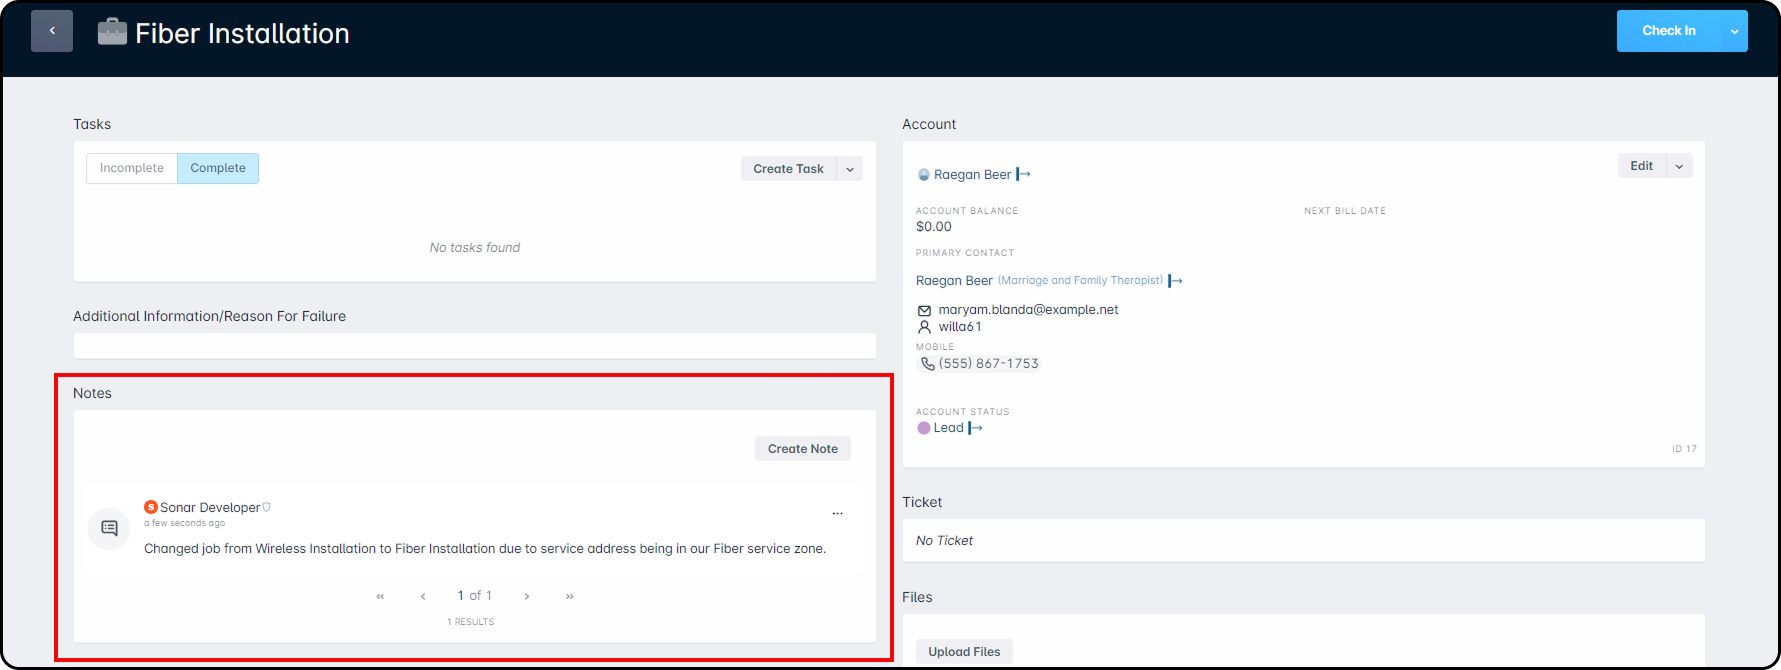
Once saved, the modal closes, the scheduling calendar updates automatically, and you’ll see the note you added when you open the job again.
 Updated
by Kristen Fiddes
Updated
by Kristen Fiddes


 Tasks already marked Completed will stay completed even if the job type changes.
 Learn more about Schedule Availabilities by clicking here.
 Because fiber and wireless installations differ significantly, make sure Replace existing tasks… is checked so the correct tasks are added.