Table of Contents
Adding a Customer Portal to Your Sonar Instance
 Updated
by Mitchell Ivany
Read Time: 13 mins
The Sonar Customer Portal allows your customers to log in to their own dedicated dashboard where they can do things like:
- View their bill
- Make payments
- View data usage
- View signed contracts
- Open and reply to support tickets, and more.
Before beginning the installation and setup of the Sonar Customer Portal, there are a few prerequisites that need to be in place. If any of the below prerequisites are not met, the installation process will fail and the customer portal will not work.
If this is not done, the Email functionality of the Customer Portal will not work, including new user registration and password resets. Sonar support is unable to assist with these requests. For more information, review https://docs.digitalocean.com/support/why-is-smtp-blocked/.
Update Your DNS Records
Before starting the installation of the Customer Portal, a DNS A Record must be created on a valid domain that you own. You'll also need to have a valid public-facing IP Address for the server you'll be hosting the customer portal on.
For example, let's say you're the proud owner of example.com and want your customers to be able to access the customer portal by going to portal.example.com, you would use the following steps to set this up:
- Login to your domain name registrar's website.https://www.namecheap.com/ is being used in this example, but the process will be generally the same for all domain name registrars or web hosts
- Find your domain example.com Advanced DNS Settings (or DNS Zone Editor).
- Once within the DNS settings for your domain, you'll want to create a new DNS record of type A Record with your desired hostname (in this case, since we're using portal.example.com, we'll set our hostname to say portal) and the IP Address of the server you want your customer portal hosted on.
This should look something similar to the screenshot below:
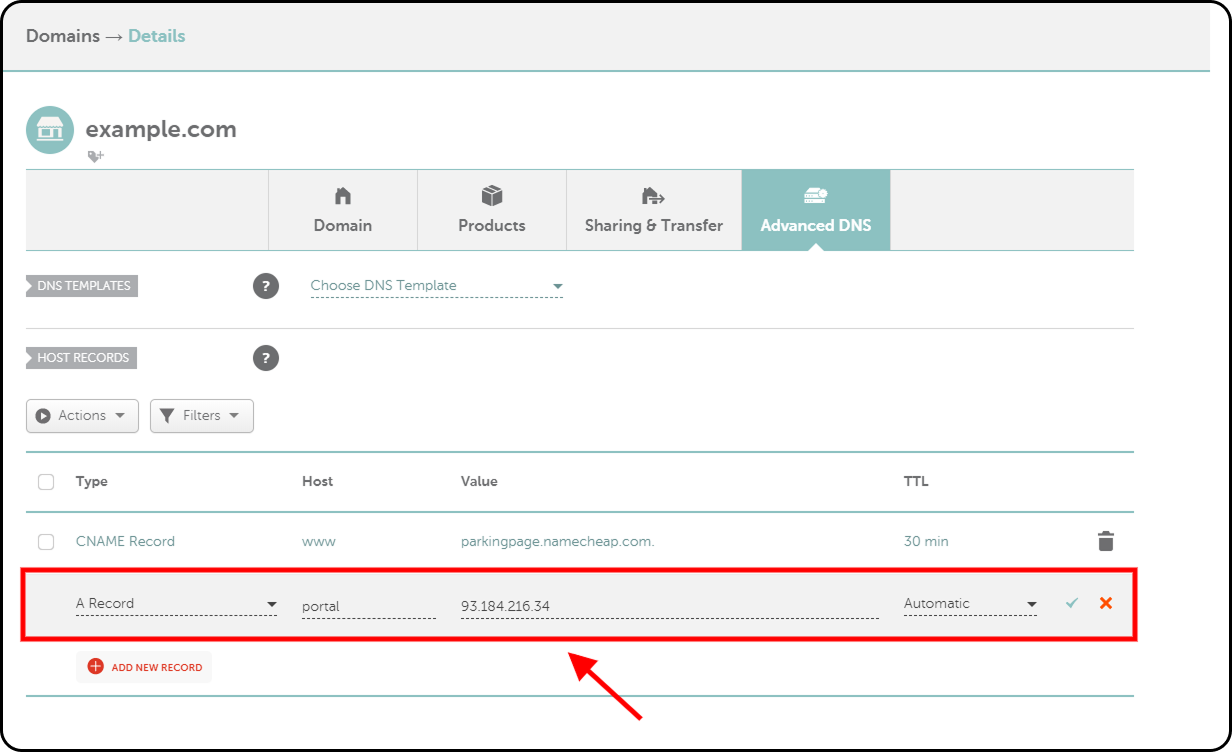
Once you've created this new A Record and saved your changes, it'll take anywhere from a few minutes, up to 72 hours, before the changes propagate throughout DNS servers worldwide.
After this process is completed, we can move on to the next step listed below of ensuring your server has the necessary hardware requirements needed to run the Sonar Customer Portal.
Hardware Requirements
Before beginning the installation of the Sonar Customer Portal, it's important to make sure your server has the necessary hardware requirements needed to properly run the Sonar Customer Portal.
Detailed below are the minimum system requirements that every customer portal server will need to function properly:
OS: Debian-based distro running Ubuntu 18 or 22 x64. Please note that the customer portal will not work with Ubuntu 19, as Docker is currently unsupported.

CPU Requirements: 2 CPU Cores (or 2vCPU)

RAM: 2GB

Storage: 25GB

Networking: Public-facing IP address and a valid domain name pointing to it (for example, portal.myisp.com)
Ubuntu 19 does not support Docker. Thus, the Sonar Customer Portal WILL NOT work on Ubuntu 19.xx
Preparing your Sonar Instance
Linking the Customer Portal URL to your instance
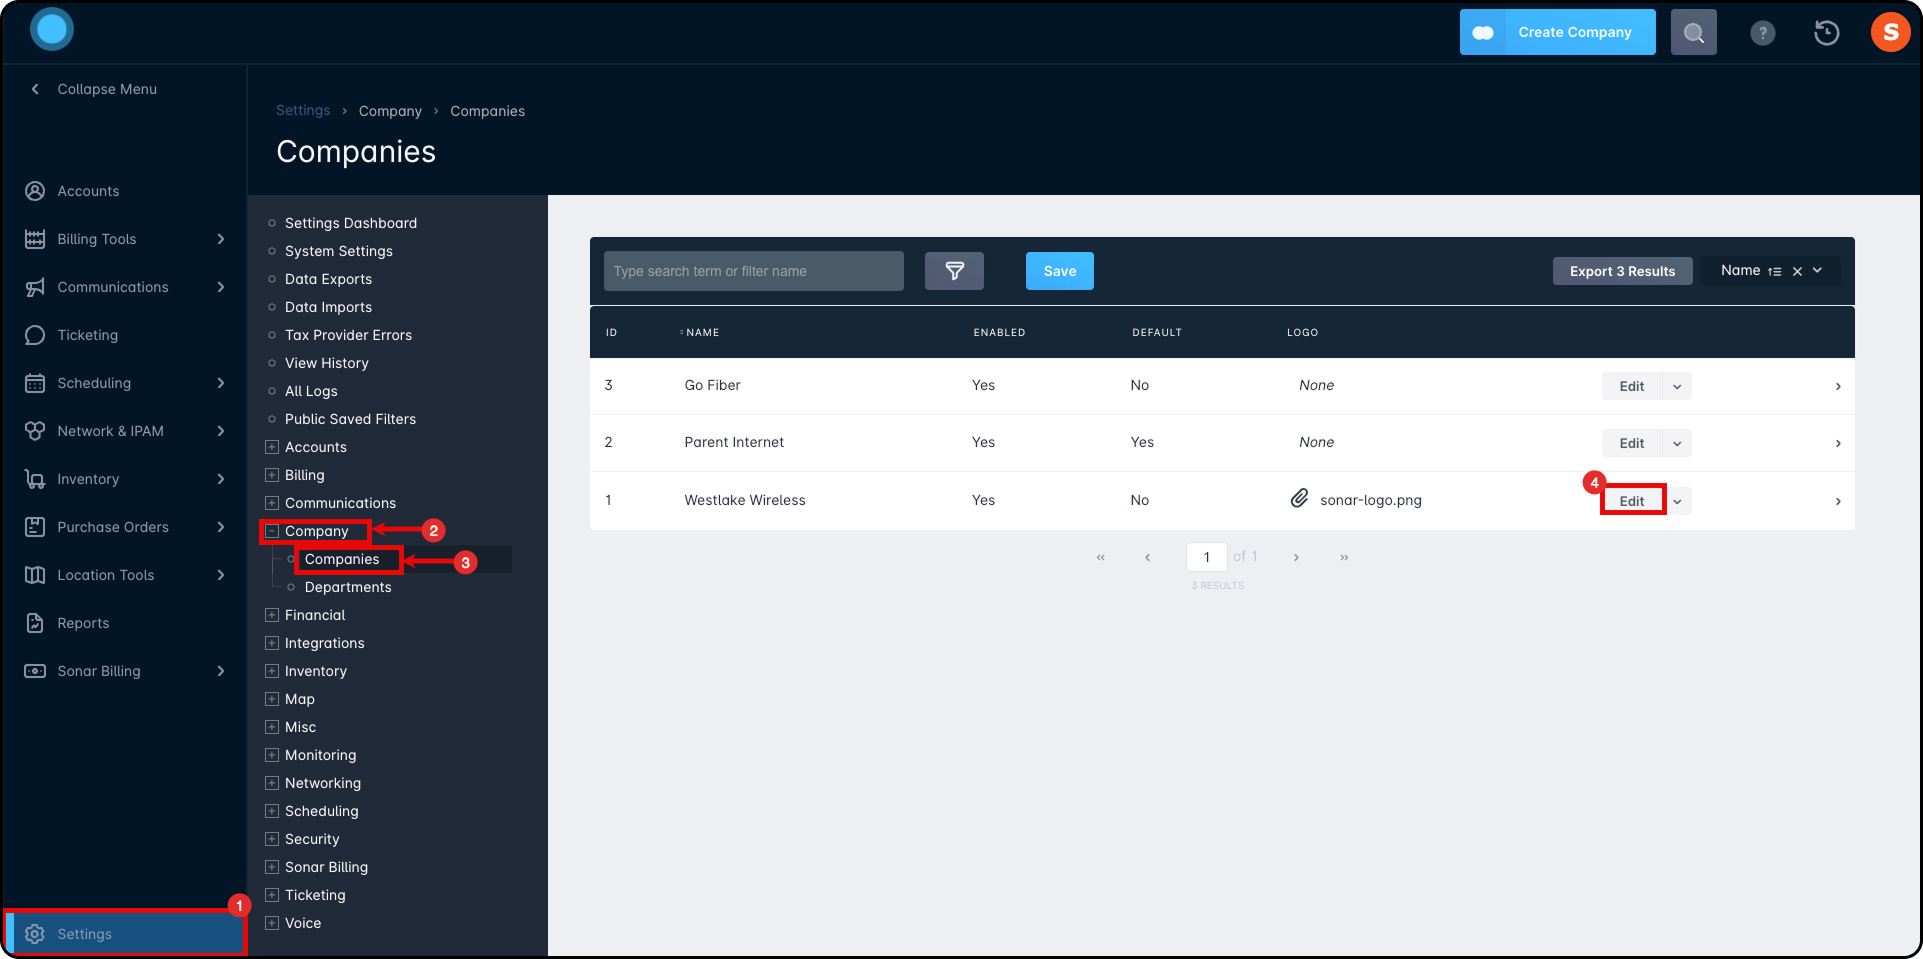
To link your new customer portal URL created previously to your Sonar instance:
- Navigate to Settings.
- Expand the Company section.
- Select Companies.
- Click “Edit” on the applicable company.
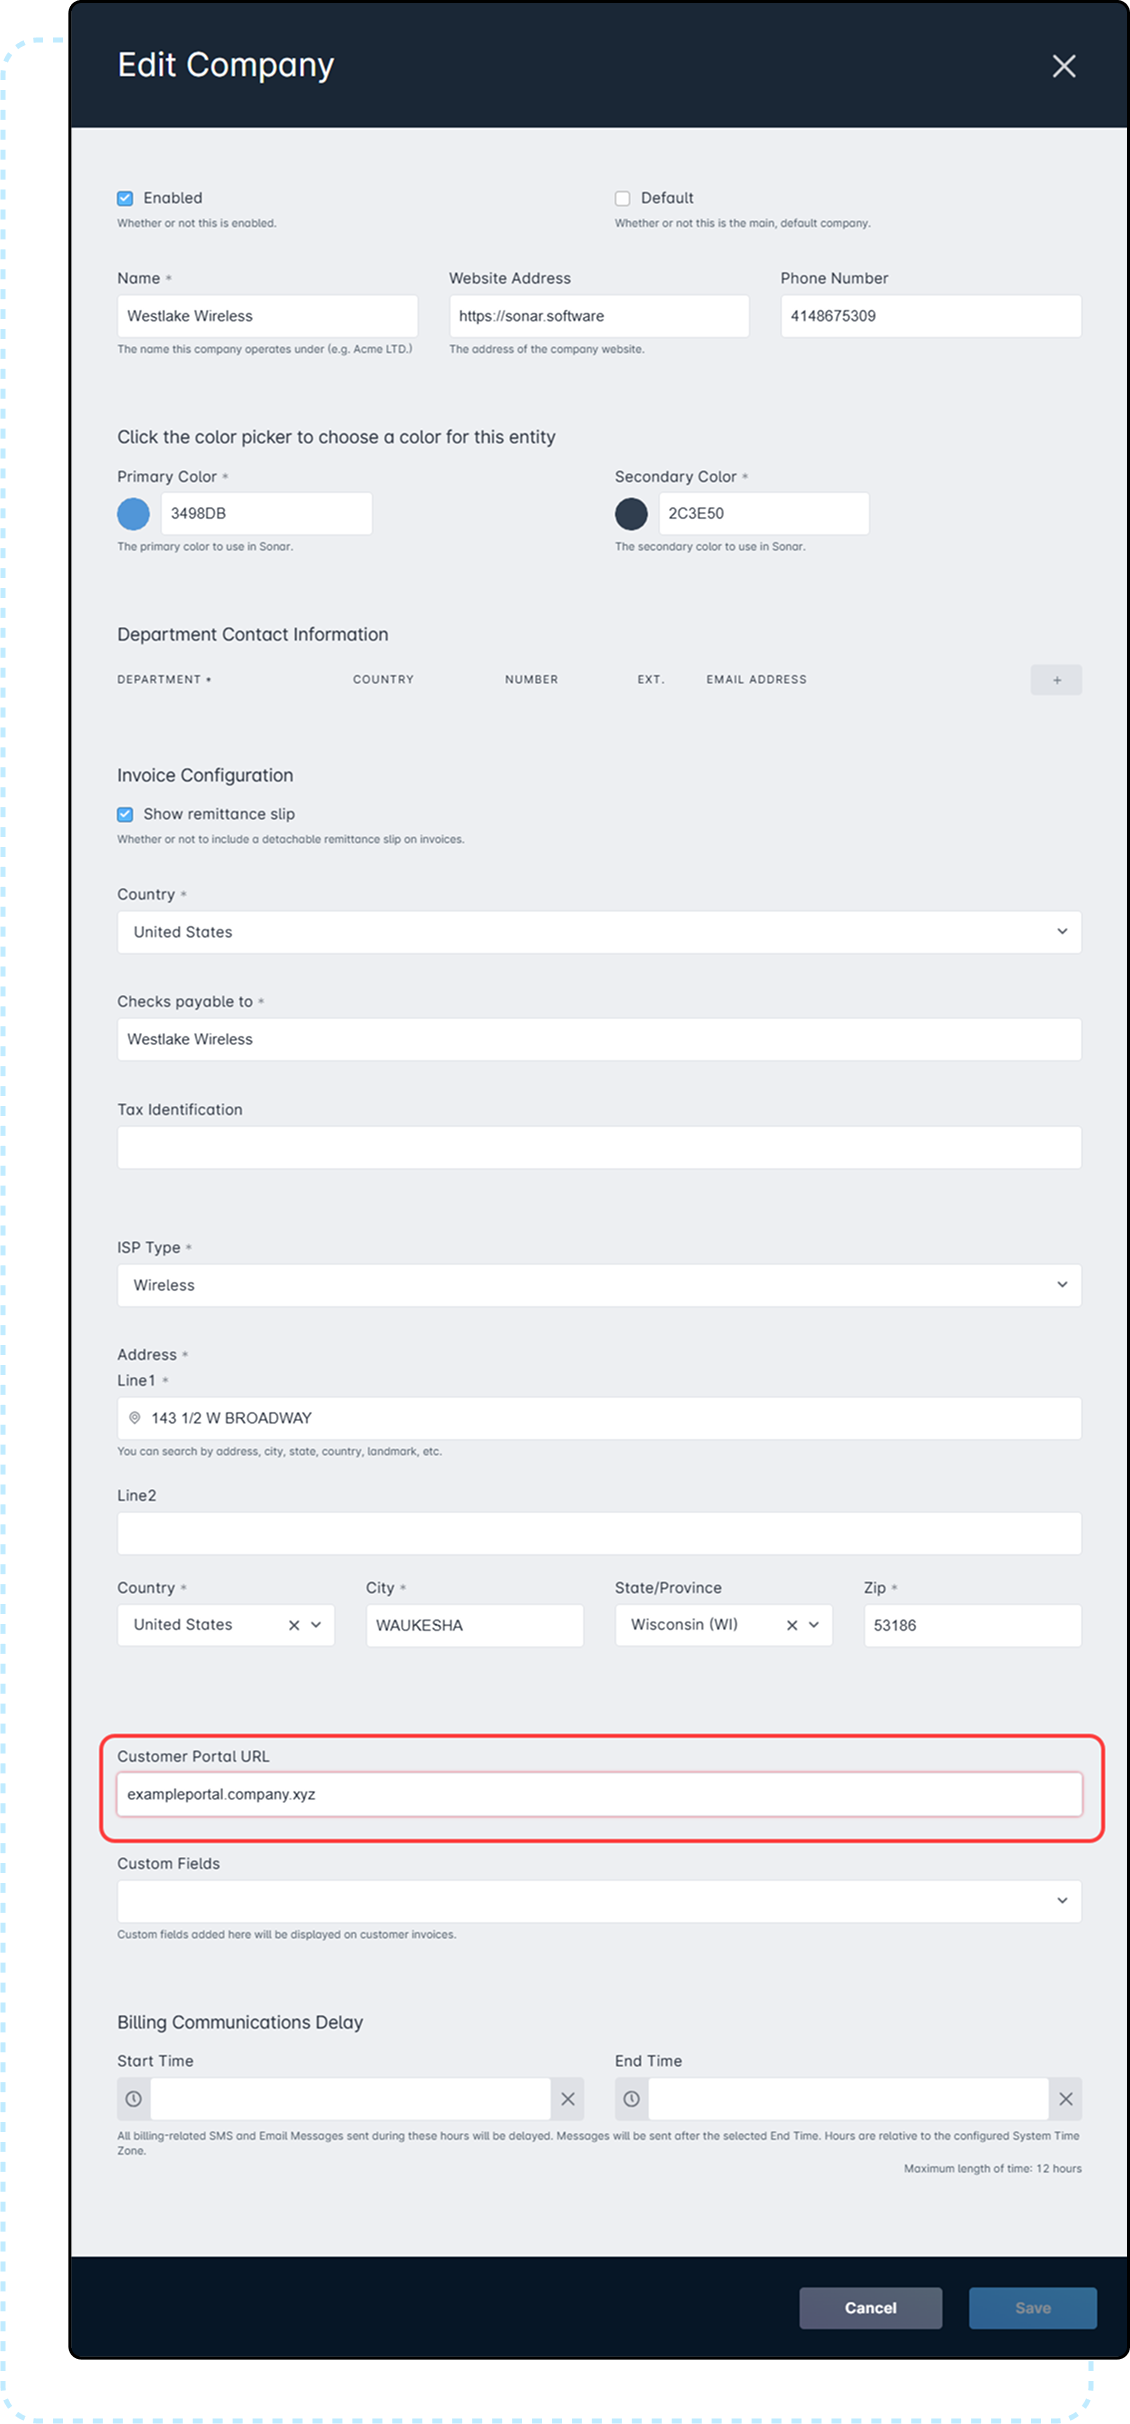
- From the Edit pane, enter the Customer Portal URL as created on your DNS record (A Record).
Creating your Customer Portal User and User Role
In your Sonar instance, you must create a dedicated user account named customer_portal_api. This account requires a password that is at least 16 characters long and includes special characters. Only the following special characters are permitted in the password: ! and #.
customer_portal_api so that it's easily recognizable at a glance to both yourself and Sonar staff if troubleshooting ever needs to be done by us in the future.This special user account acts as a bridge that connects your Sonar Customer Portal server to your Sonar Instance via the Sonar API.
API User Permissions
In addition to having a special customer_portal_api user within your Sonar instance, there also needs to exist a special role called Customer Portal to accompany it.
The purpose of this role is to allow the Sonar API to provide the customer portal with the necessary permissions that allow your customers to do things like: view their account information, create support tickets, update their payment information, etc.
Run the following in GraphQL at your Sonar V2 instance (for example, yourname.sonar.software/graphiql)
- First, add this mutation in the top-left panel:
mutation createRole($customer_portal: CreateRoleMutationInput) {
    createRole(input: $customer_portal) {
        name
    }
} - Then create a variable (drag the lower-left window upwards to reveal the screen).
{
"customer_portal":
  {
    "name": "Customer Portal",
    "applied_permissions": [
        "MODIFY_ACCOUNT_SERVICES",
        "CREATE_ACCOUNT_TRANSACTIONS",
        "READ_ACCOUNT_TRANSACTIONS",
        "UPDATE_ACCOUNT_TRANSACTIONS",
        "READ_ACCOUNT",
        "UPDATE_ACCOUNT",
        "CREATE_CONTACT",
        "UPDATE_CONTACT",
        "DELETE_CONTACT",
        "READ_CONTRACT",
        "UPDATE_CONTRACT",
        "READ_DATA_USAGE_HISTORY",
        "READ_INBOUND_MAILBOX",
        "READ_INVOICE_ATTACHMENT",
        "READ_INVOICE_MESSAGE",
        "READ_PACKAGE",
        "READ_PAYMENT_PROCESSOR",
        "CREATE_PAYMENT_METHOD",
        "READ_PAYMENT_METHOD",
        "UPDATE_PAYMENT_METHOD",
        "DELETE_PAYMENT_METHOD",
        "CREATE_PAYMENT",
        "READ_SERVICE",
        "CREATE_TICKET",
        "READ_TICKET",
        "UPDATE_TICKET",
        "CREATE_DATA_USAGE_TOP_OFF"
    ],
    "note": {
      "message": "Customer Portal",
      "priority": "NORMAL"
    }
  }
} - Finally, click the play button to run the mutation.
Building the Portal
Install the Customer Portal Image on your VM
- SSH into your VM.
- Install required packages:
sudo apt-get -y update && sudo apt-get -y upgrade && sudo apt-get -y install git unzip
- Clone the repository:
git clone https://github.com/SonarSoftwareInc/customer_portal.git
- Now change the directory into the repository that we've just cloned:
cd customer_portal
- Run the
InstallScript:
sudo ./install.sh | tee customerportal-install.log
- Follow the instructions as prompted by the installation script, providing the following:
- Portal Domain Name (for example., portal.example.com).
- The API Username.
- The API password.When setting a password, it must be 16 or more characters, and include special characters. Otherwise, the portal may give a 401 error when trying to access it.
- Your instance URL (for example, https://example.sonar.software).
- Your email address (for SSL Certificate).
- Once completed, the installation script will automatically reach out to Let's Encrypt to generate an SSL certificate for your customer portal.
- Once the SSL Certificate is generated, and the installation completes, the Settings Key is generated. Please note this Settings Key in a secure location, as it provides you access to manage the Customer Portal settings, such as mail server settings, payment settings, and appearance customization.
Commands you can use after setup
From the customer_portal directory, you can execute sudo docker-compose exec app /bin/bash to access the docker container that the portal is running in. After doing this, you can execute the commands below.
php artisan sonar:settingskeywill generate a new key for the/settingspage if you forget the one you had.php artisan sonar:test:smtp {email}will test your email configuration. Replace{email}with your email address, and the portal will attempt to send you a test email.php artisan sonar:test:paypalwill test your PayPal configuration, if it is enabled
Managing Settings & Using the Settings Key
After you've successfully completed installation of the Sonar Customer Portal, the installation script will provide you with a Settings Key.
The Settings Key (also referred to as Authentication Key) is a special 32 character long string that allows you to access and modify the configuration settings for your customer portal through your web browser. Your customer portal's settings page contains critical customization options that need to be in place for your portal to function properly.
If we continue to follow our example from earlier, you would access the settings page for your customer portal by navigating to https://portal.example.com/settings
After navigating to the settings page for your customer portal, you'll be prompted to enter your Settings Key to authenticate and gain access to the configuration settings for your customer portal.

After successfully authenticating with the settings key, you'll then be presented with the various configuration options for the Sonar Customer Portal.
Full Settings Page Overview

From here, you can fill in the fine details of what information you want to be displayed to customers via the portal. This includes configuration options for billing and your outbound mail server.
System & Design Settings:
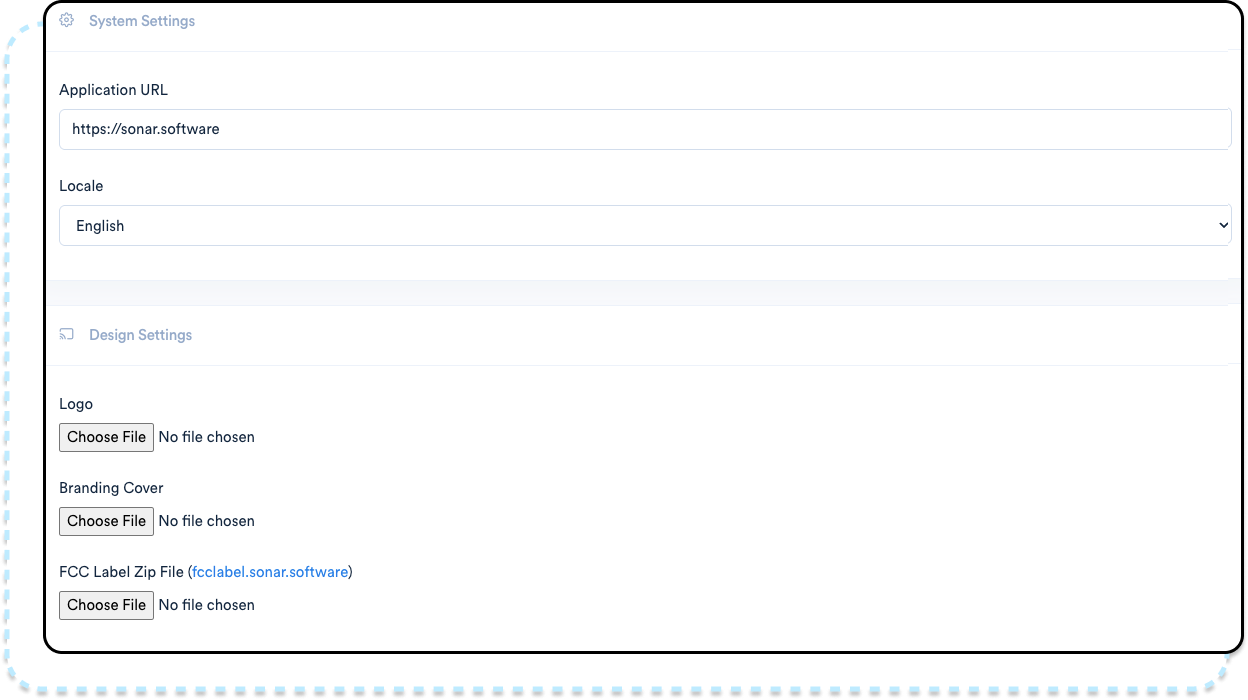
- The application URL is set automatically during the installation of your portal, and no configuration is required for this field.
- The Locale setting is designed to allow you to change the default language of your instance and any customer accounts that access it. Individual accounts can update their preferences from the Login screen. Current language options are English or French.Due to how the language is displayed with the portal, modifying this setting may necessitate clearing your cookies and refreshing the page to see it take effect.
- The Logo setting allows you to upload an image to be used as the logo of your customer portal.
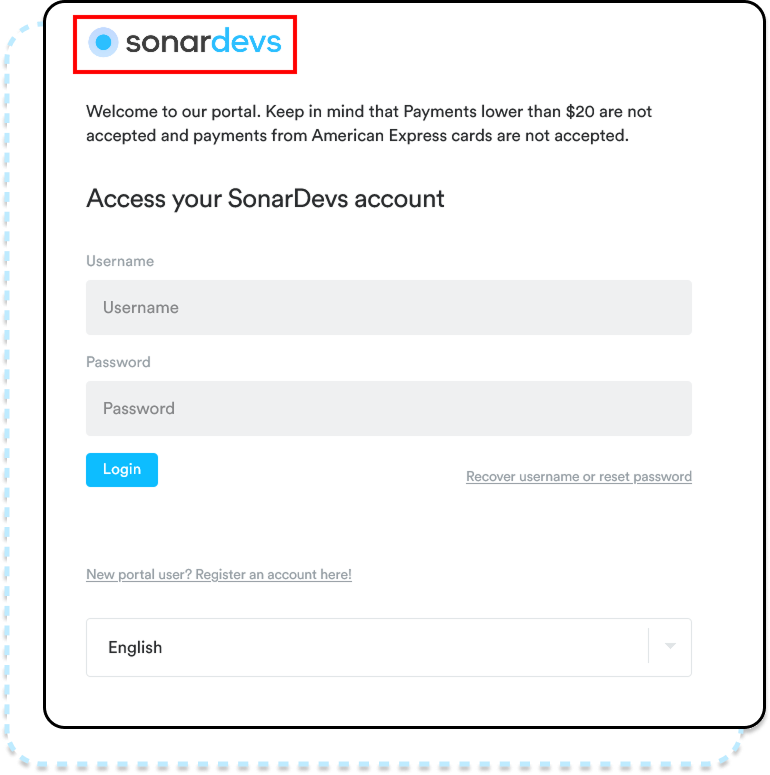
- The Branding Cover allows you to upload a cover image to be displayed above the customer's information when they're logged in to the portal.
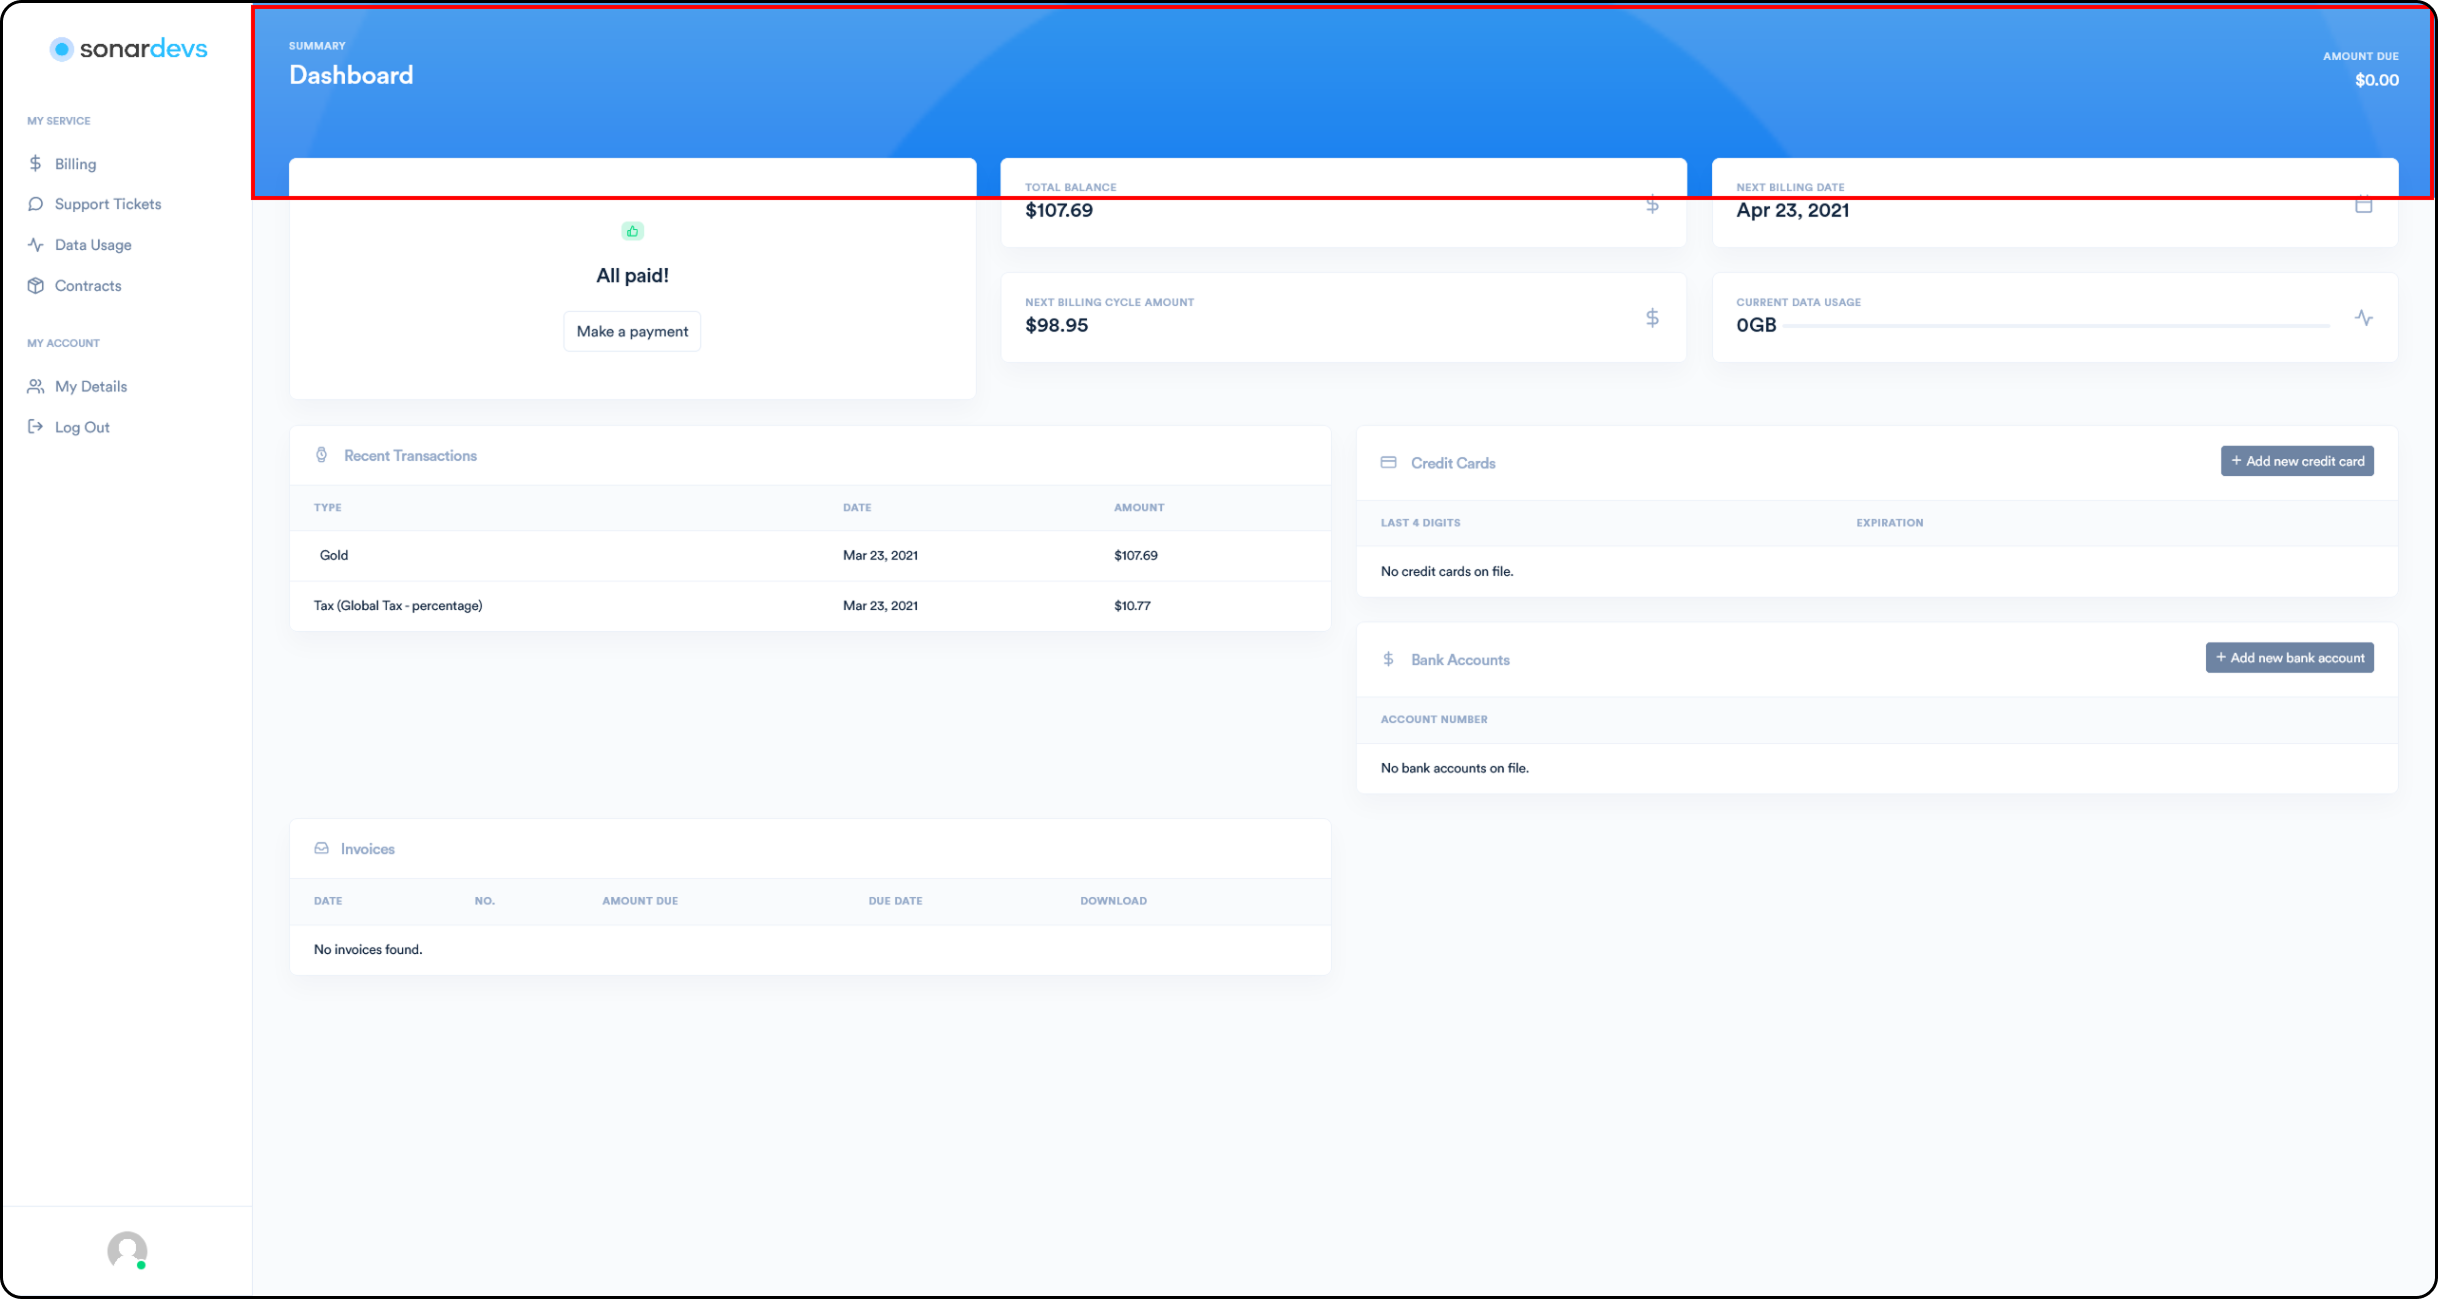
Any image uploaded to either of these settings will be displayed on mobile devices or in a browser. Larger resolution images are suggested, as they will more easily adjust to a wide variety of display sizes and resolutions.
Mail Settings Configuration
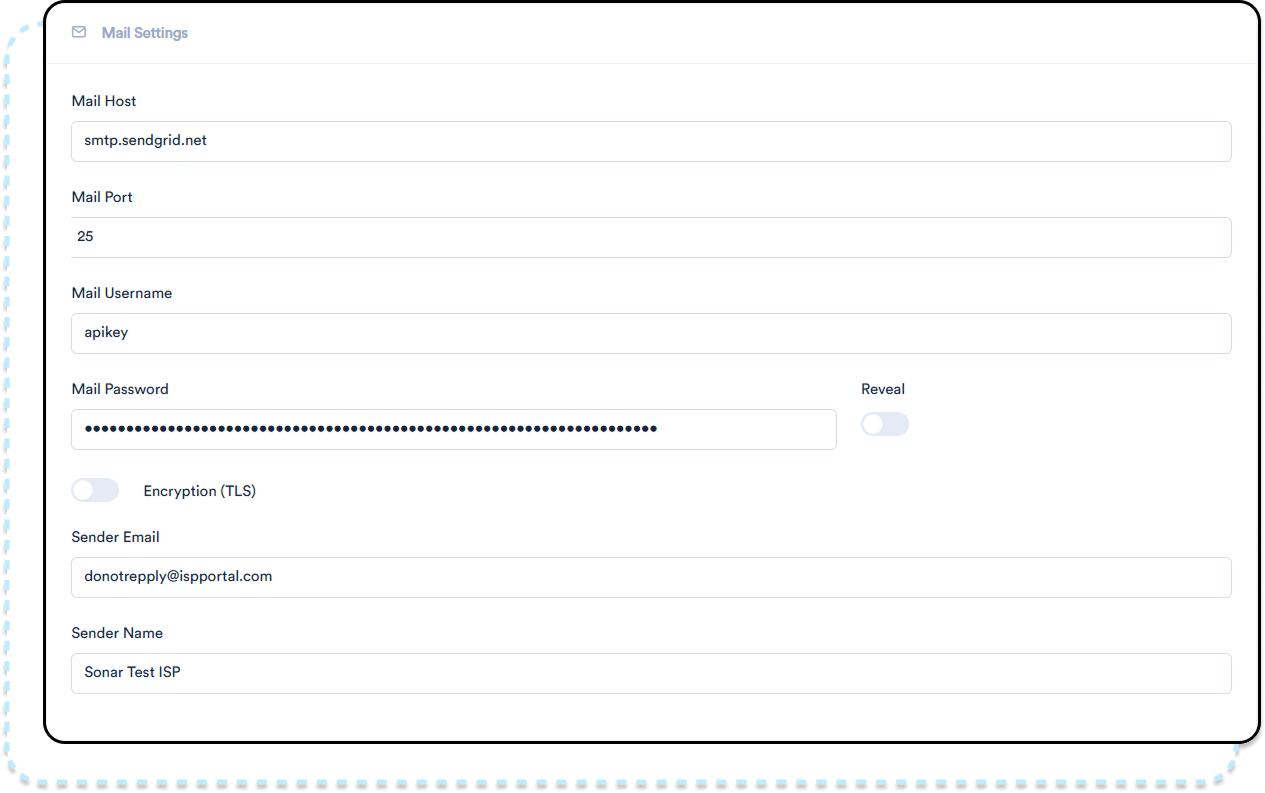
The Mail Settings configuration section on your customer portal pertains to the outbound mail server that you plan to use. The outbound mail server is what allows the customer portal server to send mail to your subscribers when they do things like:
- Registering for the Customer Portal - the outbound mail server will send them a registration email which will give them instructions on how to register for a new customer portal account.
- Initiating Password Resets - the outbound mail server will send them a password reset email with instructions on how to reset the password for their customer portal login.
If you don't have a dedicated mail server in-house that you'd like to use, or if you're unsure about which service is best for this, we highly recommend going with SendGrid.
General Settings
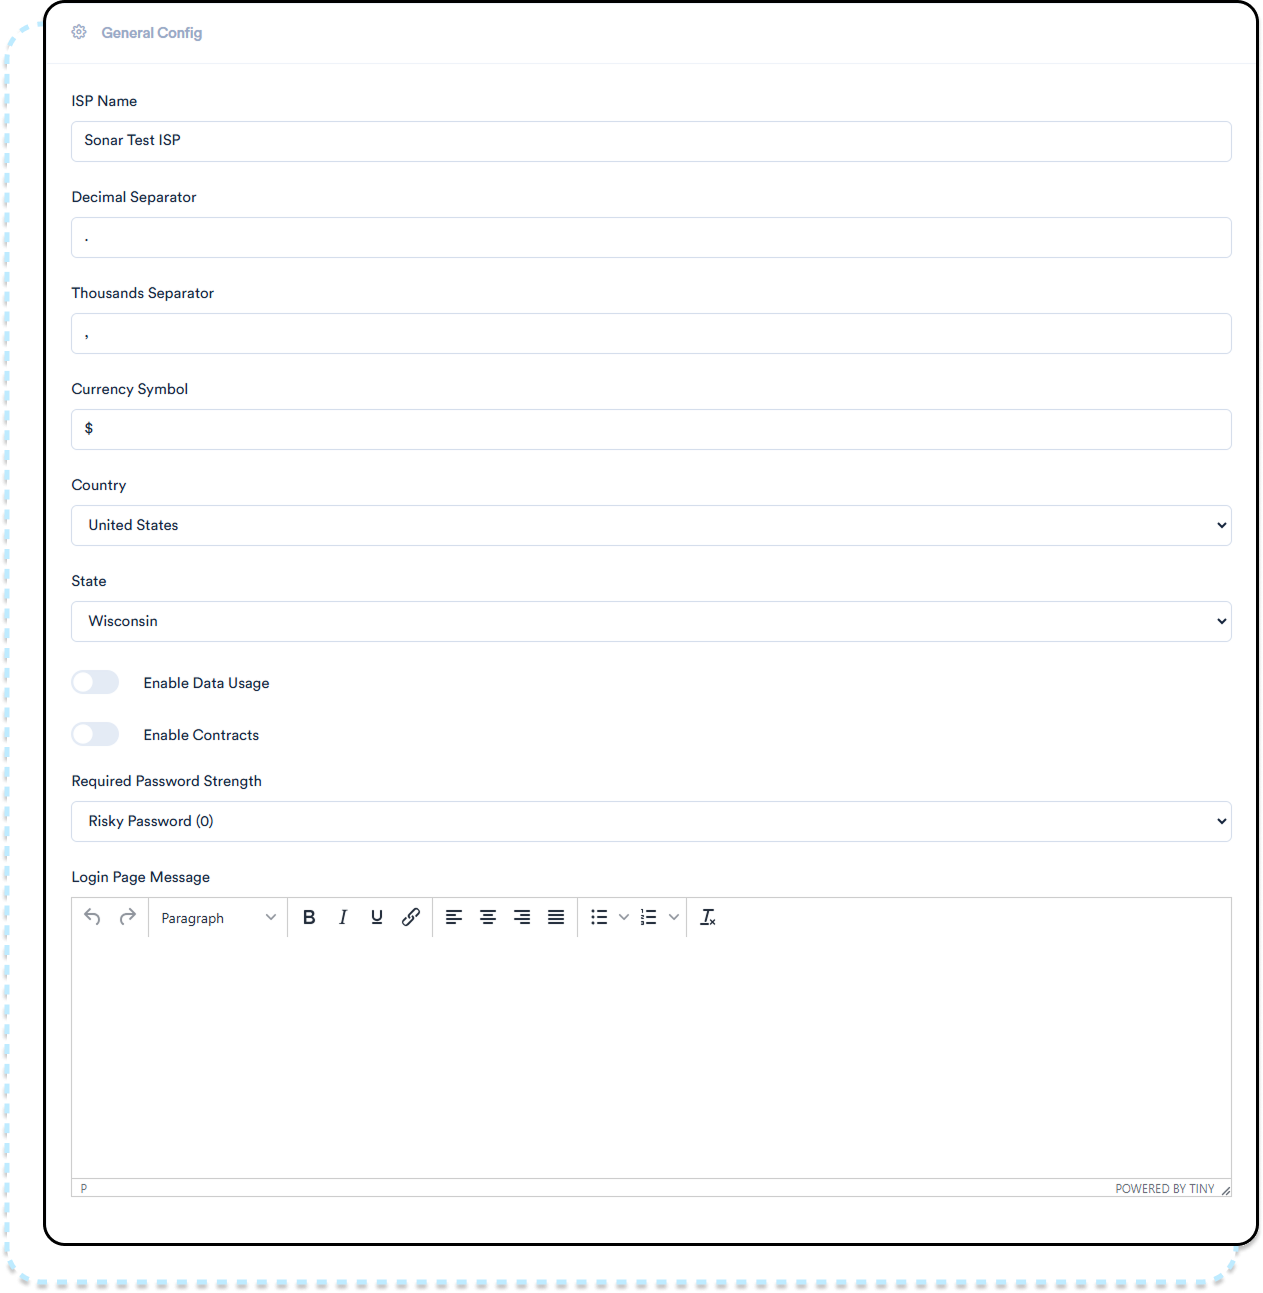
The General Settings section of the Customer Portal configuration page controls basic details about your ISP that will be displayed to your subscribers.
- You can set basic ISP name and location information.
- You set basic currency information, like the dollar symbol and decimal separator.
- You can configure as message that will appear on the Login Page, visible to all your subscribers.
Billing Configuration
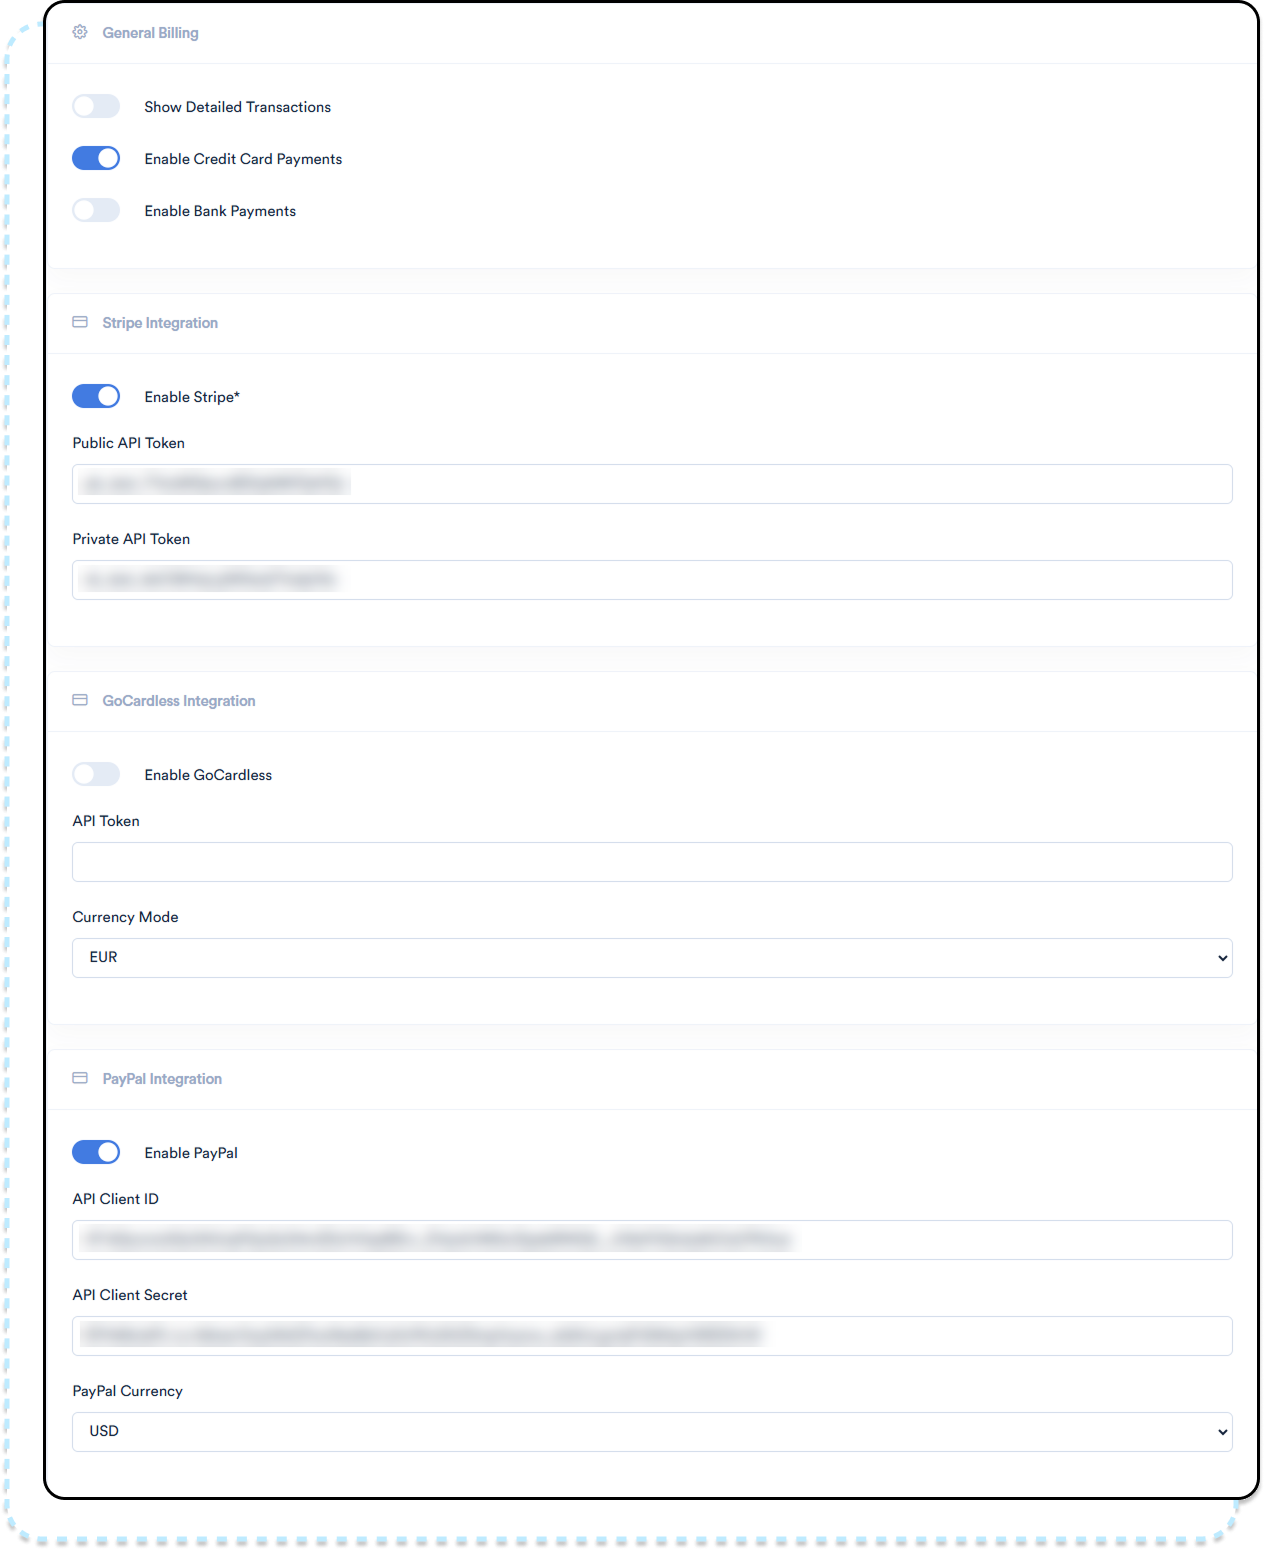
The Billing section of the customer portal's configuration page allows you to determine what subscribers can see and do regarding:
- Viewing a detailed breakdown of their billing transactions
- Making payments using a credit card
- Making payments via eCheck or ACH
- Making one-time PayPal payments
Ticket Configuration
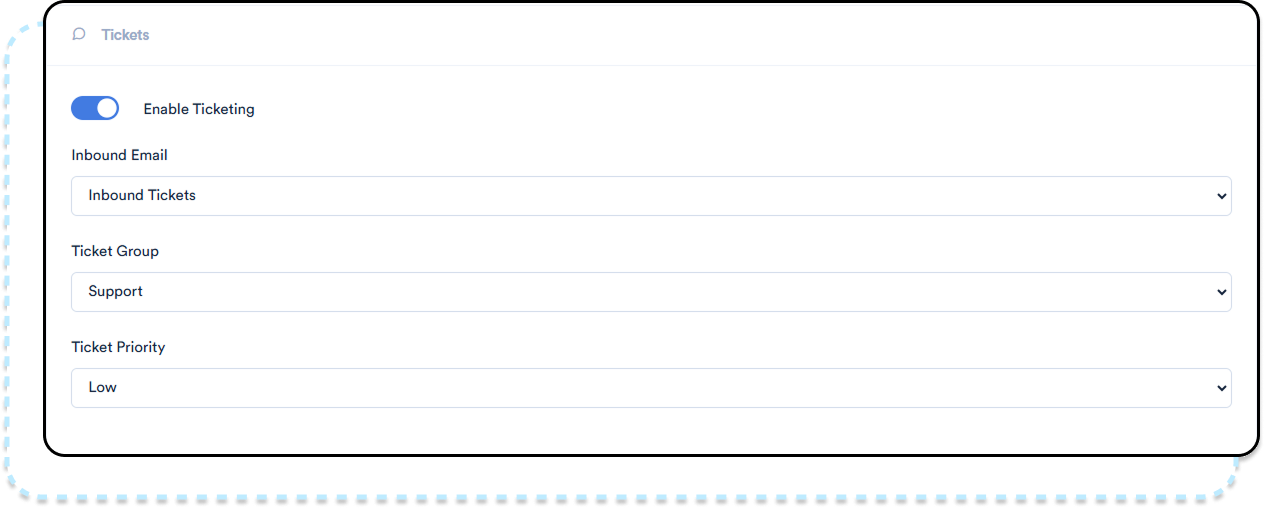
If you'd like to allow customers to open, view, and respond to support tickets via the customer portal, you'll need to make sure that the Enable Ticketing option is toggled on within this page.
Additional Payment Information
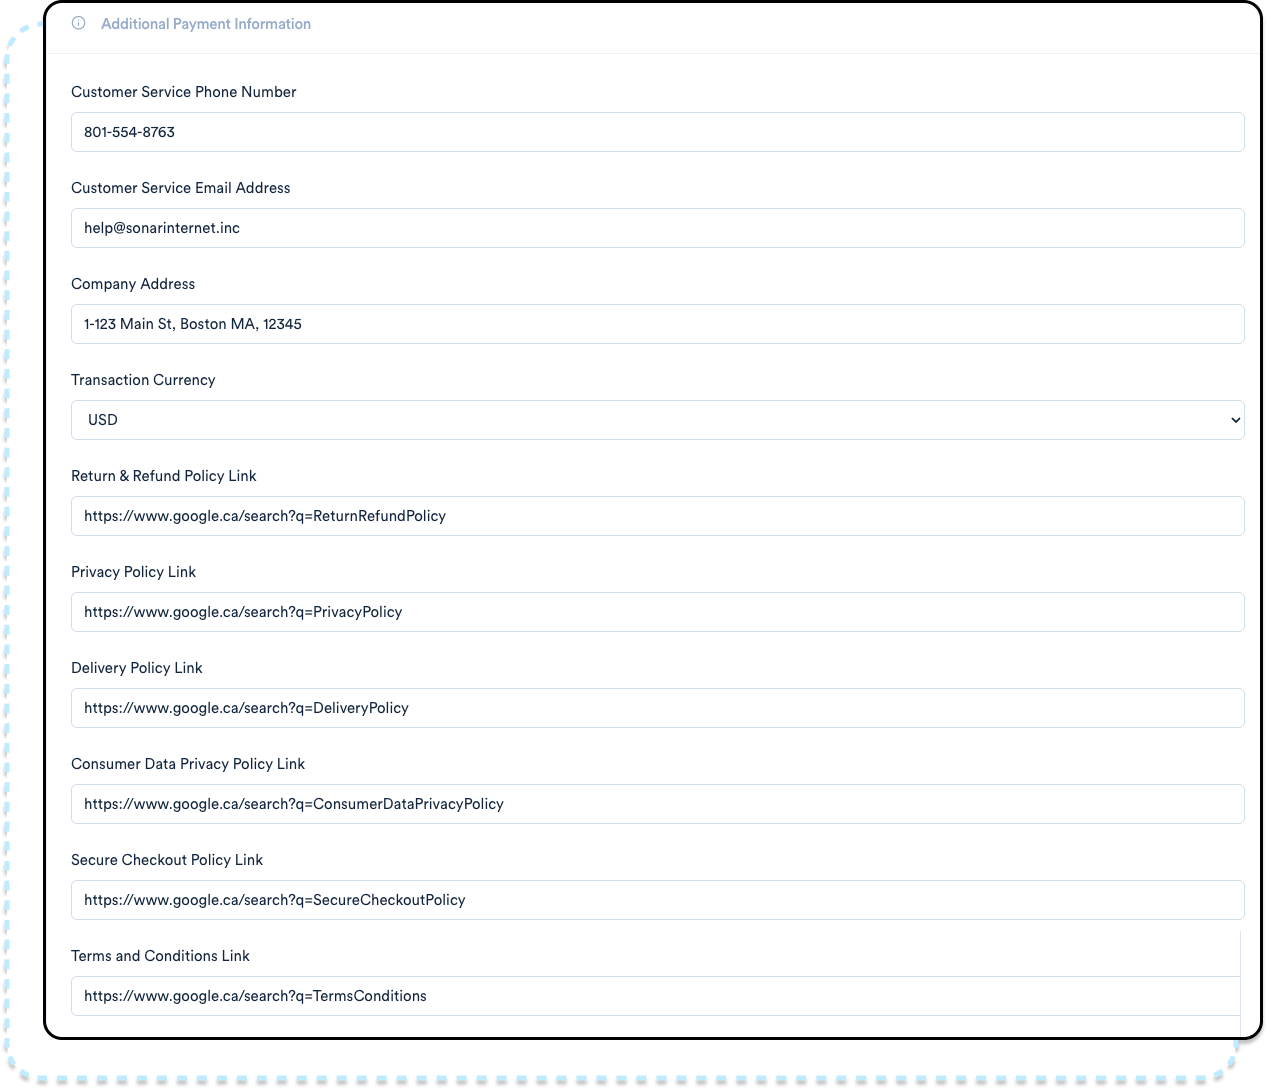
The Additional Payment Information section allows you to input the necessary information to be shown within your portal, such as:
- Your company contact information.
- Type of transaction currency your company accepts.
- All policies pertaining to your company providing services.
Testing Customer Portal Configuration
Before notifying customers about your new customer portal, it's a good idea to test your portal's configuration first to make sure everything is working properly.
As a best practice, we recommend creating a test account within your Sonar instance that's dedicated to testing and experimentation.
With this test account, you can create a new contact on there where you can then test things like:
- Registering this new contact for the customer portal access
- Manually setting portal credentials for this contact (allows you to skip the portal registration process as well as perform manual password resets)
By doing one of the above options, you can then use this contact to log in to the customer portal and ensure everything works as expected before giving real customers access.
Customizing the Portal
While Sonar provides a pre-built Customer Portal (using Laravel) which can be tied to your instance and used to provide more control to your customers, we would rather not limit your creativity, branding, or control how your customers access their information. The Sonar Customer Portal code repository is available on https://github.com/SonarSoftwareInc/customer_portal, and you're welcome to fork or clone this repository to modify the underlying code to suit your needs.
You can view our article which provides some basic commands to get you started with customizing the portal here | Customizing your Customer Portal
Troubleshooting Customer Portal installation
Troubleshooting the Customer Portal
Customer Portal - Manual Certificate Renewal
Subscriber Instructions
If your subscribers are asking for instructions on using the Customer Portal, you can refer them to How To: Using Sonar's Customer Portal
