Table of Contents
Setting up Bank Account & Credit Card Processors
 Updated
by Mitchell Ivany
Read Time: 8 mins
If you have a Payment Processor and you are changing to a new one, it is recommended that you read this article and contact Sonar before cancelling your existing Payment Processor. This allows Sonar to coordinate a token migration if necessary.
sonarPay
Sonar offers sonarPay, a fully integrated payment solution for internet service providers. With sonarPay you get payments, reporting, reconciliation, and customer service native to Sonar’s billing platform all supported within your Sonar instance.
Setting up External Payment Processors
To begin receiving customer payments (and adding the appropriate customer payment methods) your first step in the process is adding in your preferred payment processors. Below you'll find a list of external Payment processors supported by Sonar, as well as a list of items required to configure the processor.
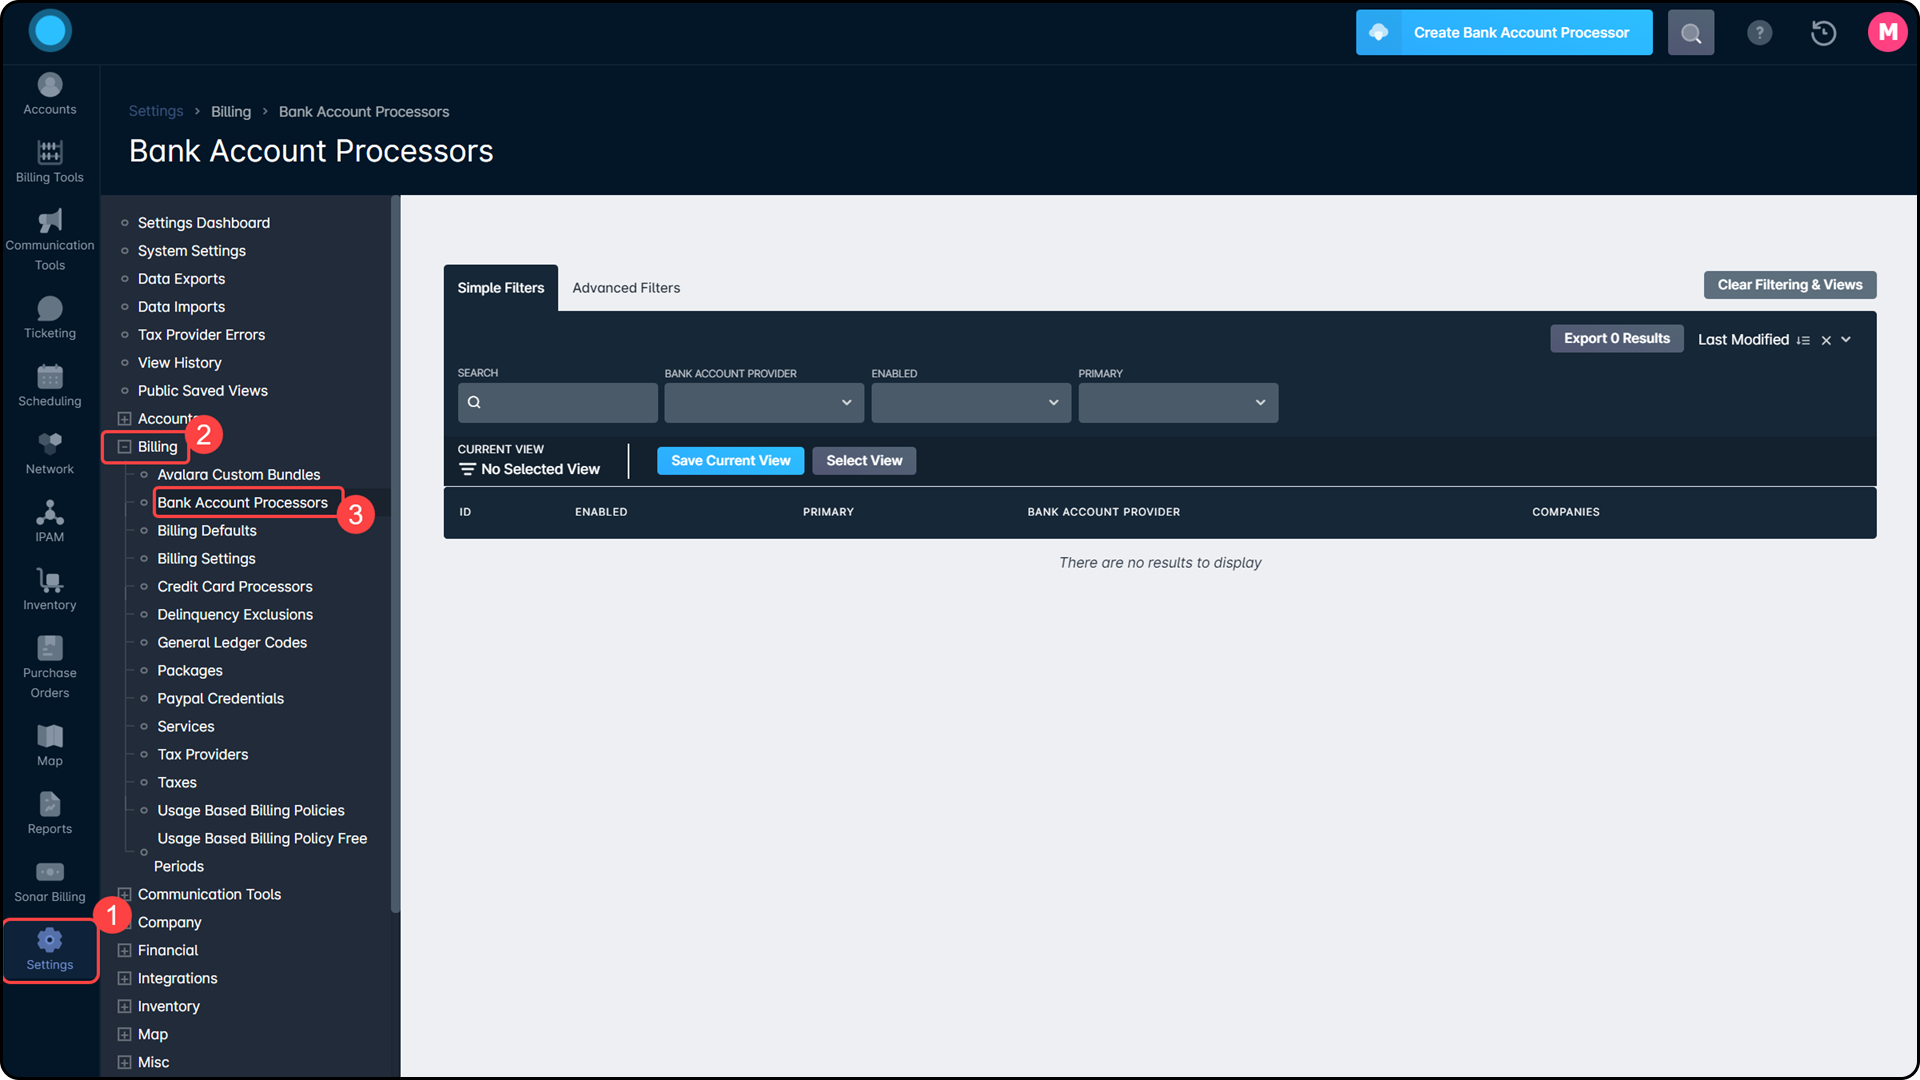
All available Payment Processors are configured from the same page - within your instance, navigate to Settings, followed by expanding the Billing segment, and lastly select either Bank Account Processor or Credit Card Processor, depending on which one you'll actively be creating.
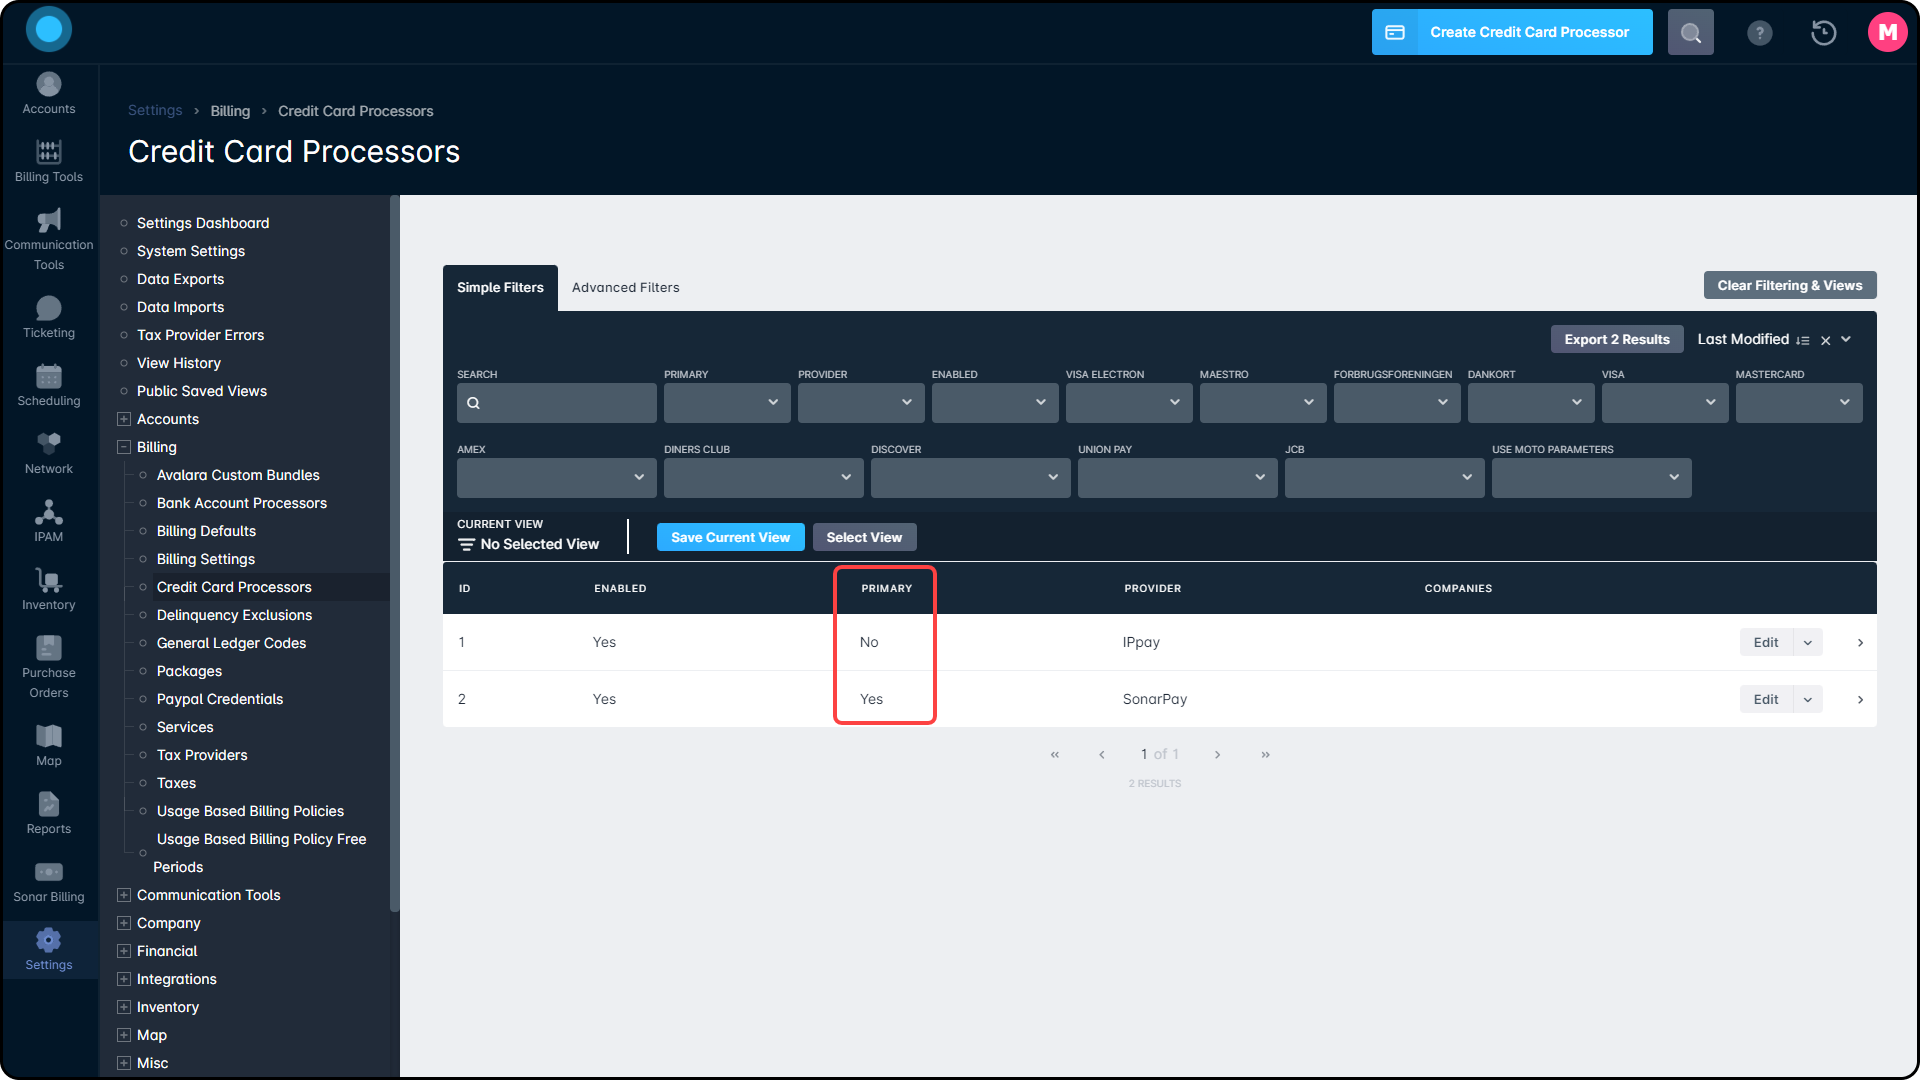
In the tables for both Bank Account Processors and Credit Card Processors, you'll see a column labeled Primary. This column shows which processor is the default used to tokenize payment methods. There can only be one primary per instance. With additional processors added to an instance, the Sonar Support Team is able to import the tokens to continue working with that processor until the tokens expire and/or a customer re-adds their payment method, at which point the primary payment processor would be used moving forward.

Whitelisting Sonar with External Processors
If your Payment Processor requires that the originating IP address be whitelisted to ensure communication occurs, all of Sonar's Egress and Ingress IP Addresses are available in the Sonar IP Addressing article.
e-Check/Bank Account Processors
You can access the Bank Account Processors by following these steps:
- Click on Settings
- Expand the Billing segment
- Click on Bank Account Processors

Next, click on the “Create Bank Account Processor” button to view the supported processors. In Sonar, we currently support the following external Bank Account Payment Processors:
Provider Name
Required Fields
Special Requirements
Provider Help
DEPRECATED | Authorize | https://www.authorize.net/
- Login ID
- Transaction Key
To obtain the Authorize.net Transaction key, follow these steps:
1. Select Settings under Account from the main menu on the left
2. Click API Login ID and Transaction Key in the Security Settings section
3. Enter the secret answer to the secret question you configured when you set up your account- Have someone with edit permissions login to the Authorize Settings Portal
- Go to “Tools”
- Select the “Fraud Detection Suite”
- Select “IP Velocity Filter”
- Add Egress IPs to IP Address Exclusion
Provider Name
Required Fields
Provider Help
Bluepay
- Account ID
- Secret Key
Provider Name
Required Fields
Provider Help
DEPRECATED | CardConnect | https://cardconnect.com/
- Username
- Password
- Merchant ID
Provider Name
Required Fields
Special Requirements
Provider Help
IPPay | https://www.ippay.com/
- Terminal ID
Click here to download a PDF list of areas that IPPay currently offers processing, as of July 2019You have to contact IP Pay to get them to associate the Sonar egress V2 IP addresses with your Terminal ID. You will need to send an email like this to support@ippay.com:
Please add the IP address XX.XX.XX.XX to the whitelist for TID XXXXXXXX.
Provider Name
Required Fields
Provider Help
Propay ProtectPay | https://epay.propay.com/protectpay/
- Account ID
- Auth Token
- Account Number
ACH
While ACH is also functionally a Bank Account processor, the methods by which ACH processors handle transactions differ sufficiently to be its own category. For more information on how ACH functions, take a look at our ACH Batching: Overview article.
In Sonar, we support any bank as long as they are using one of the following external ACH formats:
Provider Name
Required Fields
NACHA ACH
- Bank Account Number
- Company Description
- Company Identification
- Company Name
- Immediate Destination
- Immediate Destination Name
- Immediate Origin
- Origin Name
NACHA File Requirements
Sample NACHA Formatted File.pdf
Provider Name
Required Fields
Canada 1464 Byte EFT/CPA 005
- Bank Account Number
- Company Name
- Data Center Code
- Institution ID
- Originator ID
Provider Name
Required Fields
Central 1 ACH Standard
- Bank Account Number
- Company Name
- Data Center Code
- Institution ID
- Originator ID
Provider Name
Required Fields
Royal Bank of Canada 1464 byte EFT
- Bank Account Number
- Company Name
- Data Center Code
- Institution ID
- Originator ID
Provider Name
Required Fields
BMO Harris Canada 80 Byte EFT
- Bank Account Number
- Company Name
- Data Center Code
- Institution ID
- Originator ID
Credit Card Types
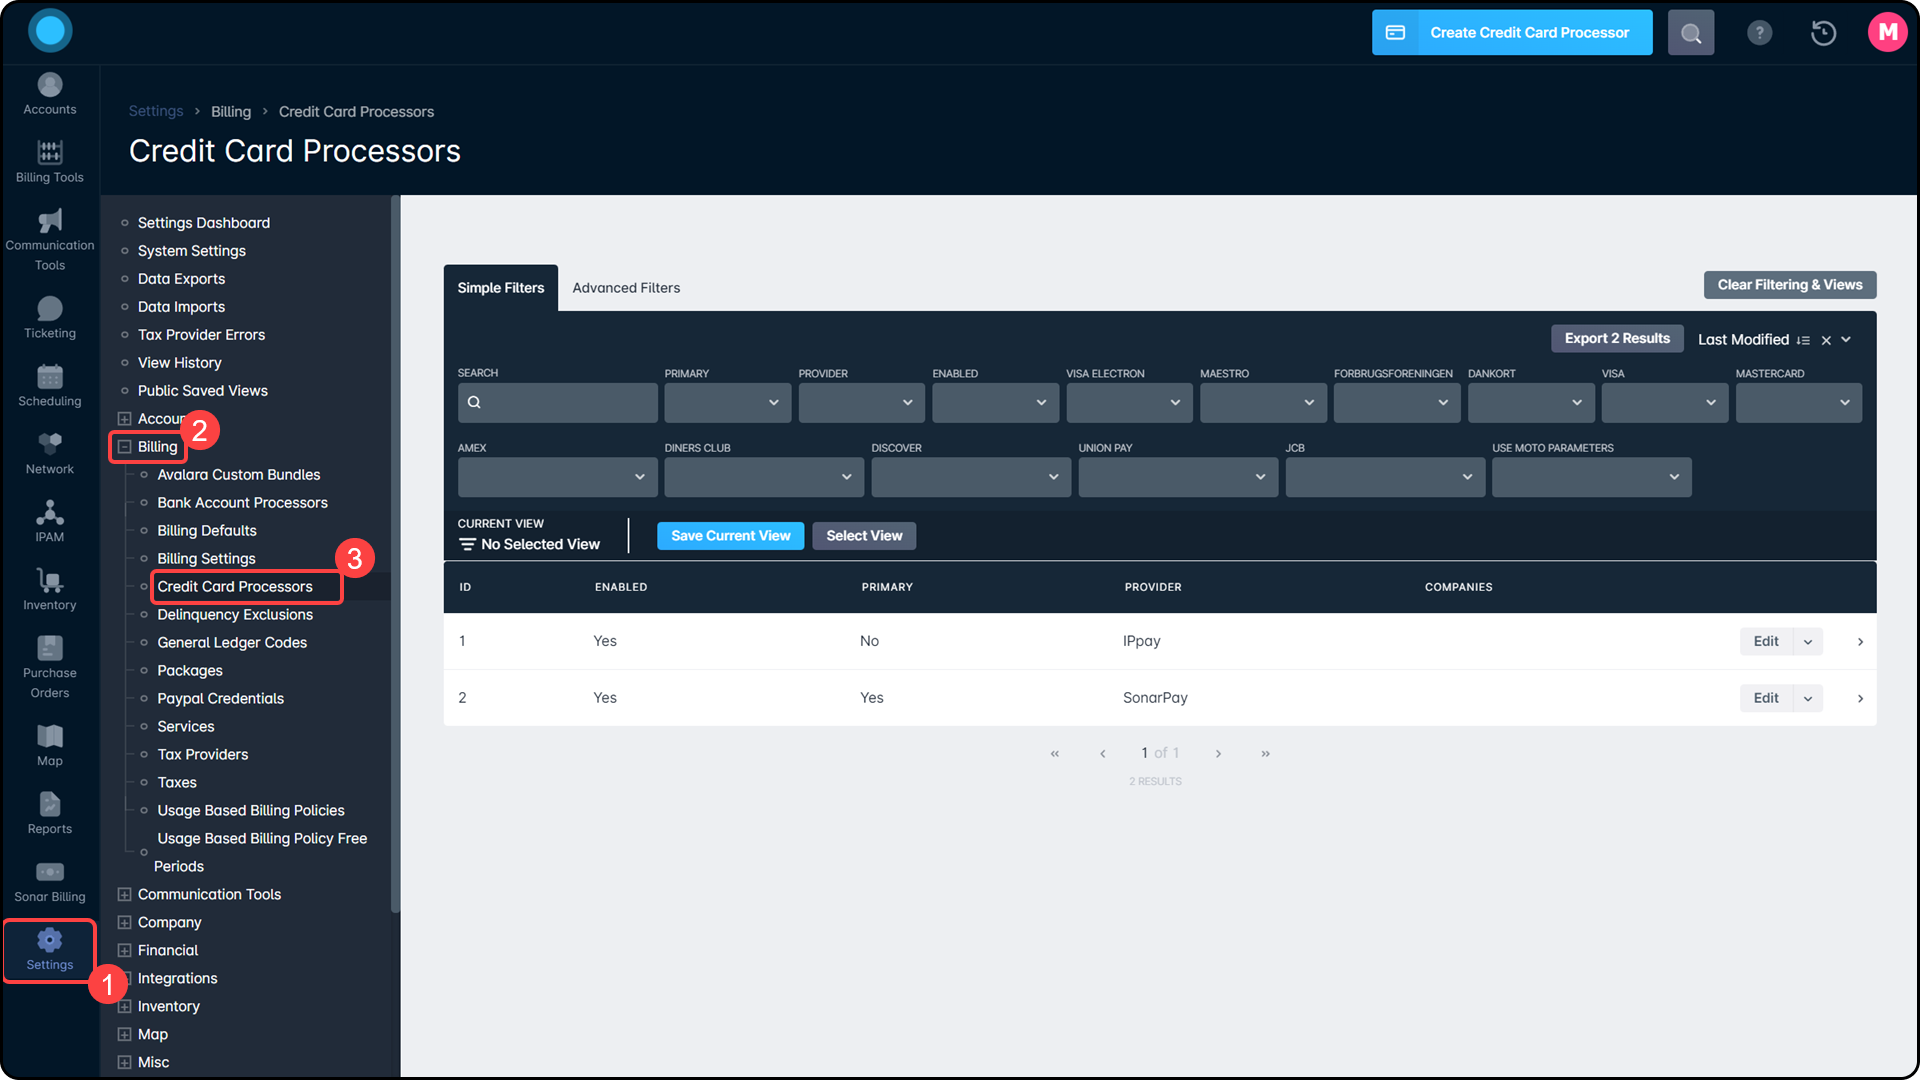
Adding a Credit Card Payment Processor can be done by following the below steps:
- Click on Settings
- Expand the Billing segment
- Click on Credit Card Processors

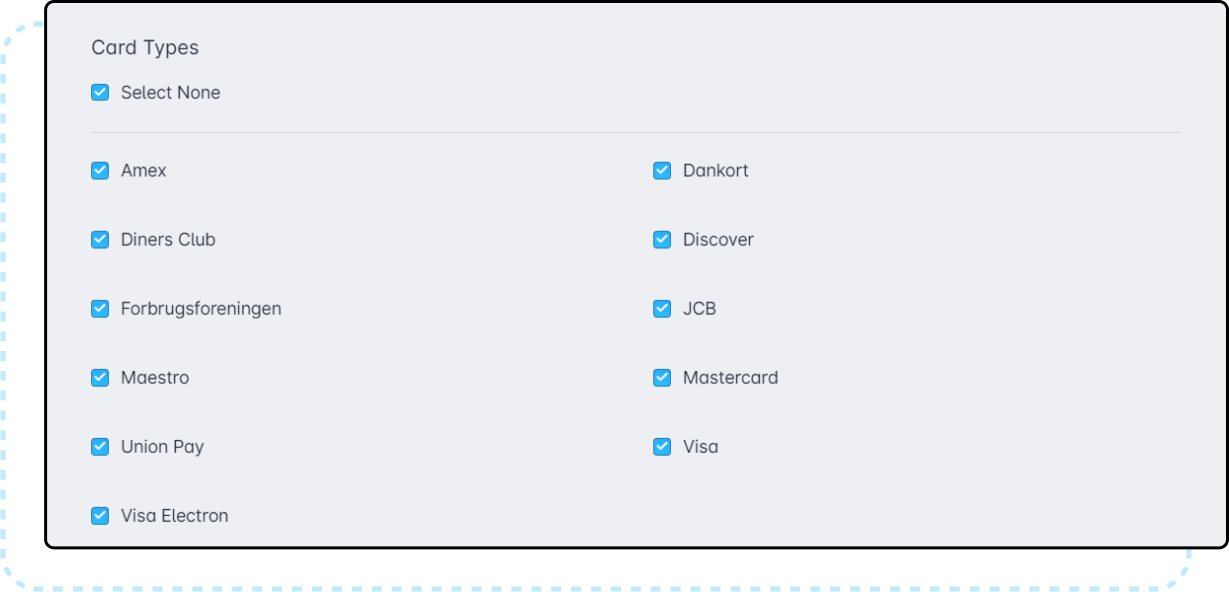
Within Sonar's Credit Card Processor configuration, you can configure each processor with a set of Credit Card Types. All supported Credit Card Types are listed below:

Details
2. Dankort
3. Diners Club
4. Discover
5. Forbrugsforeningen
6. JCB
7. Maestro
8. Mastercard
9. Union Pay
10. Visa
11. Visa Electron

Credit Card Processors
Below is a list of supported external Credit Card Payment gateways, as well as the information which can be entered to configure the gateway.
Provider Name
Required Fields
Special Requirements
Provider Help
DEPRECATED | Authorize | https://www.authorize.net/
- Login ID
- Transaction Key
- Validation Mode
To obtain the Authorize.net Transaction key, follow these steps:
1. Select Settings under Account from the main menu on the left
2. Click API Login ID and Transaction Key in the Security Settings section
3. Enter the secret answer to the secret question you configured when you set up your account
The Validation Mode field is used to indicate the processing mode for the payment. There are 3 different Validation Modes that can be selected:
Live Mode: If selected, a $0 or $0.01 (depending on card type and processor) live transaction is processed against the card and then immediately voided. Address is required for cards that support $0 authorizations and will be validated along with card code, if submitted.
Test Mode: If selected, the card data is validated using simple mathematical checks to confirm that it appears to be valid. It is not a guarantee that the card is legitimate and the customer data is not validated.
None: If selected, no validation is performed at all. It is recommended that this option only be used for integration testing and not for production.- Have someone with edit permissions login to the Authorize Settings Portal
- Go to “Tools”
- Select the “Fraud Detection Suite”
- Select “IP Velocity Filter”
- Add Egress IPs to IP Address Exclusion
Provider Name
Required Fields
Provider Help
Bambora | https://www.bambora.com/en/ca/
- Merchant ID
- Payment Profile API Key
- Transaction API Key
Provider Name
Required Fields
Provider Help
Bluepay
- Account ID
- Secret Key
Provider Name
Required Fields
Provider Help
DEPRECATED |CardConnect | https://cardconnect.com/
- Username
- Password
- Merchant ID
Provider Name
Required Fields
Special Requirements
Provider Help
IPPay | https://www.ippay.com/
- Terminal ID
Click here to download a PDF list of areas that IPPay currently offers processing, as of July 2019You have to contact IP Pay to get them to associate the Sonar egress V2 IP addresses with your Terminal ID. You will need to send an email like this to support@ippay.com:
Please add the IP address XX.XX.XX.XX to the whitelist for TID XXXXXXXX.
Provider Name
Required Fields
Provider Help
Moneris Canada eSelect Vault |
https://www.moneris.com/en/Products-Services/Online/Ecommerce
- Store ID
- API Token
Provider Name
Required Fields
PayGate PayHost/PayVault | https://www.paygate.co.za/integration/payhost/
- ID
- Password
Provider Name
Required Fields
Provider Help
Propay ProtectPay | https://epay.propay.com/protectpay/
- Account ID
- Auth Token
Provider Name
Required Fields
Provider Help
DEPRECATED |Stripe | https://stripe.com/en-ca
- Secret Key
Provider Name
Required Fields
Provider Help
sonarPay | https://sonar.software/sonarpay/
- sonarPay Merchant ID

