Table of Contents
GoCardless Integration: Overview & Setup
Read Time: 7 mins
What is GoCardless?
GoCardless is a Direct Debit provider that manages the entire collection process on behalf of other businesses and organizations. To learn more about GoCardless, including the benefits it can bring and tips on introducing it to your customers, take a look at the GoCardless website: https://gocardless.com/
Sonar can integrate with GoCardless in order to enable direct debit payments to be made from your customer accounts. It works slightly different than other payment processors in Sonar, as it is accessed through the customer portal and your customers will need to go through an authorization workflow (to complete a Direct Debit Mandate), from within the customer portal, before you can start debiting their account.
What is a Direct Debit Mandate?
In order to collect direct debit payments from customers, you need to setup a Mandate (a "Direct Debit Mandate", or "Direct Debit Instruction"). This mandate gives service providers authorization to collect payments from their customers' bank accounts; direct debit payments cannot be collected from your customers until the mandate has been agreed to and signed by the customer.
For more information on Direct Debit Mandates, refer to the GoCardless link on the topic here.
Setting Up the GoCardless Integration
There are 3 different areas that you will need to configure in order to set up the GoCardless integration: the GoCardless portal, within your Sonar instance, and within your Sonar customer portal. The steps required within each of these areas are outlined below.
Part 1: Within the GoCardless Portal
- Navigate to the GoCardless portal (this will require your GoCardless account credentials).
- Within the GoCardless portal, create an access token with Read/Write permissions:
- Navigate into the Developers tab, and in the top-right of the screen click "Create", and then click "Access token" from the list that appears.
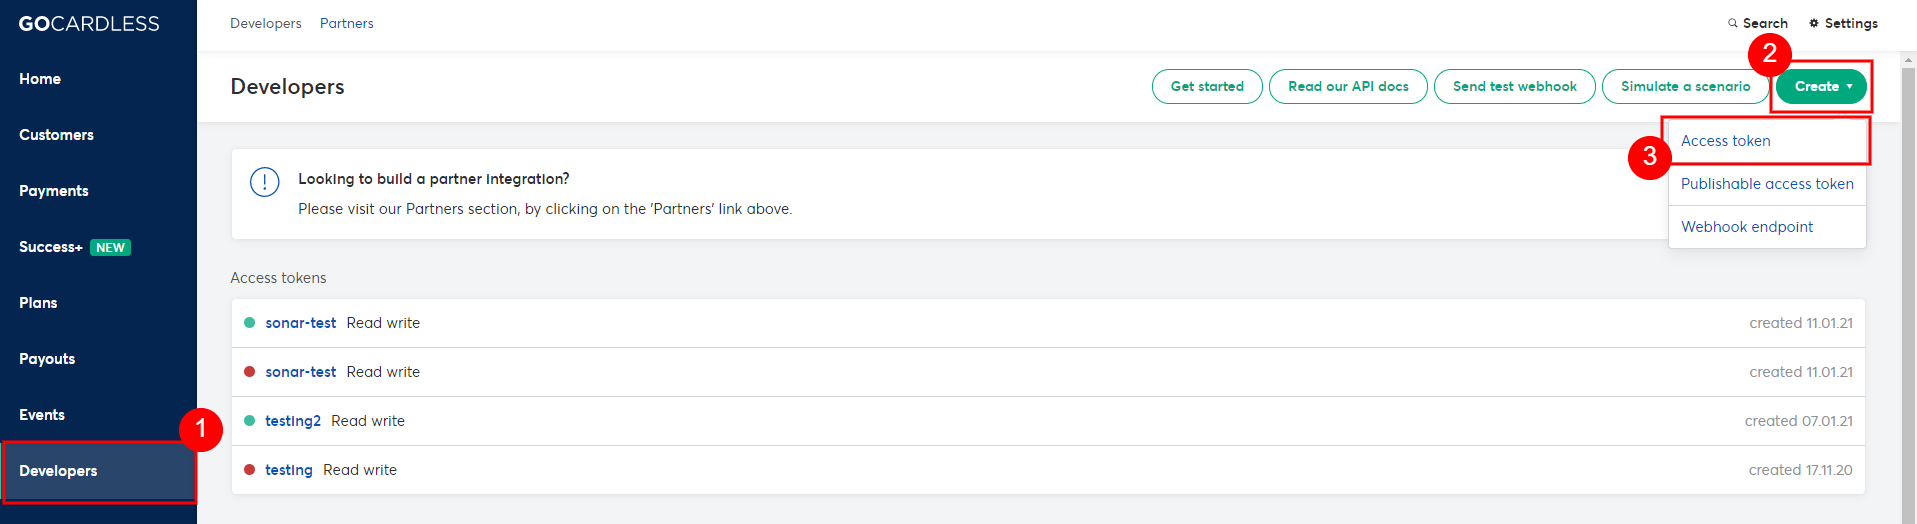
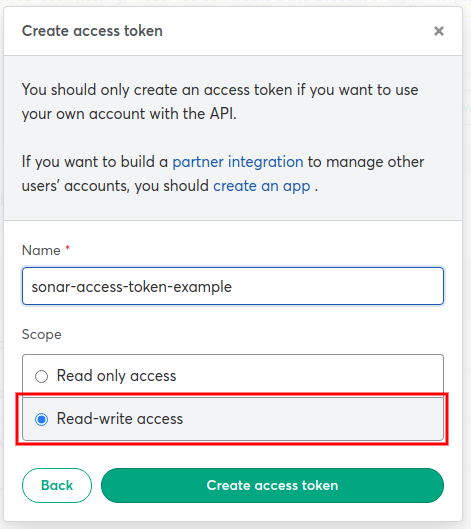
- Within the Create Access Token window that appears, give your token a name, ensure "Read-write access" is selected, and then click "Create access token".
- Your token will be created and you will need to copy it from this screen; this token will be used in parts 2 and 3 below.
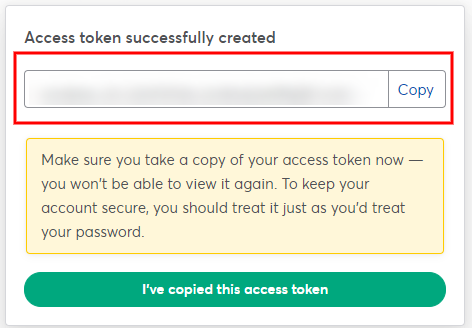 You must copy your access token from this step and keep it secure somewhere, as you would a password; you will not be able to view it again after this step, but you will need it to complete the integration setup.
- With the access token created, we can move on to creating the webhook URL/secret, which will be used to automatically update Sonar whenever the status of a payment or mandate changes (i.e. a payment fails, or a mandate expires):
- From within the Developers tab of the GoCardless portal (the same screen as step #2. a), click "Create" in the top-right corner, and then click "Webhook endpoint".
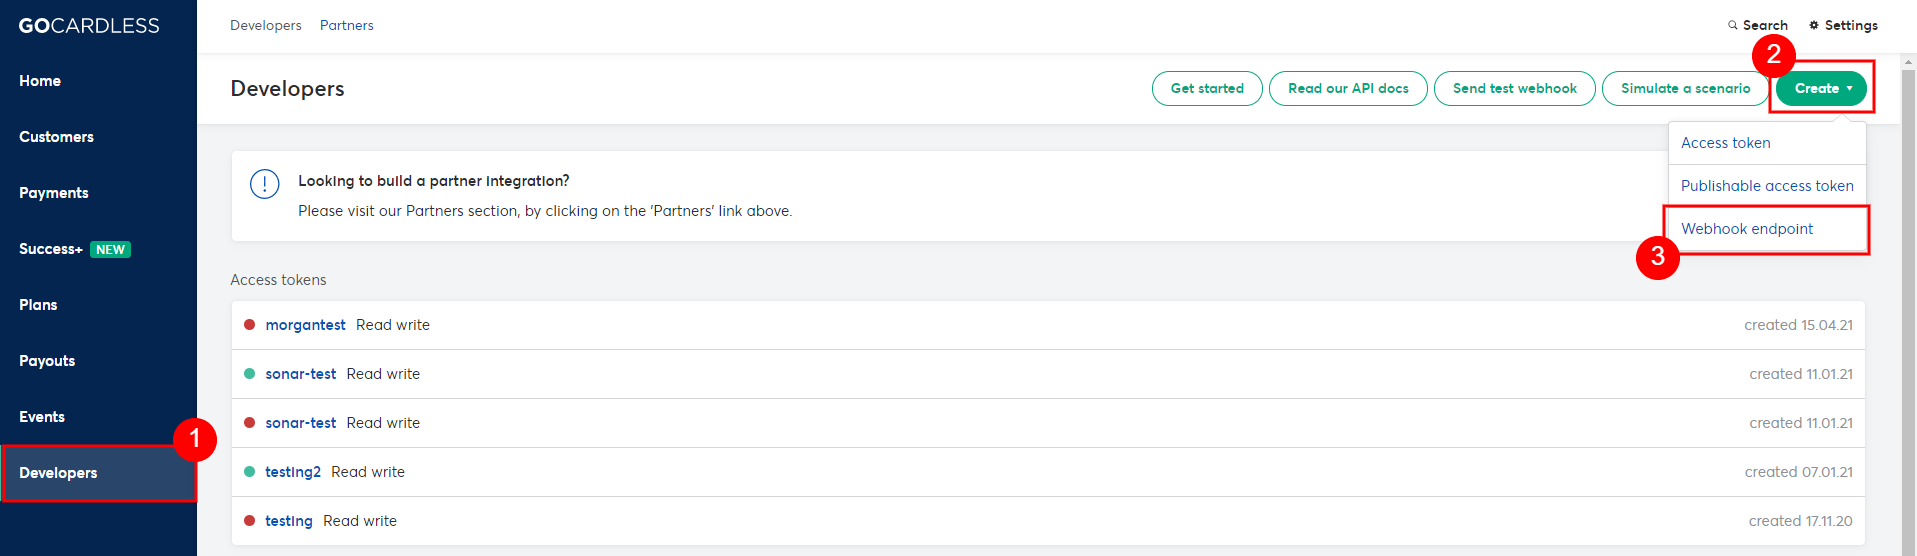
- From within the Developers tab of the GoCardless portal (the same screen as step #2. a), click "Create" in the top-right corner, and then click "Webhook endpoint".
- Within the Create Webhook Endpoint window that appears, give your webhook a name, and enter in the URL (this should be your Sonar instance URL + /api/webhooks/gocardless/events).
Optionally, you can also set a passphrase for the Secret, or you can leave it blank and have it randomly generated.
Once you've filled out the necessary fields, click "Create webhook endpoint".
- With the webhook URL/secret created, move on to Part 2 below; keep the GoCardless screen open, or be sure to have the webhook URL and secret accessible, as they will be needed in the next steps.
Expand here if you cannot find your webhook secret
From within the Developers tab of the GoCardless portal, find your newly created webhook from the Webhook Endpoints table and click on it; you will be brought to its Details screen where you can see additional information, including the Secret.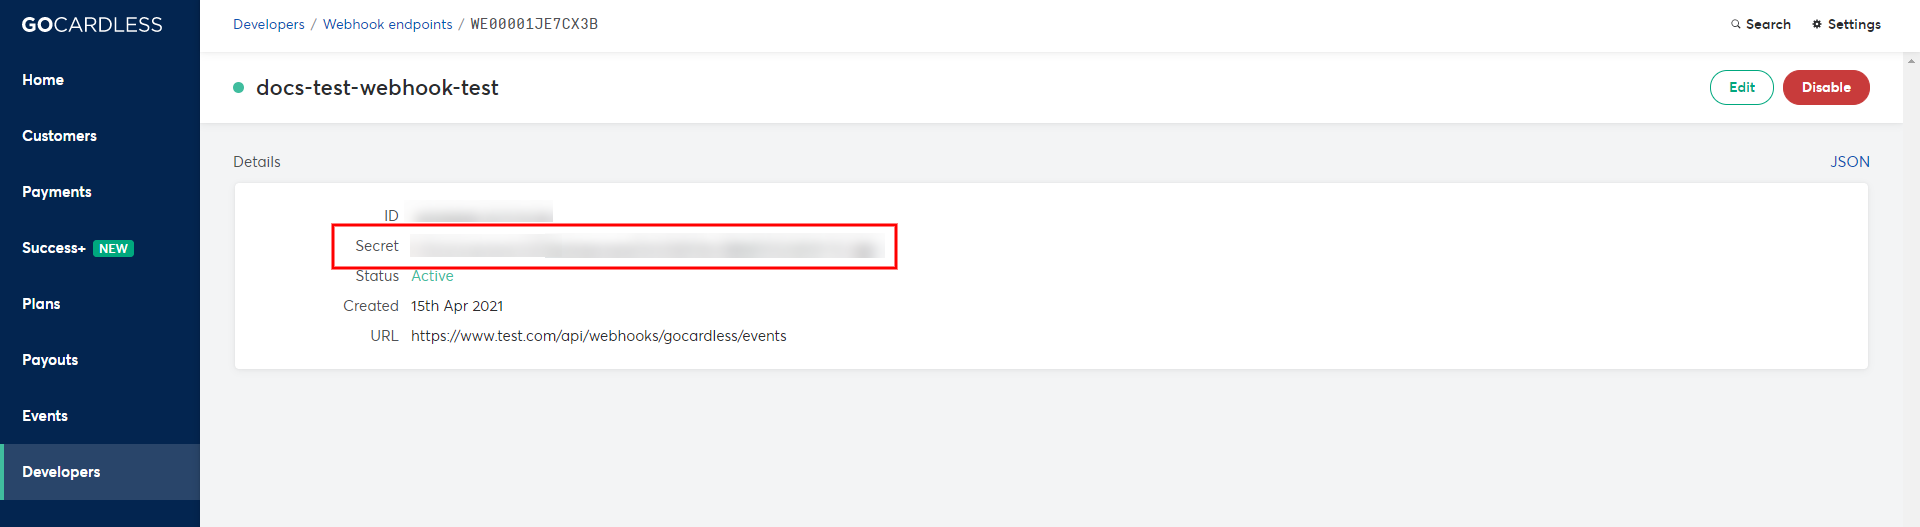
Part 2: Within Your Sonar Instance
- Within your Sonar instance, navigate to Settings menu > "Billing" > "Bank Account Processors" and click "Create Bank Account Processor".
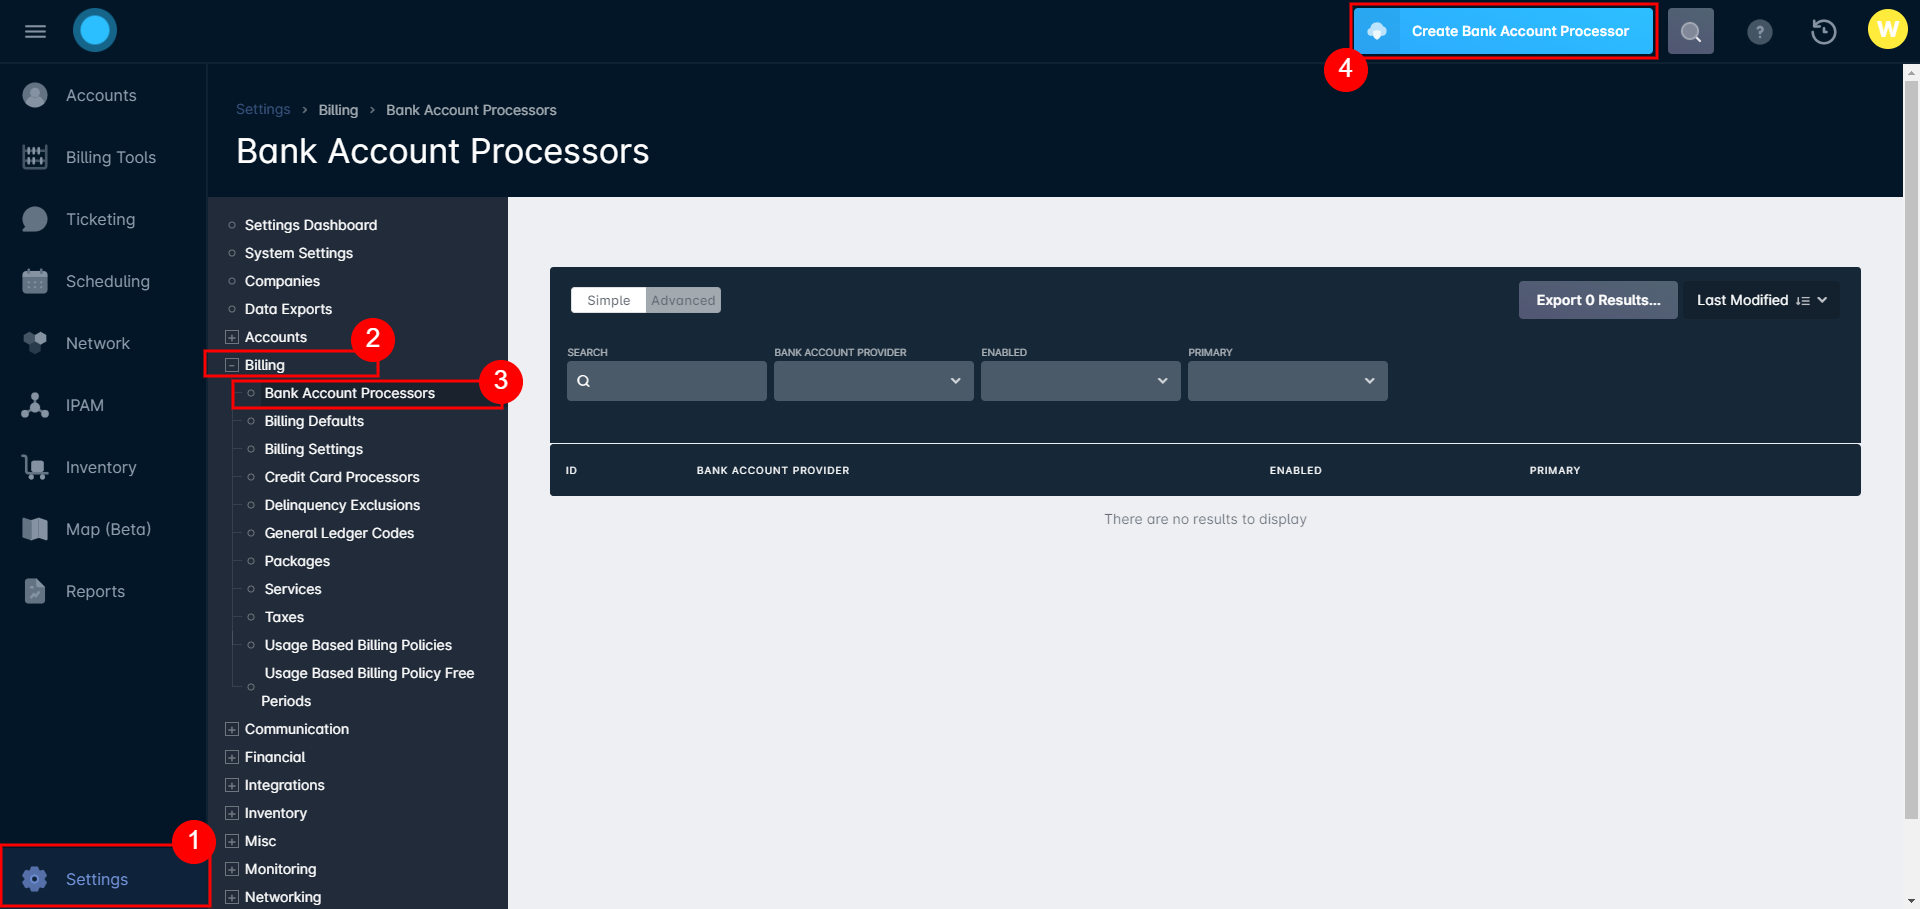
- Within the Create Bank Account Processor window that appears, select "GoCardless (https://gocardless.com)" as the Bank Account Provider.
Enter your access token and webhook endpoint secret (from Part 1) into their corresponding fields, be sure that "Enabled" is checked off, and click "Create".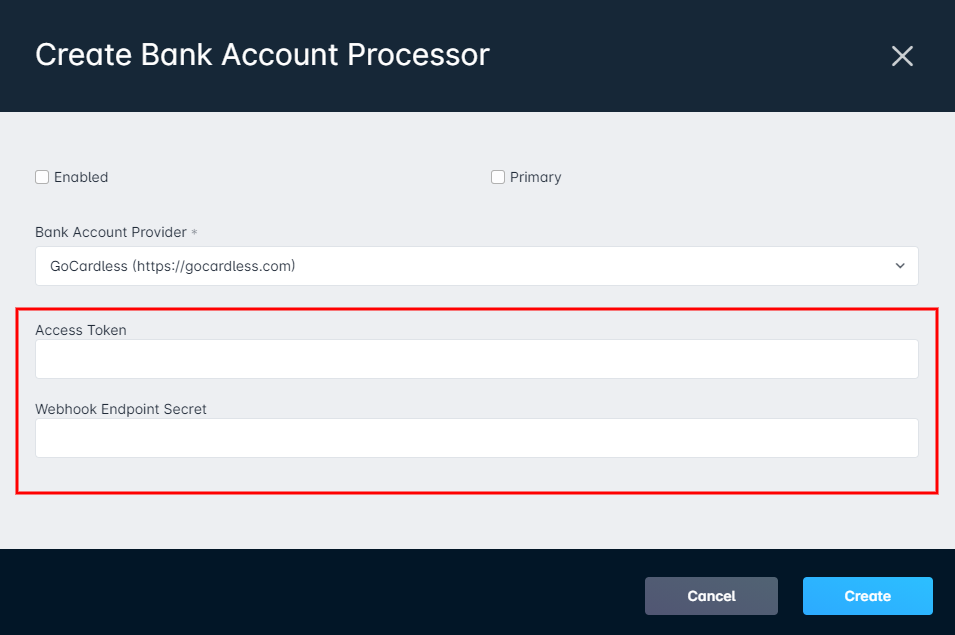
- Now that the bank account processor has been created within your Sonar instance, you can move on to Part 3 below.
Part 3: Within Your Sonar Customer Portal
- Navigate to the Settings page of your Sonar customer portal, via https://[portal-url]/settingsTo access the configuration settings for your customer portal, you'll be required to enter your customer portal Settings Key.
- Scroll to the GoCardless Integration section; this is where you will need to toggle on "Enable GoCardless", paste your Access Token (from Part 1), and can also set a currency mode.
Once complete, be sure to save your changes.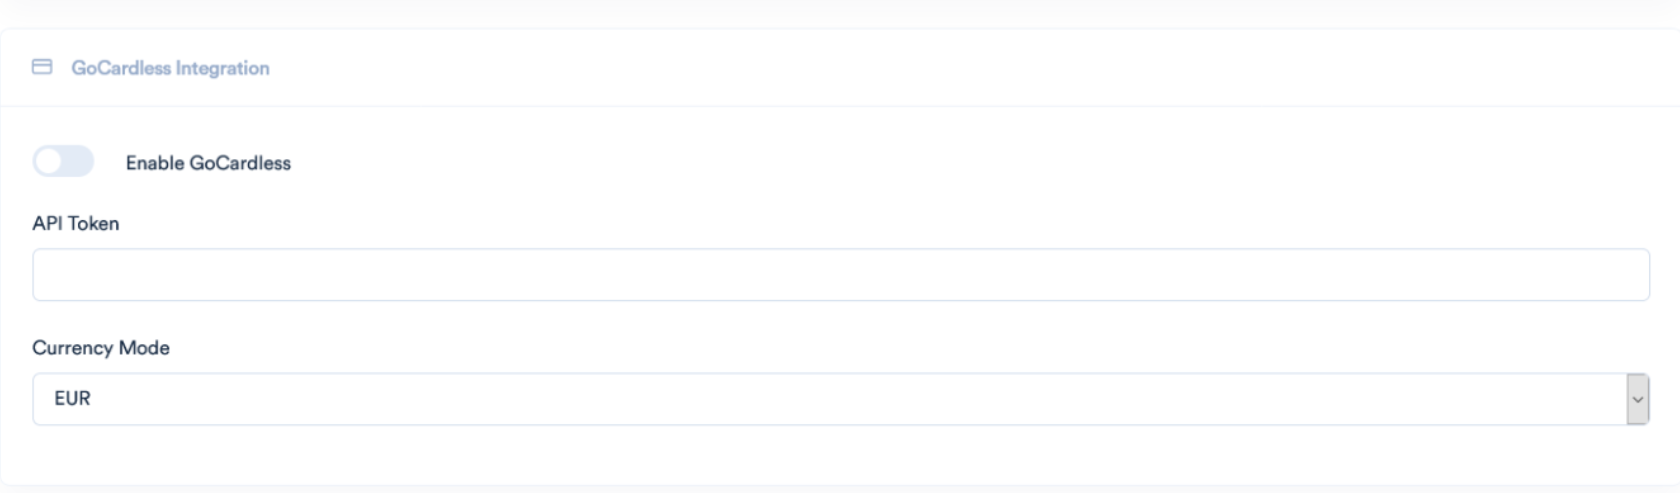
- Your GoCardless integration is now set up! Jump to the section below to see what this will mean for your customers and how they will interact with it.
From the Customer's Side
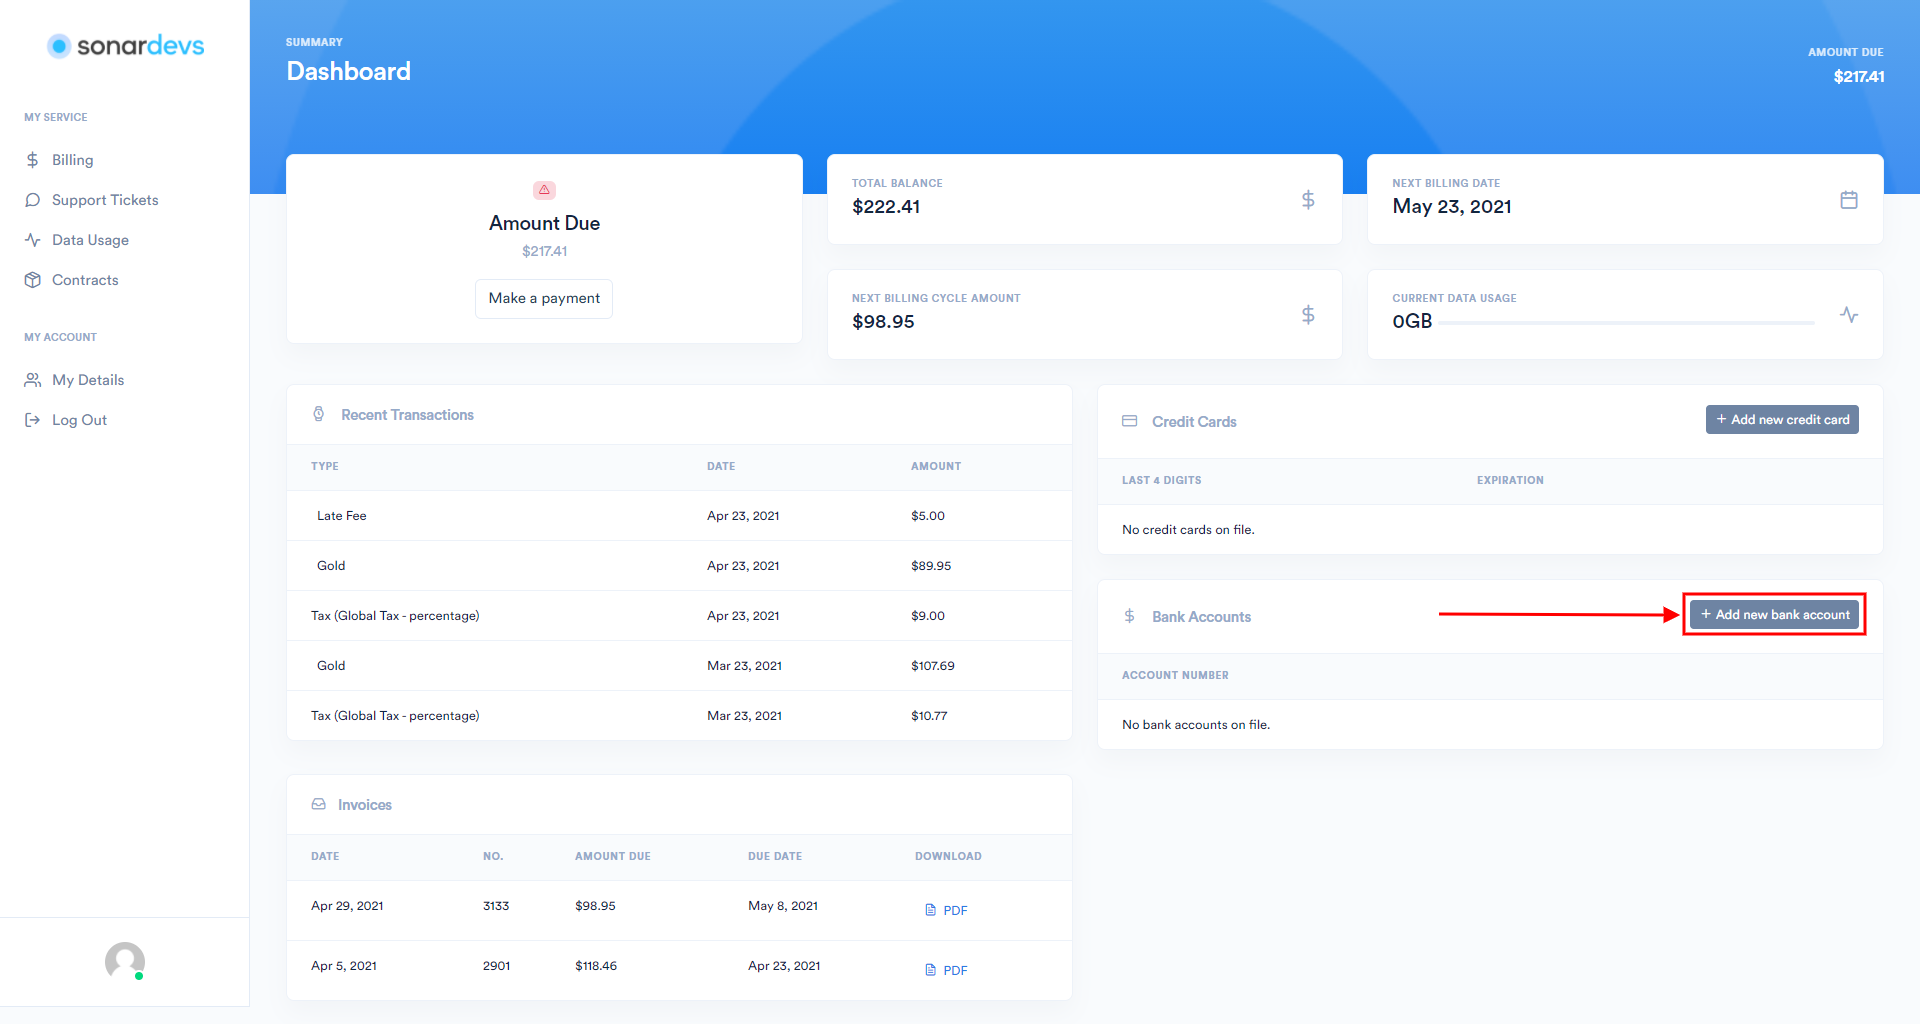
Once GoCardless has been set up, your customers will interact with it through your Sonar customer portal. Once they navigate into the portal, they will need to add in their bank account as a payment method, by clicking "Add new bank account".
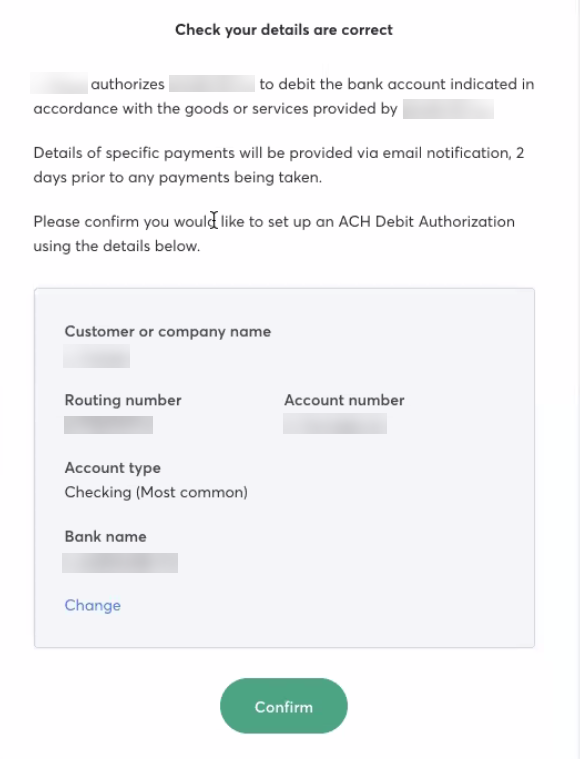
At this point, the customer will be forwarded over to the GoCardless interface where they can enter their bank account details and complete the Direct Debit Mandate, which gives you the authorization to collect payments from their bank accounts.
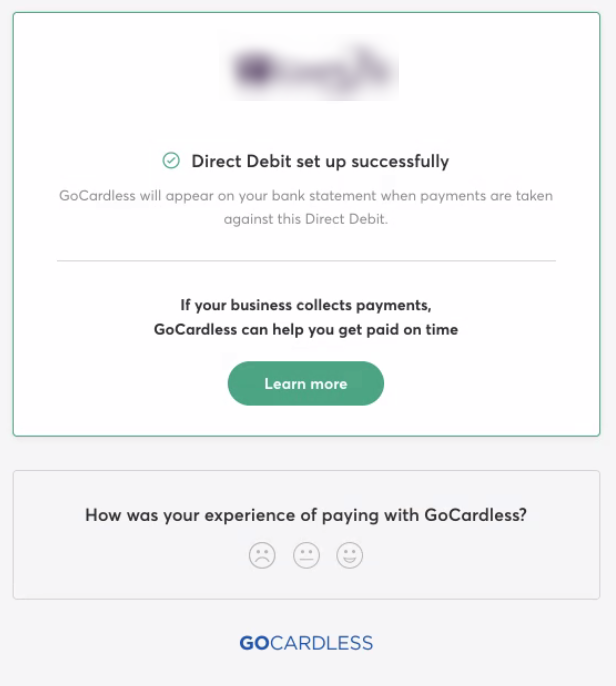
Once they have entered in their information and confirmed that the details are correct, they will see the screen indicating that Direct Debit has been set up successfully.
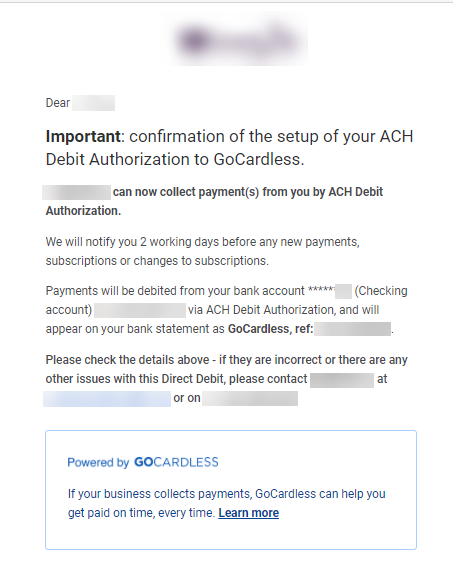
The customer will also receive an email that confirms their information and provides additional details regarding how payments will be collected.
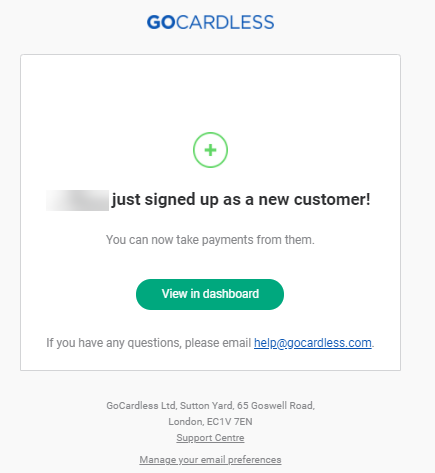
You will also receive an email, notifying you that a new customer has signed up with GoCardless and that you can now begin taking payments from them.
Notifications
As per Direct Debit regulations, there is a requirement for notifications to be sent to the customer prior to charging their account. These fully compliant email notifications are sent automatically by GoCardless and is not something you need to configure within your Sonar instance. Customers that authorize Direct Debit through GoCardless will be notified by email for events, such as when a Direct Debit mandate has been authorized, notification ahead of a payment being made against their mandate, and when a payment is made.
Note on Timing
Direct Debit is not an instant payment method, and both the mandates and payments have a multi-day processing time. Payments typically take at least 3 working days to clear and require that notice be given to the customer before the payment process can be initiated, for most cases. More information from GoCardless on Direct Debit timings can be found here.
Considerations
When implementing GoCardless as a payment provider, there are a few notes concerning insufficient funds and cancelled transactions. By default, when a payment is made by the customer through GoCardless, and it appears to succeed, the payment will be marked as successful in Sonar.
If there are insufficient funds as the charge is processed by the customer's bank, then GoCardless will decline the transaction. Once declined, GoCardless will send an update to Sonar, modifying the successful payment flag.
full_processor_response API call.If a chargeback is initiated, or the transaction is disputed, GoCardless will update the payment flag to cancelled. In both cases, the payment processor will rectify the amount owing on the account. This process will not notify you directly, but if the customer doesn't resubmit a payment, the mismatch will be reflected in your accounting reports, and on the customer's next invoice.