Table of Contents
Triggered Messages: Setup
 Updated
by Jennifer Trower
Updated
by Jennifer Trower
Read Time: 12 mins

Triggered messages allow you to configure customized email messages and canned SMS messages that can be sent out automatically to customers based on the occurrence of specific events. For example, you can have a message automatically sent to customers once they reach a certain percentage of their data usage each month, or when a credit card on the customer's account is about to expire. Below, you will find an overview of how to set up triggered messages, as well as an example use case of where these can be utilized.
These messages are fundamental to the system working, and therefore they cannot be edited or deleted, and is why you do not see an Edit option on their individual item lines.
Creating a Triggered Message
Triggered Email Messages
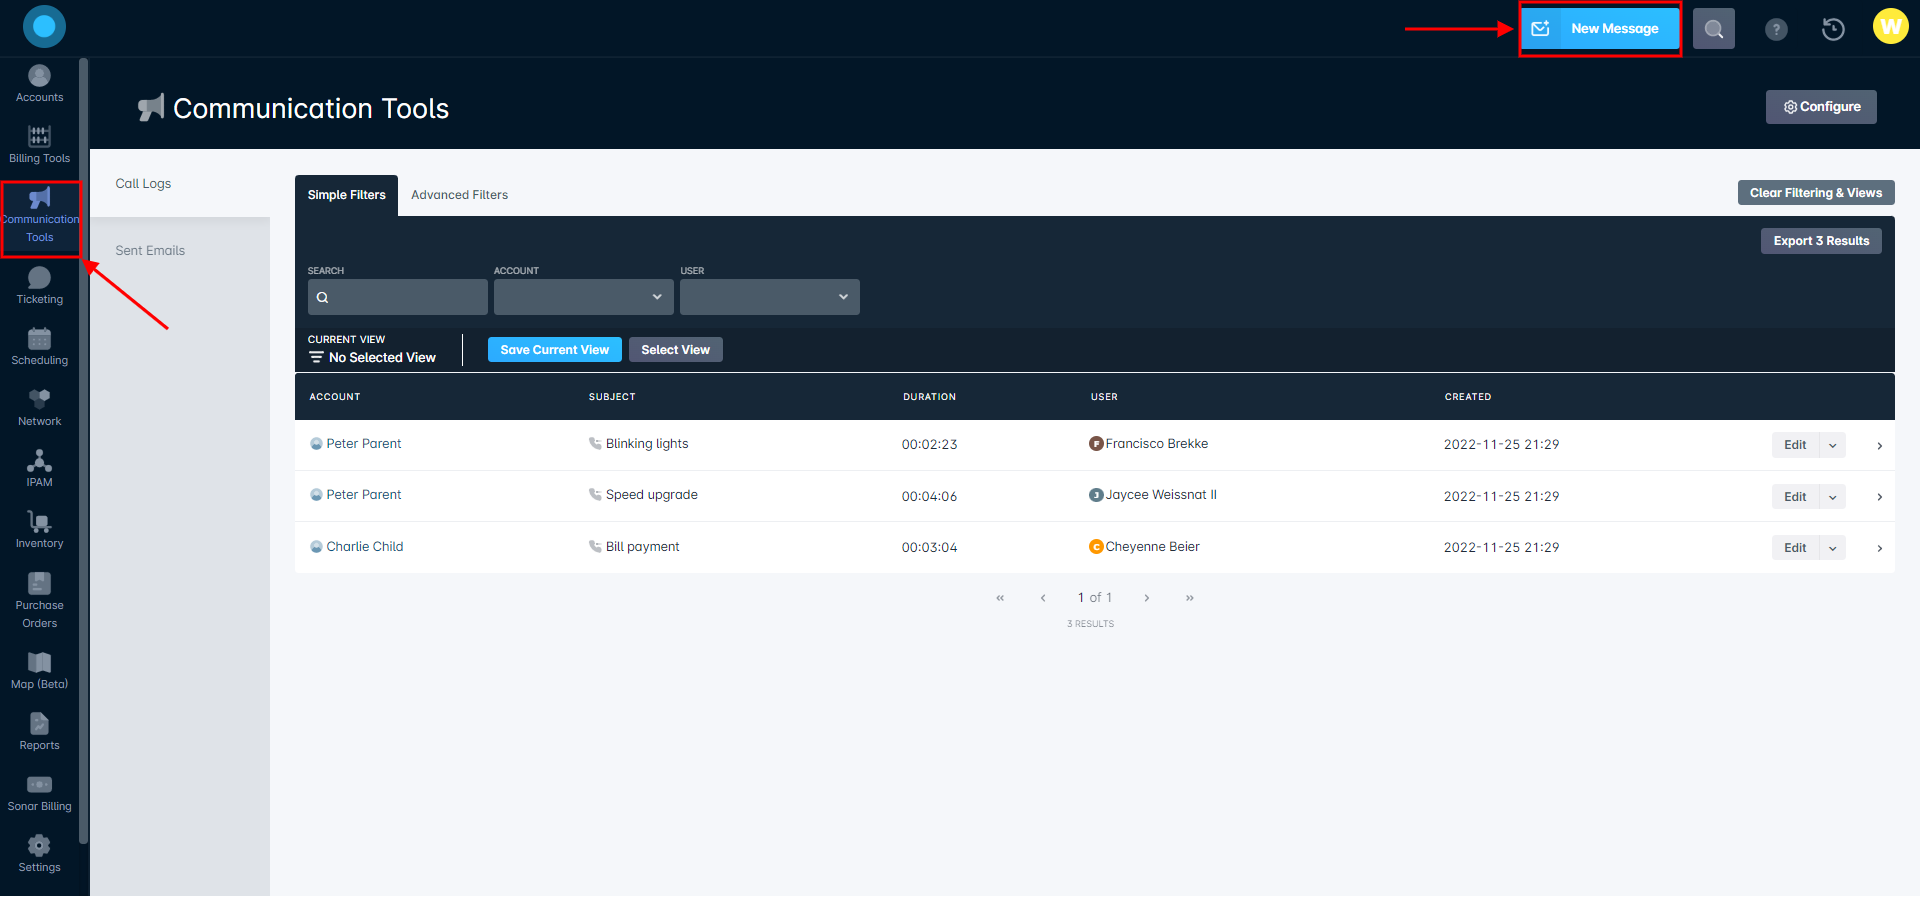
To access Triggered Messages, locate the “Communication Tools” navigation icon in the column located to the left of your screen.

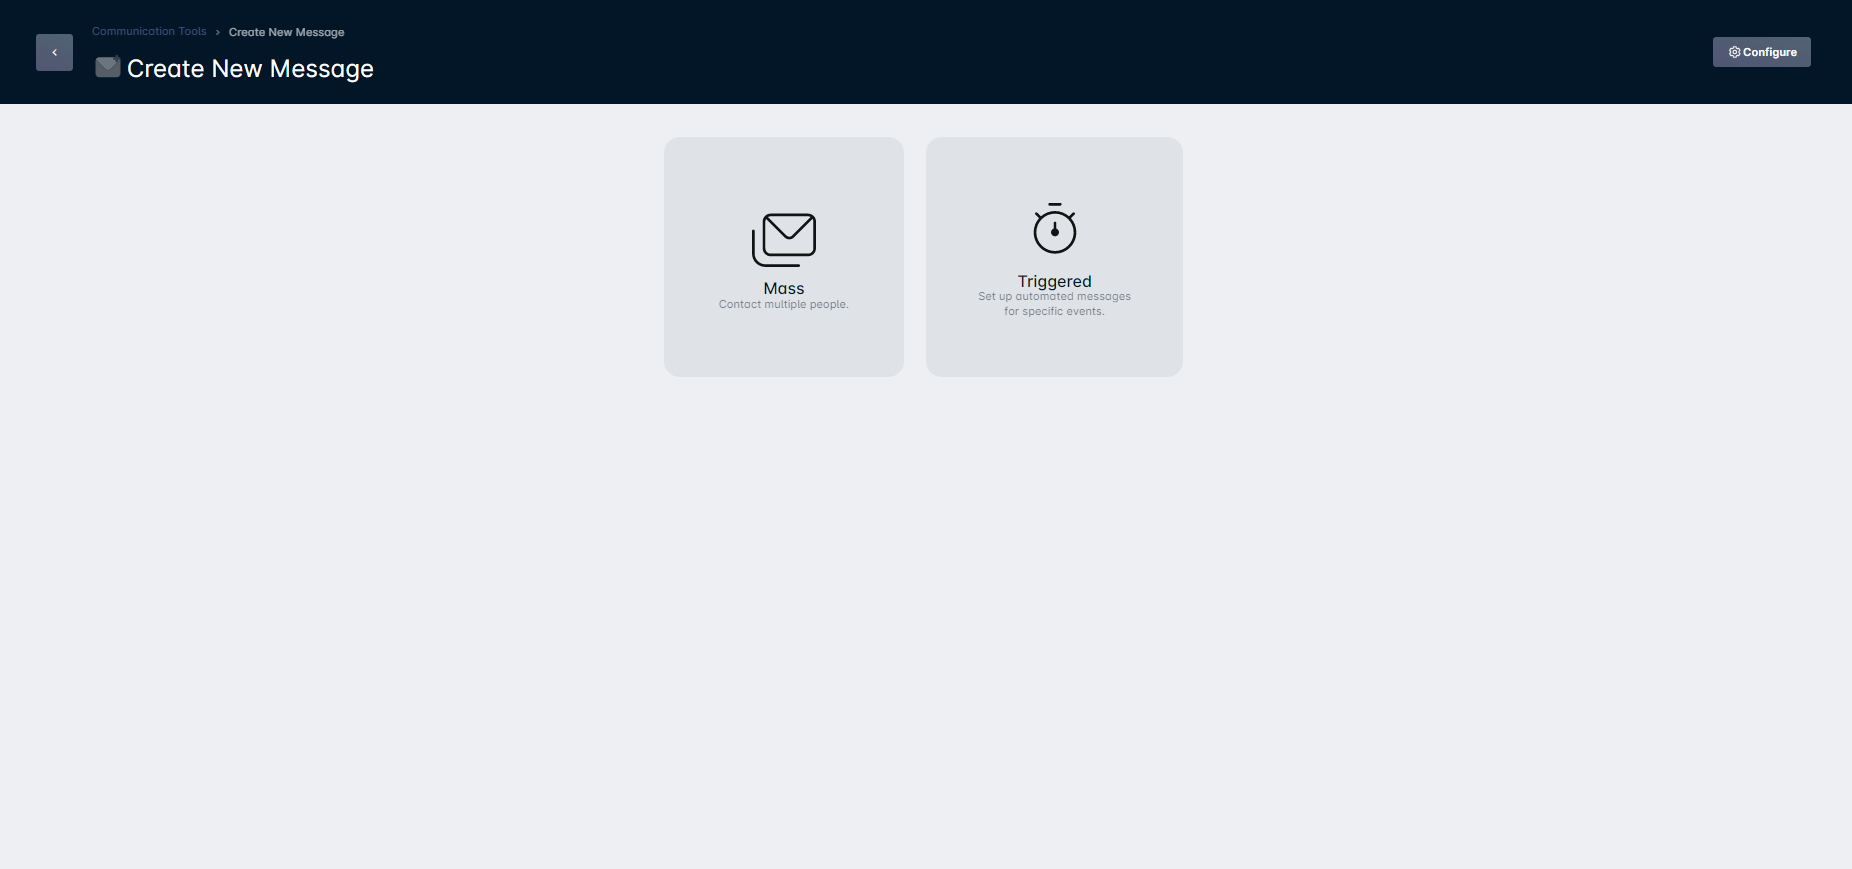
Clicking on the blue New Message button will populate a new page that offers the ability to either send a mass message or a triggered message. In the section below, we'll take a look at the creation process for Triggered Messages.

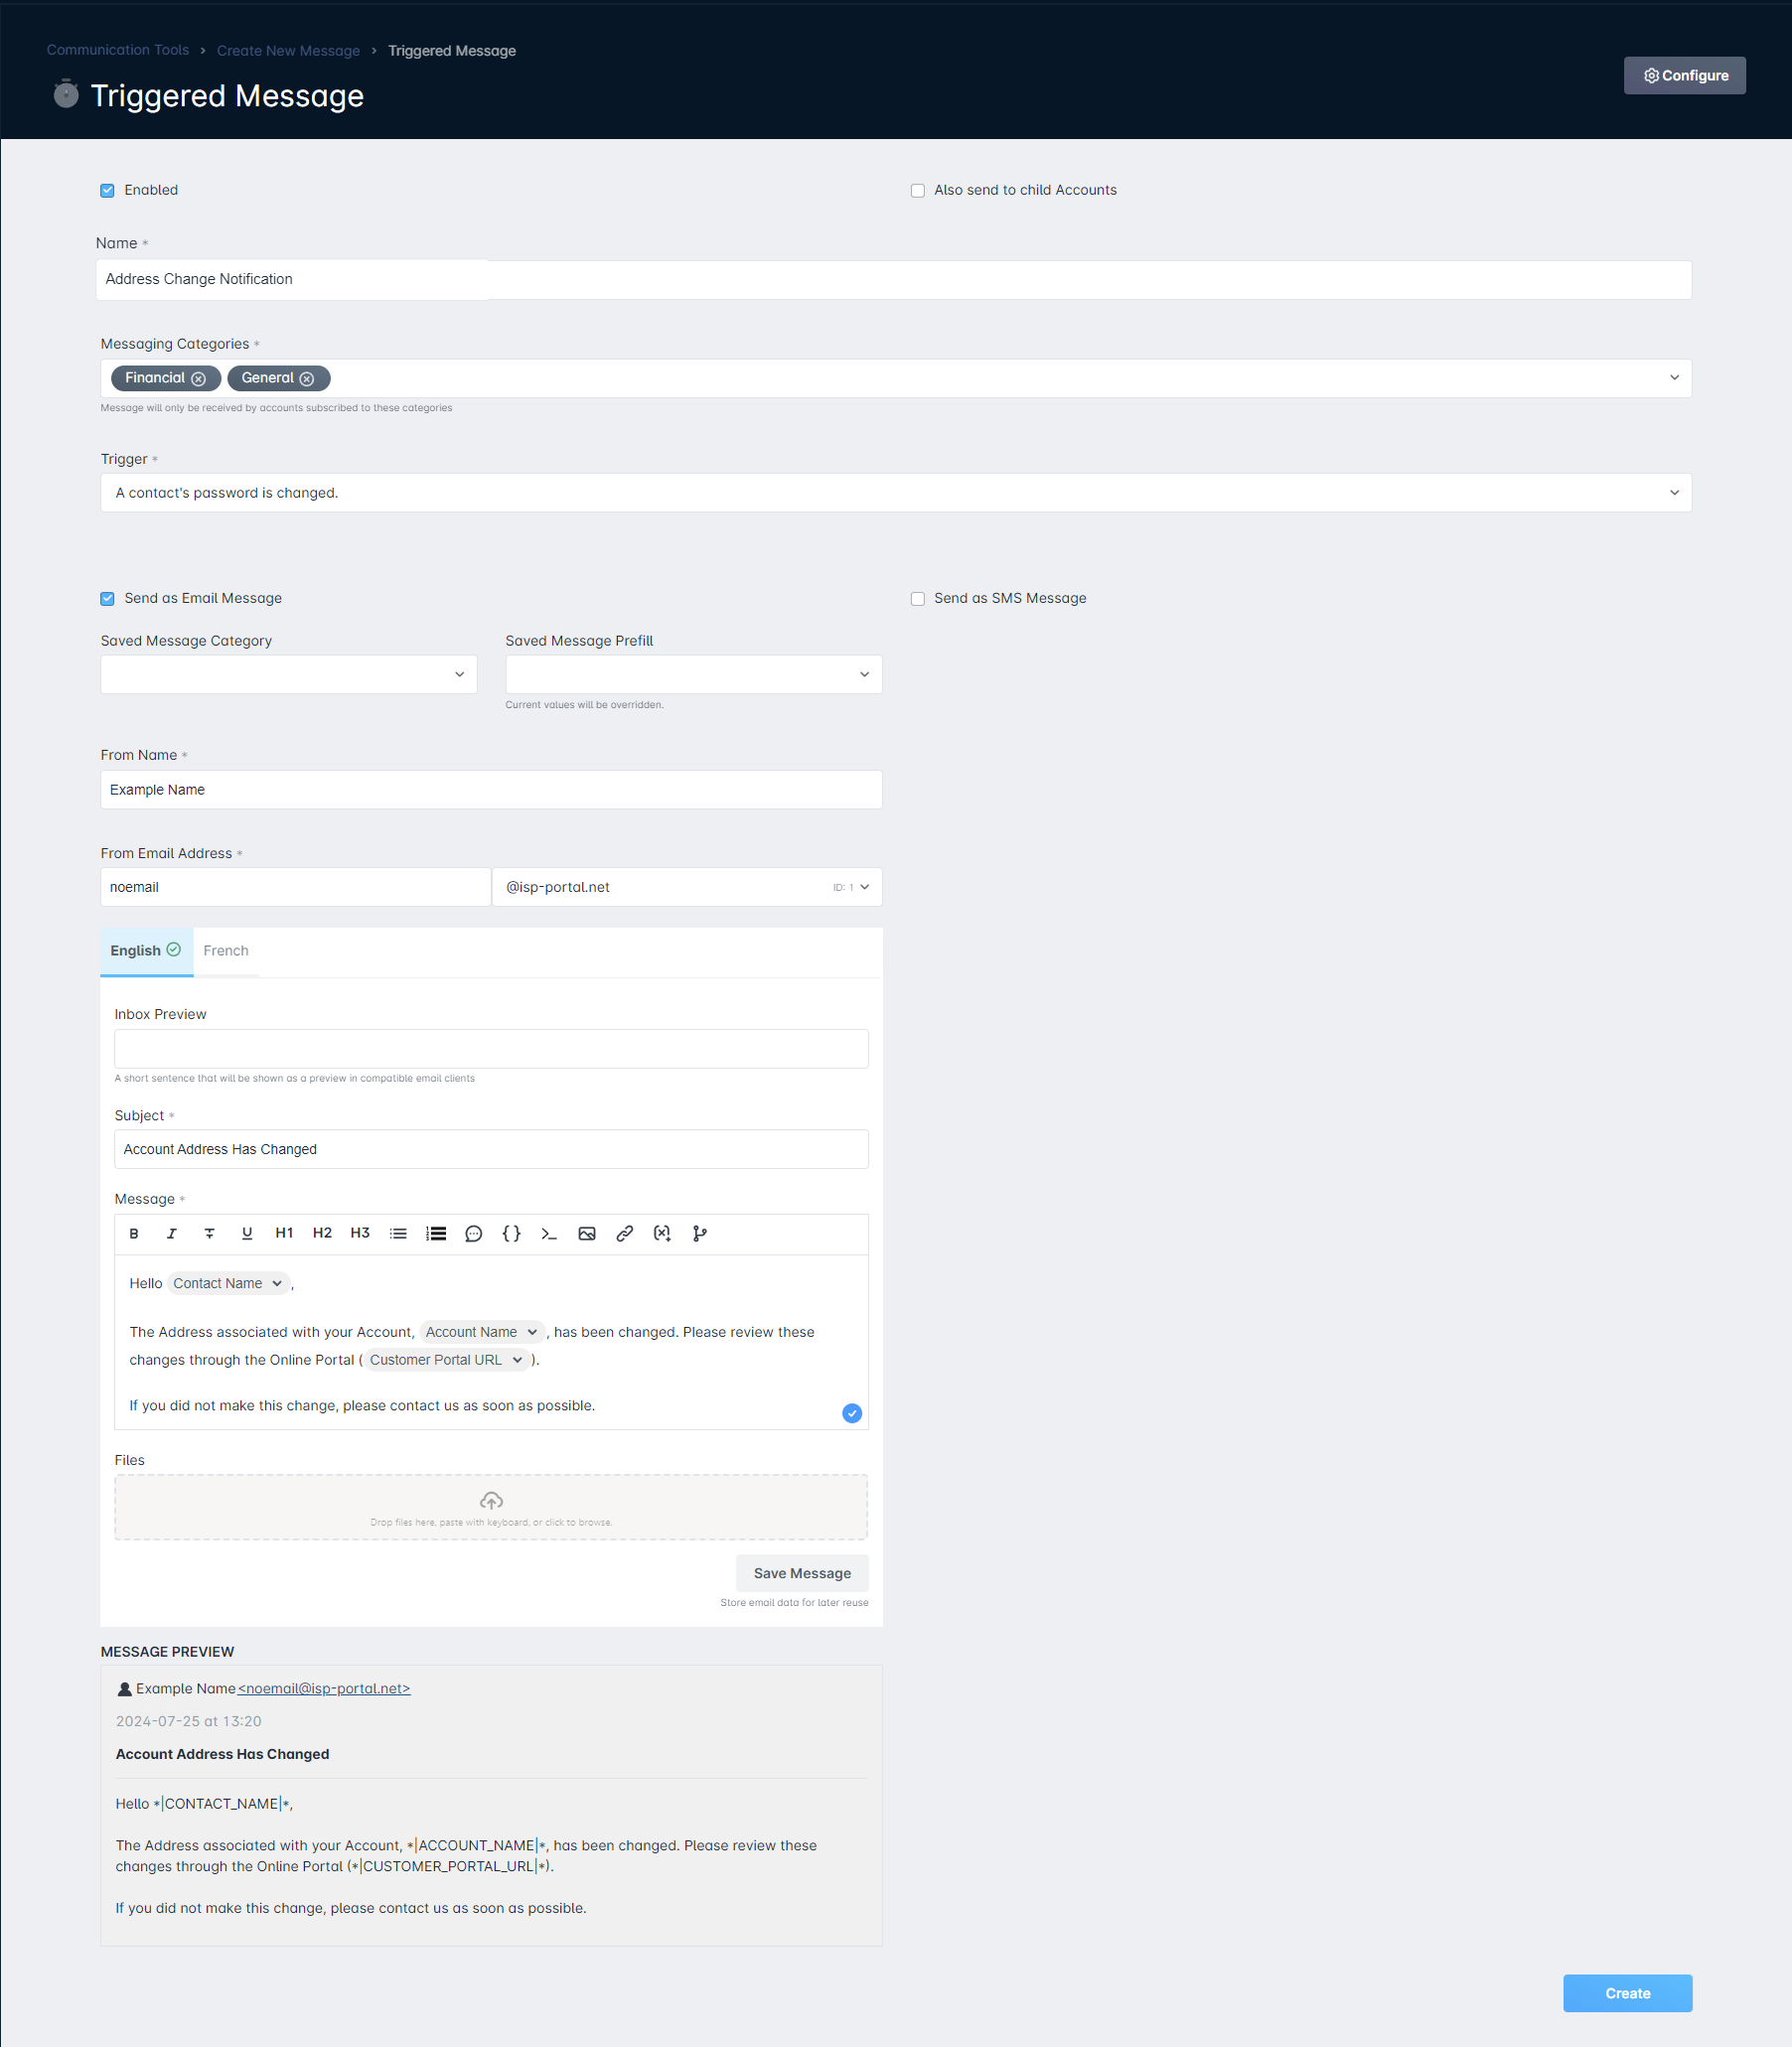
Clicking “Triggered” will open up the Triggered Message window, allowing you to complete the form. Below is a detailed layout of what each option entails.
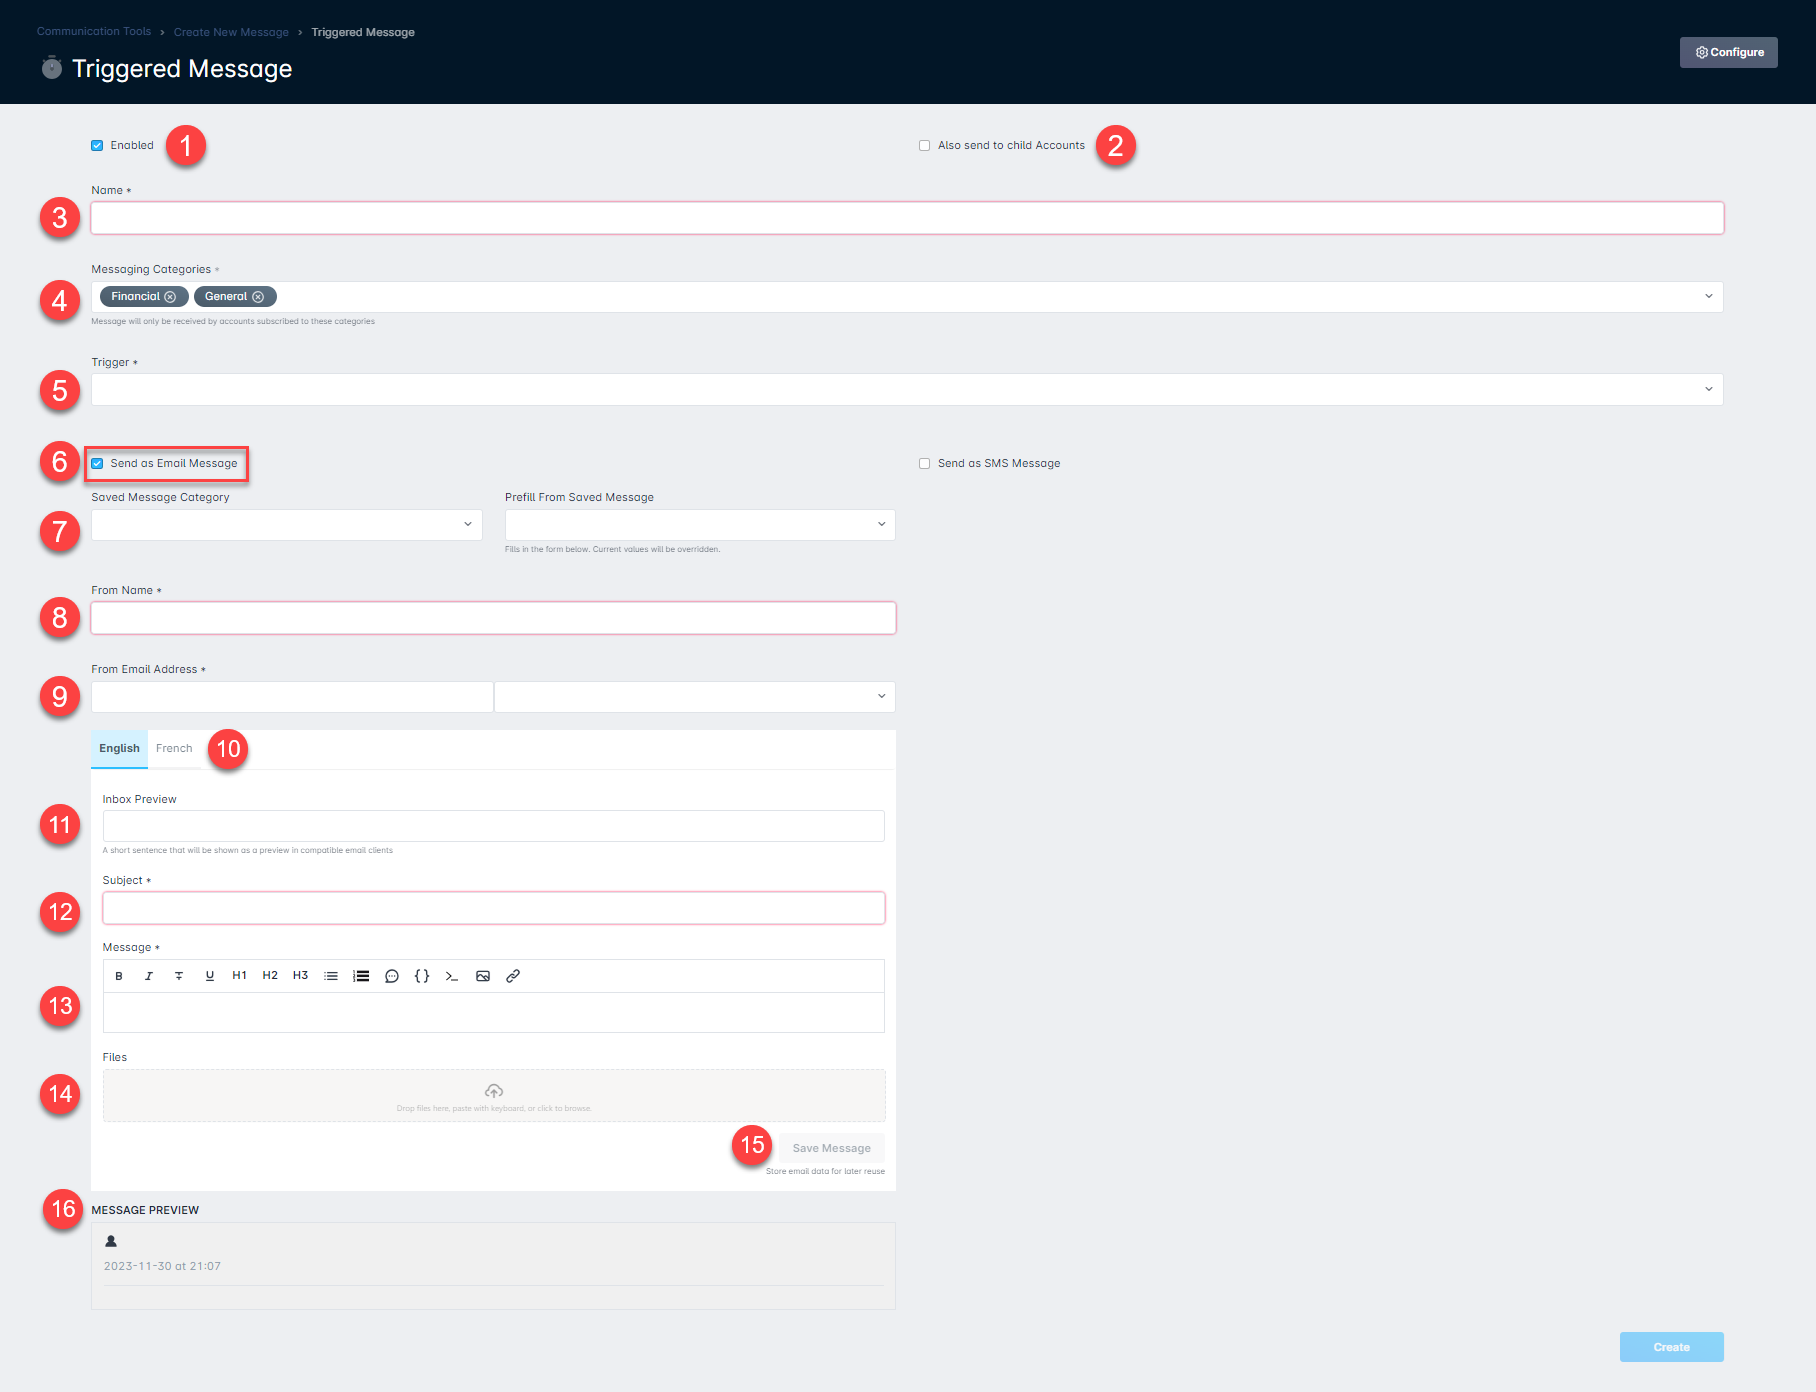
- Enabled: this checkbox determines whether the triggered message is active and currently sent out to customers, or if it is disabled and therefore not being used.
- Also send to Child Accounts: this checkbox determines whether the triggered message will also be sent when a Child Account causes the trigger to run. When this checkbox is deselected, no child accounts will receive triggered messages.
- Name: This is used for the name of the triggered message itself and is a required field.
- Messaging Categories: This is where you can select which category(ies) the triggered message should fall under, if any. Messaging categories are used to determine the type(s) of messages that a contact should receive, and can be defined for each contact listed on an account.
- Trigger: Here is where you would select the event that would trigger the message to be sent out, from a predefined dropdown list of available triggers. This is also a required field.
- Send as Email Message: this checkbox determines whether the triggered message will be sent as an Email message.This box must be selected to generate the Email Message fields found below this checkbox.
- Saved Message Category & Prefill From Saved Message:
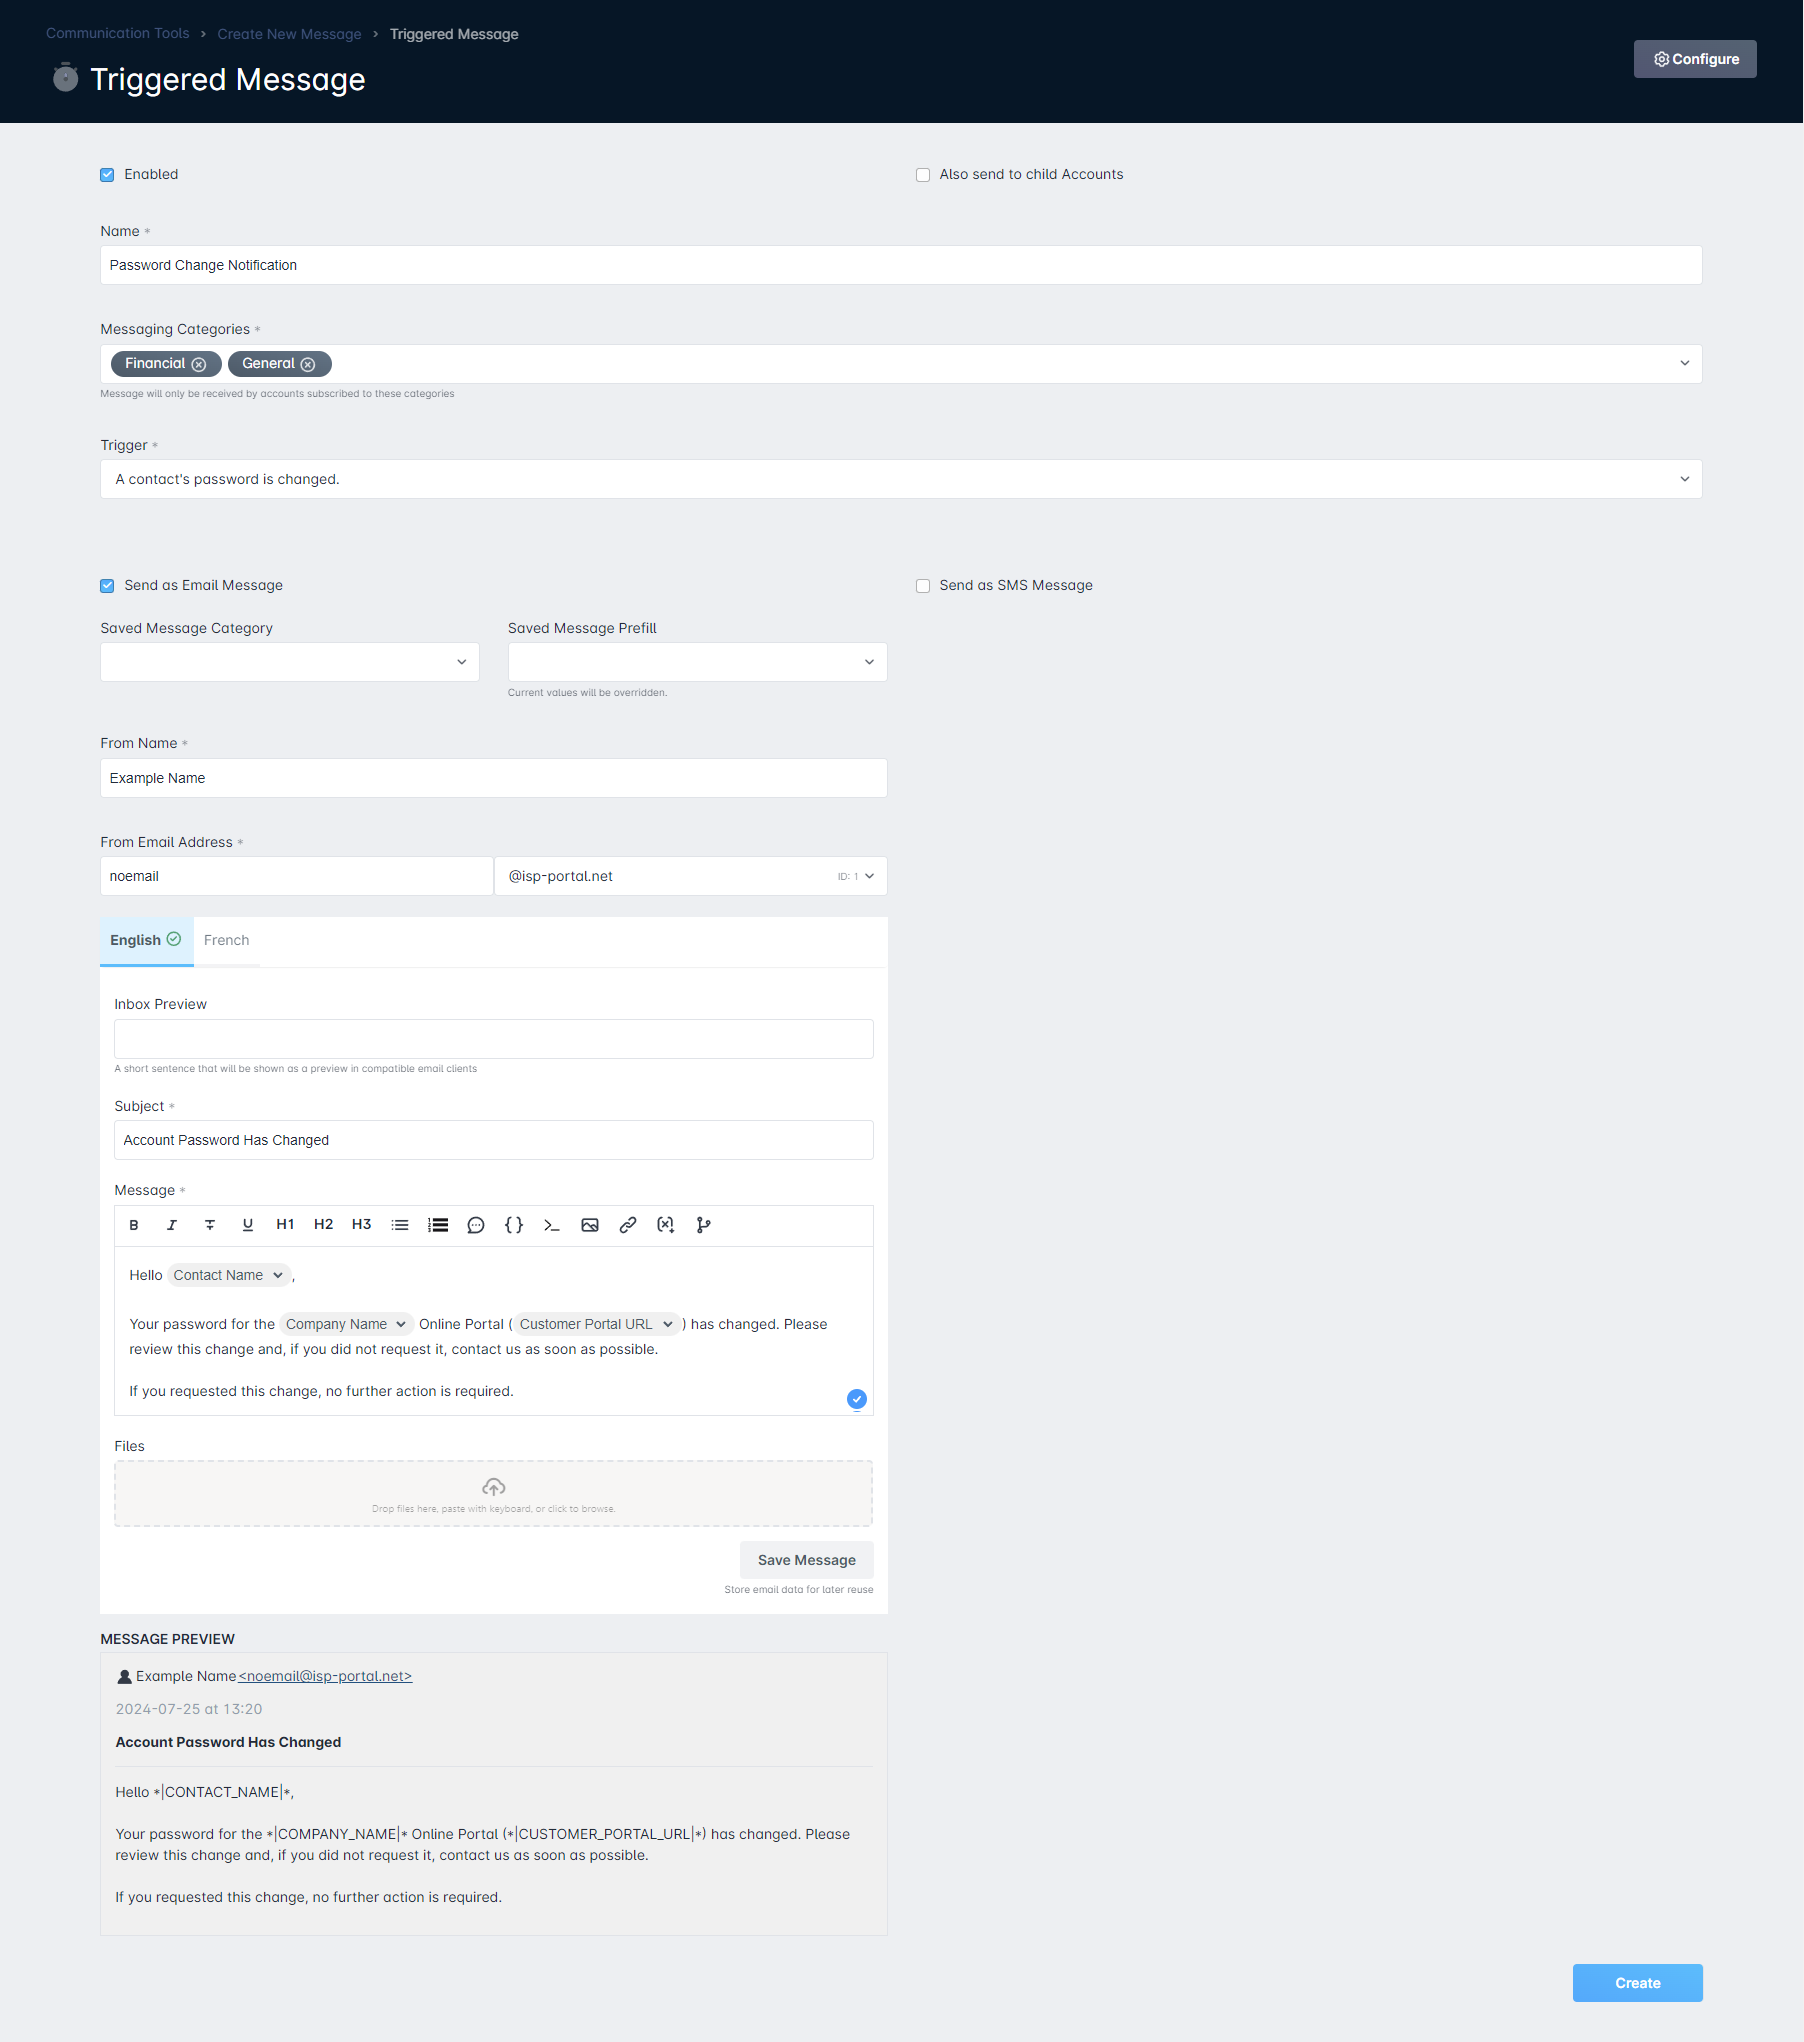
- From Name: This section determines the sender name that the message will appear from. This is also a required field.
- From Email Address: This field determines the sender email address, and it is also a required field.The “From Email Address” field can only use a domain name that has already been verified within Sonar. For more information on setting up an outbound email domain, refer to our knowledge base article found here.
- This section allows you to select which language the message is available in. Currently, the two available options are English and French only.
Language Considerations
If you are taking advantage of the “Language” dropdown per account contact, you must ensure that the body for both languages has content included.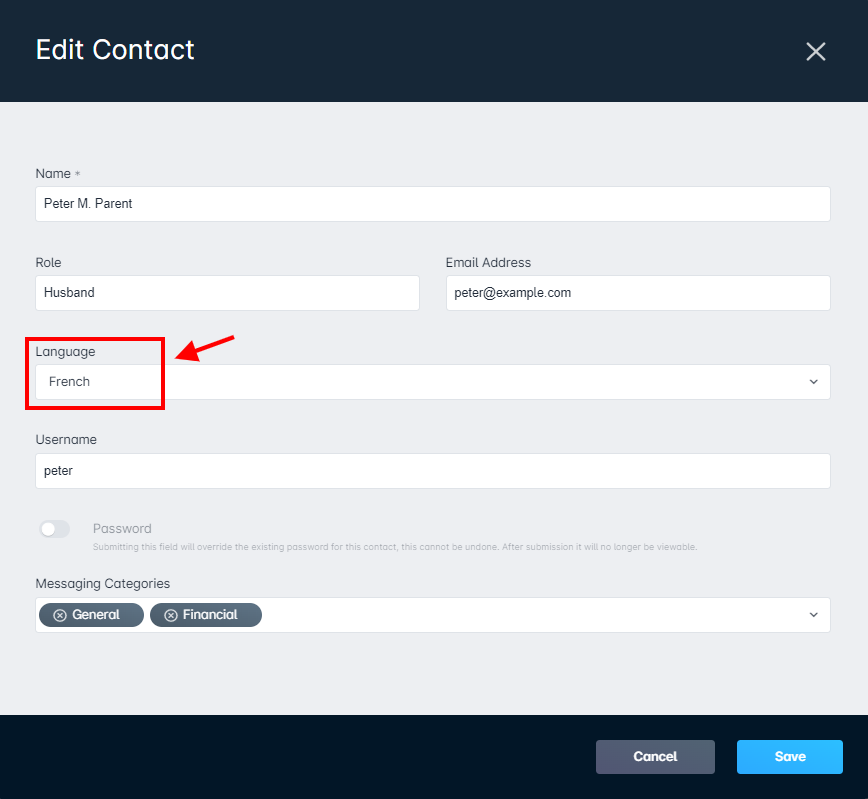
In the example above, Peter Parent has the “French” language selected. If we were to create a Triggered Message with content included in only the “English” body, Peter would not receive a message. Therefore, we will need to ensure we have both the English and French translations included when creating the Triggered Message. - Inbox Preview: This field is not required, but allows you to set an inbox preview for the message – this can be used to provide a sneak peek to the recipient of what the message is regarding before they actually open the message.

- Subject: This is where you can define the subject of the message that gets sent out.
- Message: the message body is where you can define the message's content, and can use the text editor to customize the appearance of the message. Once a trigger is selected, variables and conditional statements can be added to the message. The variables available within conditional statements, much like those within the message, depend on the selected trigger. For example, one of the conditional checks available is
Unformatted Amount Due, which is the amount of money the customer owes, as a floating-point number (e.g., 1.23.) If the message was sent with the conditional statement example below, the IF/ELSE statement will be evaluated and the message will only contain 'You owe money!' or 'You don't owe any money!', based on whetherUnformatted Amount Dueexceeds 0.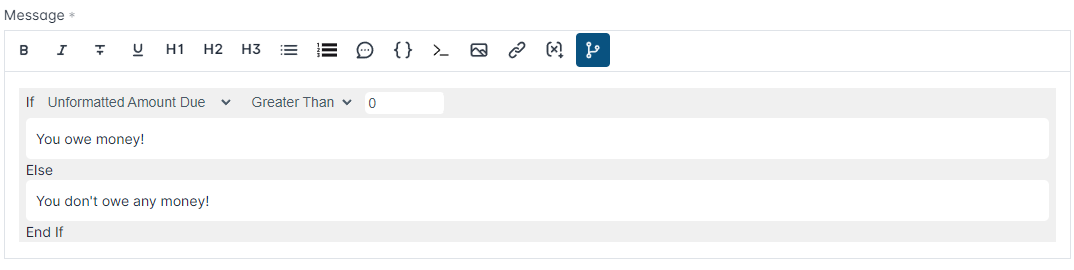
- Files: Here you can attach a specific file that you wish to be sent out with the triggered message.
- Create: Finally, this button allows you to save the configuration of the triggered message. If the message is saved successfully, a message will appear in the upper-left corner indicating “Triggered Message created”.
- Message Preview: the message preview will show you what the sent email message will look like when it's received by recipients. This preview will still show the variable fields, rather than the details the recipient will see.
Using Variables
The Variable menu highlighted below will only appear once a trigger has been selected from the “Trigger” list.
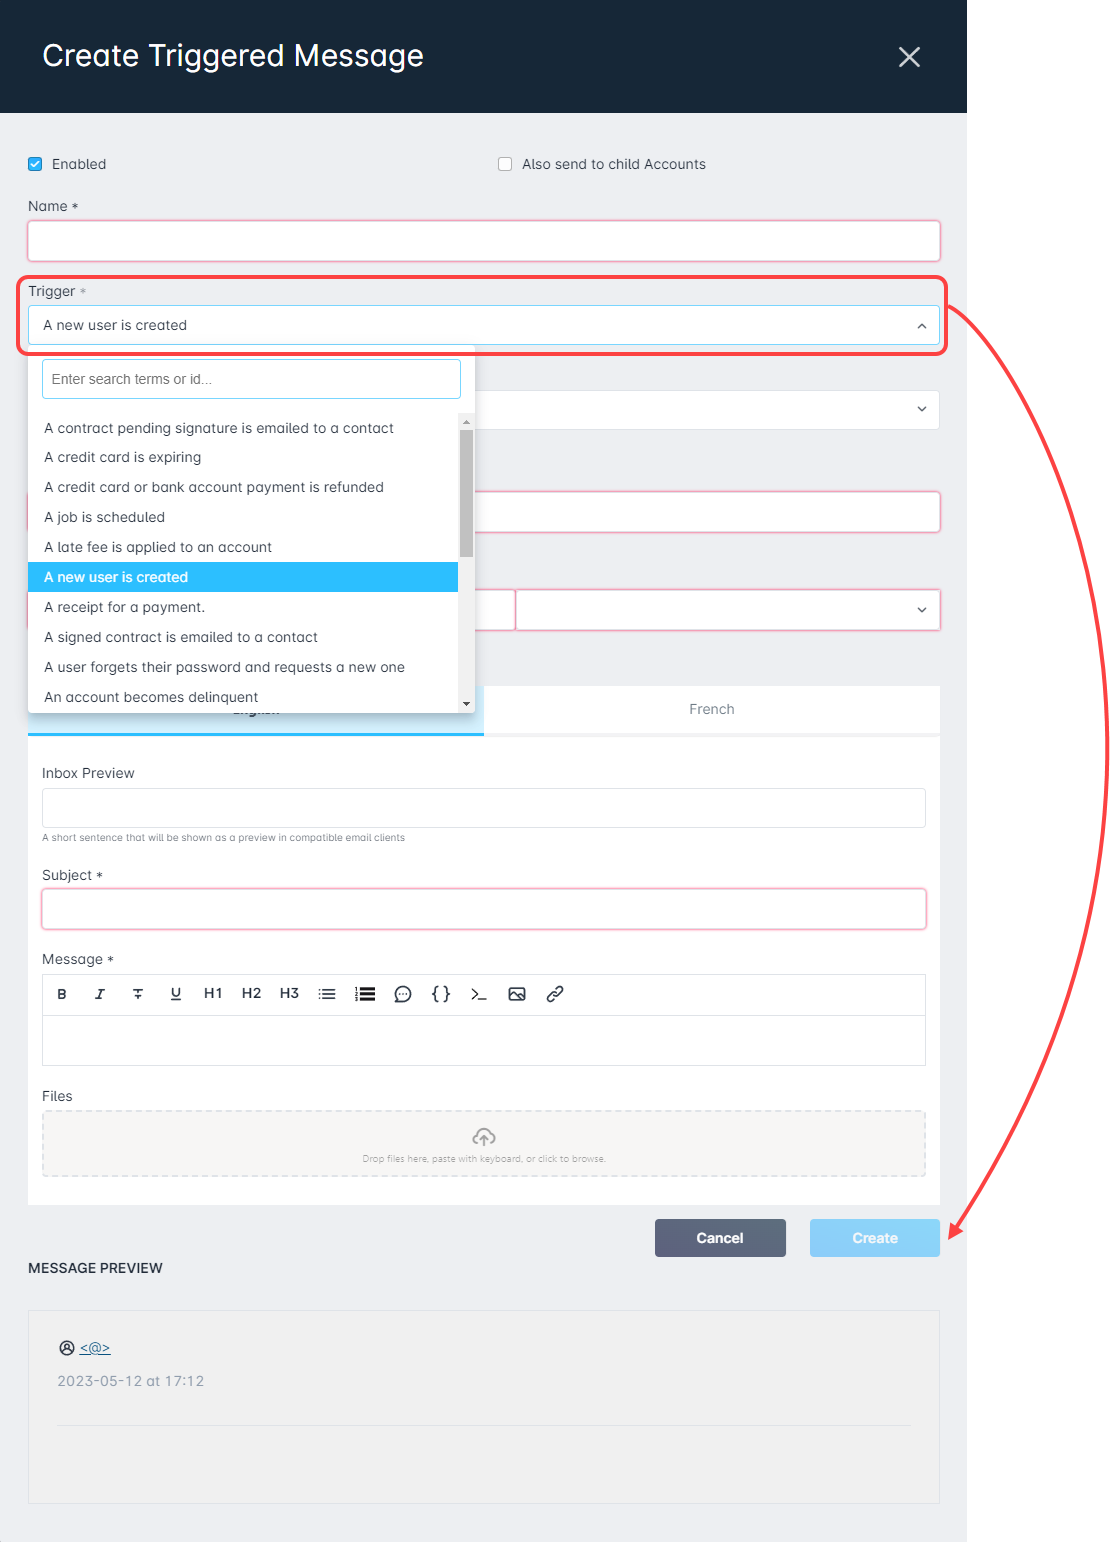
Variable options will change depending on which “Trigger” is selected. Below is a list of common variables offered for triggered messages.
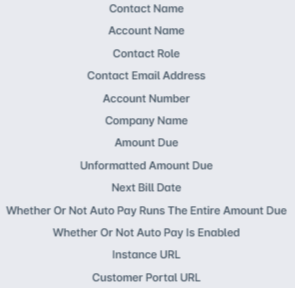
Contact Name: The contact name variable places the name of the designated recipient on the message.
Account Name: This variable will insert the recipient's account number into the message upon receipt.
Contact Role: This variable will display the contact's role listed on the recipient's account.
Contact Email Address: his variable will display the contact's email address.
Account Number: This variable will include the respective account number on the message upon receipt.
Company Name: This variable will include your company name on the message.
Amount Due: This variable will display the amount due on any unpaid invoices. This variable is useful for Mass Messages targeted at many delinquent customers.
Unformatted Amount Due: This variable will display the unformatted amount due on this invoice.
Next Bill Date: This variable will display the recipient's next bill date.
Whether Or Not Auto Pay Runs The Entire Amount Due: This variable can be used to conditionally show message content based on whether or not auto pay runs the entire amount due.
Whether Or Not Auto Pay is Enabled: This variable can be used to conditionally show message content based on an account's auto-pay status.
Instance URL: This variable will display the instance URL.
Customer Portal URL: This variable will display the customer portal URL.
Triggered SMS Messages
To access Triggered Messages, locate the “Communication Tools” navigation icon in the column located to the left of your screen.
Clicking on the blue New Message button will populate a new page that offers the ability to either send a mass message or a triggered message. In the section below, we'll take a look at the creation process for Triggered Messages.
Clicking “Triggered” will open up the Triggered Message window, allowing you to complete the form. Below is a detailed layout of what each option entails.
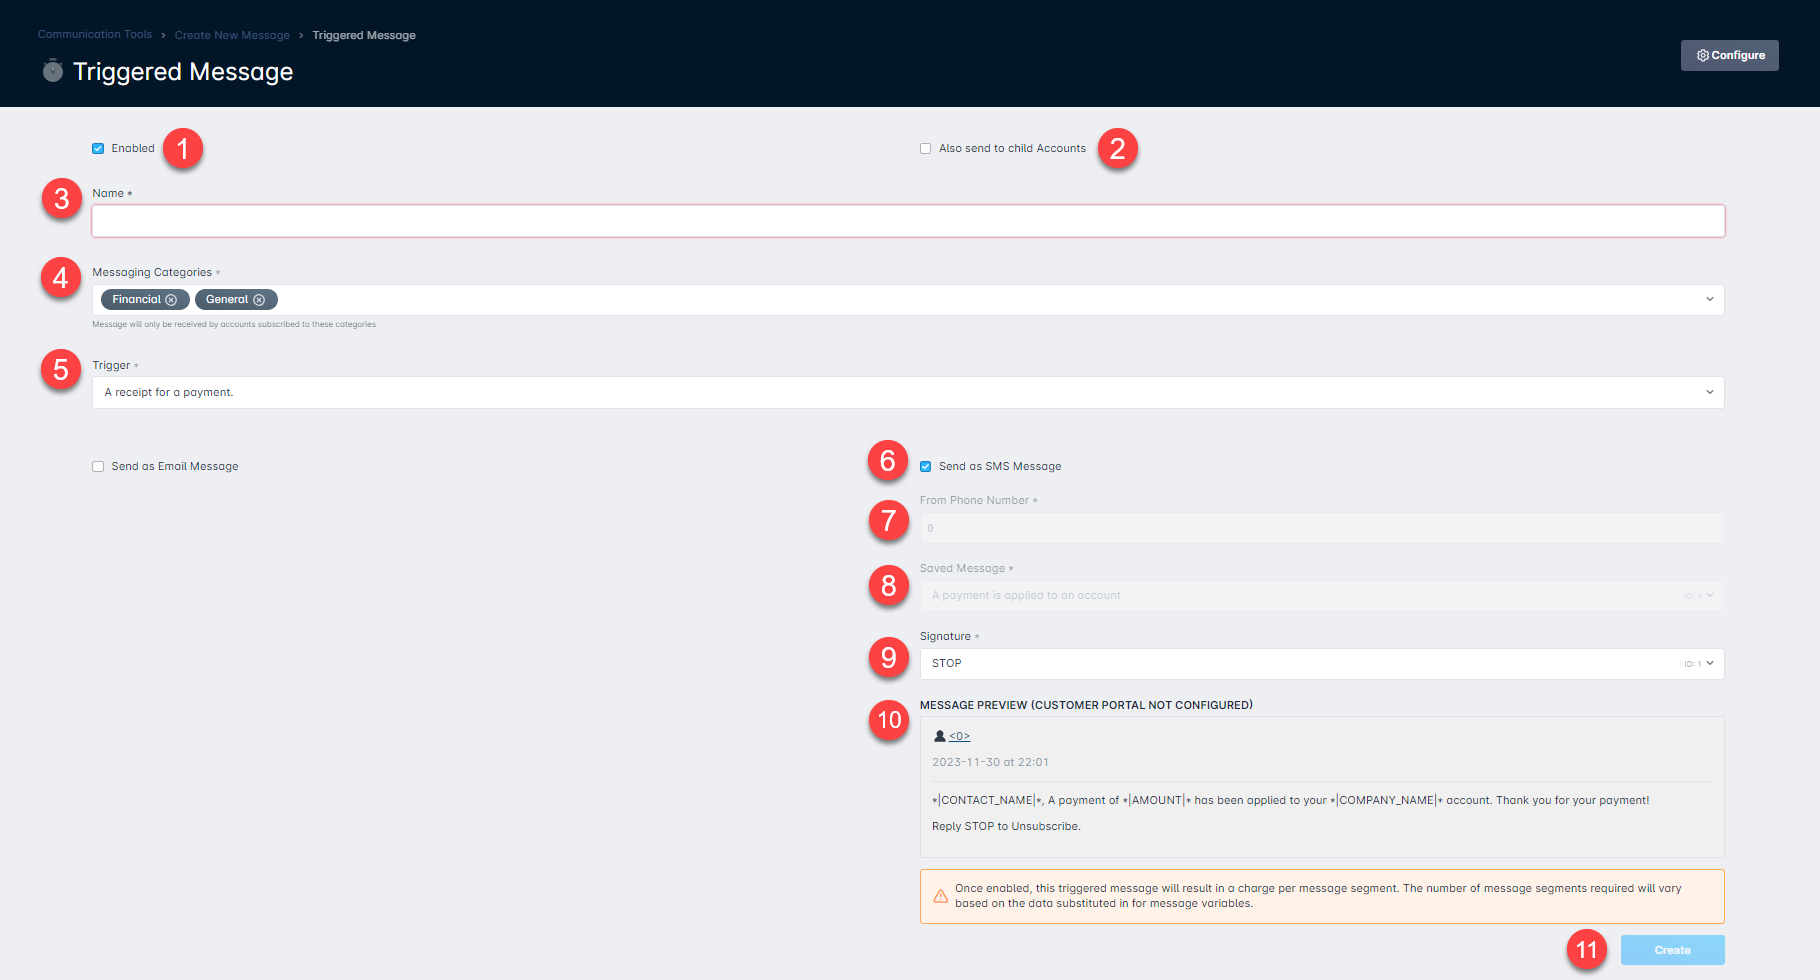
- Enabled: this checkbox determines whether the triggered message is active and currently sent out to customers, or if it is disabled and therefore not being used.
- Also send to Child Accounts: this checkbox determines whether the triggered message will also be sent when a Child Account causes the trigger to run. When this checkbox is deselected, no child accounts will receive triggered messages.
- Name: This is used for the name of the triggered message itself and is a required field.
- Messaging Categories: This is where you can select which category(ies) the triggered message should fall under, if any. Messaging categories are used to determine the type(s) of messages that a contact should receive, and can be defined for each contact listed on an account.
- Trigger: Here is where you would select the event that would trigger the message to be sent out, from a predefined dropdown list of available triggers. This is also a required field.
- Send as SMS Message: this checkbox determines whether the triggered message will be sent as an SMS message.
- From Phone Number: a customizable element if multiple phone numbers are added into your instance.
- Saved Message: once a trigger is selected, the Saved Message will be automatically selected. This is not customizable.
- Signature: this field allows you to select from your saved signatures the one you want to add to this triggered message.If you have previously selected a default Signature for Triggered messages, then it will automatically be populated in this field.
- Message Preview: the message preview will show you what the sent SMS message will look like when it's received by recipients. This preview will still show the variable fields, rather than the details the recipient will see.
- Create: Finally, this button allows you to save the configuration of the triggered message. If the message is saved successfully, a message will appear in the upper-left corner indicating “Triggered Message created”.
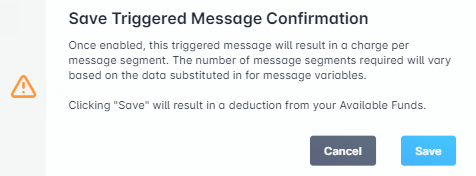
Once you create your Triggered SMS message, a confirmation message will appear, confirming that charges will occur depending on the number of message segments.
Preview Triggered Messages
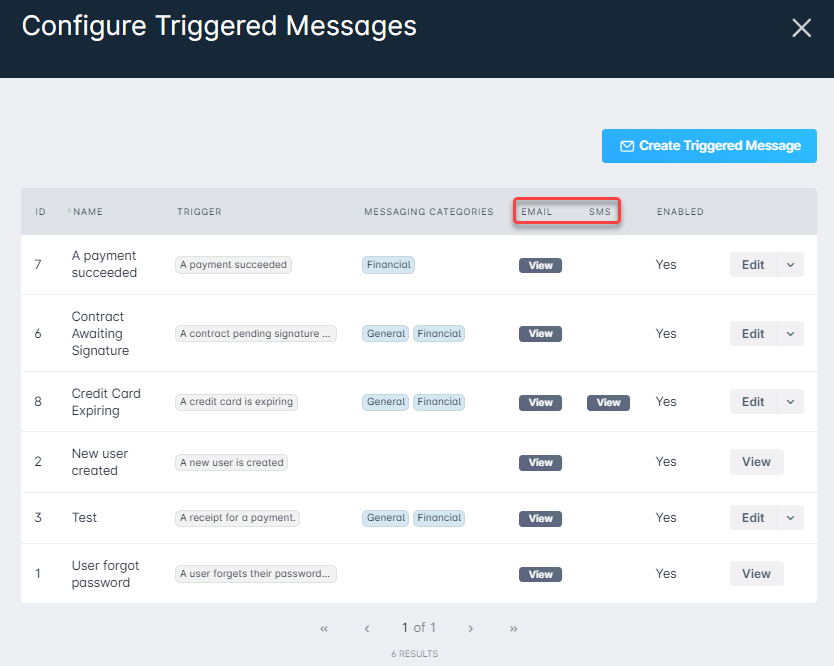
We touched on creating a Triggered Message above; however, the options visible upon clicking through “Configure”, and then “Triggered Messages”, offer a way to action all existing triggered messages in your instance. Via this modal, you can preview the message by clicking on the View button within the “Email” or “SMS” columns, or edit the message by clicking on “Edit”.
Configuring Billing Communications Delay
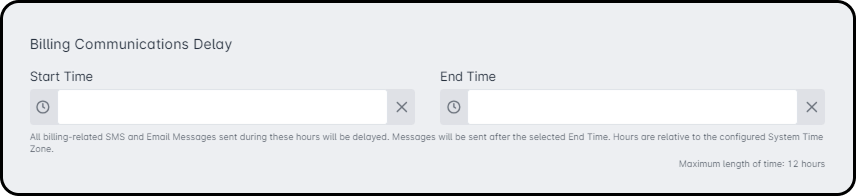
Billing Communications Delay lets you delay billing-related SMS and email messages before they are sent to your subscribers.
To set it up, go to Settings → Company → Companies, then create a new company or edit an existing one.

When you choose to create or edit a company, a pop-up window opens.
- Scroll to the bottom of the window.
- Select the Start Time for the billing delay.
- Select the End Time.
- Click Save.
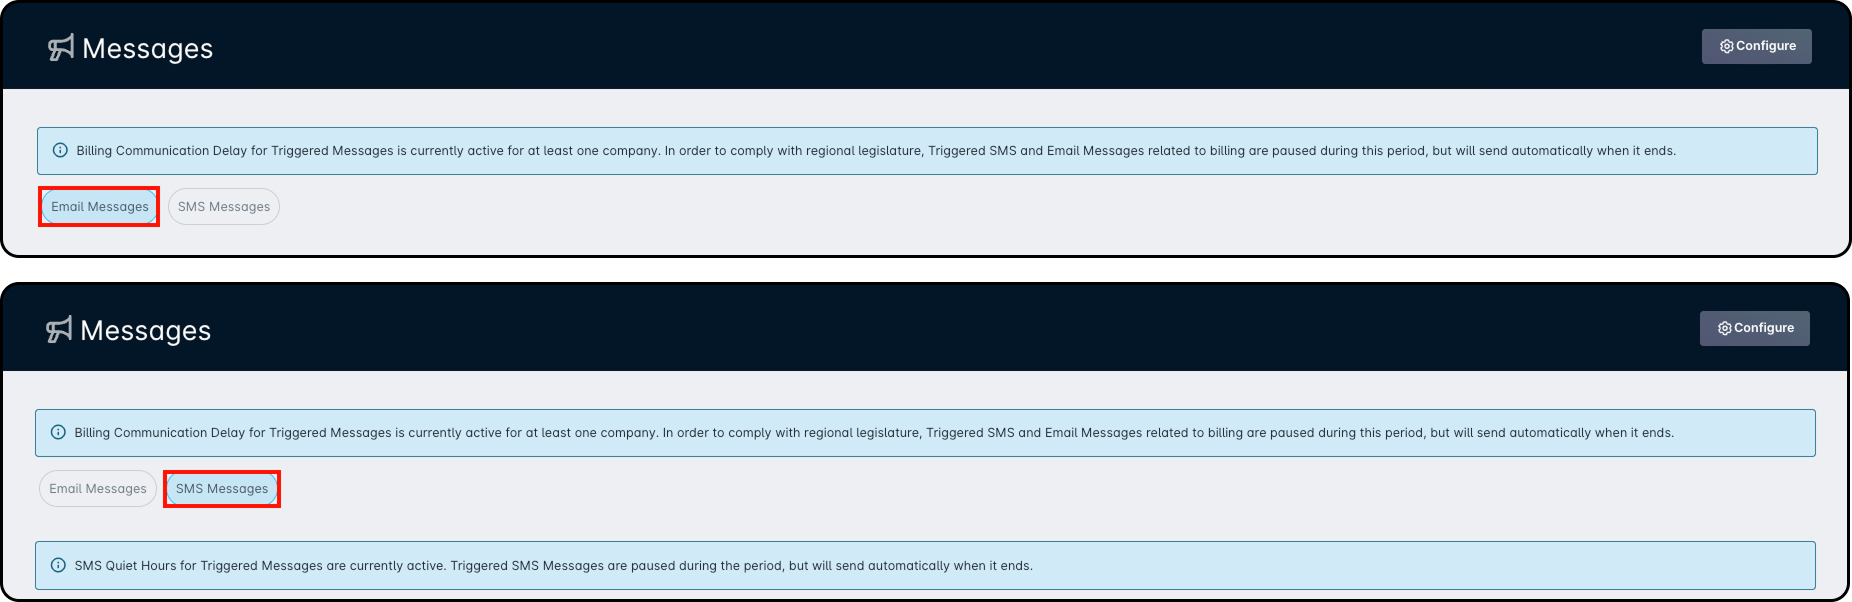
1. Communications > Messages > Email Messages/SMS Messages
2. On the subscriber’s account under Correspondence at the top of the page.
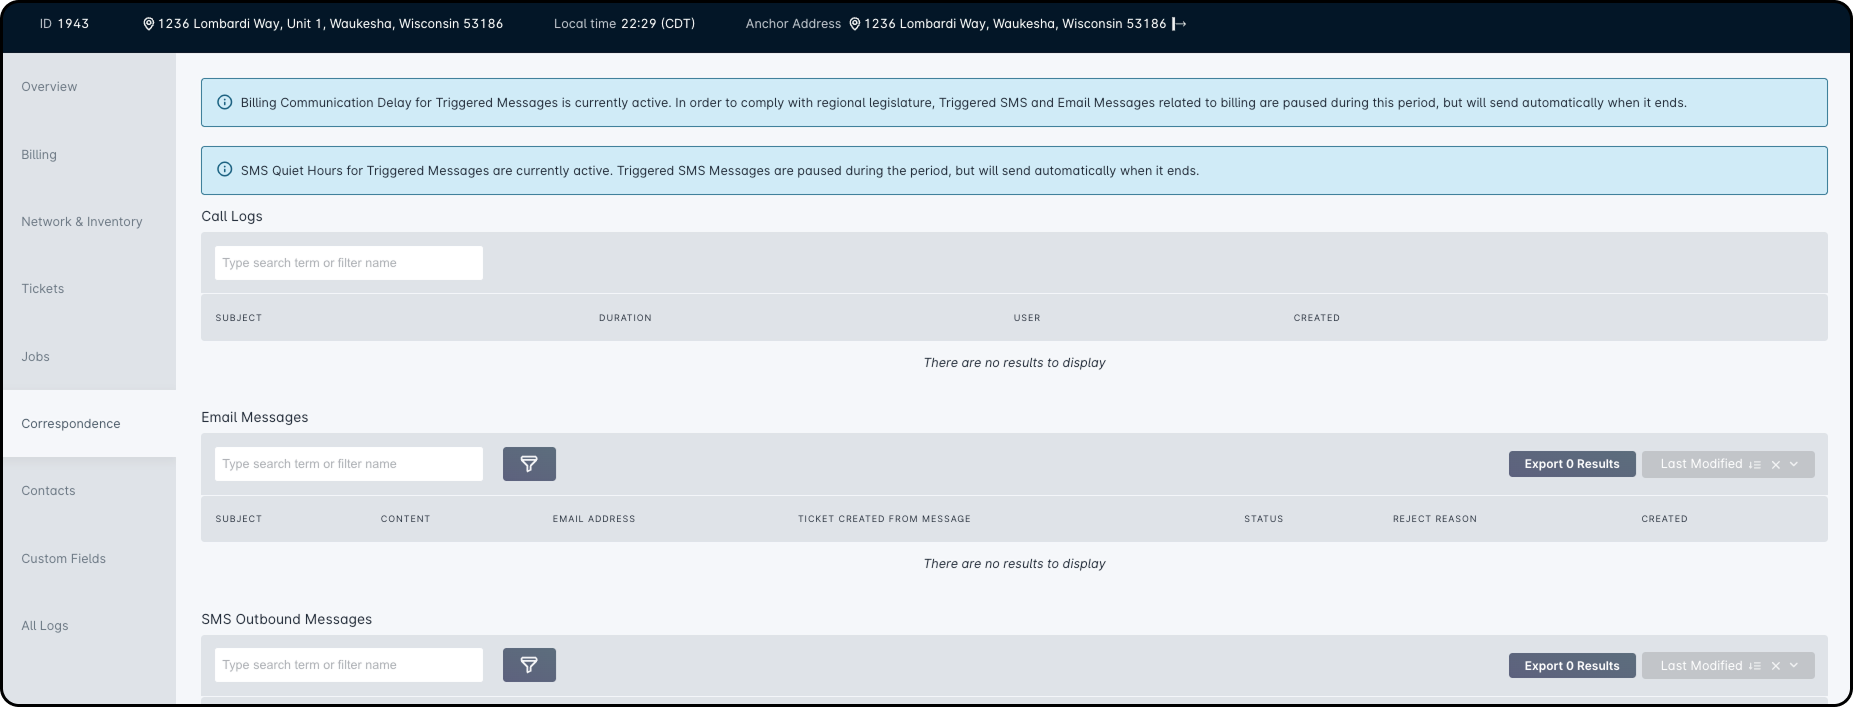
Once the Billing Communications Delay is no longer active, the message will no longer be visible.
Example Use Case
When a Late Fee is Applied to an Account
For this example, we want to set up a triggered message to go out to customers when a late fee has been applied to their account. Having a message automatically sent out once a late fee has been added will help to make customers aware that they have an outstanding amount due on their account. It will also help to avoid surprises of an additional charge when they do go to pay.
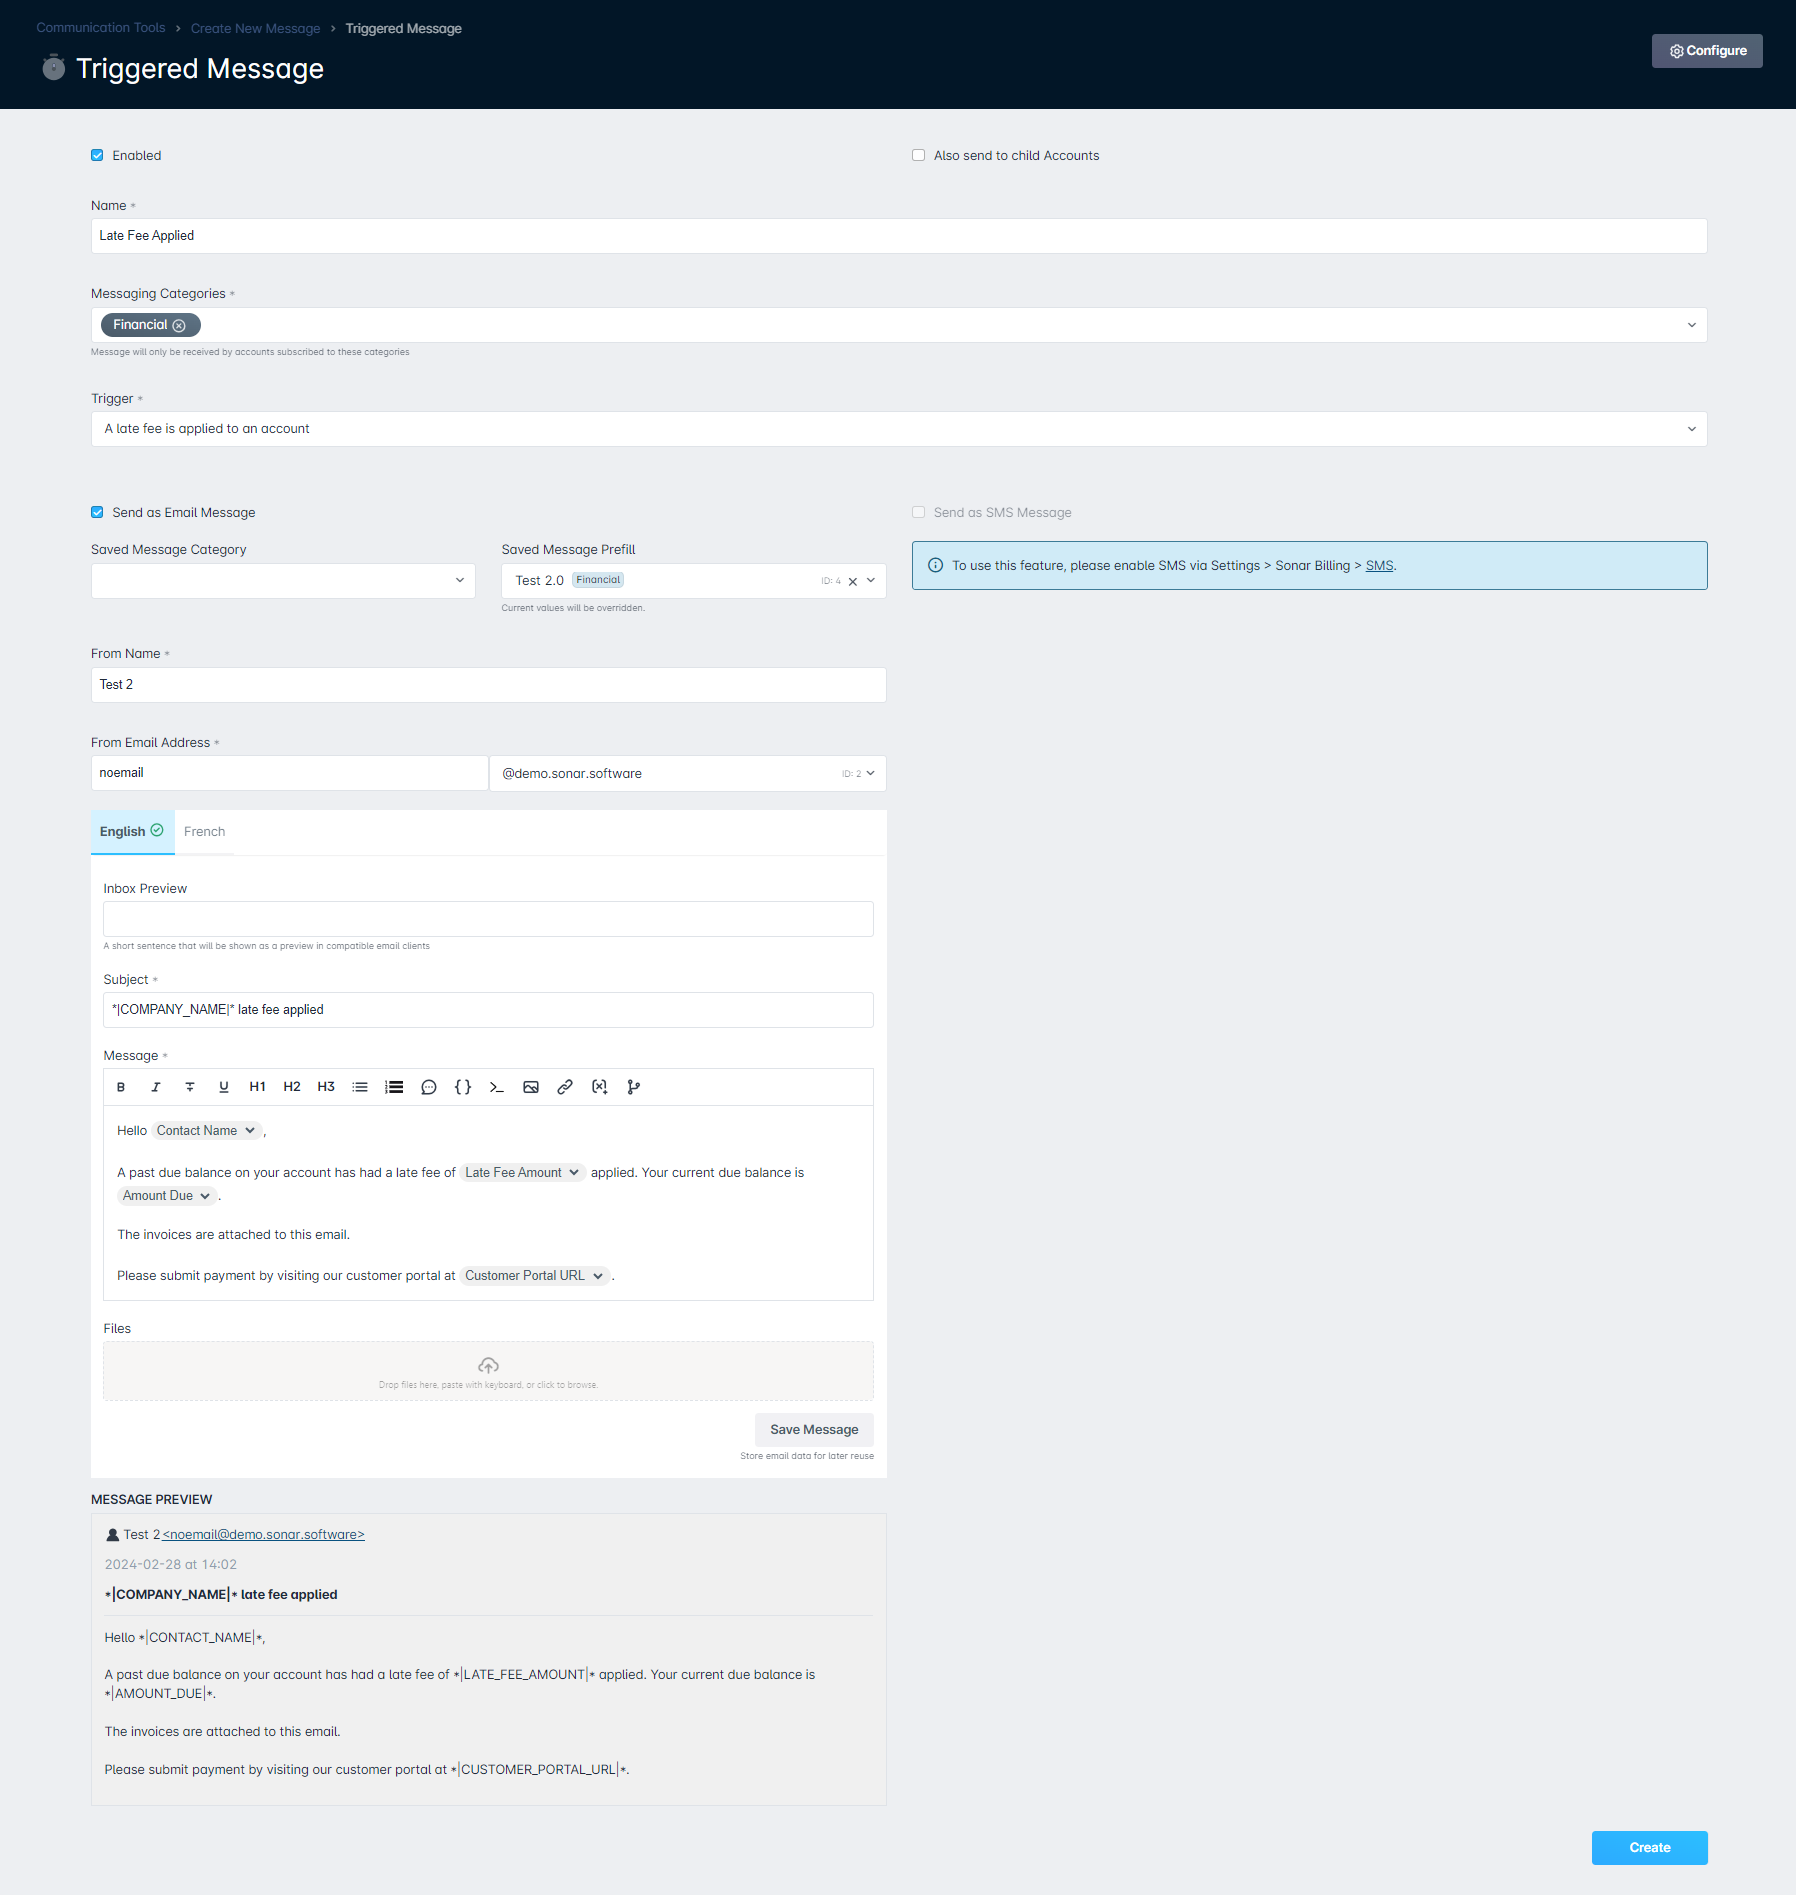
To create the 'Late Fee Applied' triggered message, click Create New Message > Triggered and fill out the required information. First, ensure the “Enabled” box is checked because we want this message to begin automatically sending out to customers as soon as we have it configured. After we give our message an appropriate name, we select the desired trigger “A late fee is applied to an account” for which we want this message to be automatically sent out. Choose the Financial message category to ensure that any contacts set up for messages related to finances will receive this.
We have selected the appropriate trigger for the message from the dropdown list and filled out the required fields. The body of our message has been set up to include variables to pull account-specific information for our customers, and also includes some conditional content.
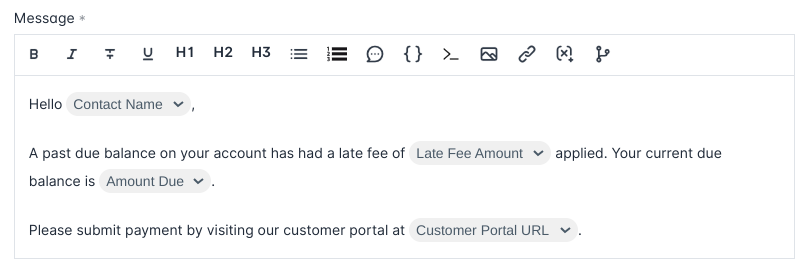
Since we have our customer portal enabled, we want to encourage customers to pay through the portal if the company their account is assigned to has the customer portal enabled; however, if they do not have the portal set up, then we would rather not include information that is unnecessary to them. Through using a conditional statement, we can accommodate both situations – with the message content above, we can direct customers to the customer portal with language instructing them to pay through it. If the company that the account is associated with does not have the customer portal set up, that section of information will not be seen.
Now we can rest assured that our customers will be receiving notices when a late fee is applied to their account, without having to manually track that information or send out messages ourselves. And in the future, if we decide that this triggered message is no longer needed, or we want to temporarily disable it, we can do so by editing the triggered message and deselecting the “Enabled” checkbox.
Further Example Content for Email Messages
A
Address Updated
C
Contact's Password Changed
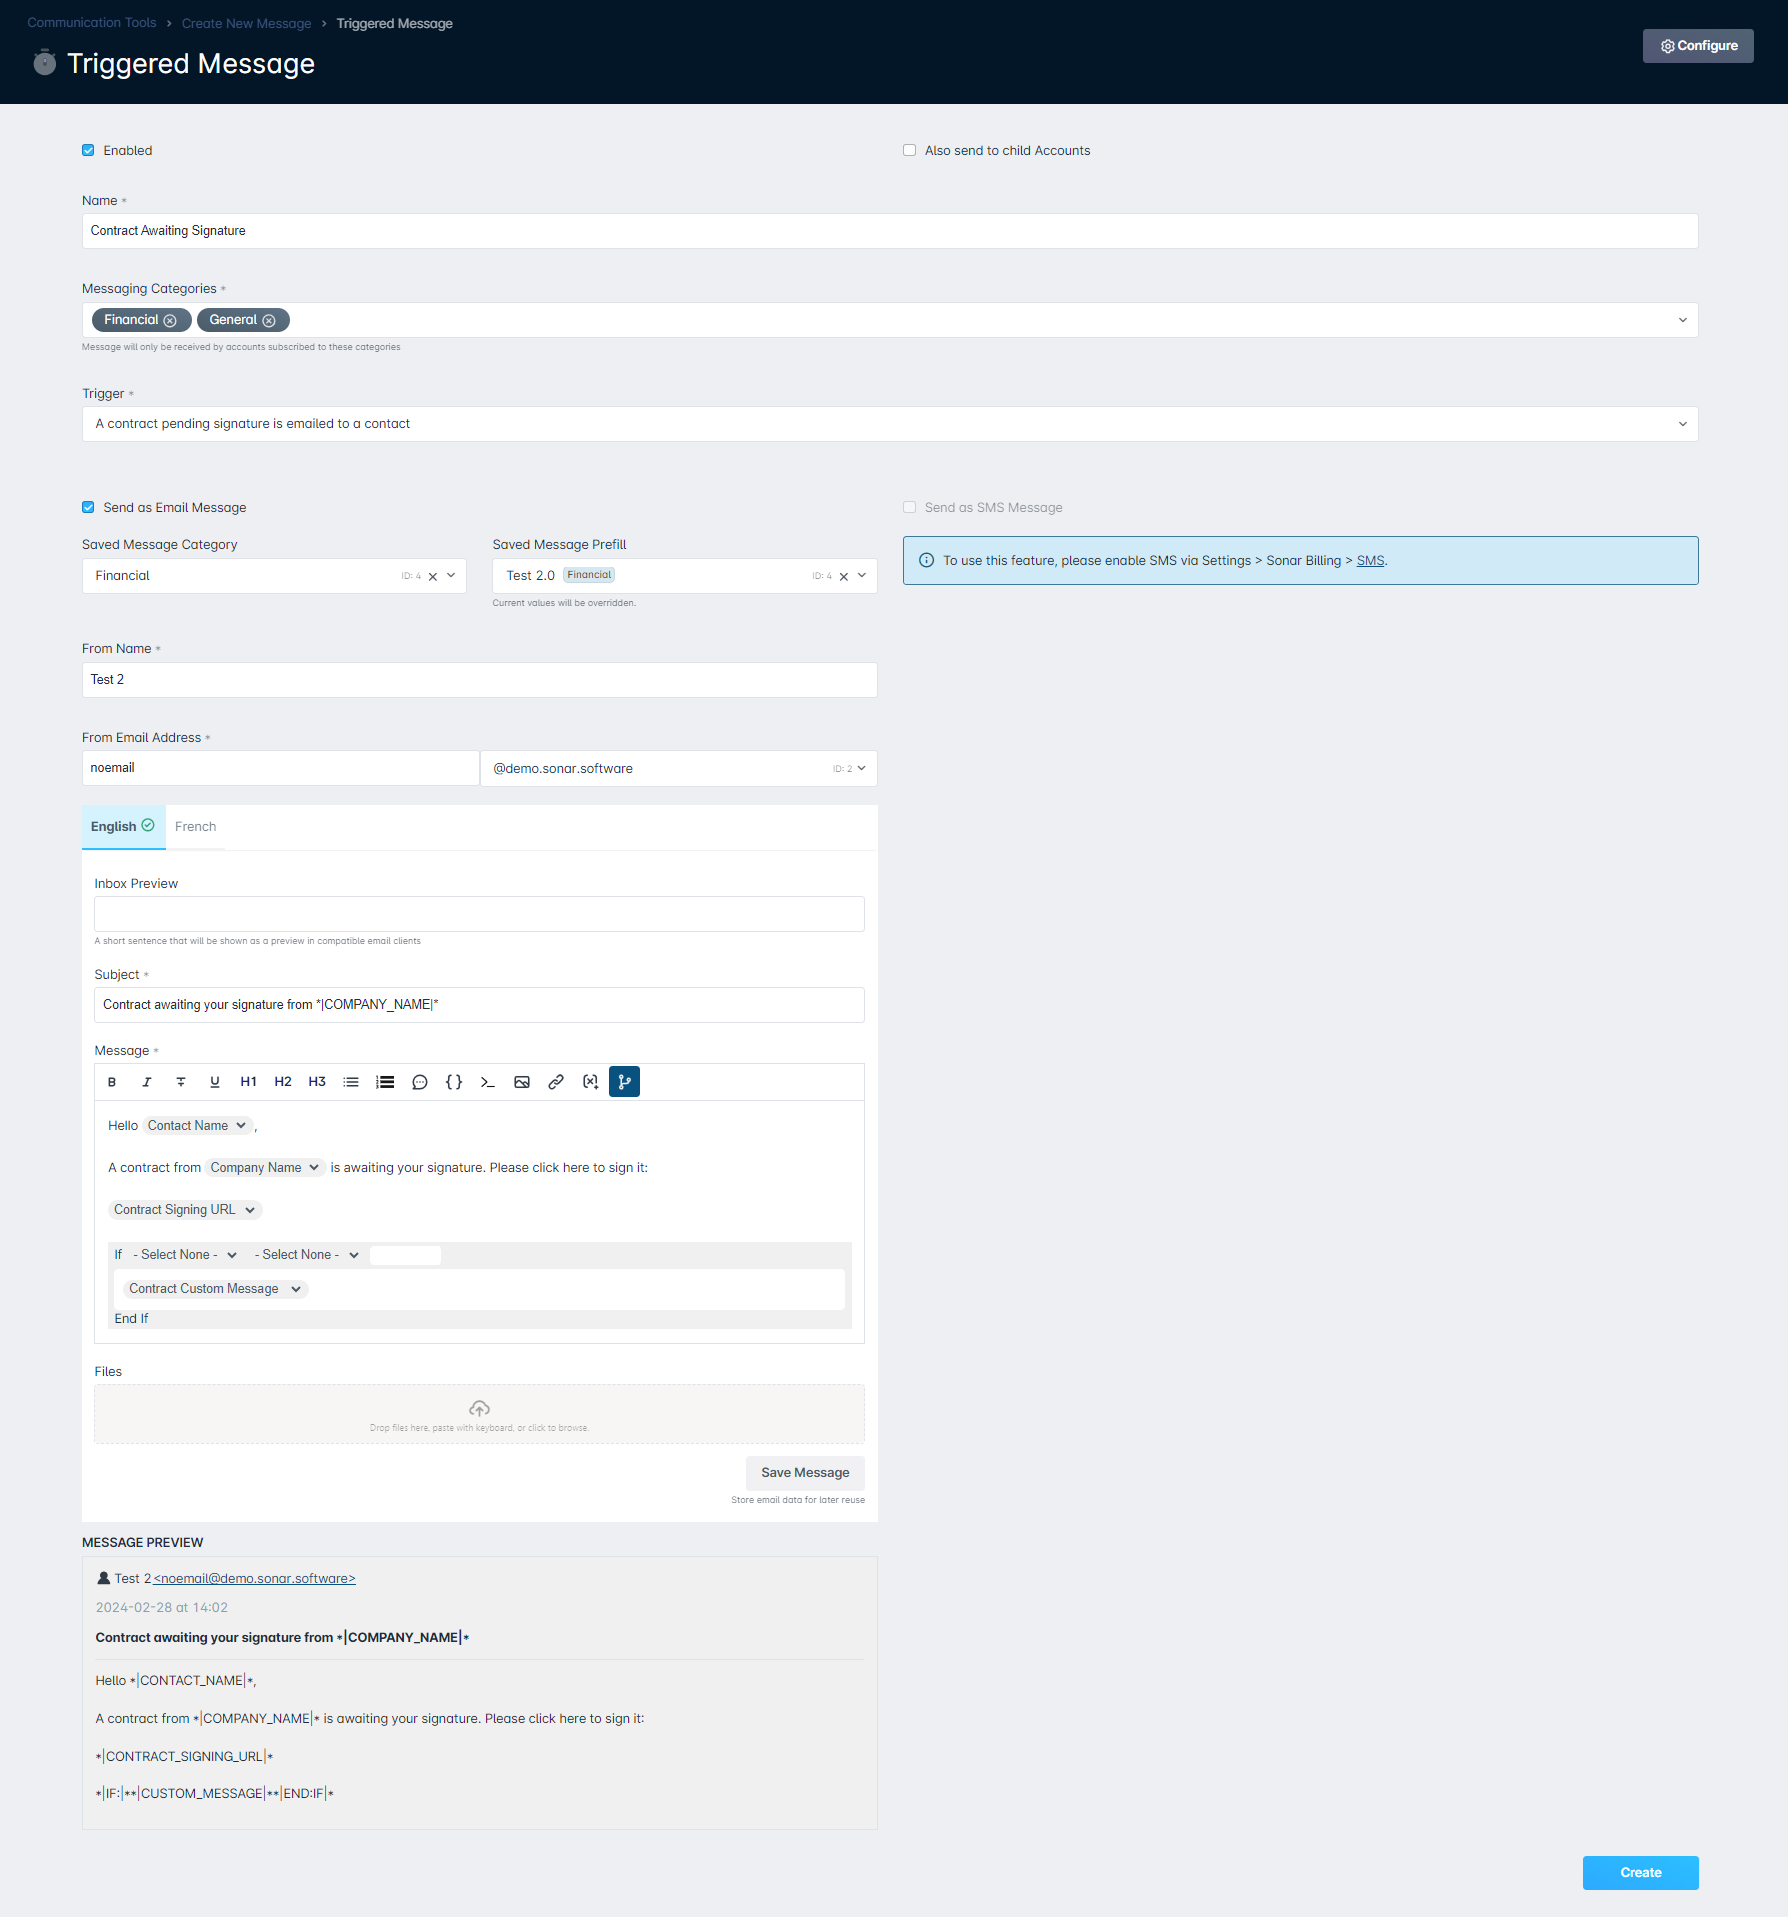
Contract Awaiting Signature
D
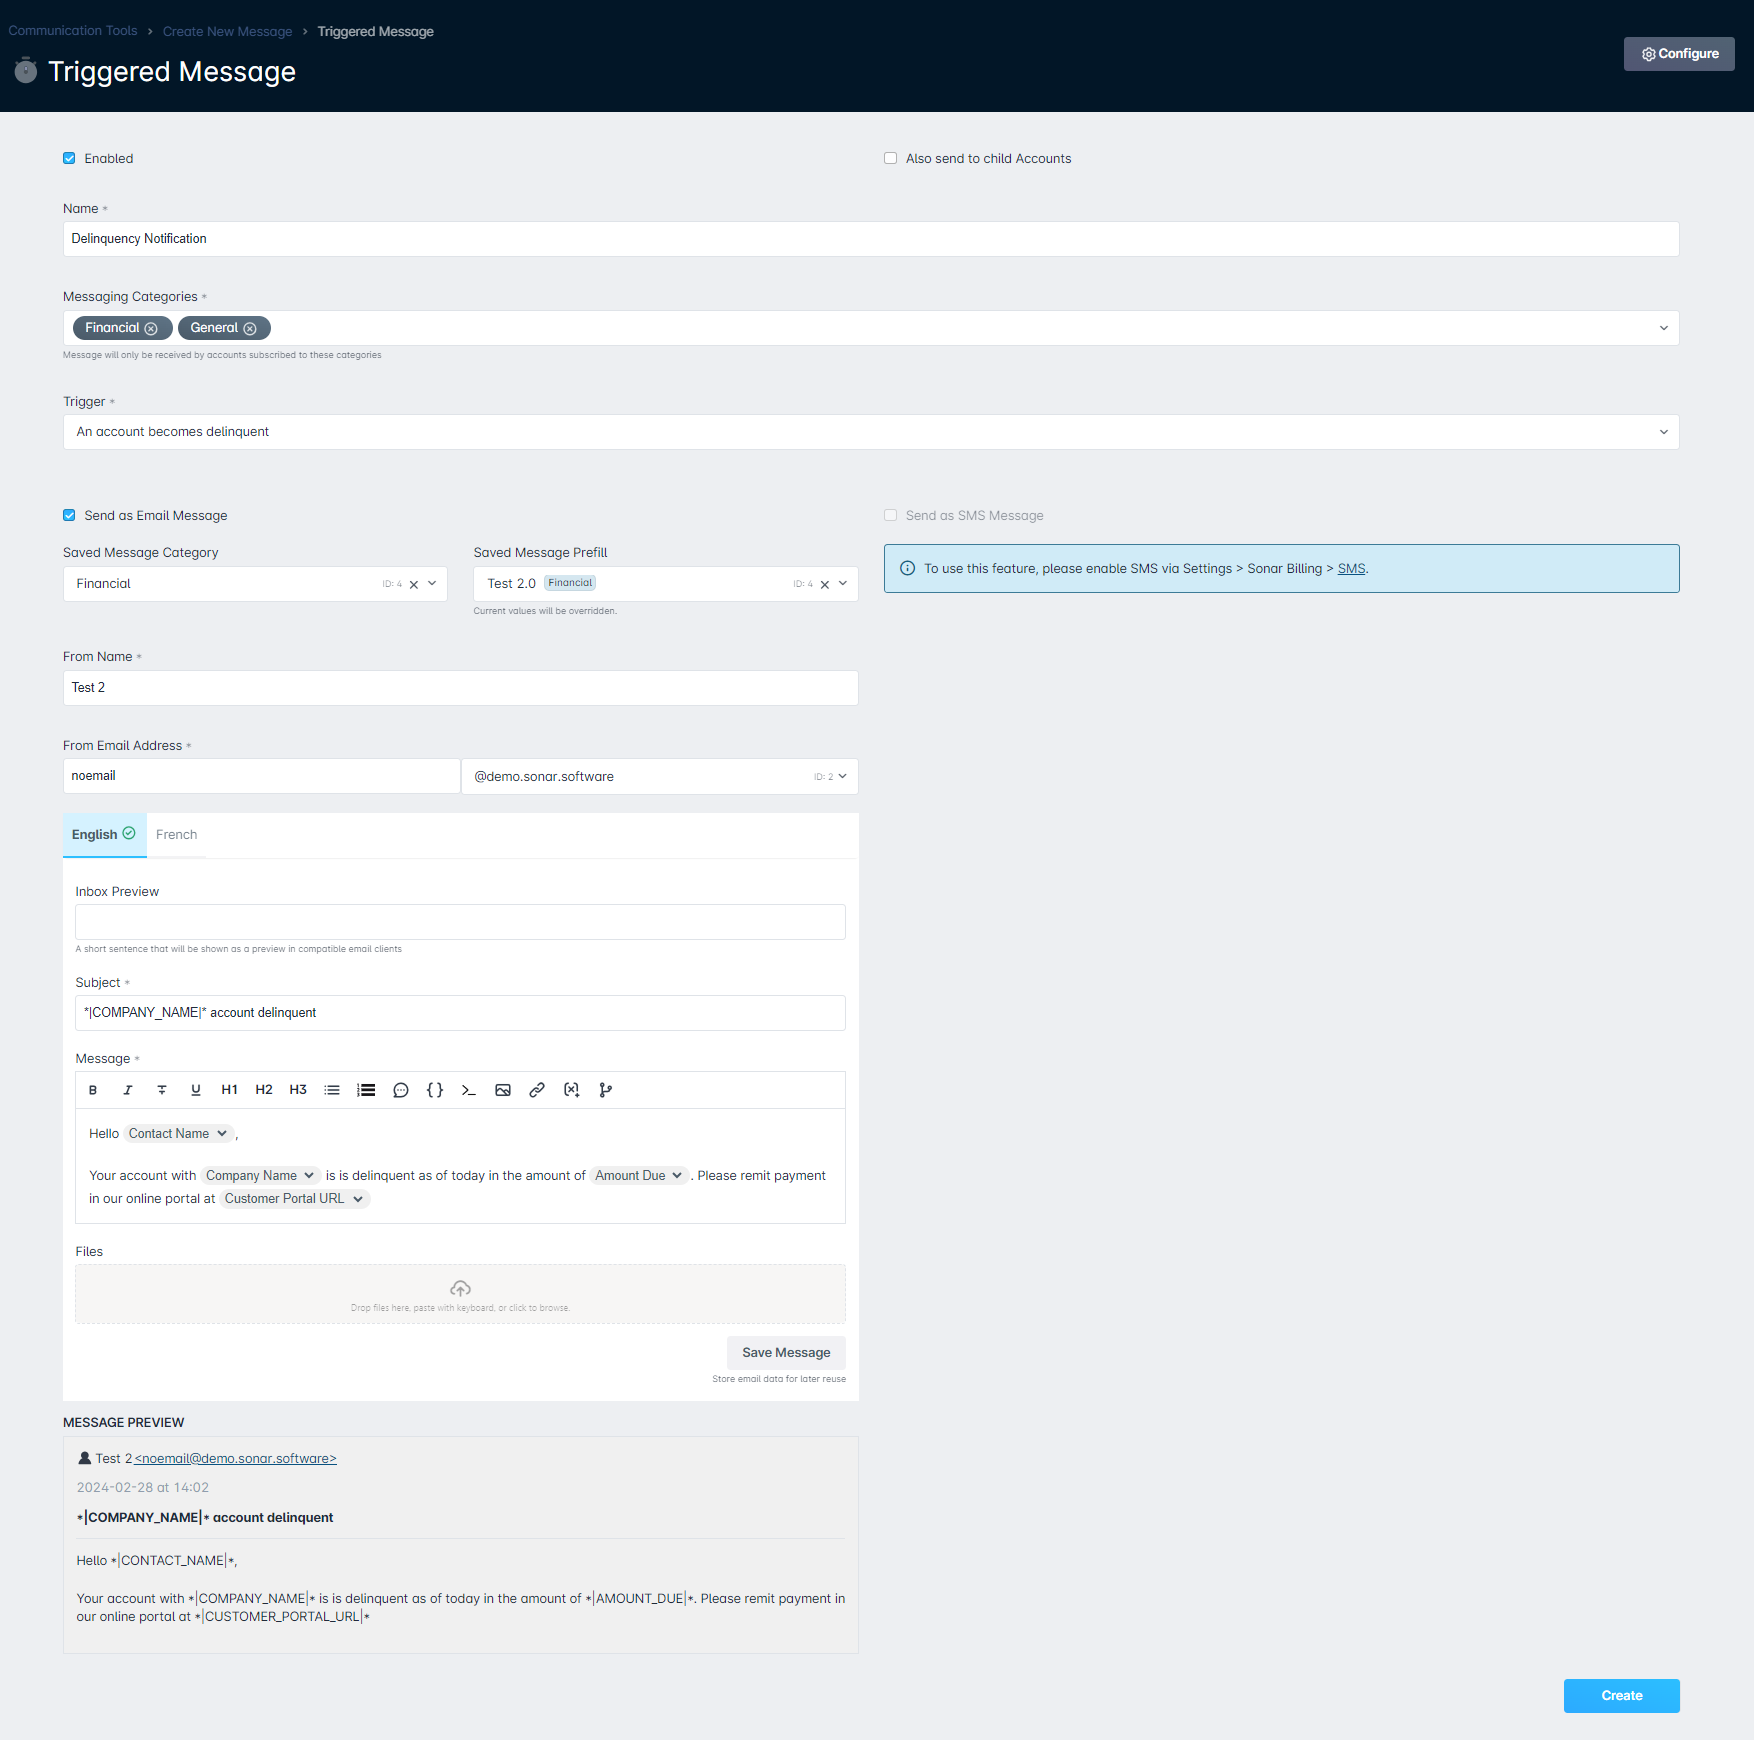
Delinquency Notification
E
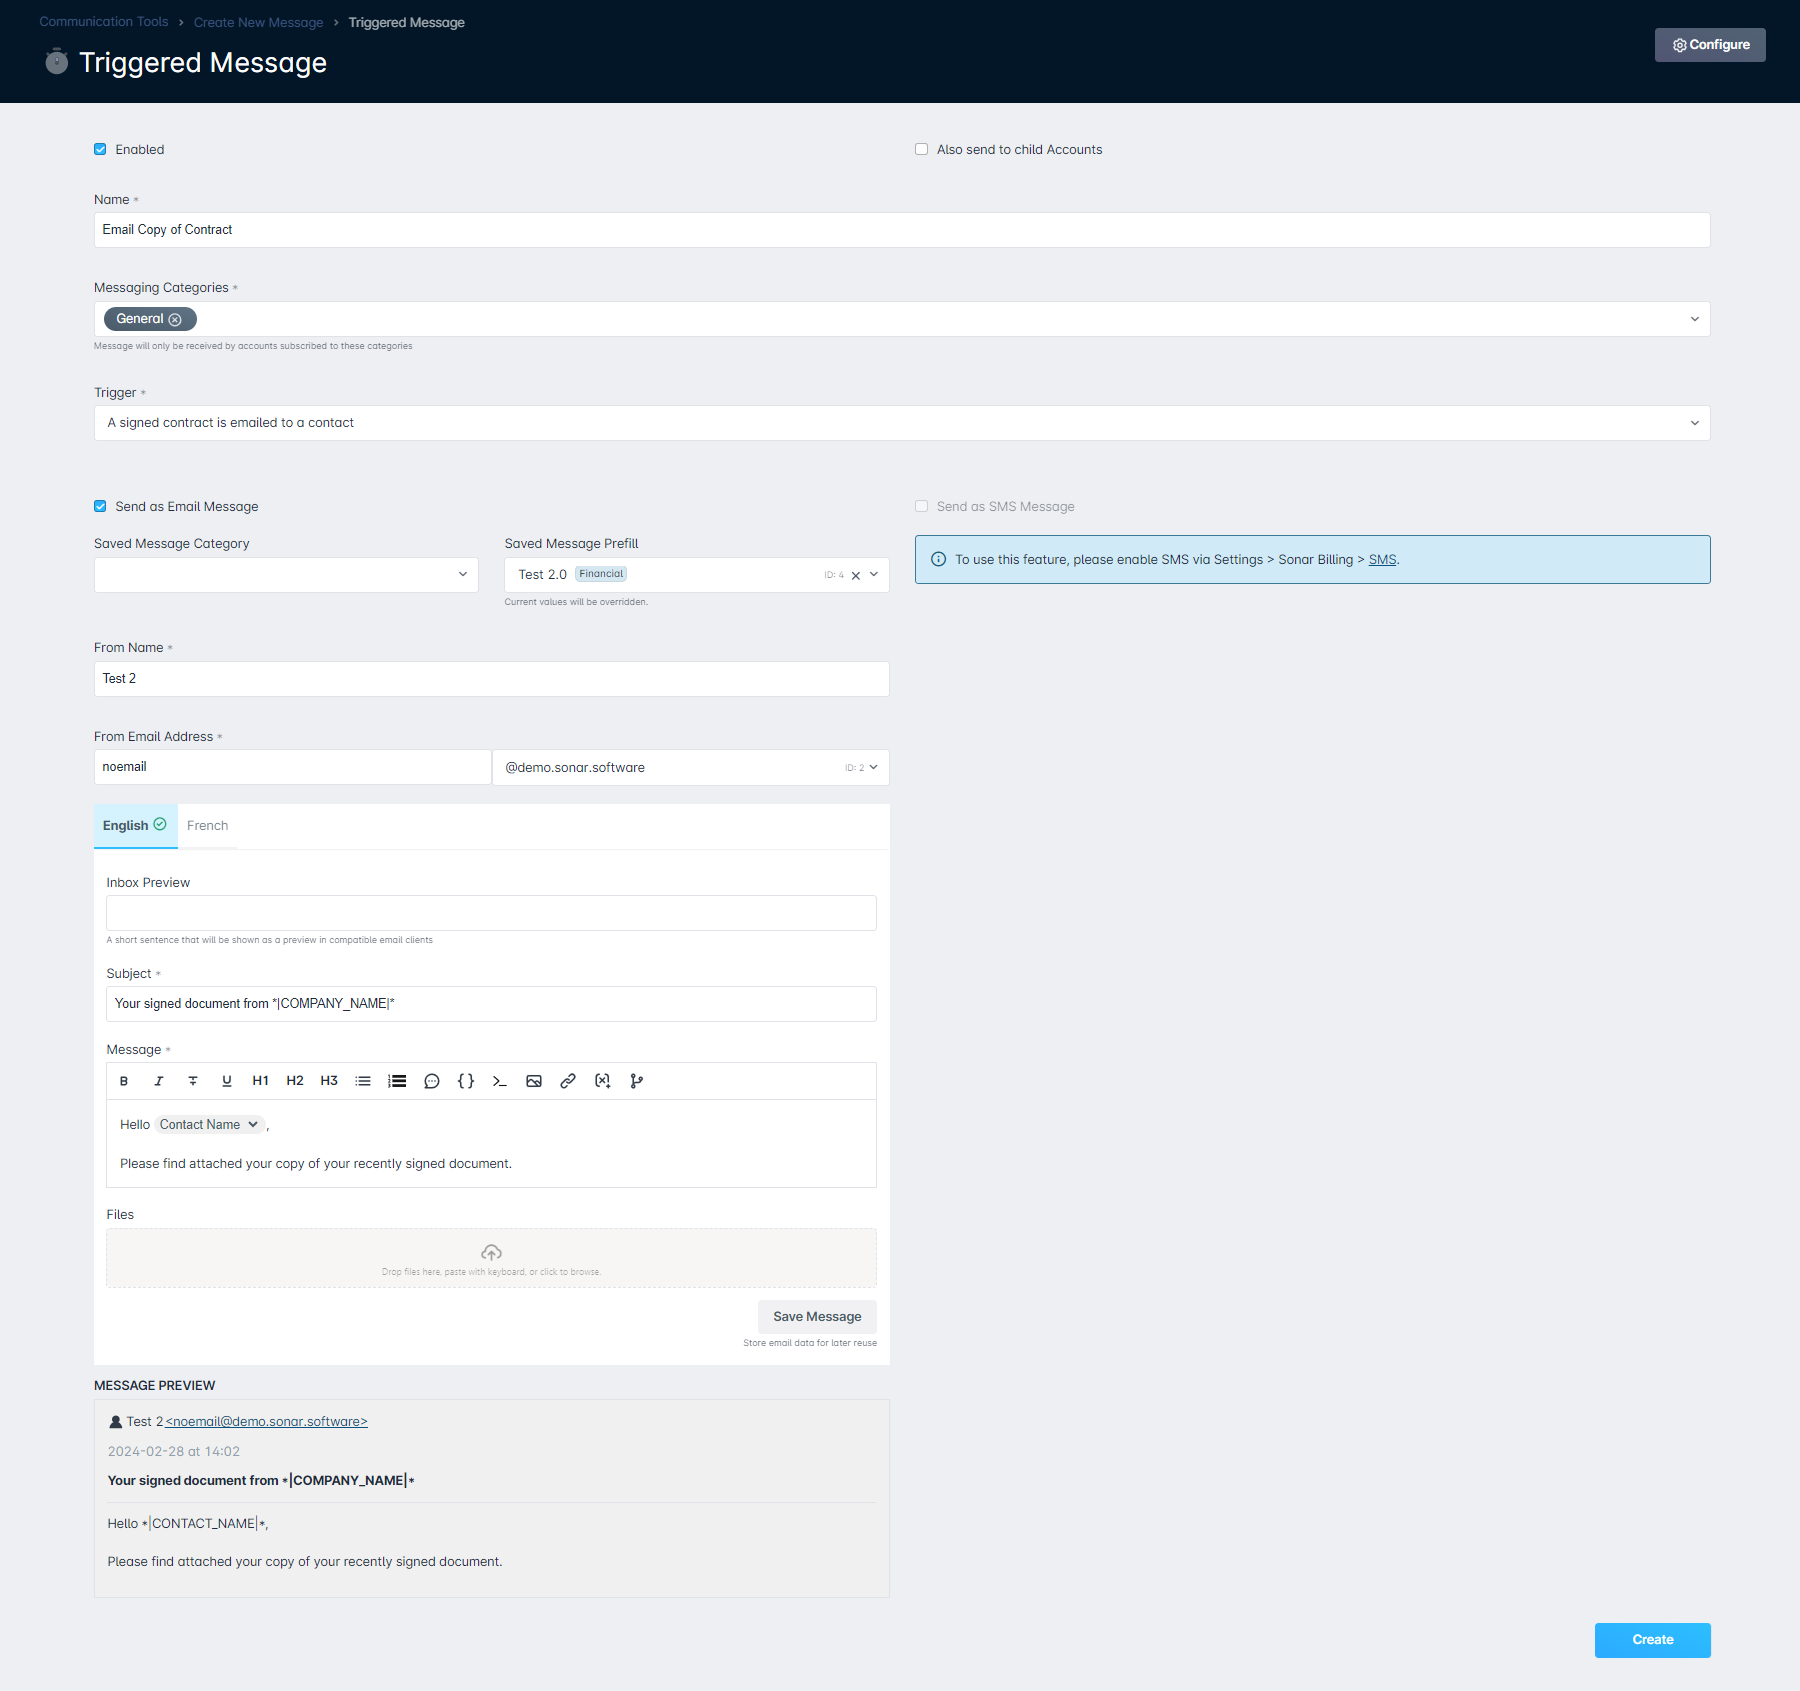
Email Copy of Contract
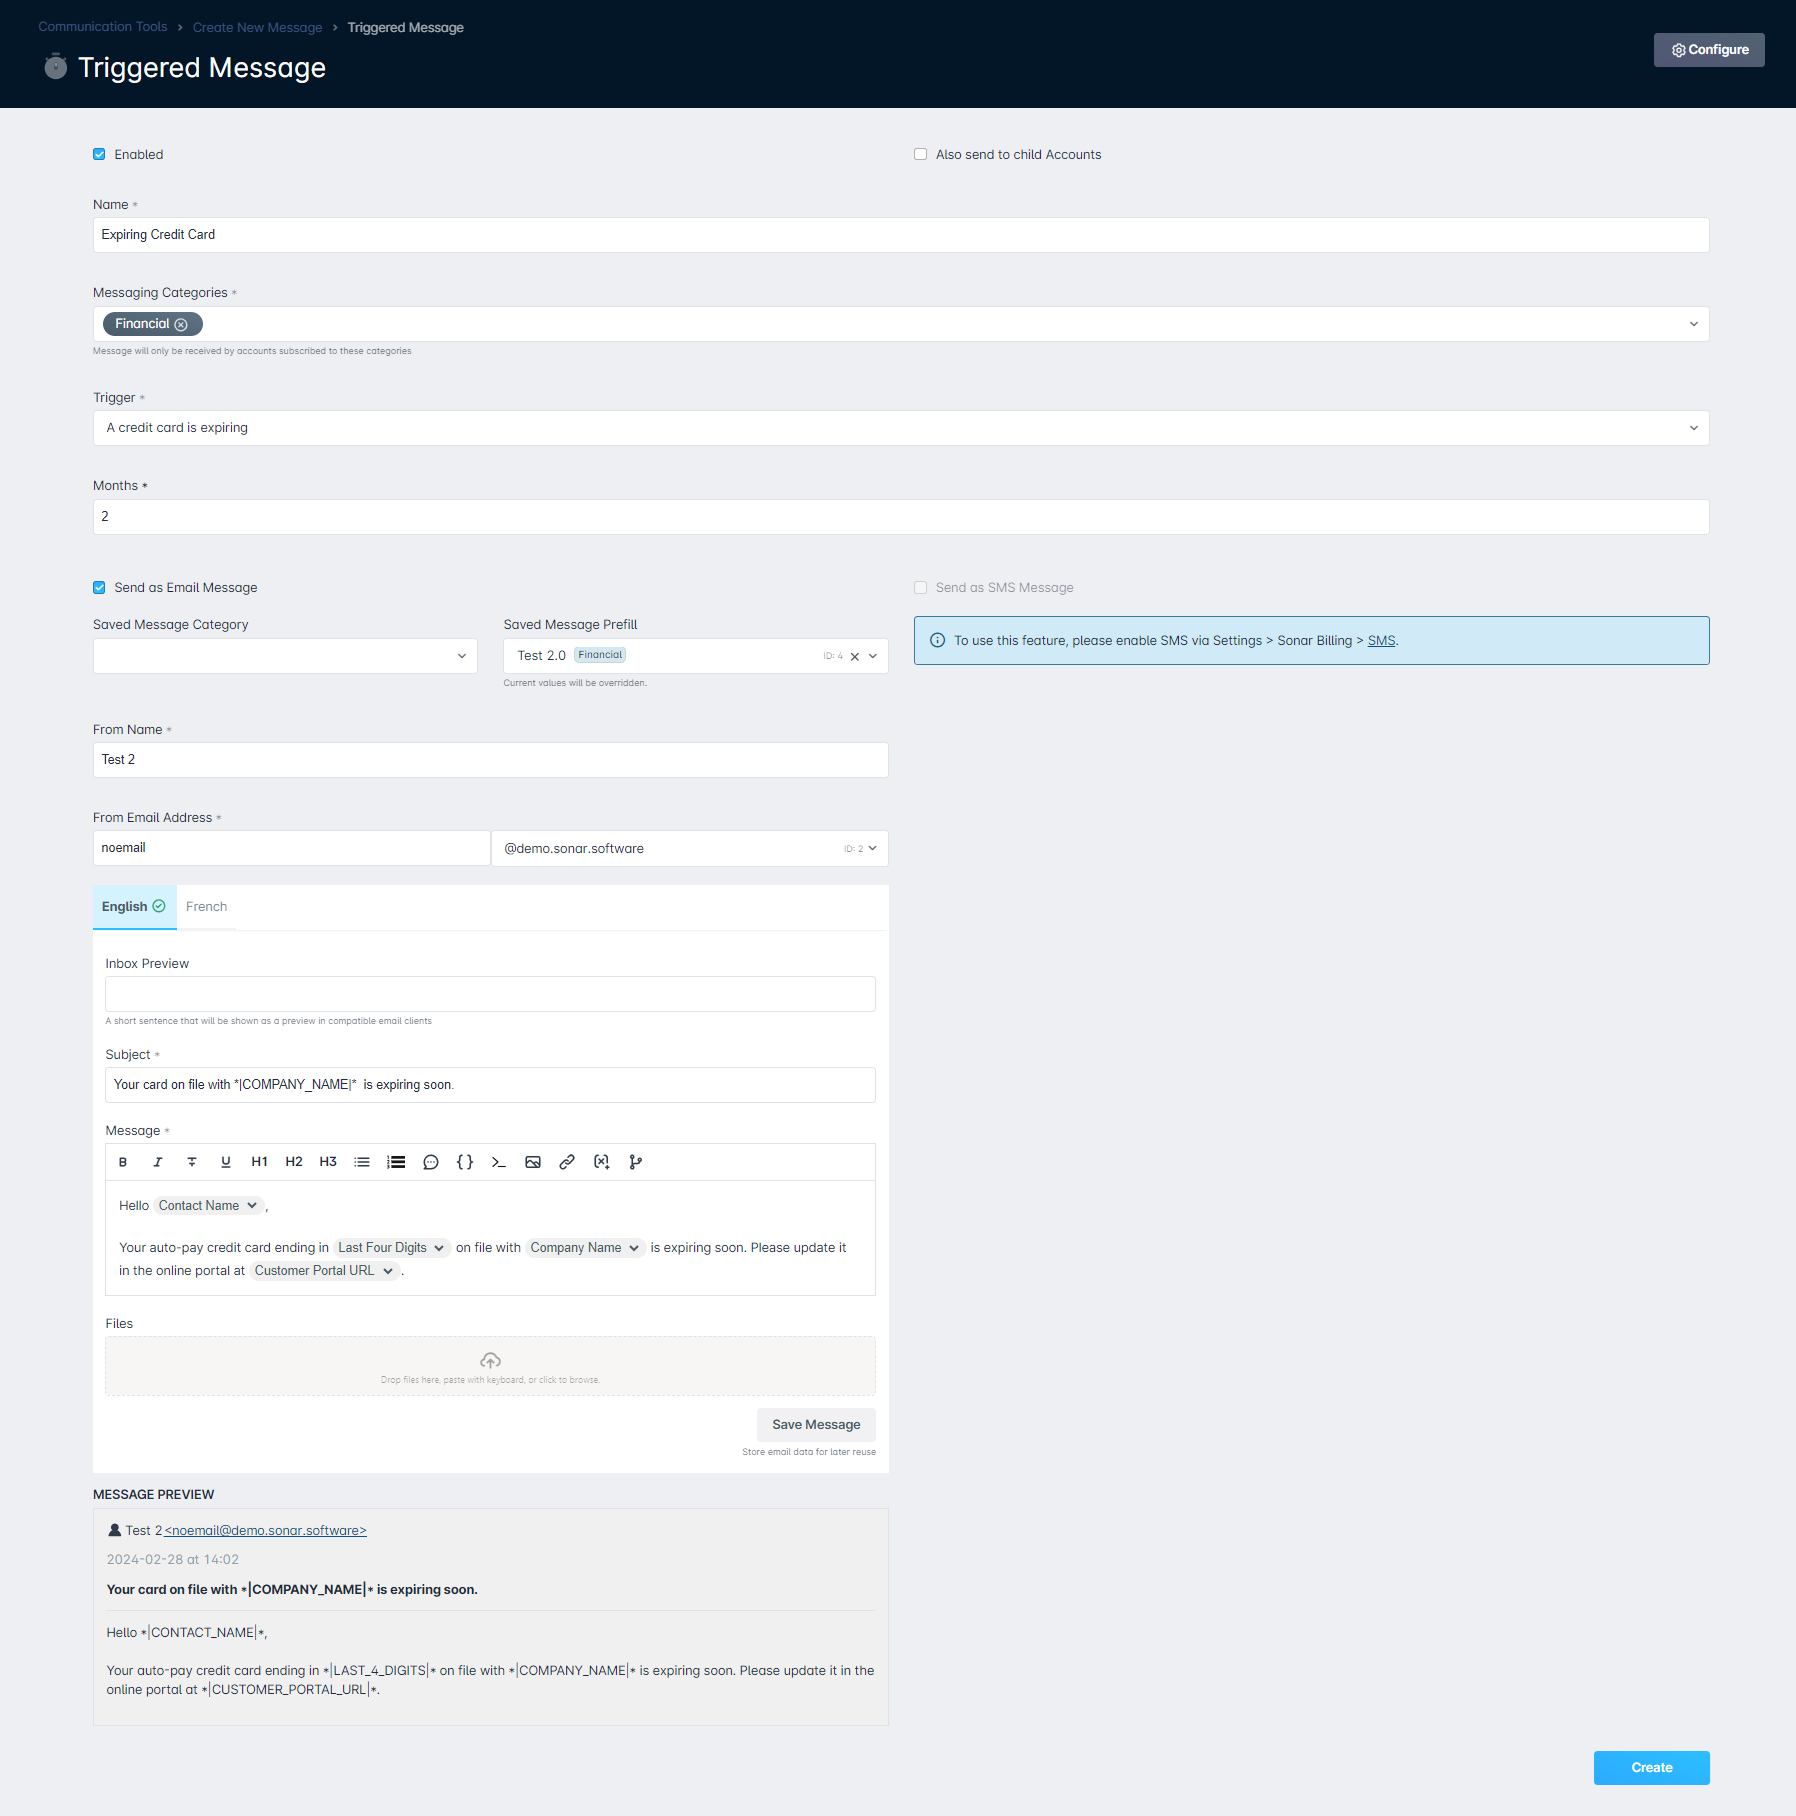
Expiring Credit Card
I
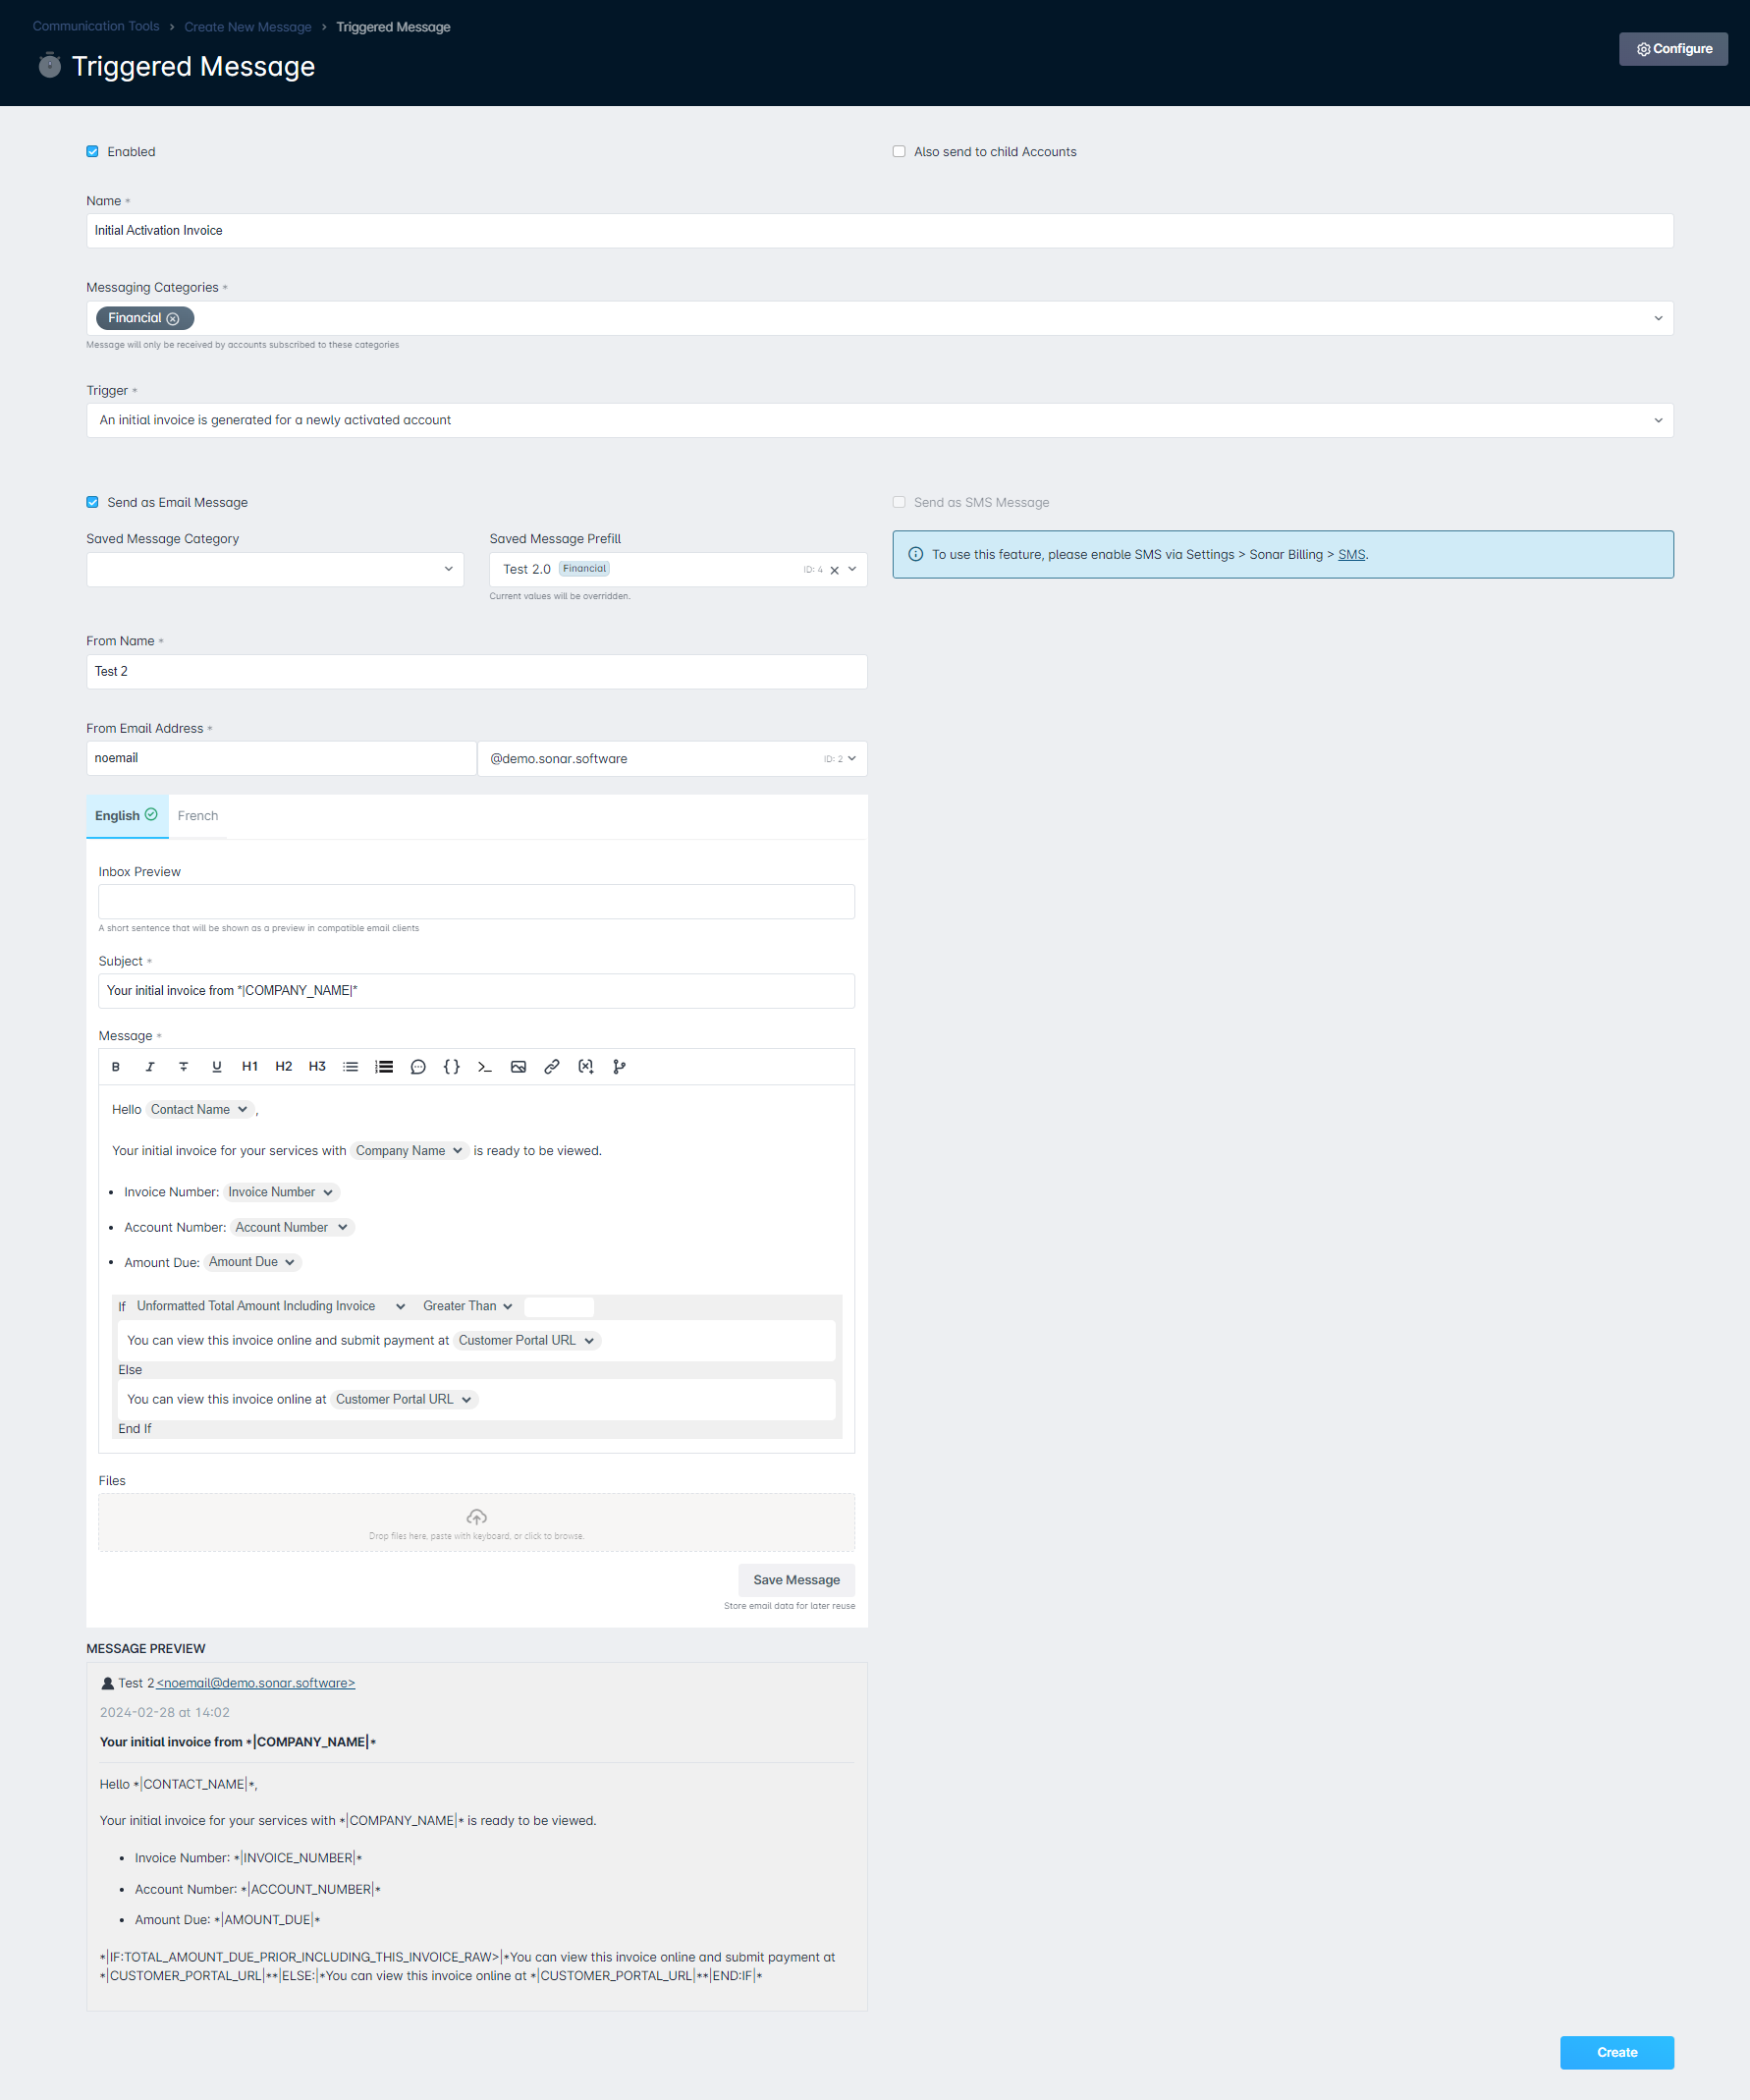
Initial Activation Invoice
L
Late Fee Applied
M
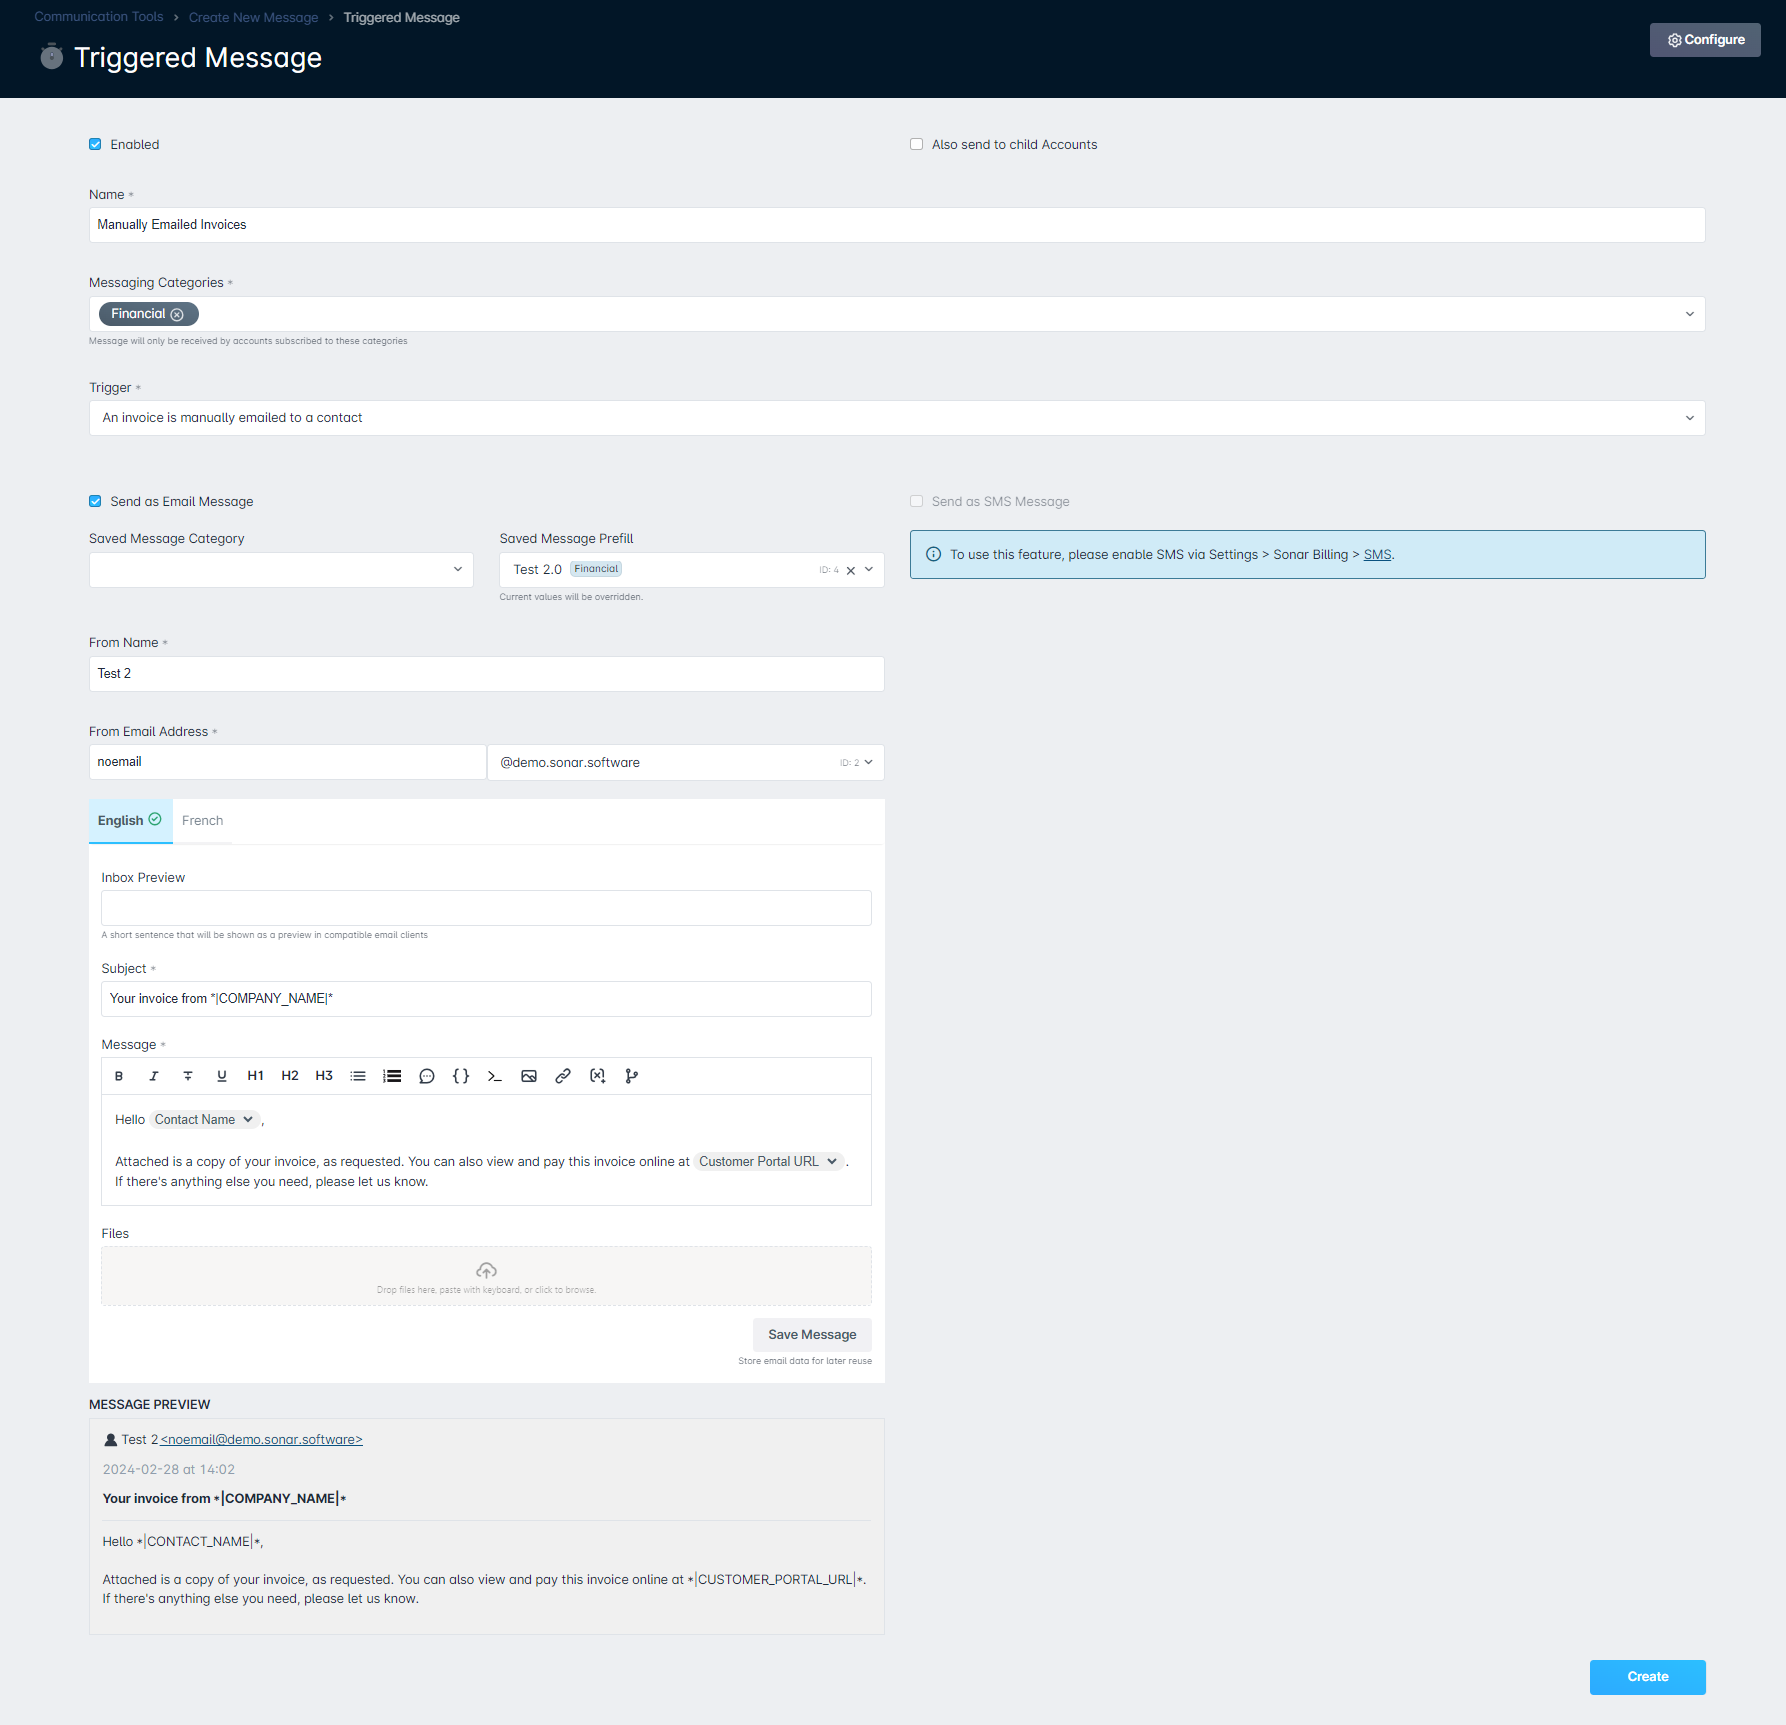
Manually Emailed Invoice
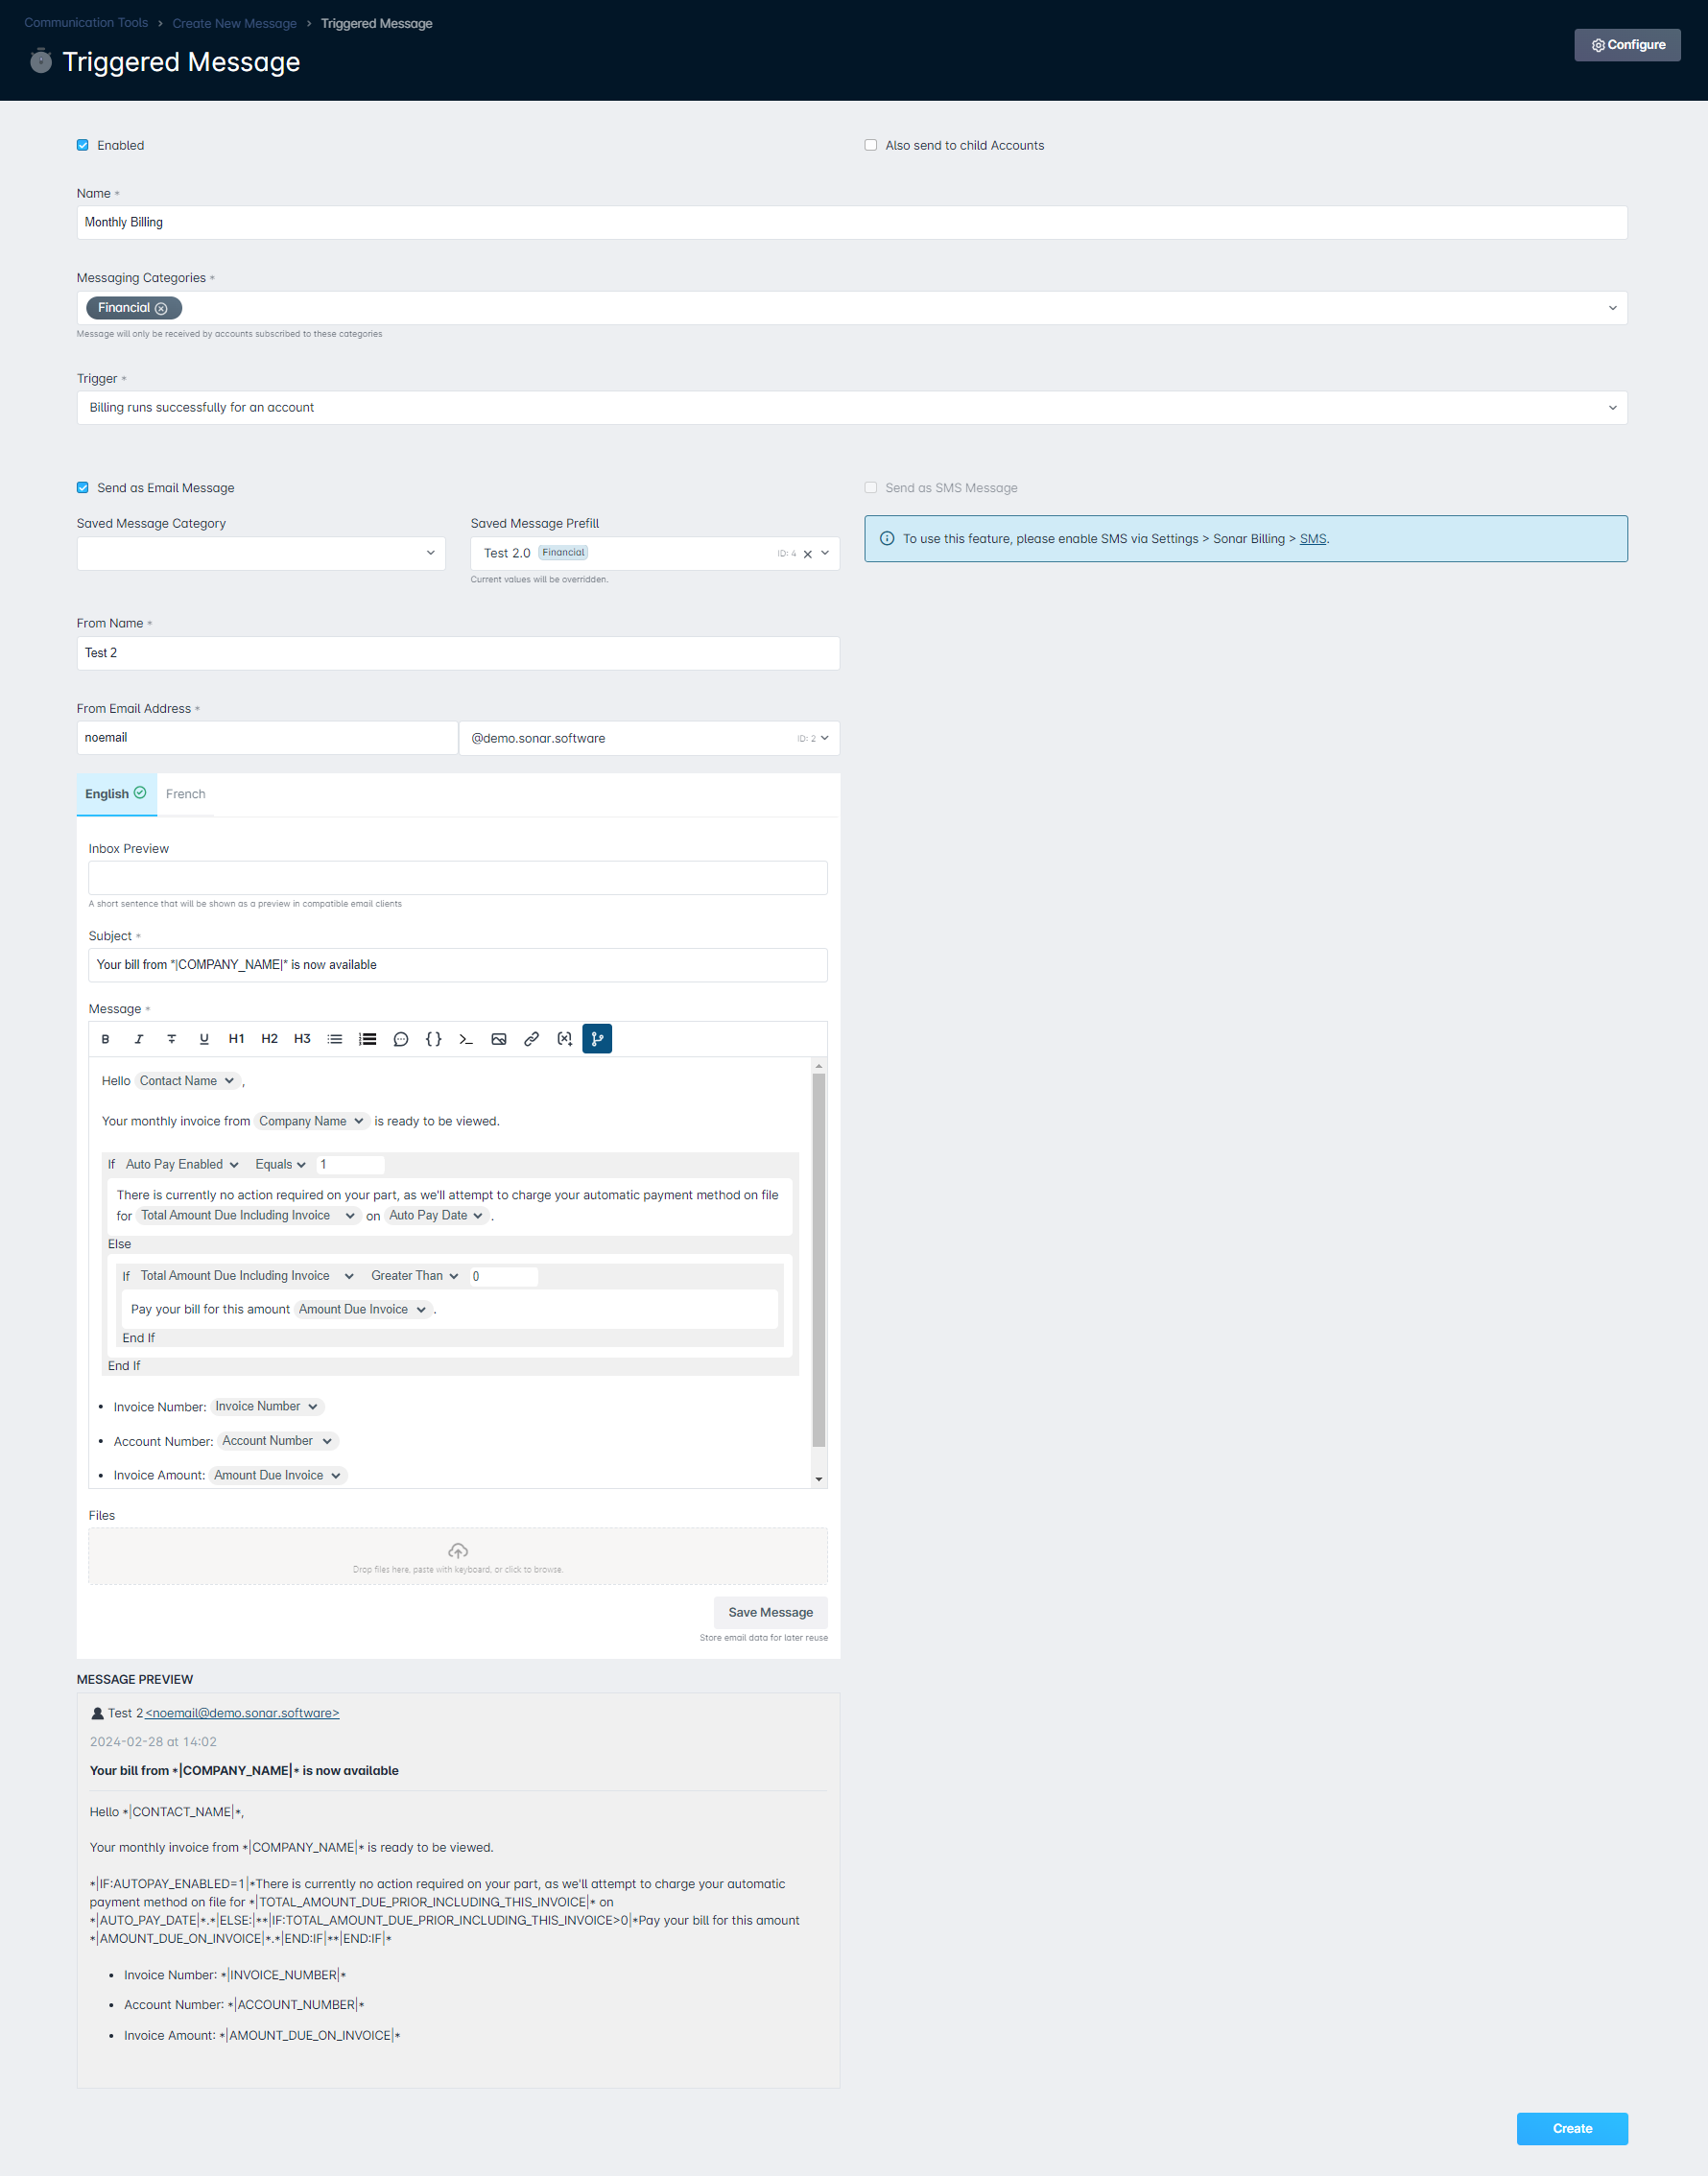
Monthly Billing
P
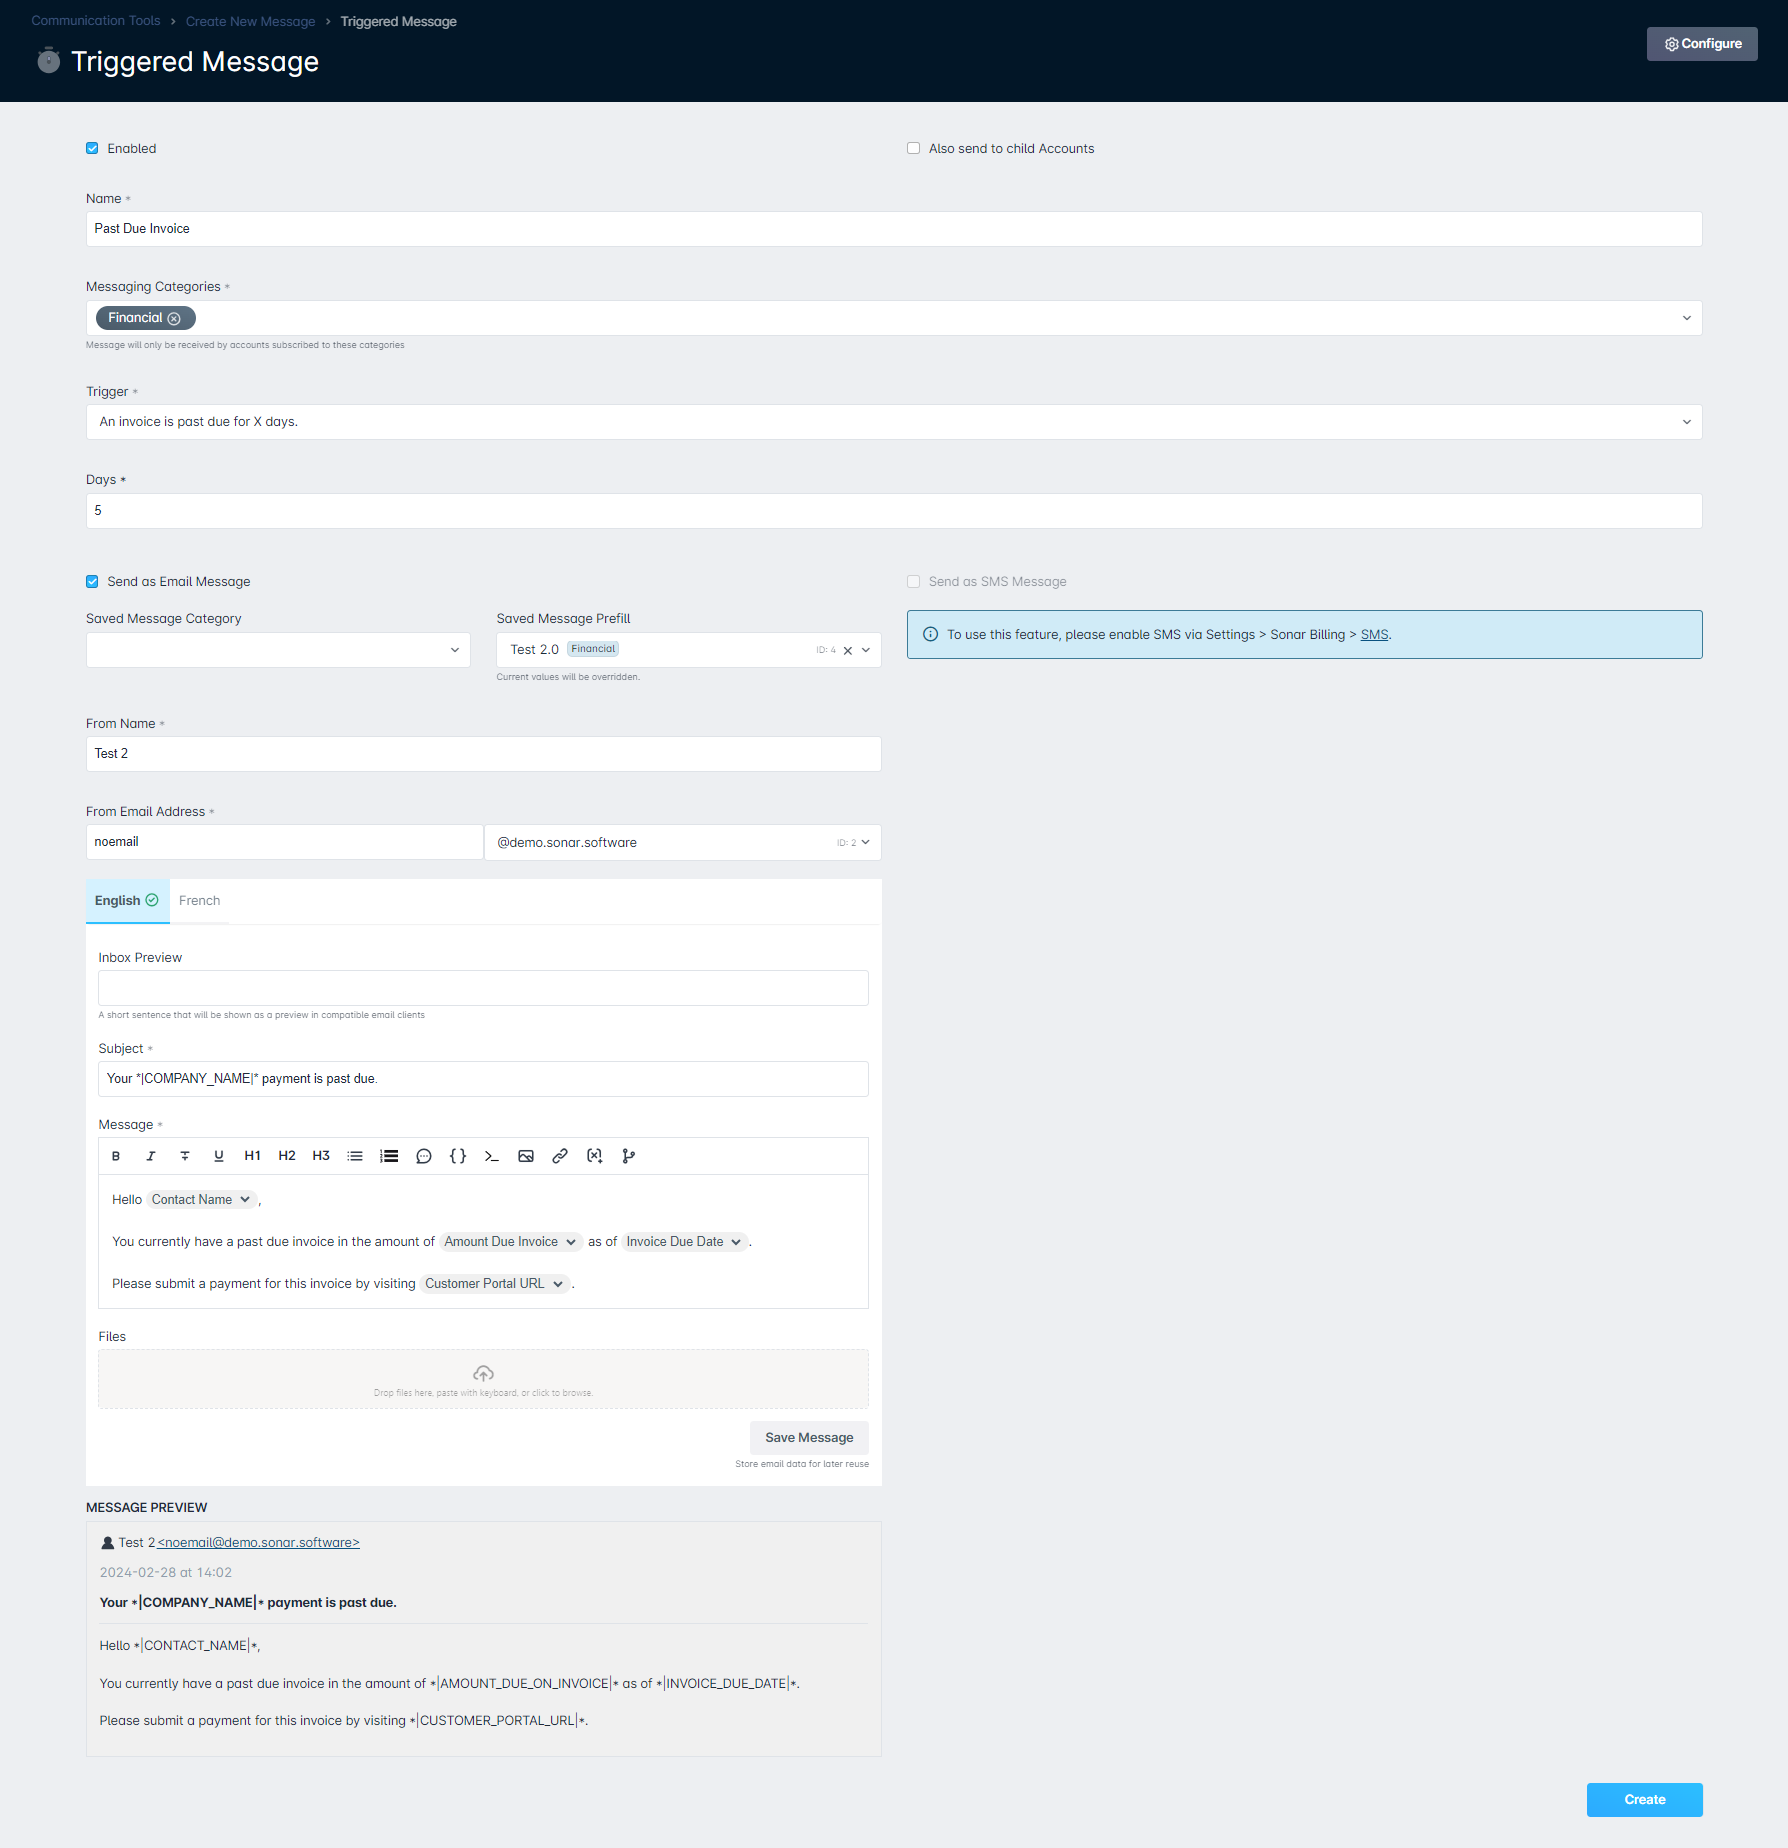
Past Due Invoice
Payment Failed

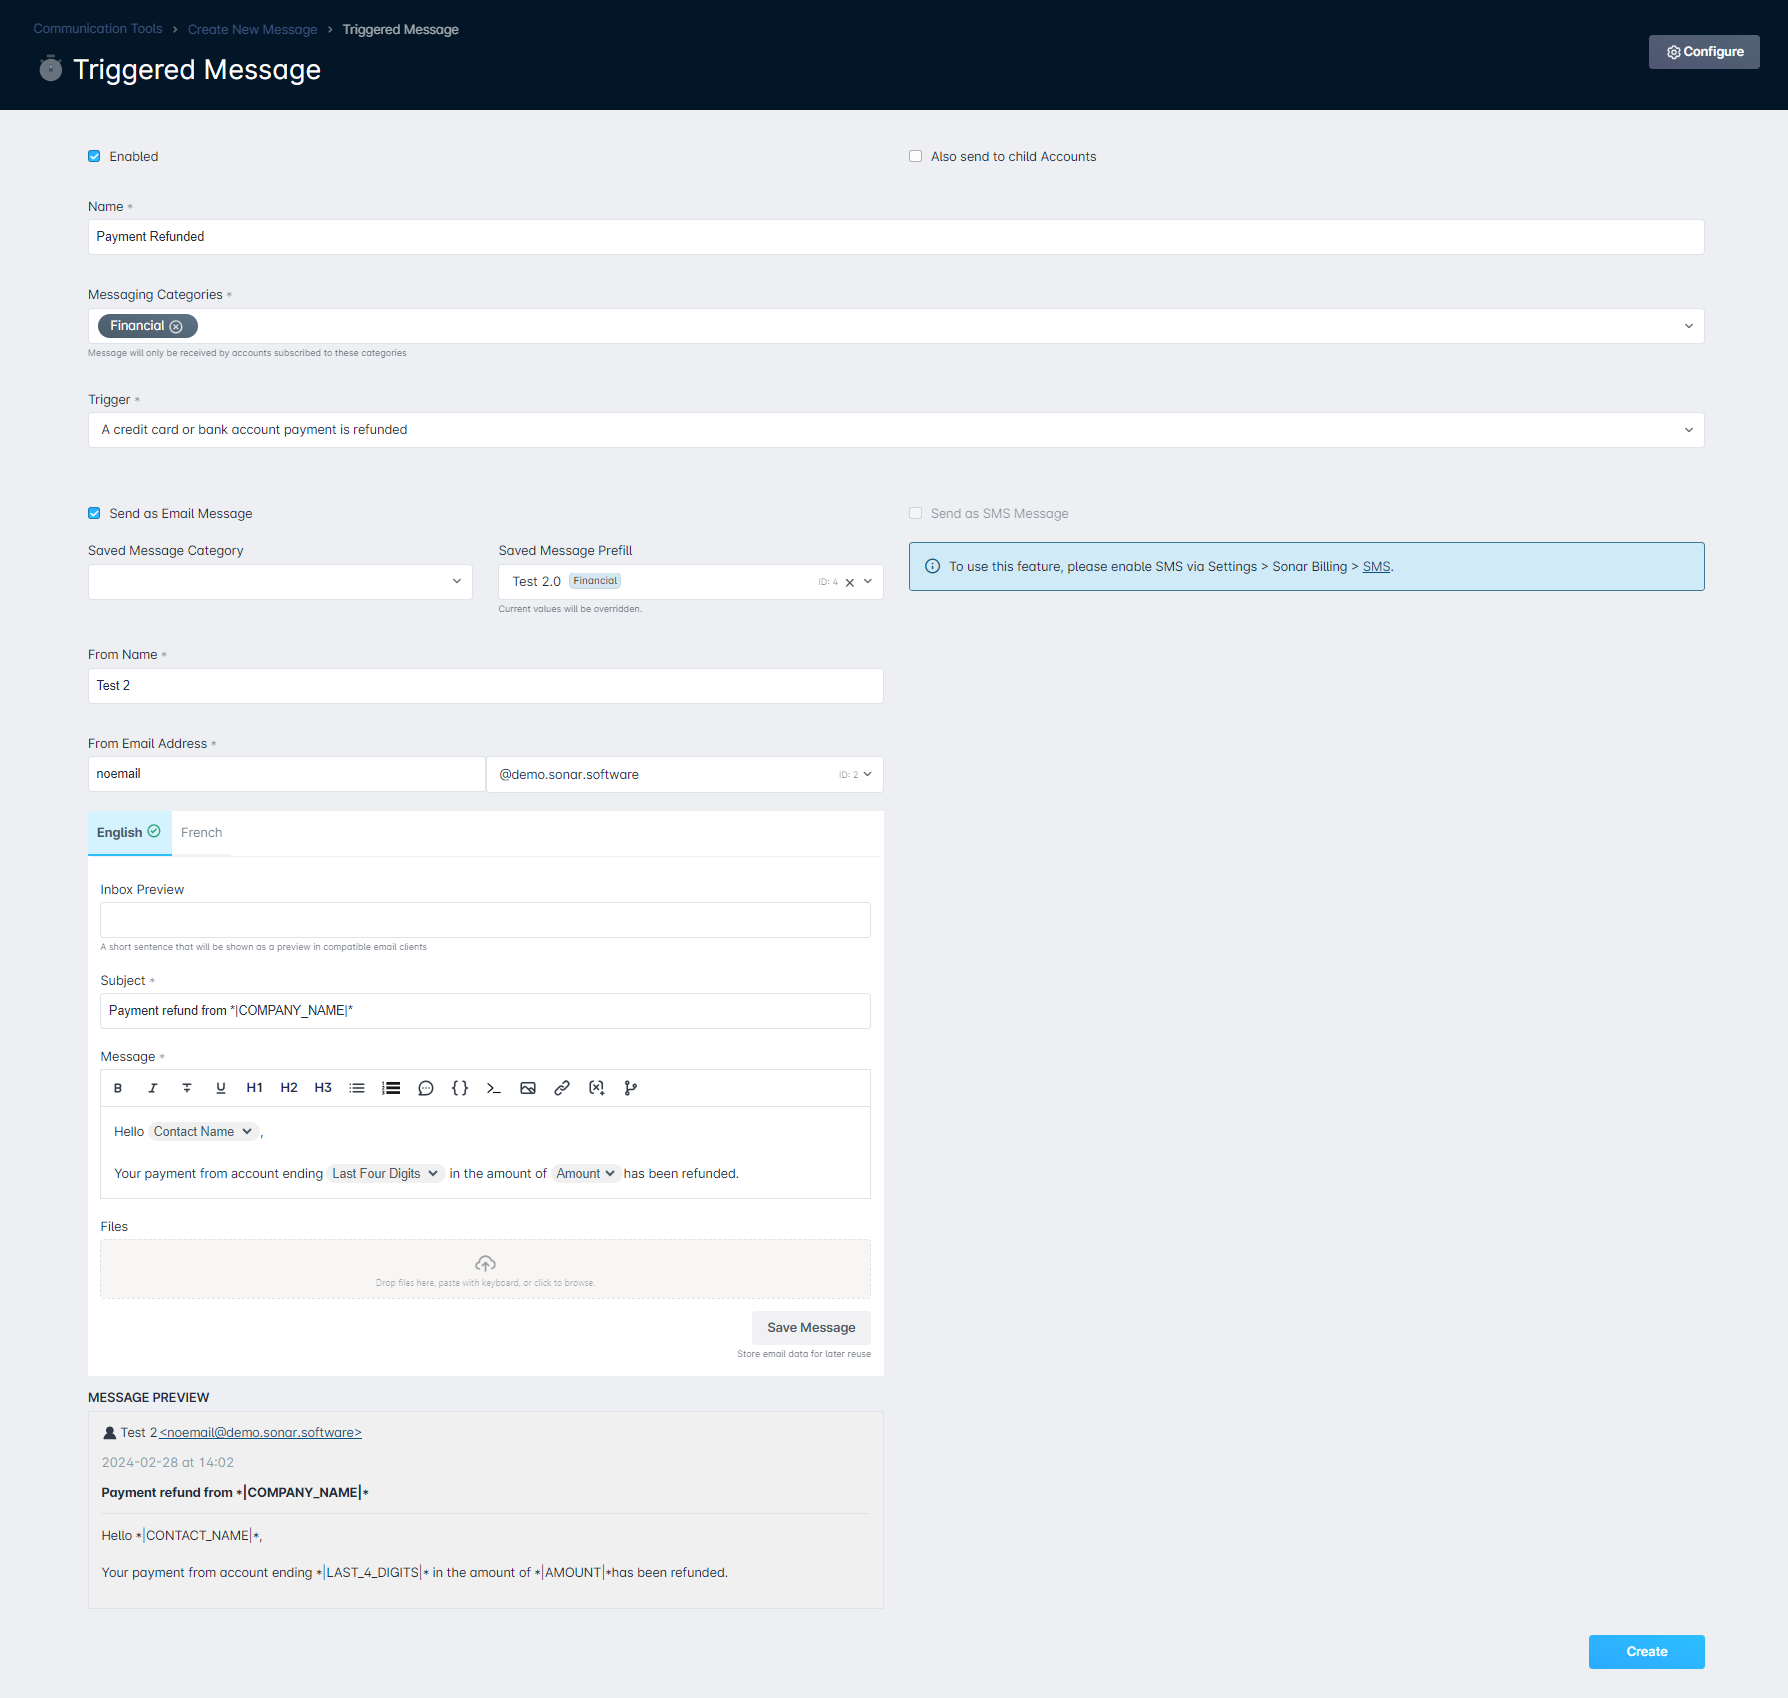
Payment Refunded
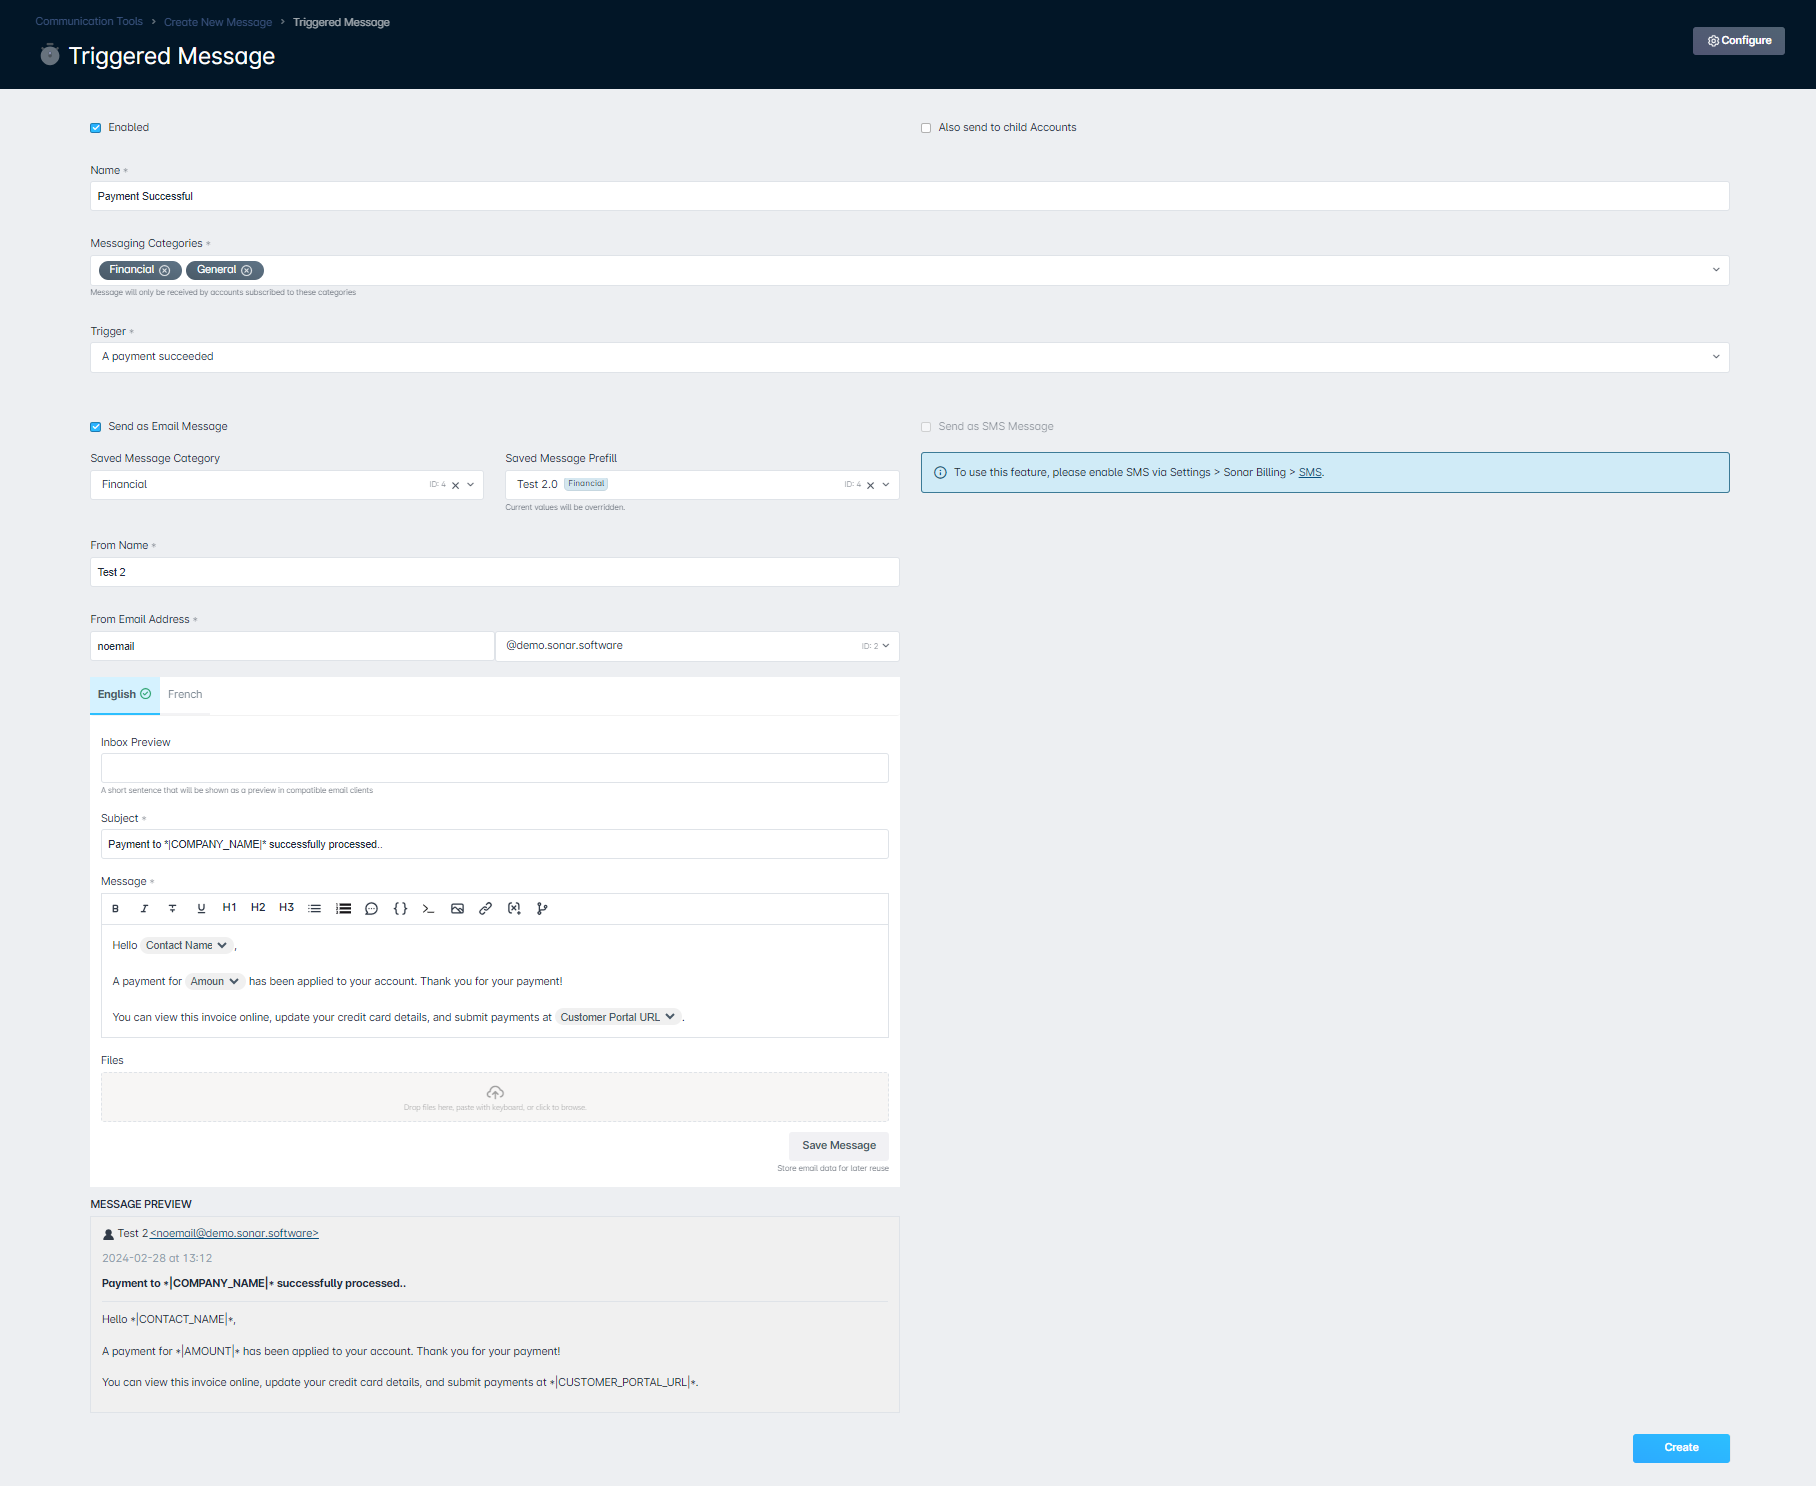
Payment Successful
S
Service Call Scheduled
