Table of Contents
Serviceable Addresses: Overview and Usage
 Updated
by Mitchell Ivany
Updated
by Mitchell Ivany
Read Time: 10 mins
Serviceable Addresses in Sonar allow you to add and track addresses or locations to which you can deliver some service, regardless of the delivery method. Additionally, when a Serviceable Address is added to your Sonar instance, and information or inventory is assigned to it, this information is stored and tracked in perpetuity. The Serviceable Address function allows a new customer to be set up quickly and easily at pre-qualified locations or previously occupied physical locations.
This functionality provides more control over previous account management methods in two main ways:
- Serviceable Addresses maintain the IP Assignments, Inventory history, elevation, and any other device or location-specific traits. This simplifies the process of changing customers when one moves out and another moves in.
- This approach is superior to renaming old accounts to preserve this information, as it protects against the risk of new users accessing old transaction history for their location.
- Serviceable Addresses can be Linked to establish a hierarchy between a multi-unit dwelling or disparate locations connected through a customer.
Serviceable Address Management Page
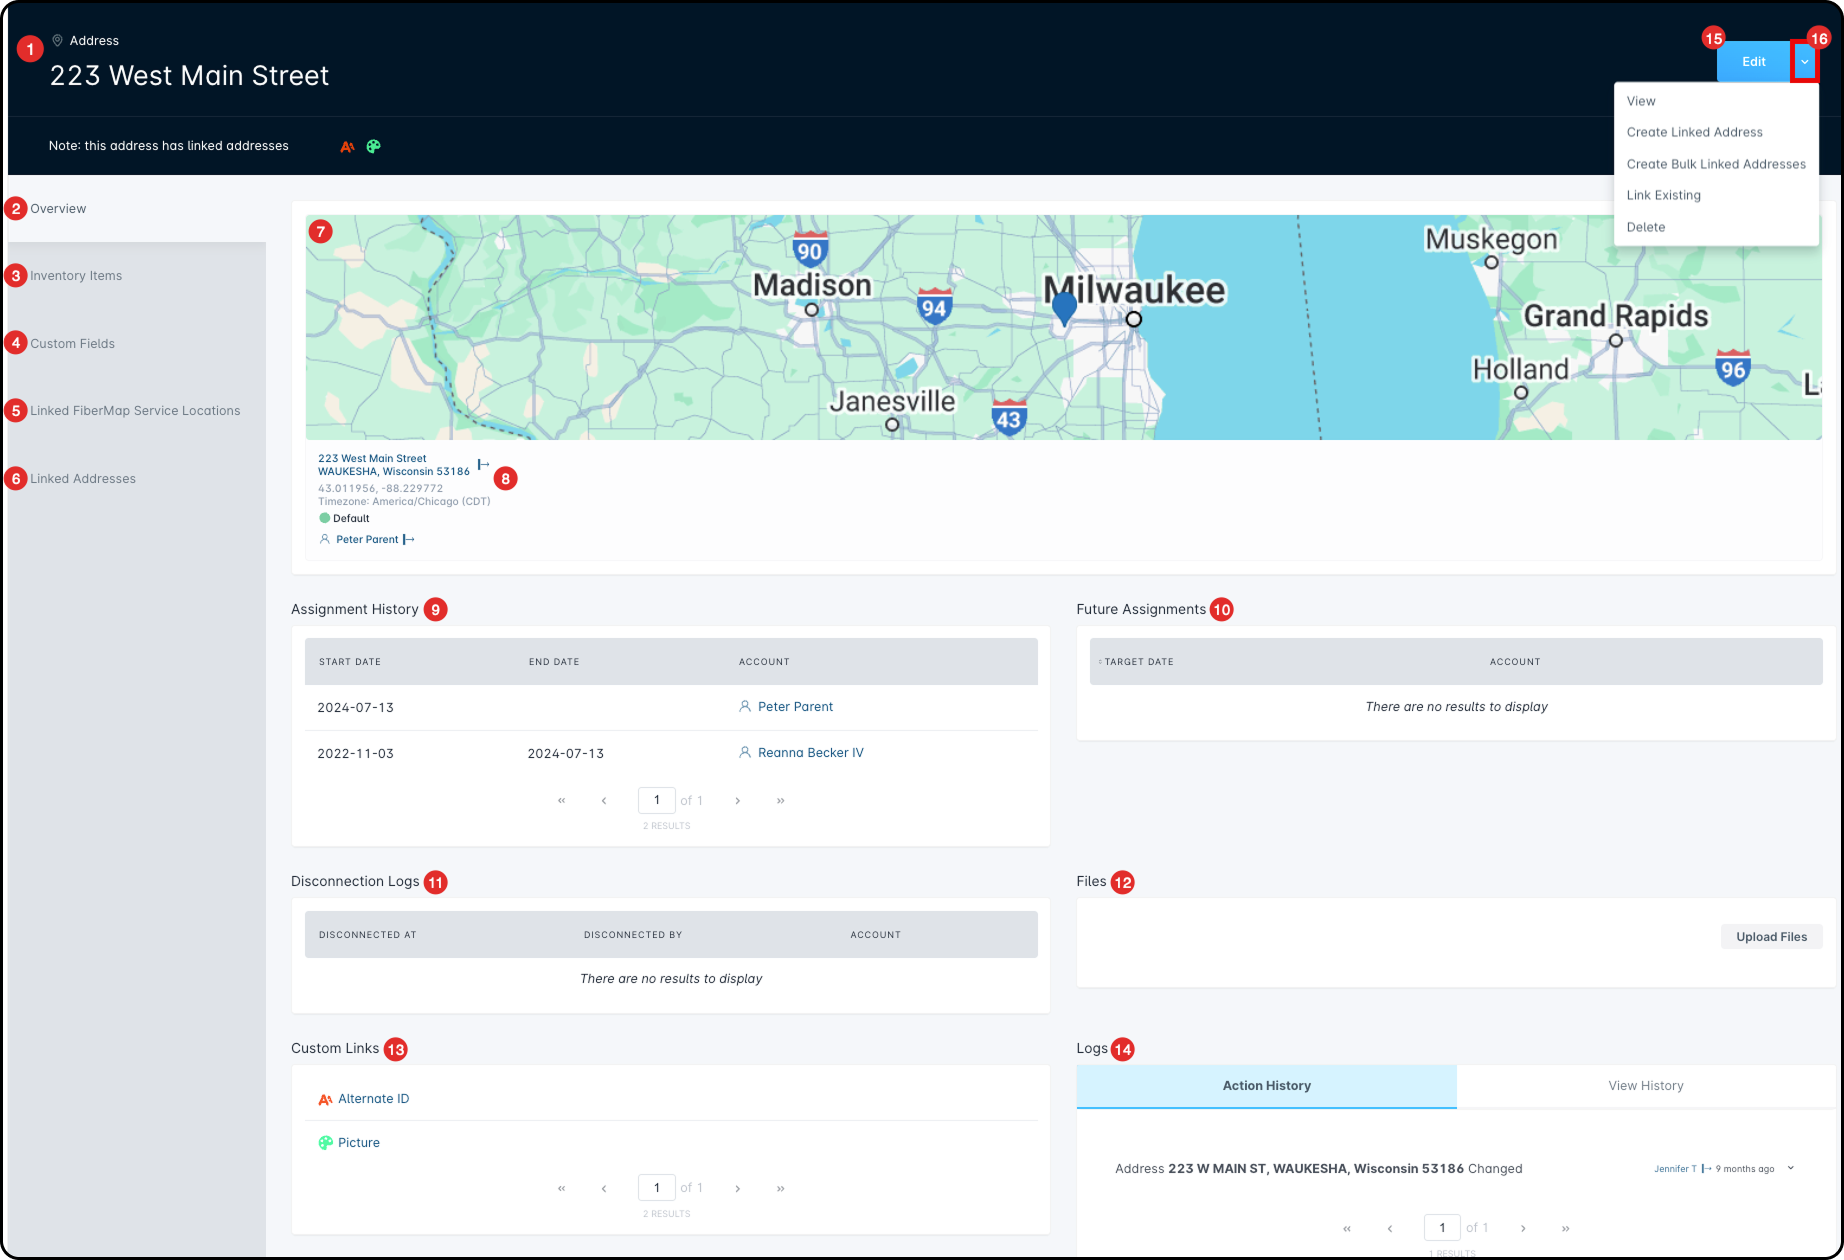
- The banner at the top of the management page houses the serviceable address you're currently looking at. If the address is an Anchor address, a note will be added to the banner, informing viewers that the address has linked addresses.
- The Overview tab encapsulates the main components of a serviceable address, including its log history; the individual sections are described in their associated number below.
- The Inventory Items tab reflects any inventory items presently assigned to the serviceable address.
- The Custom Fields tab is utilized to track any information specific to that location. If you have previously set up a custom field to associate with serviceable addresses, the option to fill this out will populate in the creation or edit modal. With data added to the field, the tab will look like this:

- The Linked FiberMap Service Locations tab is used to monitor and review any Service Locations linked to this address. This tab can also be used to generate Splice Reports for the linked service locations.This tab will only appear if the Vetro FiberMap integration is enabled.
- The Linked Addresses tab is used to review any addresses that have been linked to the current one.This tab will only appear if the Anchor & Linked addresses feature is used in your instance.
- The map preview provides the ability to quickly identify whereabouts the serviceable address is within your service area.
- Below the address, you'll see the current serviceability status.
- The Serviceable Assignment History reflects all accounts associated with the address since it's been created, including the date range they were connected.
- The Future Assignments reflects any account that will be associated with the address in the near future, including the target date that the new account will be assigned to this serviceable address.
- The table below Disconnection Logs expands on the data underneath the assignment history, reflecting who processed the disconnection and providing access to a sidebar menu.
- The Files section of the page will display any uploaded pictures and/or files; these items will remain associated even as customer accounts are disconnected.
- The Custom Links section provides you with any associates custom links with the serviceable address.For more information about Custom Links and how to create them, view the Custom Links: Overview article.
- The tabs below Logs reflect both the action history and the view history of the serviceable address.
- The Edit button prompts a modal similar to the creation modal, allowing you to alter the serviceability status, network site connections, and any custom fields.
- The dropdown arrow provides the option to Delete the serviceable address. You will have more options if the serviceable address is an Anchor address.
Adding a New Serviceable Address
New Serviceable Addresses in Sonar can be added in one of two ways:
- During the creation process for a new customer account.
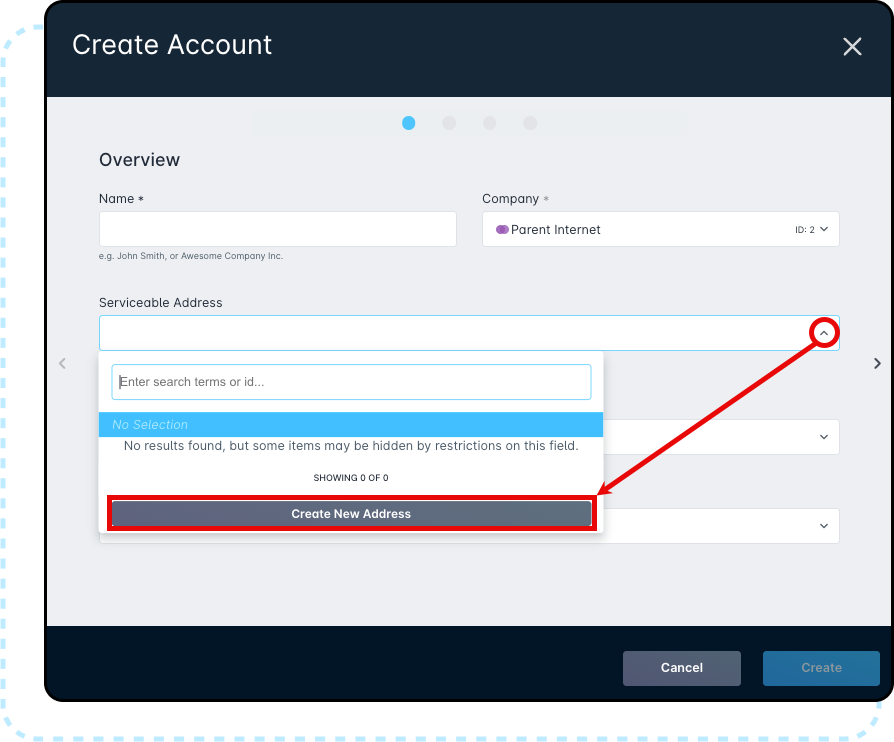
- From the Location Tools → Serviceable Addresses page.
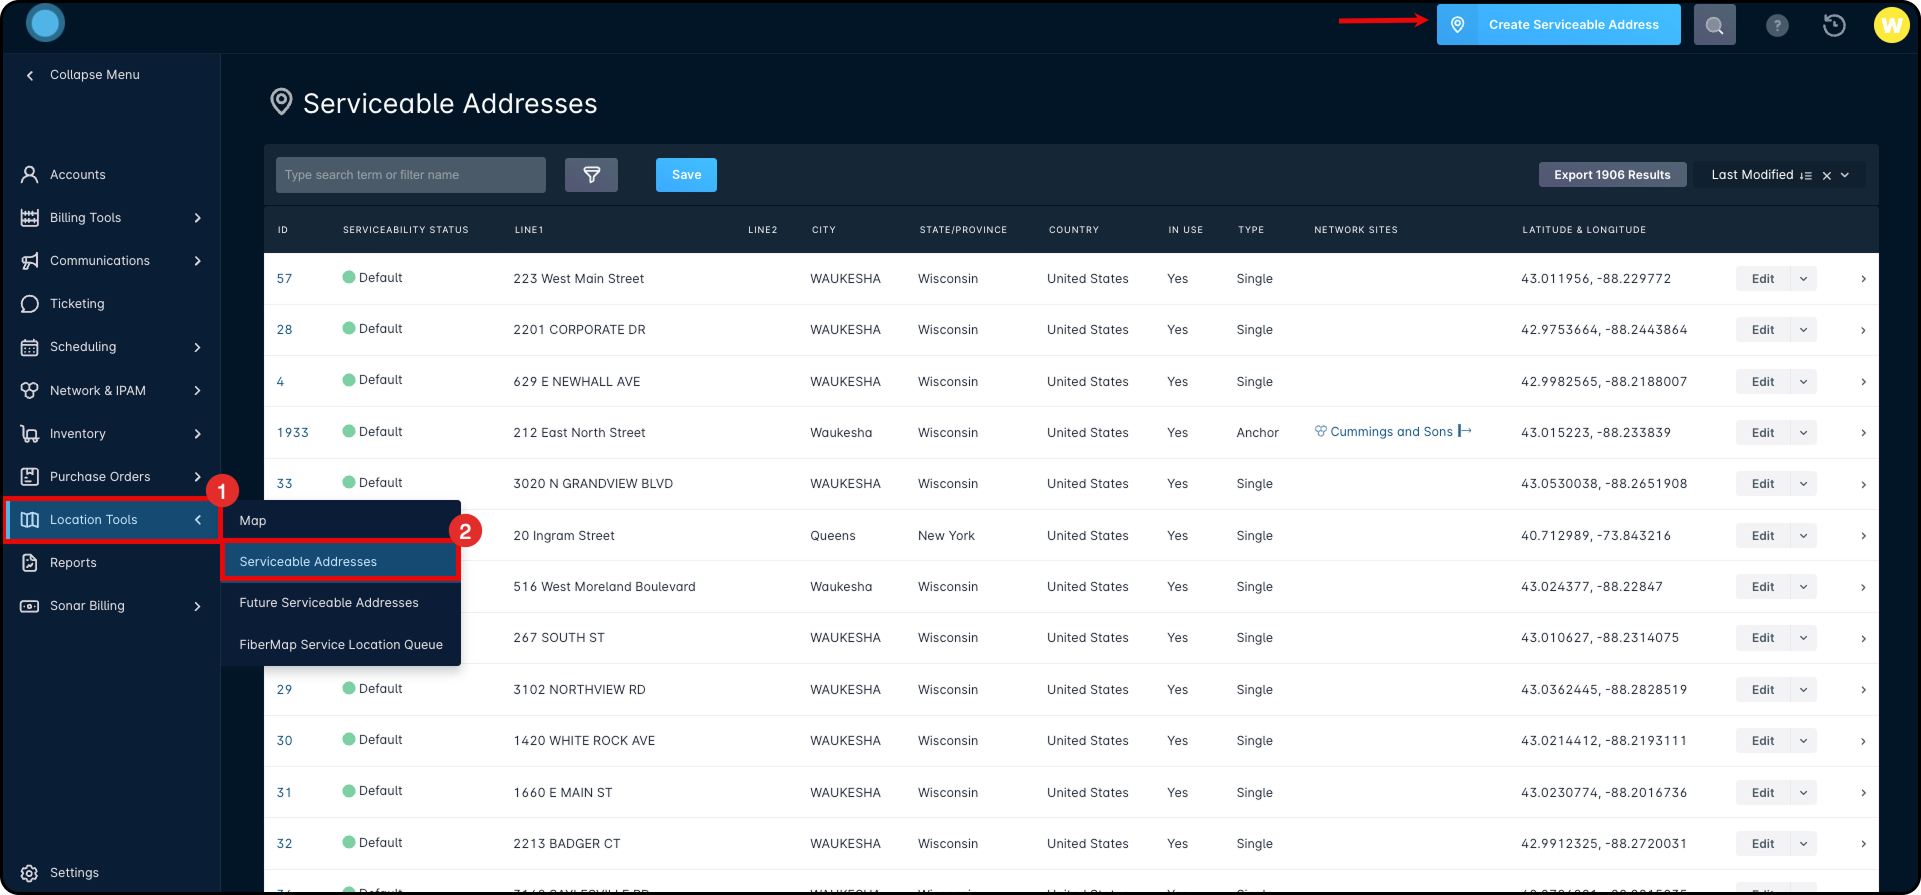
Creating a Serviceable Address from either location opens up the “Create Serviceable Address” modal, which allows you to add a new address, or location, to your instance:

Adding a Serviceable Address Using GPS Coordinates Only
It is possible to add a new serviceable address using GPS coordinates; this is particularly beneficial when developing a lead intake form. To complete this, you would need to follow the steps below:
- Get the customer's address, then perform an API call to somewhere (for example, Google Maps) to get the GPS coordinates. As an easier alternative to this step, put in static GPS coordinates to be converted later.Note that they must be real GPS coordinates (for example, don't use 0,0 which puts you in the ocean off the coast of Ghana). Using your headquarters is recommended, as you can filter on that later to find addresses with incomplete coordinates.
- Create the serviceable address in Sonar (using the
createServiceableAddressmutation) and read the ID that it outputs. - Feed that ID into the
createAccountmutation (outlined in this article here) using theserviceable_address_idproperty.
Serviceability Statuses
Serviceability Statuses provide the ability to categorize addresses as needed. For example, during a Fiber deployment there may be certain addresses that will not be receiving drops until a specific date, or at all, and having that status easily viewable makes it easy for your sales team to know what they can or cannot offer.
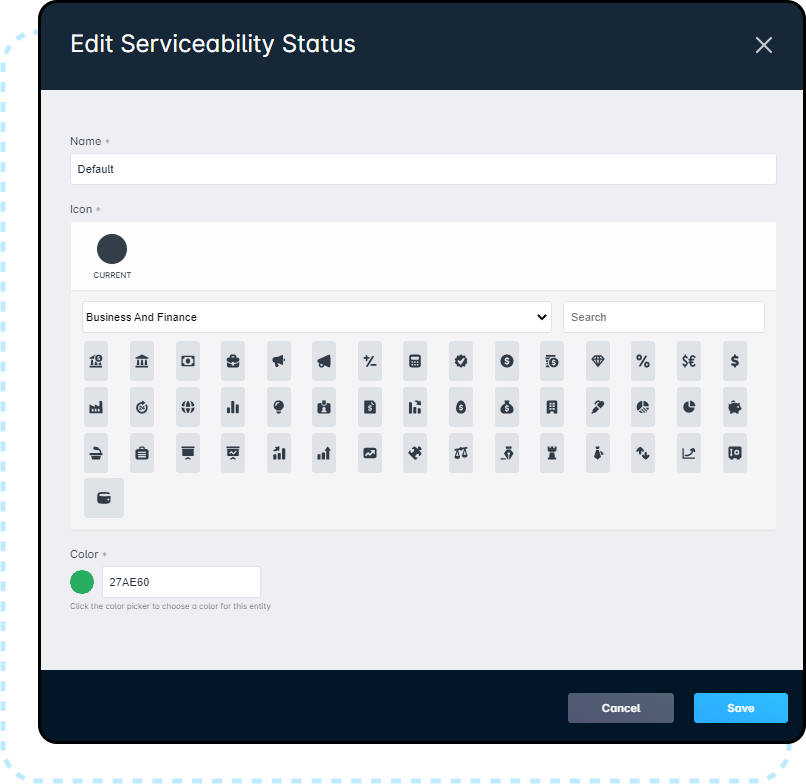
To make adjustments to statuses in your instance, navigate to Settings → Accounts → Serviceability Statuses.
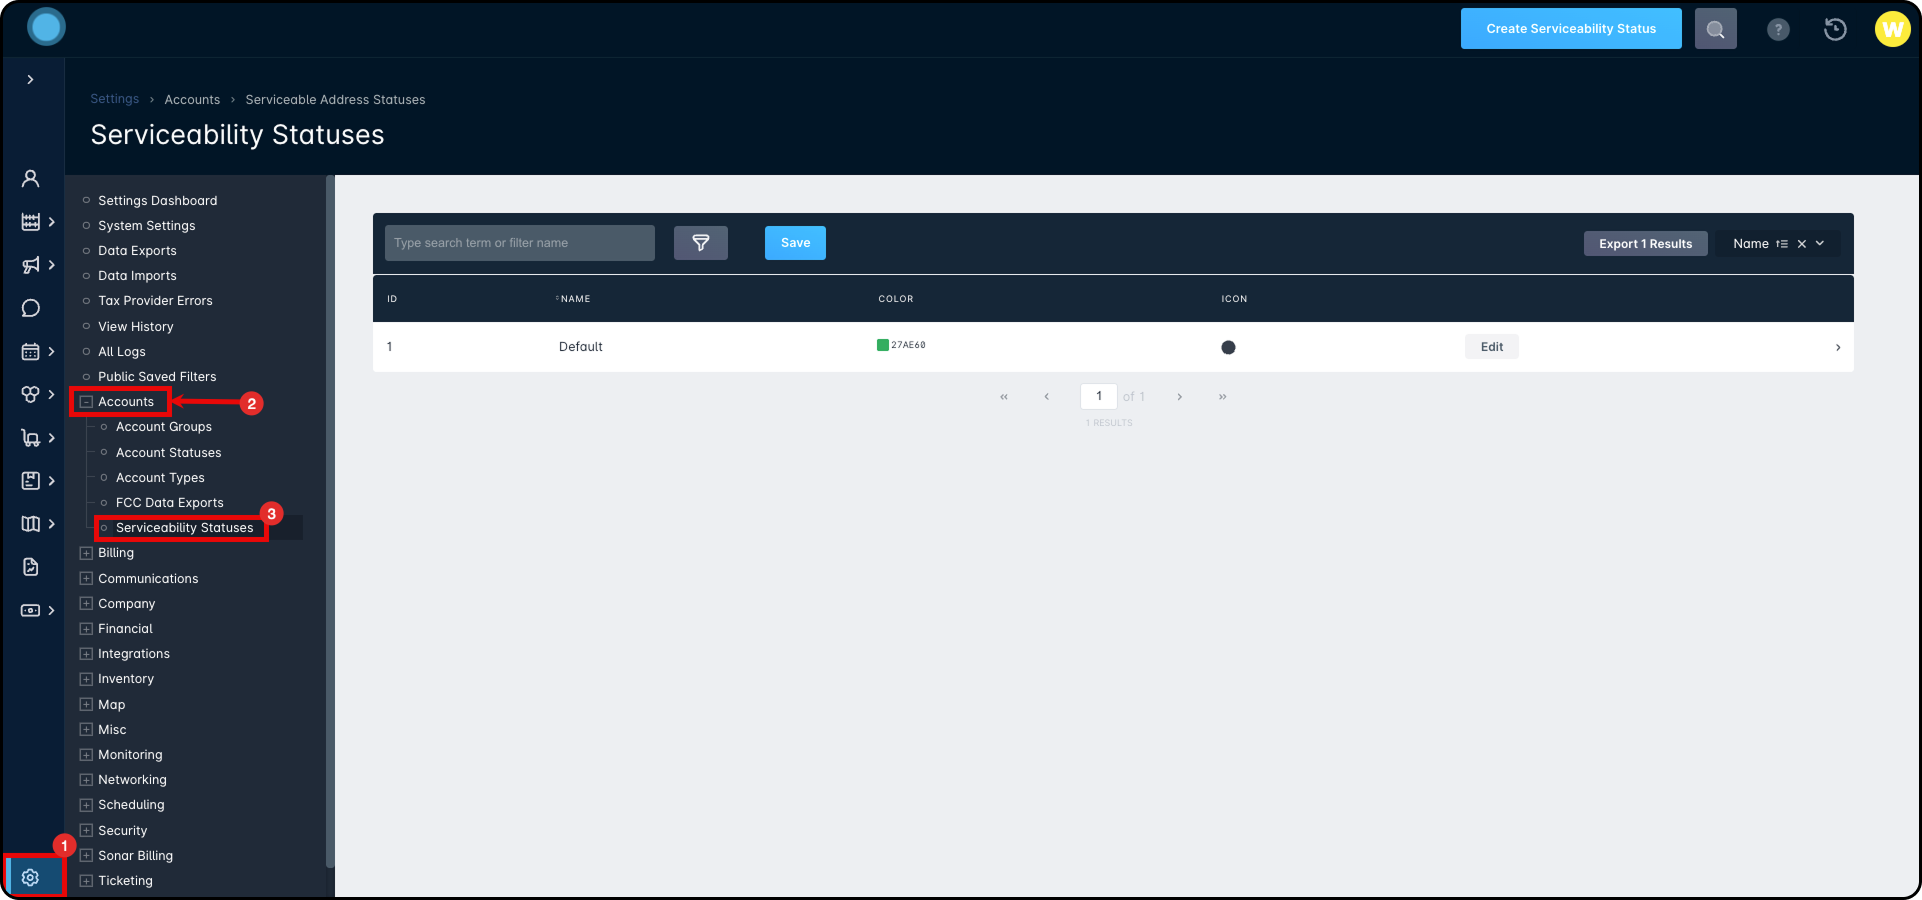
A default status is automatically added to your instance, and all accounts are enrolled with that status. While you can edit this status by renaming it, changing its icon, or altering the color, you cannot delete it. New statuses can be added by clicking on the blue Create Serviceability Status button in the upper right corner. To make adjustments to serviceability statuses, click Edit alongside the corresponding line item and use the following modal to make your changes:
How to Edit an Addresses Serviceability Status
The Serviceability Status dropdown is available via the Edit Serviceable Address modal, which can be accessed from a few different spots within your instance.
- Navigate to Location Tools → Serviceable Addresses and locate the address you wish to adjust, then click on “Edit”. With the edit modal populated, use the first dropdown to make your selection and then save your changes.
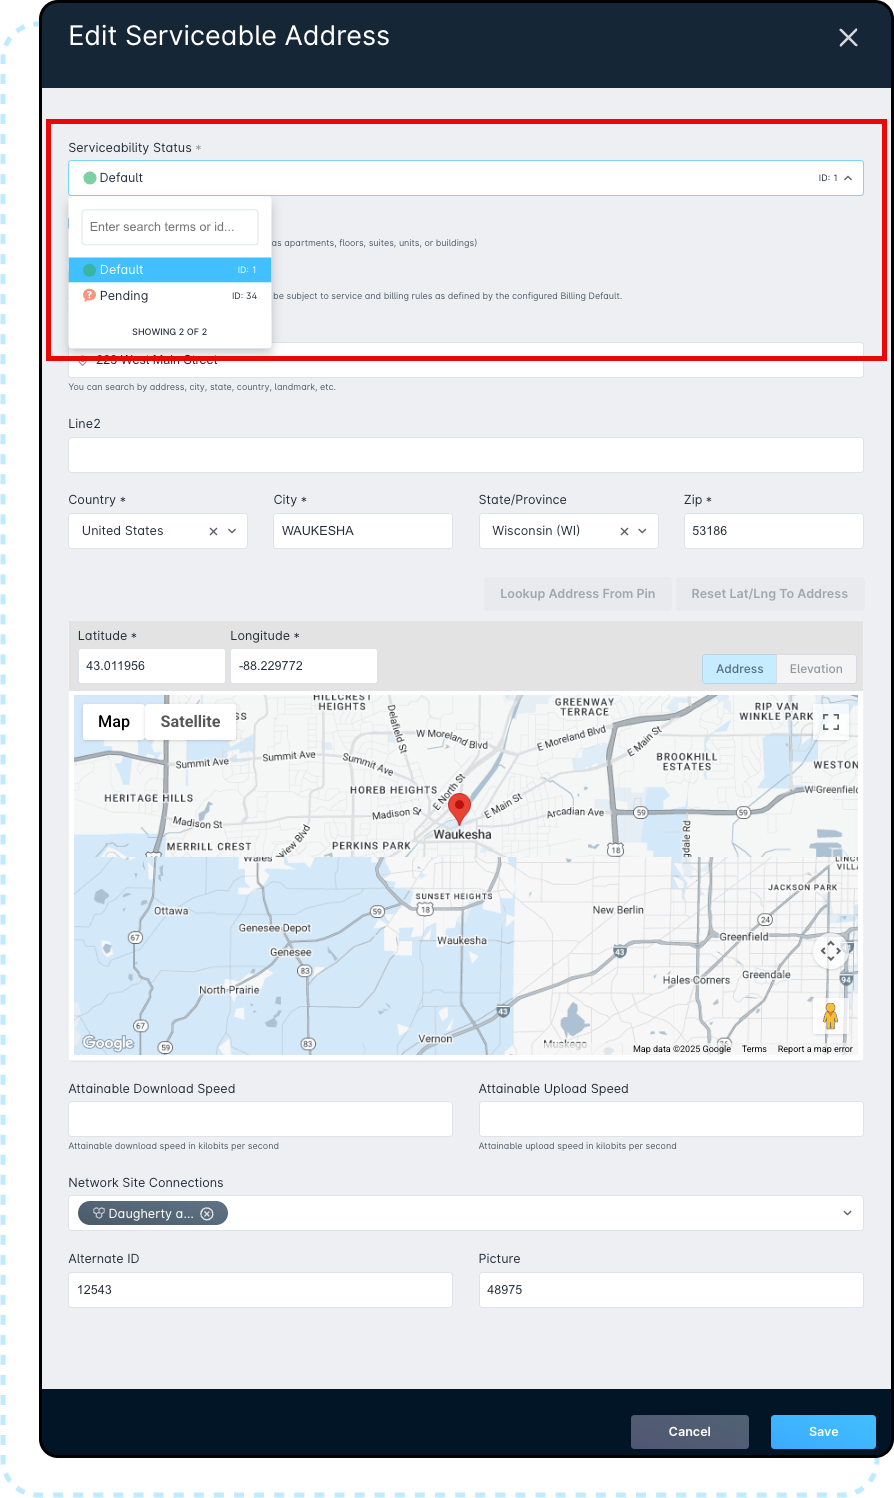
- Navigate to the address's management page and click Edit. This will populate the same modal as the above screenshot.
- Navigate to a customer's account and click Edit alongside their serviceable address. Once again, the same modal will populate.
Network Site Connections
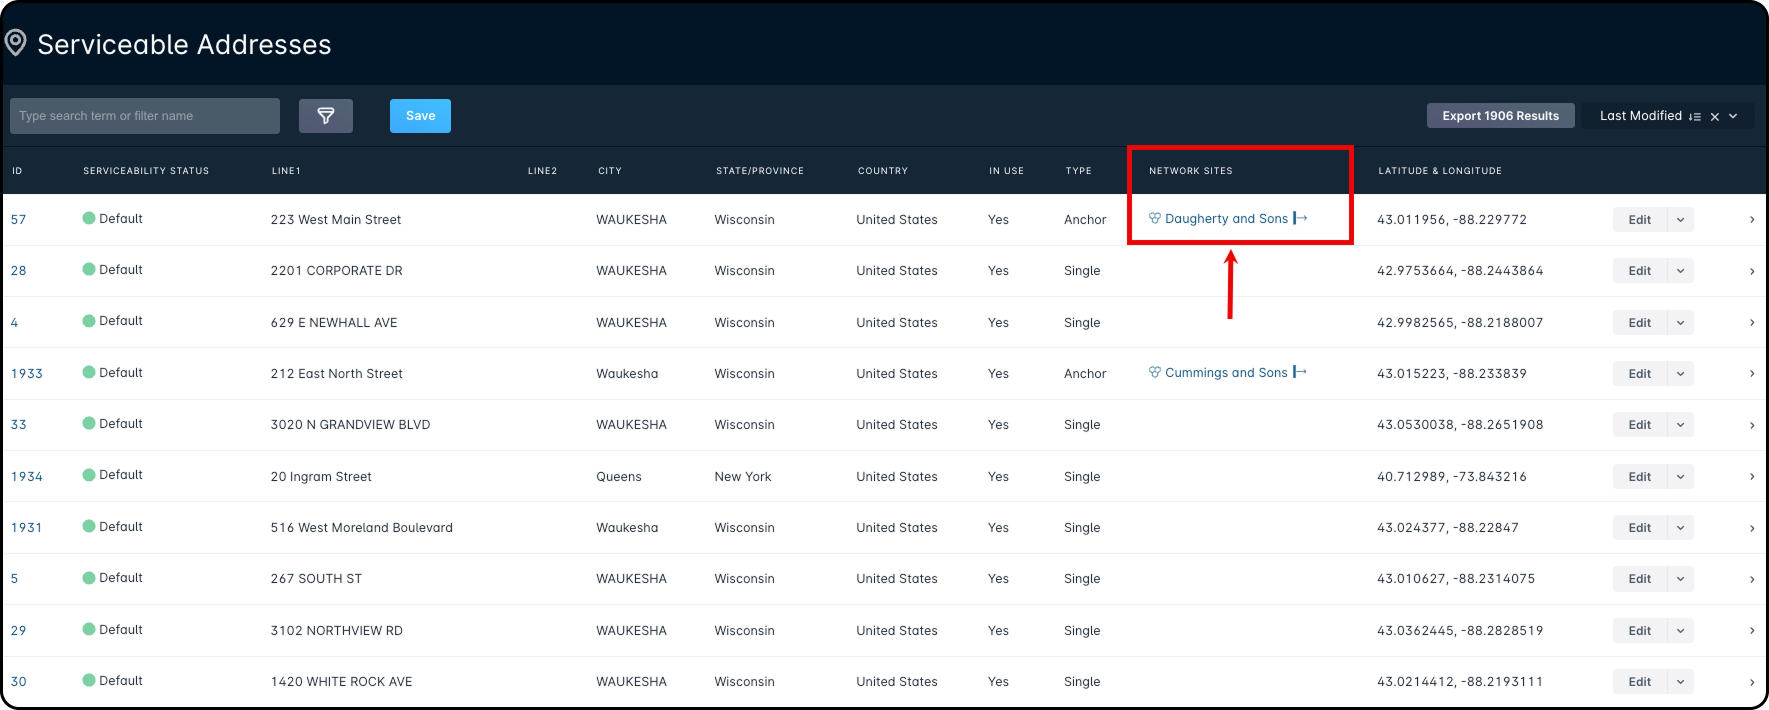
Network Site Connections offer a way to link a serviceable address to a network site, even before any networking equipment is deployed to the address. This feature can be particularly beneficial during a Fiber deployment to distinguish which locations will route through which network sites. The table within Service Addresses reflects any associated network sites via the Network Sites column.
You can add network site connections to a serviceable address during the creation process or at a later time via the edit modal. The same edit modal allows you to change or delete a network site connection at any time.

Using Serviceable Addresses
Serviceable Addresses are a critical function in Sonar, as inventory assigned to a customer's home for provisioning is stored and tracked with the serviceable address. Fundamentally, this means that each Serviceable Address is unique, and must always remain unique, even while the accounts which use this address aren't necessarily unique. In this section, we'll be taking a look at a few example scenarios of how to use accounts and serviceable addresses together.
Example 1: A resident moves out
In this example, a current customer of a WISP will be moving out of their home. This customer has had an access point installed at the address to receive service, and trees removed. As a result, the WISP knows that this address remains a location to which services can be offered. Ordinarily, the account would simply be made inactive, and when a new customer signs up at the address, inventory would need to be migrated. In Sonar, this same scenario is simplified, as when a new customer moves in, the equipment and IP assignment history is tied to the address, and will all be migrated automatically.
Example 2: In a shared home, the service contract is being picked up by another
In this example, a home is being shared by several roommates, and the contract for their data service will be getting picked up by a new resident once the current contract expires. In many cases, you would need to change the name of the account, the primary account owner, the contact information, and possibly even custom fields on the account. However, this may result in the new account owner inadvertently being granted access to billing information that belonged to the previous contract owner. By leveraging serviceable addresses, you retain the IP information and device assignments while creating an entirely new account without any legacy billing information or network access credentials.
Example 3: Multiple Accounts sharing a serviceable address
In Sonar, we allow you to import past customer information into your instance, and in some cases this may result in two accounts that would share a serviceable address. Unfortunately, the versatility and robustness of the Serviceable Address function means that you can't have two accounts with the same serviceable address. However, there are some alternatives:
- If this address is split up into different units or residences, or if each service is tied to a separate individual, then the best course of action is to create a unique address for both, with some value added to the “Line 2” field to differentiate them.
- If this address should, in fact, share services, such as a primary service and a backup service, then both services would be on the same account, either as one larger service that triggers pair bonding on the provisioning side, or as a primary data service with a backup recurring service
Permissions
To make use of some features touched on above, the following role permissions must be looked at. Please take a moment to review these permissions and ensure that the relevant roles have them added.
Navigate to Settings → Security → Roles and either choose to edit an existing Role or create a new Role. With the next page populated, locate the permissions reflected in the screenshots below and enable whichever ones are applicable to that Role.
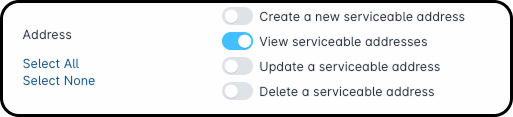
Without view serviceable addresses enabled, none of the features mentioned will be usable as the Serviceable Address page won't be reachable.
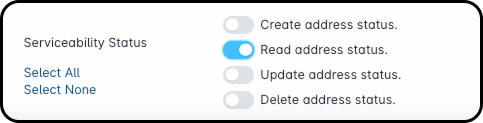
To be able to utilize the serviceability status portion of serviceable addresses, you must have read address status enabled first and foremost. Without it, you will be able to see the statuses to update or delete them.
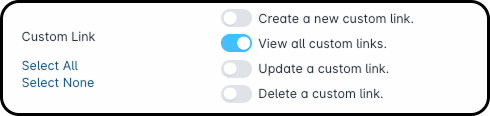
The above permission must be enabled for the Custom Link portion of the Serviceable Addresses to be visible.

The above permission must be enabled for the Network Site Connections portion of the Serviceable Address modal to be visible, along with the Network Sites column on the Serviceable Address page.