Table of Contents
Child Accounts: Best Practices & How Tos
 Updated
by Jennifer Trower
Updated
by Jennifer Trower
Read Time: 7 mins
Adding A Child Account In Sonar
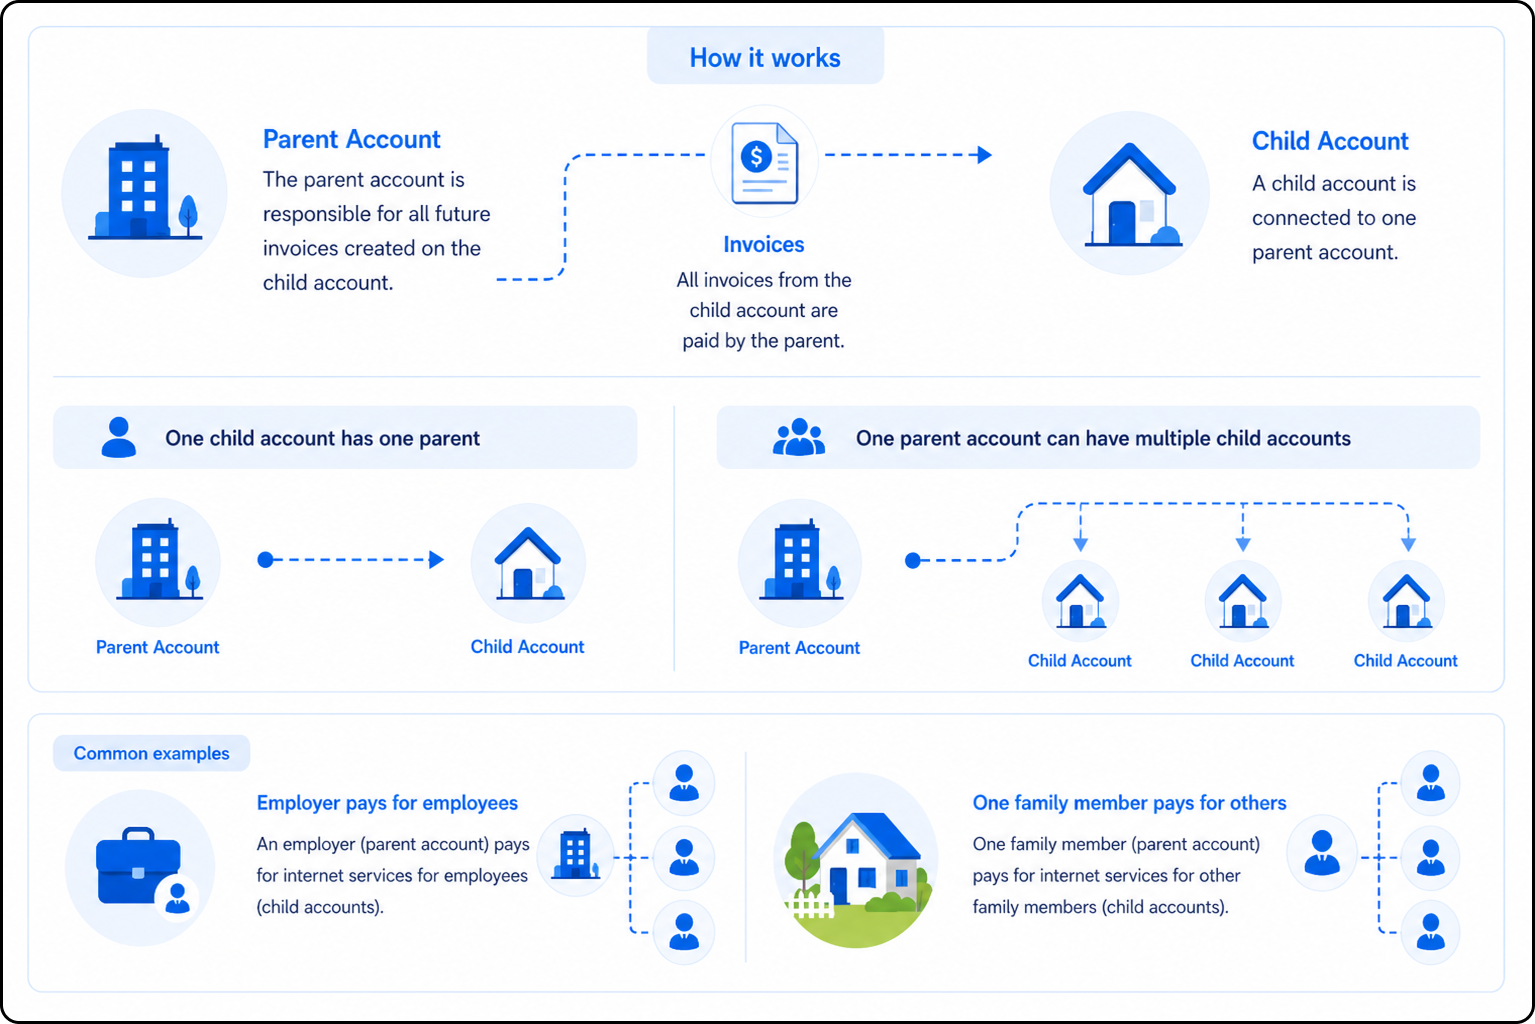
A child account lets you connect one account to another in Sonar. Once connected, the parent account is responsible for all future invoices created on the child account.
A child account can only have one parent account, but a parent account can have multiple child accounts.
This is useful when one person or organization pays for another account’s services. For example, an employer may pay for employee services, or one family member may pay for services for other family members.
Child accounts are different from Anchor & Linked Addresses, which are used to connect accounts at different physical locations. To learn which option is best for your situation, see the Anchor & Linked Addresses article.
You can still send manual messages to child accounts, and events can still be triggered.
How To Add A Child Account
You can add a child account to a parent account in two ways. We’ll walk through both options below.
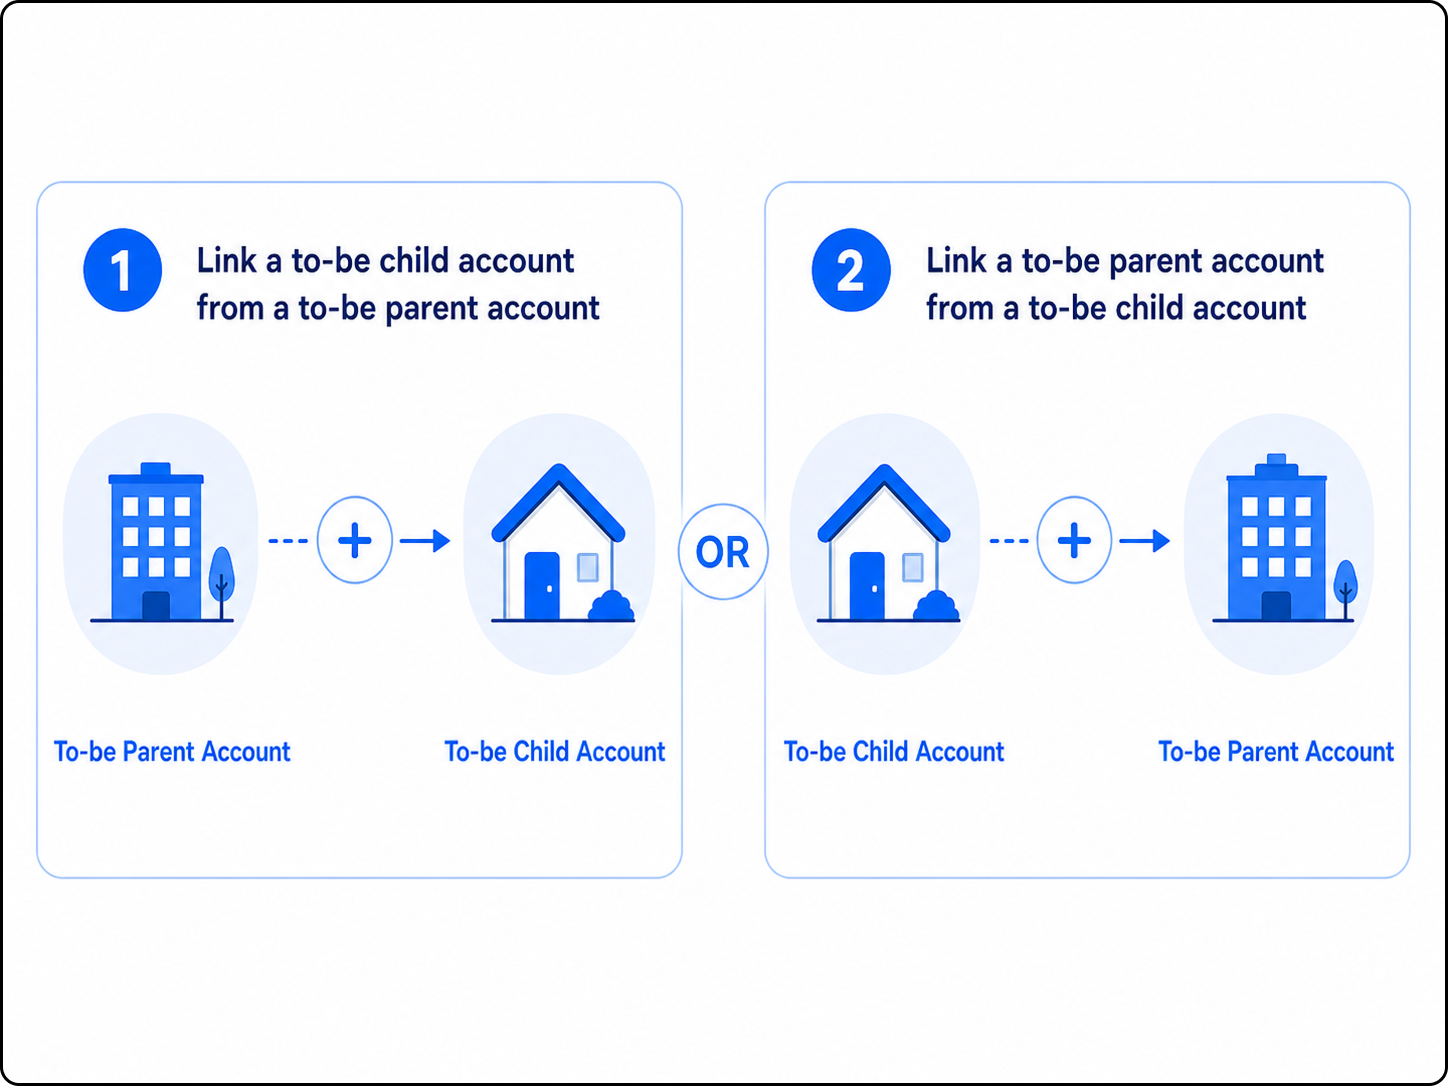
Method #1: From the Parent Account
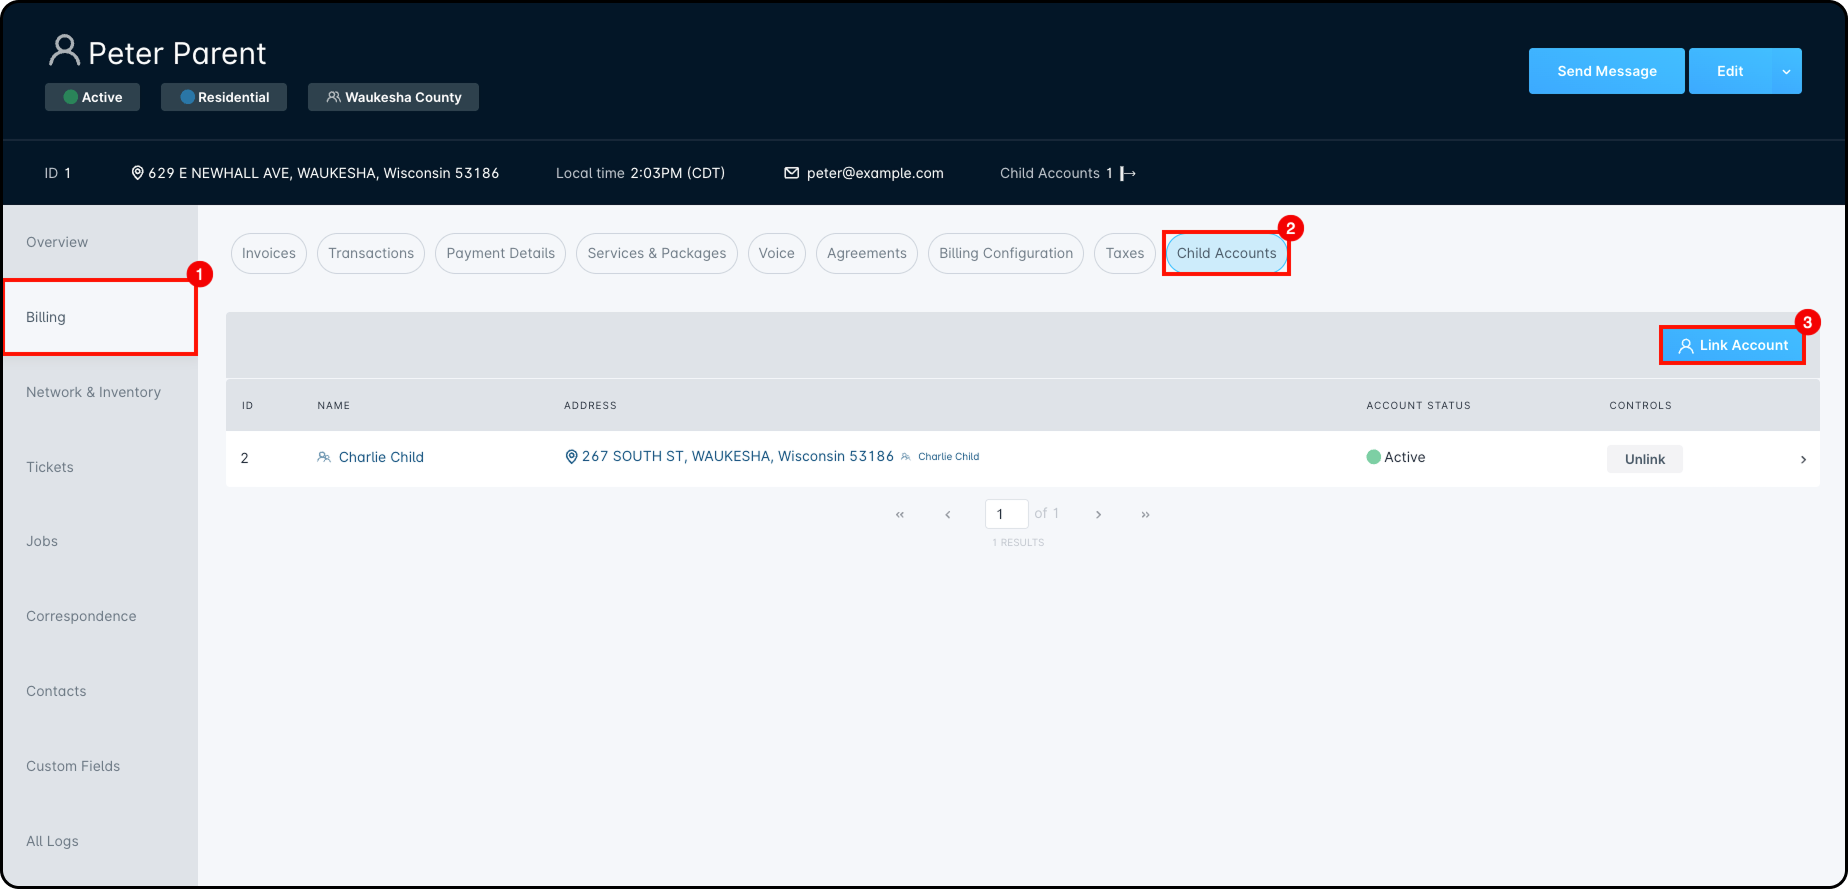
- Open the account you want to make the parent account.
- Select Billing from the left-side menu.
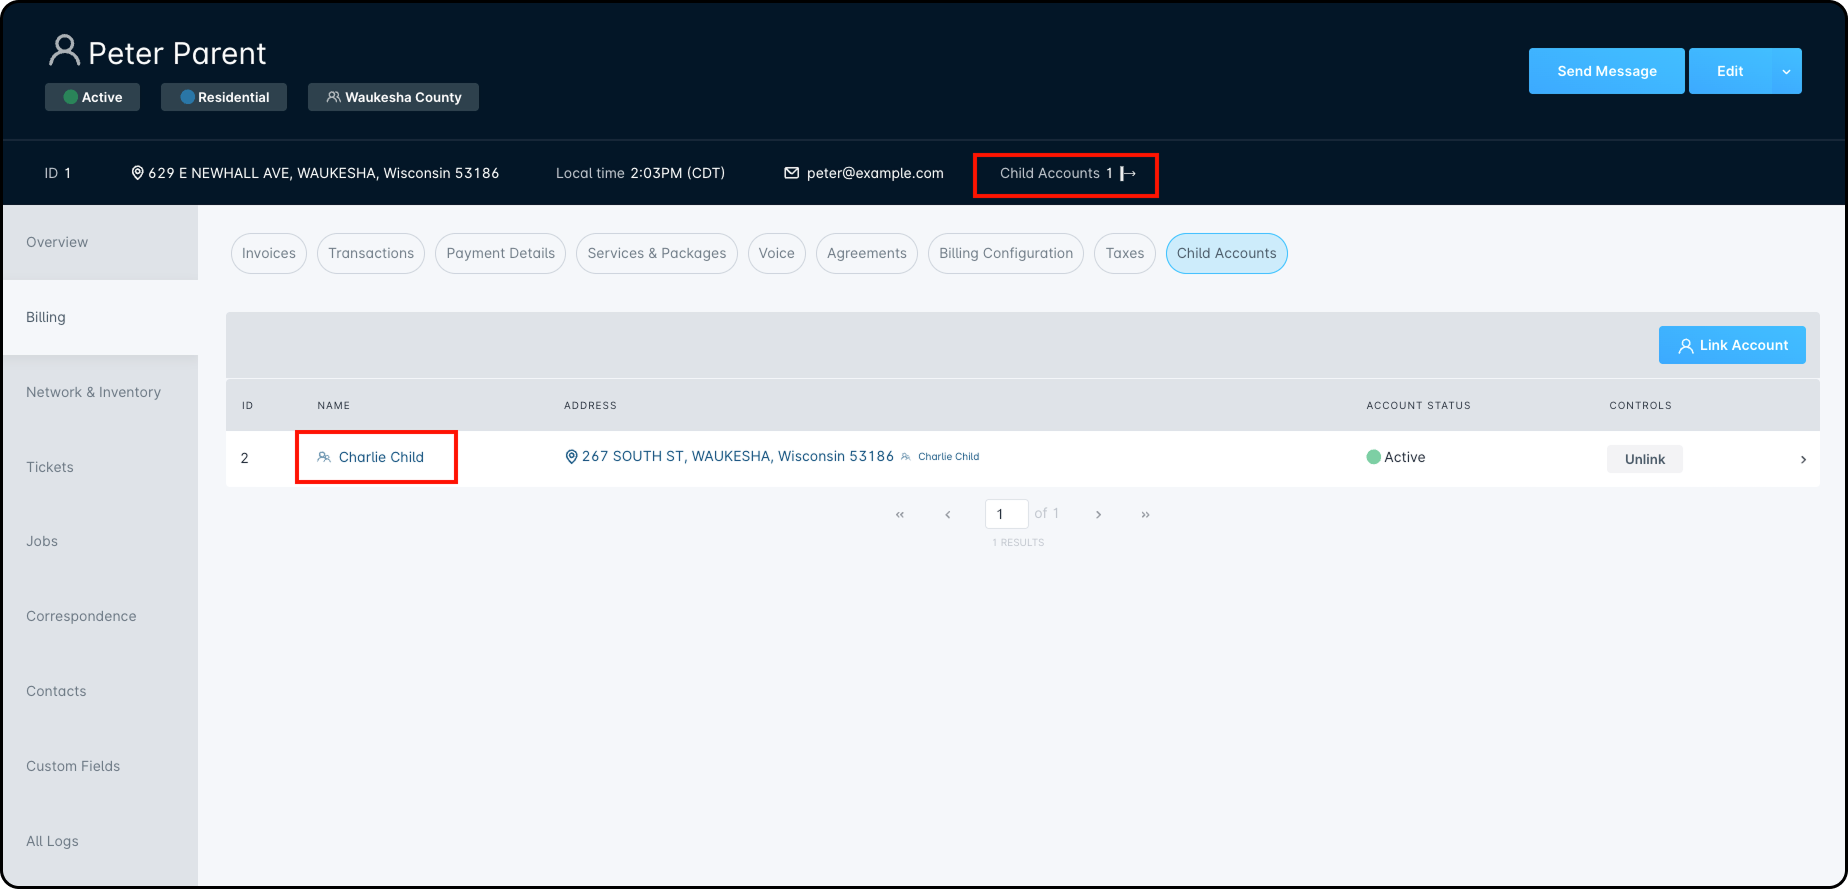
- Select the Child Accounts tab.
- Click Link Account.
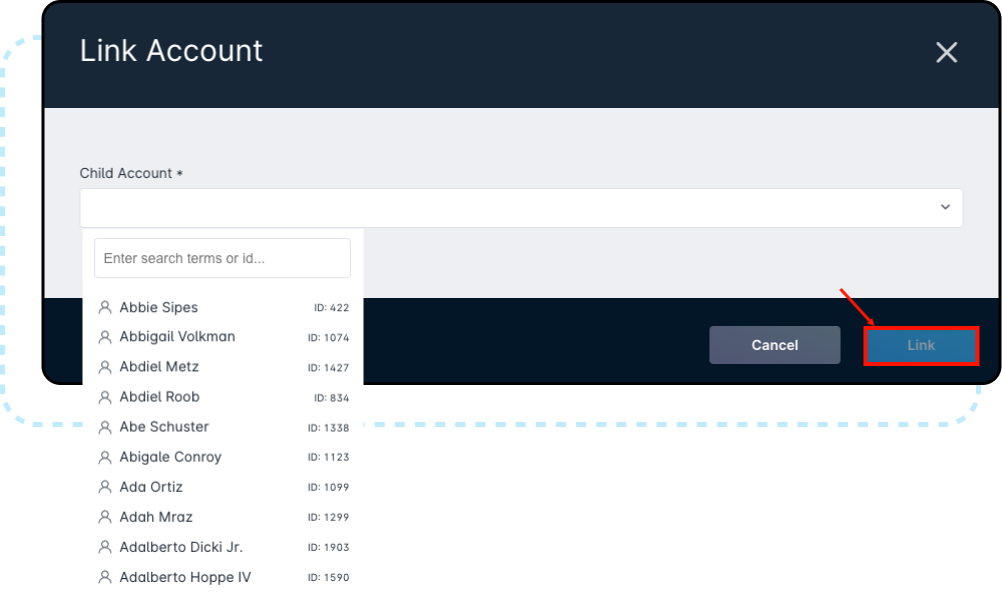
- In the Link Account window, choose the account you want to make the child account from the Child Account dropdown. Click Link.
- The linked child account will now appear under the Child Accounts tab. The total number of linked child accounts will also appear in the account header.After a child account is linked, you can click Child accounts: # in the header to open a sidebar with all linked child accounts.
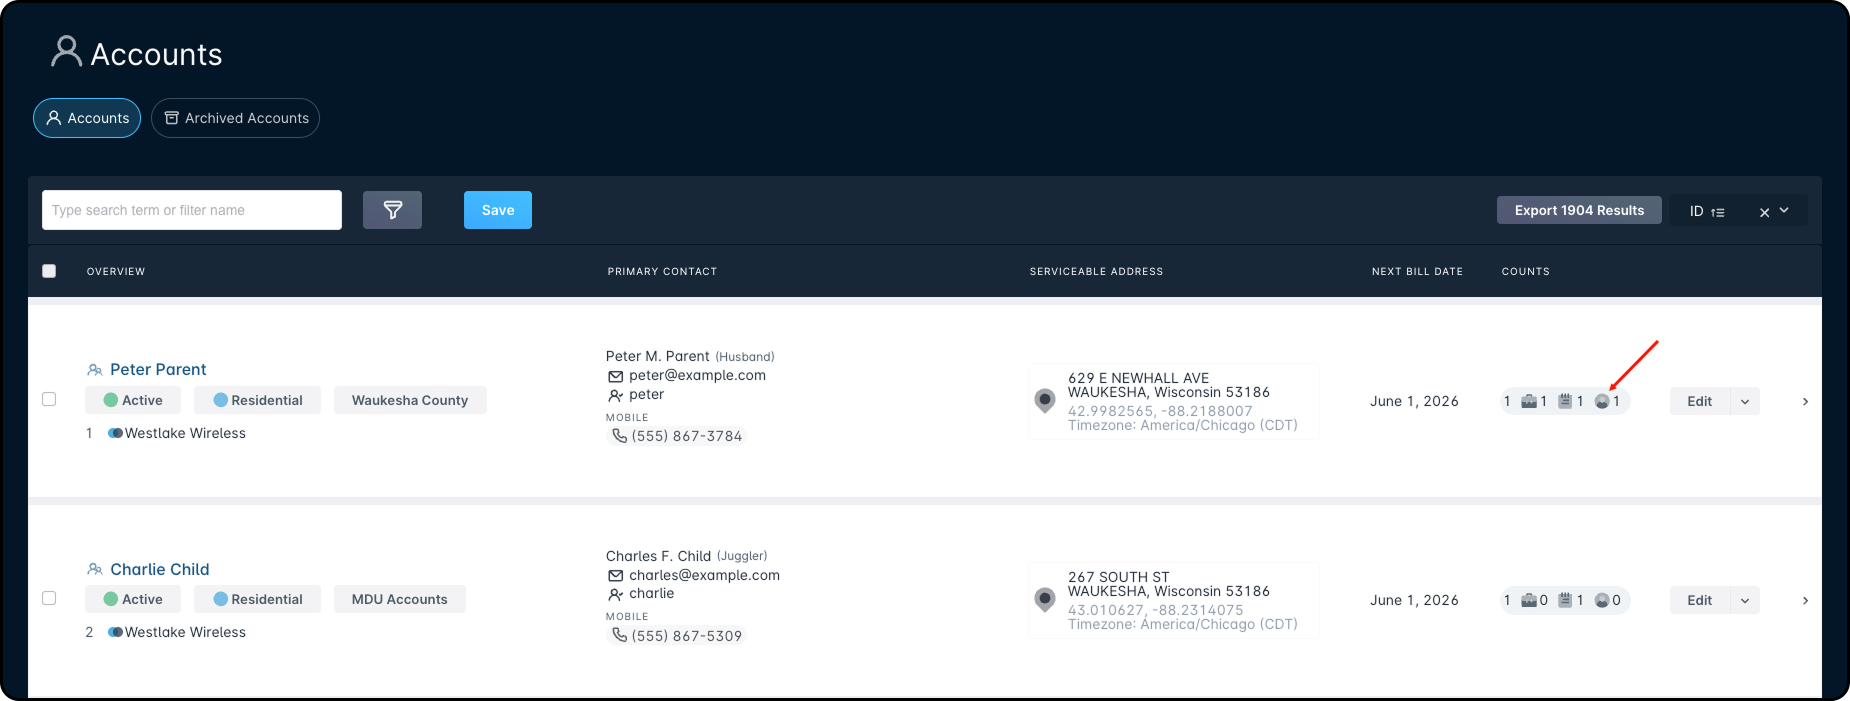
- You can also view the number of linked child accounts from the Accounts list. For example, once Adrien Leanon is linked as Osvaldo Heaney’s child account, Osvaldo Heaney will show a 1 next to the child accounts icon.
Method #2: From the Child Account
- Open the account you want to make the child account.
- Click the arrow next to Edit. Select Link Parent Account.
 You can also access Link Parent Account from the main Accounts list.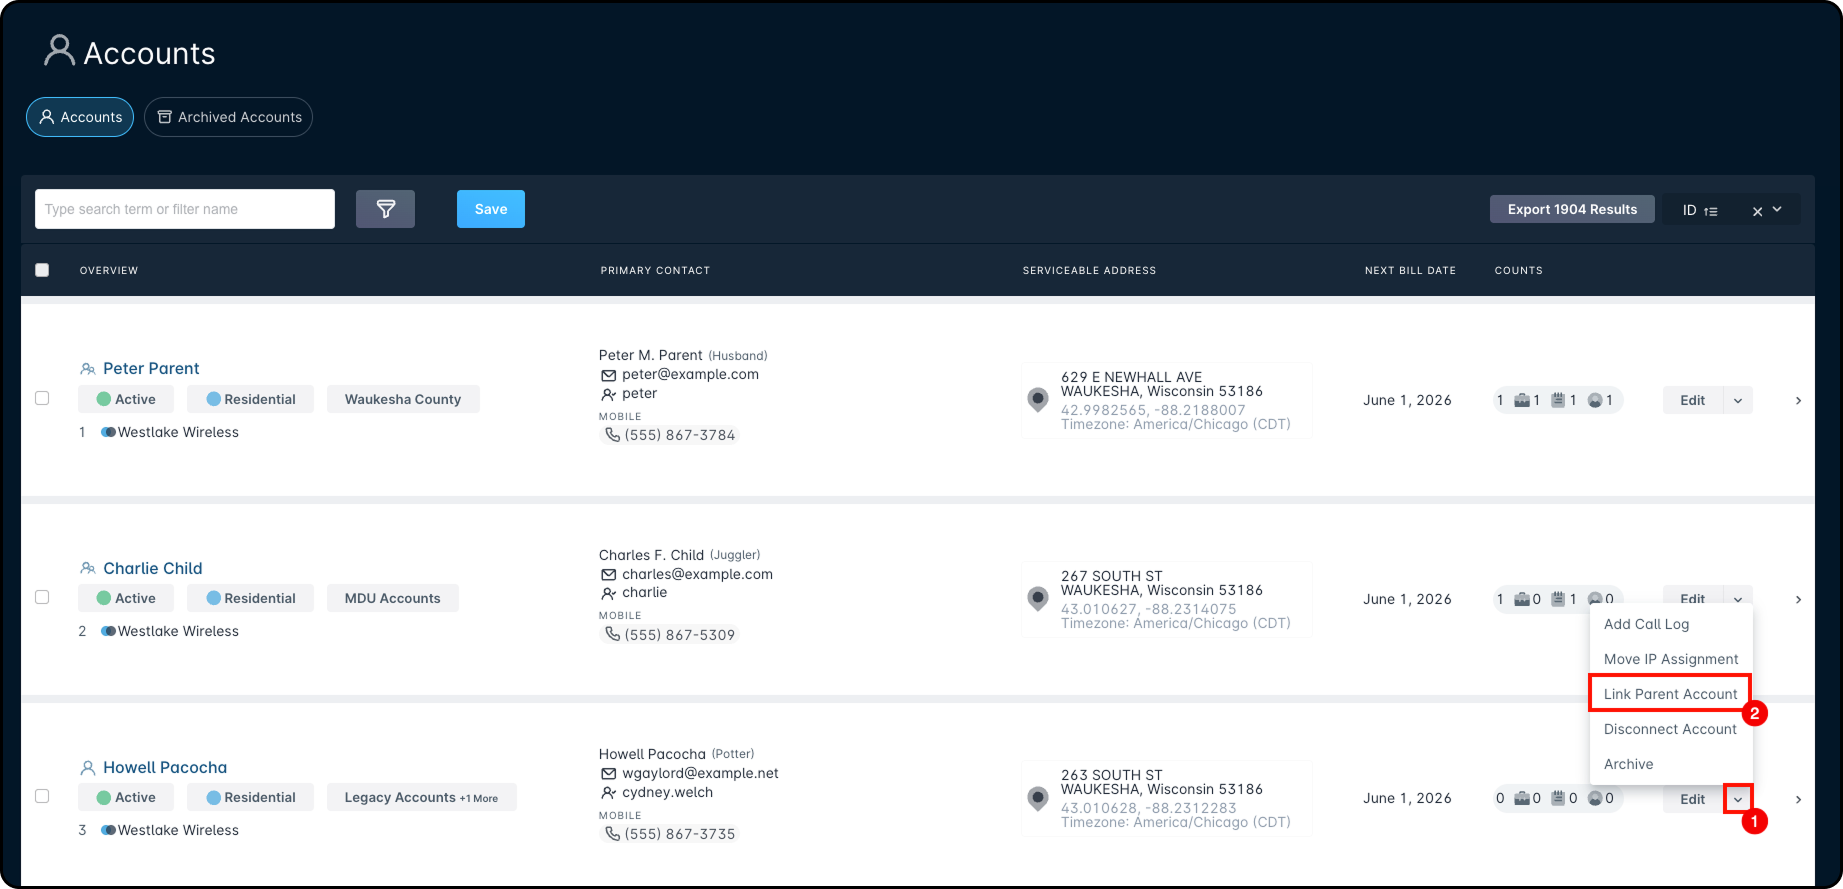
- In the Link Parent Account window, select the account you want to make the parent account. Click Link.
- The linked parent account will now appear in the top panel of the child account’s main page.

Invoices With Child Accounts
When an invoice is created for a child account, the balance is automatically linked to the next recurring invoice for the parent account.
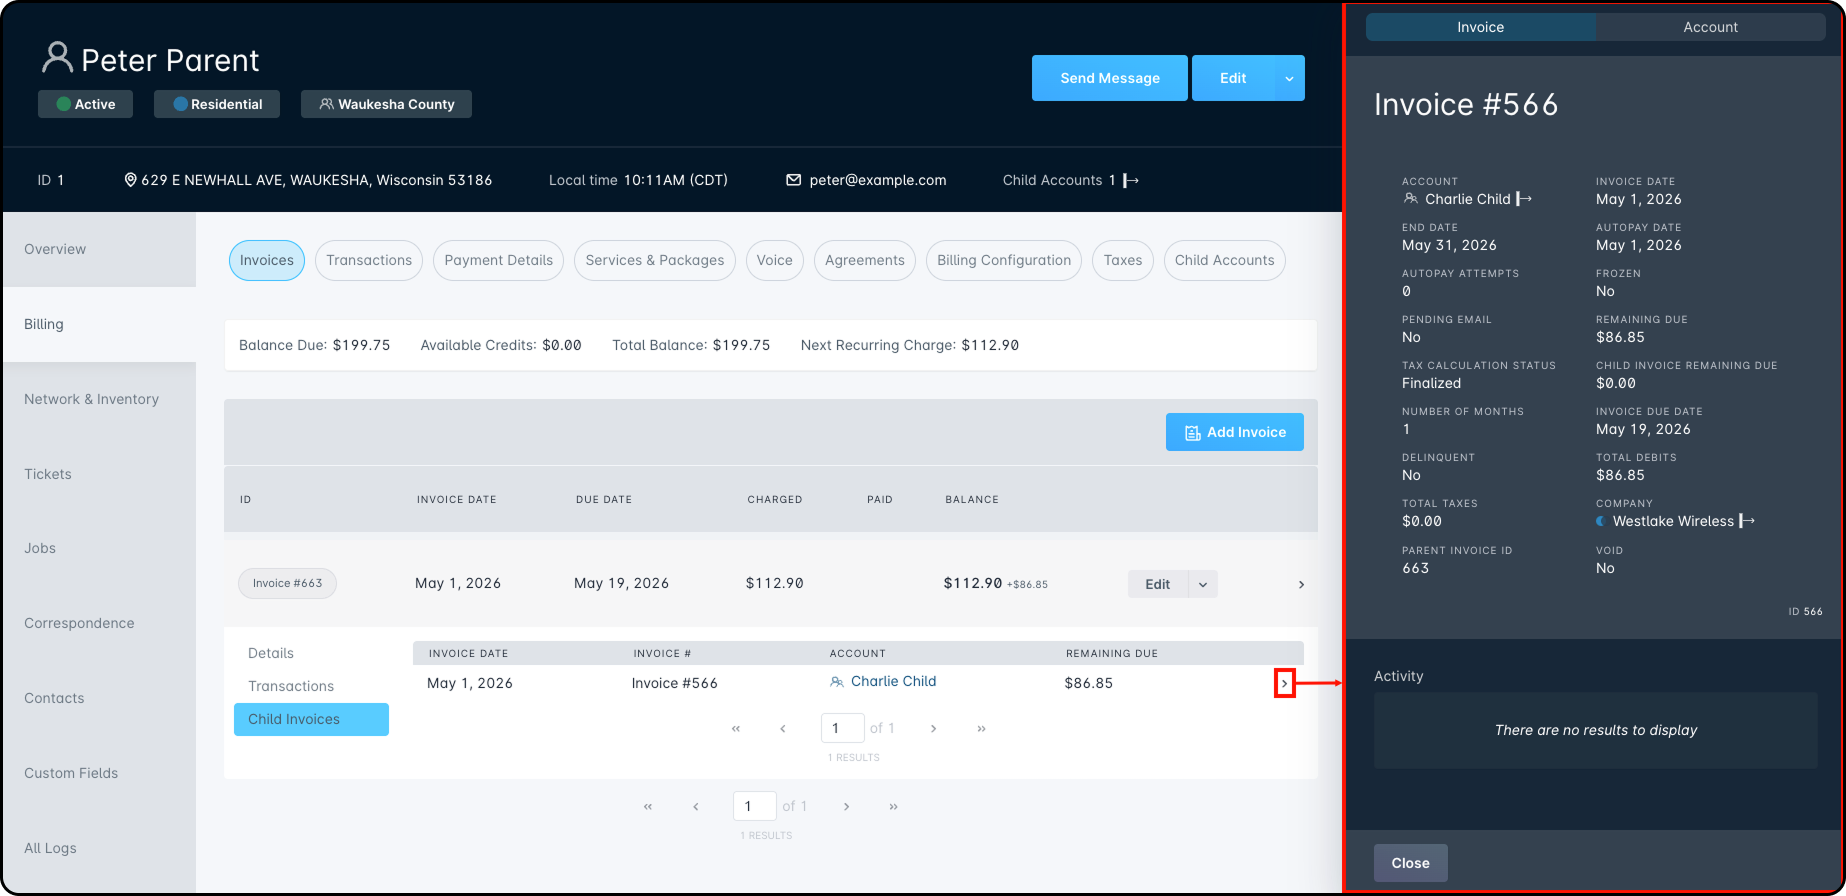
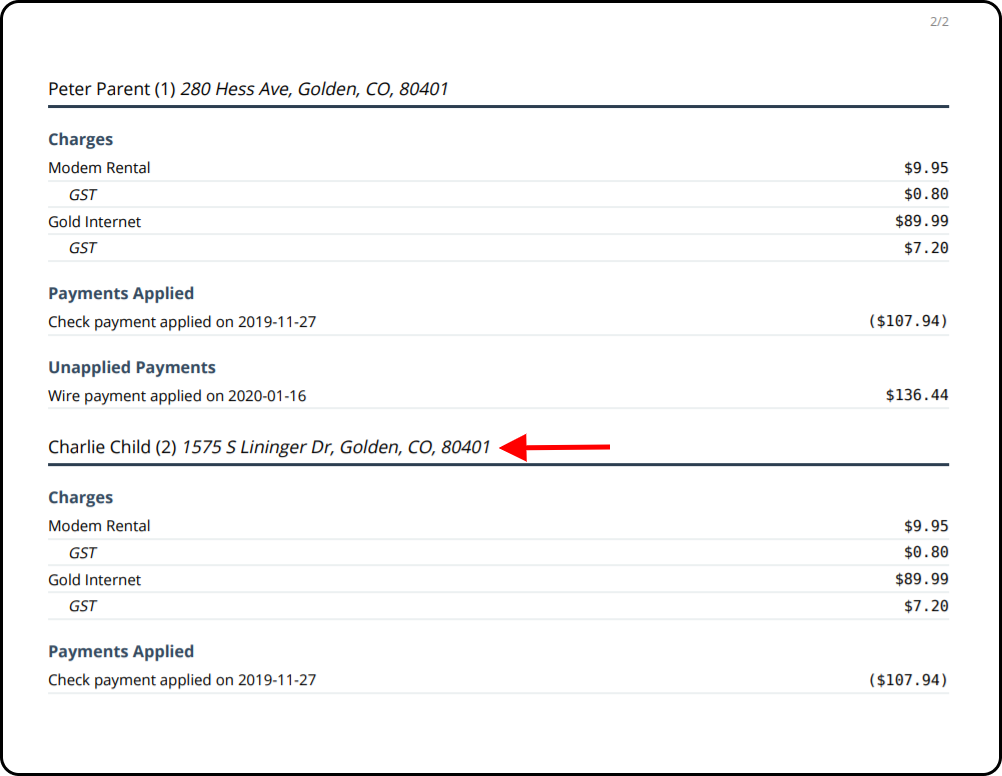
You can view the child account’s invoice from the parent account’s invoice page. It is also included in downloadable versions of the parent account’s invoice.
For example, if Peter Parent has Charlie Child linked as a child account:
- Each invoice created for Peter Parent will include Charlie Child’s invoice.
- Charlie Child’s invoice will appear under the Child Invoices tab.
- The Details tab will show the parent invoice details and the child invoice remaining due amount.
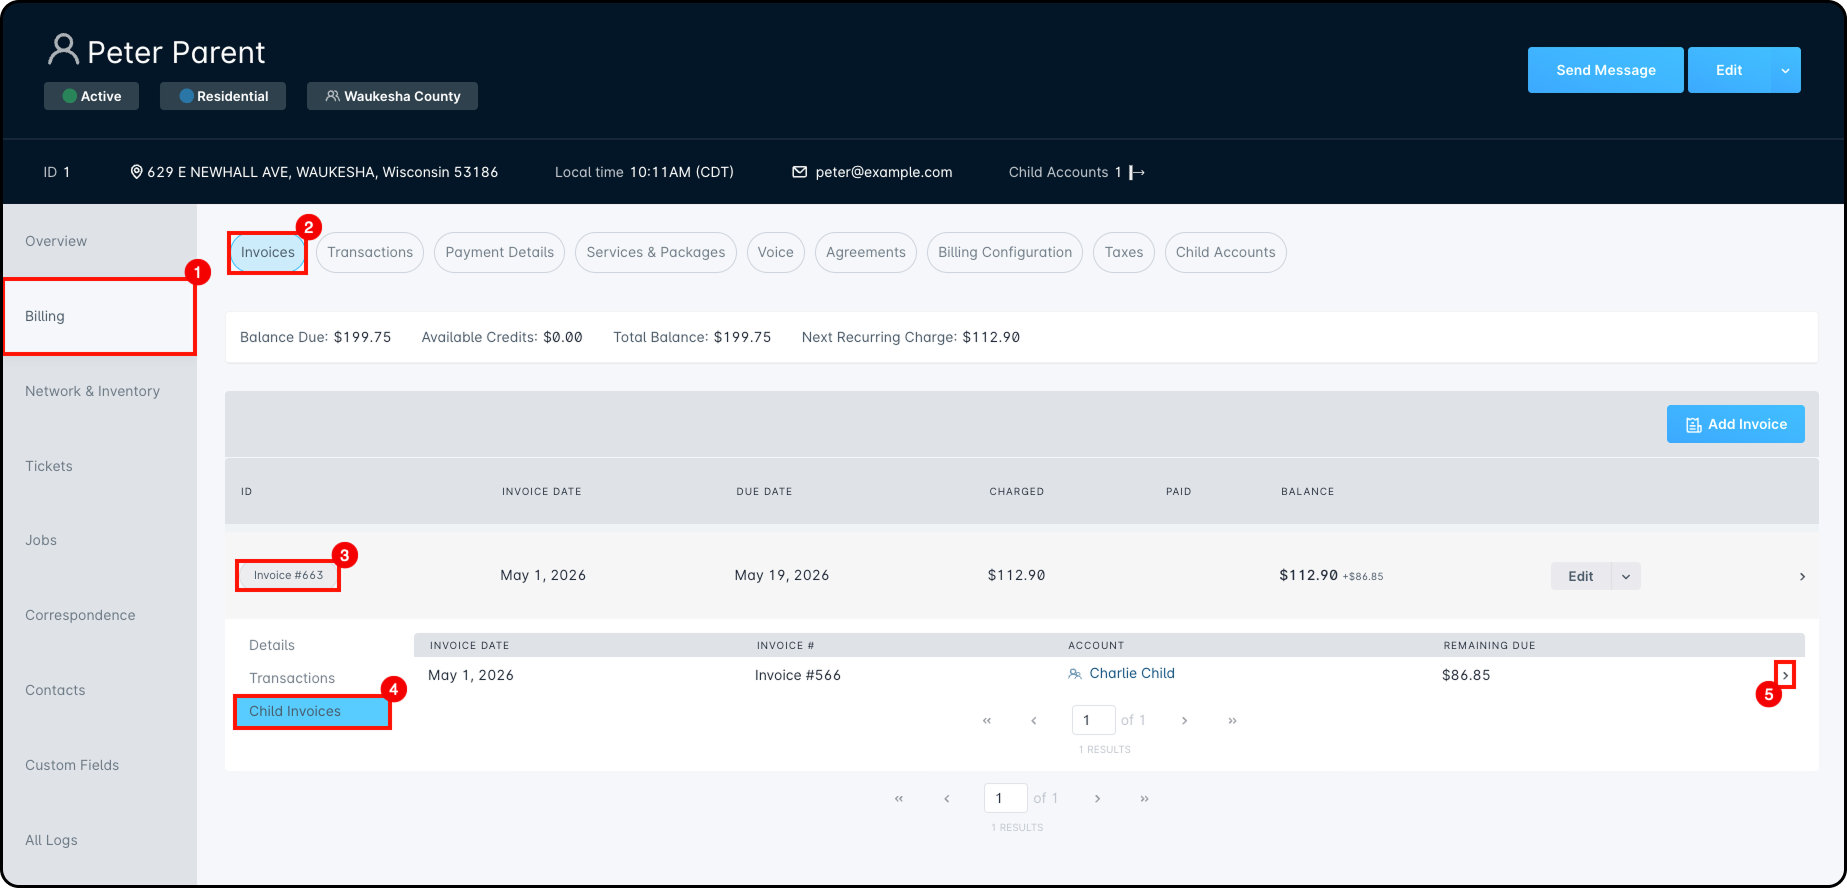
Click the arrow at the end of a row to open a sidebar with details for that child invoice.
In downloadable invoices and statements, the child account invoice appears at the bottom of the parent account invoice.
Manually Linking and Unlinking Invoices
Child invoices are usually linked to parent invoices automatically during billing. Manual linking or unlinking should only be used to fix an error.
From the child account:
- Go to Billing.
- Open the Invoices section.
- Find the linked invoice.
- Click the Edit menu.
- Select Unlink Parent Invoice to remove the child invoice from the parent invoice.
Transaction History and Child Accounts
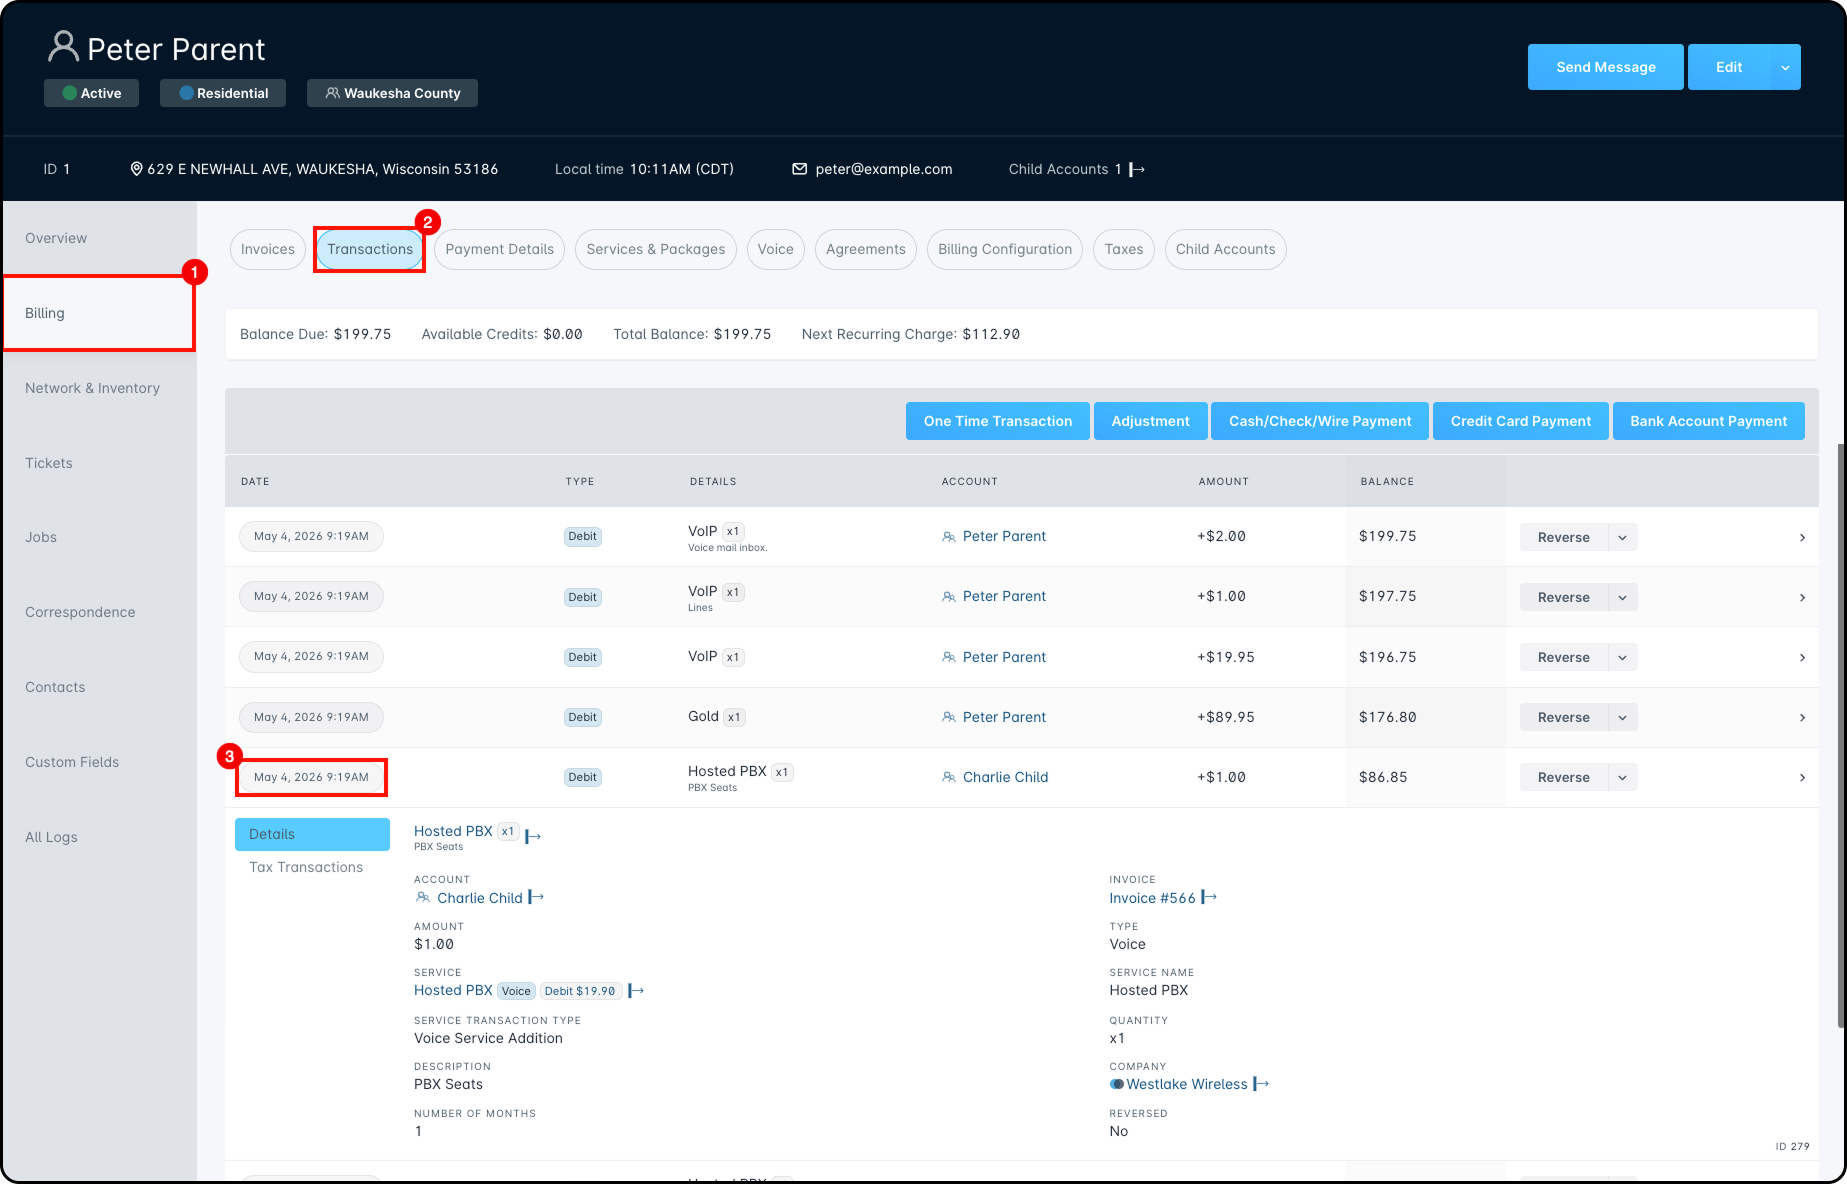
When a parent account has a linked child account, the child account’s transactions also appear in the parent account’s Transaction History tab.
These transactions still appear in the child account’s own transaction history.
To view more details about a transaction, click the date and timestamp in the Date column.
Billing Considerations
Account Delinquency
Child accounts follow their own delinquency cycle. Because of this, it is best to keep the parent and child accounts on the same billing cycle whenever possible.
If the billing cycles are not aligned, a child account may become delinquent before the parent account is billed for the child account’s balance.
Example
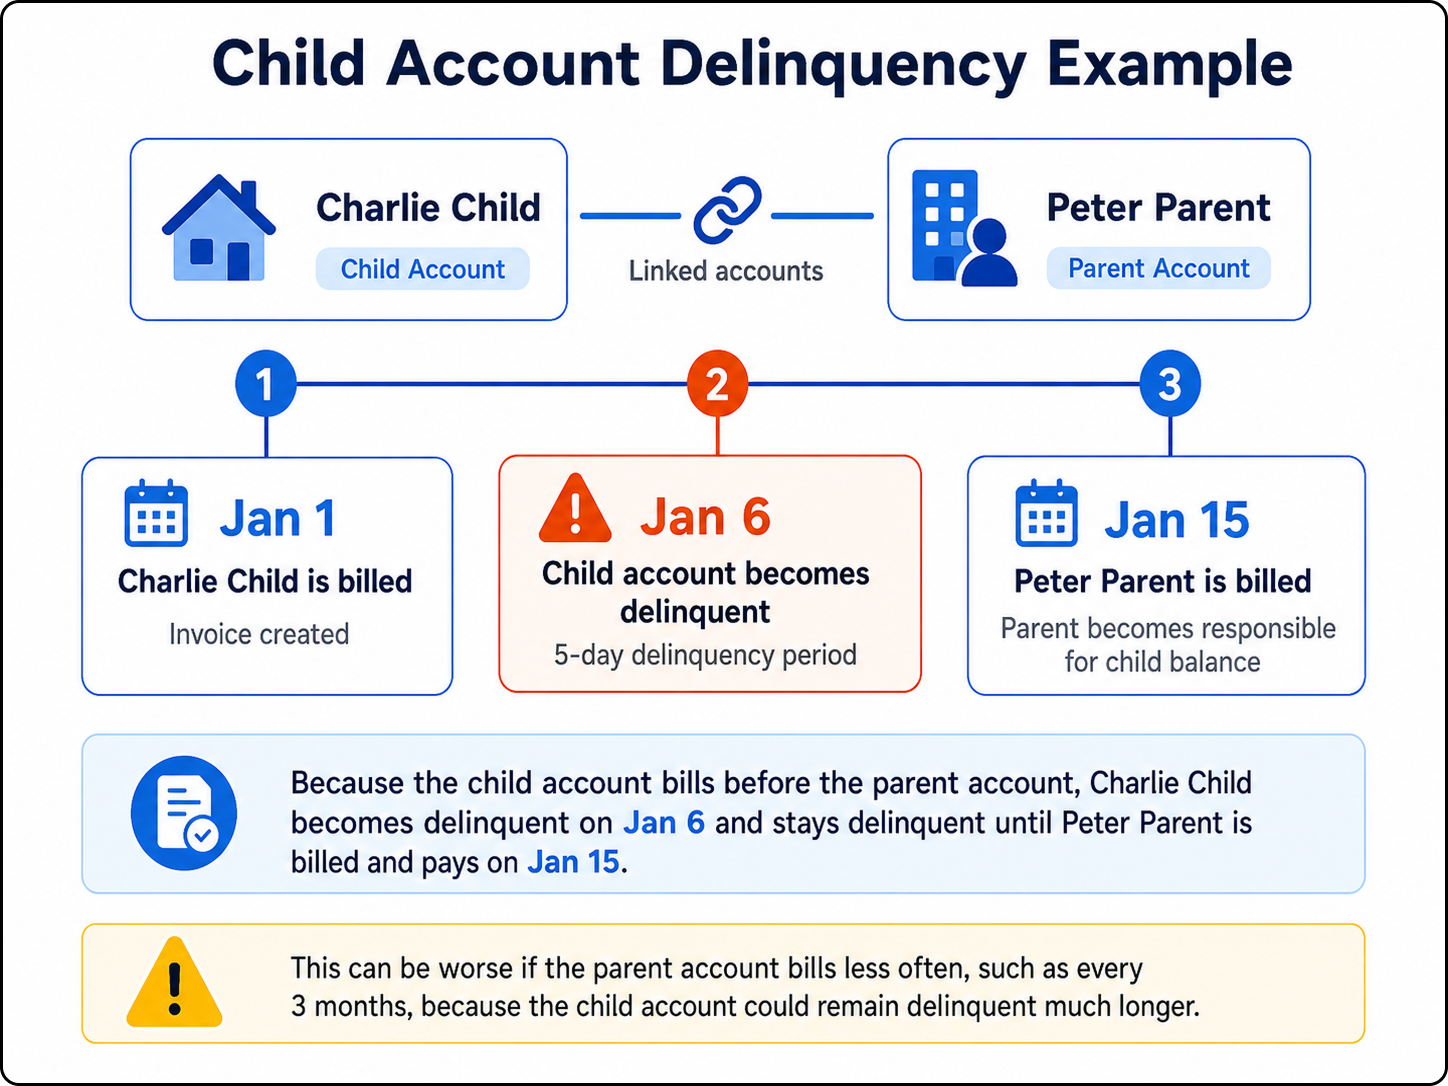
- Charlie Child is linked to Peter Parent.
- Charlie Child is billed on the 1st of the month.
- Peter Parent is billed on the 15th of the month.
- Charlie Child becomes delinquent after 5 days.
- Charlie Child’s invoice is created on the 1st, but Peter Parent is not billed for it until the 15th.
- Since the balance is unpaid, Charlie Child becomes delinquent on the 6th and stays delinquent until Peter Parent is billed and pays the invoice.
This issue can be worse if the parent account bills less often, such as every 3 months. In that case, the child account could stay delinquent for much longer.
To avoid this, keep child accounts on the same billing cycle as the parent account, or make sure the child account has a long enough delinquency period. In some cases, you may need to manually link a child invoice to the parent account’s most recent invoice and send the updated invoice to the parent account.
Late Fees
In Billing Settings, you can choose whether late fees apply to child account invoices.
When Apply Late Fees To Child Invoices is enabled, late fees are added to child account invoices.
When it is disabled, child account invoices linked to a parent invoice will not receive late fees.
Vacation Mode
When placing an account in vacation mode, keep in mind that child invoices will not move to the parent account if the parent account is not active.
If the parent account still needs to receive monthly invoices for a child account, use scheduled events to add and remove the parent account’s data service instead of placing the parent account in vacation mode.
How Payments Are Applied
When a payment is made on the parent account:
- The payment is first applied to the parent account’s outstanding balance.
- Any remaining amount is then applied to linked child account balances.
- Child account payments are applied in order by invoice ID, starting with the lowest invoice ID.
Example
Peter Parent makes a $100 payment and has no outstanding balance.
- Charlie Child’s invoice #1798 has a $75 balance.
- Gina Grandchild’s invoice #1831 has a $150 balance.
- The first $75 is applied to Charlie Child’s invoice because it has the lower invoice ID.
- The remaining $25 is applied to Gina Grandchild’s invoice.
Removing Child Accounts In Sonar
You can unlink a child account from a parent account in two ways:
- From the parent account
- From the child account
We’ll walk through both options below.
Method #1: From the Parent Account
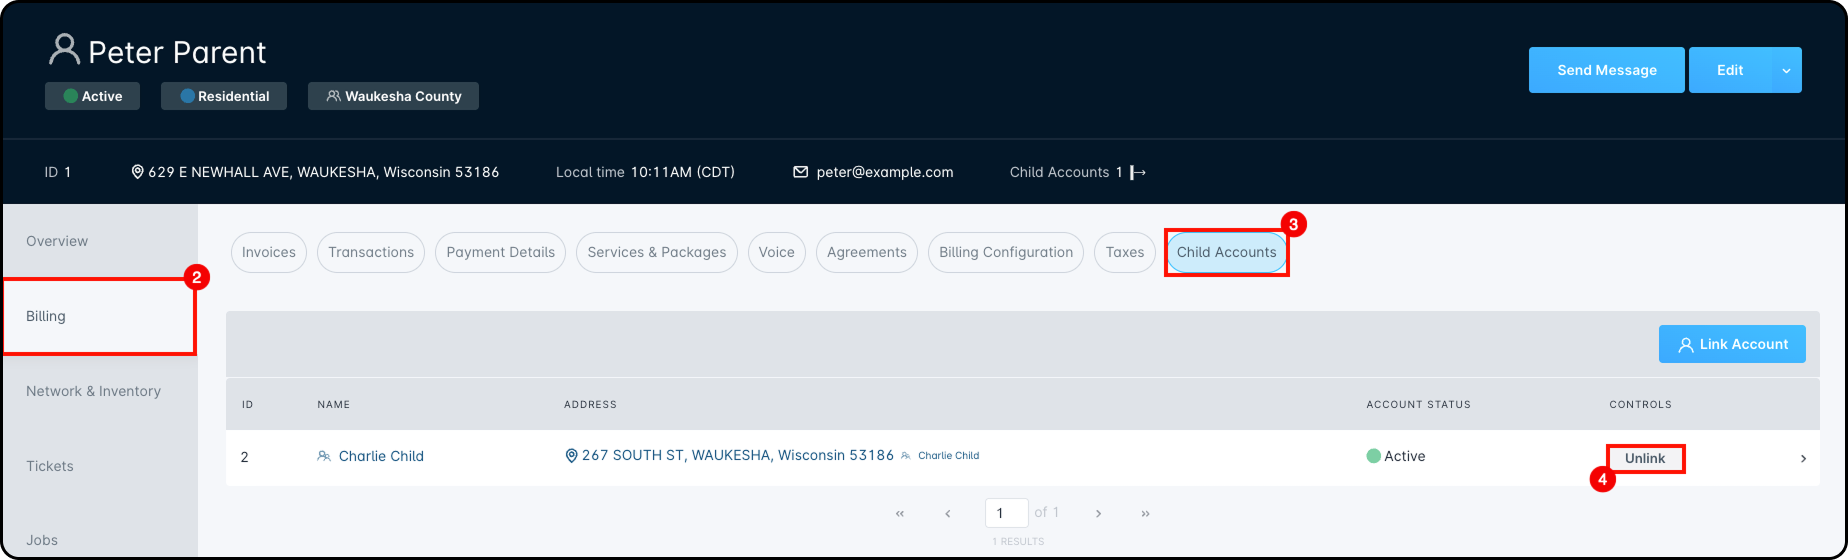
- Open the parent account.
- Select Billing from the left-side menu.
- Select the Child Accounts tab.
- Click Unlink next to the child account you want to remove.
- In the Unlink Account window, click Unlink to confirm.
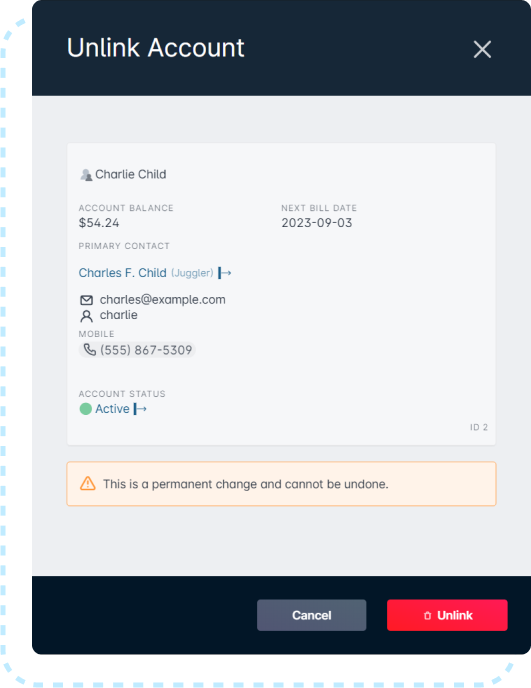
- The child account will be removed from the parent account. It will no longer appear under the Child Accounts tab, and the child account count will update on the Accounts list.
Method #2: From the Child Account
- Open the child account.
- Click the arrow next to Edit. Select Unlink Parent Account.
 You can also access Unlink Parent Account from the main Accounts list.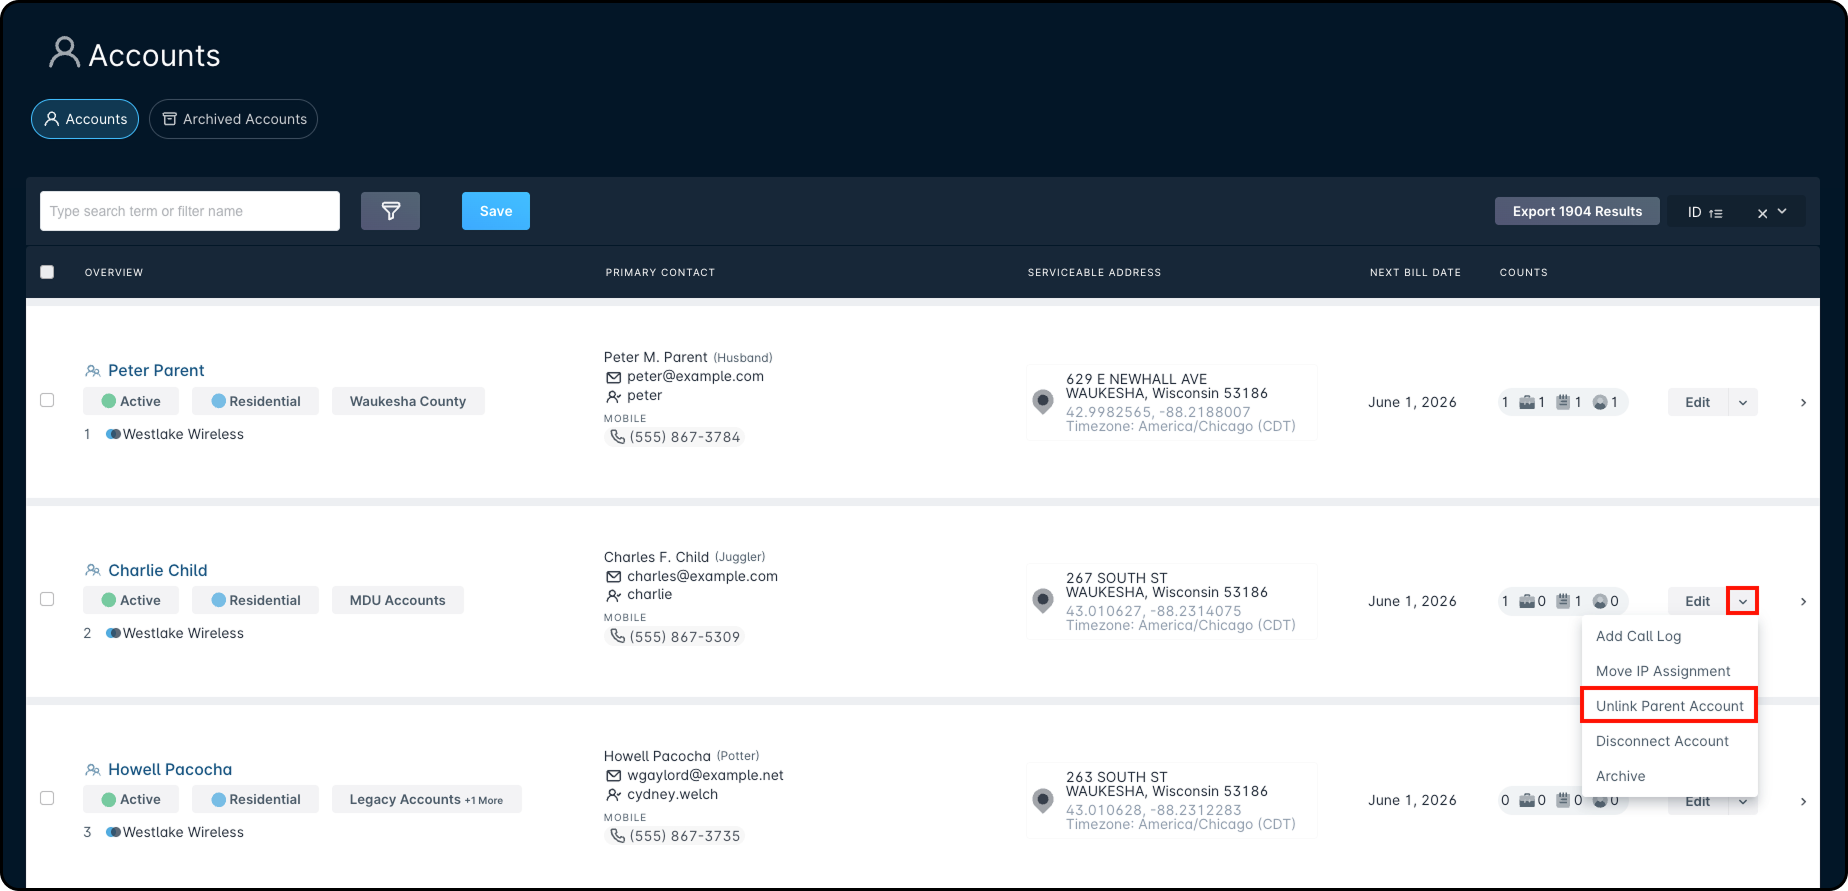
- In the Unlink Parent Account window, click Unlink to confirm.
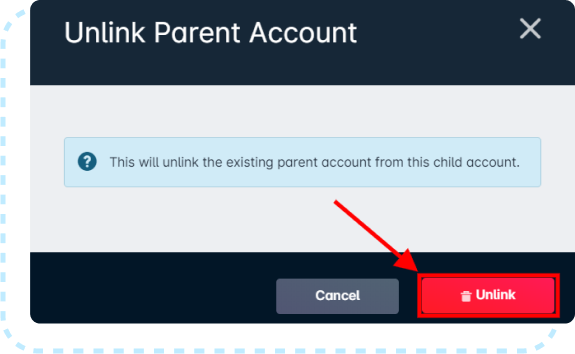
- The parent account will be removed from the child account. It will no longer appear in the child account’s top panel or sidebar.
Disconnecting Parent/Child Accounts
When disconnecting a parent account, the disconnect only applies to the parent account. The child account will not be disconnected automatically.
If both accounts need to be disconnected, make sure to schedule or complete the disconnect for the child account separately.