Table of Contents
Future Serviceable Addresses: Overview
 Updated
by Jennifer Trower
Updated
by Jennifer Trower
Read Time: 12 mins

Future Serviceable Addresses in Sonar let you set a future date for a new or existing subscriber to take over a Serviceable Address that’s currently assigned to someone else. This makes it possible to schedule a job on the subscriber’s account before the Serviceable Address is officially assigned to that account.
Permissions
Before getting started with the feature, your user roles will need to be adjusted to account for the permissions required to use the Future Serviceable Addresses feature.
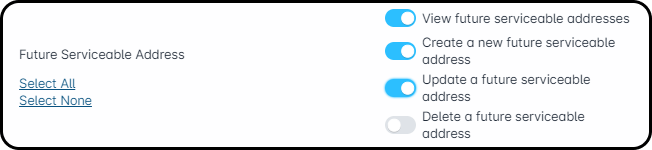
Permission Details
2. Create a new future serviceable address: allows you to create new future serviceable addresses.
3. Update a future serviceable address: allows you to update any or all future serviceable addresses.
4. Delete a future serviceable address: allows you to delete any or all future serviceable addresses.
Creating a Future Serviceable Address
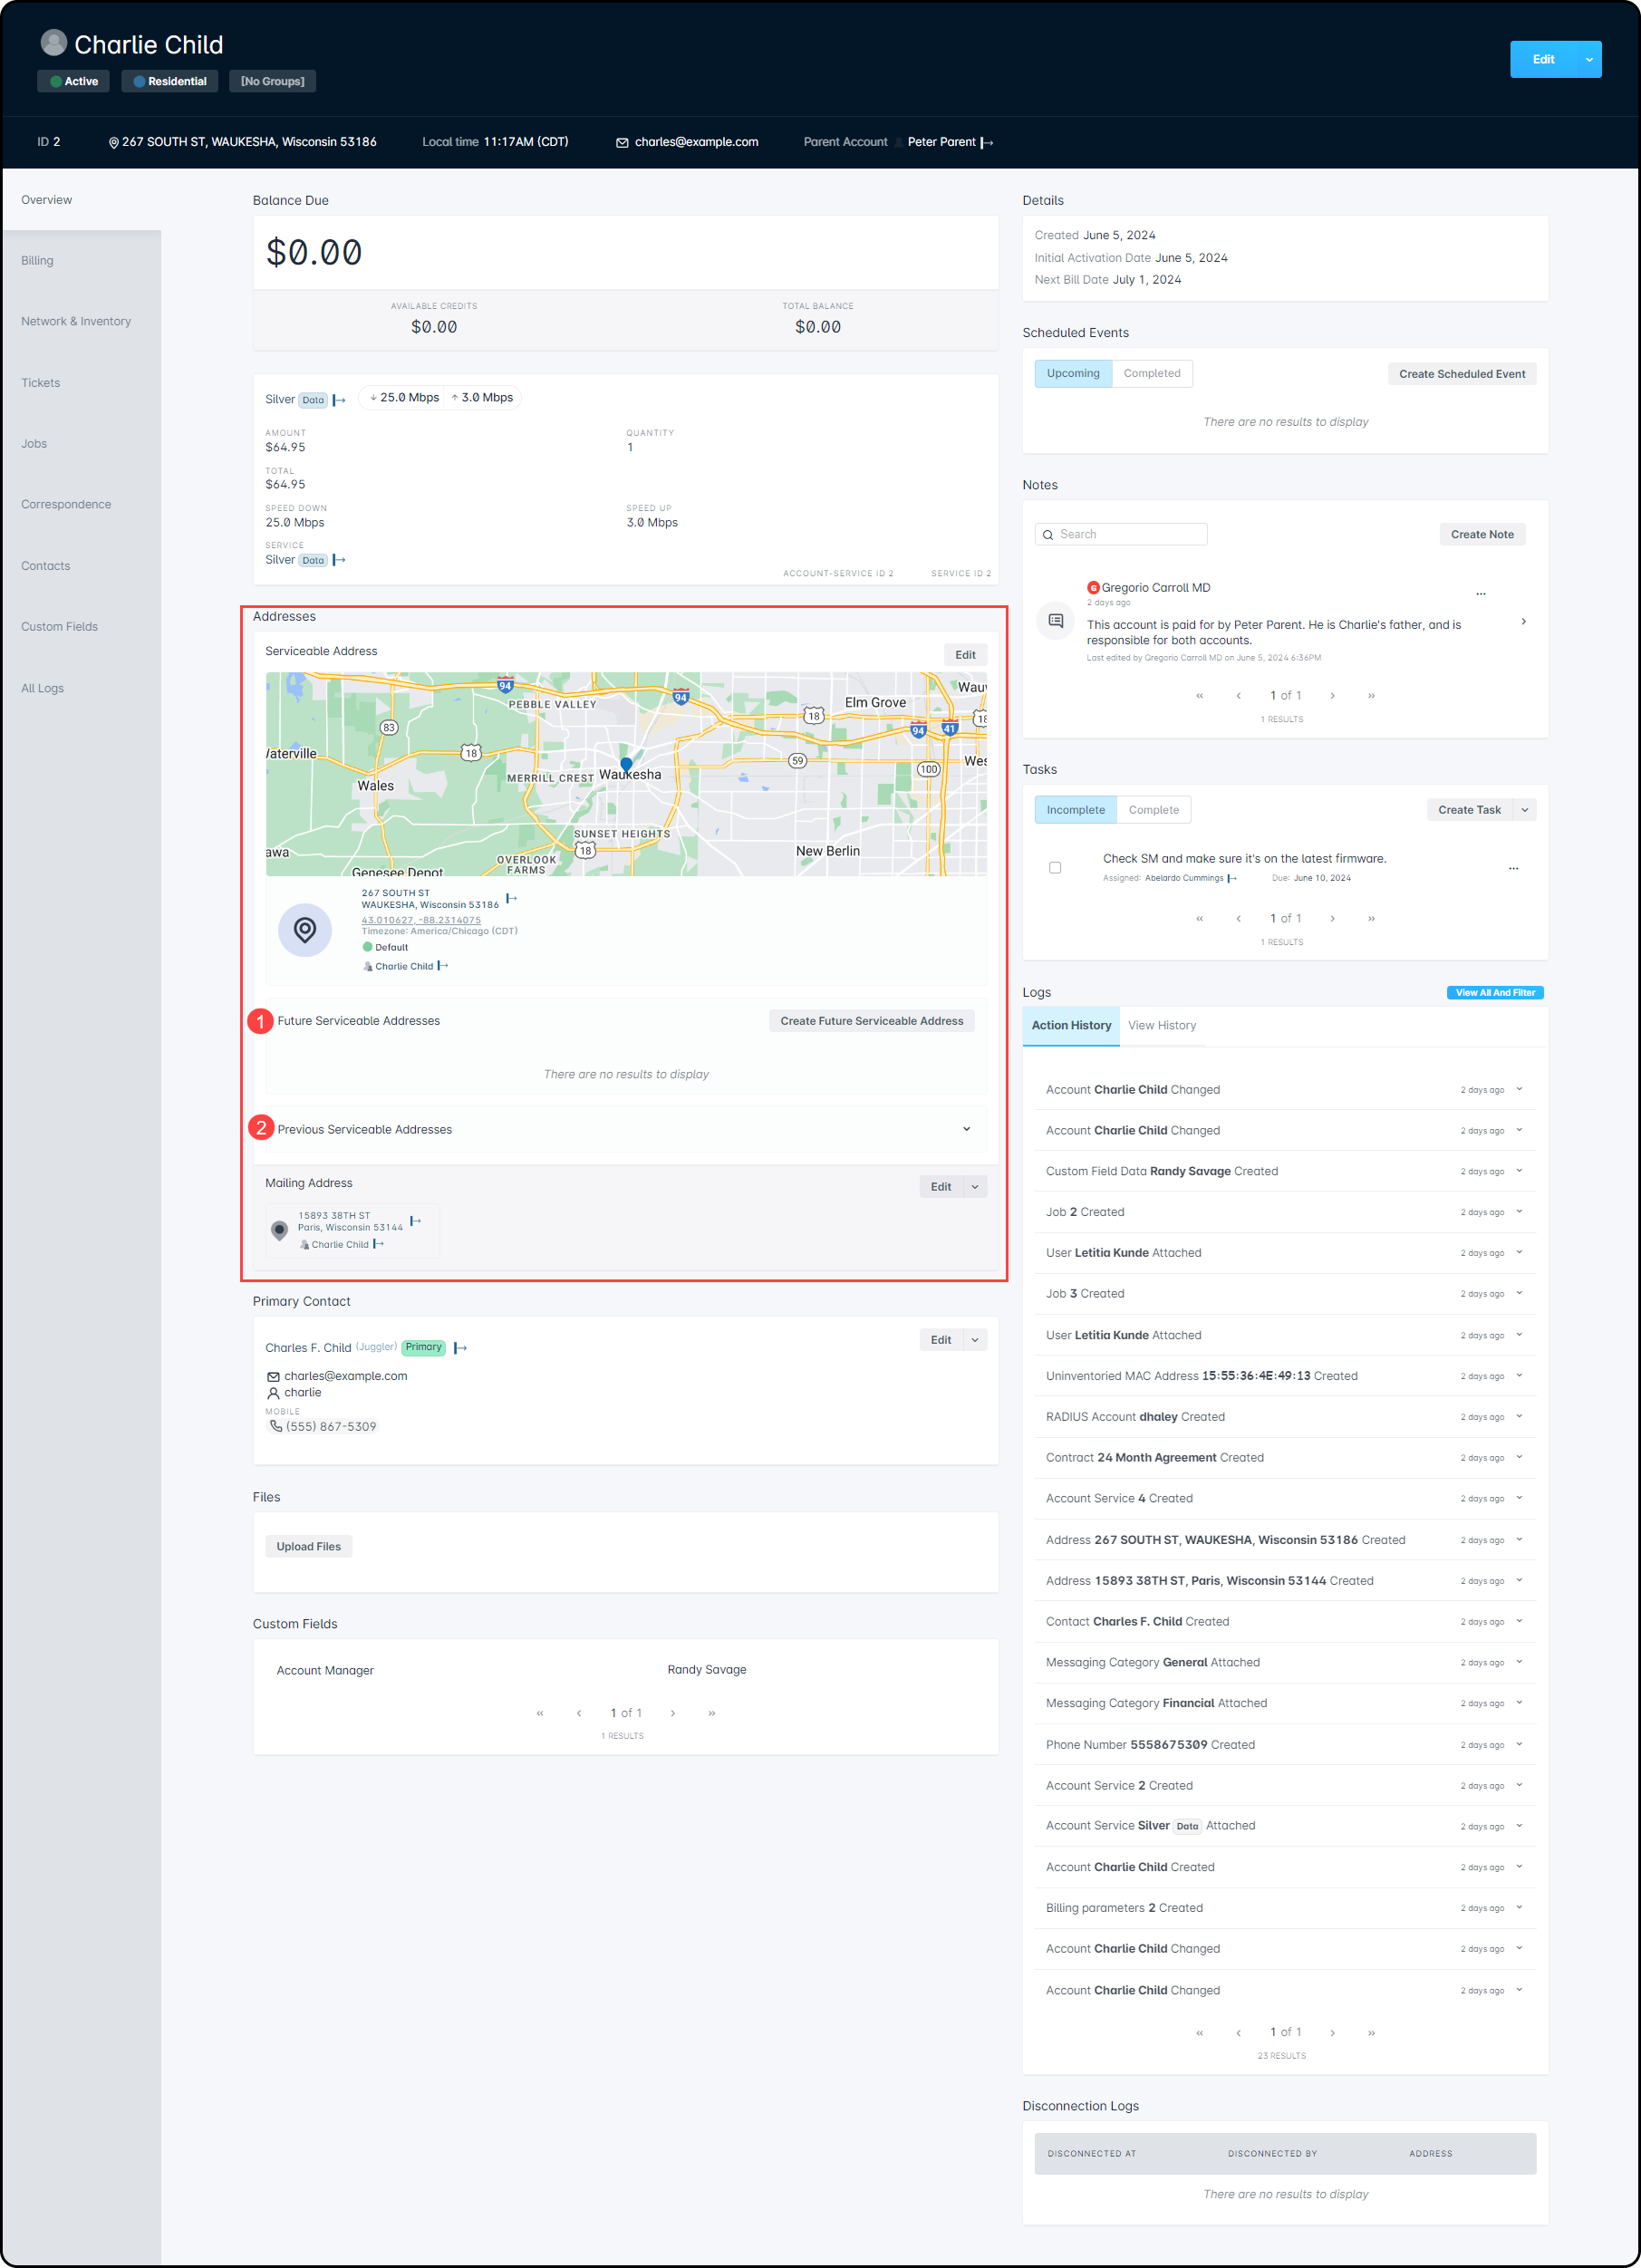
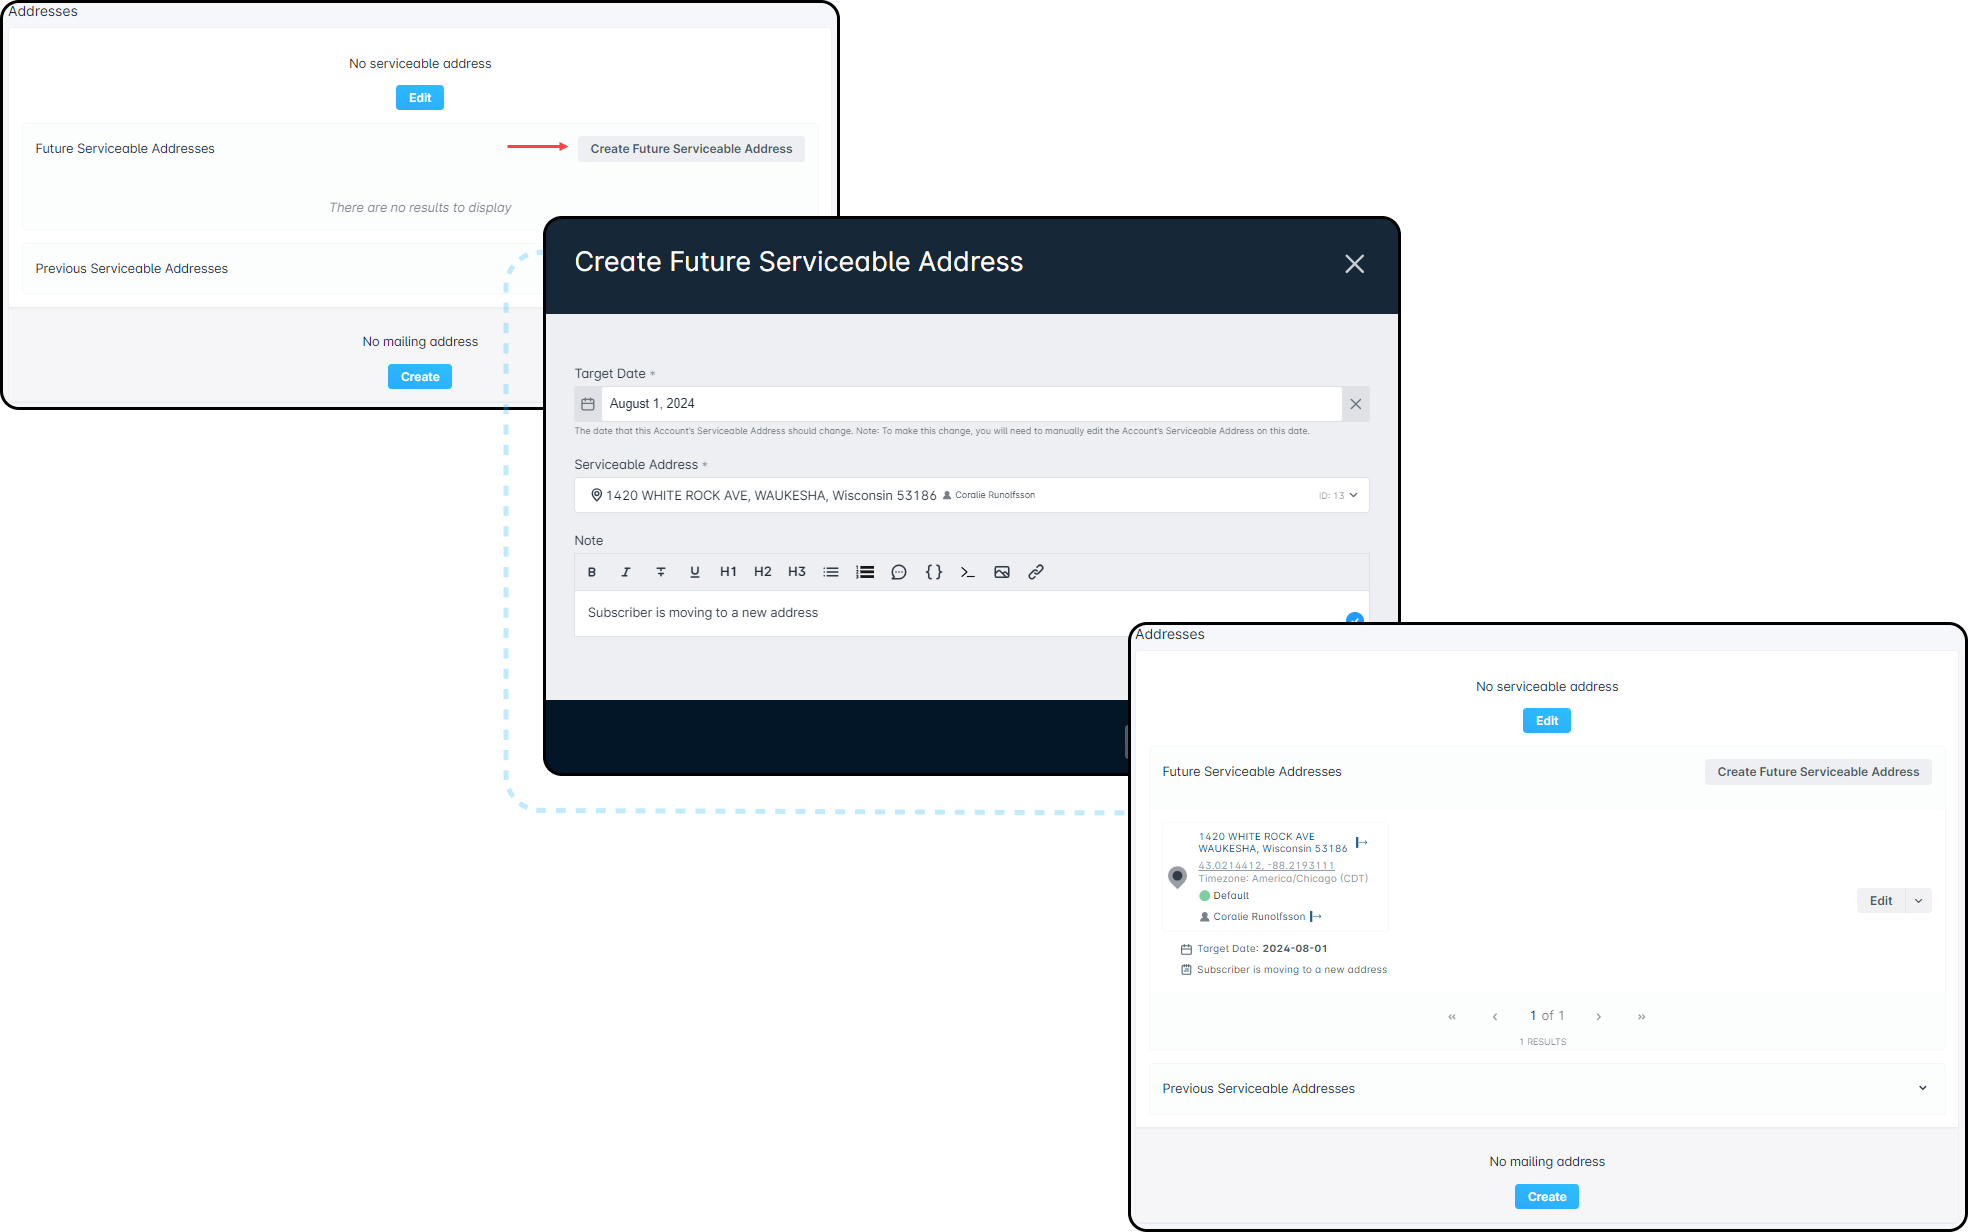
To create a Future Serviceable Address, open the account you’re working on. On the Account Overview page, find the Addresses section and click Create Future Serviceable Address.
The Create Future Serviceable Address window will open. Fill out the fields below, add notes if needed, then click Create.
- Target Date: The date the selected Serviceable Address will be assigned to the account.
- Serviceable Address: An address not currently tied to this subscriber (it may be assigned to another active account in Sonar).
- Notes (optional): Helpful for explaining why the Future Serviceable Address was created.After the Future Serviceable Address is applied to the account, the notes are automatically deleted and the address is removed from the Future Serviceable Addresses list on the Account Overview.

After you create the Future Serviceable Address, you can see it in the Addresses section on the subscriber’s account overview page.
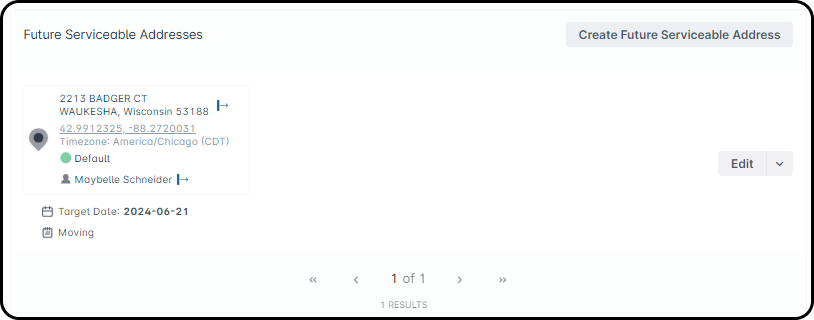
As shown in the image above, the Future Serviceable Address displays the account currently assigned to that address, the target date, and any notes you added.
If you need to make changes, click Edit. This opens the Edit Future Serviceable Address window, where you can choose a new target date and update the notes.
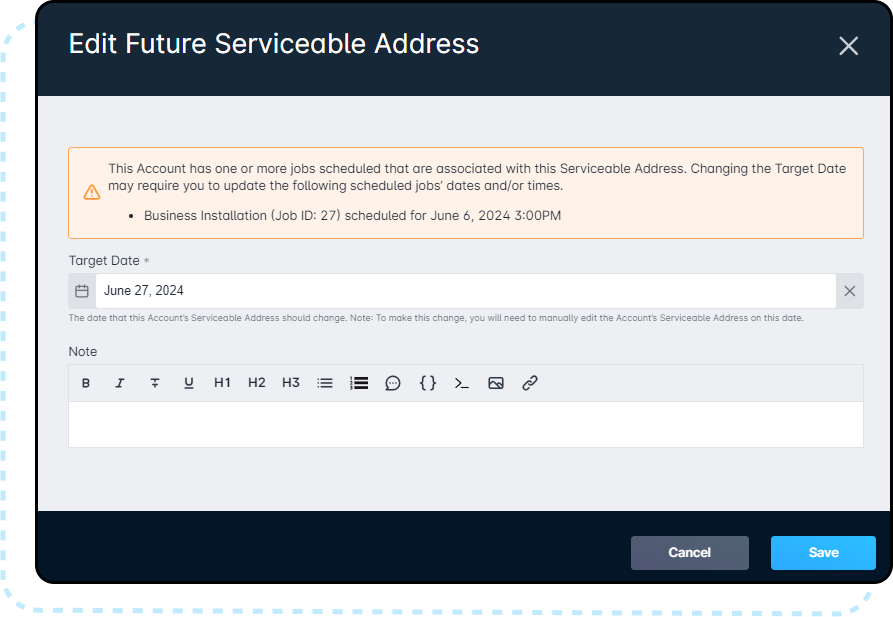
To change the selected Serviceable Address, you’ll need to delete the current Future Serviceable Address first. Click the drop-down arrow and choose Delete, then create a new Future Serviceable Address with the correct address.
On the target date, the Target Date field turns red and a banner appears to remind you it’s time for the Future Serviceable Address to become the account’s current Service Address.
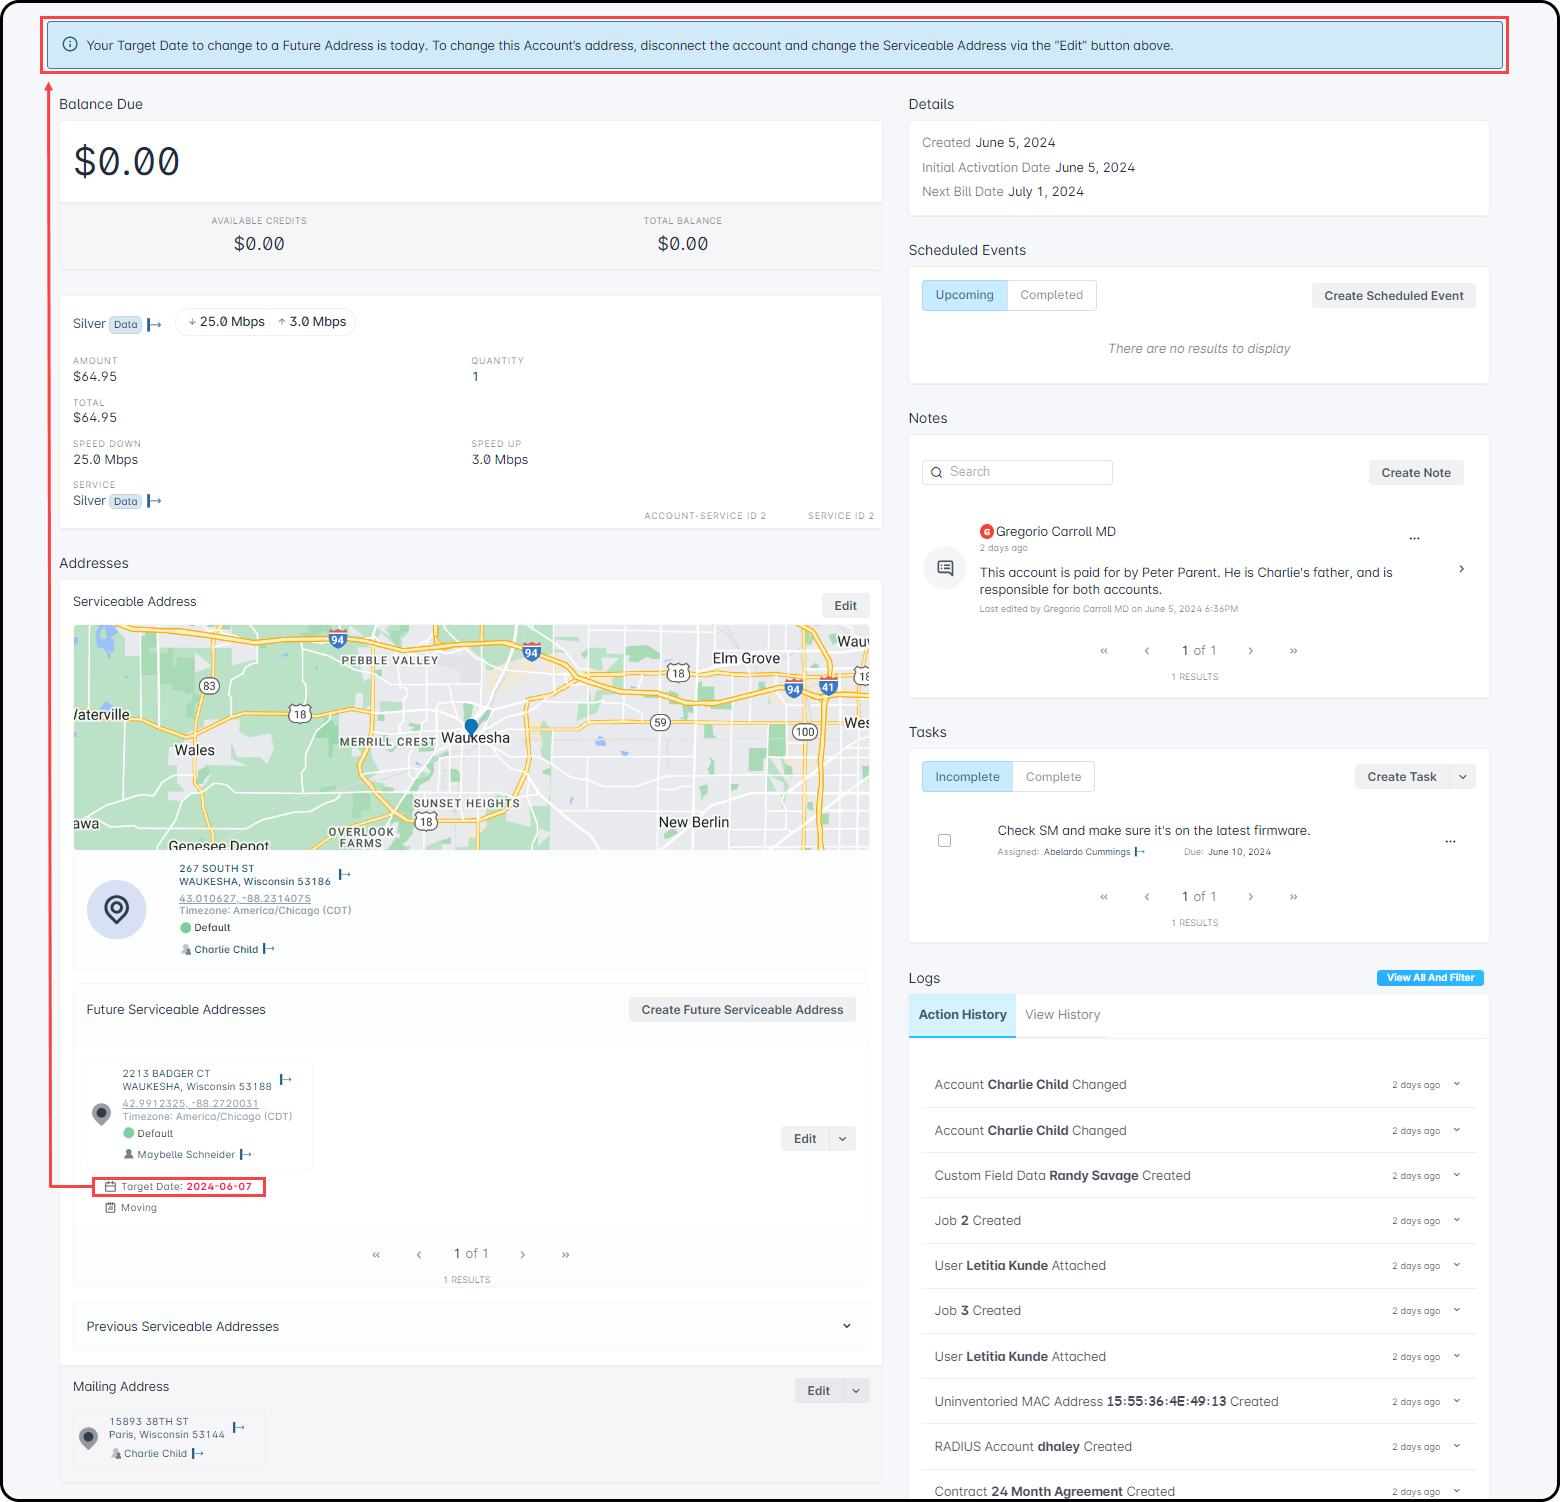

Once the Future Serviceable Address is applied to the account, it’s automatically removed from the Future Serviceable Addresses list on the Account Overview. If it isn’t applied, it stays listed—with the target date in red and the banner message—until it’s either applied or deleted.
Serviceable Addresses Overview
To view the Future Serviceable Address table, navigate to Location Tools → Future Serviceable Addresses.
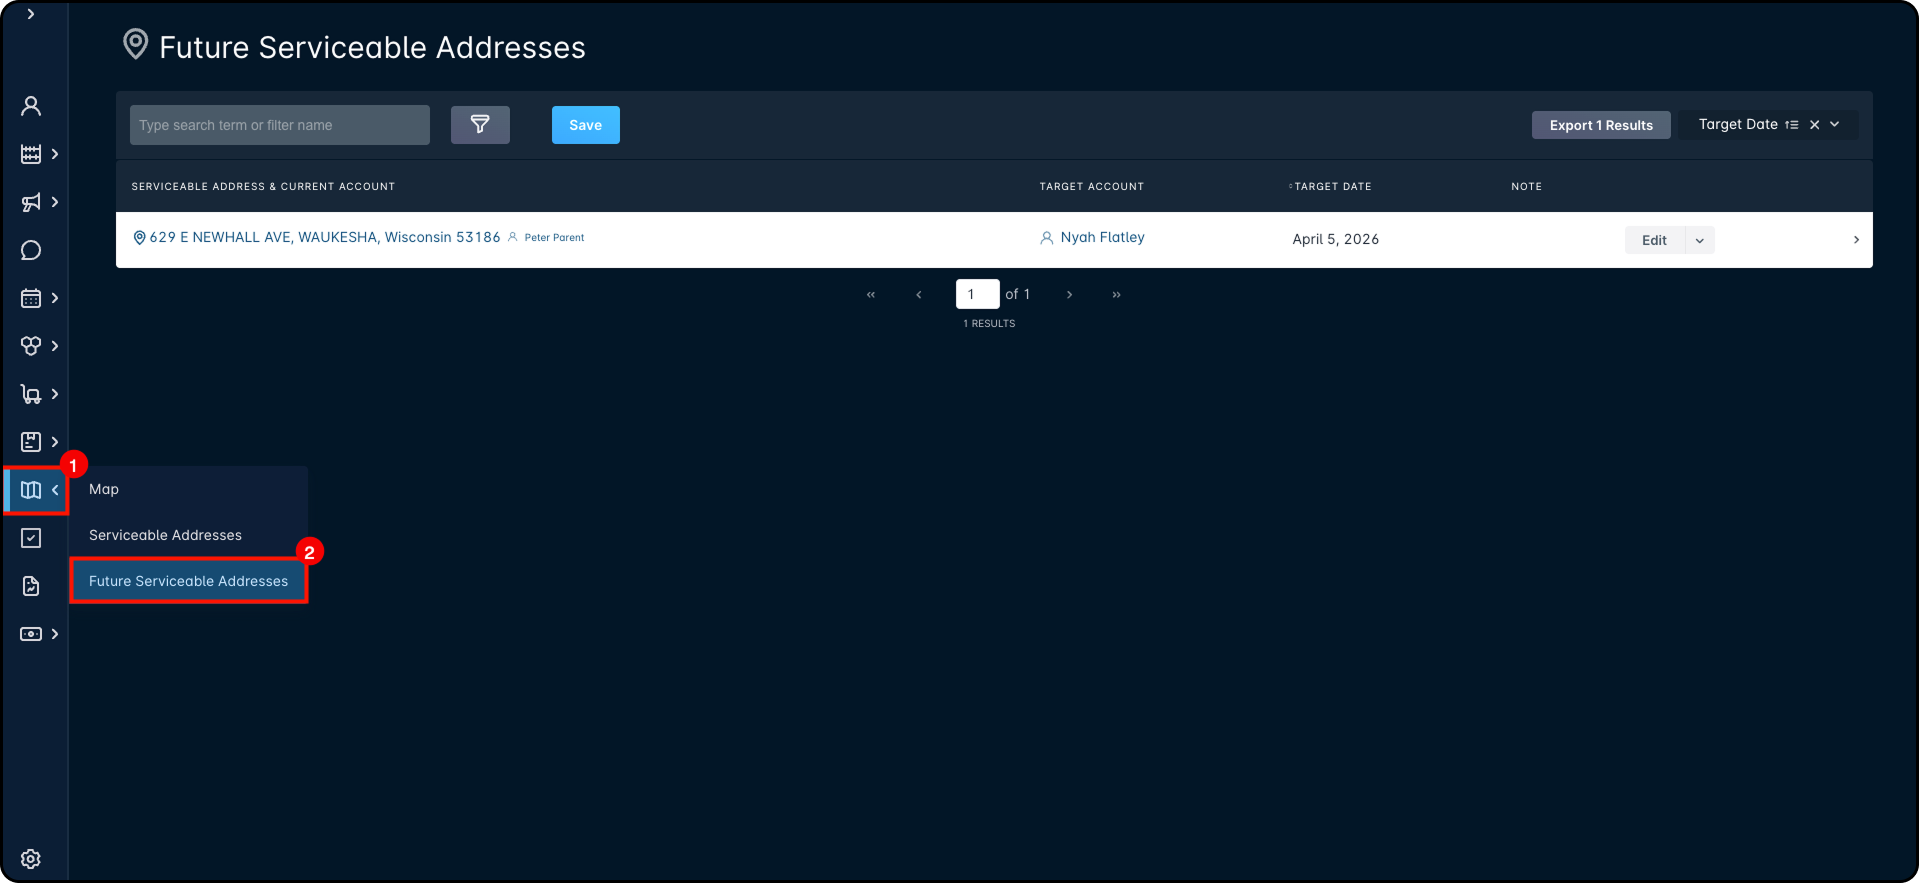
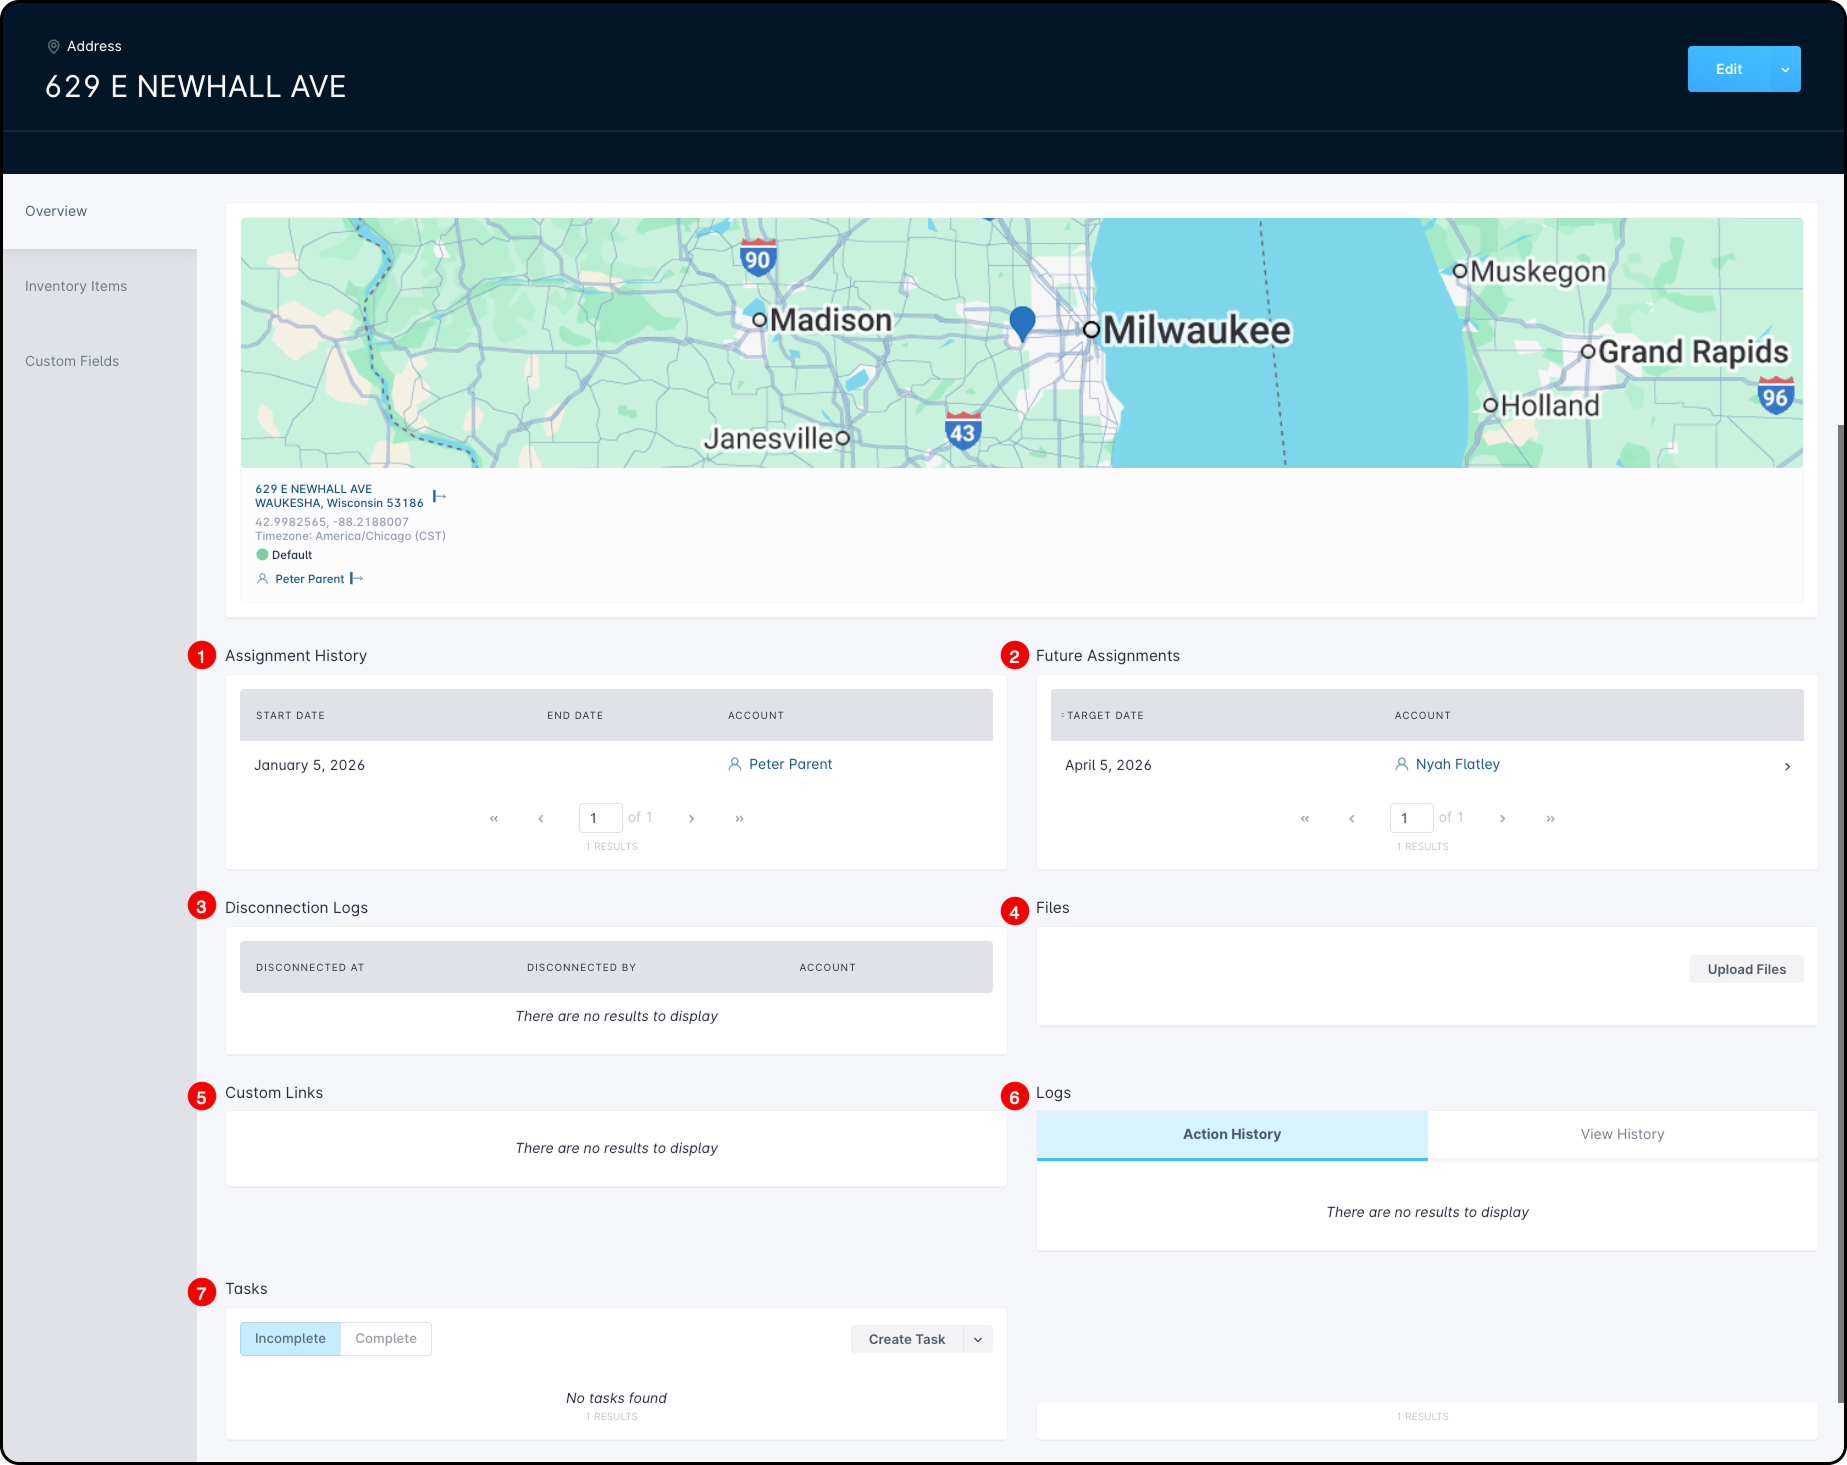
Here, you can view and track all Future Serviceable Addresses in your instance. They’re listed by target date, and you can open an account by clicking its name in the Target Account column.
Creating and Scheduling a Job
You can create a job for an account from three places in Sonar: Account, Scheduling, or Tickets.
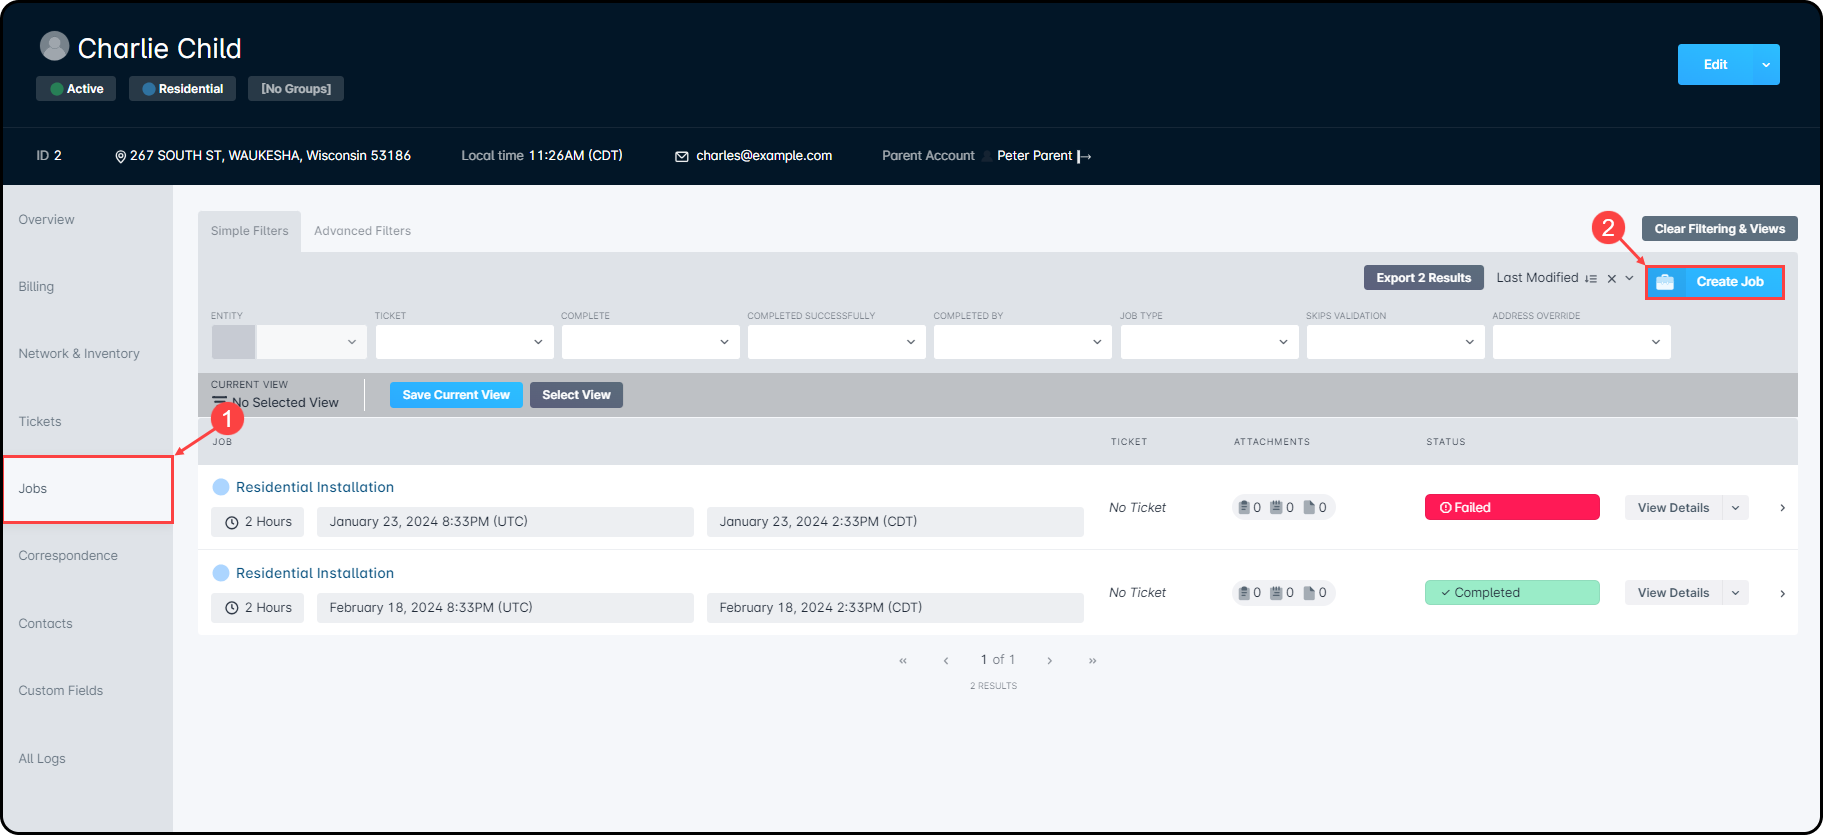
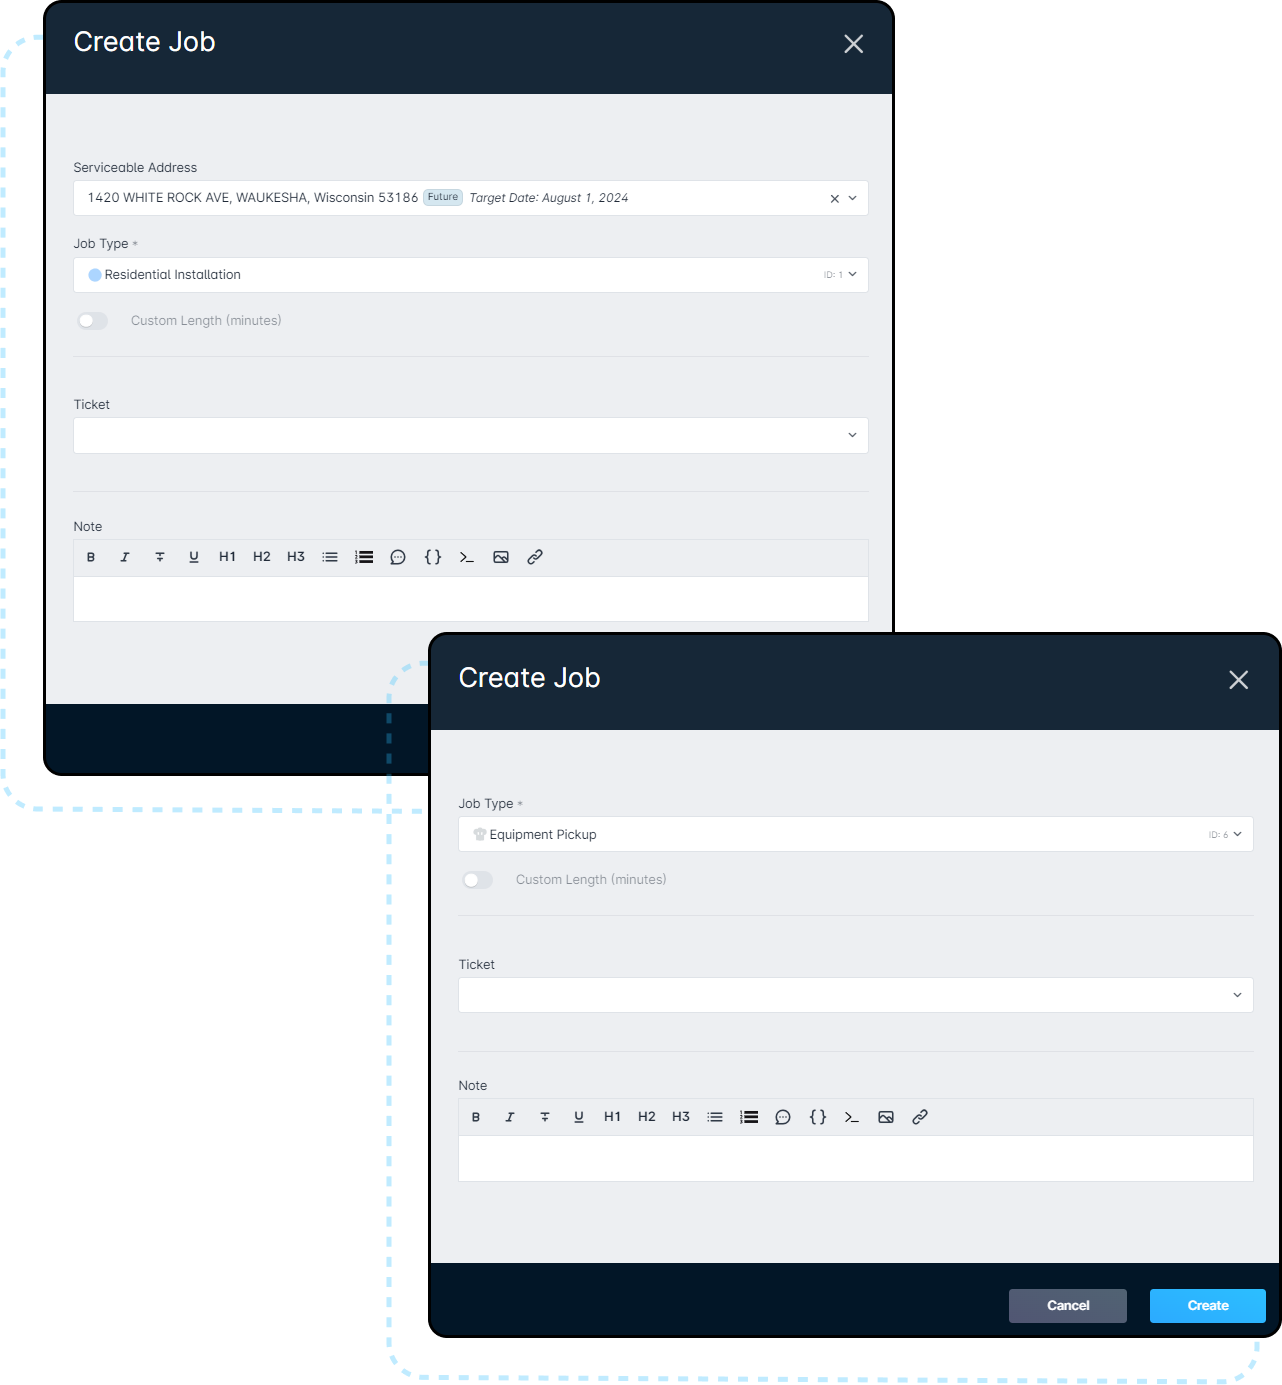
- Account view: Go to the account overview page, open the Jobs tab, and click Create Job.
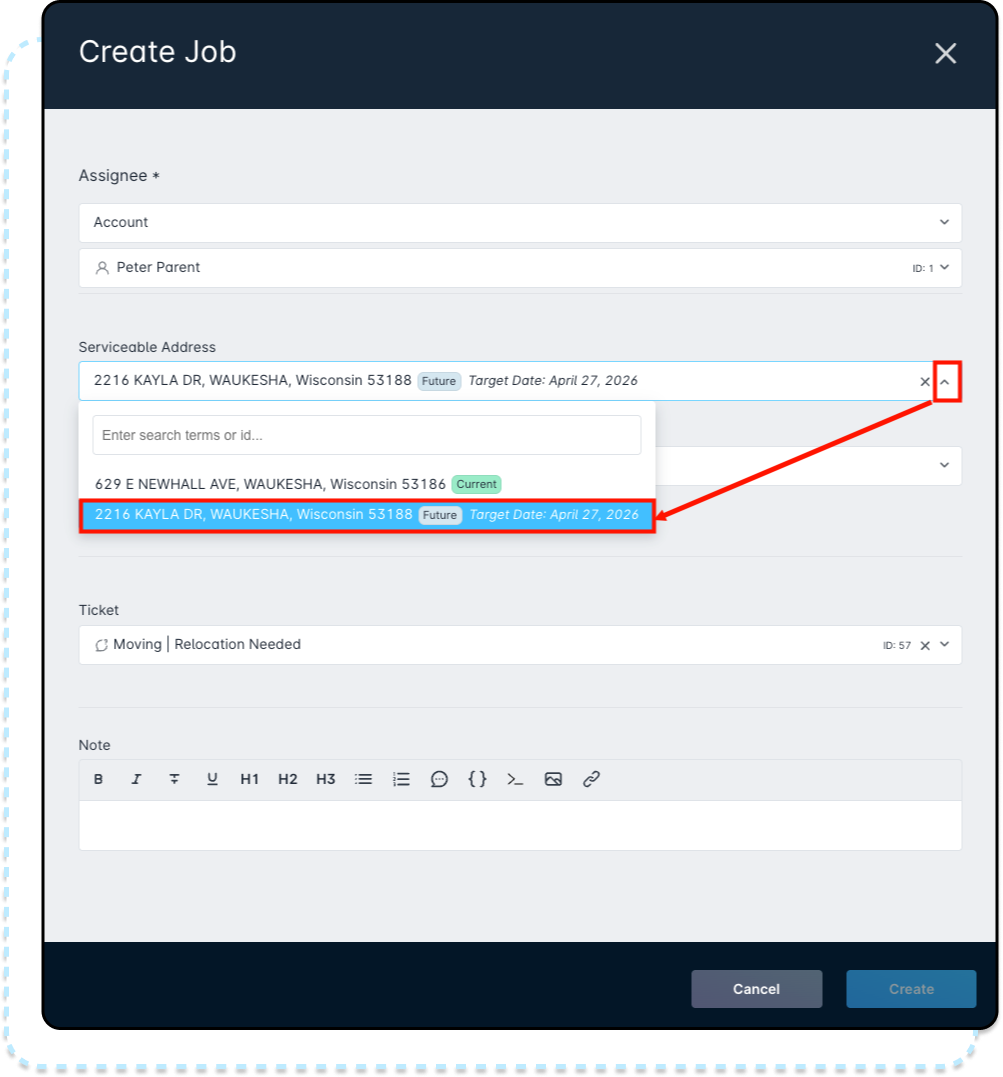
- The Create Job window will open. Under Serviceable Address, use the drop-down to select the Future Serviceable Address.
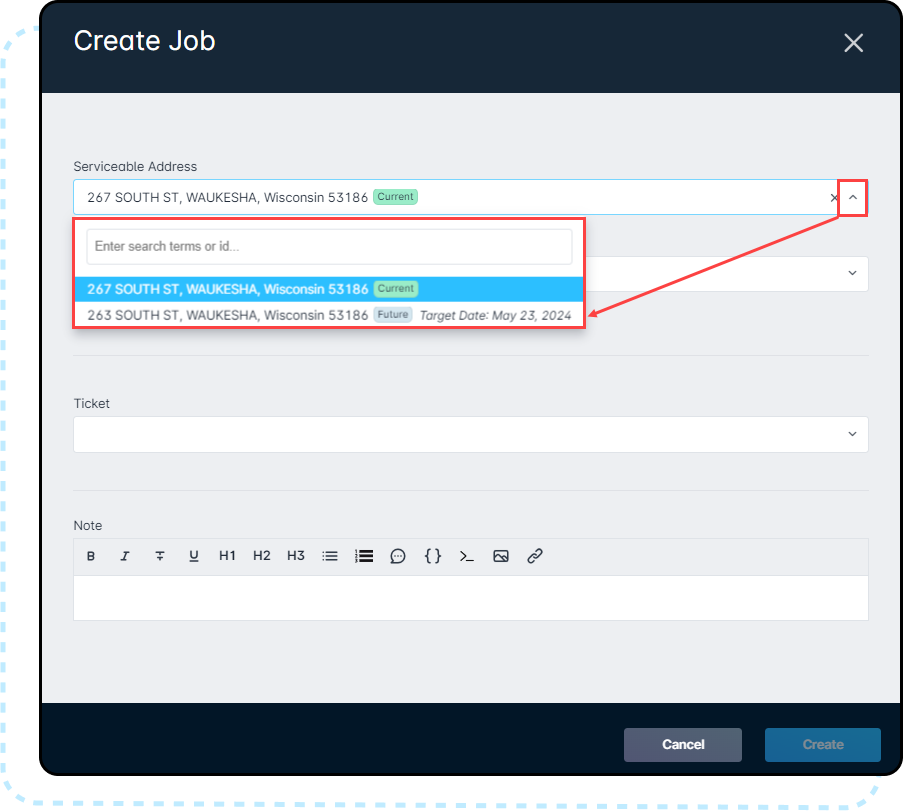
- The Create Job window will open. Under Serviceable Address, use the drop-down to select the Future Serviceable Address.
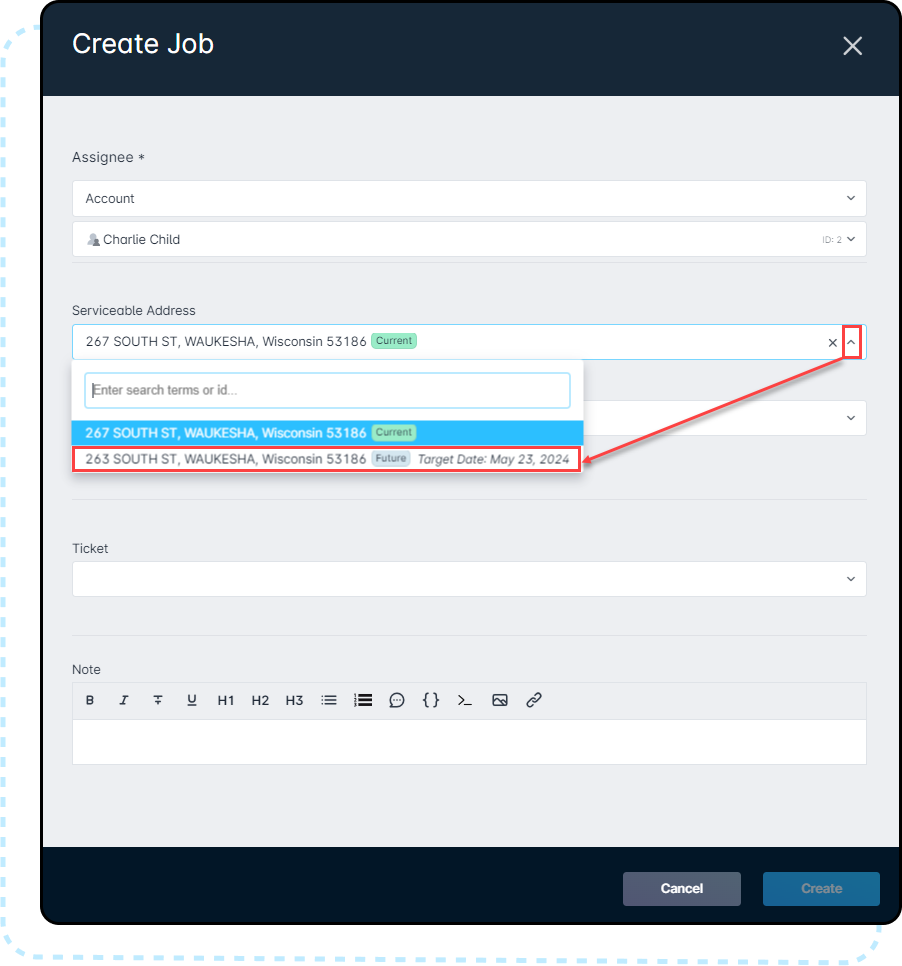
- Scheduling: Go to the Scheduling tab and click Create Job to open the Create Job window. After you choose an assignee, use the Serviceable Address drop-down to select the Future Serviceable Address.
- Ticket View: Go to the ticket overview page, click the drop down arrow and click Create Job.
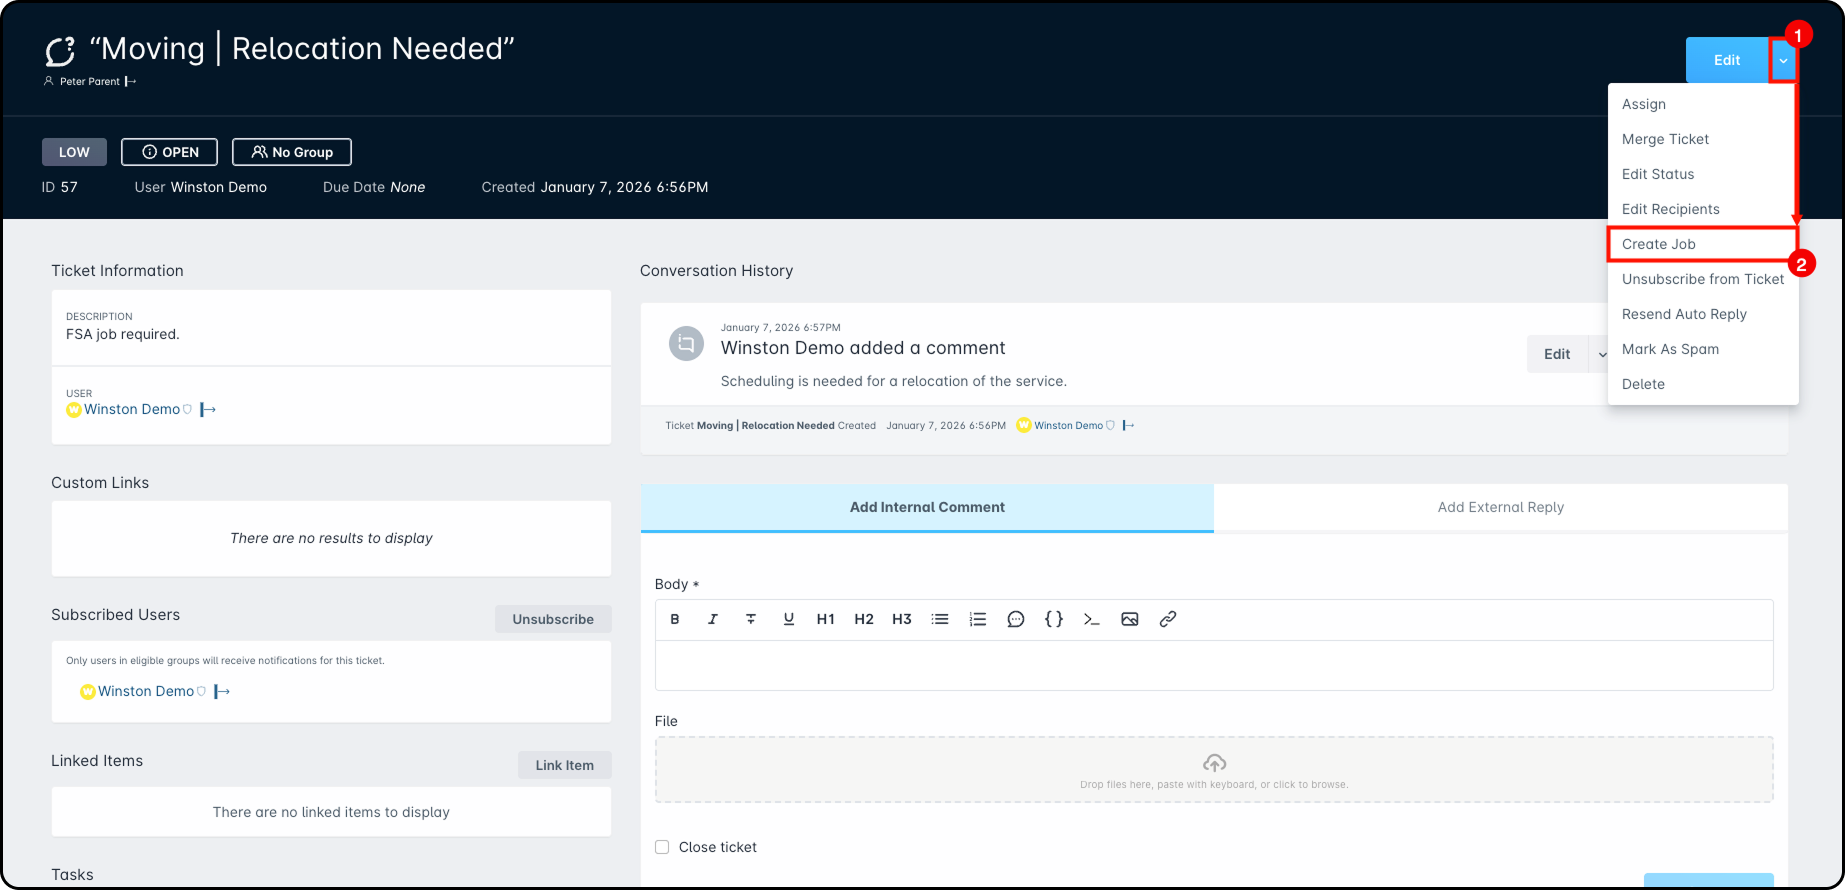
- The Create Job window will open. Under Serviceable Address, use the drop-down to select the Future Serviceable Address.
Viewing Scheduled Jobs
You can view the scheduled job within the Account View or within all three areas of the Scheduling Tab.
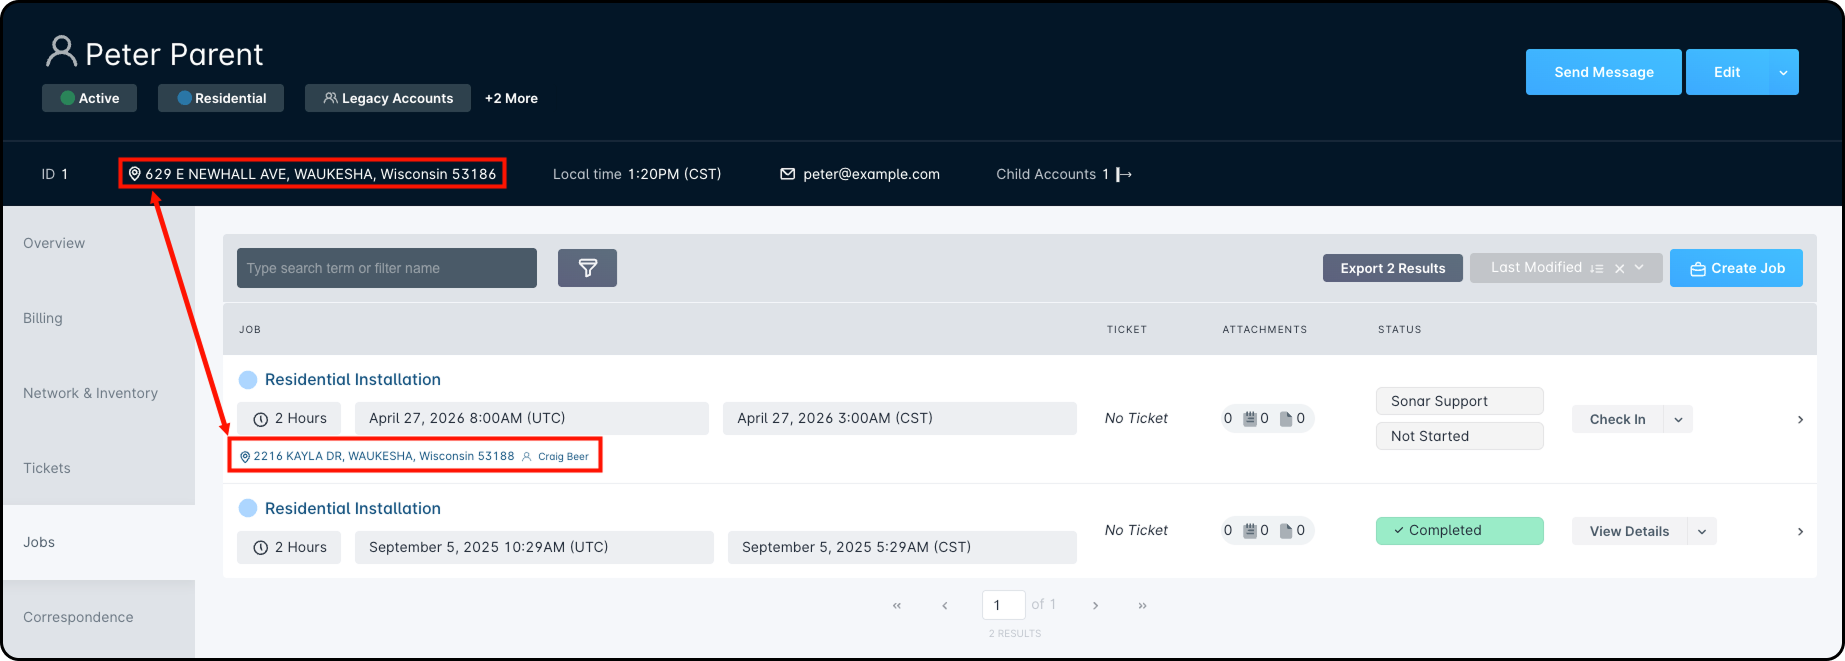
- Account view (Jobs tab): After the job is created, you can see the Future Serviceable Address attached to it. It will show both the account’s current address and the Future Serviceable Address linked to the job.
- Scheduling view: In the Scheduling tab, you can see the scheduled job in all three scheduling views.
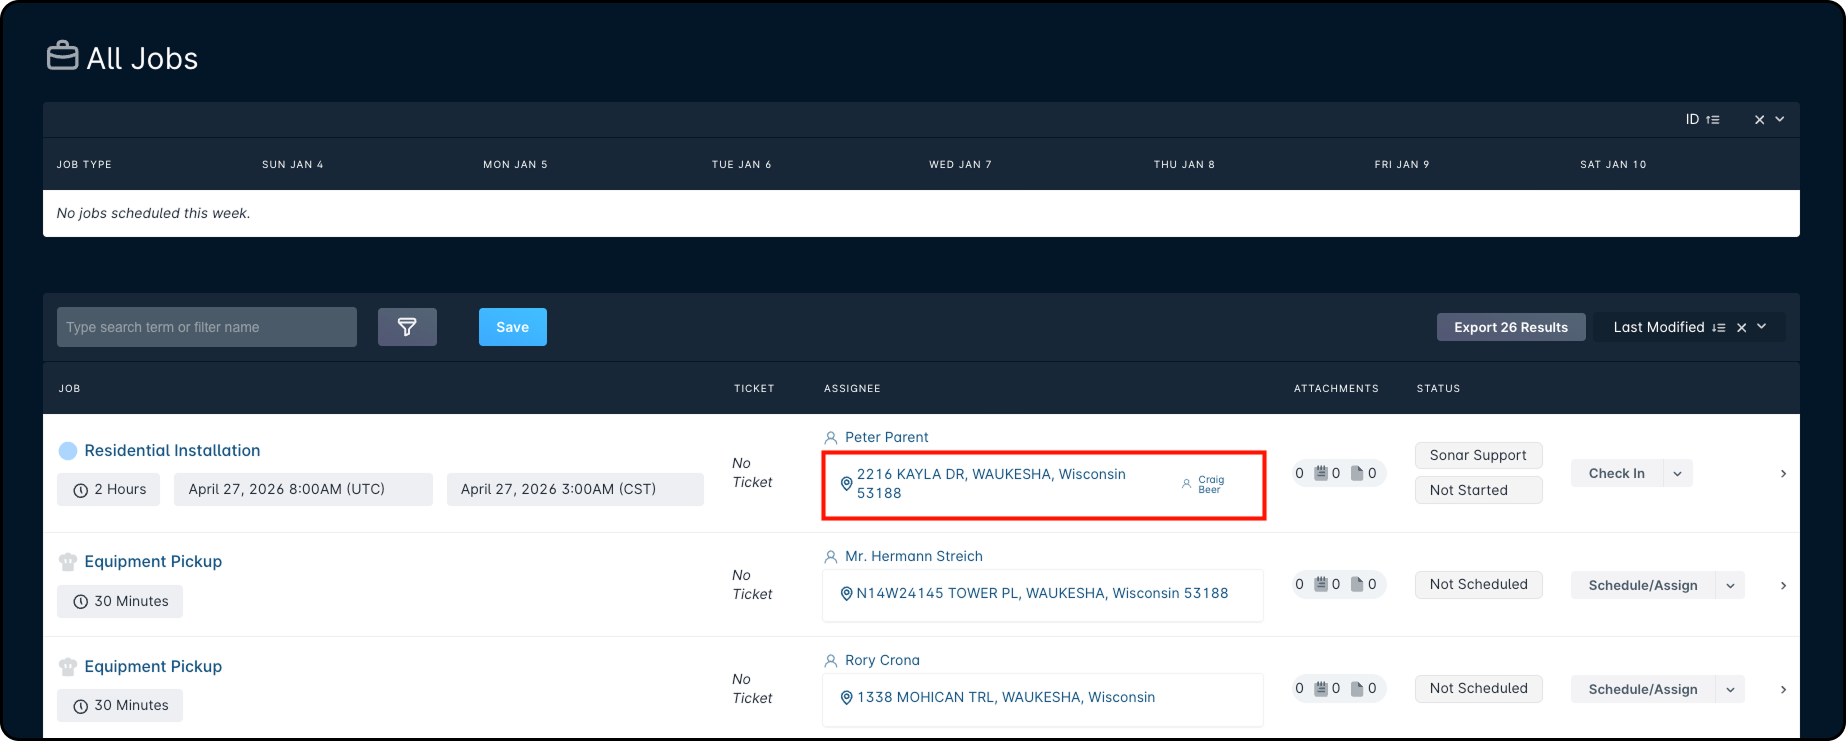
- Jobs table view: In the Assignee column, you can see which jobs have a Future Serviceable Address assigned and which do not.
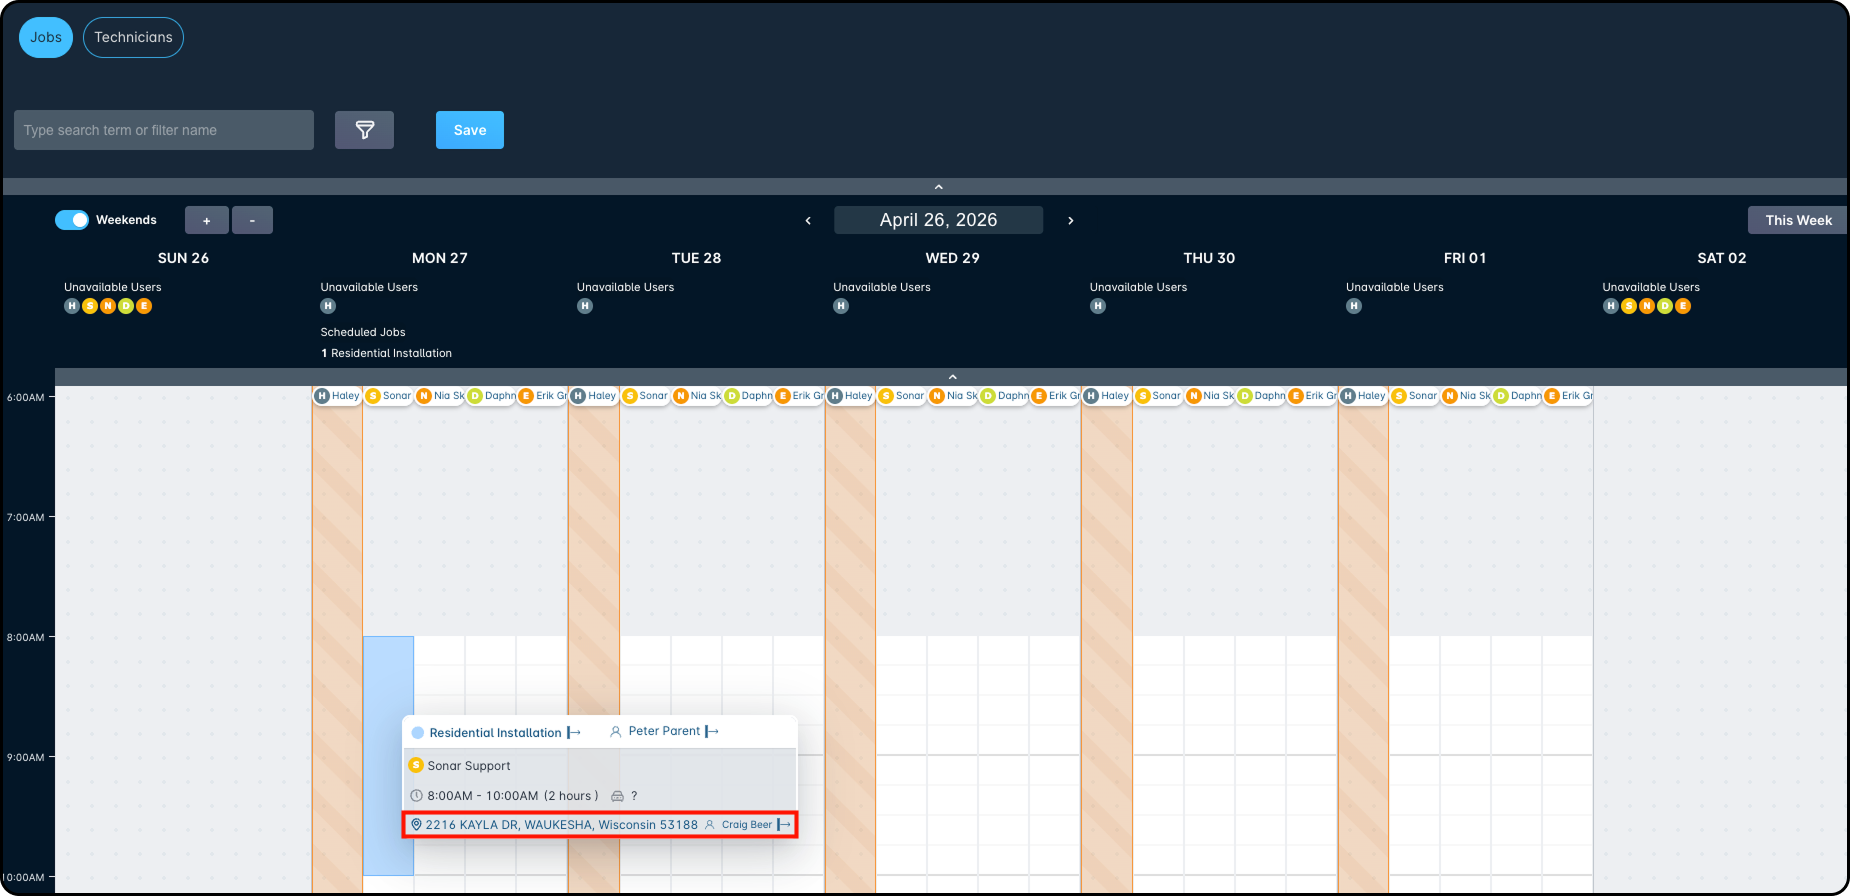
- Dispatcher view: Hover over the job to see a pop-up showing the Future Serviceable Address assigned to it.
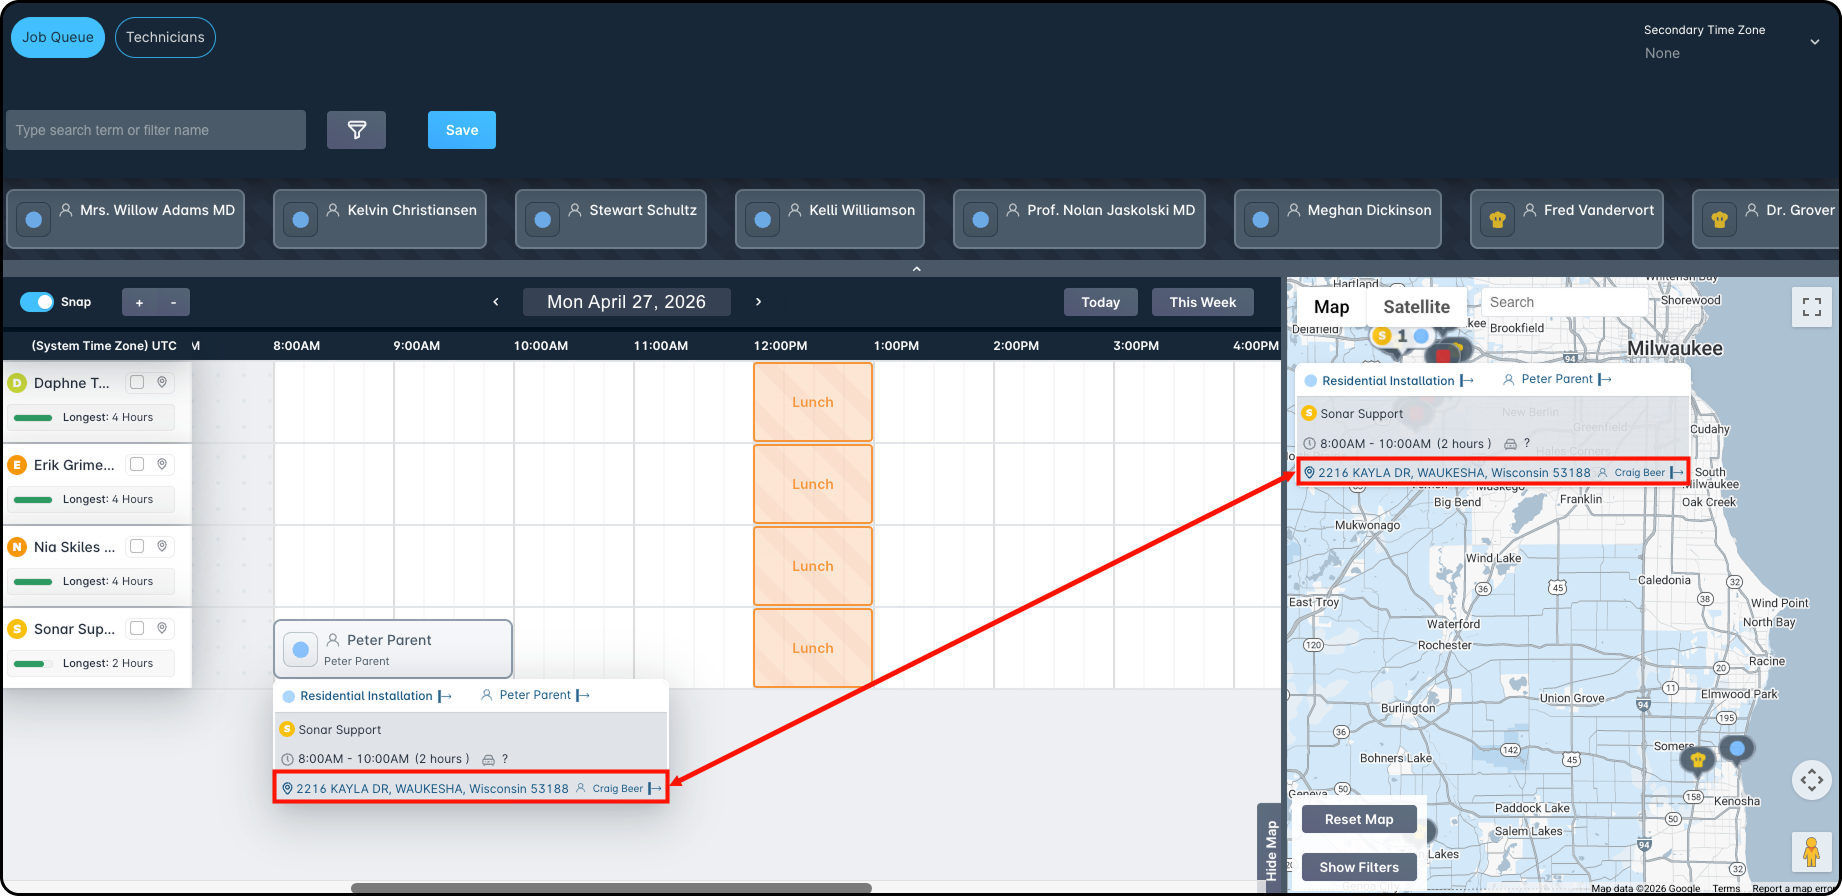
- Weekly view: Hover over the job to see a pop-up showing the Future Serviceable Address assigned to it.
- Jobs table view: In the Assignee column, you can see which jobs have a Future Serviceable Address assigned and which do not.
Editing a Job
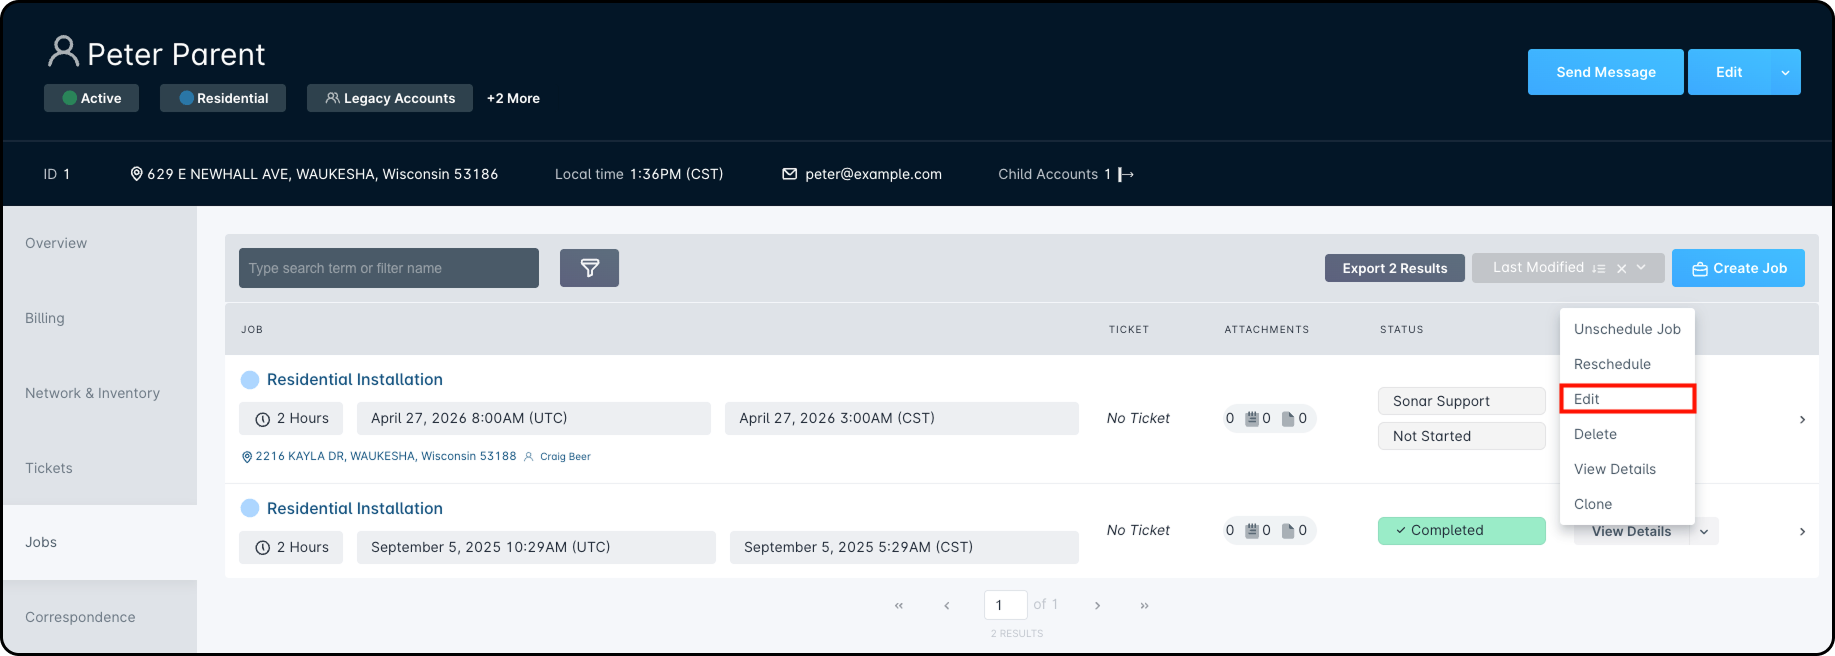
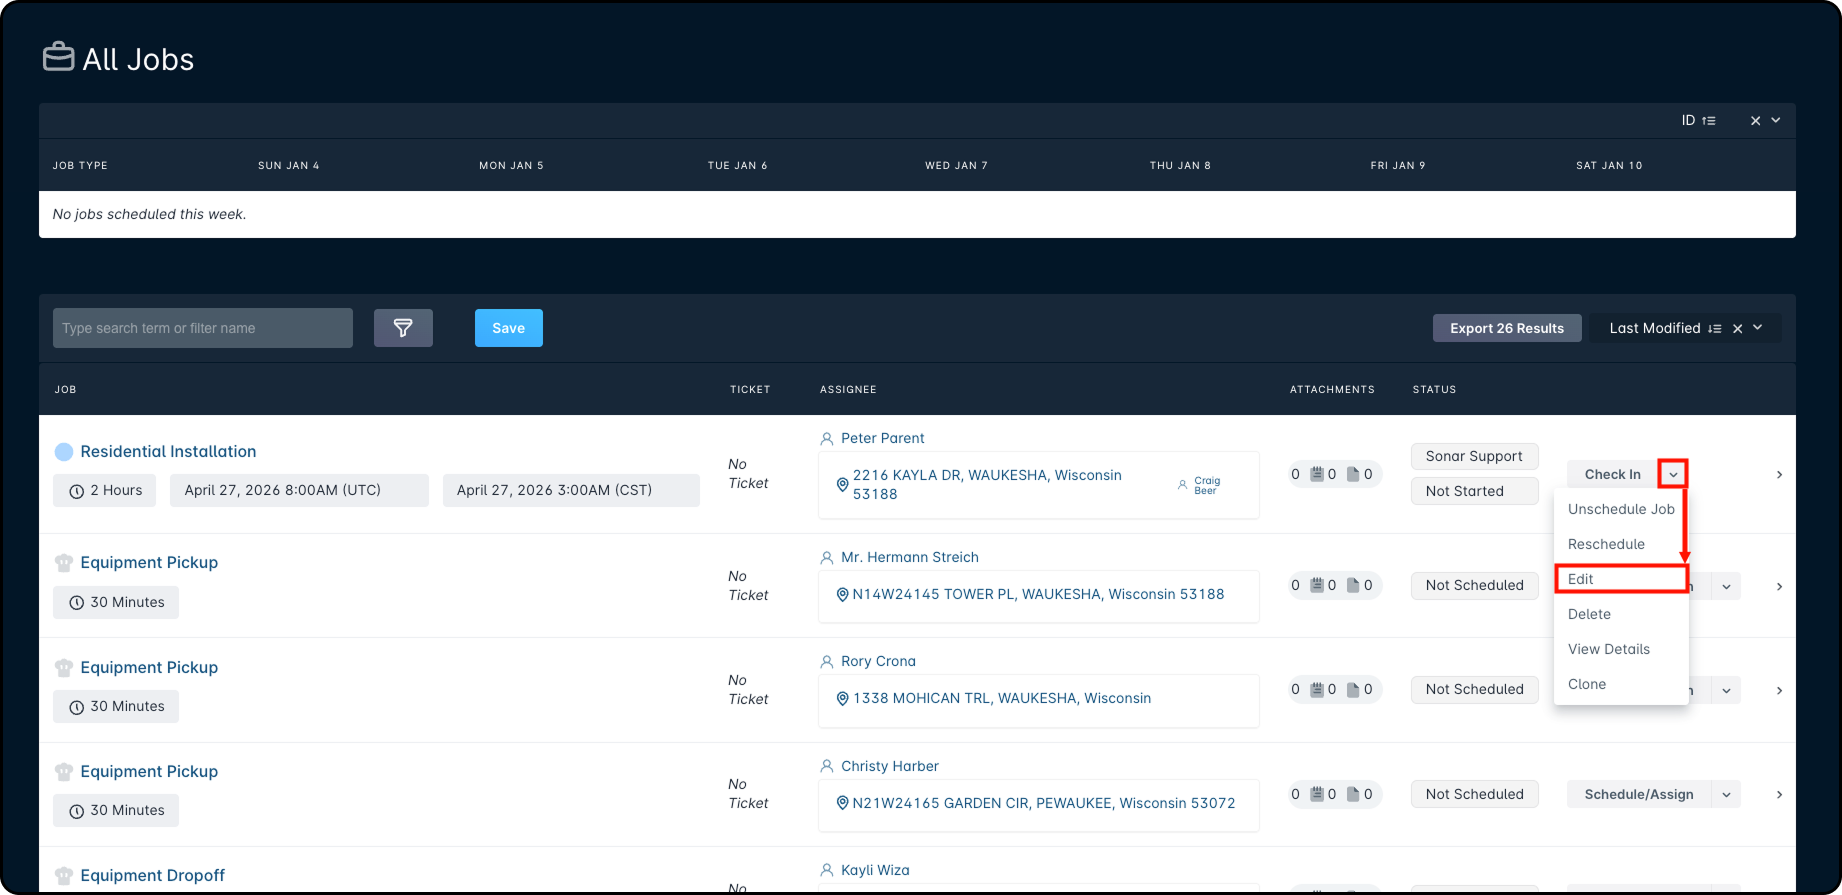
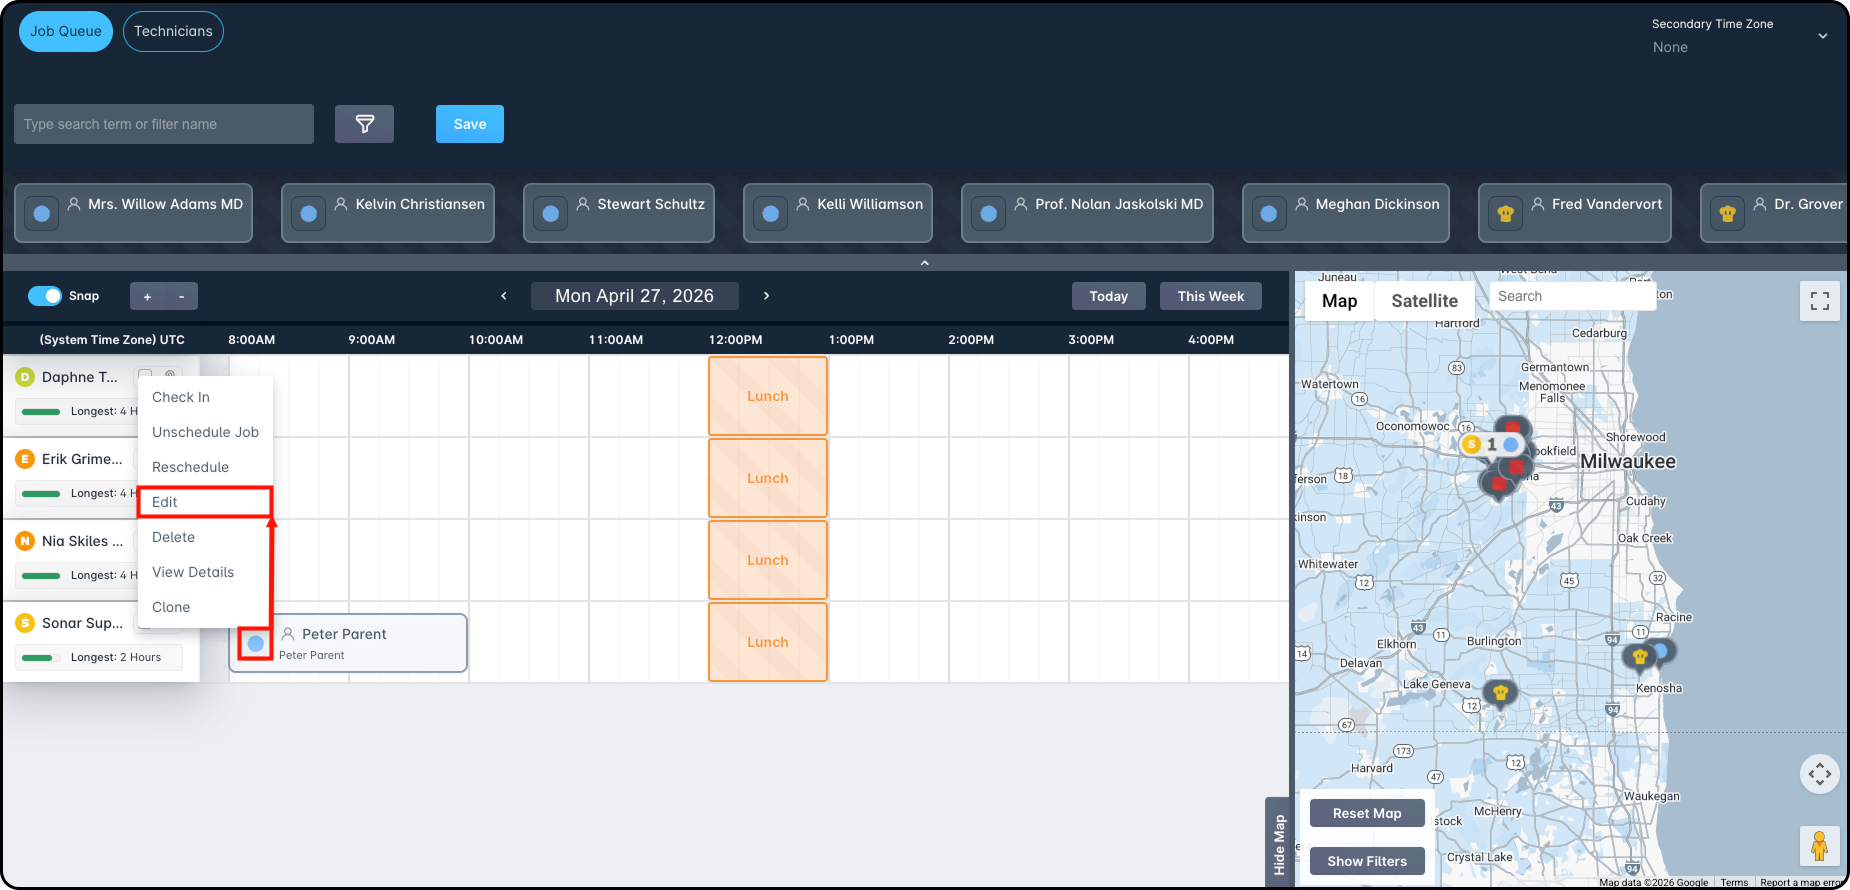
To edit a job, go to the Account or Scheduling tab, select the job, and click Edit.
- Account:
- Scheduling:
- Jobs Table view:
- Dispatcher View:
- Jobs Table view:
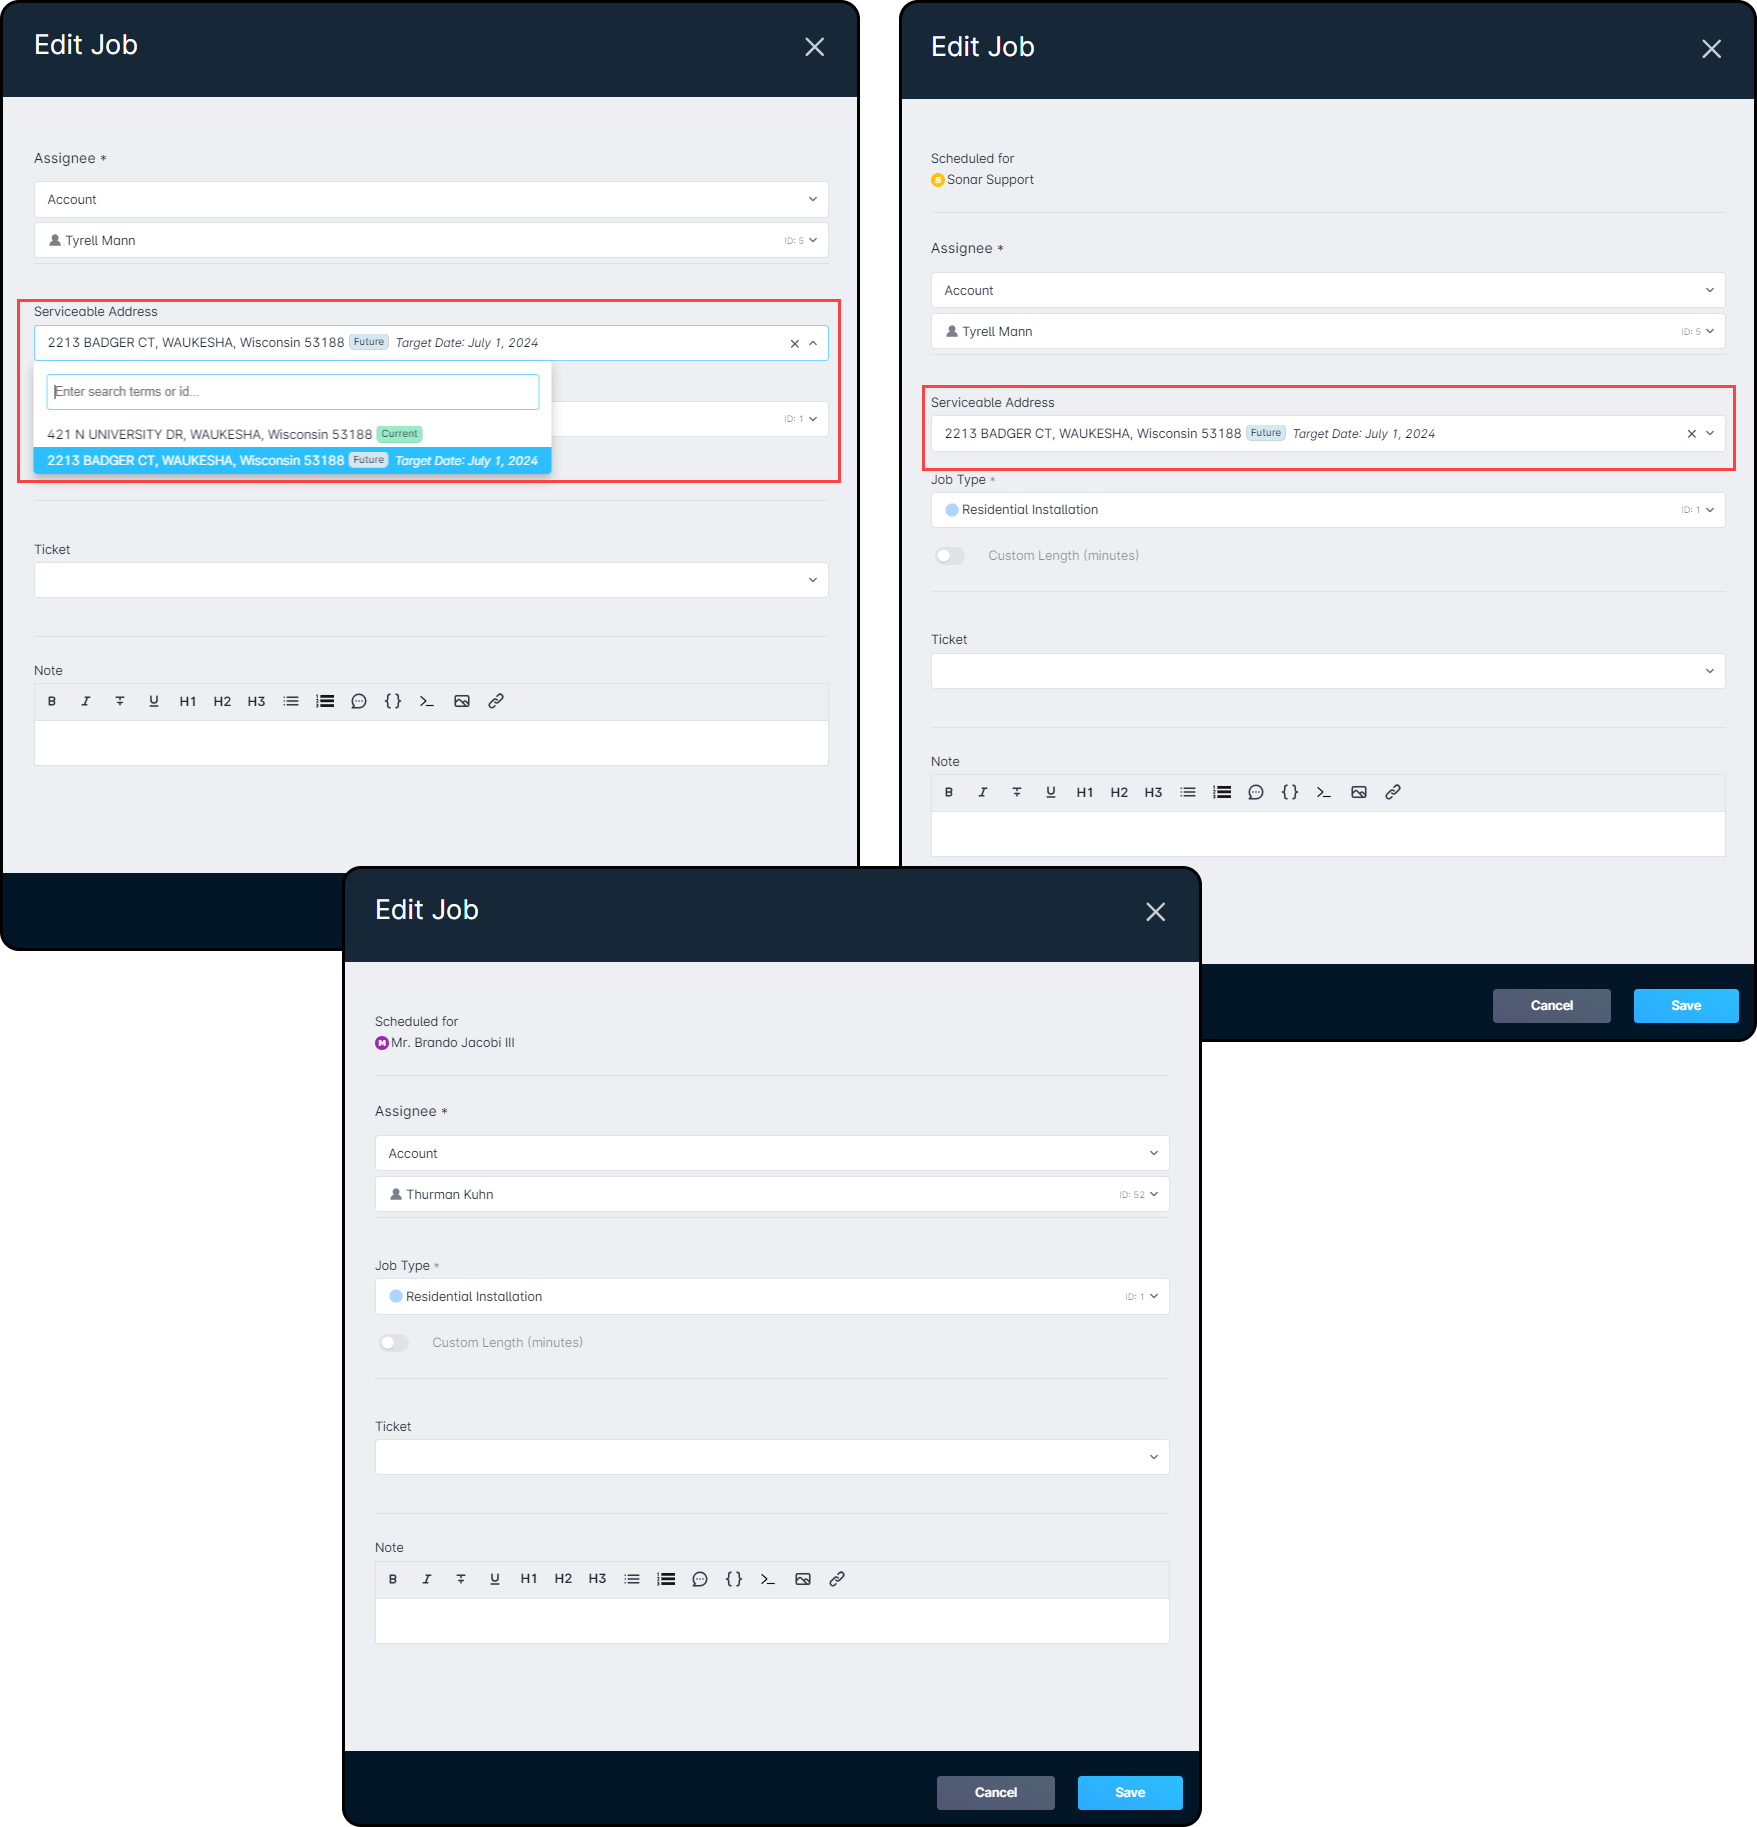
When the Edit Job window opens, you can update the address assigned to the job (if needed). The images below show the differences between the Edit Job windows:
The top images are from the Account > Jobs tab or Scheduling views (Table, Dispatcher, or Weekly).
The bottom image is for a job that does not have a Future Serviceable Address assigned.
Checking Into a Job
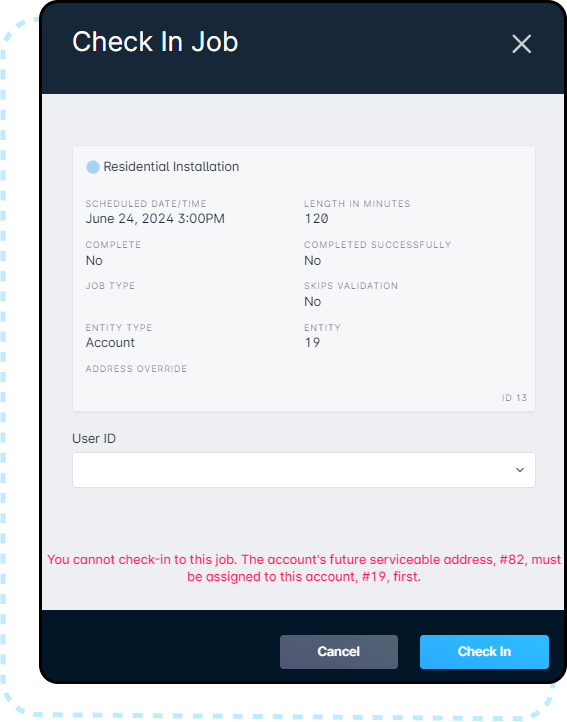
When checking in to a job, make sure the Future Serviceable Address has been applied to the account. If the job does not have automated workflows, you may be able to check in without any error.
If the Future Serviceable Address hasn’t been applied, you’ll see an error when you try to check in. This happens because the job type includes automated actions—like automatically activating or disconnecting an account when the job is completed.
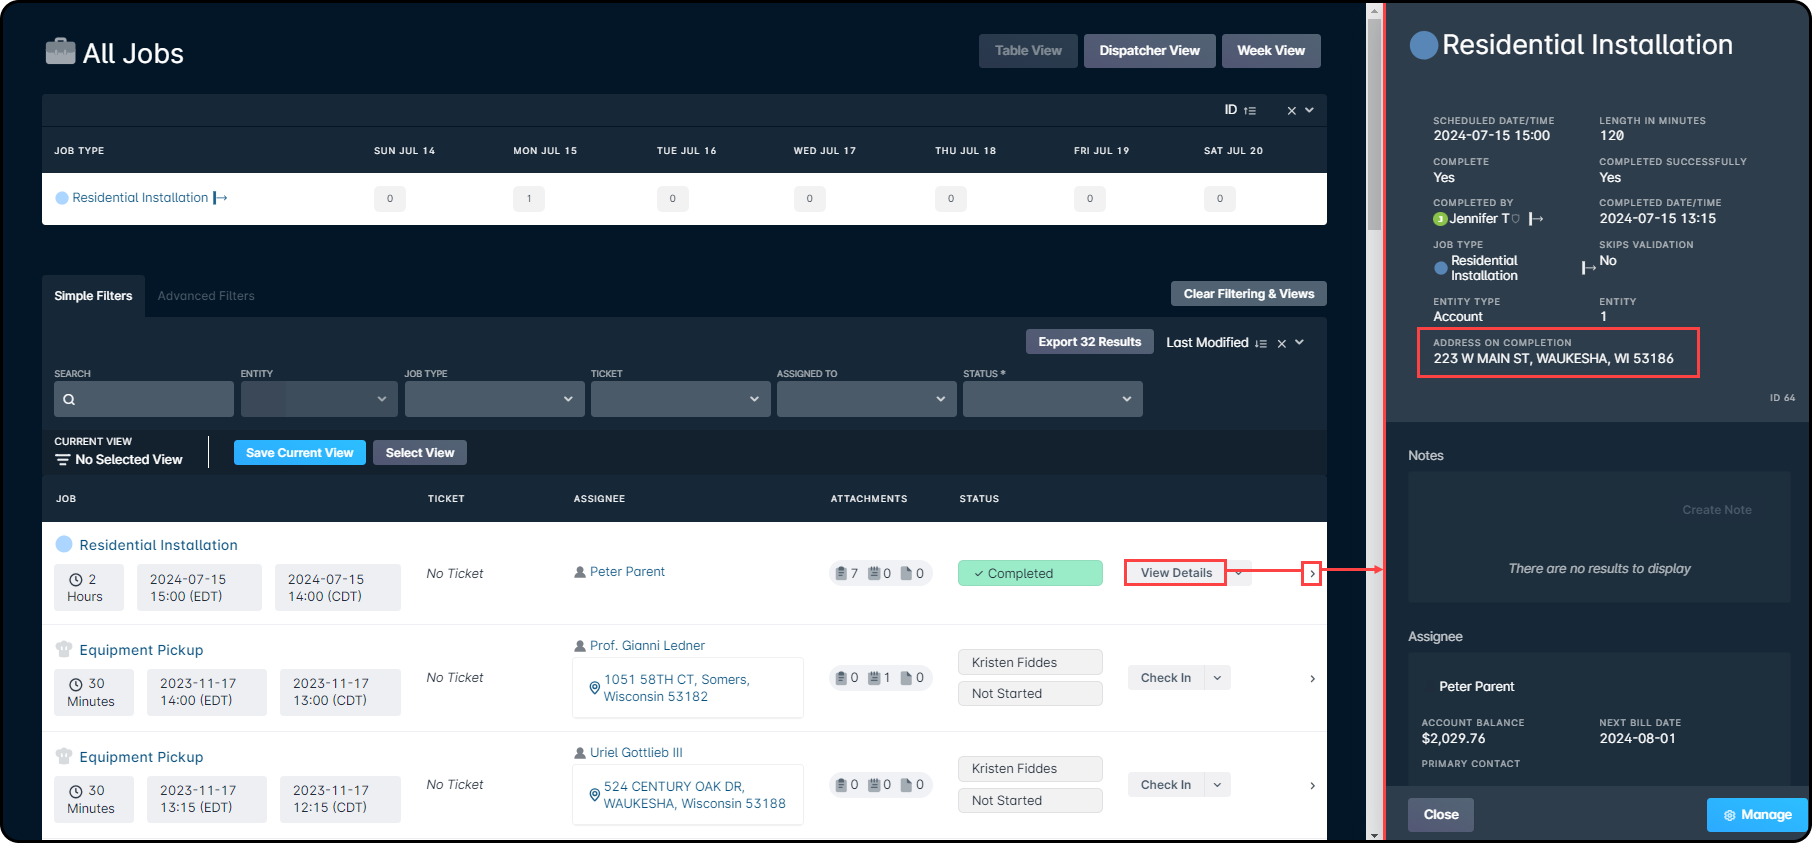
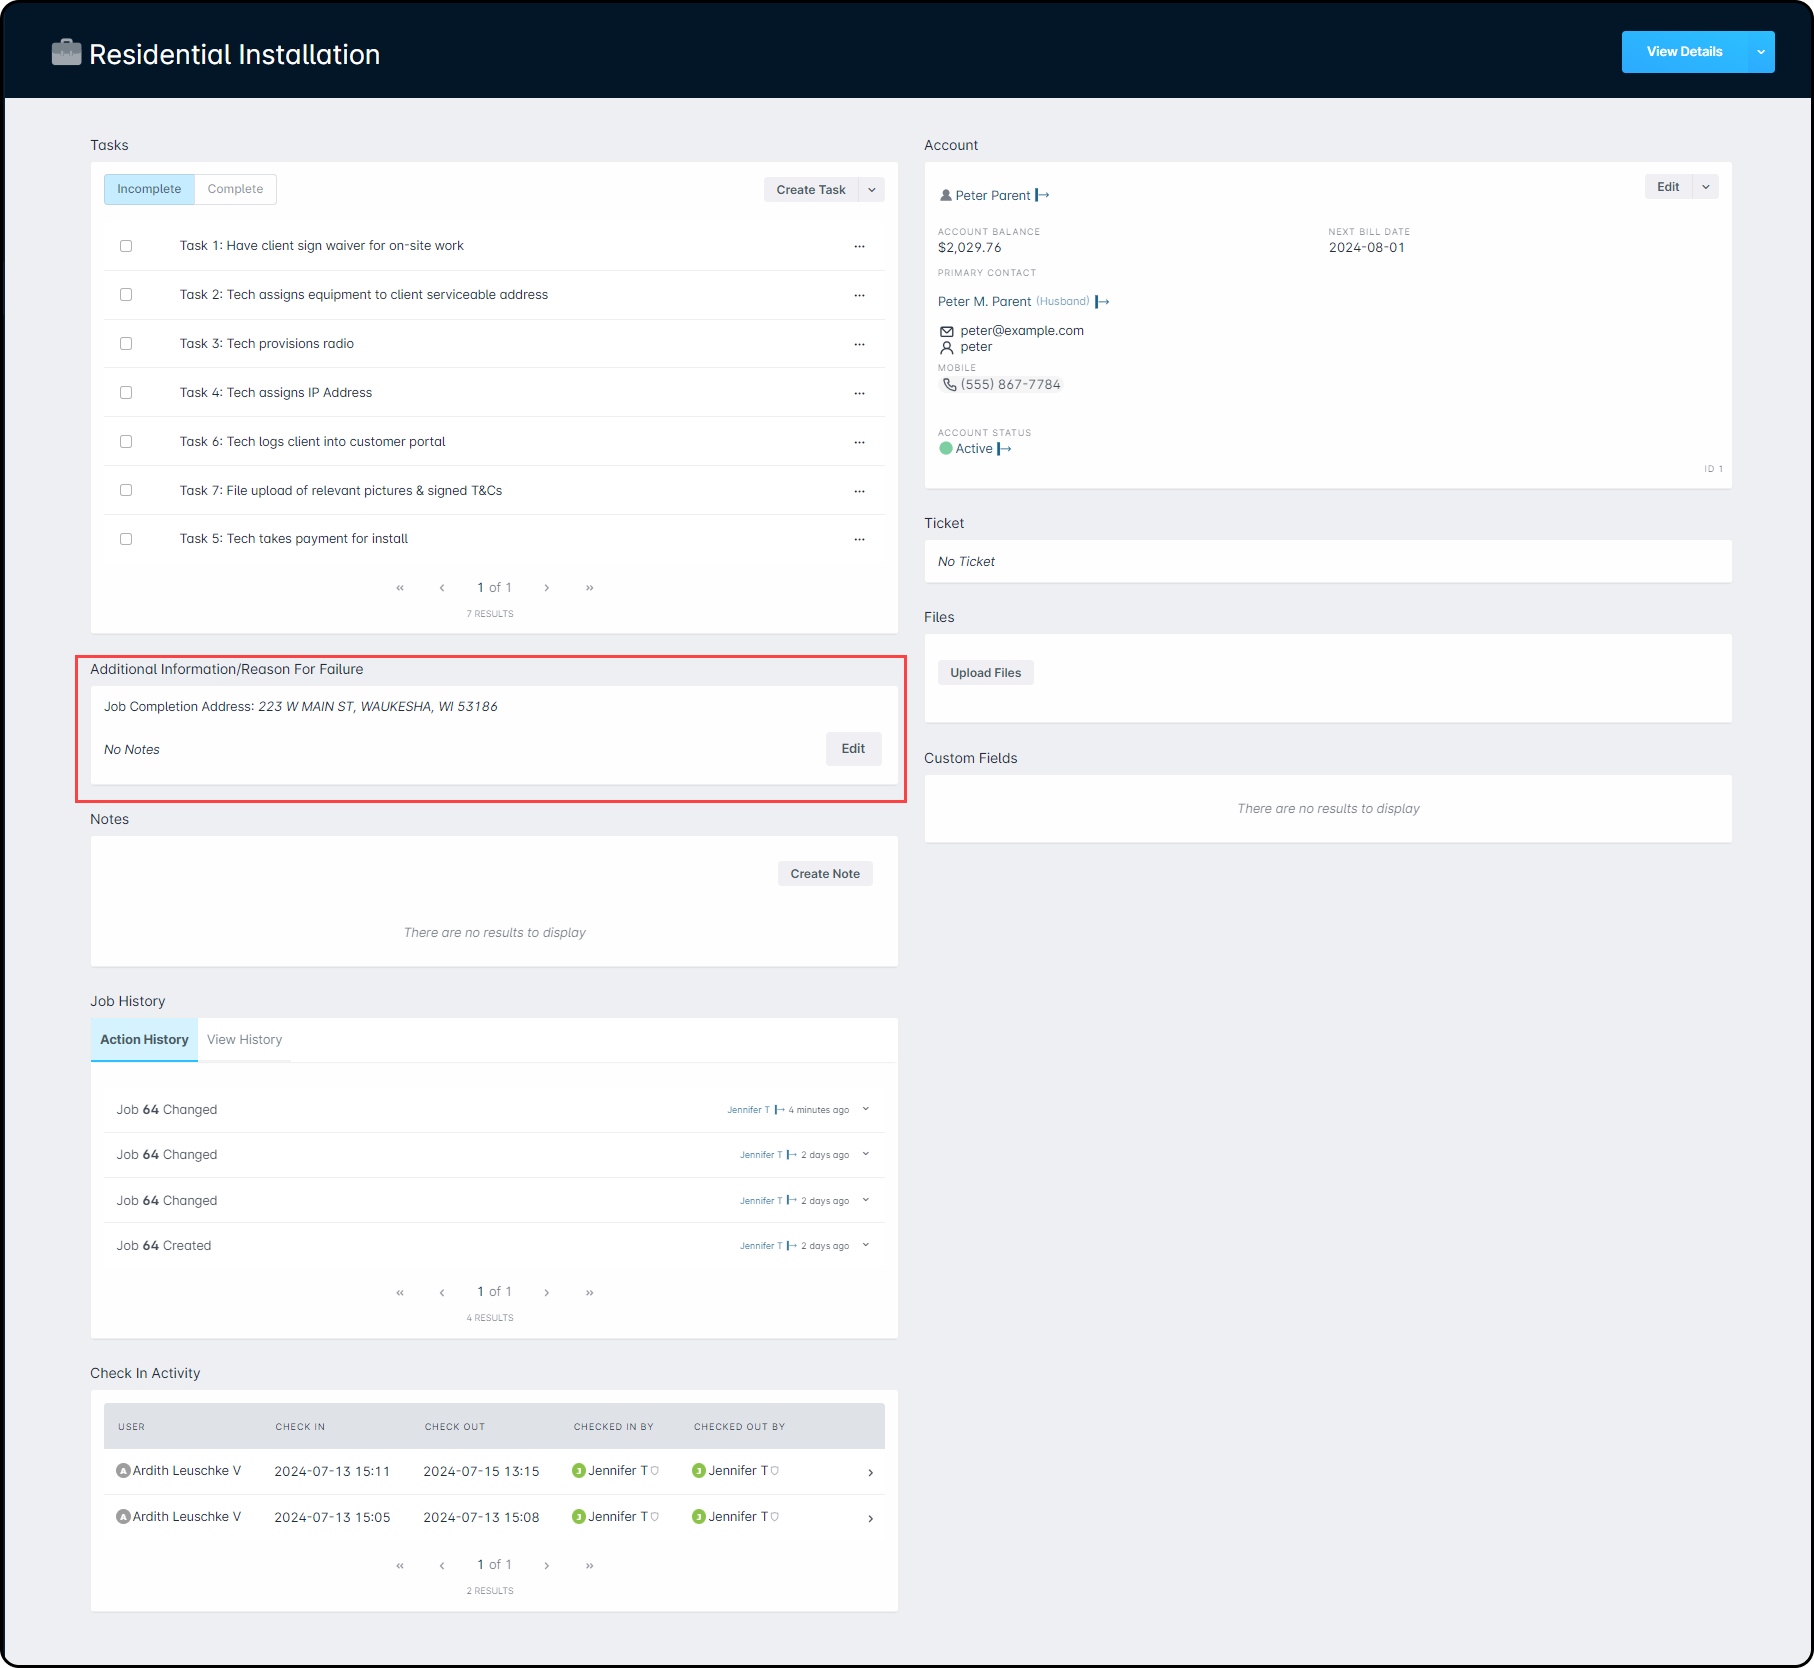
Completed Jobs
After a job is completed (successful or failed), you can see the address linked to it by clicking the job details. This opens a sidebar with a preview, or you can select Manage to open the job’s Overview page.
Disconnecting an Account
With Future Serviceable Addresses, you can use Scheduled Events to automatically disconnect the current account from the Serviceable Address and then assign that address to the new account.
If you don’t use Scheduled Events, you’ll need to manually disconnect the current account before you can reassign the Serviceable Address.
Using Global Search
When you search for an account, any Future Serviceable Address assigned to it will appear in the Global Search window. Make sure you’re viewing Accounts (not Contacts), then scroll down to the Serviceable Address section.

Using the Field App
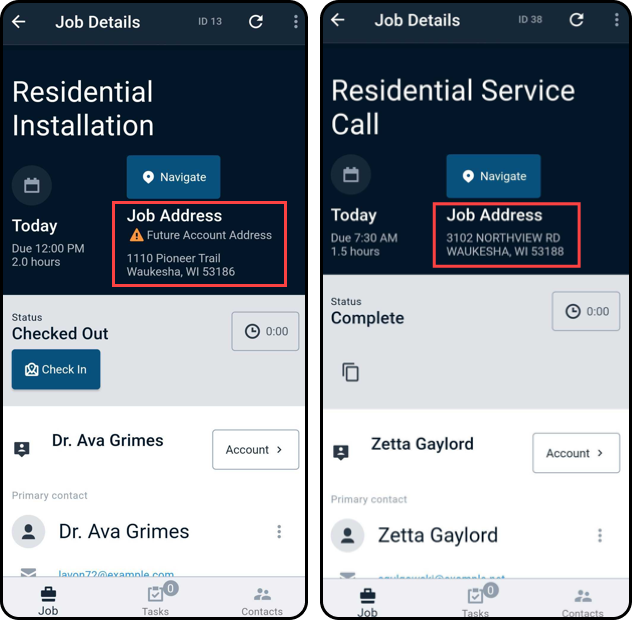
In the Sonar Field App, you can view the Future Serviceable Address on the work order, check in, and complete the job.
- If a job has a Future Serviceable Address, it will be labeled Job Address Future Account Address.
- If not, it will simply show Job Address.
Example Use Case
Future Serviceable Addresses are most often used when a subscriber is moving into a location that’s currently assigned to another active subscriber—but they aren’t limited to that situation. This section covers other common scenarios and how to use Future Serviceable Addresses to support your business.
Example 1: New Subscriber Moving to an Active Subscriber's Location
To start you will create a new account for the new subscriber, leaving the Serviceable Address blank. Once the account is created you will add the move-in address as a “Future Serviceable Address”. Clicking on the “Create Future Serviceable Address” button in the Addresses section on the Account Overview page, will open a creation modal. Here you'll define the Targeted Date for the Serviceable Address change, the Serviceable Address to be assigned, and, optionally, any notes that should be associated with this change. In this case, the Target Date will be set to August 1st, the Serviceable Address will be the new address provided by the subscriber, and the notes will say “Subscriber is moving to a new address”.
New Subscriber's Account
With the Future Serviceable Address entered on the account, any necessary work before the subscriber's move-in date can be scheduled. In this example, the customer is subscribing to a Fiber service, which will require a new drop at the subscriber's location. To take care of this, a job can be created and scheduled using the Future Serviceable Address assigned to the new subscriber's account. While it is the same address as a current subscriber, using the FSA will ensure that future work audits and job analytics will be correctly tracked for this subscriber. Another series of jobs can also be scheduled ahead of time, created to disconnect the outgoing subscriber and connect the new subscriber at this location. Within these jobs, the normal processes for deactivating an outgoing subscriber and activating an inbound subscriber will take place, with your technician able to work without any special considerations.
New Subscriber's Job on top | Existing Subscriber's Job on bottom
Finally, a Scheduled Event can be created on the new subscriber's account, dated for the day of their move, which will attach the Serviceable Address to their account, replacing the Future Serviceable Address and finishing the new account setup.
Existing Subscriber's Account
New Subscriber's Account
Example 2: Existing Subscriber Moving to an Active Subscriber's Location
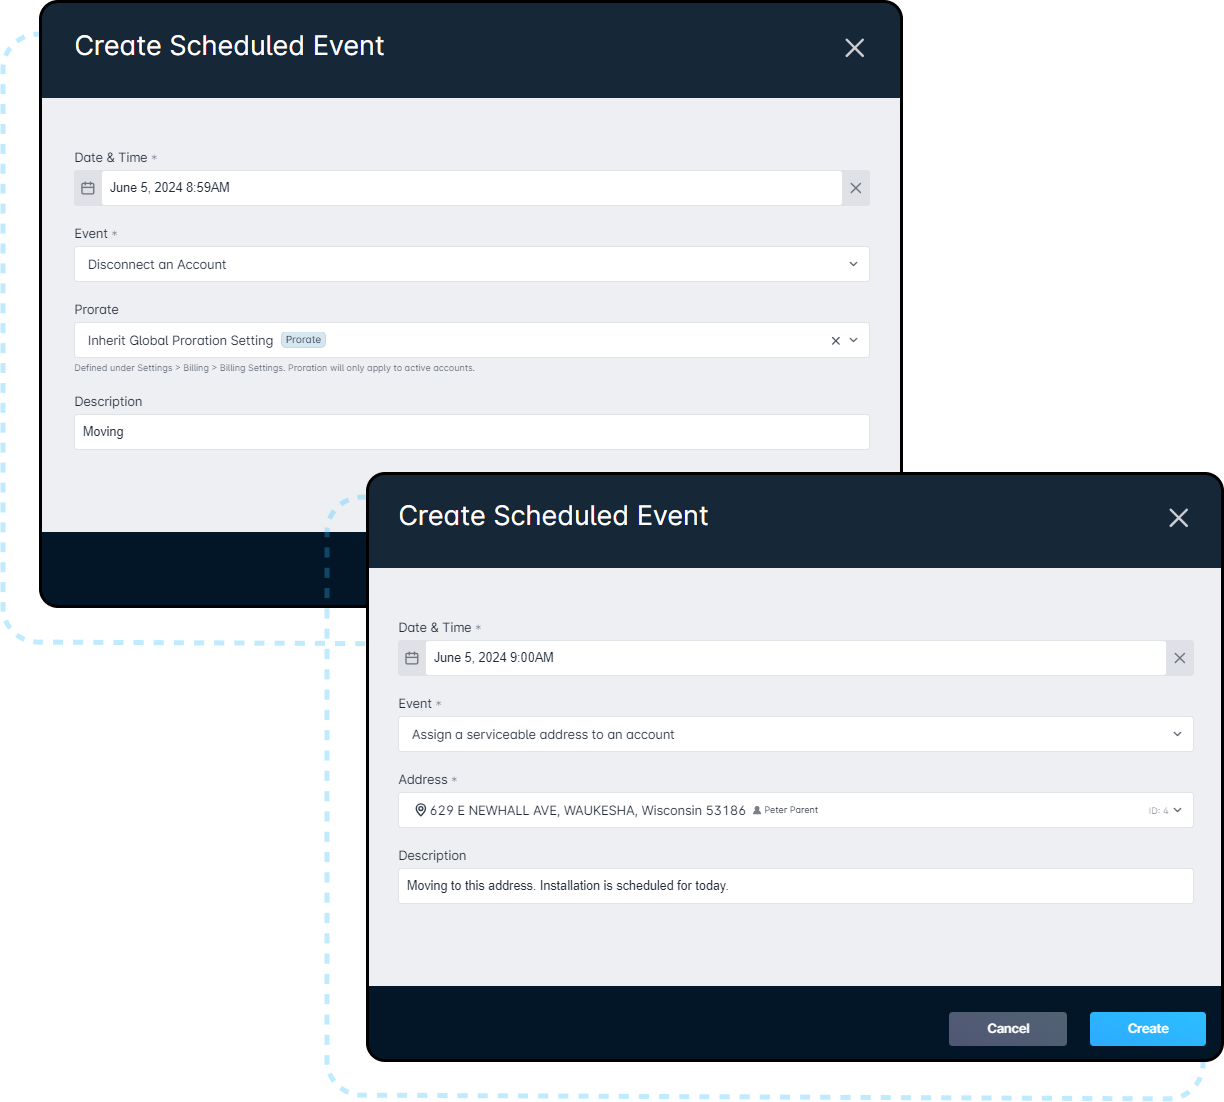
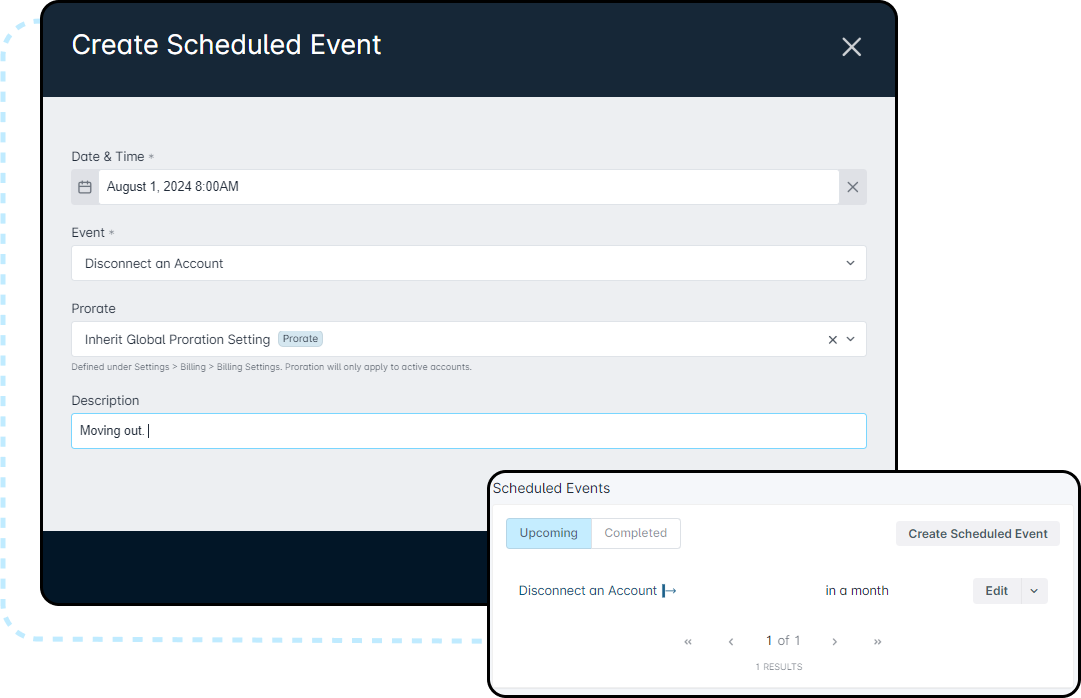
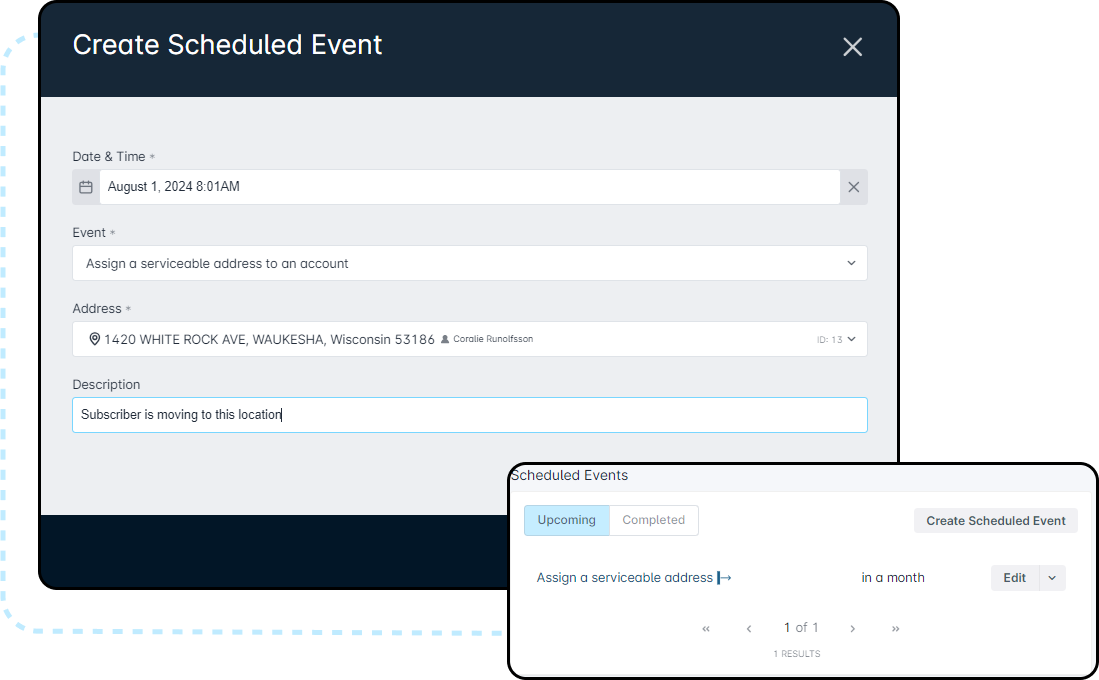
With the Future Serviceable Address entered on the account, you can create a Installation job on the account for the Future Serviceable Address location. Next you can create a Scheduled Event with the target move date to “Disconnect the Account” from the currently assigned Serviceable Address. Then create a second Scheduled Event to “Assign a serviceable address to an account”. We recommend both of these Scheduled Events be scheduled prior to the scheduled job to allow for the serviceable address to be assigned to the account, which will allow for the technician to check in to the job without complications.
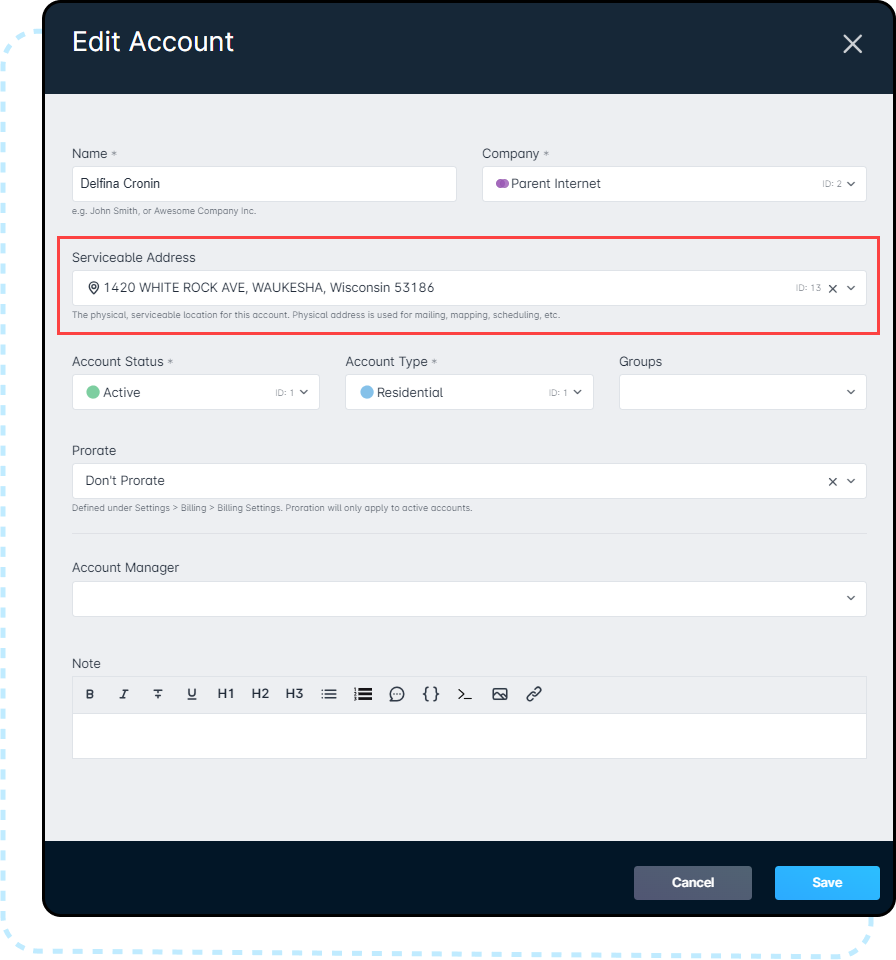
If you would prefer not to use Scheduled Events you can also update the serviceable address by clicking the "Edit" button on the Overview page of the Account and simply updating the "Serviceable Address", then clicking "Save". This option will remove the currently associated Serviceable Address and place the Future Serviceable Address on the account without causing any automated workflows associated with Billing to take place.