Table of Contents
How to: Using Webhooks in Sonar
 Updated
by Mitchell Ivany
Updated
by Mitchell Ivany
Read Time: 7 mins
If you've been using Sonar and exploring the various features on offer, you'll likely have encountered the different articles provided in the knowledge base describing the usage of Sonar's GraphQL API integration to manage the data being entered into Sonar. Webhooks serve a kind of inverse functionality to the API. While the API can be used to trigger certain actions within the instance (such as creating a serviceable address), a webhook is specialized in triggering an action outside of Sonar (such as automatically sending a letter to a customer through some 3rd party service when their account is created).
In this article, the functionality of webhooks in Sonar will be explored, and examples surrounding the usage of webhooks to enhance your experience within Sonar.
How to Use Webhooks
When creating a webhook, you need to select an endpoint. The endpoint you enter when configuring a webhook is the location Sonar will POST data to, and you select from the list of webhook events to determine which webhooks are posted to the specified endpoint.
When Sonar POSTs a webhook to an endpoint, it expects to receive an “HTTP 200” response code. The data returned is not relevant (or stored) but if the endpoint does not return an “HTTP 200” response code, Sonar will continue to POST to the endpoint once per minute for 4 hours. After 4 hours have passed, all super admins registered in Sonar will receive an email letting them know a webhook is failing.
The format of POSTed webhook data is JSON and is as follows:
{
	"event": "event.name",
	"object_id": 1,
	"current": {
                "created_at": "2021-05-25T20:48:40+00:00",
		*some content and details regarding the event*
	}
}
The event name will correspond to the event registered in Sonar. For example, an account changing status is account.status; an account having a new service added is account.service.add. The object ID will be the ID of the top-level entity referenced in the event. For example, in account.service.add, the top-level entity is account, so object_id will be the ID of the account.
The “current” array may or may not contain data, but each array is detailed in this format. The “current” array generally contains some data about the event that may be useful for you to process the webhook. It may be necessary to open the Event History sidebar and view the payload to gather exact details.
Finally, created_at is a UTC timestamp showing when the webhook was entered into Sonar for delivery. Because Sonar will retry webhooks over a 4-hour period, it is possible that you can receive webhooks out of order if one fails, but the next succeeds before the retry cycle on the failed item. Therefore, if you must receive webhooks in order, you should store the created_at value for the last event of a specific type for a specific entity so that you can deal with any out-of-order broadcasts.
You will never receive out-of-order webhooks as long as your endpoint is online and responding with an “HTTP 200” response code, but interruptions in communication between Sonar and your endpoint can also cause problems.
If you need any clarification regarding the expected behavior or data format for webhooks, if you find any bugs, or have any suggestions, please feel free to contact us at support@sonar.software.
Creating a New Webhook
To make use of webhooks in Sonar, or tie them to applications outside of Sonar, they need to be created. To do that, follow the steps below:
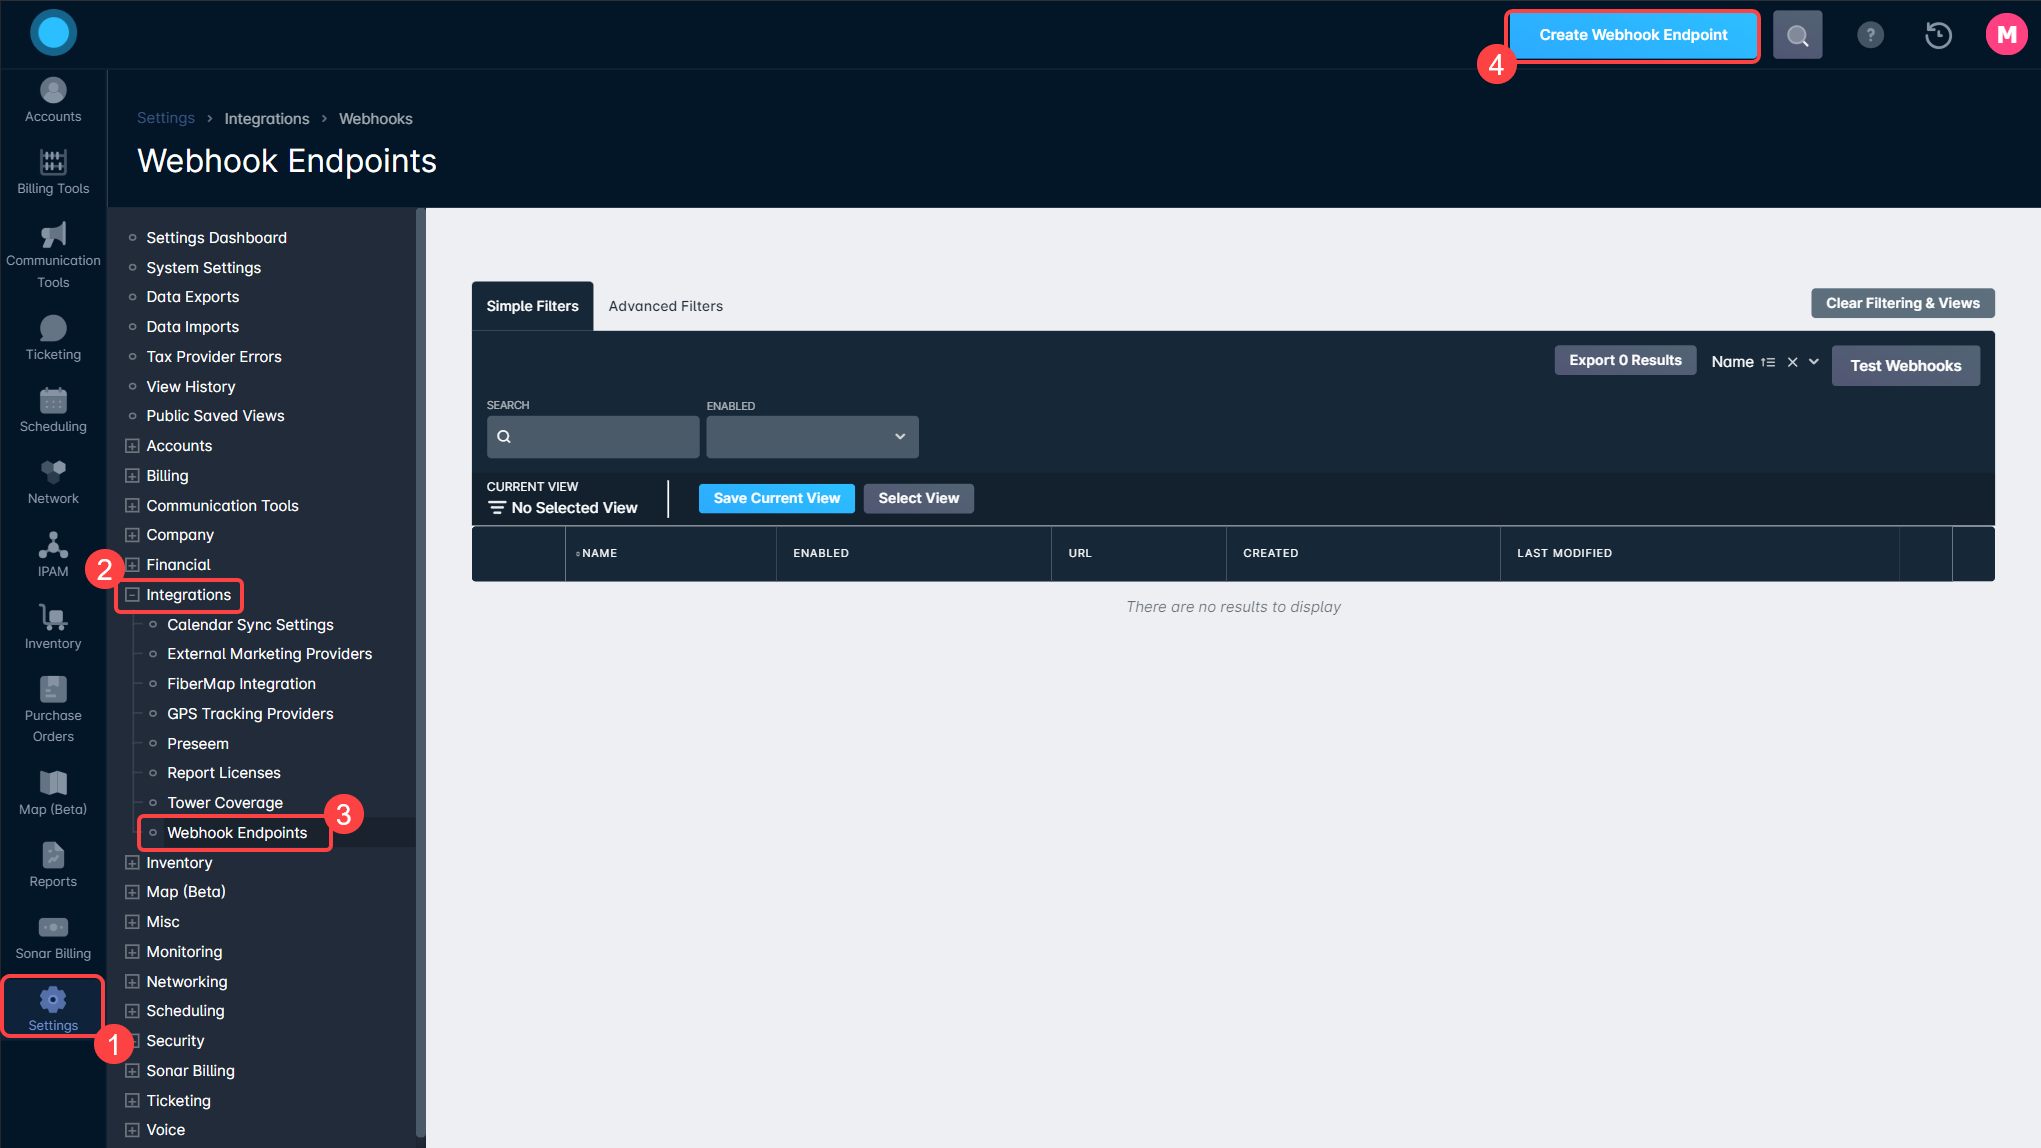
- Click on "Settings"
- Expand "Integrations"
- Select "Webhook Endpoints"
- Click on "Create Webhook Endpoint"

Field Breakdown for Creating a Webhook Endpoint
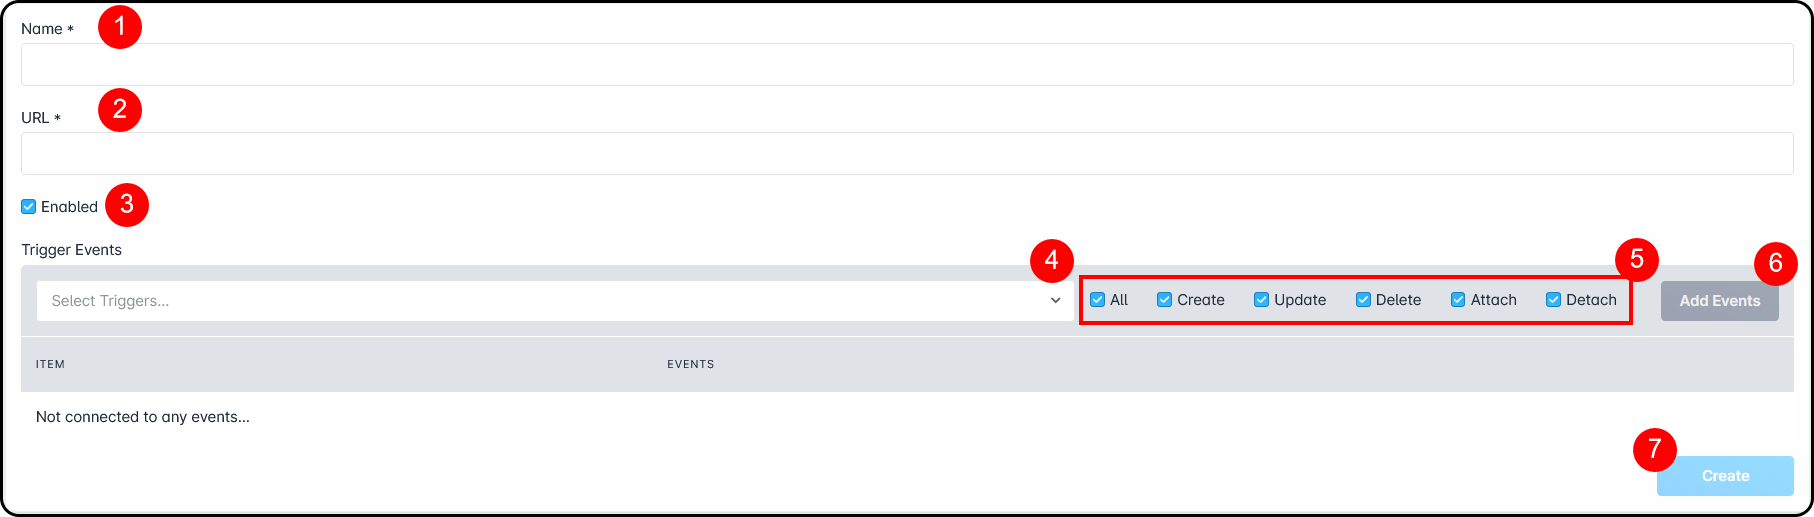
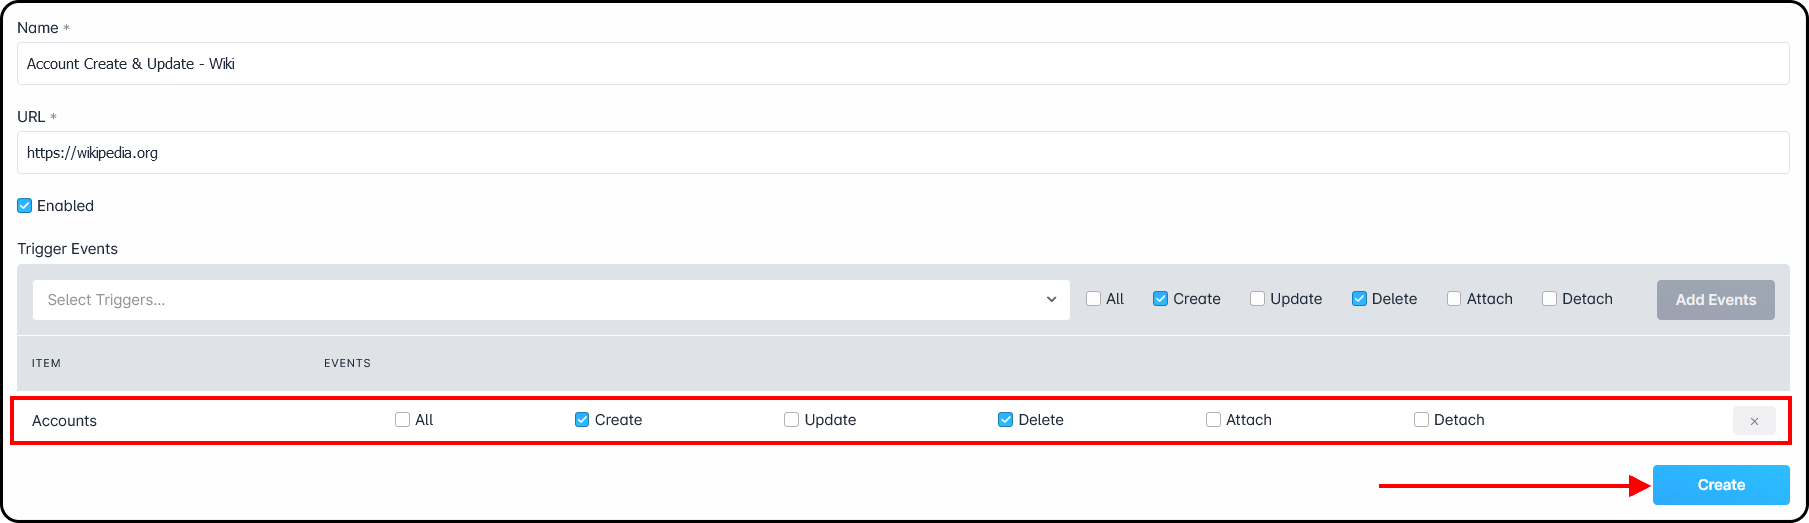
1. The name of the webhook being created will go here - this should be indicative of both the Trigger Events and the linked service for easier management in the future.
2. The URL entered here is the recipient of the webhook, and will usually be given to you by your service provider.
3. The enabled checkbox will allow you to activate or deactivate the particular webhook.
4. The "Triggers" drop-down allows you to define the event categories that will trigger the webhook action.
5. The events listed here combine with the defined trigger. For example, combining "Account" as the Trigger with "Update" as the event will result in the webhook triggering on any Account Update.
6. The "Add Events" button will take the trigger and events and add them to the webhook. You can connect multiple events to each webhook.
7. Once you've added the events and triggers to the webhook, clicking "Create" will finalize the process and add the webhook to your instance.
Once a webhook has been created, it appears in the table and shows the webhook name, whether the webhook is enabled, how many individual events are tied to the webhook, and by clicking on "Event History" followed by the arrow next to the specific event, a sidebar will appear with details about the payload that was sent.
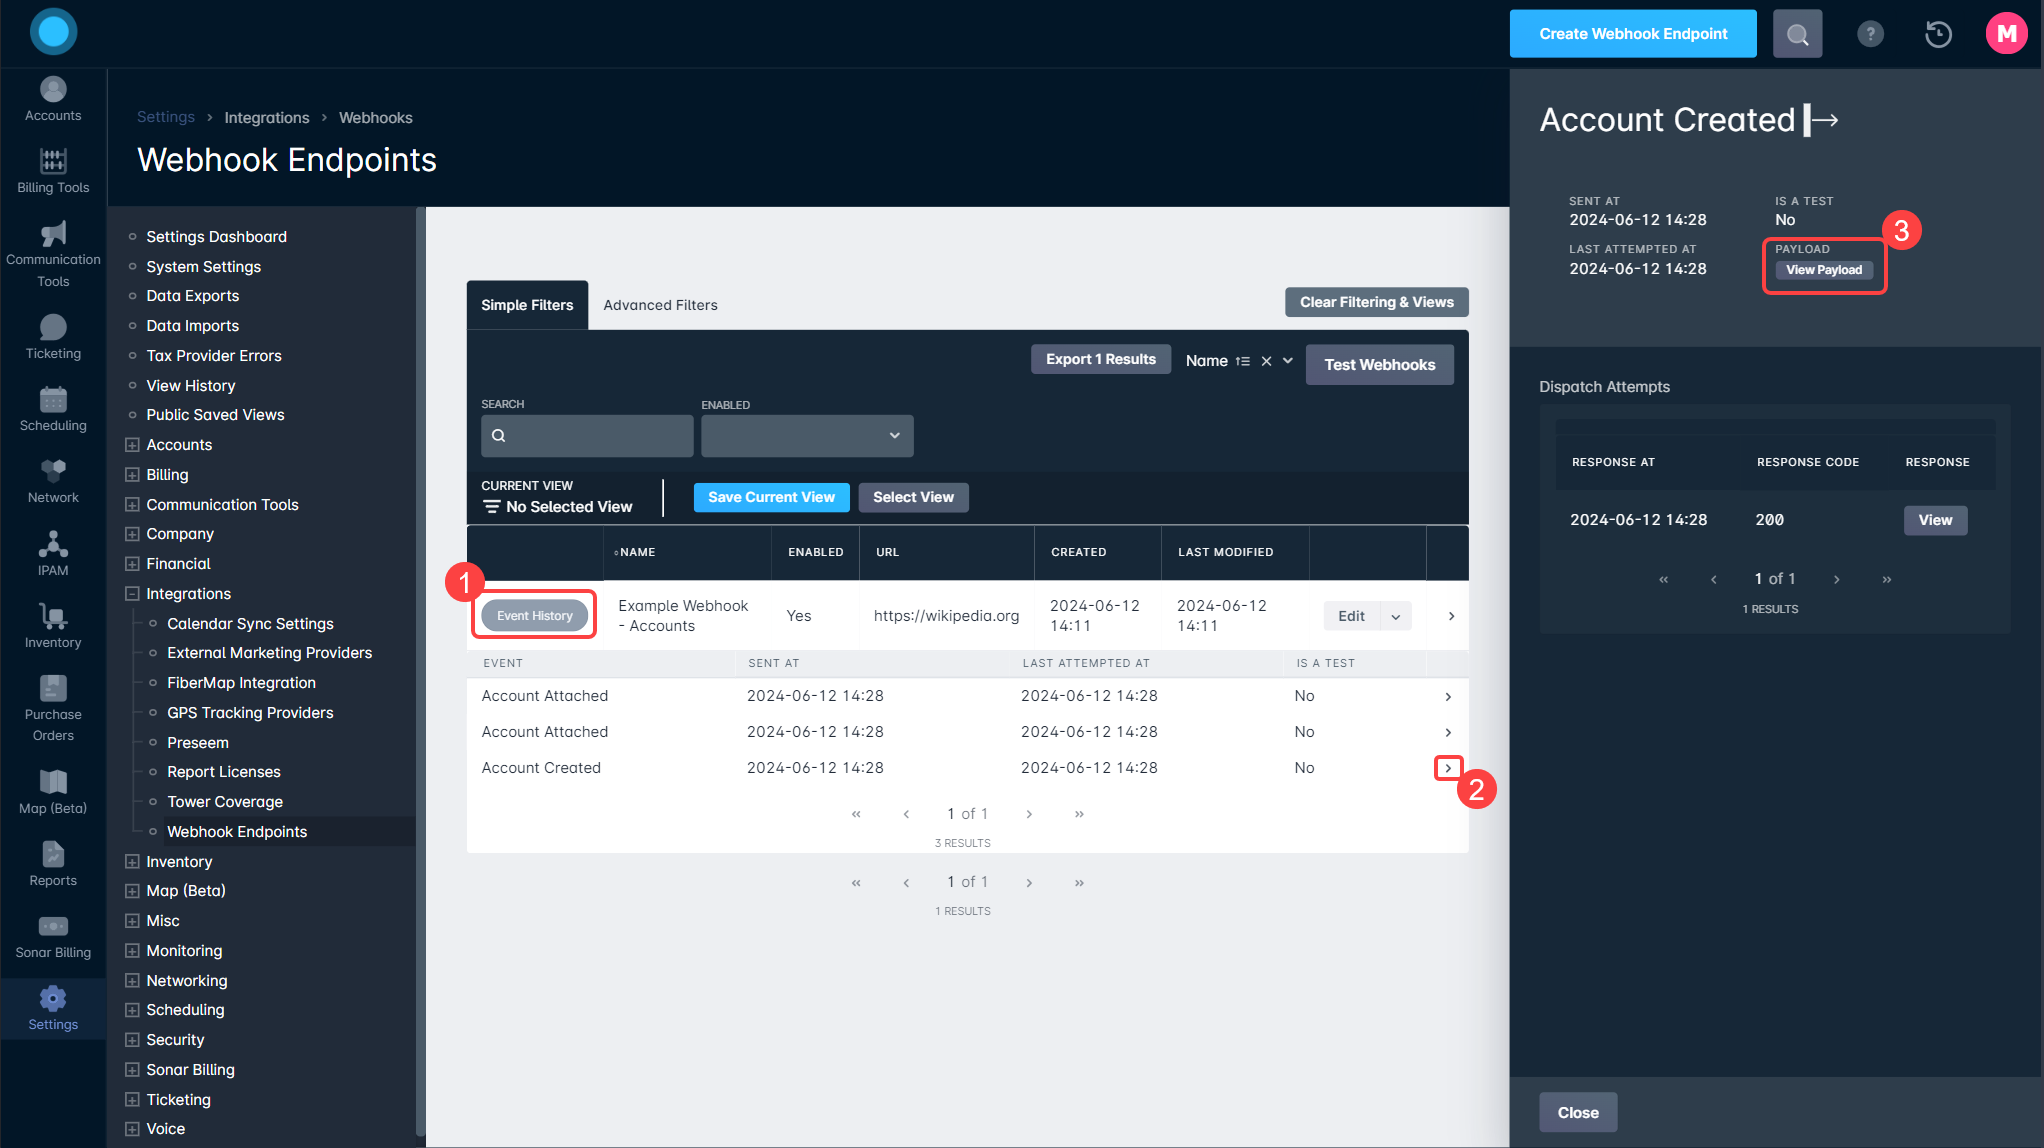
The logs in the sidebar will also record when the webhook was last triggered, and the reply that was received from the webhook recipient.
Webhook Examples
Basic Configuration Example
In this first example, we'll be using Wikipedia as the destination for the webhook that's being created. Wikipedia is a good tool for this because it will always accept the webhook input and return a “200” HTML code. In this example, the webhook will trigger any time an account is created or deleted. Let's create this webhook.
- Open the Webhook Creation modal by going to Settings → Integrations → Webhook Endpoints and clicking on “Create Webhook Endpoint”
- Within the modal, we'll set the Webhook Name and URL
 The Name and URL fields are the only ones required by Sonar to complete the creation of a Webhook Endpoint, however, without adding Triggers, this webhook will have no functionality.
 - Next, we'll set the Trigger, and Trigger Events:
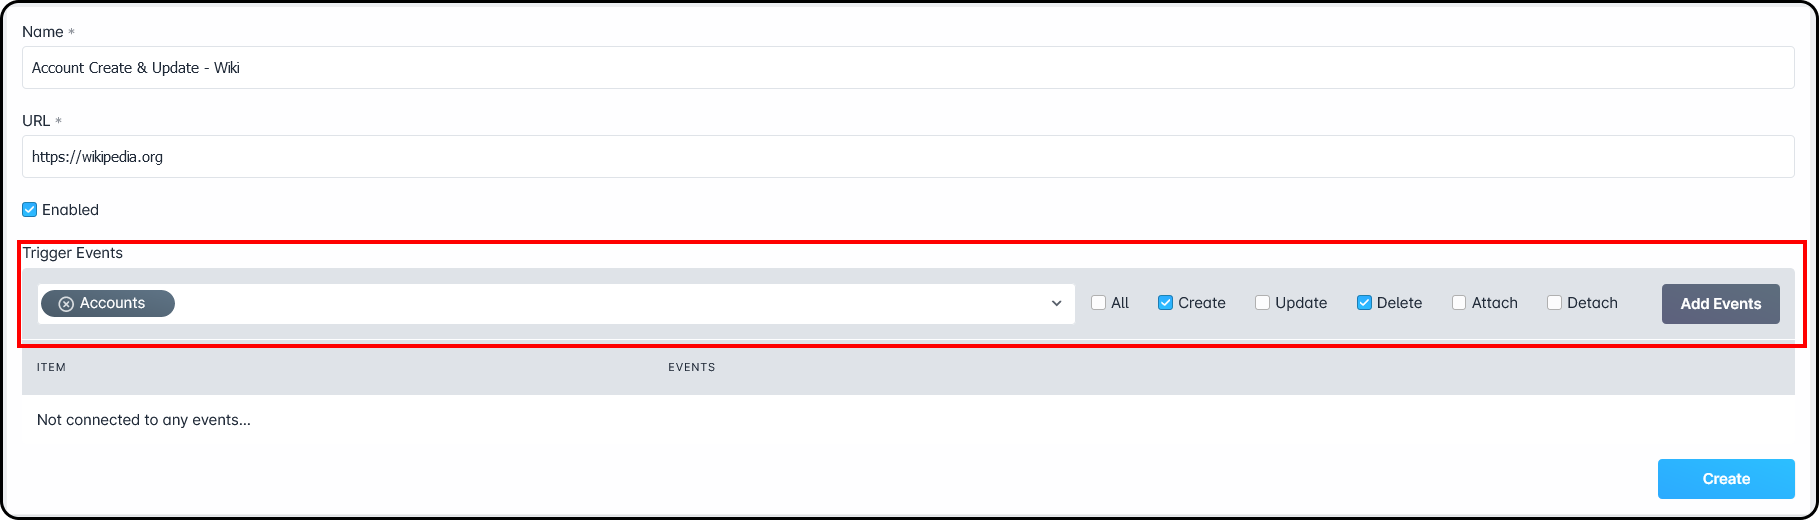
- Once the Trigger and Events are added, they'll appear in the list, and we can click on “Create”
Basic PHP Example
Through the article linked below, you will find an example of a basic webhook receiver that you could host on a server to get webhooks from Sonar.
Webhooks in Sonar: Basic PHP Example
Testing your Webhooks
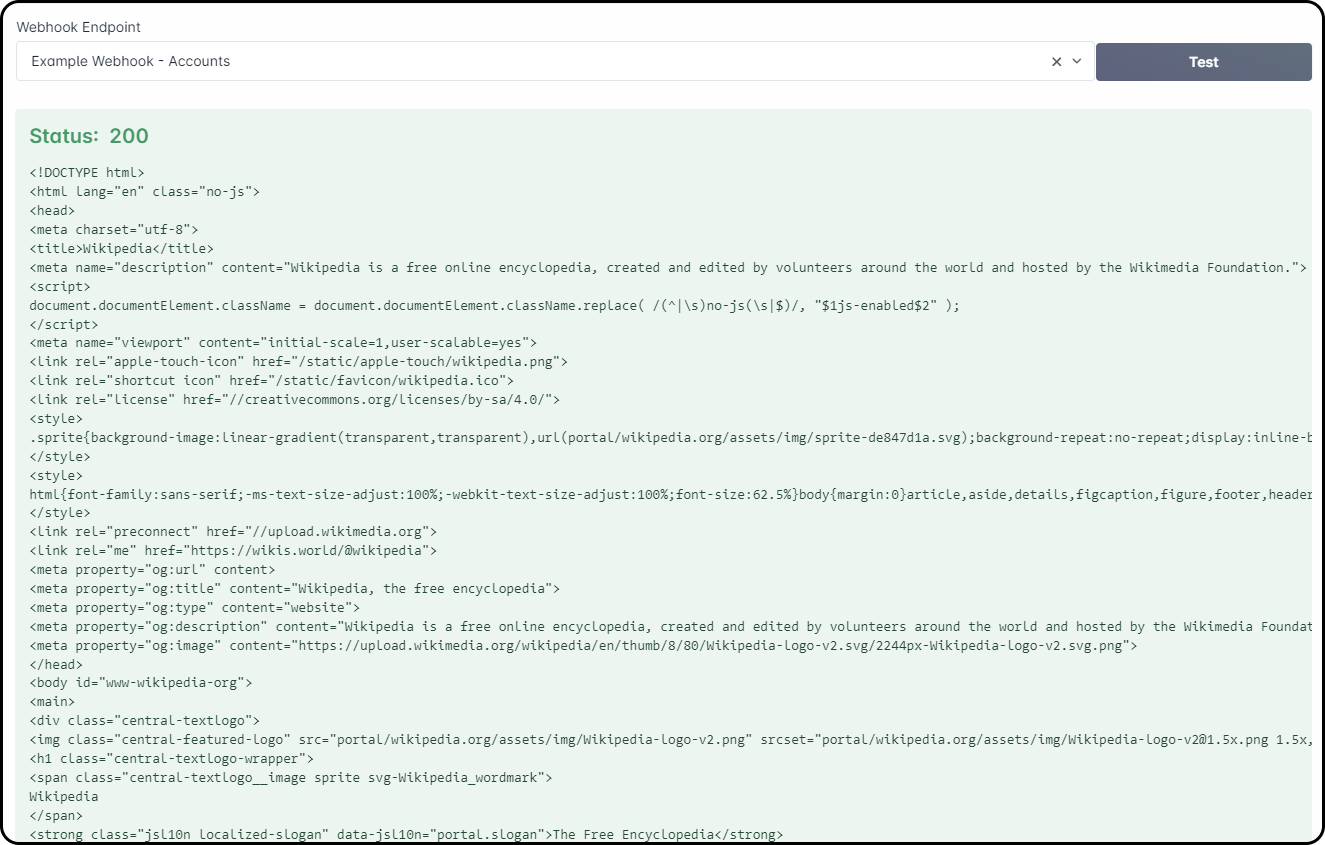
When deploying Webhooks, it's important to confirm their functionality before relying on them. While you could wait for the event(s) to occur, Sonar offers a better way. With the “Test Webhook” action, you can send a test event and receive a response from the destination URL.
To get started, locate the  button, found in the Filters section of the page.

Clicking on the button will open a new page, where your Webhook can be selected, and a test can be launched. The results will load below the selection box, once the test is submitted.
Whitelisting your Webhooks
If your Webhook Endpoint requires that the originating IP address be whitelisted to ensure communication occurs, all of Sonar's Egress and Ingress IP Addresses are available in the Sonar IP Addressing article.