Table of Contents
Billing Settings
 Updated
by Mitchell Ivany
Updated
by Mitchell Ivany
Read Time: 11 mins

In this article, we’ll review Billing Settings and explain what each section and field controls. These settings determine how billing behaves across your Sonar instance, including late fees, delinquency timing, and other general billing rules.
To control the timing of specific billing events for each account type, use Billing Defaults.
First Time Setup
When you sign in to your Sonar instance for the first time, you may see the initialization process. These setup pages help you configure the basic settings needed to start using your instance.
One of the setup pages is for Billing Settings, where you can configure how billing should behave in Sonar.
These parameters work the same way as the settings in your Sonar instance. Each section follows the same behavior and controls the same billing options.


Billing Settings
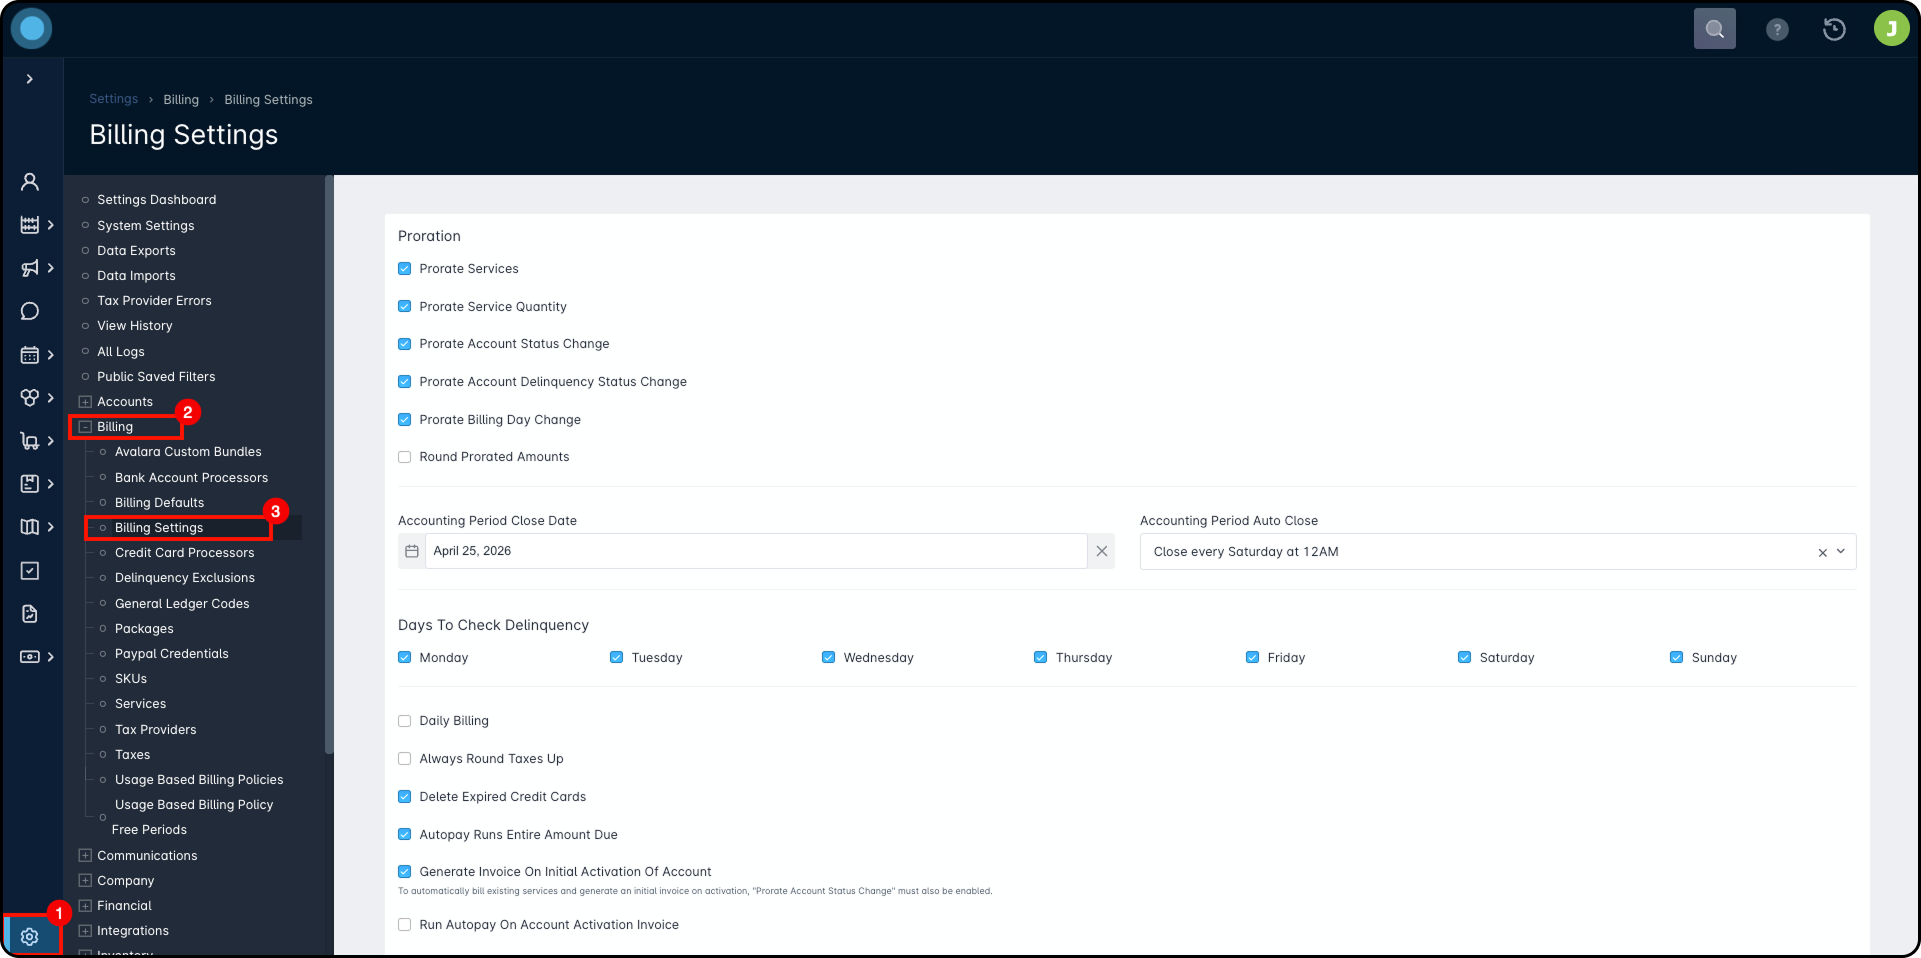
You can access the Billing Settings page by:
- Click Settings.
- Expand the Billing category.
- Click Billing Settings.
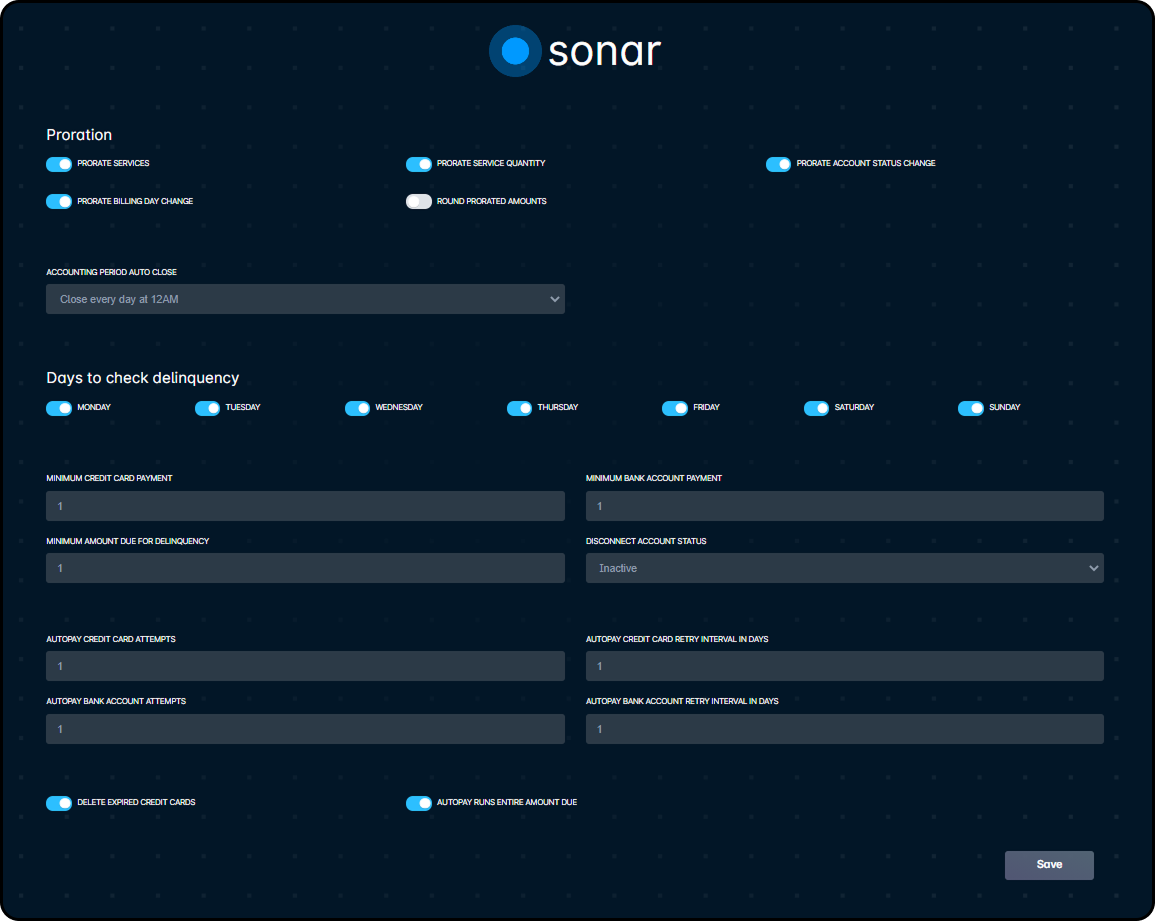
Proration
Proration in Sonar calculates the amount due based on the days remaining in the current billing cycle.
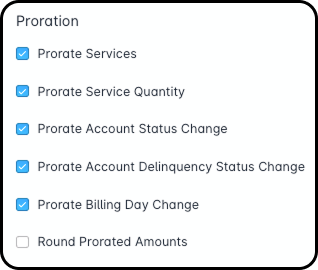
In Billing Settings, the proration checkboxes control whether proration is selected by default when changes are made to customer accounts.
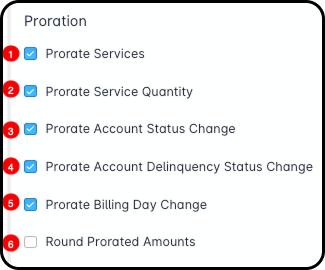
- Prorate Services: Allows customer services to be changed mid-billing cycle and adjusts the price based on when the change is made.
- Prorate Service Quantity: Allows additional quantities of the same service to be added to a customer account while only billing for the remaining time in the billing cycle.
- Prorate Account Status Change: Allows account status changes, such as canceling an account, to be prorated. Any remaining bill amount can be refunded to the account’s payment method.If an account uses activation day billing and generates an initial invoice when first activated, Prorate Account Status Change must also be enabled.
If this setting is not enabled, the invoice will not generate until the next billing period. - Prorate Account Delinquency Status Change: Controls whether proration is selected by default when an account’s delinquency status changes from active to inactive or inactive to active.In Billing Defaults, if an account is set to move into another status after being delinquent for a set period, this setting will prorate the account by default when it moves into or out of delinquency.

- Prorate Billing Day Change: Allows Sonar to prorate any amount due when an account’s billing day changes, whether by customer request or company policy.
- Round Prorated Amounts: Allows prorated amounts to be rounded based on your company’s preference, such as to the nearest cent or dollar.
General Accounting
The General Accounting section of Billing Settings controls key accounting and billing behavior, including:
- Accounting period limits.
- When Sonar checks due invoices for delinquency.
- Whether daily billing is enabled.

Closing an accounting period sets a cutoff date. After that date, payments can no longer be deleted, which helps keep transaction records consistent when reconciling with accounting software.
Accounting Period options
The Accounting Period settings include two options:

- Accounting Period Close Date: Allows you to manually choose a specific date to close the accounting period. This is useful if an outside accounting firm reviews or reconciles finances on a set date each month.
- Accounting Period Auto Close: Allows you to automatically close the accounting period on a recurring schedule. This is useful if an internal accountant regularly manages the books.
Implications of Closing the Accounting Period
Most accounting changes in Sonar are handled by creating adjustments rather than editing or deleting existing transactions.
There are two exceptions:
- Reversing an invoice credit.
- Reversing a discount.
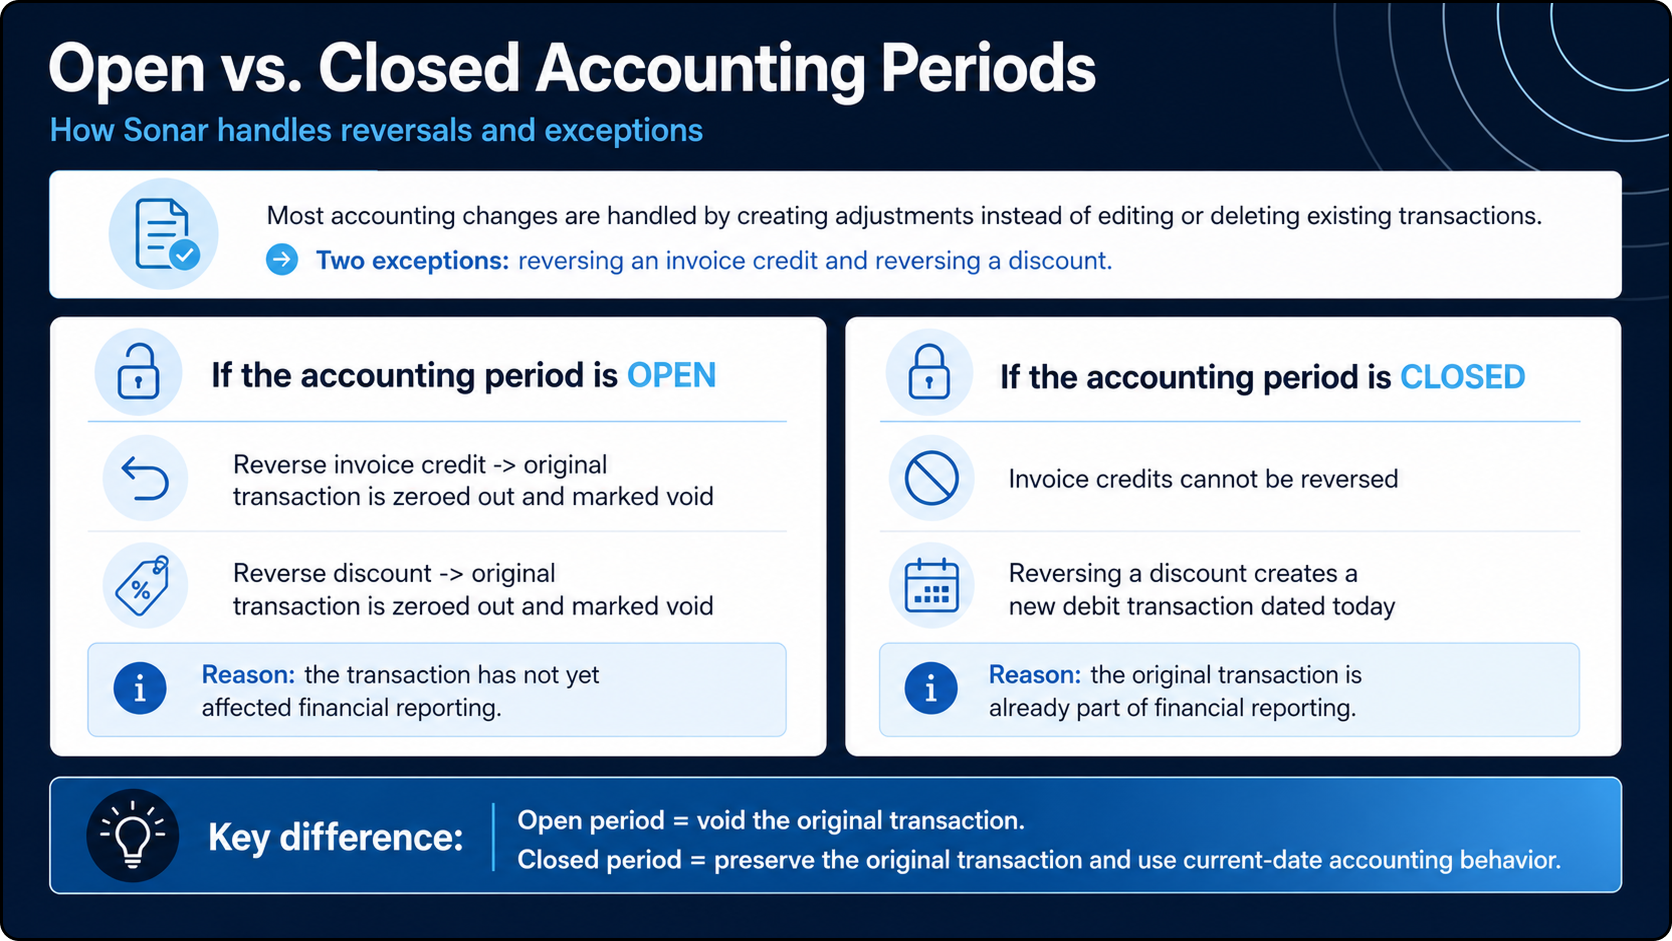
If the accounting period is still open, reversing a discount or invoice credit will zero out the transaction and mark it as void. This is because the transaction has not yet affected financial reporting.
If the accounting period is closed:
- Invoice credits cannot be reversed.
- Reversing a discount creates a new debit transaction using the current date instead of zeroing out the original transaction.
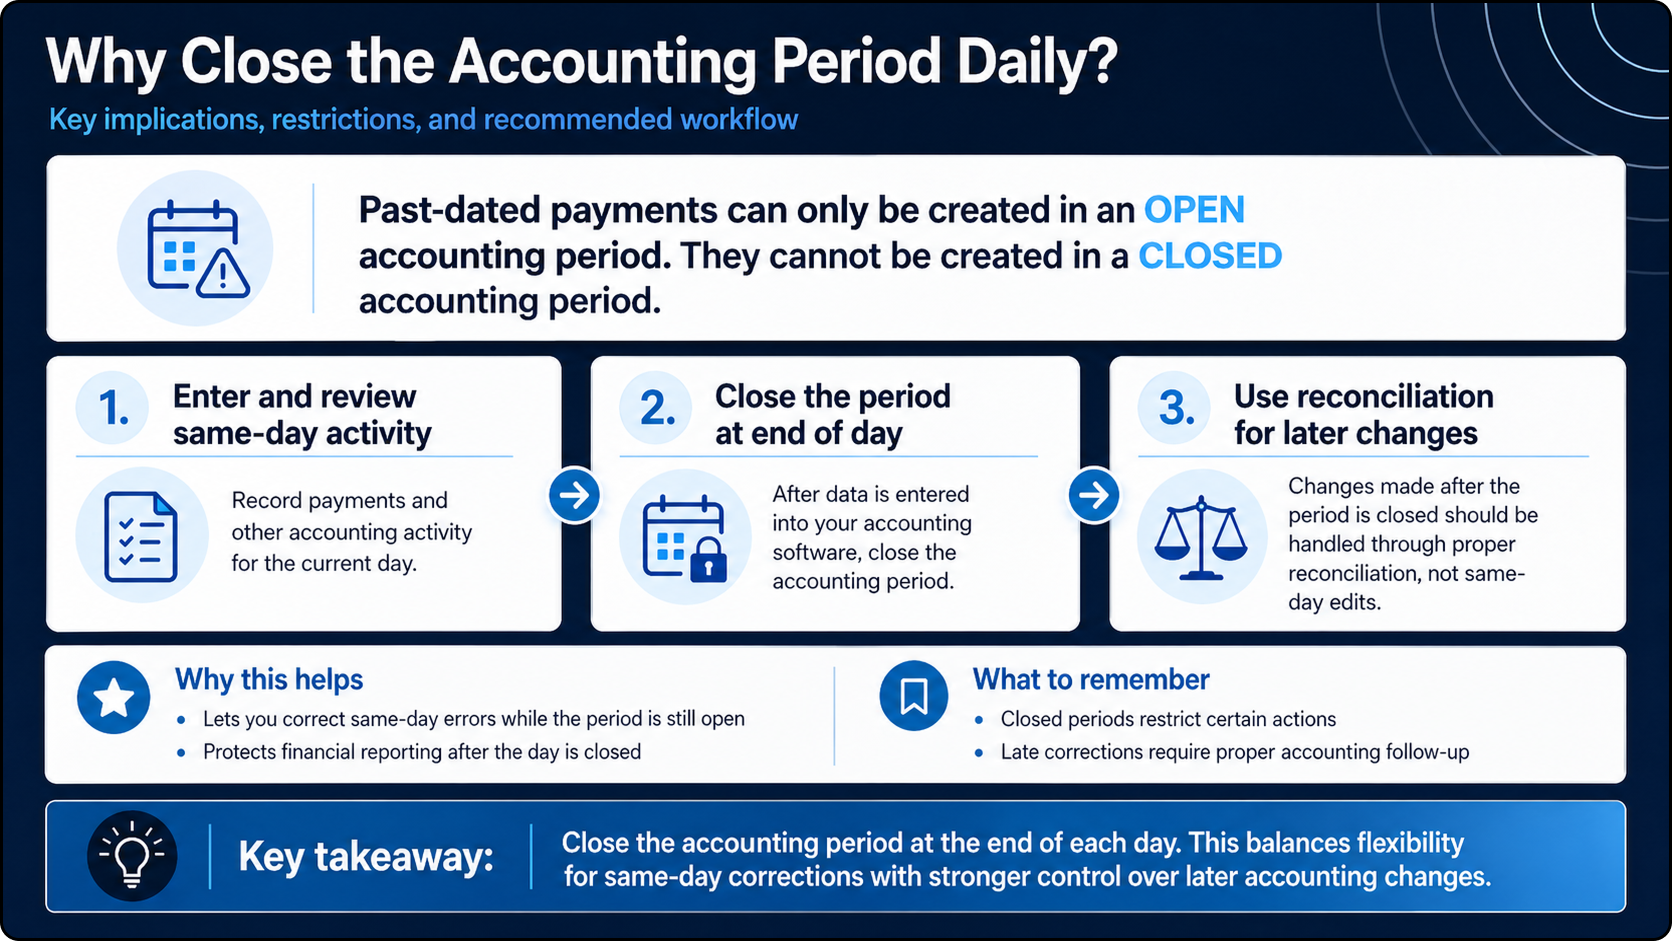
For this reason, we recommend closing the accounting period at the end of each day after entering data into your accounting software. This allows same-day errors to be corrected while requiring proper reconciliation for changes made on later days.
Days to Check Delinquency

Delinquency checks work with the settings configured in Billing Defaults. If a day is unchecked, Sonar will not run delinquency processing on that day. This can help prevent accounts from being disconnected or moved into a delinquent status on days when your team is unavailable to respond.

This also applies to account status changes triggered by Days of Delinquency for Status Switch. These status changes follow the same delinquency processing schedule as invoice delinquency checks.
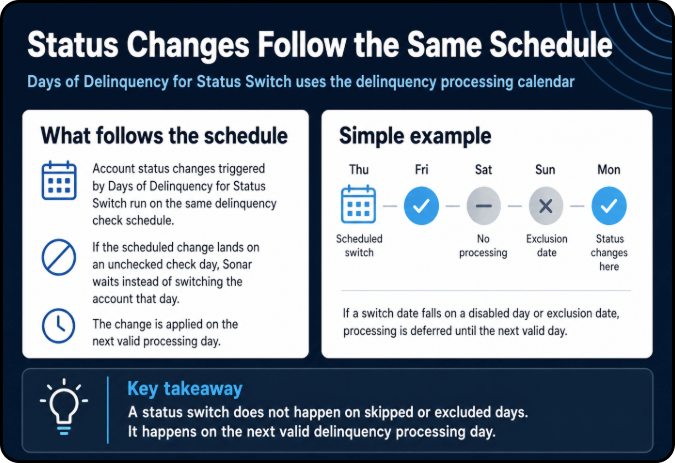
If a scheduled delinquency status change falls on a disabled check day or a Delinquency Exclusion date, Sonar will defer the status change until the next valid processing day.
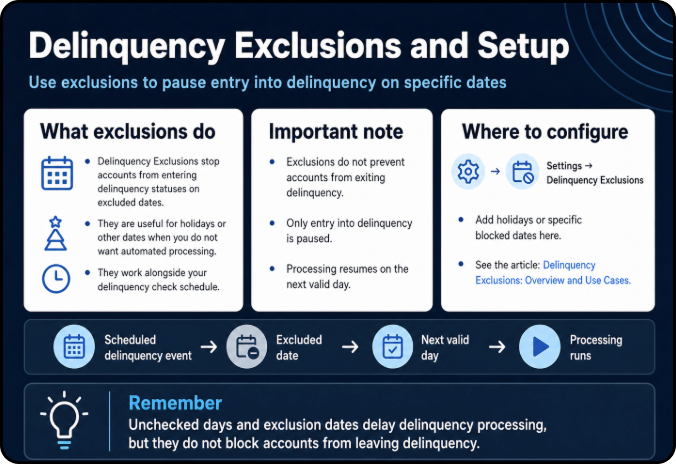
To disable delinquency processing for holidays or other specific dates, go to Settings → Delinquency Exclusions. For more information, see the Delinquency Exclusions: Overview and Use Cases article.
Daily Billing
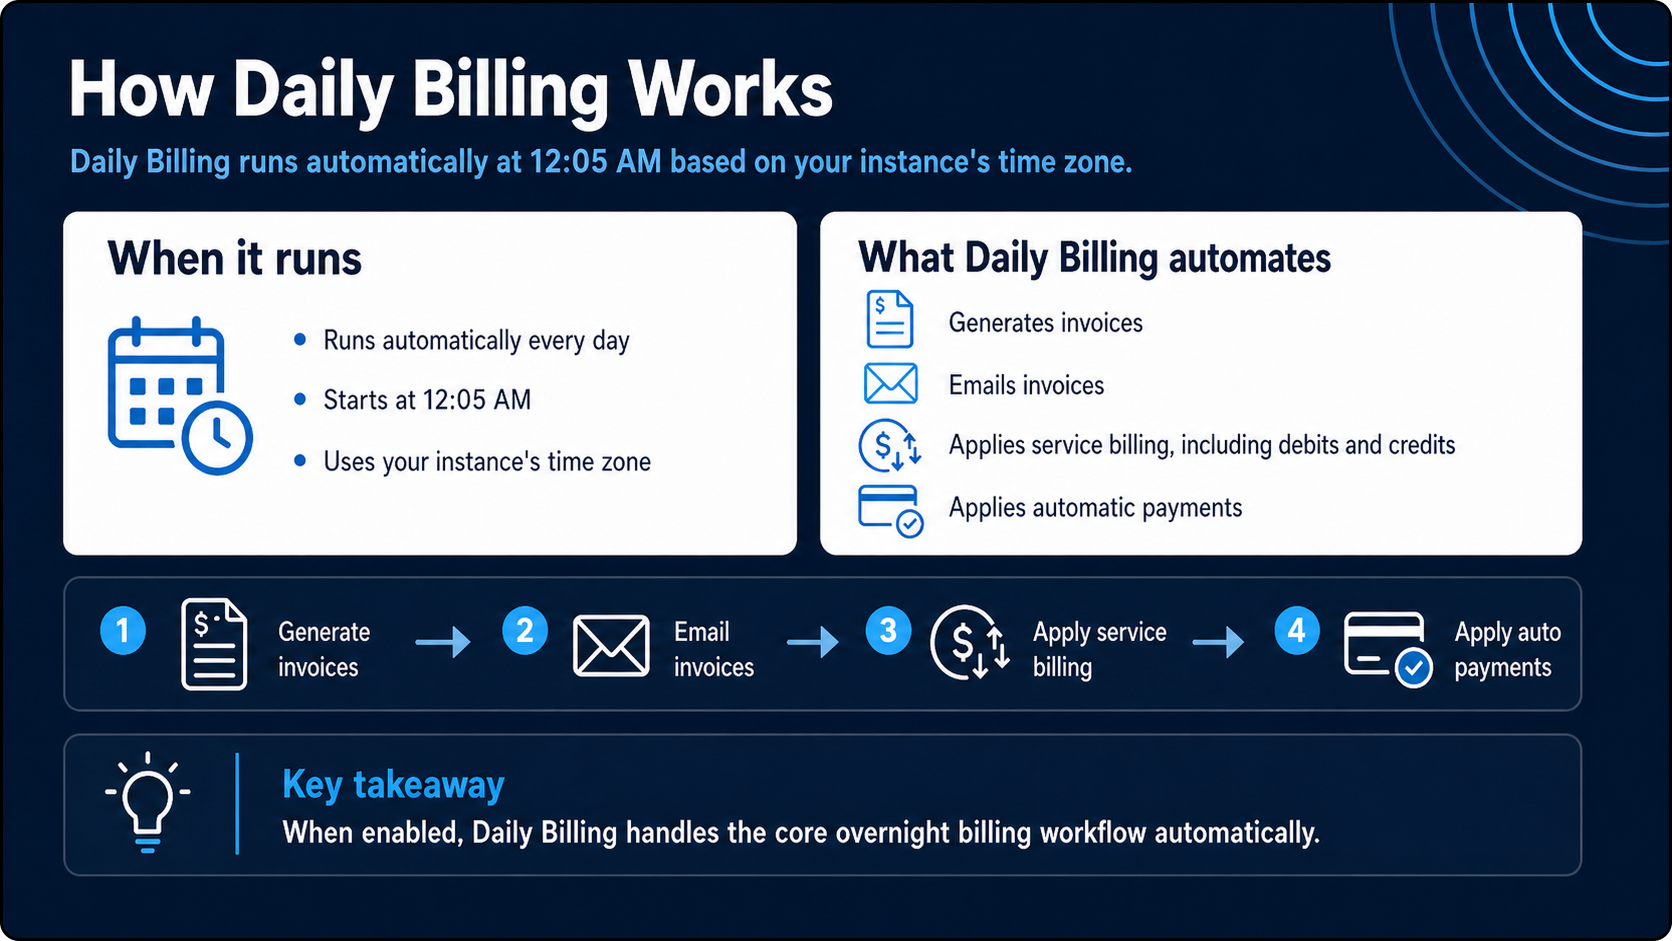
Daily Billing runs automatically at 12:05 AM based on your instance’s time zone.
When enabled, Daily Billing automates the following actions:
- Generates invoices.
- Emails invoices.
- Applies service billing, including debits and credits.
- Applies automatic payments.
Always Round Taxes Up
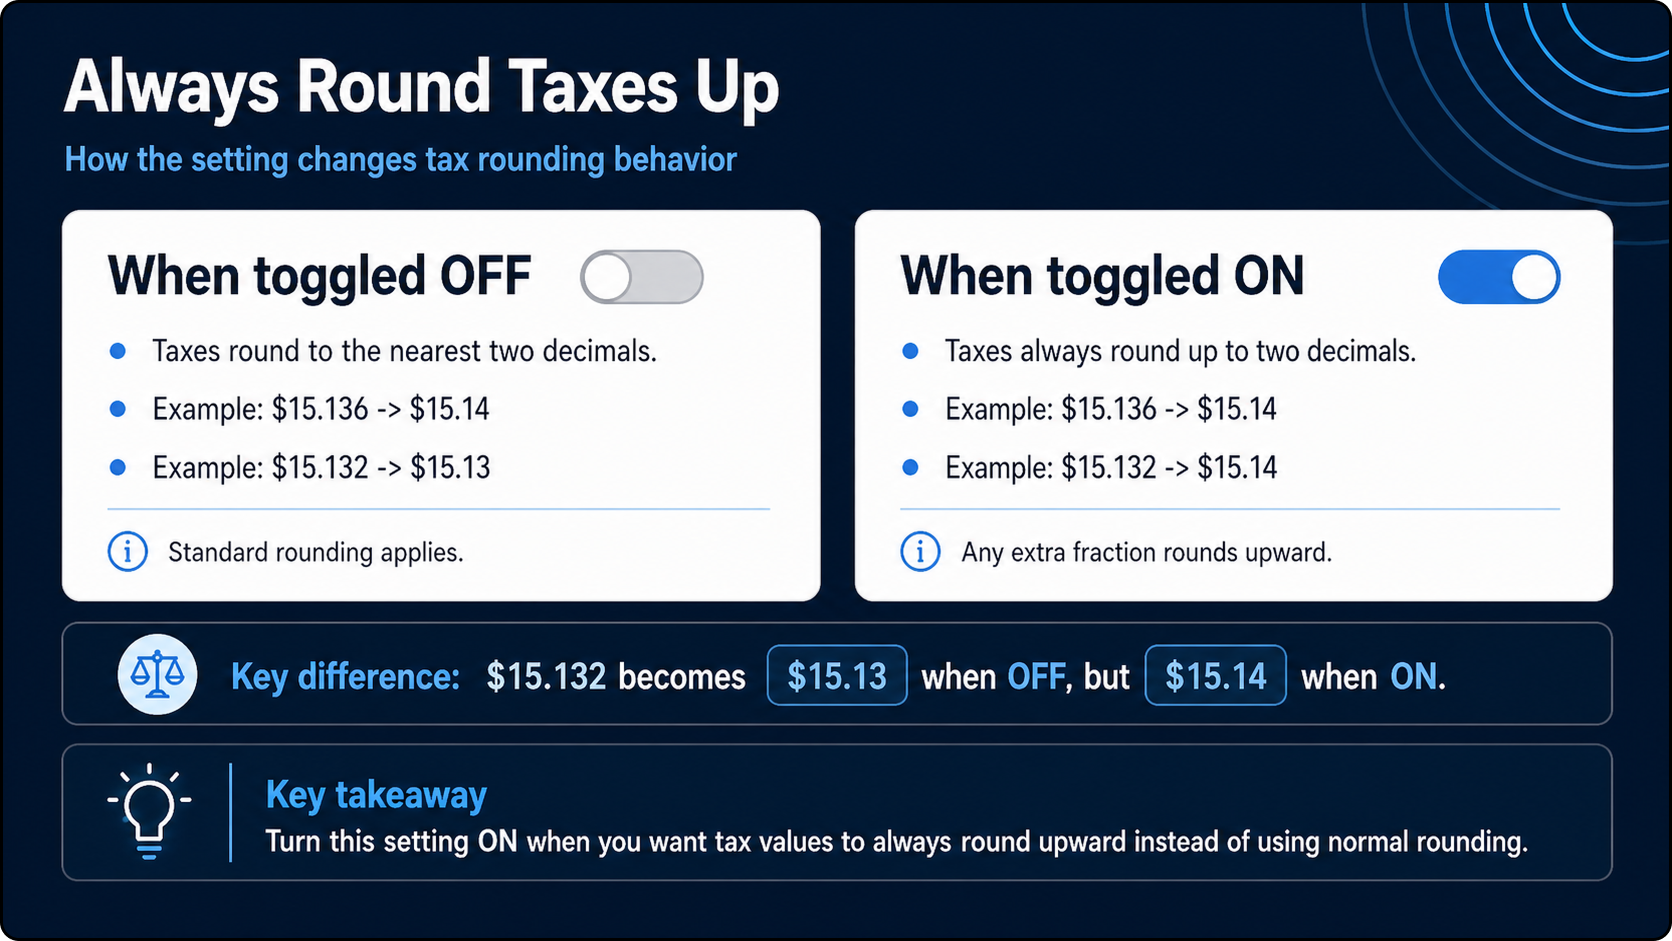
- When toggled OFF: Taxes will round to the nearest two decimals; for example, $15.136 becomes $15.14, while $15.132 would become $15.13.
- When toggled ON: The value will always round up; for example, $15.136 still becomes $15.14, as does $15.132.
Payment & Card Management
The Payment Card section of Billing Settings controls payment card behavior for customer accounts.
Use this section to configure:
- Autopay attempts.
- Minimum credit card payment amounts.
- The minimum amount Sonar will charge to a saved credit card.
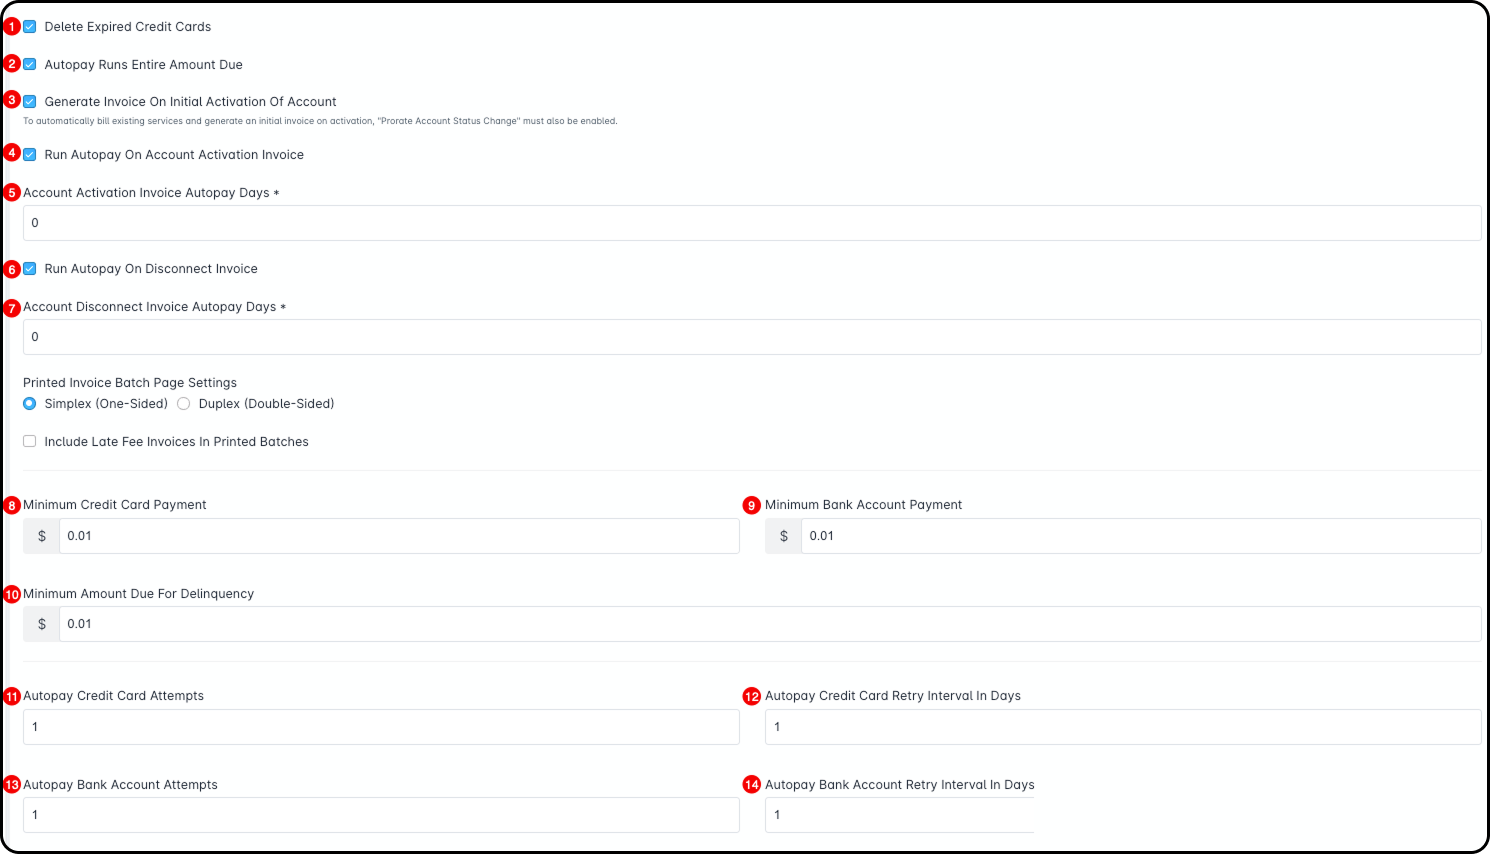
- Delete Expired Credit Cards: Removes expired credit cards from customer accounts so they can no longer be used for payments.For cards created with sonarPay, this setting also removes cards that are marked as closed or invalid.
- Autopay Runs Entire Amount Due: Includes the full amount due in autopay. This includes regular charges, delinquent balances, and any additional transactions on the account.
- Generate Invoice On Initial Activation Of Account: Creates an invoice when an account is moved to an active status for the first time.
- Run Autopay On Account Activation Invoice: Runs autopay on the invoice created when an account is first activated.This option is only available when Generate Invoice On Initial Activation Of Account is enabled.
If this box is not checked, then you will no longer see this option available.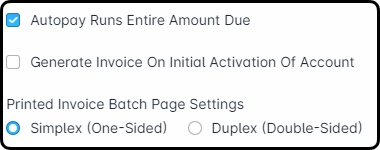
- Account Activation Invoice Autopay Days: Sets when autopay runs for the account activation invoice.
For example, enter 0 to run autopay the same day the invoice is generated. Enter 1 to run autopay the next day. - Run Autopay On Disconnect Invoice: Runs autopay on the final invoice created when an account is disconnected.An account can be disconnected in three ways:
1. From the account, go to Edit dropdown → Disconnect.
2. Use a scheduled event to disconnect the account.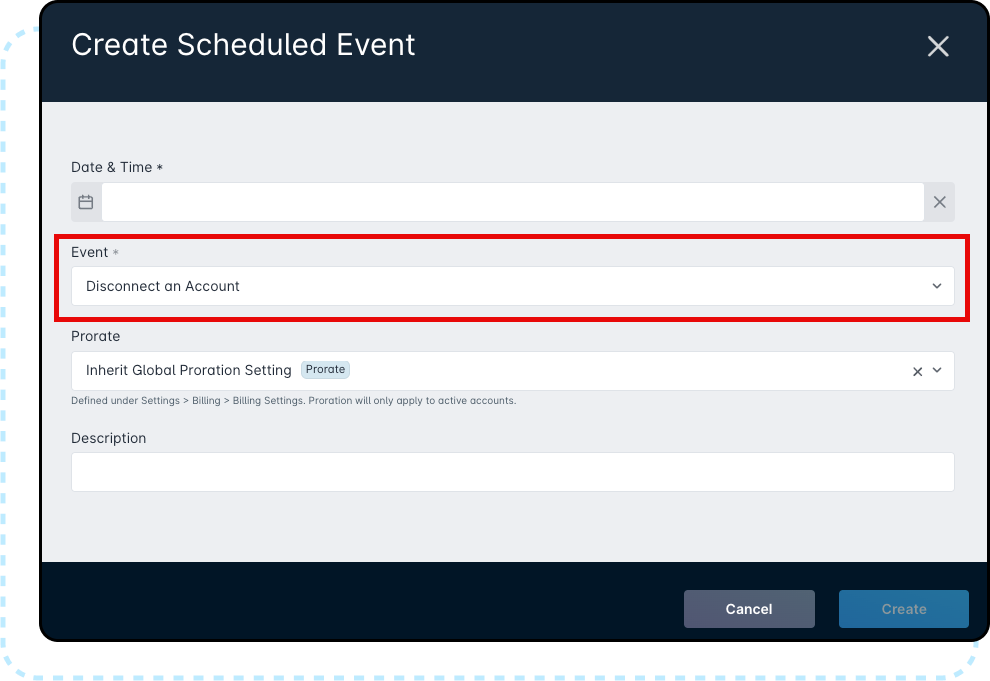
3. Complete a job that has Disconnects Account enabled. Moving an account from Active to Inactive does not trigger this setting. The account must be disconnected.
 - Account Disconnect Invoice Autopay Days: Sets when autopay runs for the account disconnect invoice.
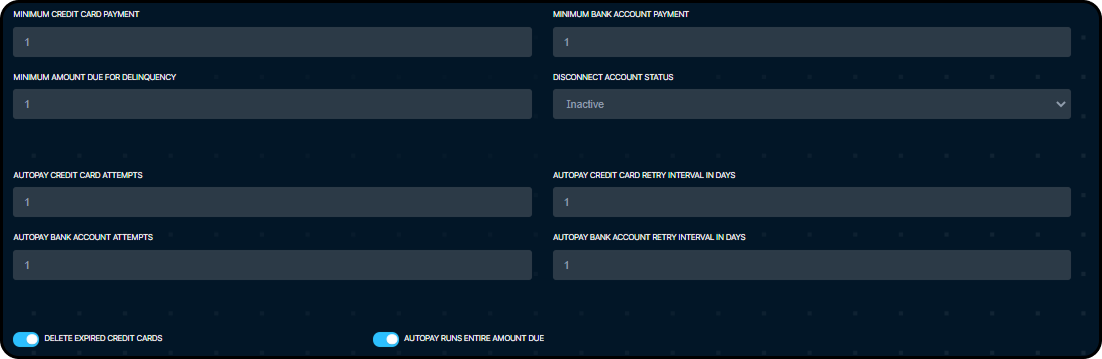
For example, enter 0 to run autopay the same day the account is disconnected and the invoice is generated. Enter 1 to run autopay the next day. - Minimum Credit Card Payment: Sets the minimum amount required to process a credit card payment. If an invoice is below this amount, it will remain unpaid until the next billing cycle.
- Minimum Bank Account Payment: Sets the minimum amount required to process a bank account payment.
- Minimum Amount Due For Delinquency: Sets the minimum unpaid invoice amount required for an account to be considered delinquent.
For example, you may choose not to mark accounts as delinquent when the unpaid amount is less than $5. This amount should align with your minimum credit card and bank account payment settings so customers are not marked delinquent because of your payment thresholds. - Autopay Credit Card Attempts: Sets how many times Sonar will attempt a credit card payment before the payment is considered declined.
- Autopay Credit Card Retry Interval In Days: Sets how many days Sonar waits before retrying a declined credit card payment. This works with Autopay Credit Card Attempts.
- Autopay Bank Account Attempts: Sets how many times Sonar will attempt a bank account payment before the payment is considered declined.
- Autopay Bank Account Retry Interval In Days: Sets how many days Sonar waits before retrying a declined bank account payment. This works with Autopay Bank Account Attempts.
Additional Management
The Additional Management section of Billing Settings includes options for managing invoice behavior, automatic customer fees, and account status after an account is disconnected from the network.
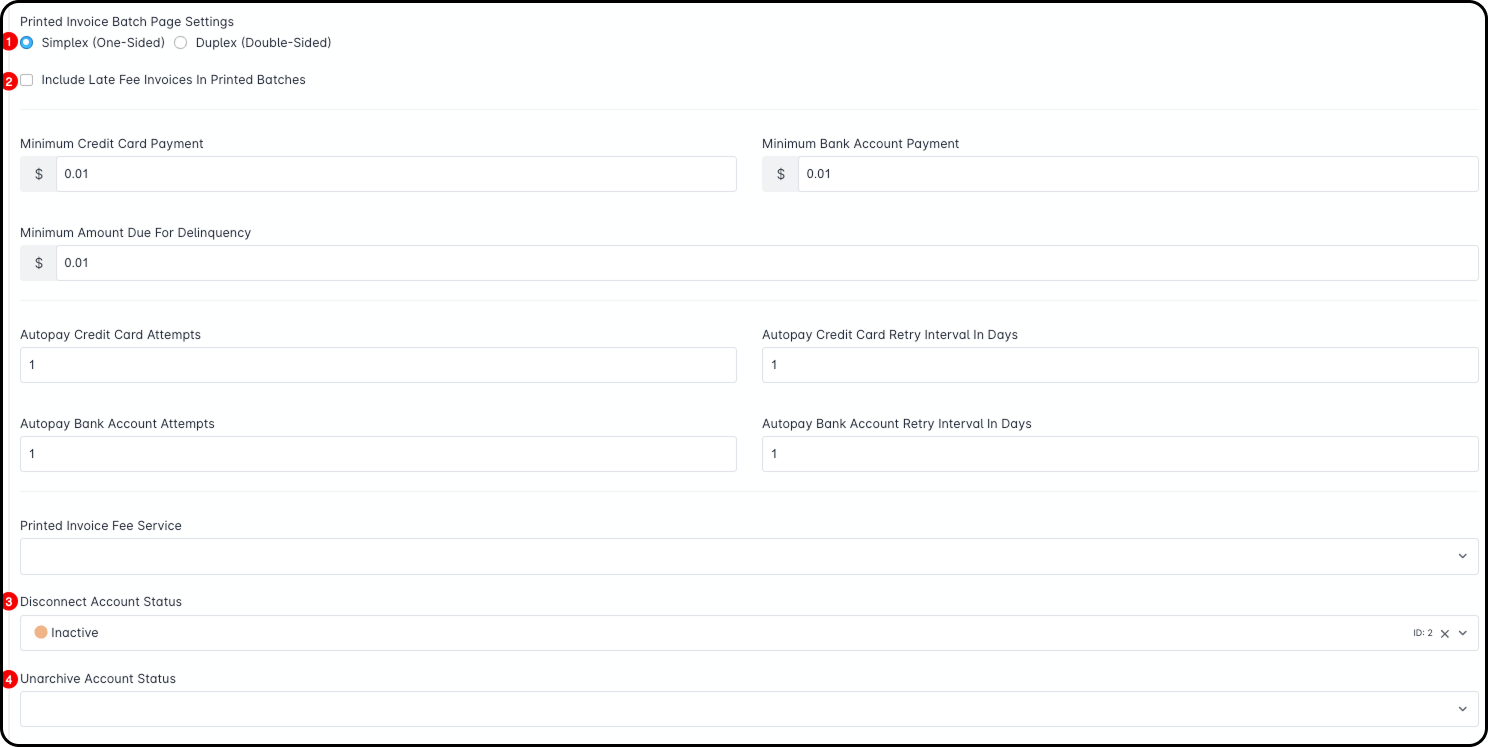
- Printed Invoice Batch Page Settings: Controls whether printed invoice batches are printed as simplex (one-sided) or duplex (double-sided).To learn more, see the Printed Invoice Batches article.
- Include Late Fee Invoices in Printed Batches: Adds invoices created from late fees to Print Invoice and Print to Mail batches.This applies when Invoice and Email Late Fees Immediately is also enabled.
- Disconnect Account Status: Sets the default account status that accounts move into after they are disconnected.To learn more, see the Disconnecting an Account article.
- Unarchive Account Status: Sets the default account status that accounts move into after they are Unarchived.To learn more, see the Archiving an Account: Overview article.
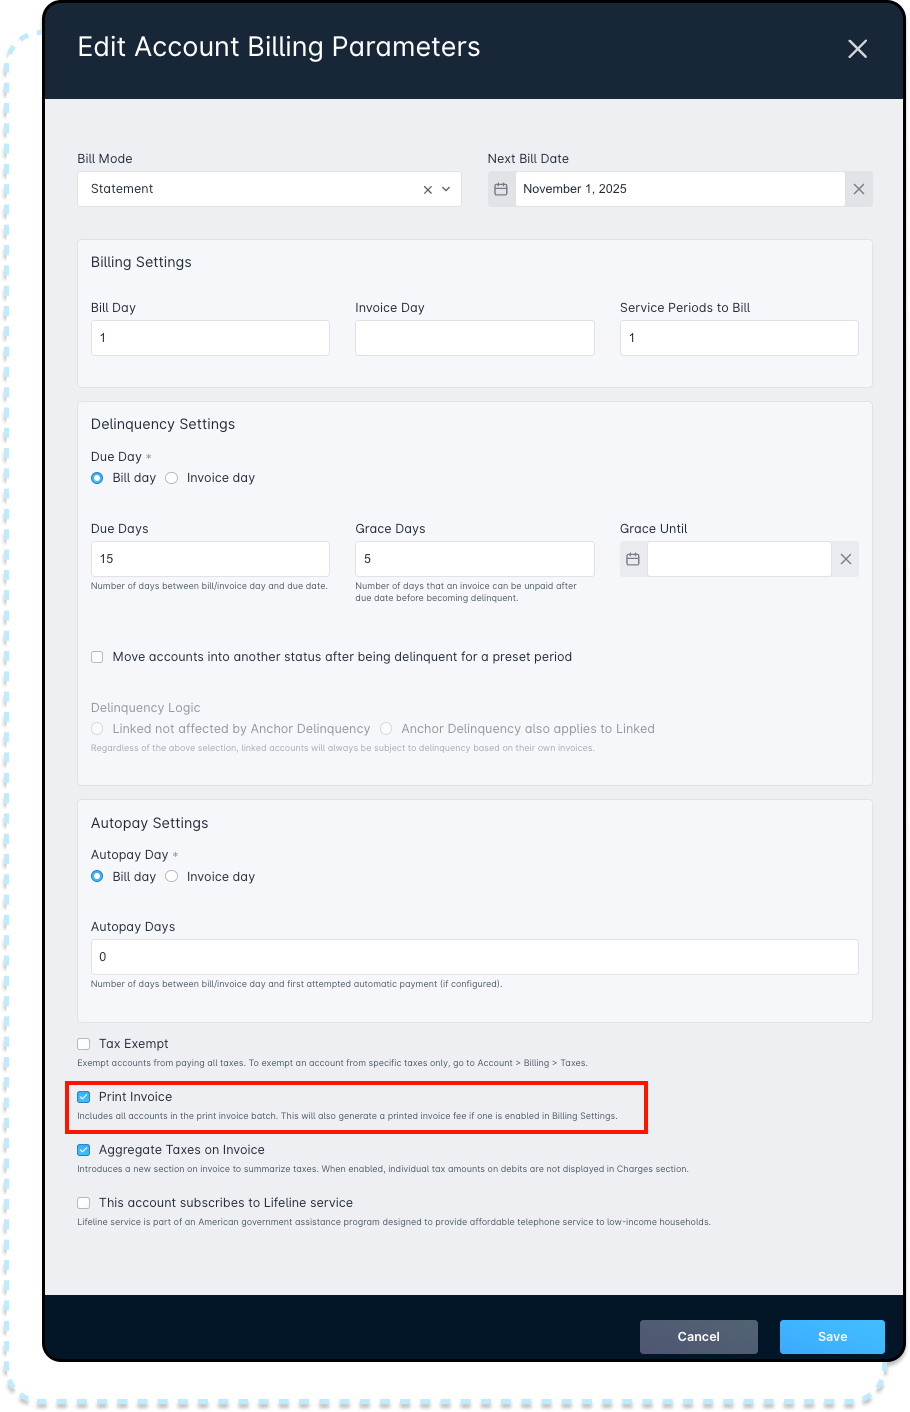
Printed Invoice Fee Service

The Printed Invoice Fee Service dropdown lets you apply a debit to customer accounts that choose to receive a paper invoice or statement. This fee is applied when the account’s invoice is included in an invoice batch.
The example below shows this setting on a demo account.
Late Fees
The Late Fees section of Billing Settings is enabled by selecting Apply Late Fees near the bottom of the page.
This may include late fees that are invoiced immediately or multiple past-due invoices if late fees are enabled after invoices are already overdue.
When Apply Late Fees is enabled, additional late fee options will appear.
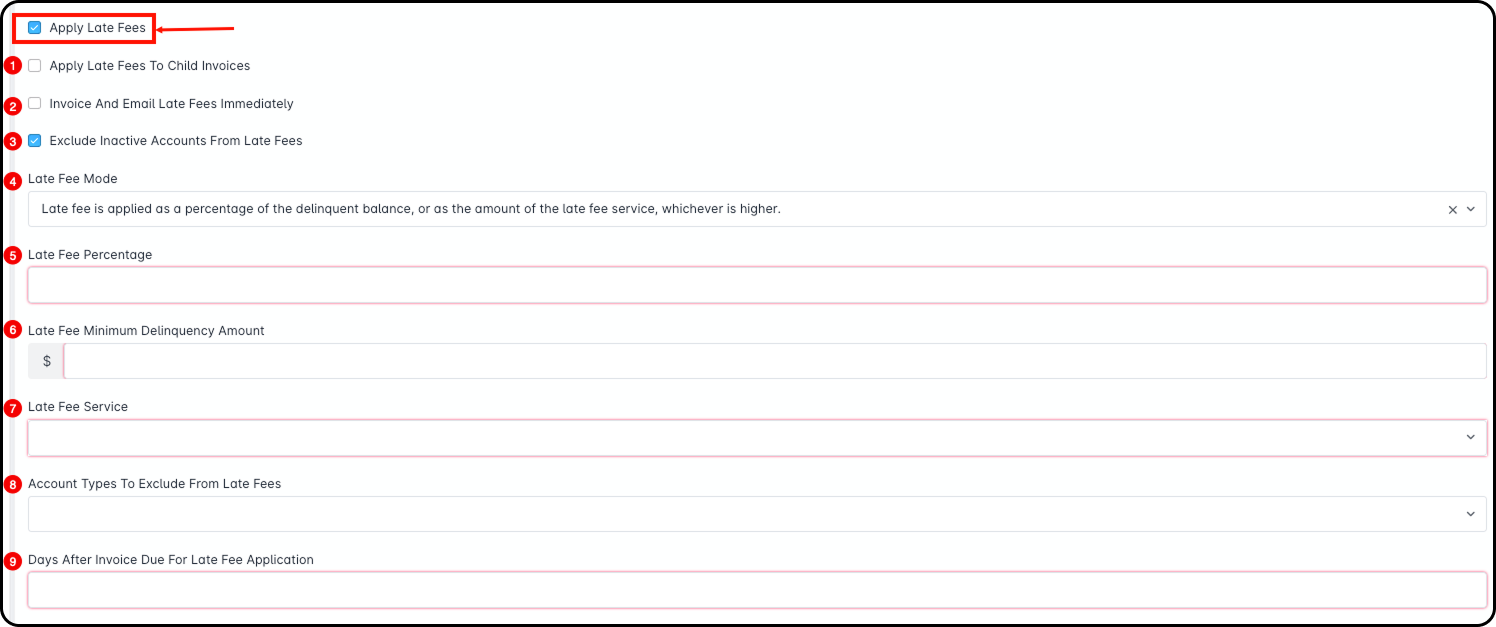
- Apply Late Fees to Child Invoices: Applies late fees to child invoices, in addition to parent invoices, when the payment due date is missed.This only applies to accounts using a parent/child account structure. For more information, see the Child Accounts: Best Practices & How-Tos article.
- Invoice and Email Late Fees Immediately: Controls when late fees are invoiced.
- If this setting is disabled, late fees are added as a transaction on the account and invoiced during the next service period.
- If this setting is enabled, Sonar creates an invoice immediately and emails it to the customer.Invoices created from late fees are due the next day. These invoices will not receive additional late fees.
- Exclude Inactive Accounts from Late Fees: Prevents late fees from being applied to inactive accounts that still have an amount due.
- Late Fee Mode: Determines how late fees are calculated.
Late fees can be applied as:- A fixed charge based on the selected late fee service.
- A percentage of the delinquent balance or the late fee service amount, whichever is higher.
- Late Fee Percentage: Sets the percentage used to calculate the late fee.This field only appears when Late Fee Mode is set to apply the late fee as a percentage of the delinquent balance or the late fee service amount, whichever is higher.
- Late Fee Minimum Delinquency Amount: Sets the minimum invoice amount required before a late fee is charged.This is useful if you would rather not charge late fees on small invoice amounts, such as service change or vacation mode fees.
- Late Fee Service: Sets the late fee service that will be added as a debit on the customer’s account when an invoice becomes past due.For more information, see the Services: Overview article.
- Account Types to Exclude from Late Fees: Allows you to exclude one or more account types from the late fee settings configured here.
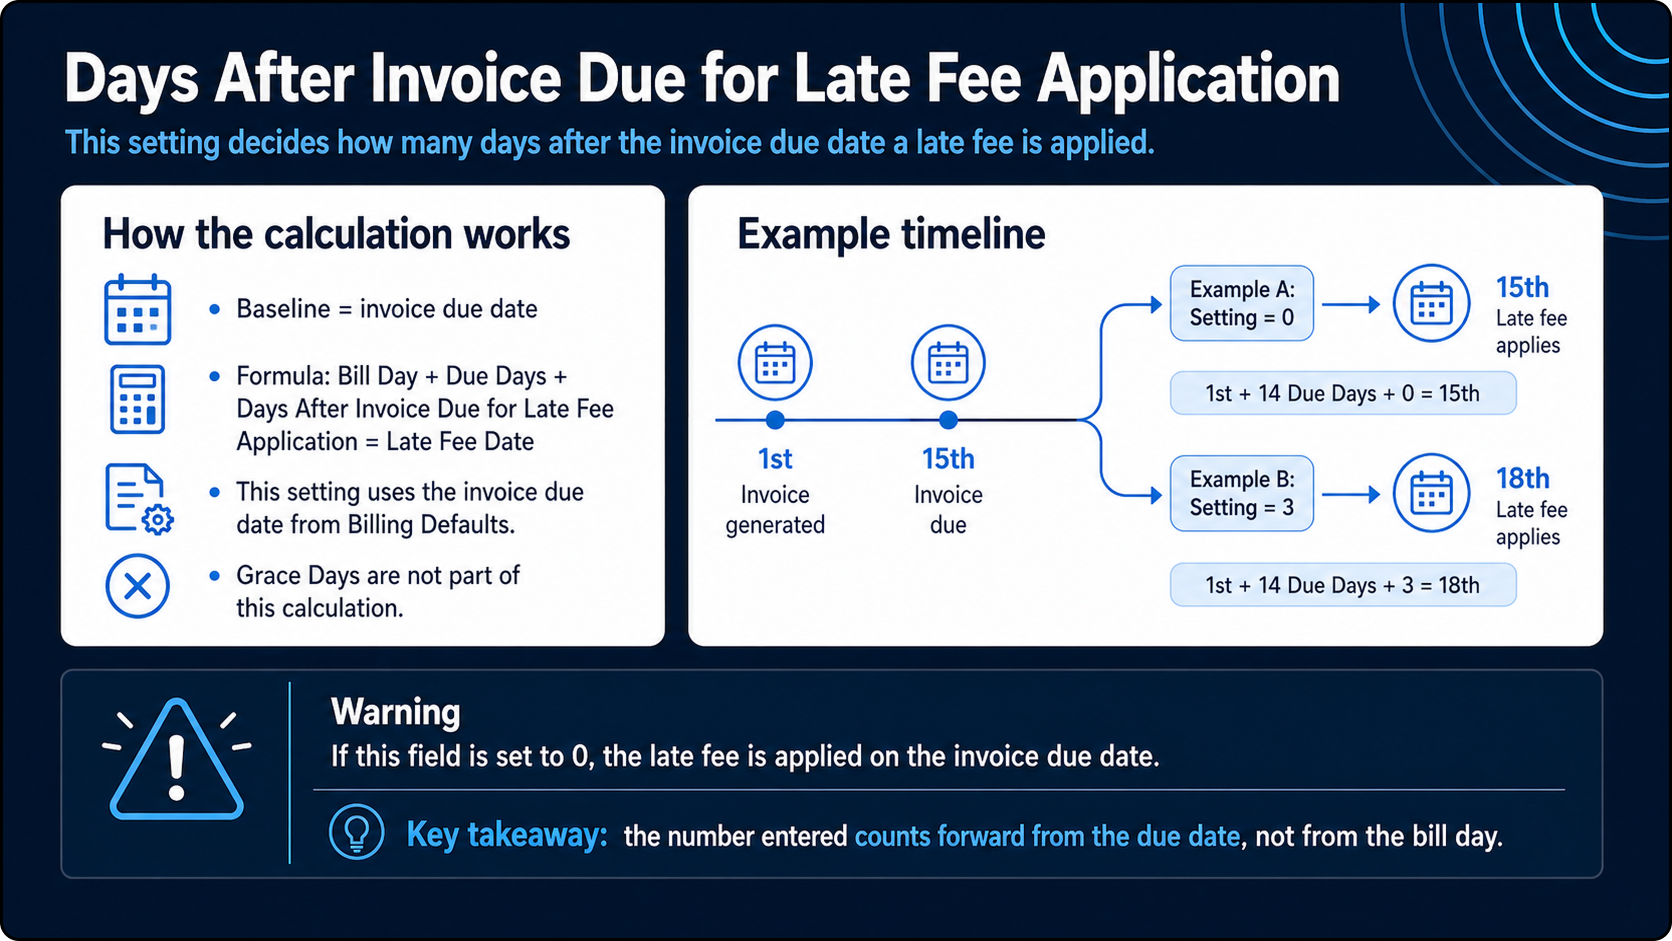
- Days After Invoice Due for Late Fee Application: Sets how many days after the invoice due date the late fee is applied.
This setting is based on the invoice due date configured in Billing Defaults.If this field is set to 0, the late fee is applied on the invoice due date.