Table of Contents
Assigning an IP Address Using Sonar's IPAM: How to
 Updated
by Mitchell Ivany
Updated
by Mitchell Ivany
Read Time: 7 mins
In order to provision service for your customers in Sonar, two things are needed - a data service on the customer's account, and an IP address assigned to the customer premises equipment. In other knowledge base articles, the process of setting up your DHCP Server and your Inline Device have been covered, both of which are methods of automating the IP assignment and service provisioning processes.
In this article, using the built-in Sonar IP Address Management Interface as a method for manually assigning IP Addresses will be highlighted and covered in detail in order to demonstrate the versatility of Sonar, and allow your organization to use any means of provisioning you'd like, without worrying about complete compatibility.
Using the IP Address Management Interface
The IP Address Management Interface is an incredibly robust tool, and at first, can appear quite daunting. In this section, concepts highlighted in the IPAM: Overview and IPAM: Basic Setup articles will be reviewed as applicable to the process of assigning IP Addresses. We do recommend that you review those articles at this point as they cover the overall topics in greater detail.
Creating Supernets, Subnets, and IP Pools
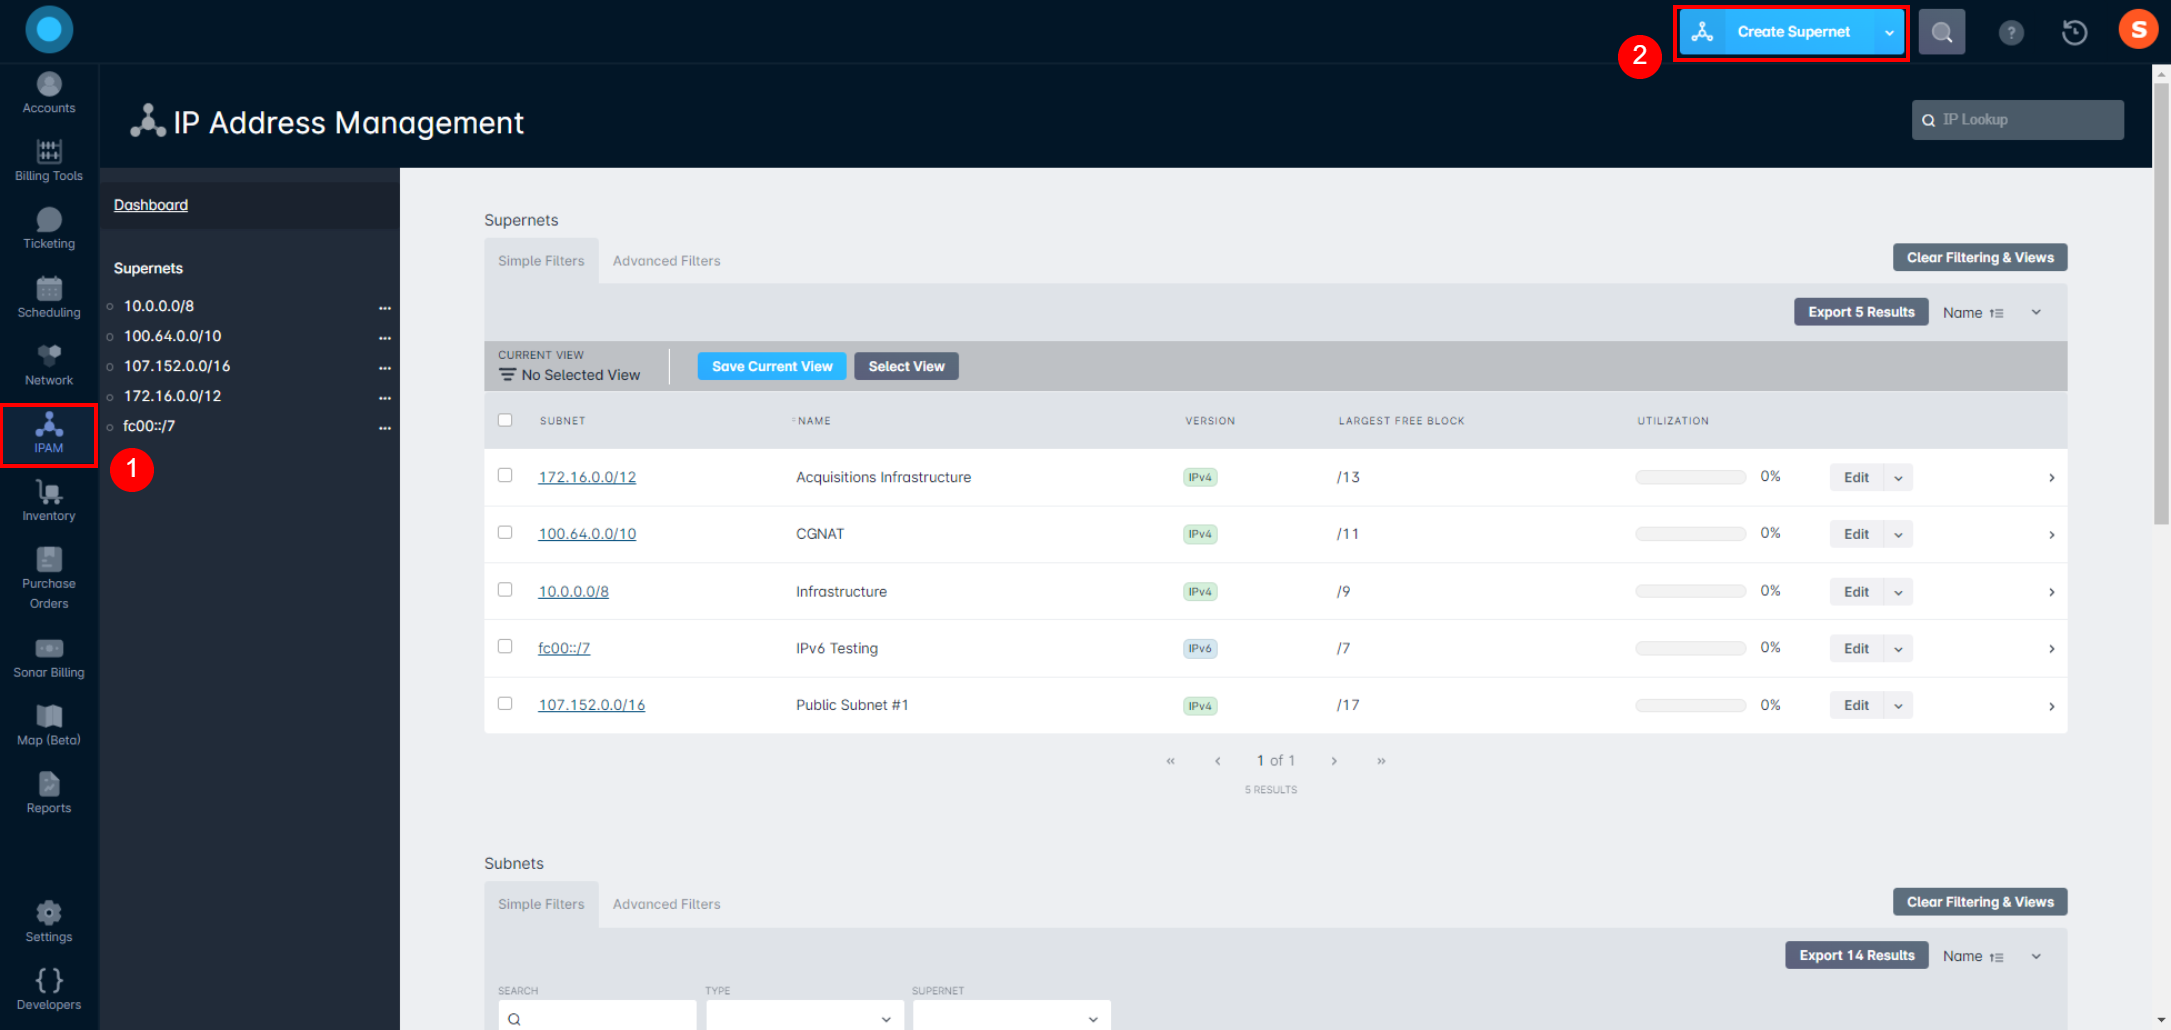
In order to begin using IPAM to assign IP addresses to accounts and devices, your Supernets and Subnets need to be created. Supernets act as a container for your Subnets, while Subnets contain the IP addresses assigned to your customers. Creating a Supernet is simple - from the IPAM page in Sonar, click on the "Create Supernet" button, pictured below:
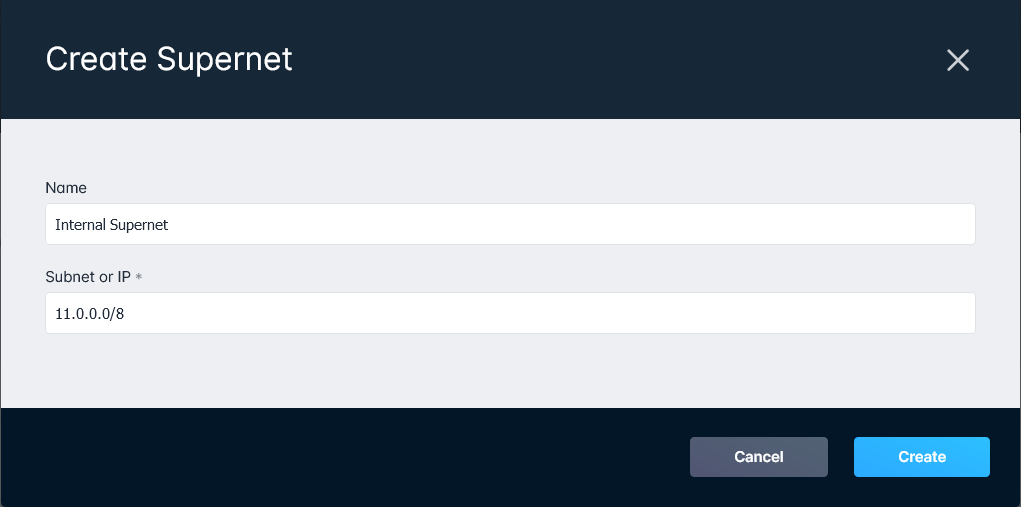
Next, you provide a name and a block of IP addresses, as pictured below:
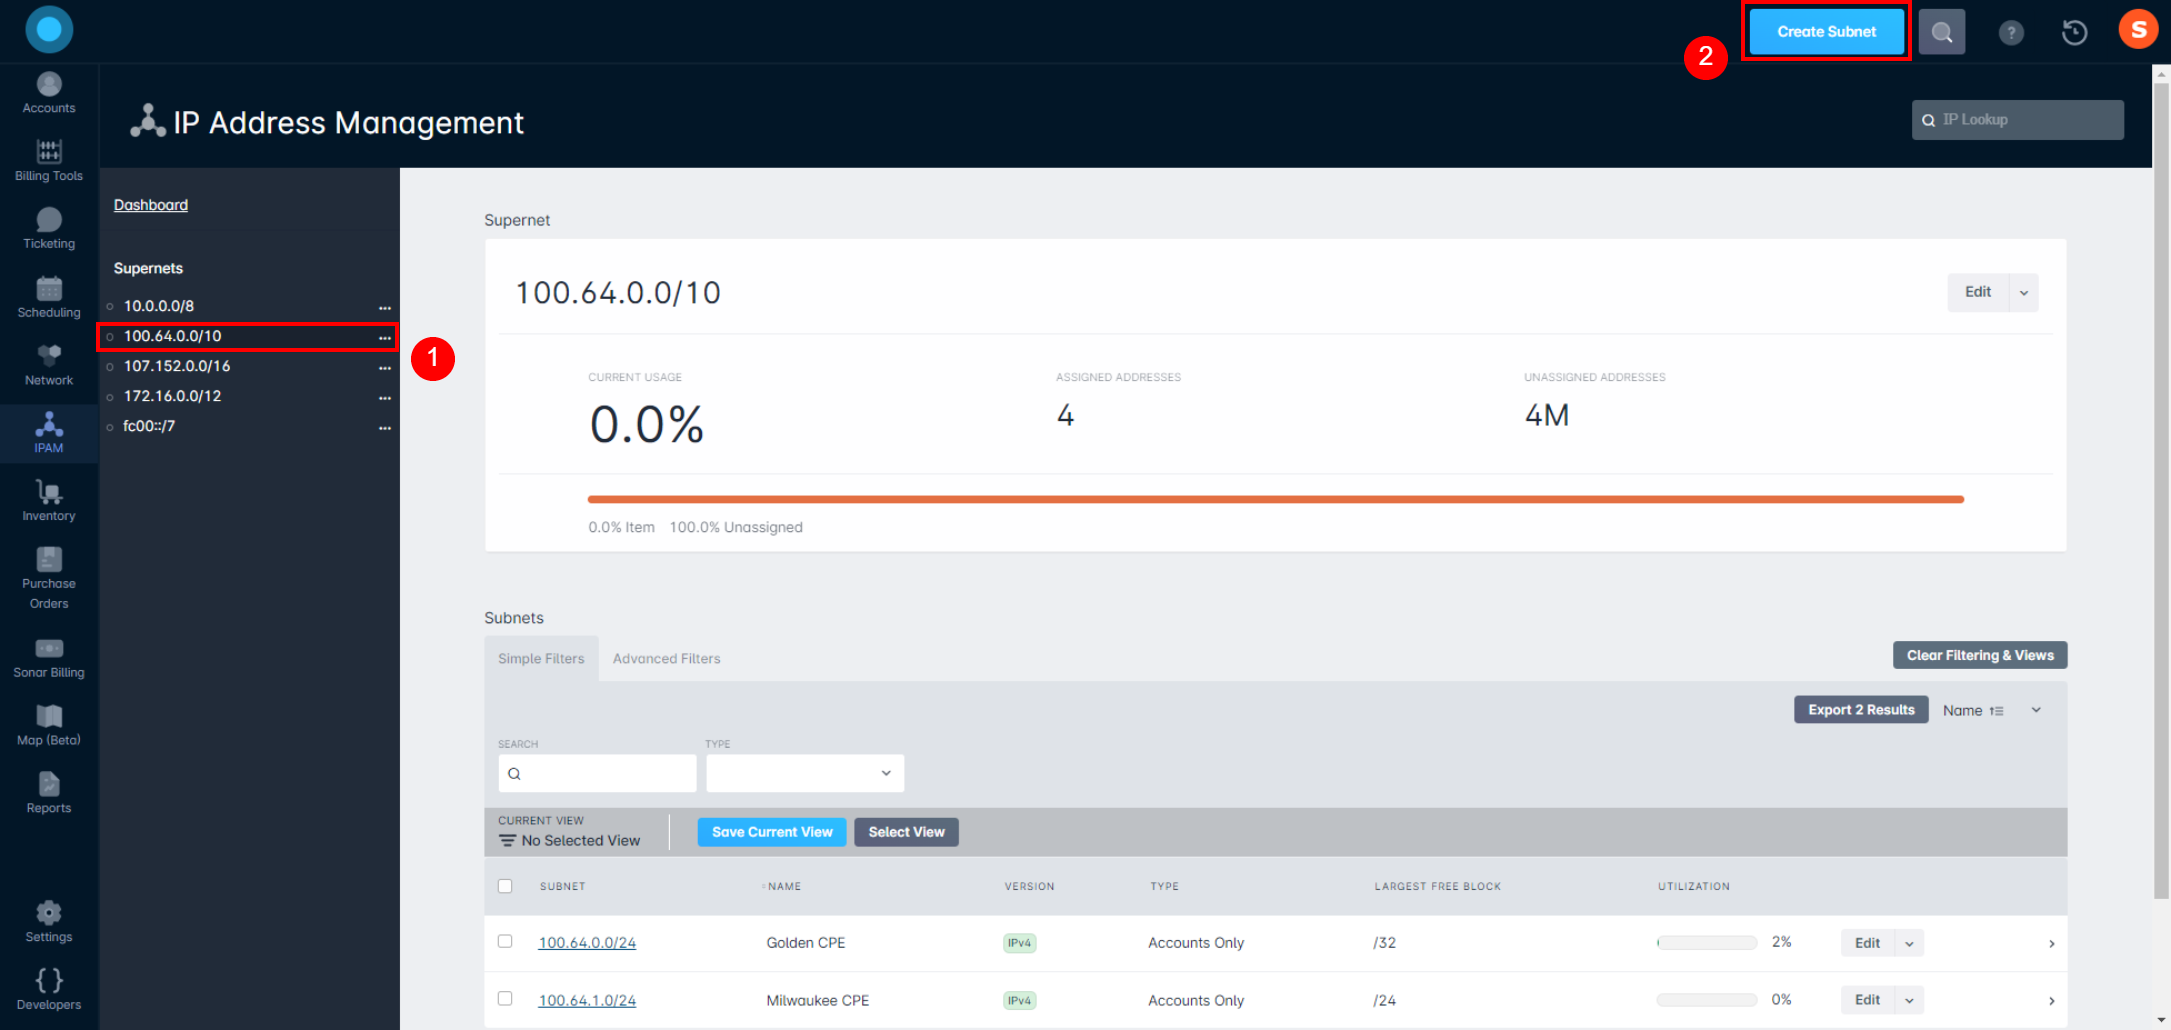
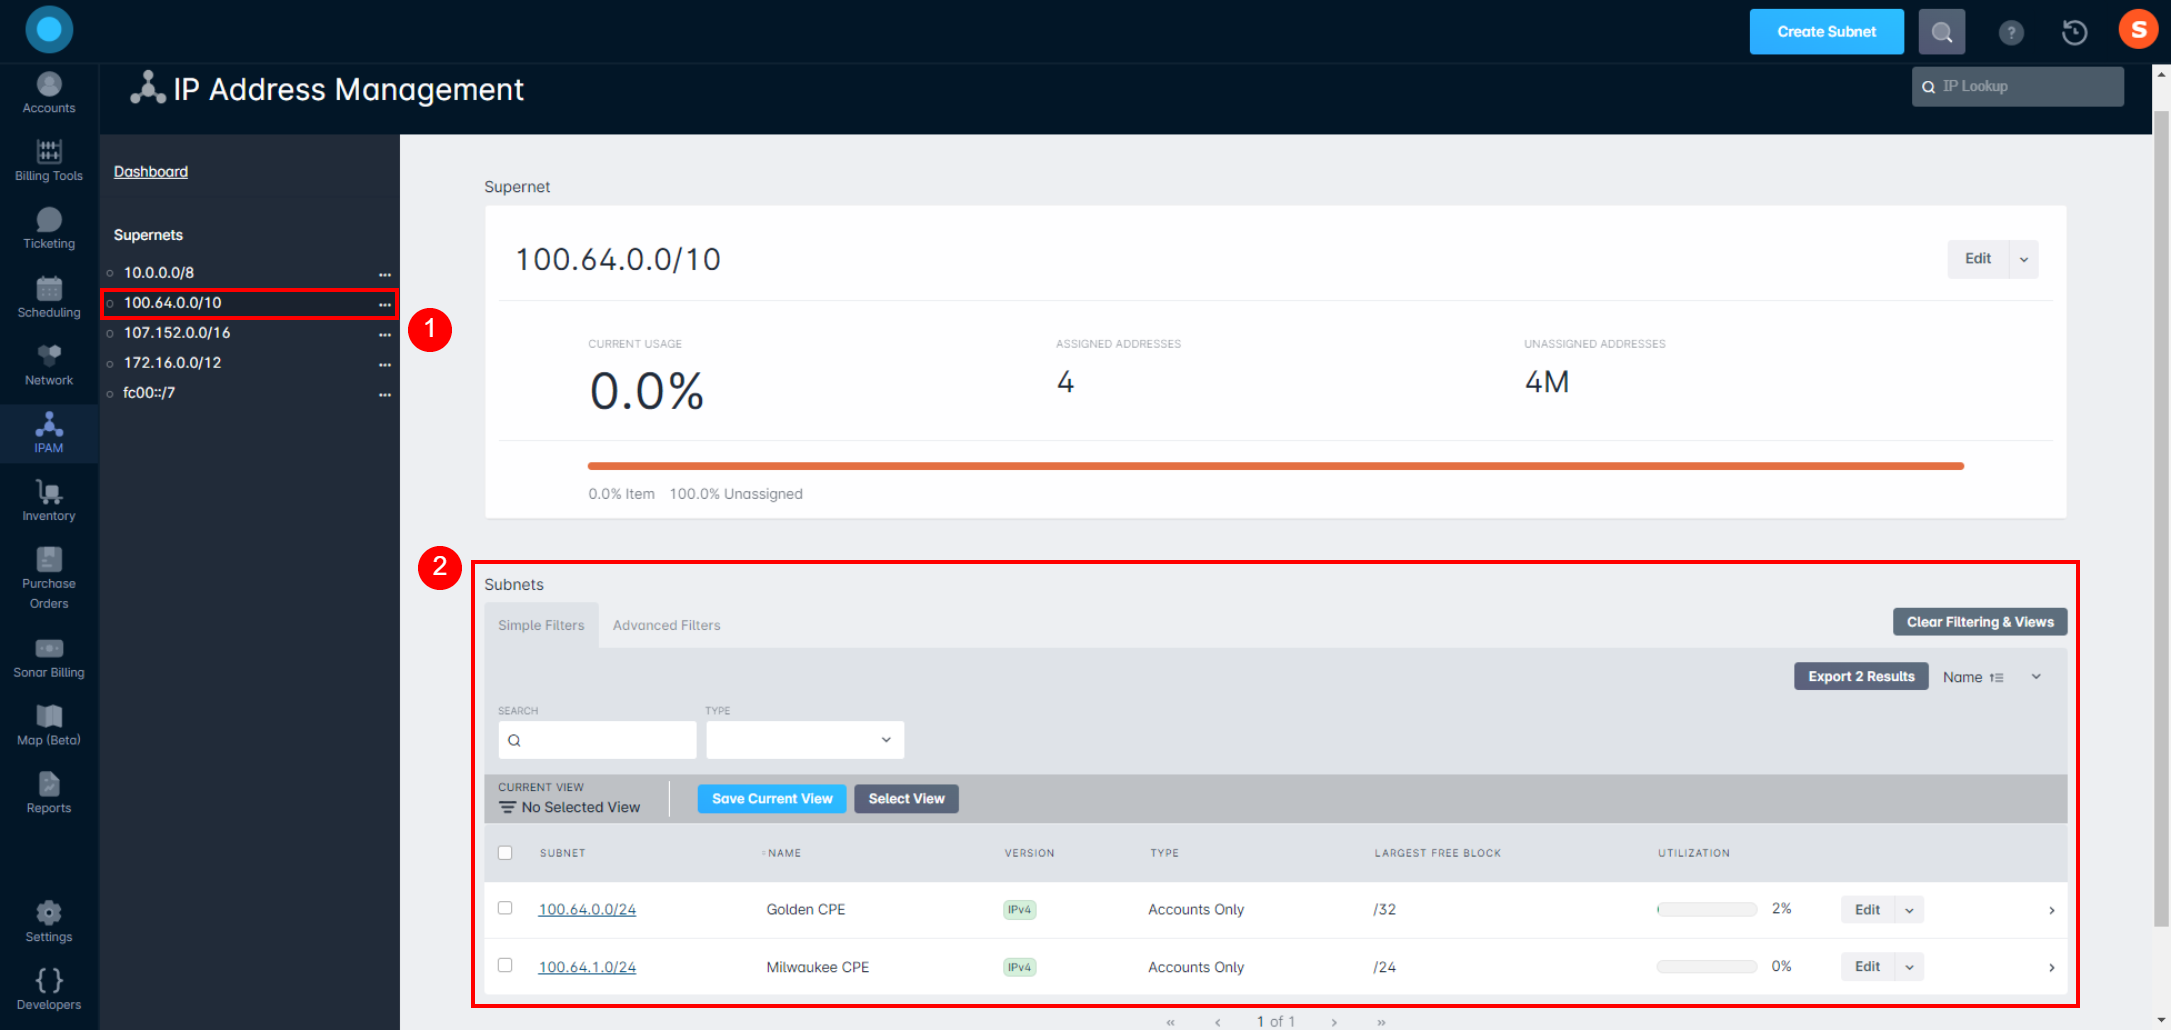
Next, you have your subnets, which can be created in multiple ways. In this section, the subnet will be created by navigating into the Supernet followed by clicking the "Create Subnet" button:
Once you've clicked the button, the "Create Subnet" modal will open, where you'll enter your Subnet information:
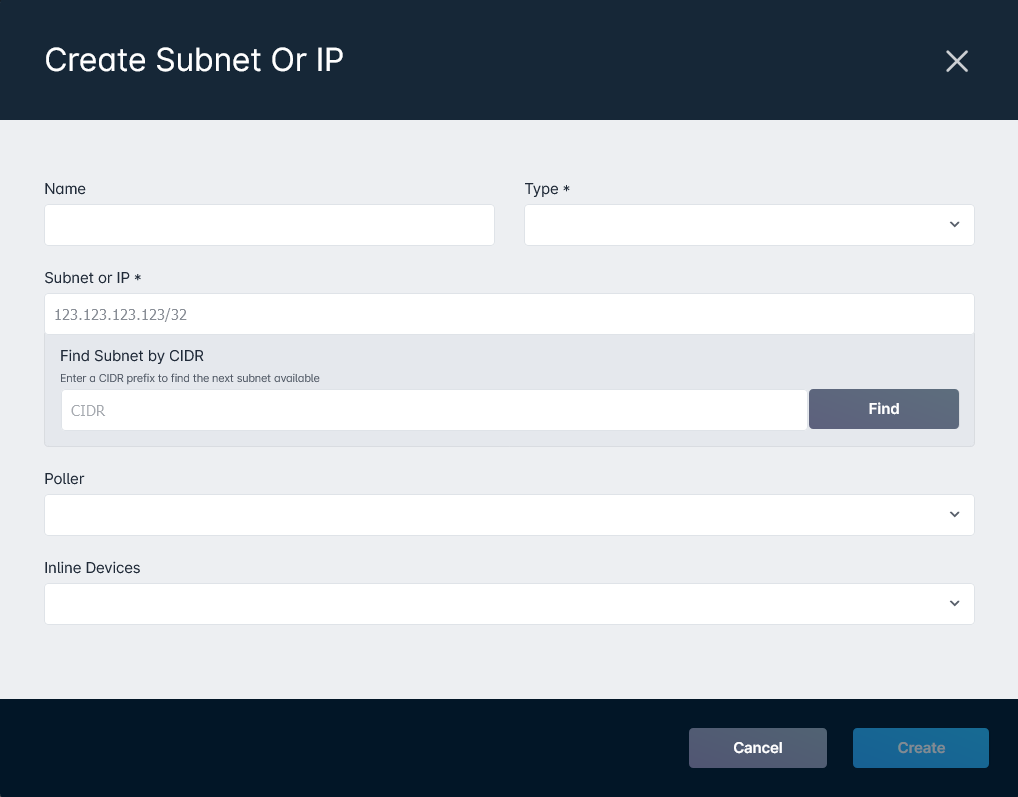
Field Breakdown for Creating a Subnet
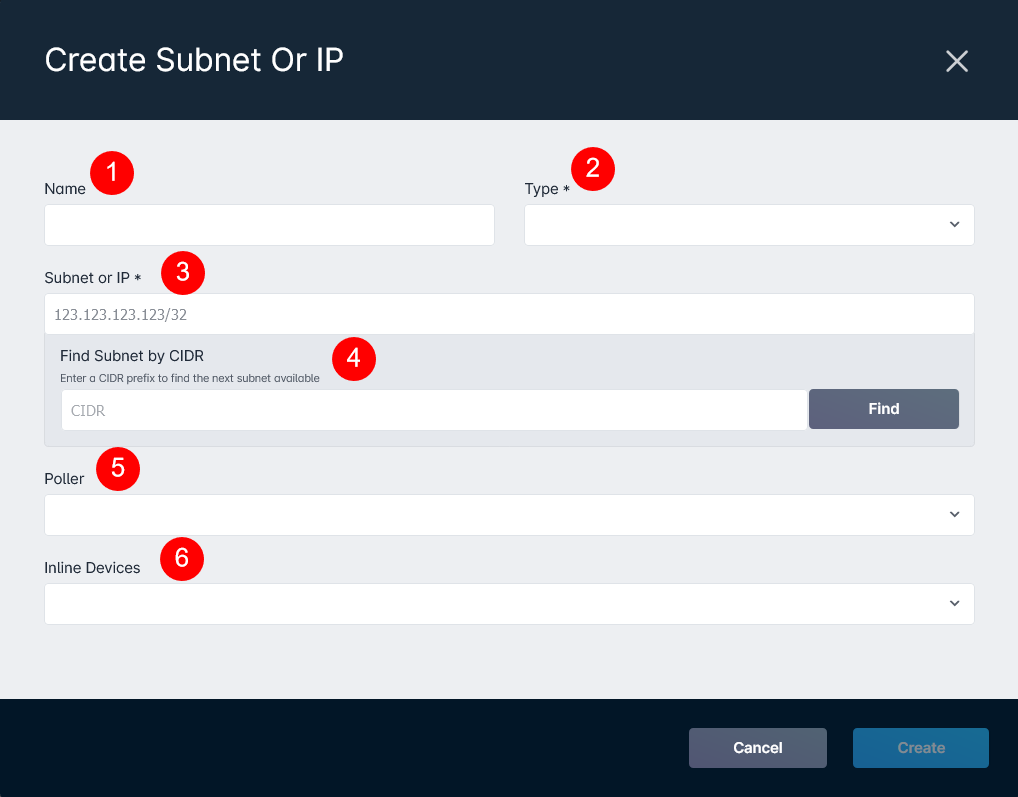
1. The Name field allows you to name your Subnet. This field isn't required but does allow you to more quickly identify where the IPs may be assigned.
2. The Type dropdown allows you to select what Entities IP addresses in this subnet can be assigned to. You can choose between "Accounts Only", "Excluded" which means they cannot be assigned, "Mixed", and "Network Sites Only".
3. The Subnet or IP field allows you to enter the Subnet to be created from the available subnets within the selected Supernet.
4. The "Find Subnet by CIDR" allows you to enter a portion of the Subnet/CIDR Prefix and have the next available Subnet found automatically.
5. The Poller dropdown allows you to select a specific Poller on your instance that will be monitoring this Subnet for any issues.
6. The Inline Devices dropdown allows you to directly assign this subnet to a specific Inline Device configured on your instance.
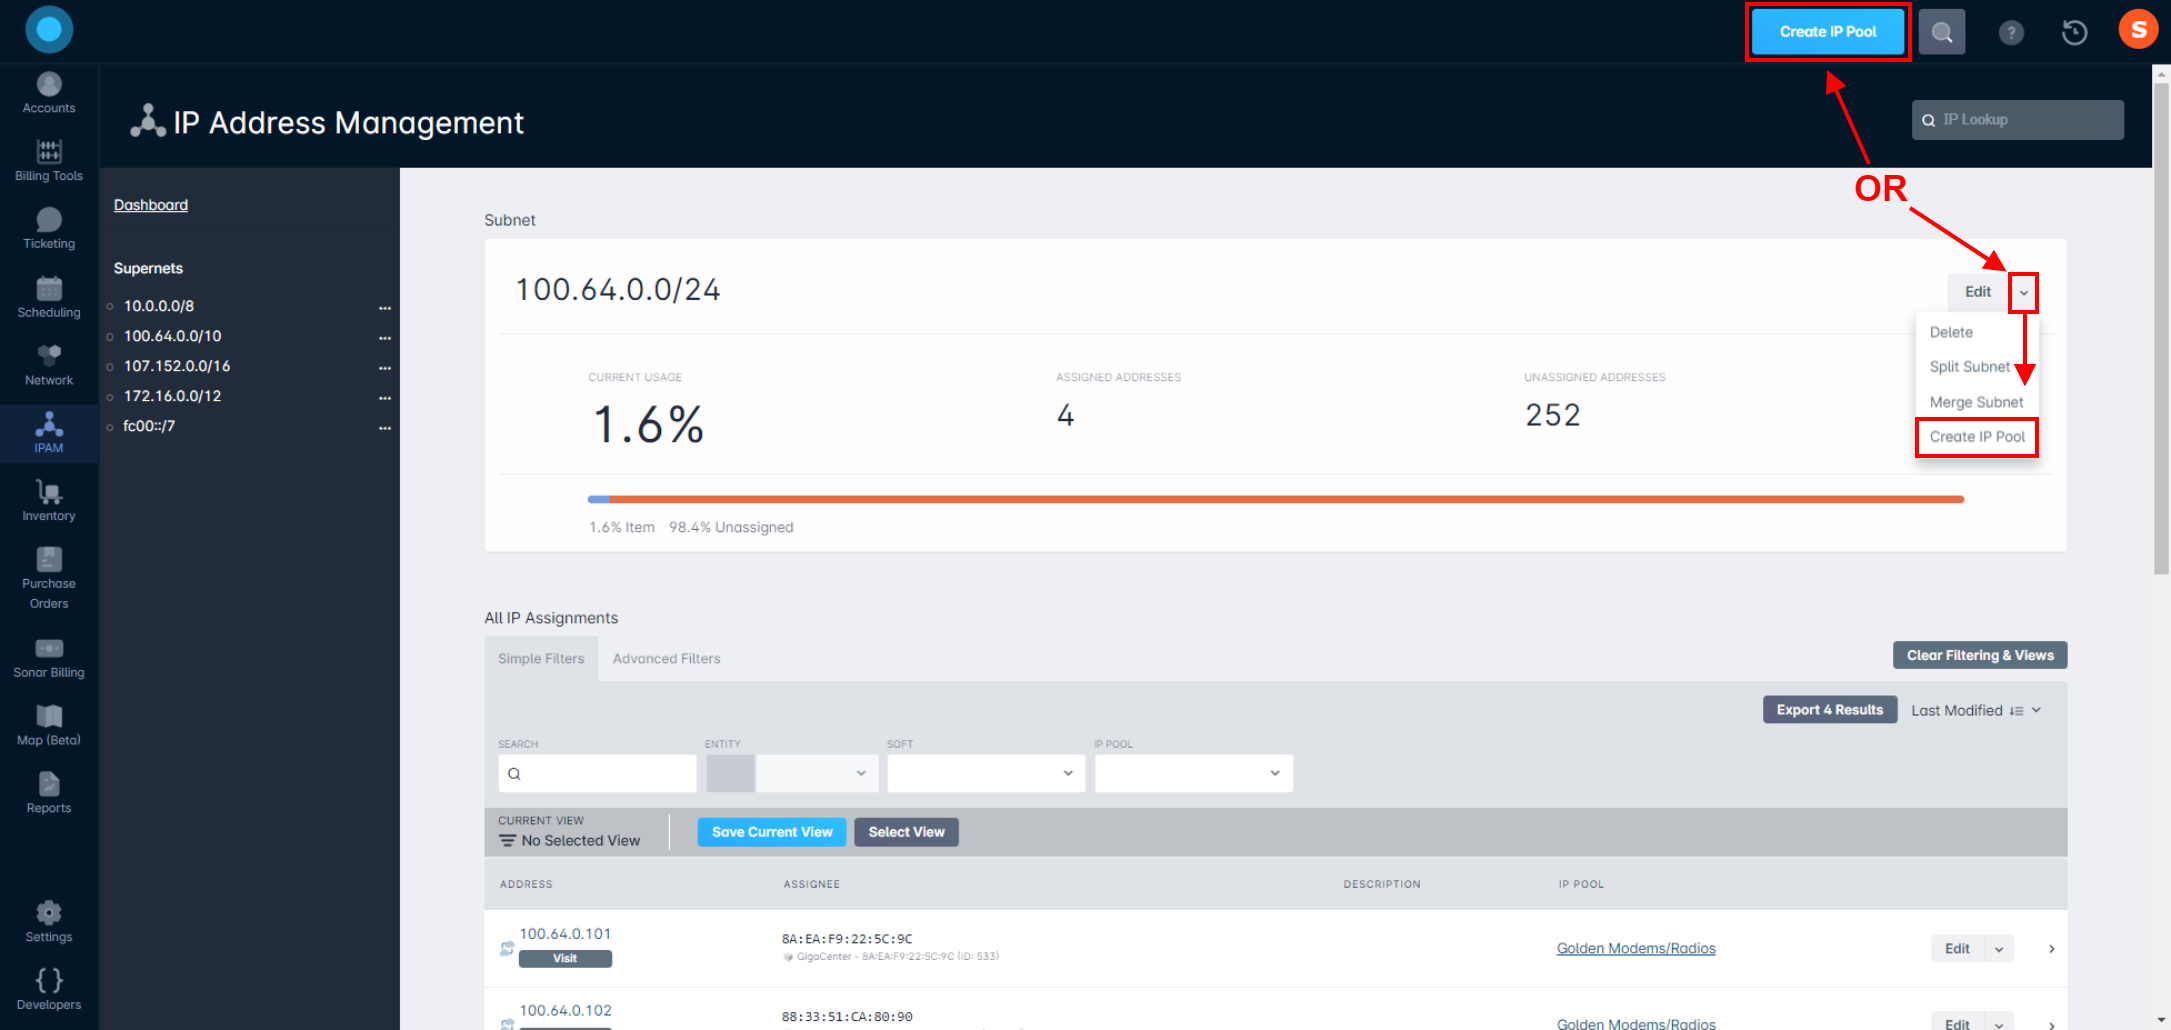
When you create a subnet, you can assign space from it to customers and network infrastructure using any prefix available within the subnet. For example, if you create a /24 subnet, you can assign a /24 or smaller subnet to a customer, or to network infrastructure. However, this doesn't make sense if you are assigning single IPs from a pool via DHCP or RADIUS, so Sonar also allows you to define IP Pools. To define an IP pool, click on the newly added subnet in the table below the "Subnets" header and a new page will populate. From here, you can either click the "Create IP Pool" button or click the dropdown beside "Edit" and click "Create IP Pool" from there instead.
When defining an IP pool, you select a start and end IP for the pool. When assignments are made inside the pool, they can only be made for a single IP - you cannot assign larger subnets from a pool. When creating a pool, you will have the option to associate the pool with specific DHCP servers & LTE EPCs. If a DHCP server is not set to control all pools, and you associate it with a pool, leases for that pool will be written to the DHCP server:
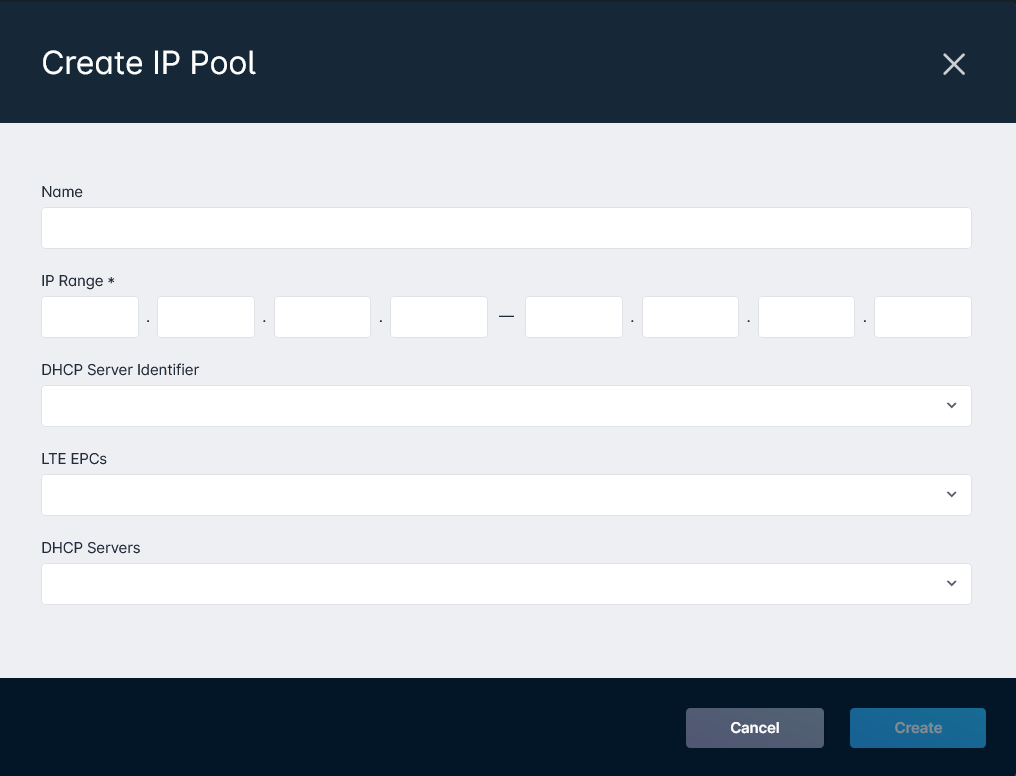
Field Breakdown for Creating an IP Pool
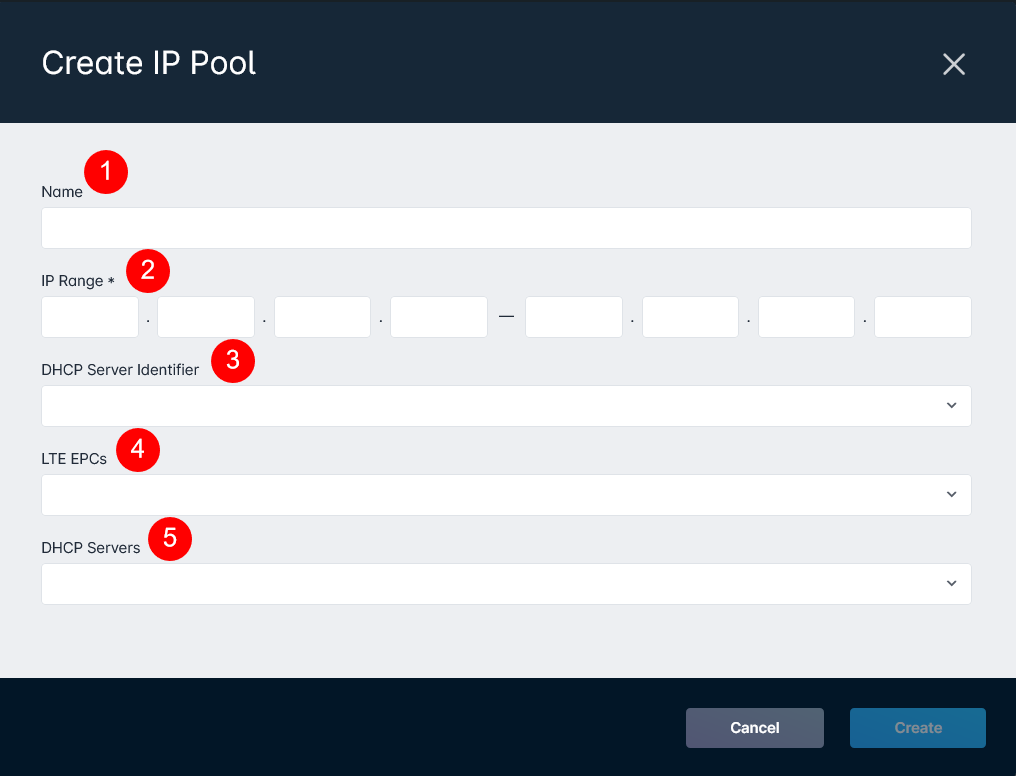
1. The Name field allows you to set some identifying name for your IP pool, used in reporting and when viewing IP assignments.
2. The IP Range field is a mandatory field, setting the specific number of IP addresses available for assignment within the pool. A single pool can contain as few as 1 IP address and as many as the entire subnet range.
3. The DHCP Server Identifier dropdown allows you to assign your IP pool to a specific Identifier you've configured on your instance.
4. The LTE EPCs dropdown allows you to assign this IP pool to a specific LTE EPC configured in your Sonar instance.
5. The DHCP Servers dropdown allows you to add the IP pool to a specific DHCP server for assignment to devices.
Assigning IP Addresses
Once you've created your various subnets and IP pools, assigning IP addresses can be done in a number of different ways. Automating the assignment of IP addresses is discussed in the IP Assignments & Sonar article; in this article, the focus will be on the manual assignment of IP addresses in Sonar. There are 2 ways you can manually assign an IP address: you can use the Inventory Item Management page, or they can be assigned on the entity directly (either a customer account or network site).
Using the Inventory Item Management View
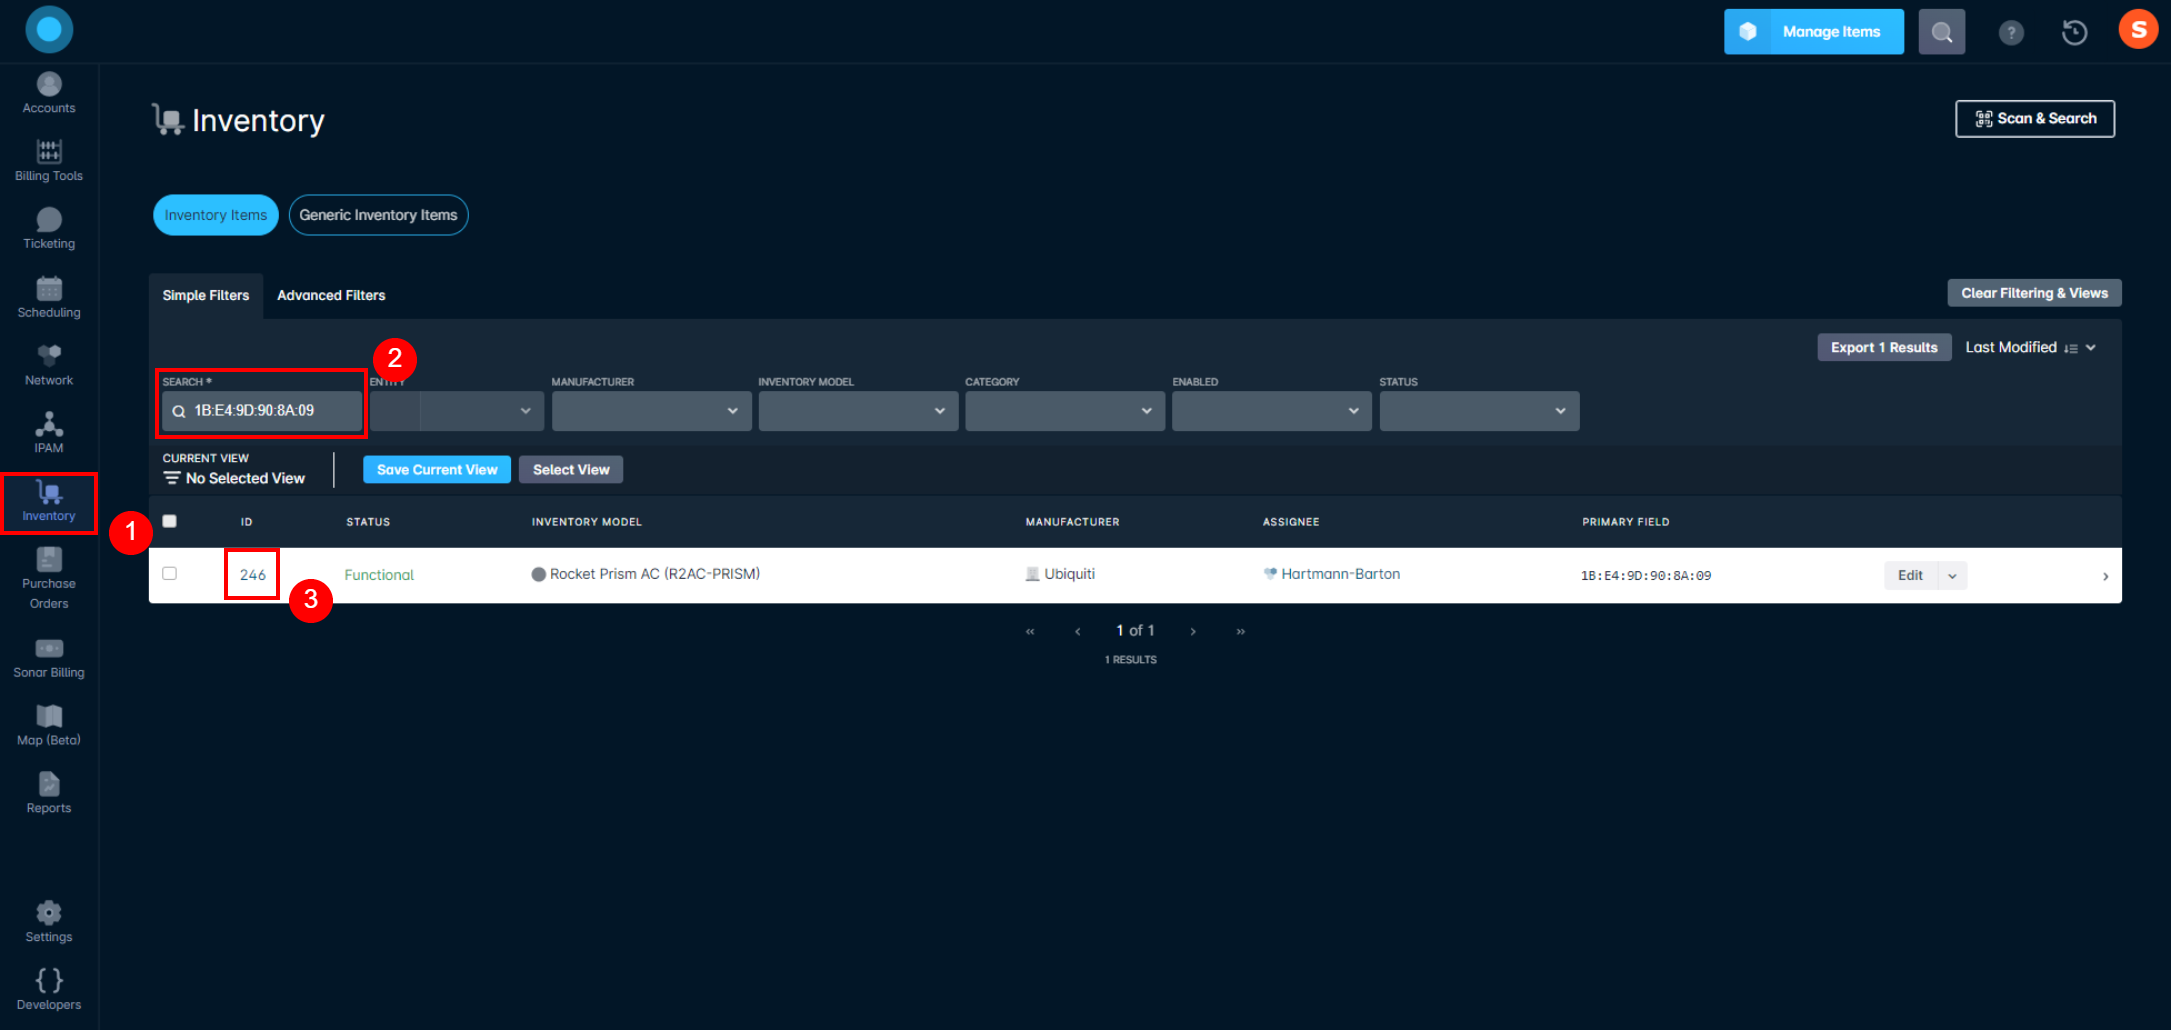
In order to assign an IP address to an inventory item, you first need to locate and select the inventory item from the list:
- Click on the Inventory tab, then locate your Inventory Model and click on the item ID to populate the Inventory Item Management page.
- From the Inventory Item Management view, click on the dropdown arrow next to the "Edit" button and choose "Create IP Assignment".
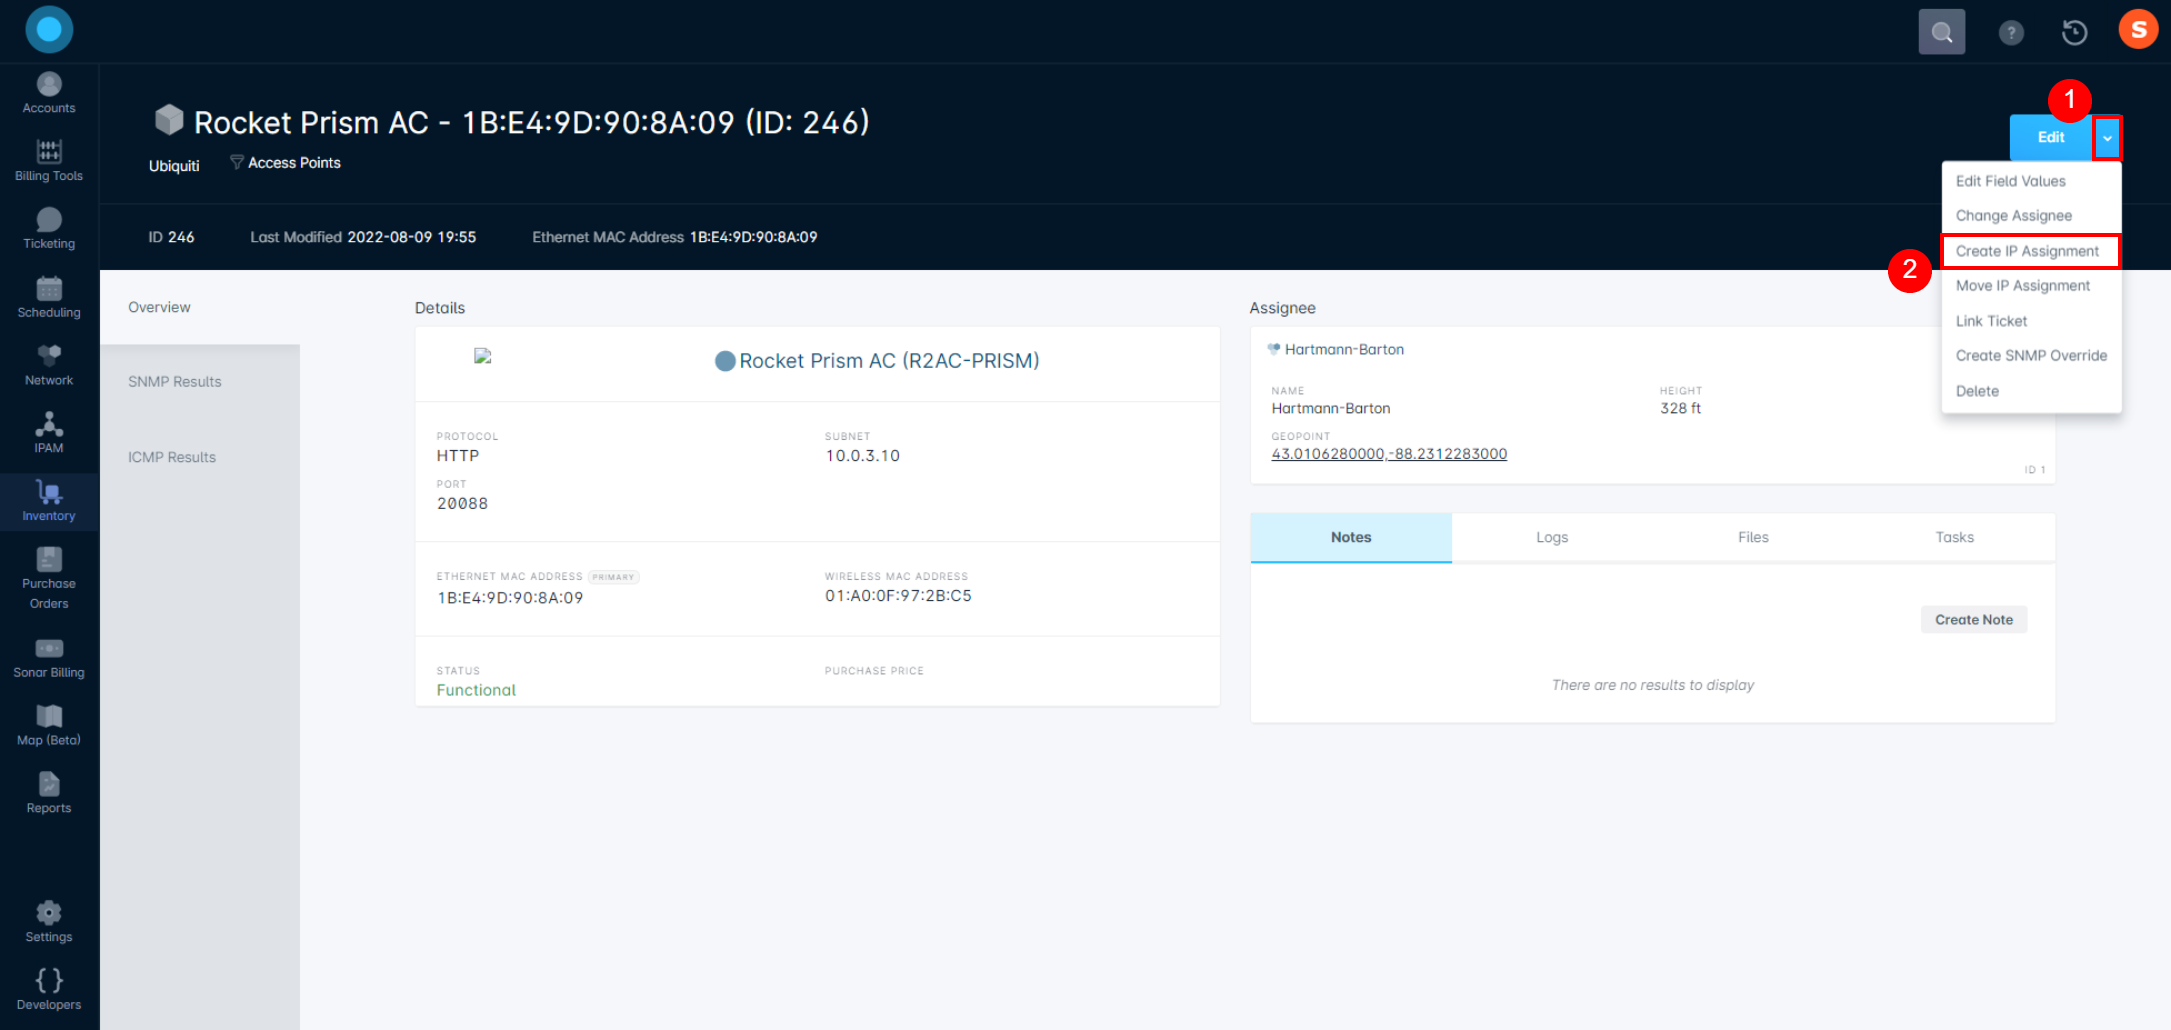
- From the "Create IP Assignment" modal that appears, enter in your IP pool and desired IP address:
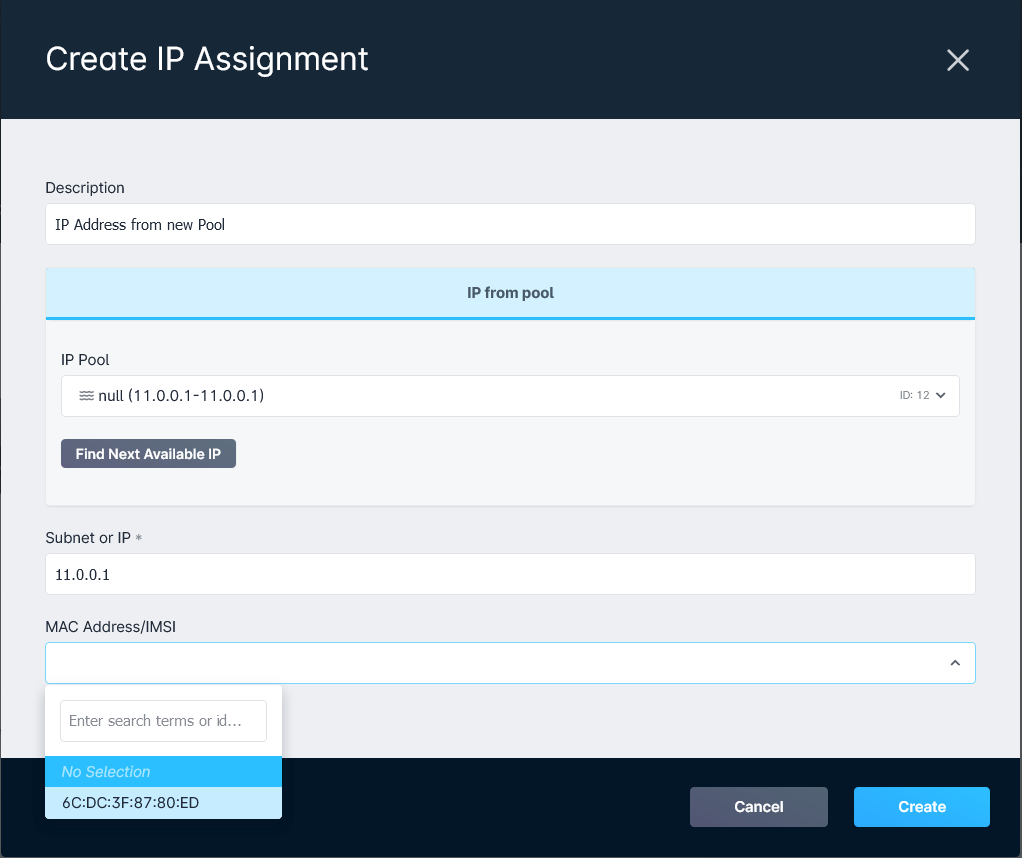 If the device has multiple MAC Addresses, you're able to assign the IP to whichever one is applicable.
 - Clicking on "Create" will add the IP assignment to the device and the MAC addressNo IP assignment information is listed on the inventory item itself - you would need to view the entity it's assigned to or use the IPAM interface to view the IP assignment details.
Assigning an IP Address from the Entity (Account or Network Site)
You can also assign an IP address within the entity, at the account and network site levels. For the purpose of this example, we will use an account. Starting with an account, you can follow the steps below:
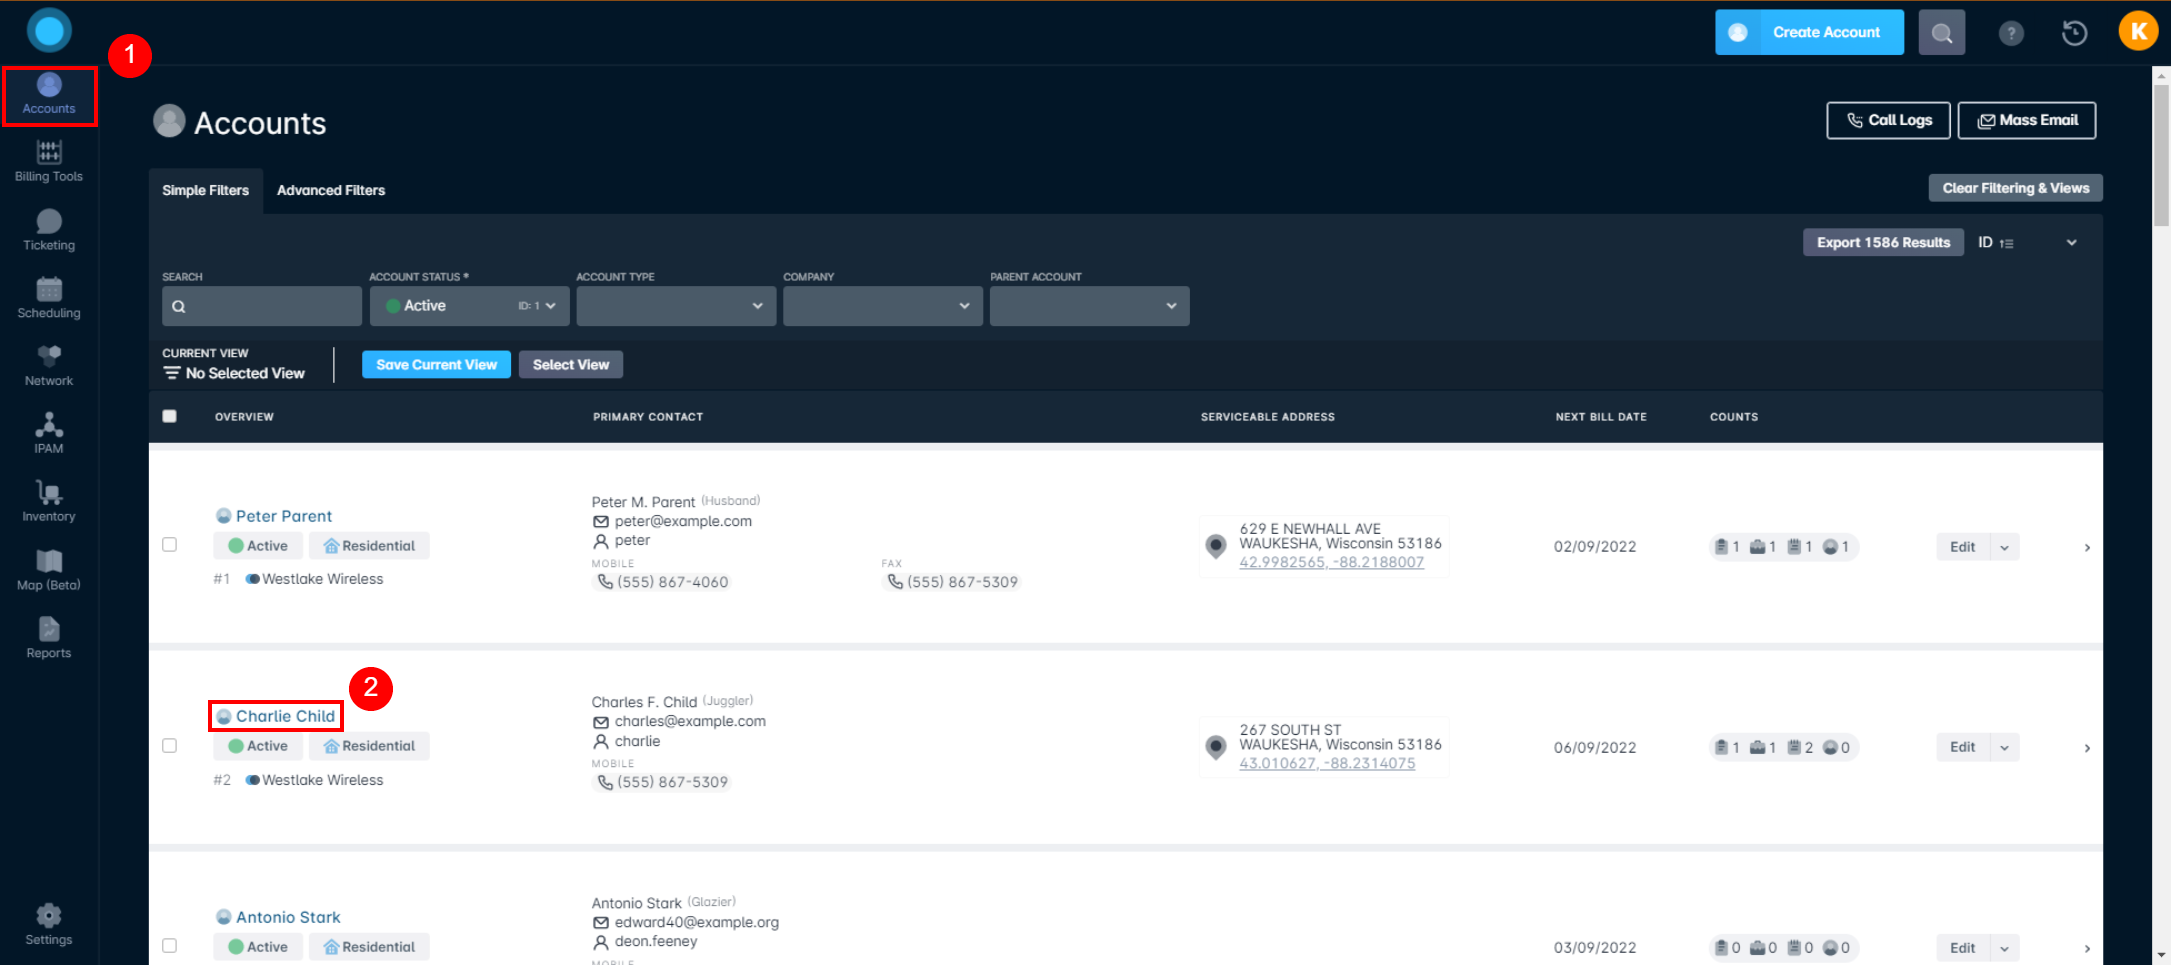
- Open the desired account by clicking on the Accounts tab and then clicking on the account name:
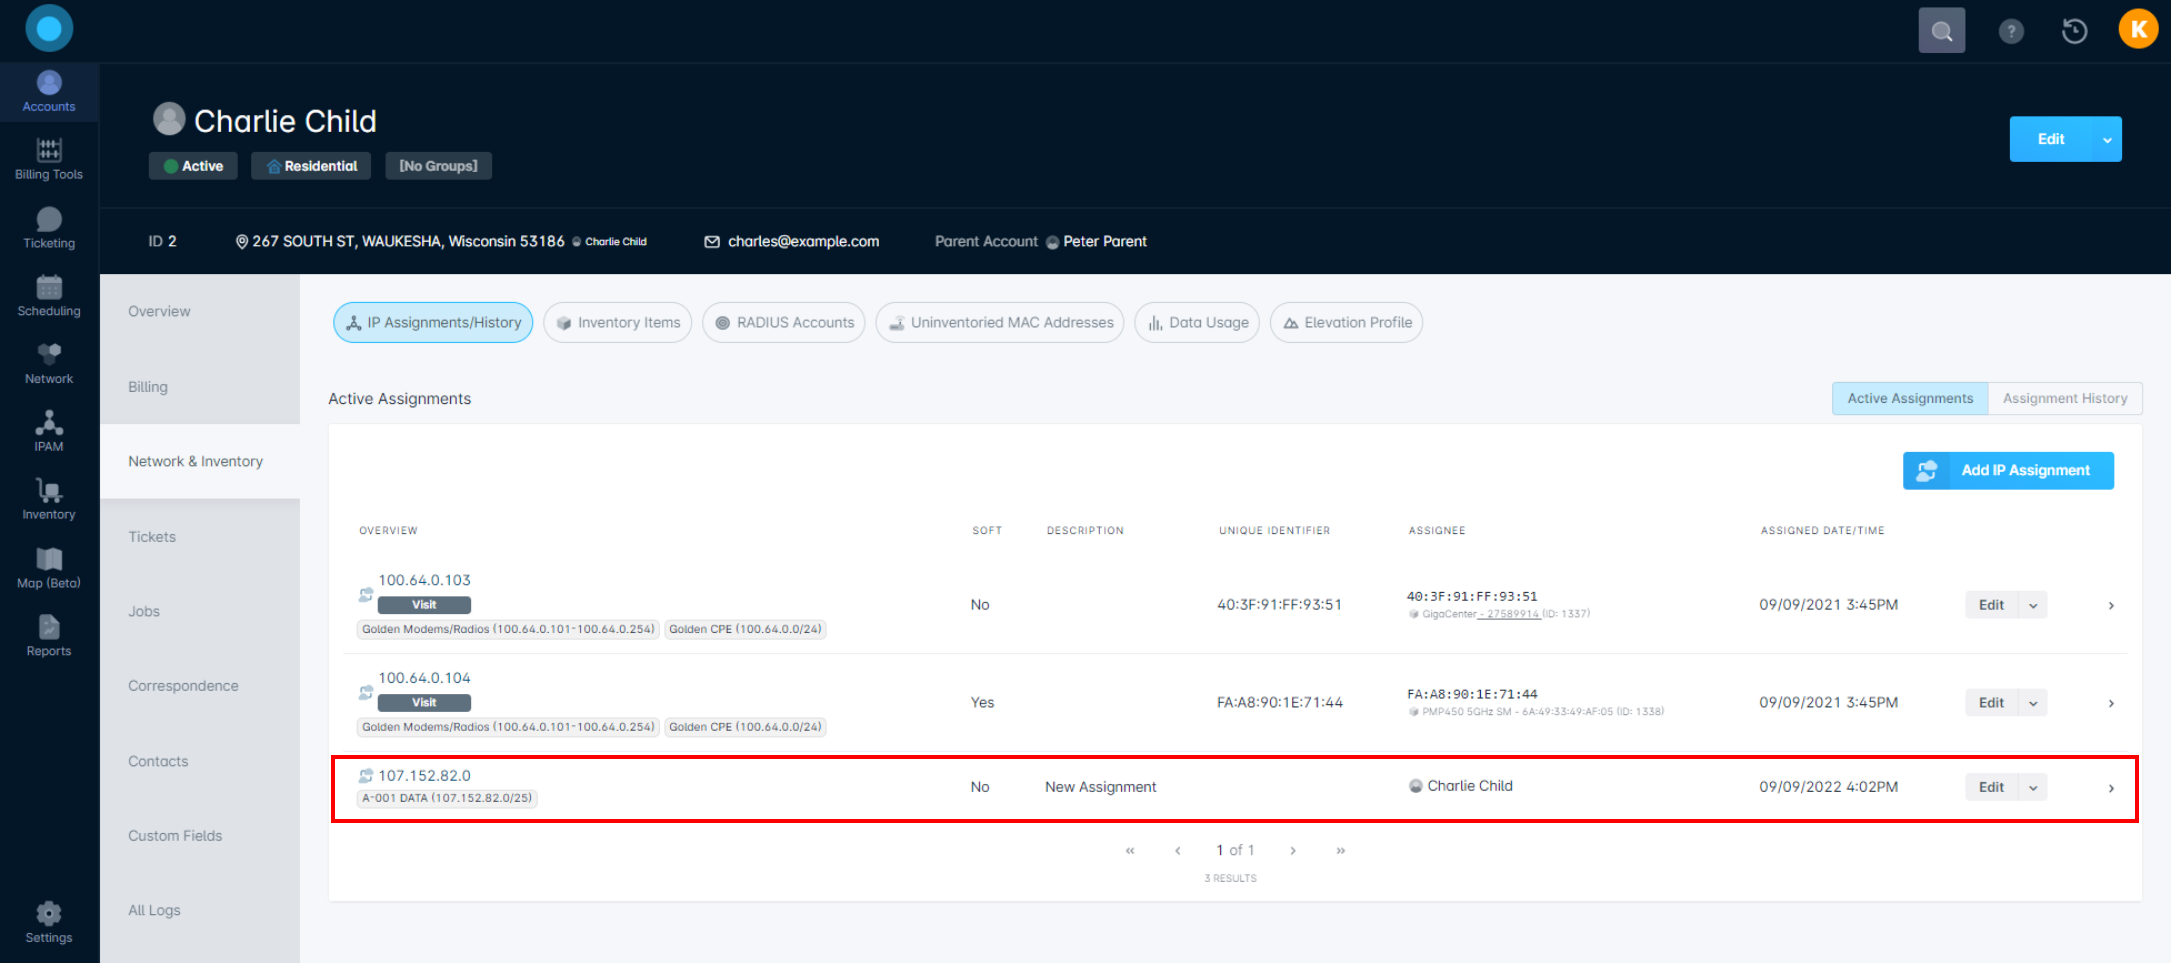
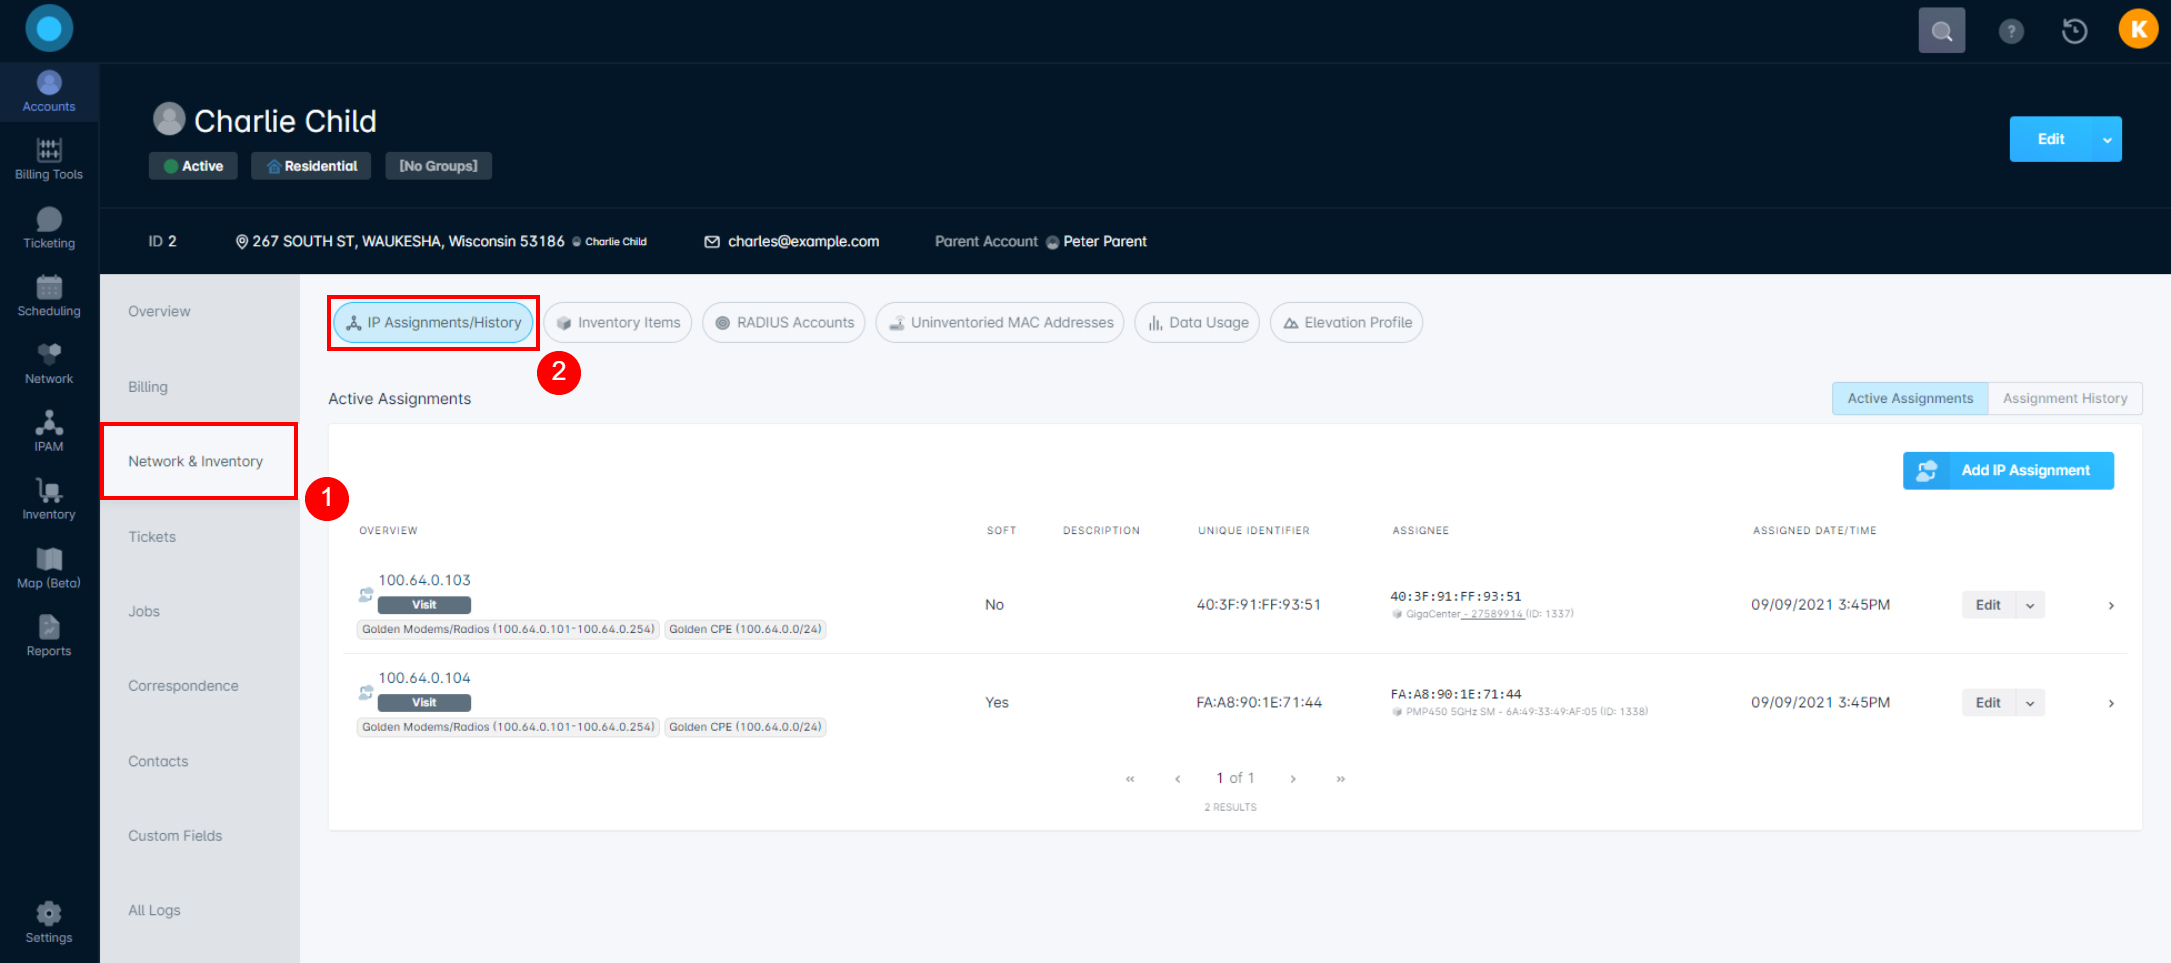
- From the Account Management view, click on the Network & Inventory tab, followed by the "IP Assignments/History" pill:
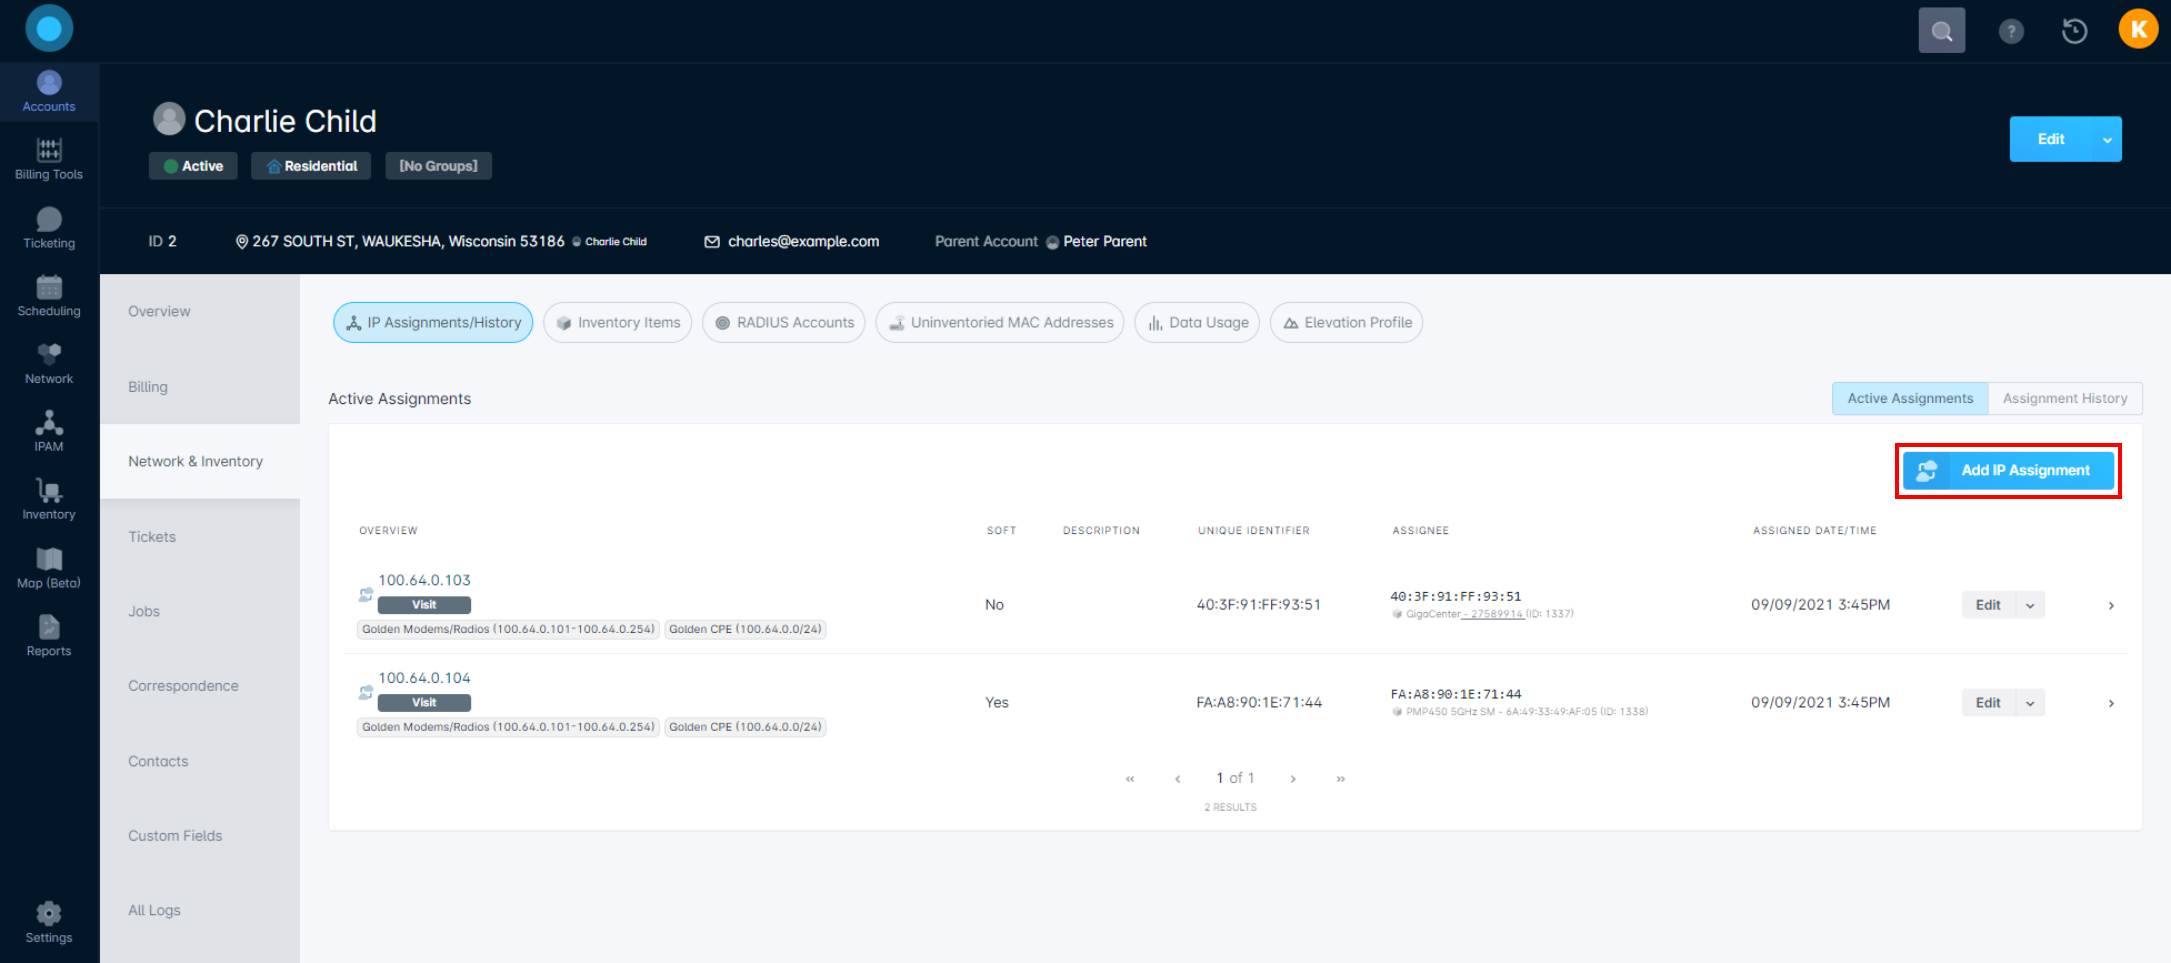
- Click on the "Add IP Assignment" button:
- Fill in the fields for the new IP assignment on the account:Unlike inventory item assignments, accounts can only have unpooled IP addresses assigned to them.
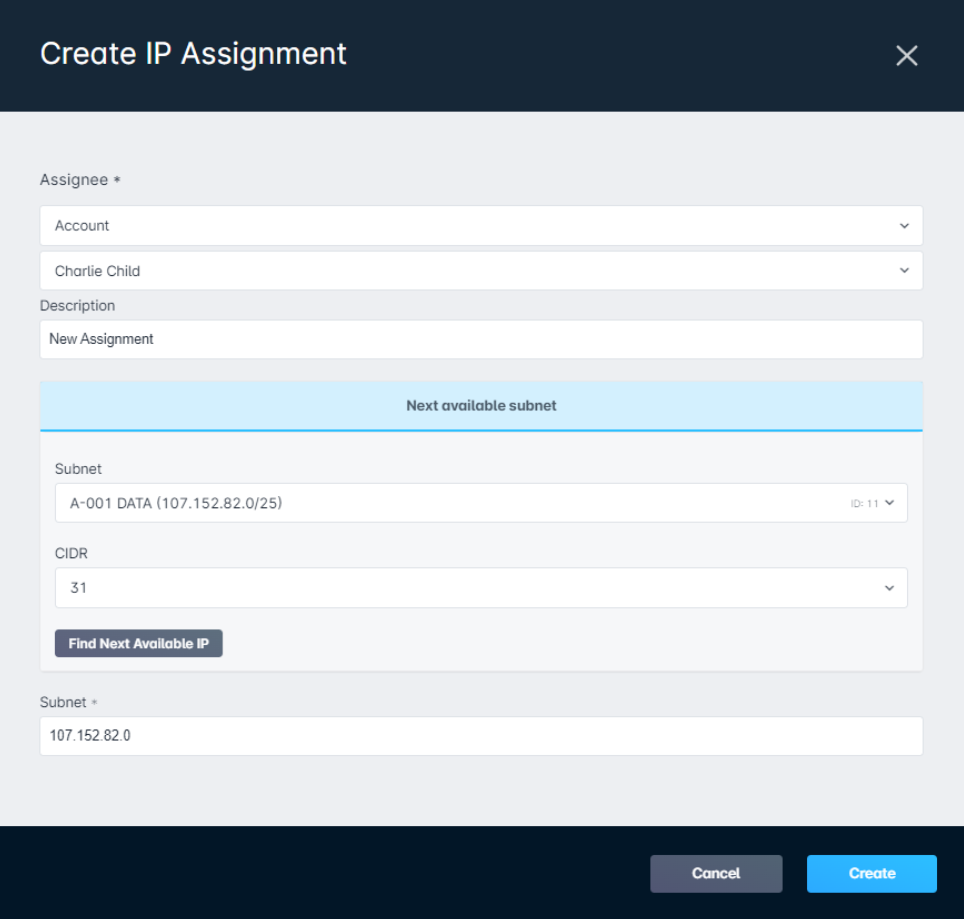
IP Assignment Field Breakdown
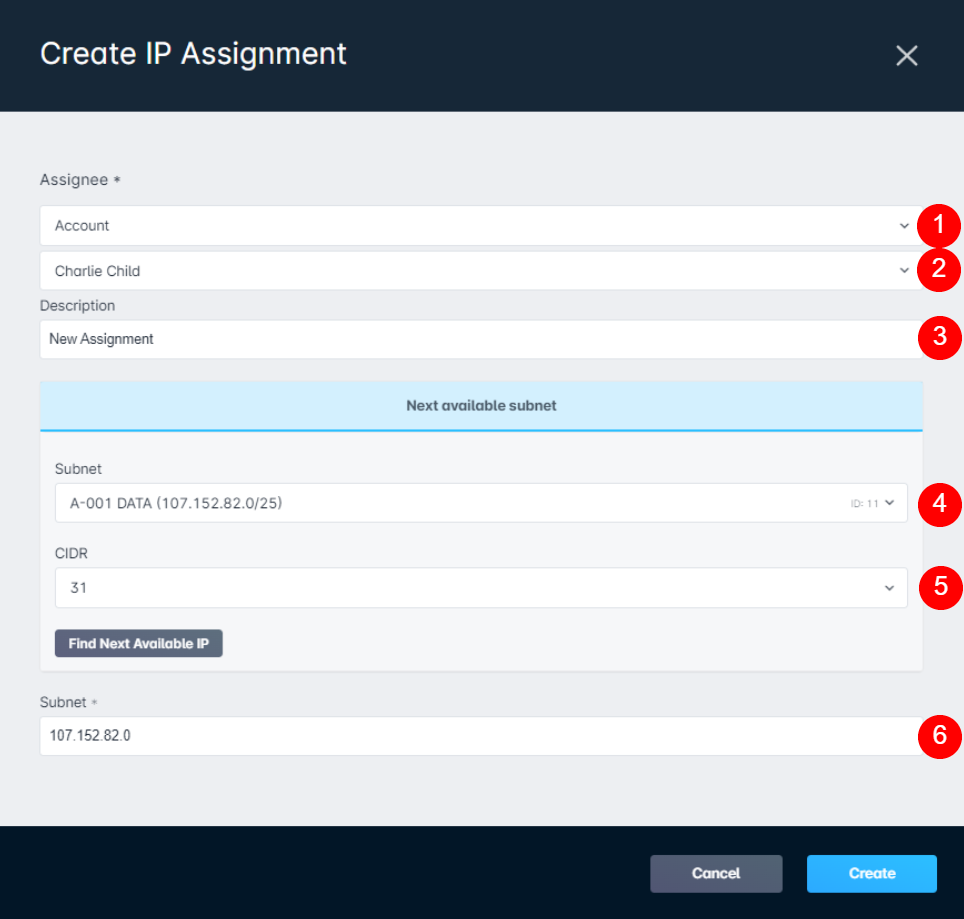
1. The Assignee dropdown allows you to select where the IP should be assigned. The selections available are Account, (Inventory) Item, RADIUS Account, or an Uninventoried MAC Address.
2. The secondary dropdown allows you to specify the Account, Inventory Item, RADIUS Account, or MAC Address.
3. The Description field allows you to add information regarding the assignment being made.
4. This section will vary depending on the selection made in #1, however, for an account, you select the Subnet in this section. For an Inventory Item, Uninventoried MAC Address, or RADIUS Account, you would select the IP Pool instead.
5. The CIDR allows you to set the prefix/number of IP addresses to search for and assign to the account.
6. The Subnet or IP Field will list or allow you to type in the IP address that will be getting assigned to the account.
- Once you click on "Create" with all the required fields filled out, the IP assignment will be displayed in the list: