Table of Contents
How-To & Usage Guides: The Sonar Field Tech App
 Updated
by Mitchell Ivany
Updated
by Mitchell Ivany
Read Time: 16 mins
All the guides below are reflective of the mobile app user having only the minimum required permissions for the field tech role.
Account Management
How to Add or Edit a Disconnection Reason While Completing a Job
If Disconnection Reason is set as required, you won’t be able to complete the job until a reason is selected. Follow the steps below to add or edit the Disconnection Reason during job completion.
1. Open the job you’re working on.
2. Tap Check In.
3. When you’re finished, select Complete Job (or Fail, if needed).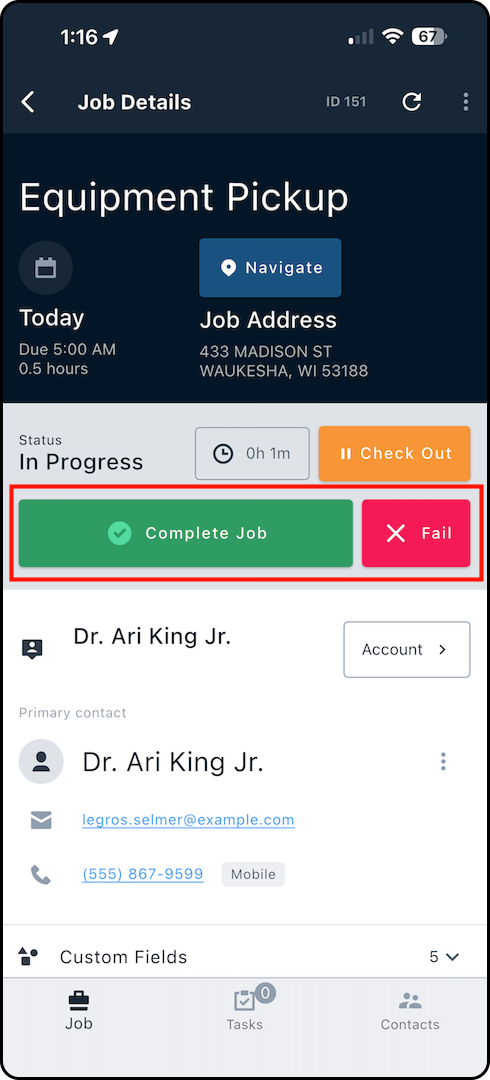
4. On the completion screen, find Disconnection Reason under Completion Notes.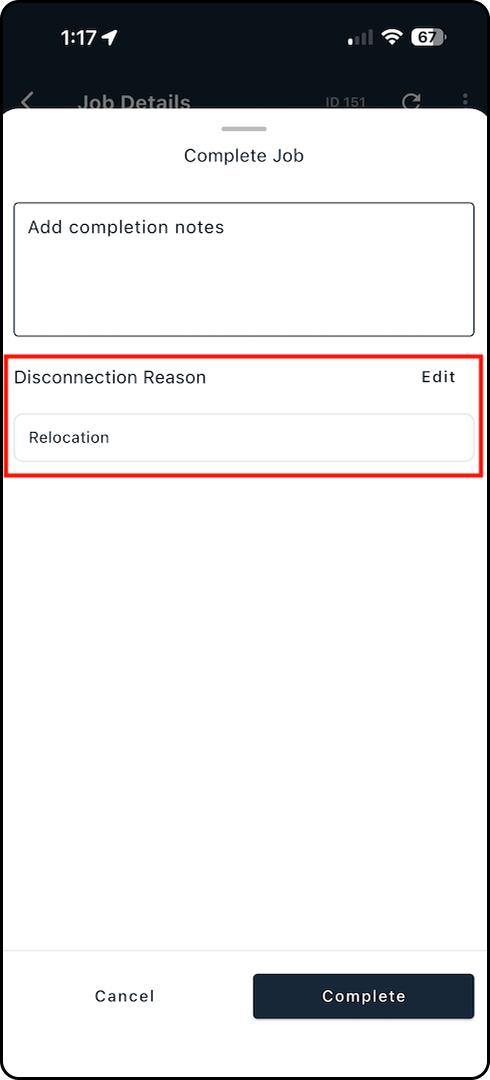
5. Tap Edit to choose a reason (or update the current selection).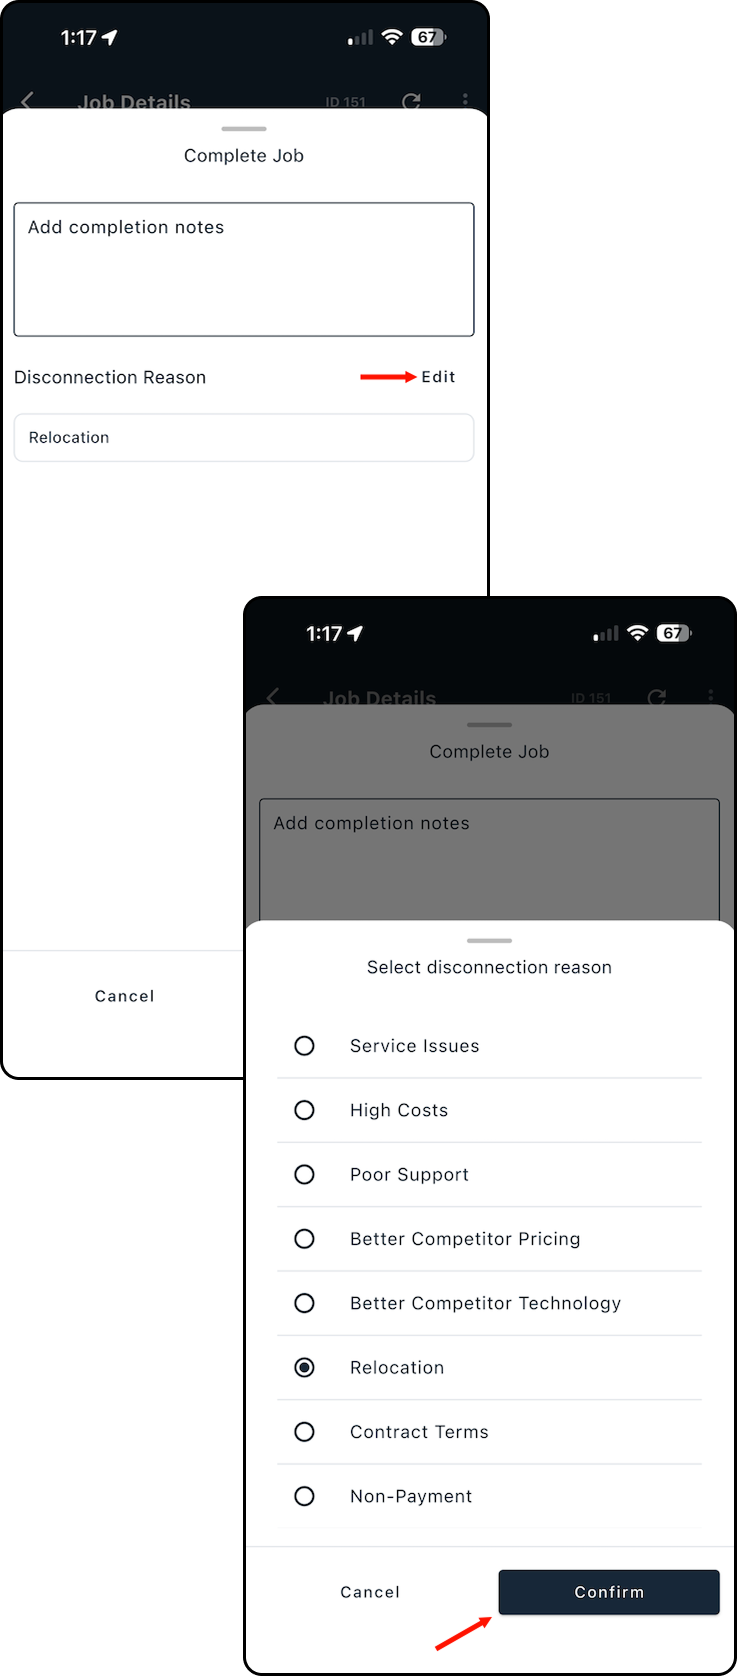
6. Enter any Completion Notes, then tap Complete to finish.
Disconnection reasons help you consistently capture why subscribers are leaving, so you can spot trends instead of relying on guesswork. With clearer data, your team can improve churn reporting, prioritize retention efforts, and address the most common issues driving disconnects.
For more information on the feature itself, review our Disconnection Reason Management: Overview article.How to Add and Update Customer Contacts
1. Navigate into the Job Details screen for the associated customer's job.
2. Tap "Contacts" along the bottom navigation bar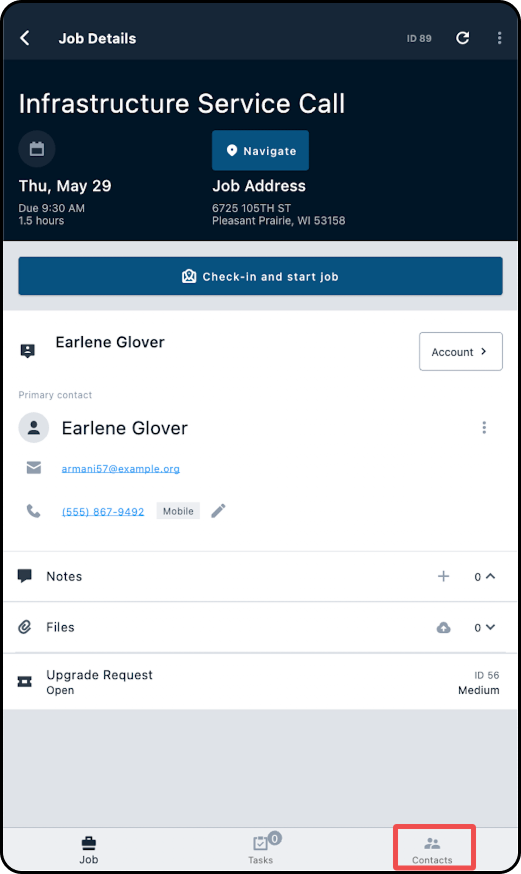
3. On the Contacts page, you can click on "Add" to add a new contact to the account, or click on the 3 dots and select Edit from the menu that appears.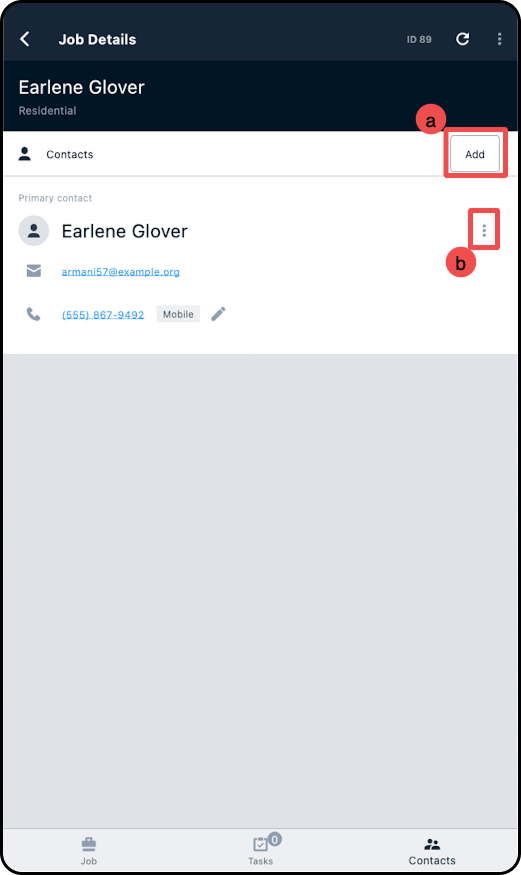
a) Clicking on the "Add" button will cause the "Create Contact" modal to open, where you can fill in the information for the new contact: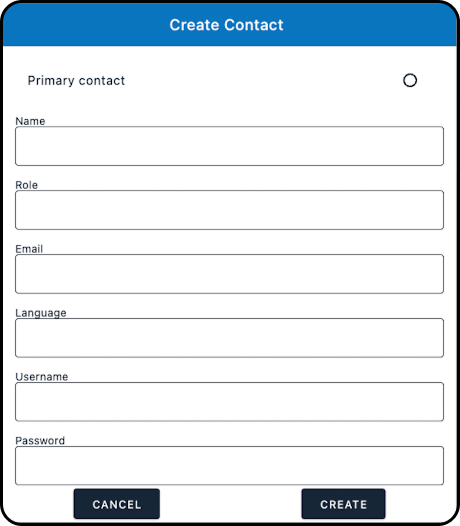
b) Clicking on the 3 dots next to any existing contact and selecting "Edit" from the dropdown will open the "Edit Contact" modal, where you can modify the information for an existing contact: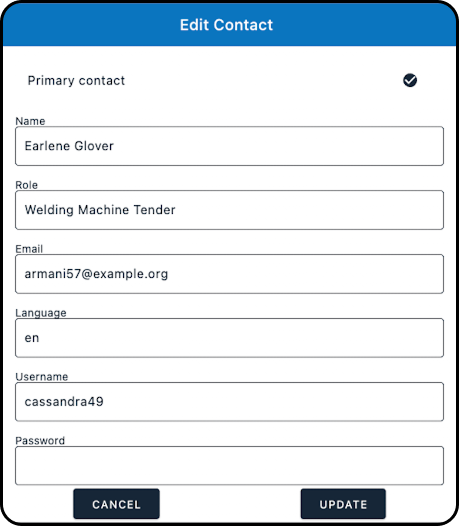
Important Note: Modifying the "Password" field on an existing contact will reset their customer portal password. Don't modify this unless the customer has requested a change and their identity has been verified.How to View and Have a Customer Sign a Contract
1. Navigate into the Job Details screen for the associated customer's job.
2. Tap "Account".
3. Scroll through the Account View until you see the Agreements section and select the agreement to be signed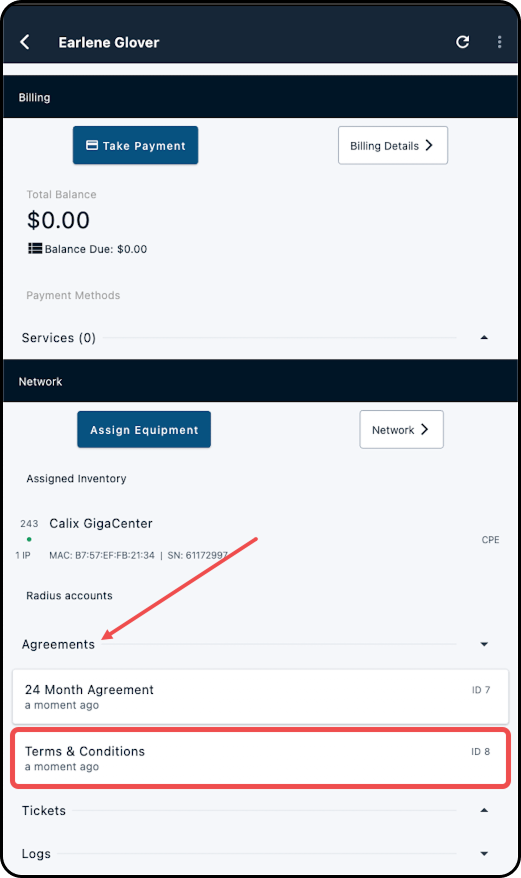
4. On the contract page, you can allow the customer to view the contract on your device, then click the "Sign Contract" button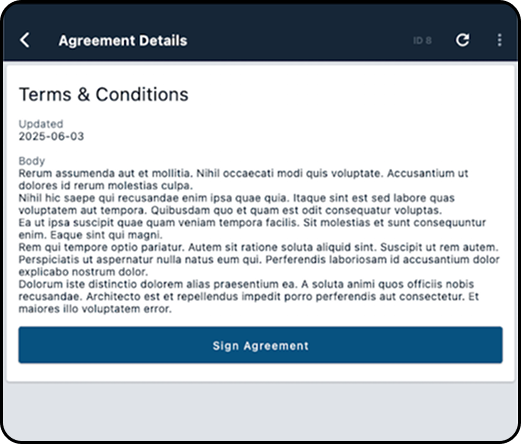
5. This will take the customer to the signature page, where they'll use your device to type their name and add their signature.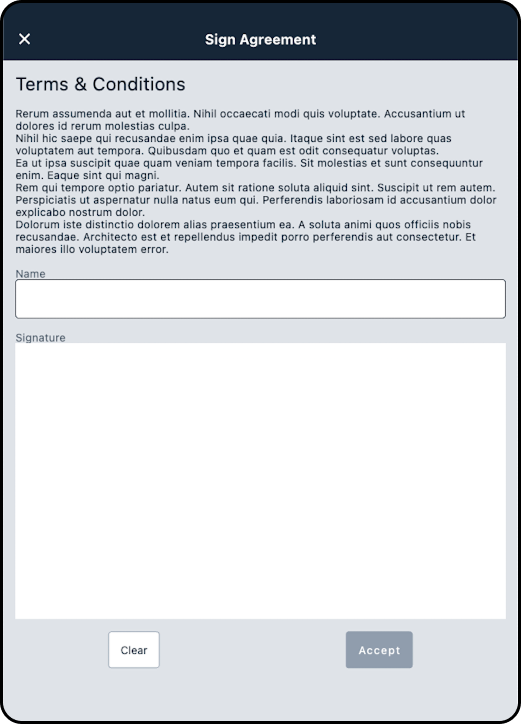
6. Once the contract is signed, you'll be able to see the contract with a checkbox next to it, and clicking on it will show you the signature.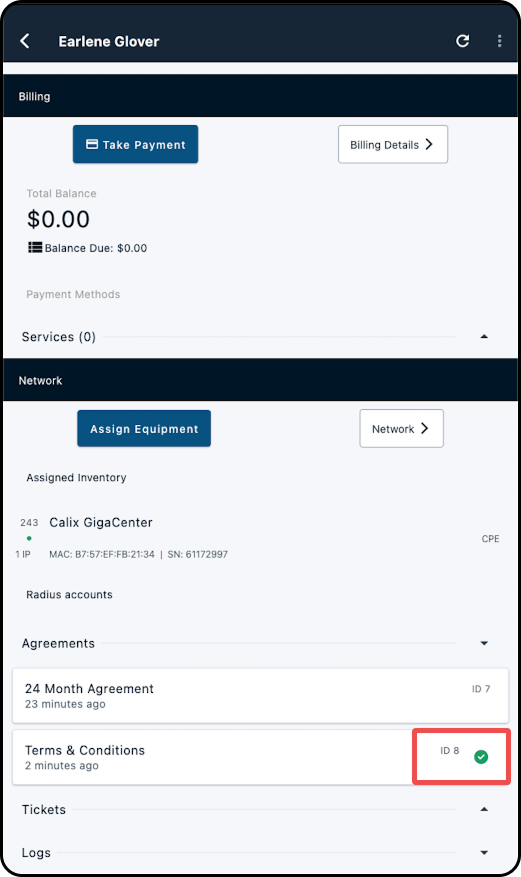
The signature will be attached to the account and will be viewable within the instance as well as on the Field Tech app.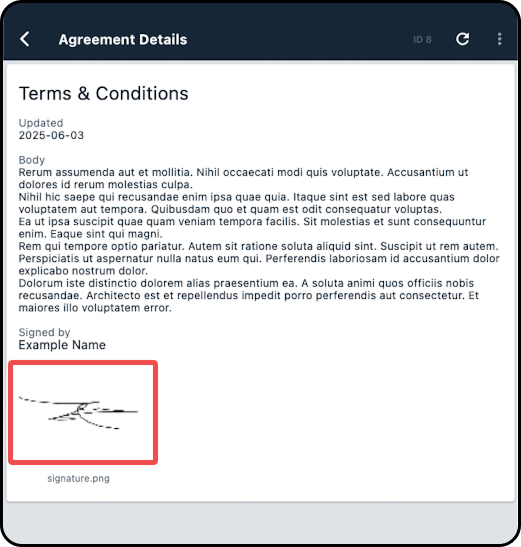
Billing
Add a Bank Account as a Customer Payment Method
1. Navigate into the Job Details screen for the associated customer's job.
2. Tap "Account".
3. Scroll down to the Billing section.
4. Tap on "Billing Details".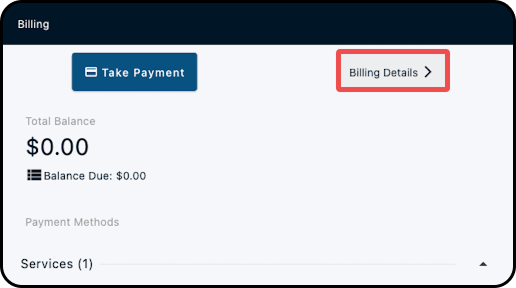
5. Scroll down to the Payment Methods section.
6. Tap "+ Add bank account"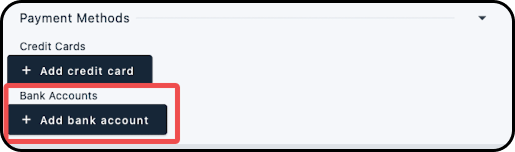
7. Enter in the name the bank account is in; the account name will be populated here by default.
8. Enter in the bank account's routing number.
9. Enter in the bank account number.
10. If this is a savings account, check off the "Savings Account" box; otherwise, this account will be considered a checking account.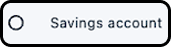
11. The account's associated serviceable address will be populated within the Billing Address section; if the account has a separate mailing address, it will be available to be selected by tapping "Others", as will the option to add a new address.
12. If this account will be used for autopay, enable the "Autopay with this account" checkbox.
13. Tap "+ Add bank account" to add the payment method to the account.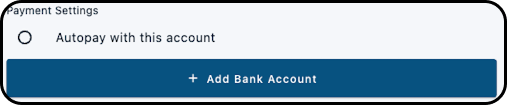
14. The bank account will now appear listed under within the account's Payment Methods section.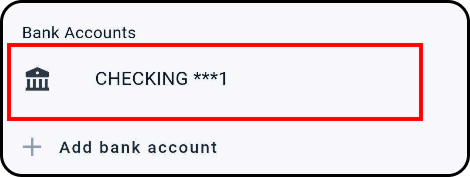
Add a Credit Card as a Customer Payment Method
1. Navigate into the Job Details screen for the associated customer's job.
2. Tap "Account".
3. Scroll down to the Billing section.
4. Tap on "Billing Details".
5. Scroll down to the Payment Methods section.
6. Tap "+ Add credit card".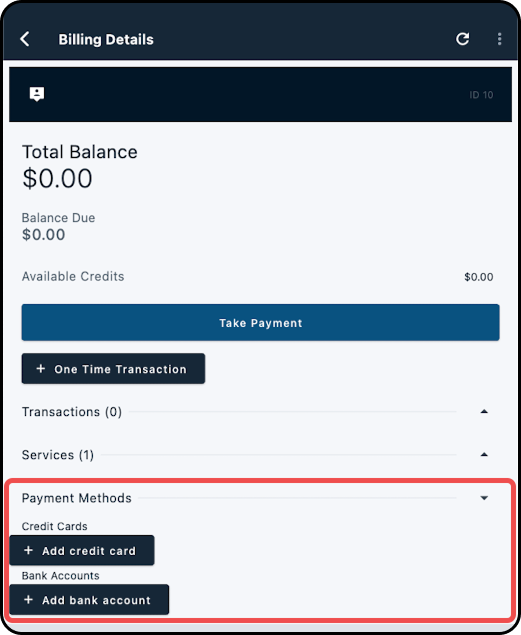
7. Enter in the name on the credit card; the account name will be populated here by default.
8. Enter in the credit card number.
9. Enter in the credit card's expiration date (in the format of MM/YY).
10. Enter in the credit card's CVV2 code.
11. The account's associated serviceable address will be populated within the Billing Address section; if the account has a separate mailing address, it will be available to be selected by tapping "Others", as will the option to add a new address.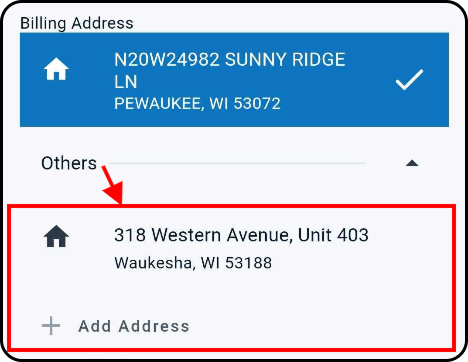
12. If this card will be used for autopay, enable the "Autopay with this card" checkbox.
13. Tap "+ Add credit card" to add the payment method to the account.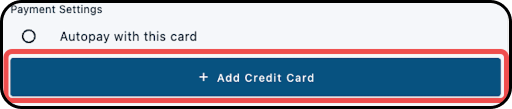
14. The credit card will now appear listed under Credit Cards within the account's Payment Methods section.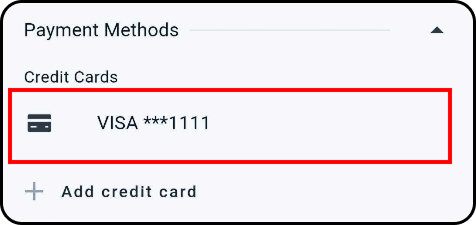
How to Add a Recurring/Expiring Service to an Account
1. Navigate into the Job Details screen for the associated customer's job.
2. Tap "Account".
3. Scroll down to the Billing section.
4. Tap on "Billing Details".
5. Under the Services section, select "Add Service".
6. From the screen that appears, select the service that will be added to the account. This can be done by:
a) Using the "Search Services" to enter in the service name, or scrolling through the list to find the service: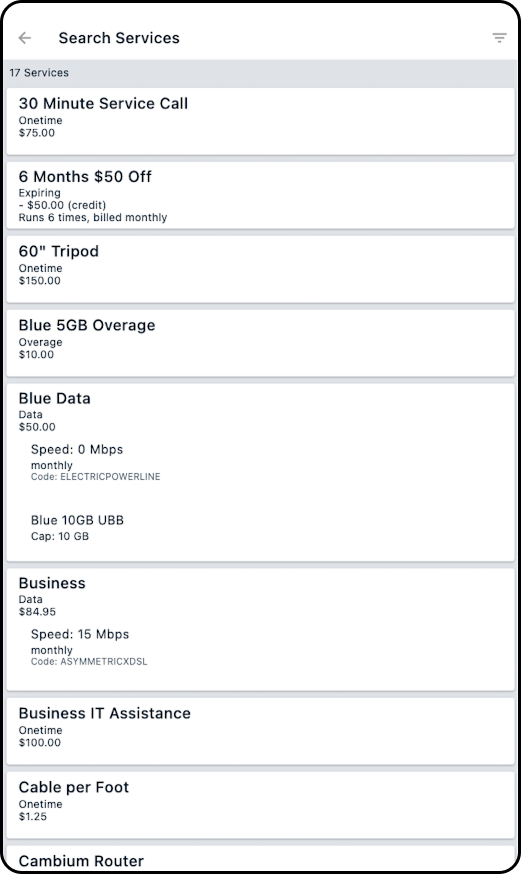
b) Using the filters to toggle the services that appear in the list:
7. Once you've selected the service you wish to add, the Add Service To Account window will appear.
8. Use the "Quantity" field to enter in how many of this service should be added.
9. If this service will have a price override, use the "Price Override" field to enter in the new price, and provide a brief explanation in the "Price Override Reason" field.
10. If the service name needs to be changed before being added to the account, use the "Name Override" field to enter in the service name that will appear for the customer.
11. If the bill date for this service is different from the customer's next bill date (configured within their billing settings), enter in the date to the "Next Bill Date" field.
12. Select "Add Service".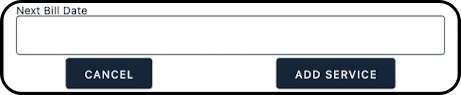
13. The service will be added to the account and appear under the account's Services section.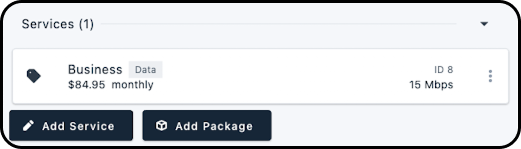
How to Add Packages to an Account
The following steps require the permission Add and remove account services to be enabled for the user; this permission is also known as UPDATE_ACCOUNT_SERVICE_PARAMETERS if you're adding the permission via GraphiQL.
1. Starting from the Job Details page, tap through to the customer's account.
2. Scroll down to the Billing section of the account and tap on Add Package.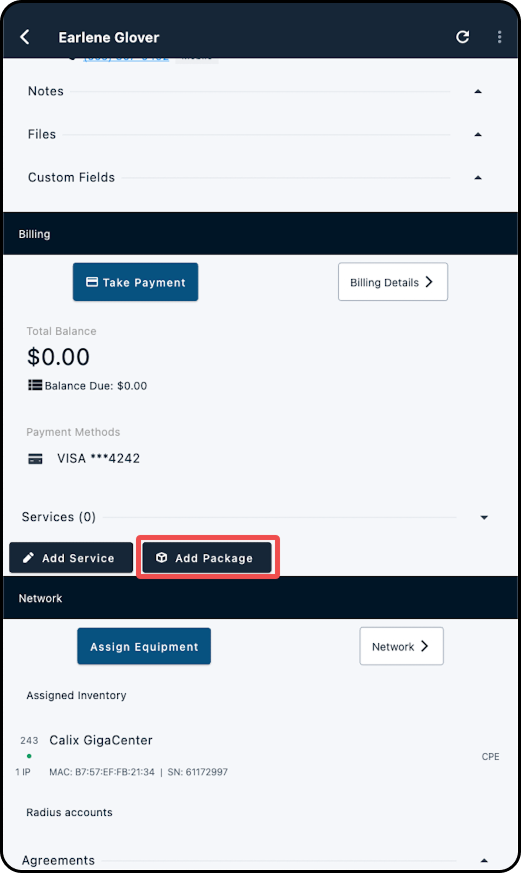
3. On the new page, locate the package you wish to add and tap on it's title.
4. In the Add Package to Account modal, make any adjustments that may be needed (such as adding quantity to generic parameters), add a checkmark alongside Prorate addition if necessary and tap on Add Package.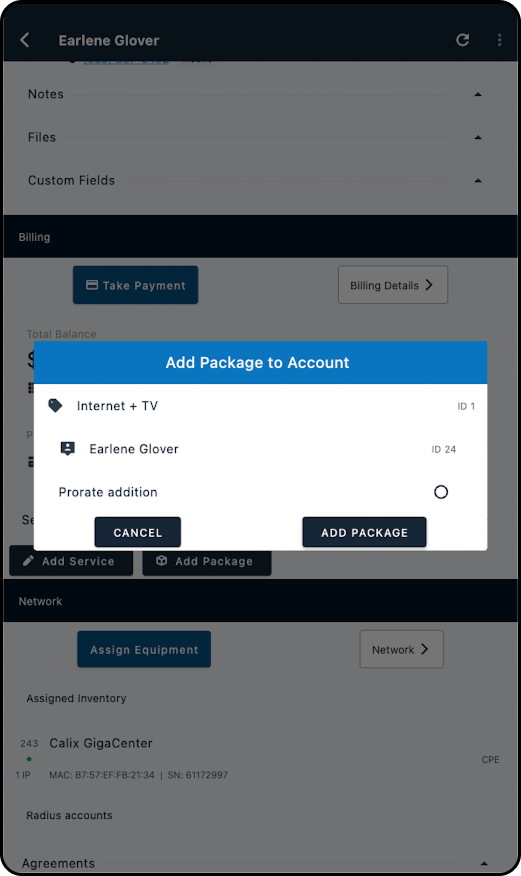
How to Generate a One-Time Invoice
1. Navigate into the Job Details screen for the associated customer's job.
2. Tap "Account".
3. Scroll down to the Billing section.
4. Tap on "Billing Details".
5. Under the Billing History section, tap the "+ Generate One-Time Invoice" button.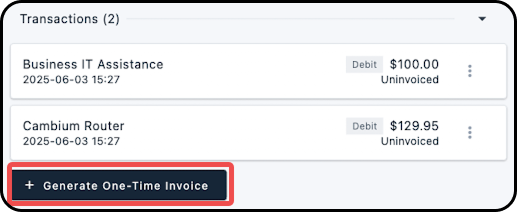
6. The Create Invoice window will appear, where you will need to select which debits you wish to invoice, out of the uninvoiced debits available.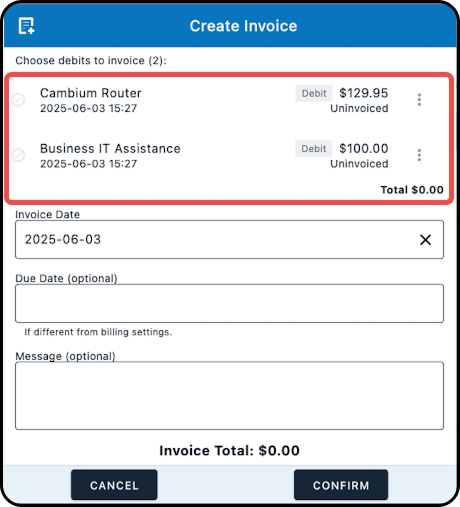
Once you select a debit (by tapping on it), the checkmark next to it will turn green; the Total and Invoice Total amounts will be updated to reflect the included debit(s).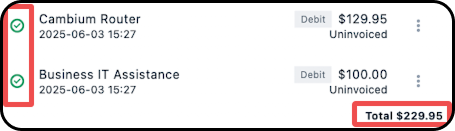
7. Enter in an invoice date; the current date will be populated here by default.
8. Optionally, you can enter in an invoice due date, if the invoice due date needs to be different than what is configured within the account's billing settings.
9. Enter in a message to appear on the invoice, if needed. Please note that the text entered here will overwrite any existing invoice message that is in place within the Sonar instance.
10. Tap "CONFIRM" to generate the invoice.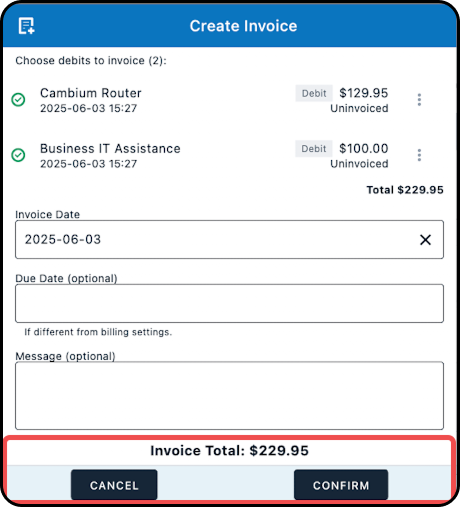
11. The invoice number will now appear for each debit that was invoiced, under the Billing History section of the account.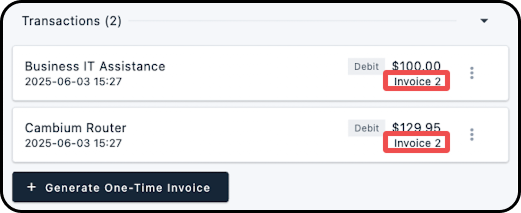
How to Take a Customer Payment
1. Navigate into the Job Details screen for the associated customer's job.
2. Tap "Account".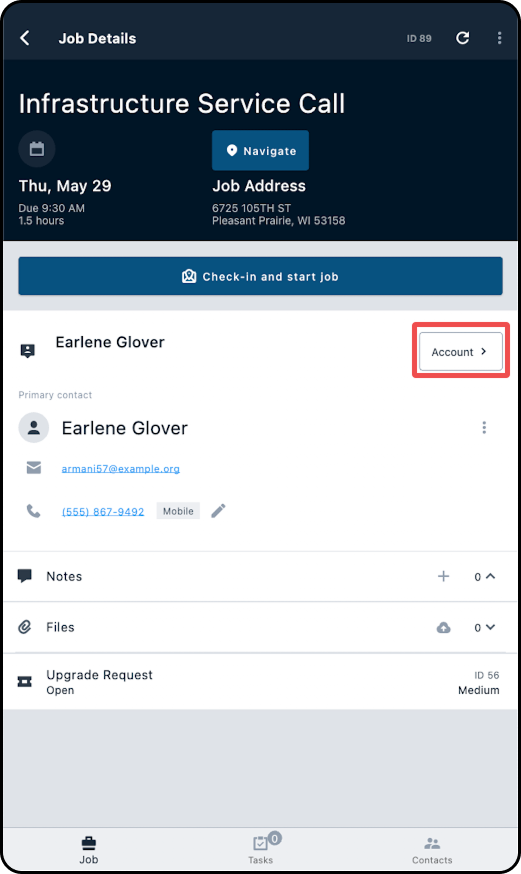
3. Scroll down to the Billing section.
4. Tap on "Take Payment".
Note: You can also access this by navigating into the "Billing Details" screen and selecting the "Take Payment" button from there.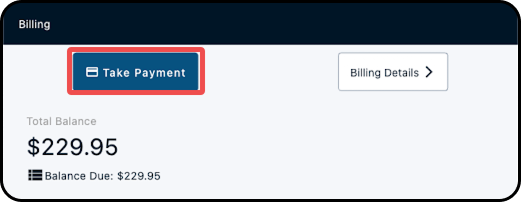
5. At the top of the Take Payment screen is where you can determine the amount of the payment, out of 3 options:
Due Now: select this button to have the payment amount be the account's currently due total.
Total: select this button to have the payment amount reflect the account's total balance.
Enter Custom Amount: select this to enter a custom amount for the payment; a Payment Amount window will be displayed, where you will need to enter in the amount in dollars and hit "Enter".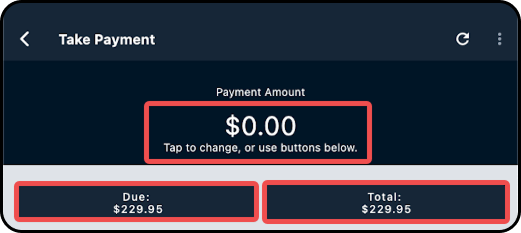
6. Once you have set the payment amount, you can then select which method will be used to make the payment. Cash, check, and wire, and other (e.g., PayPal) will be available as payment methods, in addition to any credit card or bank account that has already been, or could be, added to the customer's account. Once decided, simply tap on the payment method you wish to use.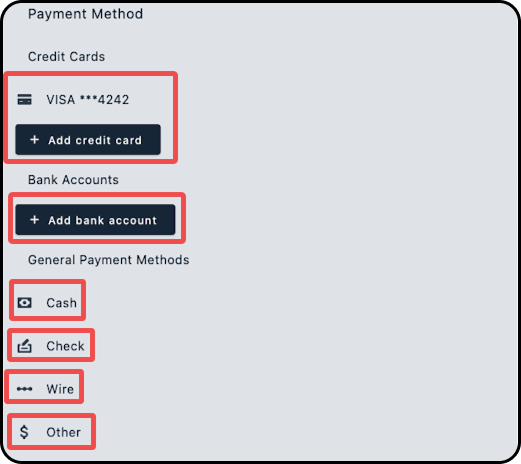
7. Tap on the "Review Payment" button.
8. Within the Confirm Payment window that appears, ensure the payment details are correct, and then tap "Confirm".
9. The payment will be made and the account's Due Now and Total Balance amounts will be updated accordingly.
Inventory
Assign Equipment to an Account
1. Navigate into the Job Details screen for the associated customer's job.
2. Tap "Account".
3. Scroll down to the Network section.
4. Tap the "Assign Equipment" button.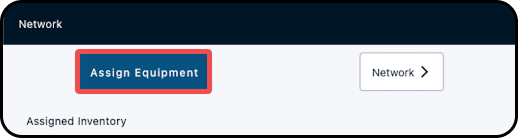
5. The Assign Inventory window will appear, where you will need to select the inventory item. This can be done by:
a) Scrolling through your list of inventory items,
b) Using the search bar to narrow down your list of inventory items, or
c) Tapping the "SCAN" button to use your mobile device's camera to scan the barcode on the item or the box the item is packaged in.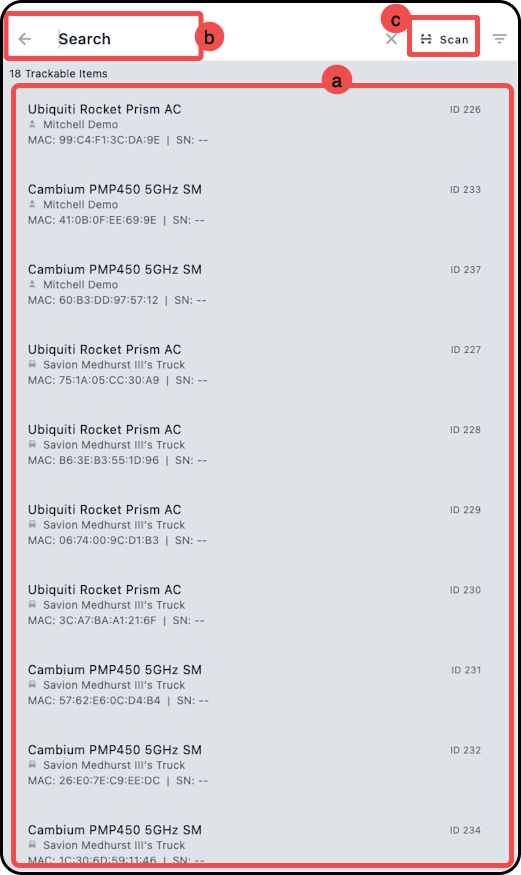
6. Once you have selected the inventory item you wish to add, it will now appear under ASSIGNED INVENTORY within the Network section.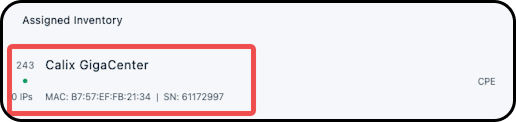
7. Tapping on any inventory item listed under the ASSIGNED INVENTORY section for an account will navigate you into the Item Details page for that piece of equipment; from this page you will be able to view model information and additional details, as well as view and add IP assignments, notes, or files to the item.How to Consume Inventory
From User/Vehicle Details:
1. Navigate to User Details.
2. Expand the items below Consumable Inventory Items and tap on the applicable inventory item.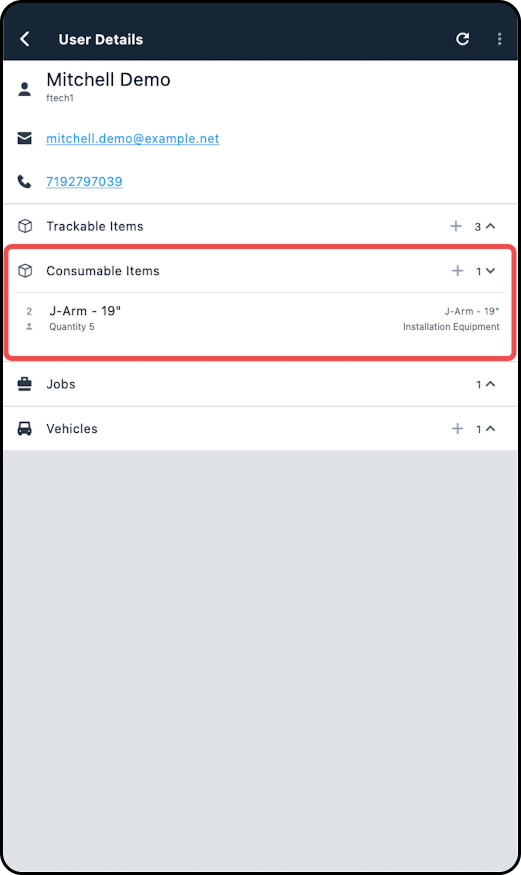
3. Tap on "Consume Items".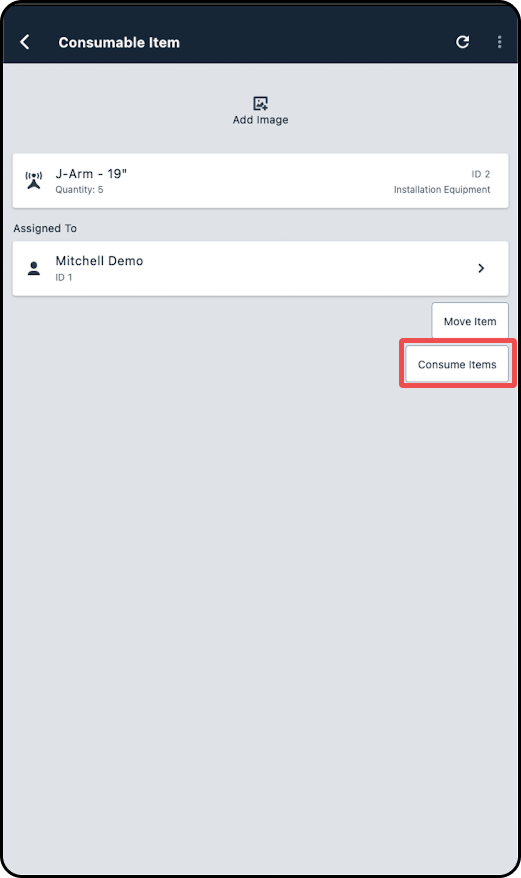
4. Input the quanity you need and tap on "Consume".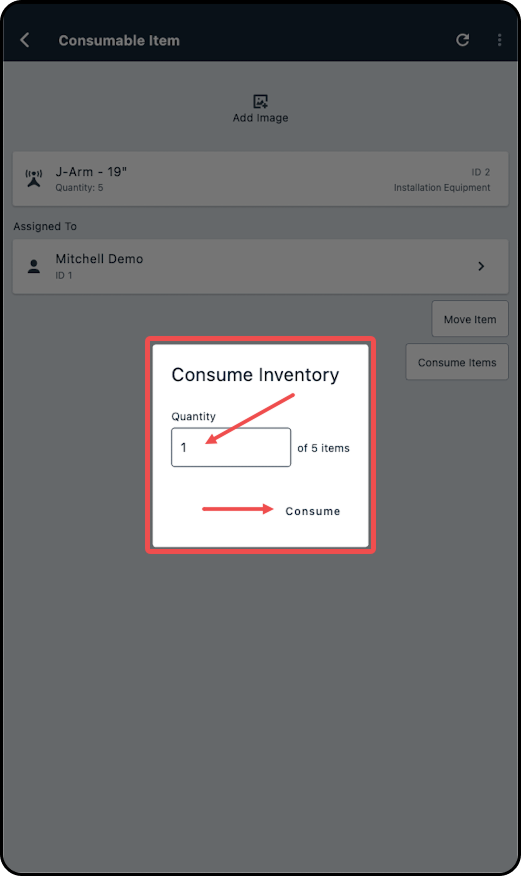
From Inventory:
1. Navigate to Inventory.
2. Select from the listed Inventory Locations.
3. Locate the applicable model and tap on it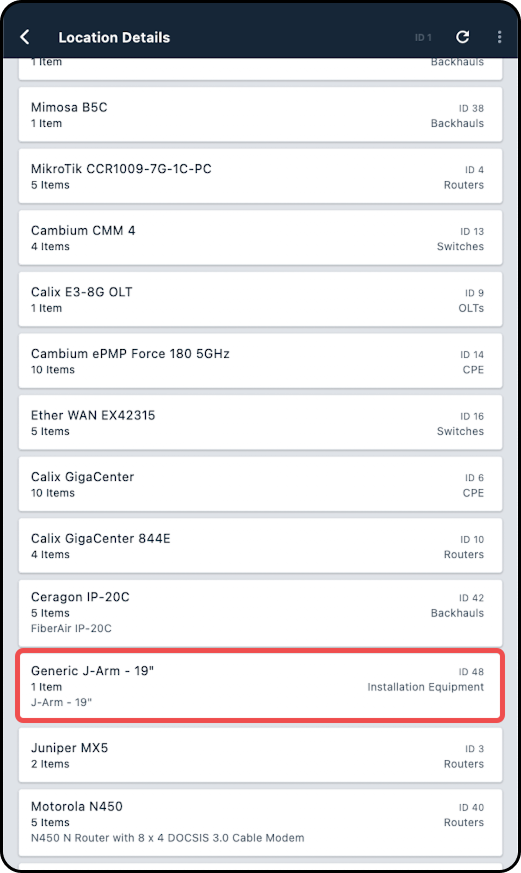
4. Within Model Details, tap on the item.
5. Tap on Consume Items.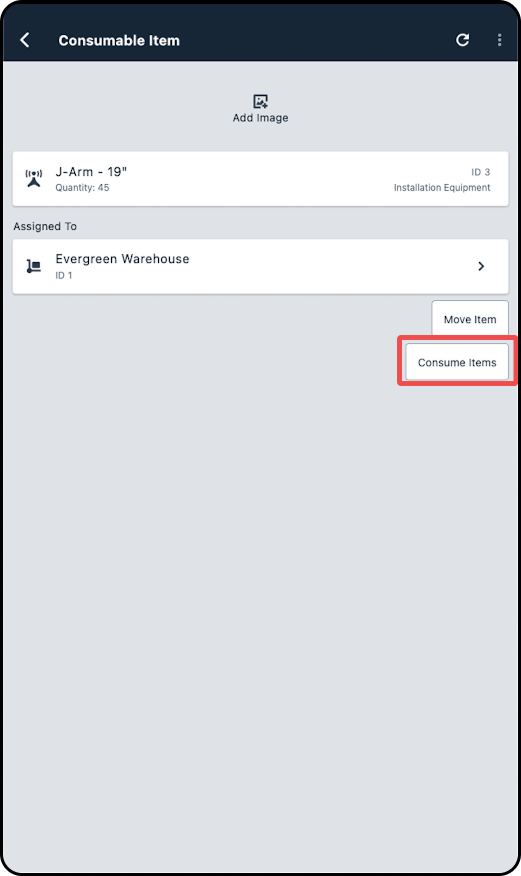
6. In the new modal enter the quantity and tap on Consume.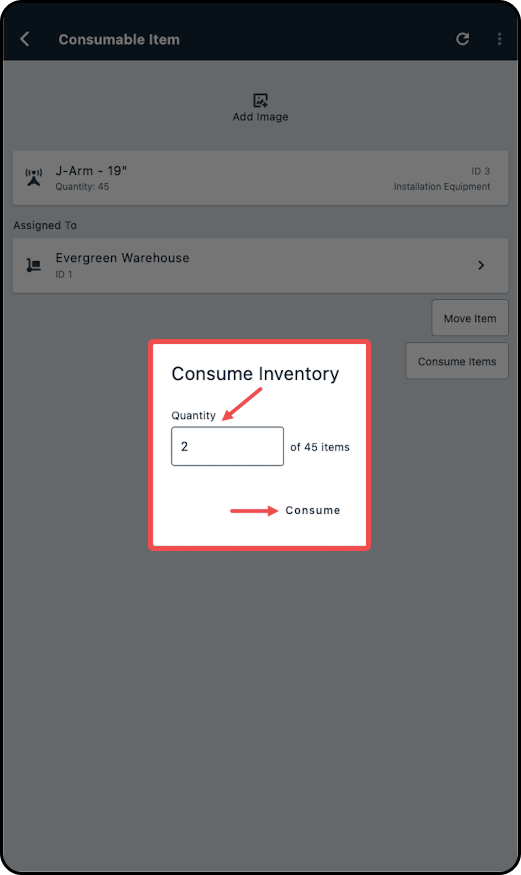
How to Move Equipment From an Account
1. Navigate into the Job Details screen for the associated customer's job.
2. Tap "Account".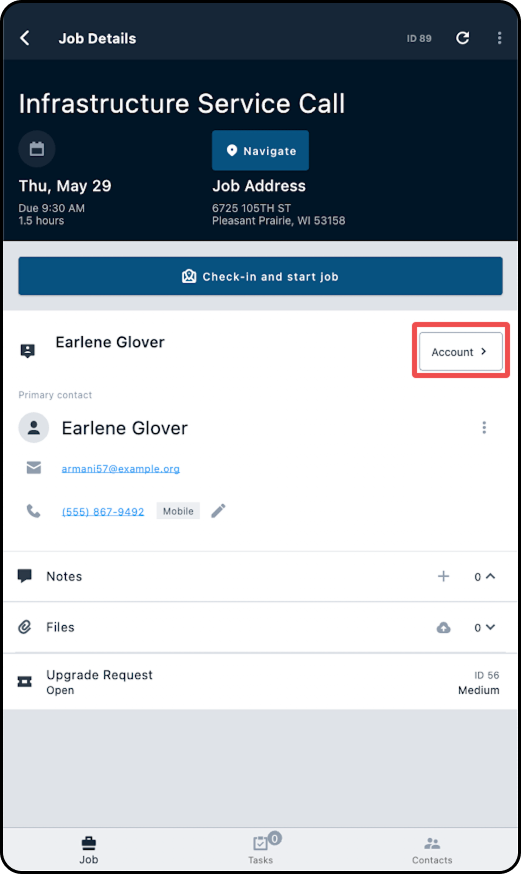
3. Scroll down to the Network section.
4. Under ASSIGNED INVENTORY, select the piece of equipment you wish to remove from the account.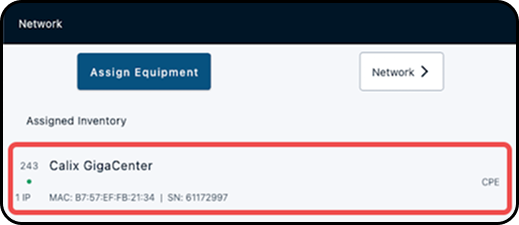
5. Within the Item Details screen, tap on "Move Item".
Note: All IPs assigned to the inventory item will be removed once the equipment has been moved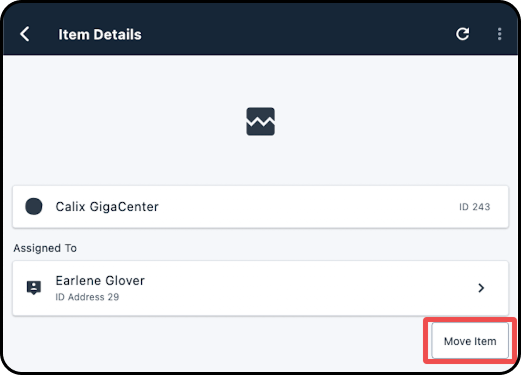
6. In the 'Move Inventory' window that appears, select the inventory location that this piece of equipment will be reassigned to (i.e. to your Sonar user, or the vehicle you are currently using).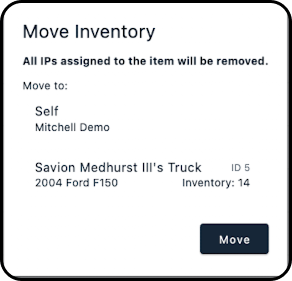
7. Select "Move" from the bottom right corner.
8. Navigating back a screen (to the account page), you will no longer see the inventory item appearing under ASSIGNED INVENTORY.How to split, assign, and deploy Segmentable Inventory.
The follow steps require the permission Create a new inventory item to be enabled for the user; this permission is also known as CREATE_INVENTORY_ITEM if you're adding the permission via GraphiQL. Segments must be created and assigned to their destination in a two-step process, as detailed below:
1. Navigate into the Inventory page and locate the segment to be modified. Segmentable inventory can always be identified by the scissor icon.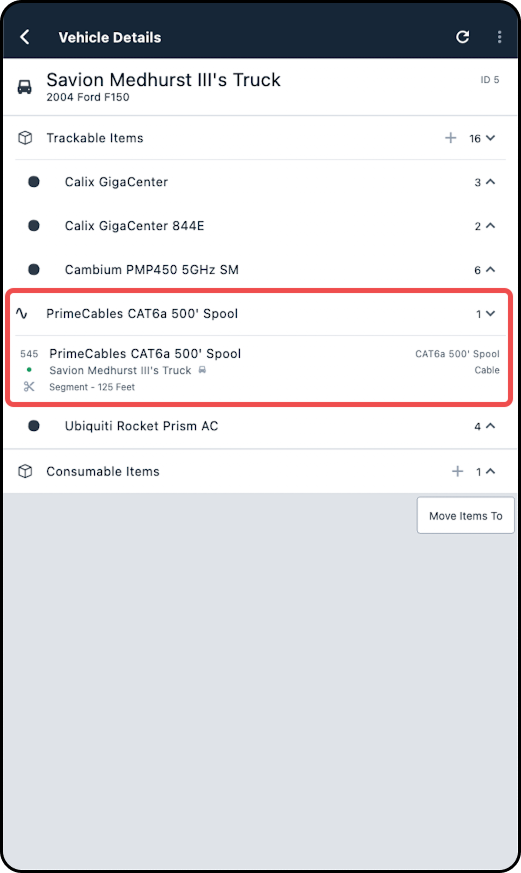
2. On the Item Details page, tap on "Edit Segment"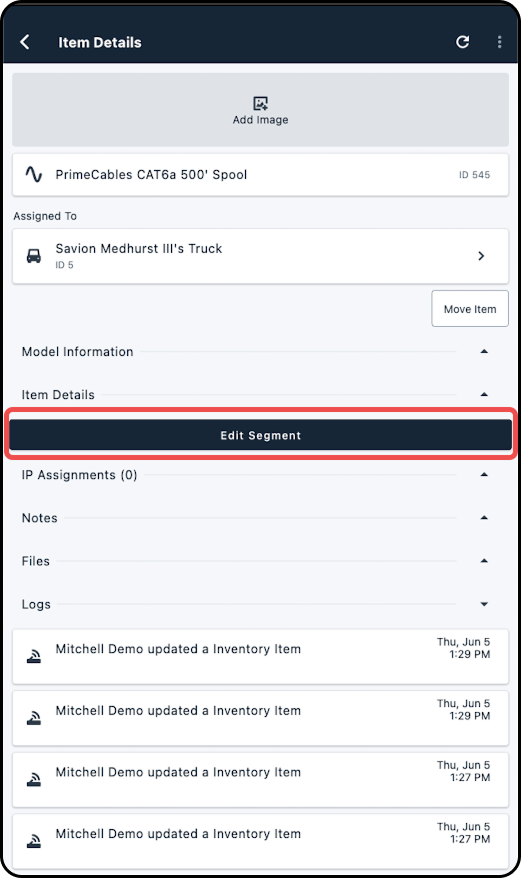
3. Enter the desire Quantity value. For a new segment, ensure "Create New Segment" is selected, in addition to the appropriate destination for the remainder.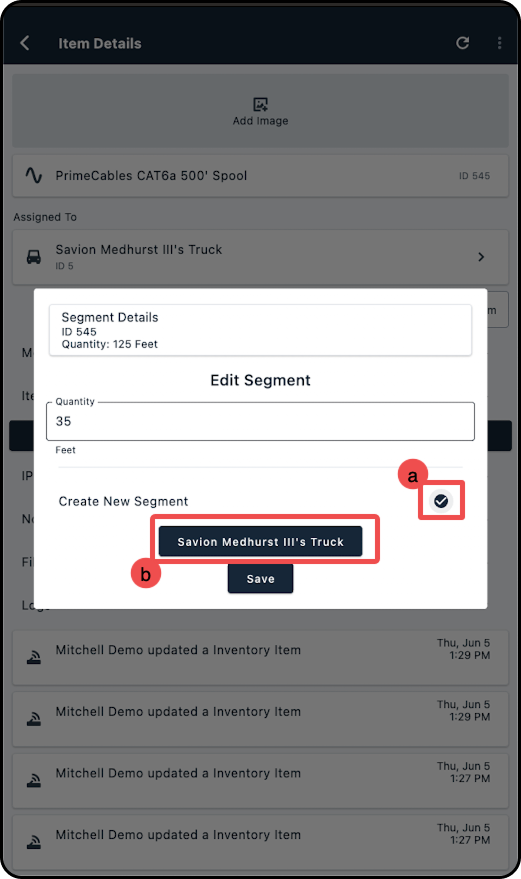
a) If Create New Segment is not selected, it will be treated as a correction, amending the original parent segment and this segment.
b) The selectable destinations will always be your vehicle or yourself - assigning directly to an account, network site, or inventory location is not supported.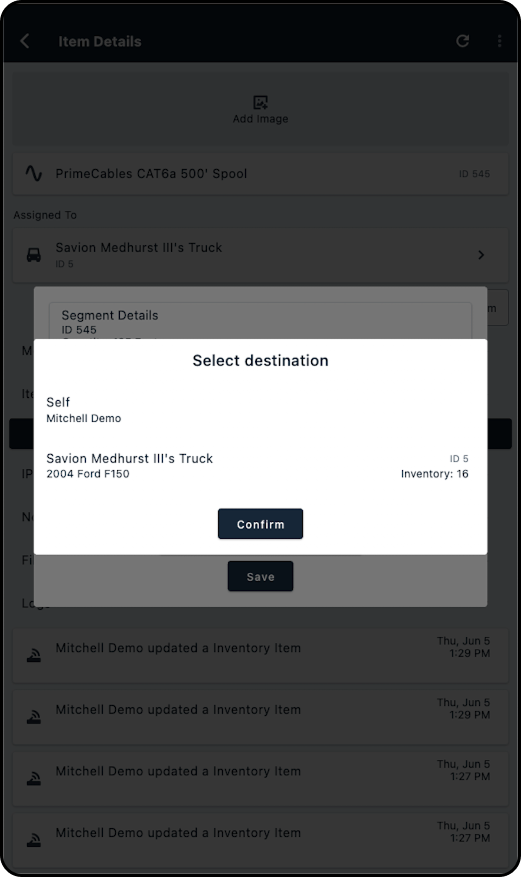
4. Navigate to the job details for the job that requires the segmentable inventory to be deployed, and click on Account.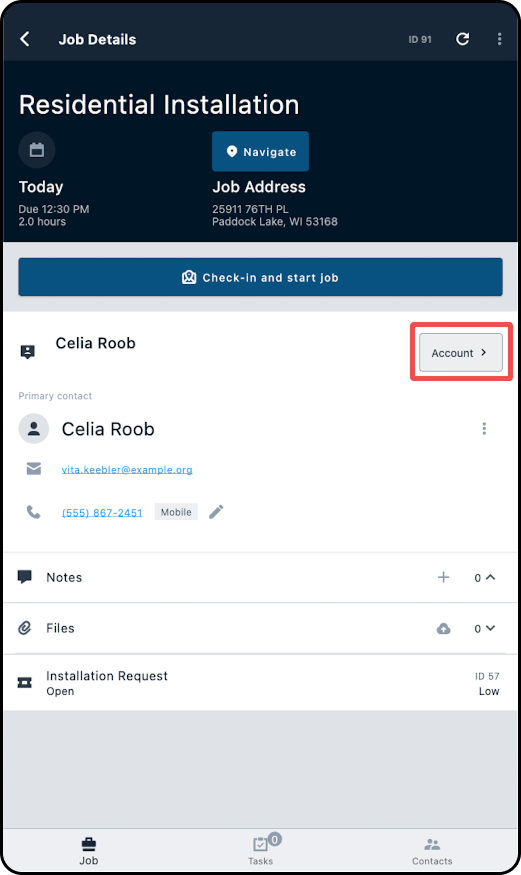
5. Scroll down to Network, and select "Assign Equipment".
6. Locate the newly created segment and select it. This will assign the created quantity to this location for tracking purposes. If too muchn was removed from the original segment, the newly assigned segment can be further modified, ensuring only the exact amount used on the job is recorded.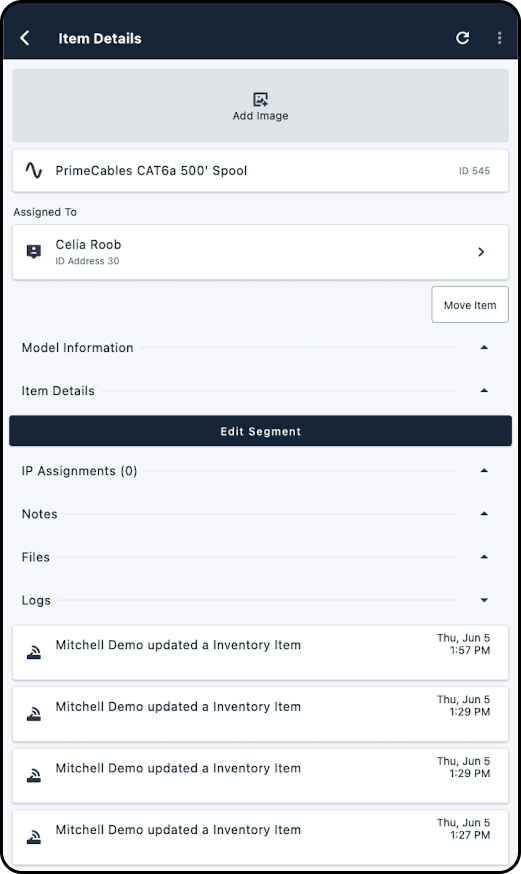
Networking
How to Assign IP Addresses
1. Navigate into the Job Details screen for the associated customer's job.
2. Tap "Account".
3. Scroll down to the Network section.
4. Select "Network".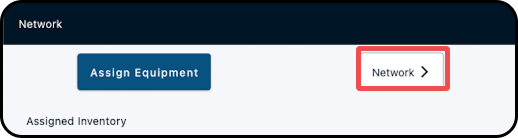
5. Within the Network Details screen, expand the Assigned Inventory section and scroll to IP Assignments.
6. Select "+ Assign IP".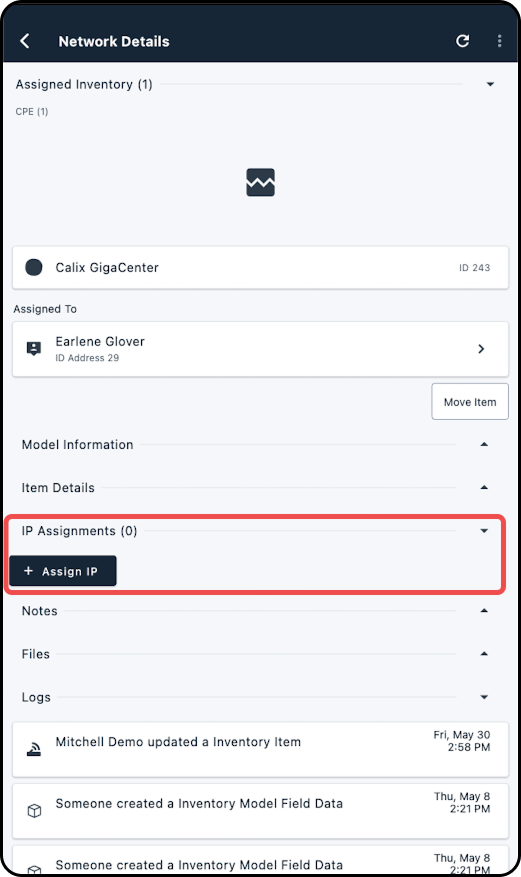
7. Within the Assign IP window that appears, select the 3 dot menu (located under Target), to open the IP Assignable Chooser window.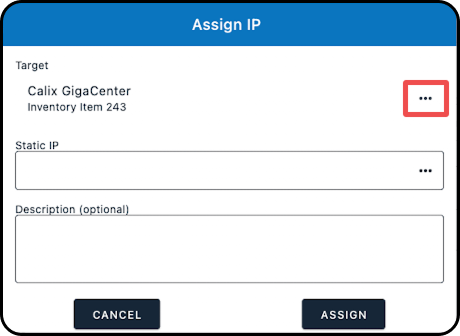
8. From the IP Assignable Chooser window, select the target for the IP address assignment; the selection made here will populate the Target section of the Assign IP window.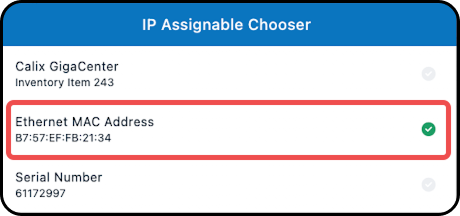
9. Back within the Assign IP window, use the "Static IP" field to specify the IP address; to enter in an IP address, you can either:
a) Manually enter in the IP address to the Static IP field.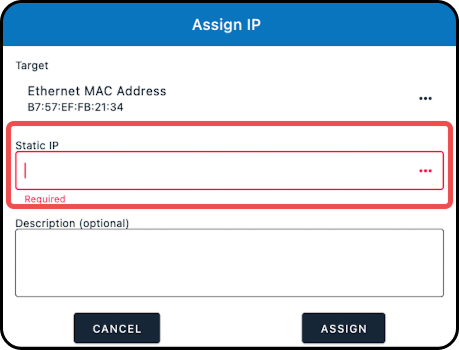
b) Select the 3 dot menu (from the Static IP field) to open the IP Pool Chooser window, where you can toggle between a flat view (that displays IP pools only), or a hierarchical IP view (that contains supernets, subnets, and pools); based on the selection made here, the IP address will automatically populate the Static IP field.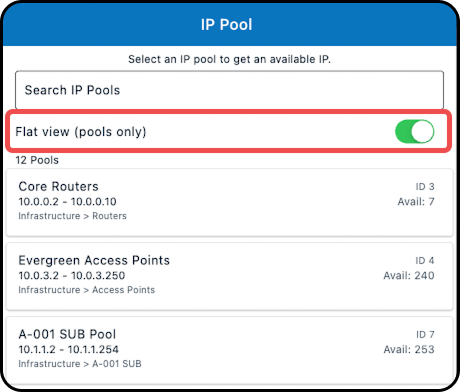
10. Once you've entered in the IP address, use the "Description" field to enter in any other required information for the assignment.
11. Select "ASSIGN".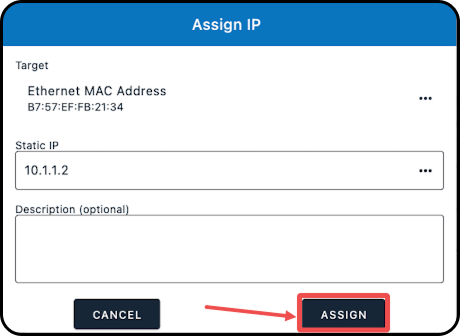
12. The new IP assignment will now be displayed under IP Assignments of the Network Details section for the account.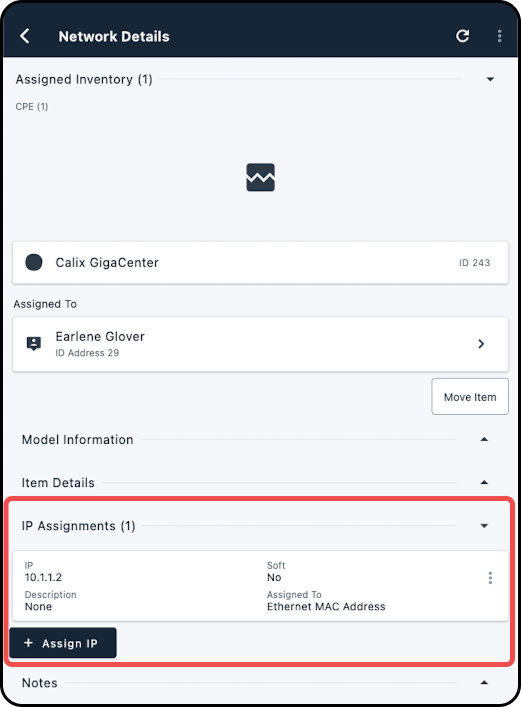
How to Assign Equipment to a Network Site
The following steps apply for both trackable and consumable inventory items.
1. Locate the job associated with the network site and tab on it to open the Job Details.
2. Tap on the Network Site button alongside the network site name.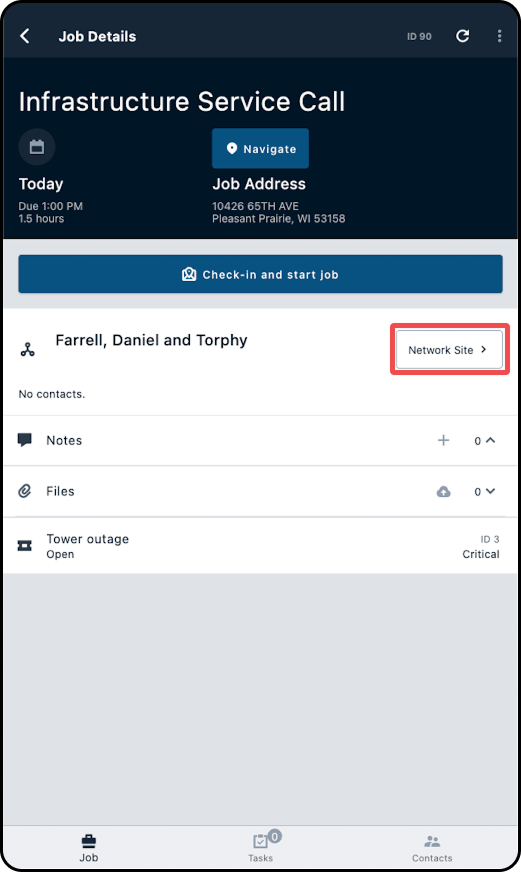
3. Tap on the + symbol alongside the applicable inventory item type.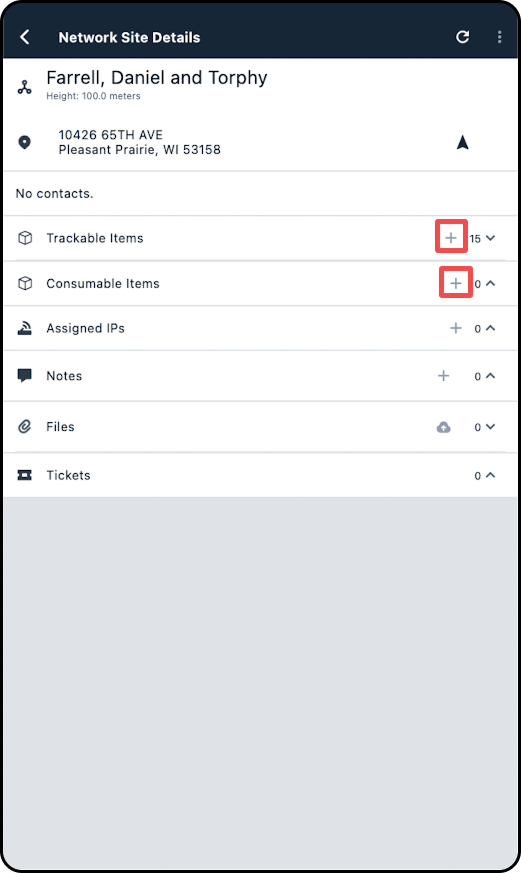
4. In the new modal, locate the inventory item you wish to assign and tap on it.
5. Following this, the item will display as associated with the network site.
Provisioning
Provision a Calix-SMx mapped service on an account
The following steps requires the permissions View all Calix integrations, Read account calix service detail,
View all integration field mappings, and View all integration service mappings to be enabled for the user; these permissions are also known as READ_CALIX_INTEGRATION, READ_ACCOUNT_CALIX_SERVICE_DETAIL, READ_INTEGRATION_FIELD_MAPPING, and READ_INTEGRATION_SERVICE_MAPPING if you're adding the permission via GraphiQL.
1. Navigate into the Job Details screen for the associated customer's job.
2. Tap "Account".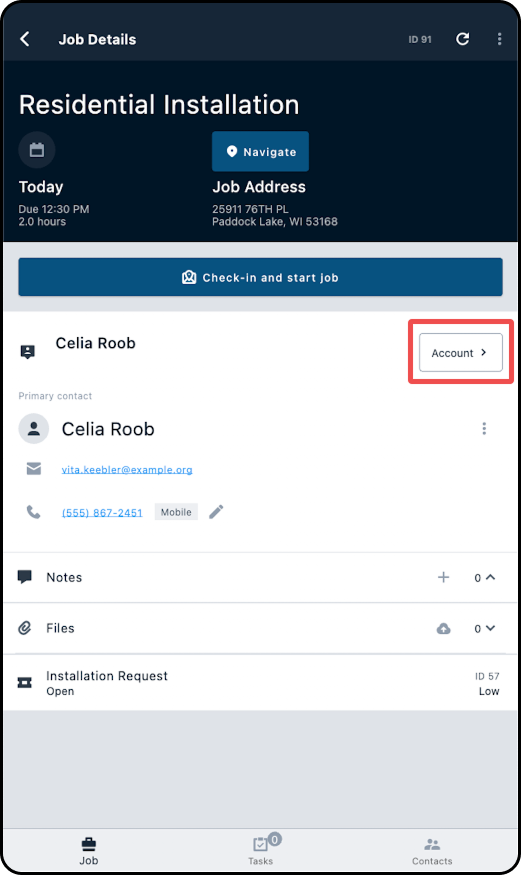
3. Because Calix SMx provisioning requires a mapped inventory item and mapped service, both needed to be added to the account for Calix Provisioning Details to generate.
4. Scroll to the Network section and tap "Assign Equipment".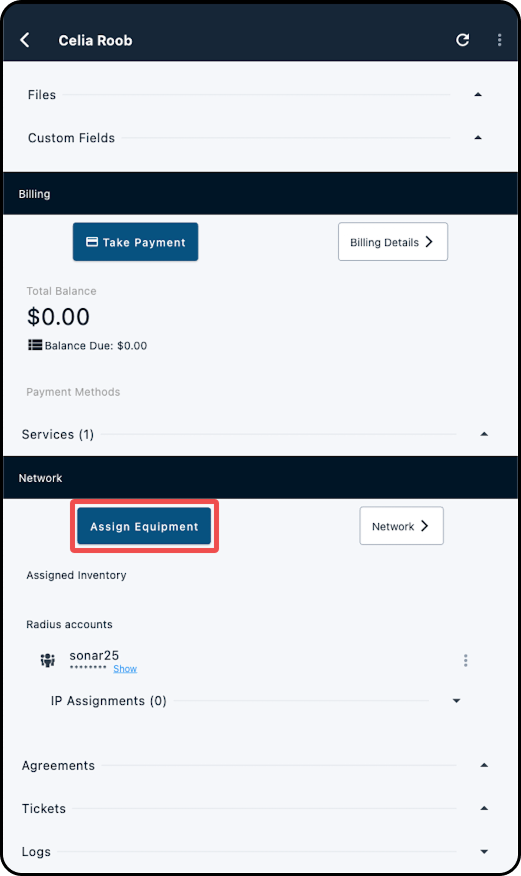
5. Tap on the filter icon and select "Calix Only Inventory"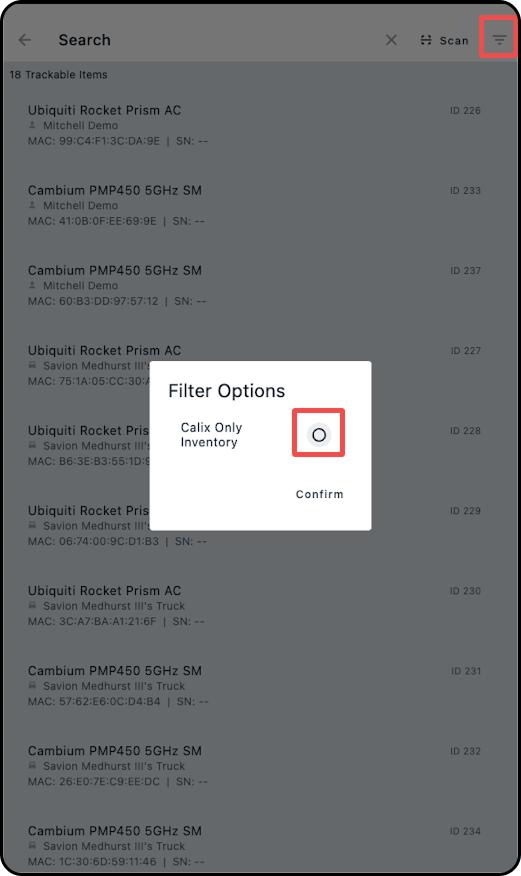
6. Select the desired inventory item to assign it to the subscriber's account. Doing so will return you to the account overview, with the item now assigned.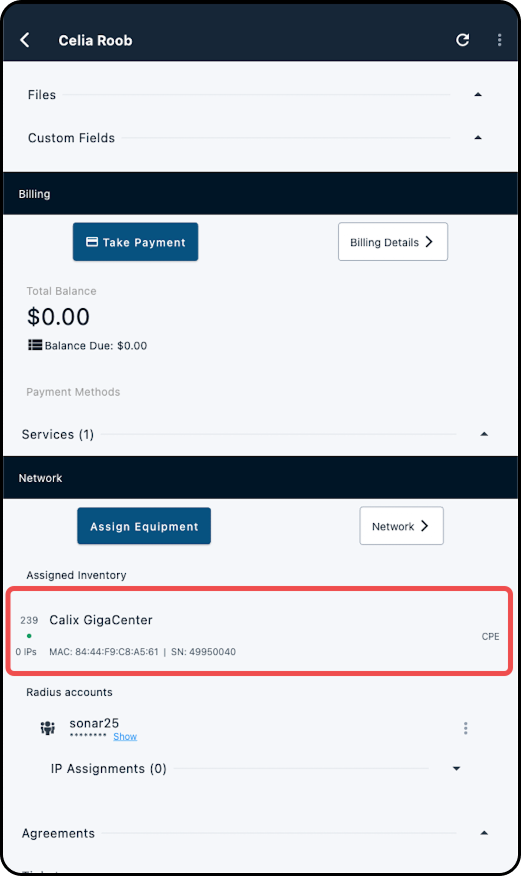
7. Scroll up to the Billing Details section, expand the "Services" dropdown, and tap "Add Service"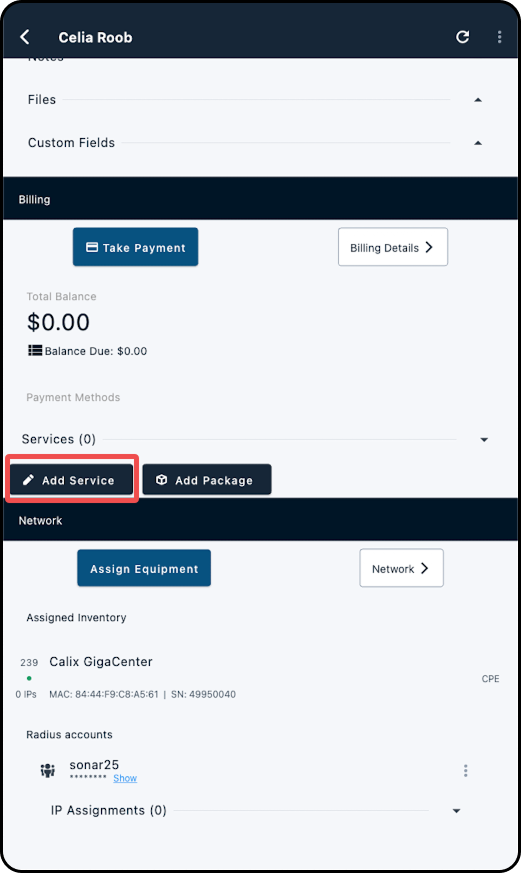
8. Tap on the filter icon and select "Calix Only Services"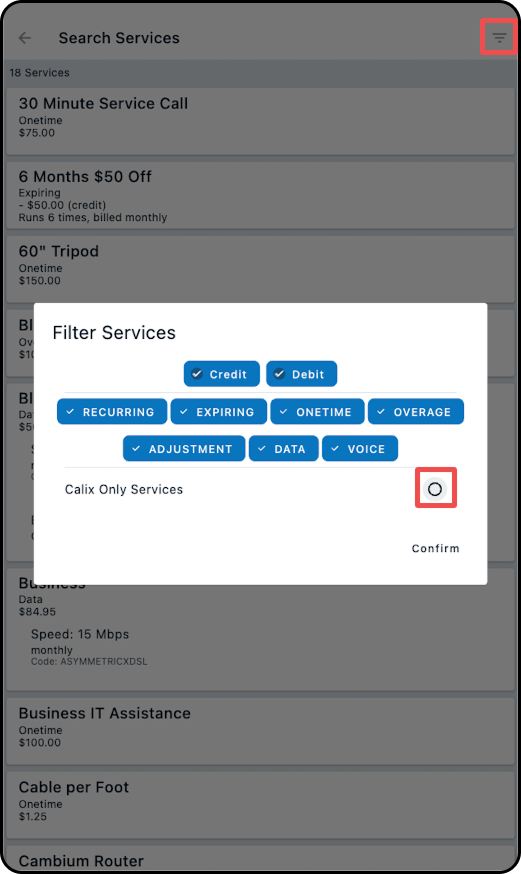
9. Select the appropriate service from the filtered list to assign it to the subscriber.
If your instance is not configured to automatically create provisioning detail records, this step will need to be performed manually:
1. Expand the Services dropdown, and tap on the 3 dots for the Calix SMx-mapped Data service, followed by Edit Provisioning Details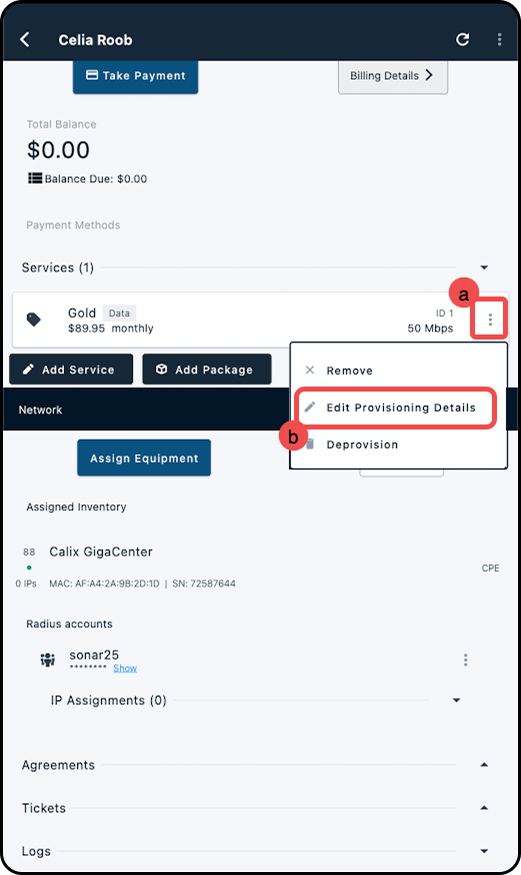
2. In the modal that appears, overwrite any default provisoning calues (if required) by checking the option, then click "Provision"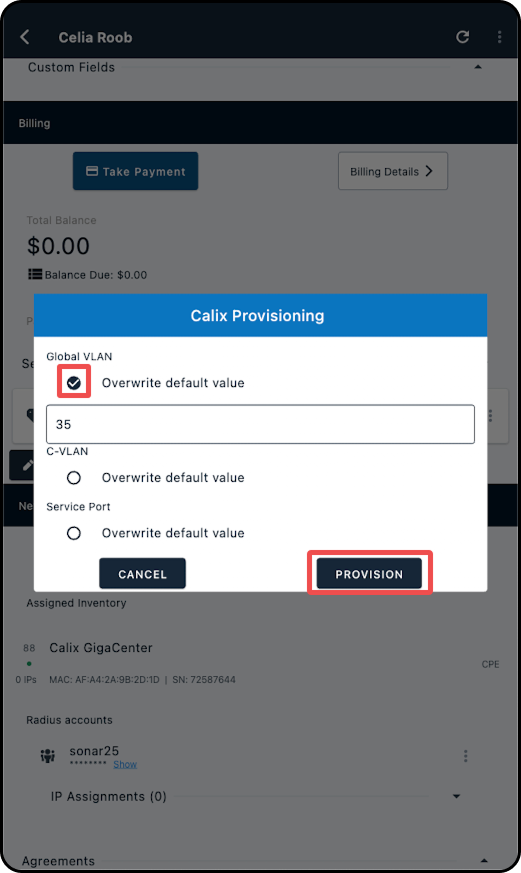
Ticketing
How to: Update a Ticket’s Resolution Reason from the Account View
This feature ensures tickets are closed with the correct Resolution Reason at the moment the work is completed—whether the ticket is closed through a job or from the account view.
Follow the steps below to add or edit the Ticket Resolution from the Account view.
1. Open the job details for the job you’re working on.
2. Tap Account.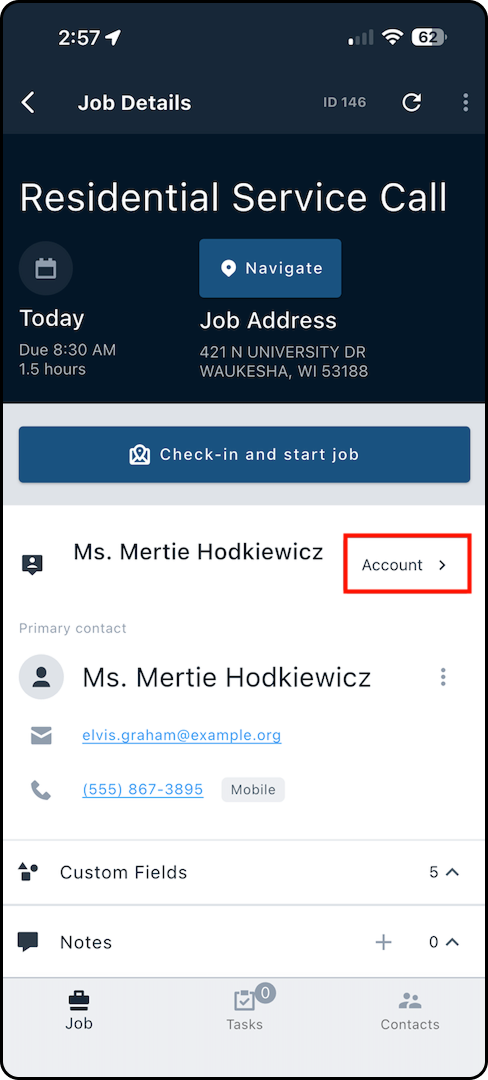
3. Scroll to the Tickets section at the bottom.Tap the drop-down arrow, then select the ticket you want to close.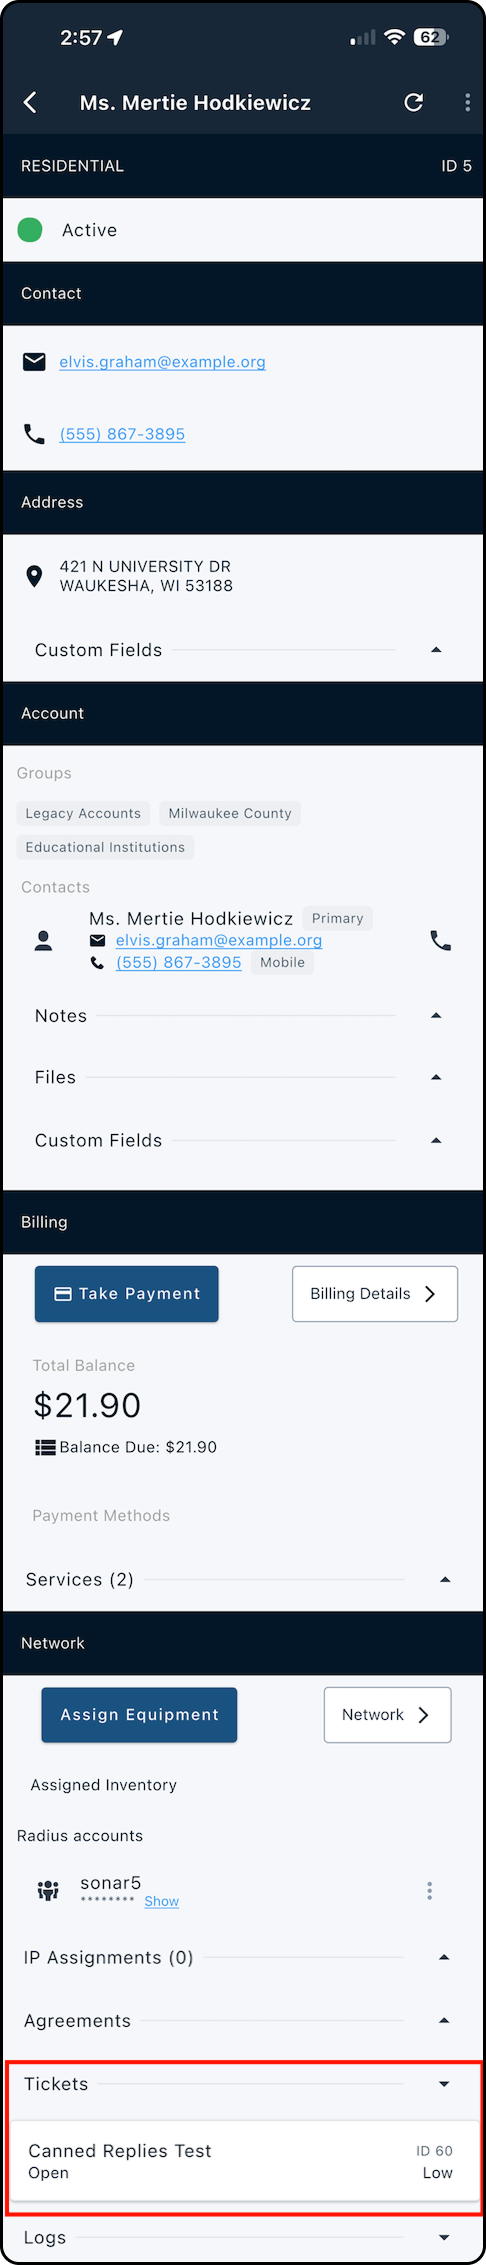
5. On the ticket details screen, tap the pencil icon next to the status option to edit the status.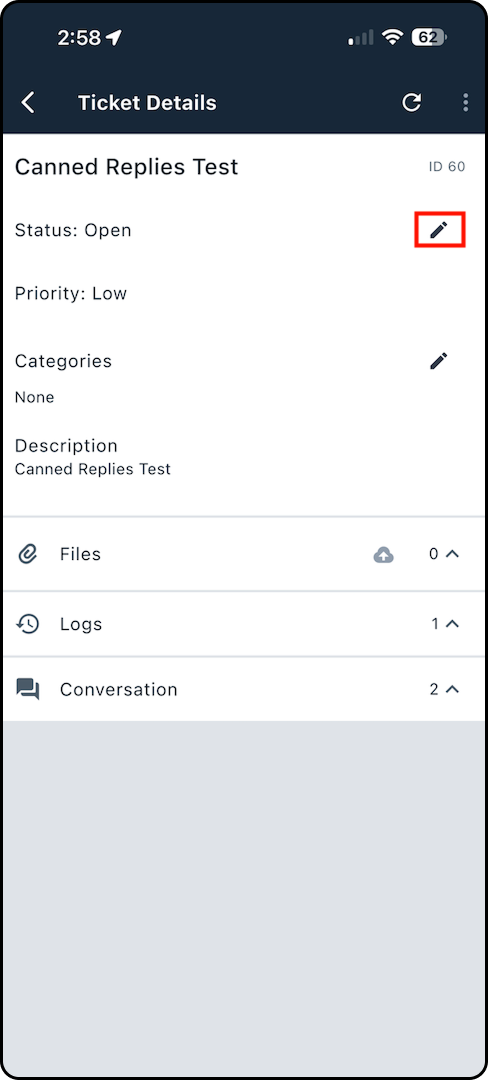
6. Click Edit, select Closed, then tap Confirm.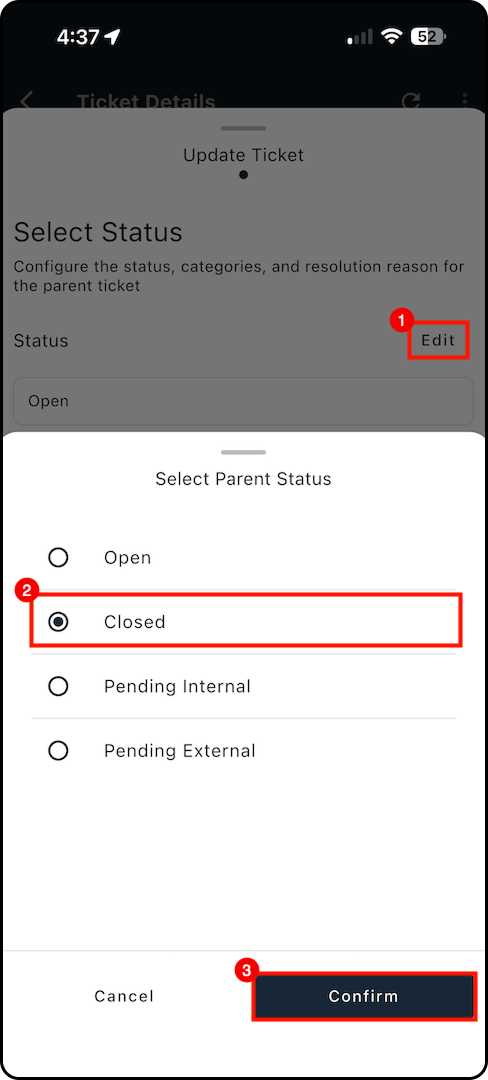
7. Next to Resolution Reason, tap Edit and choose the reason, and click Confirm.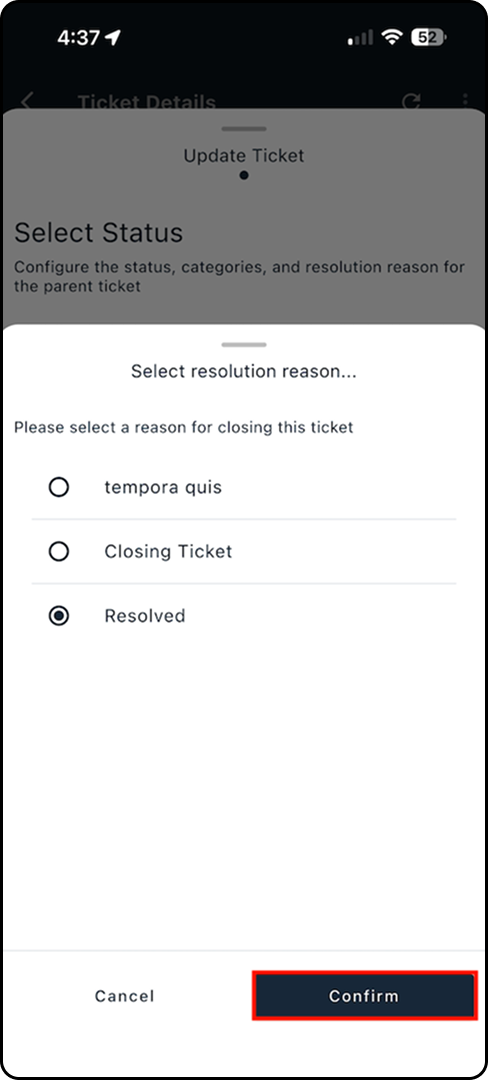
8. Verify your selections, then tap Update.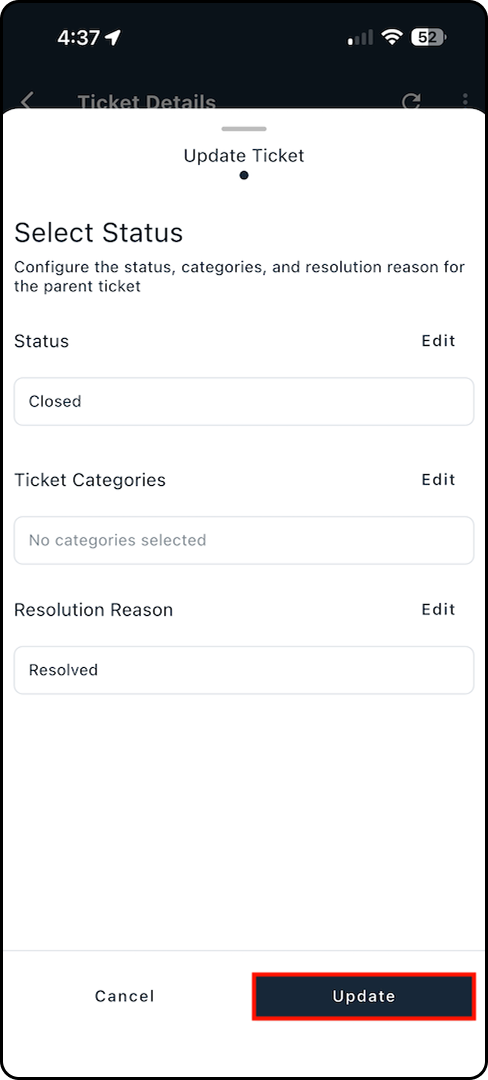
9. Verify the ticket shows as Closed on the ticket details screen and in the account’s Tickets section.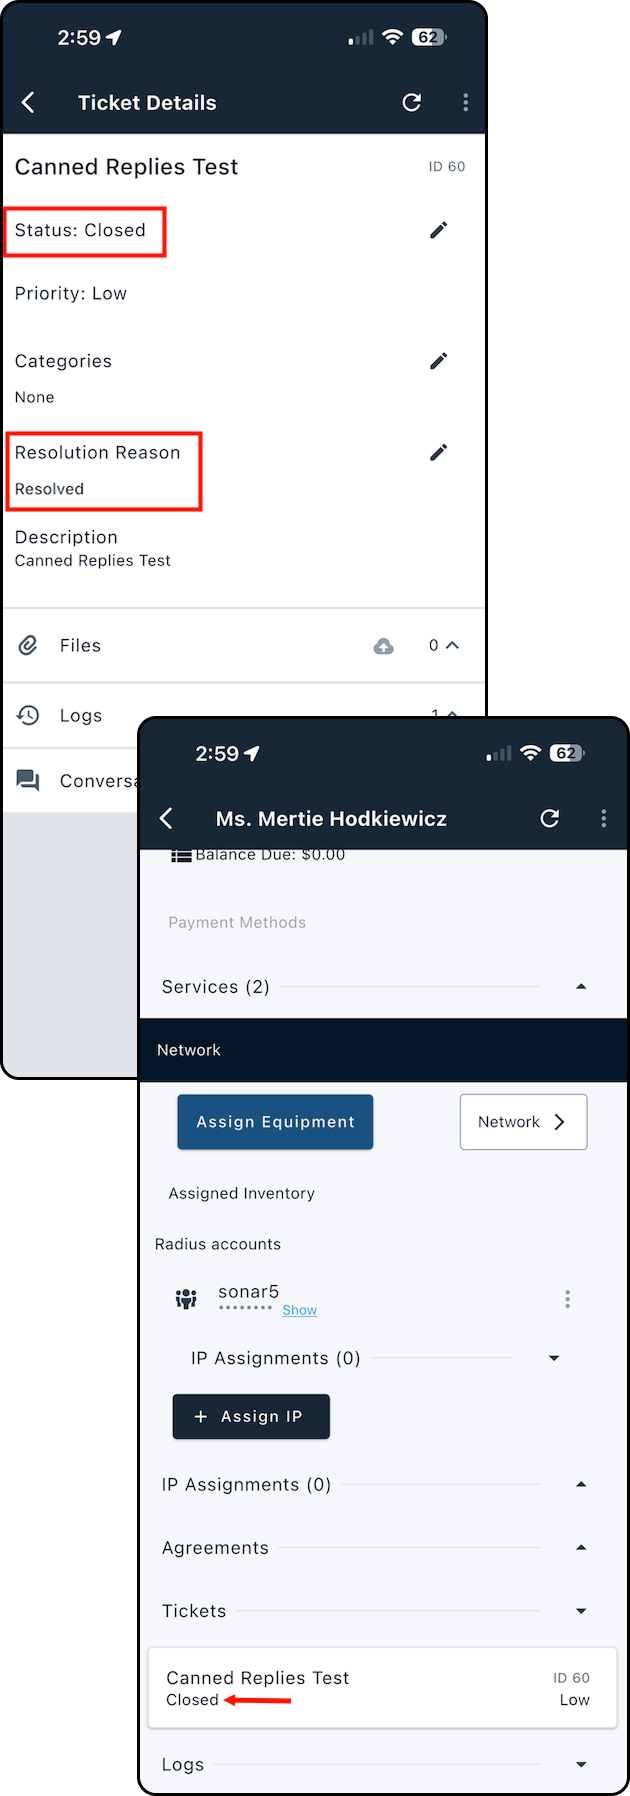
For more information on Ticket Resolutions, refer to our Ticket Resolution Reasons: Overview article.How to: Update a Ticket’s Resolution Reason When Completing a Job
This feature ensures tickets are closed with the correct Resolution Reason at the moment the work is completed—whether the ticket is closed through a job or from the account view.
If Ticket Resolution is set as required when closing a ticket, you won’t be able to complete a job that closes a ticket until a Resolution Reason is selected.
Follow the steps below to add or edit the Ticket Resolution during job completion.
1. Open the job you’re working on.
2. Tap Check In.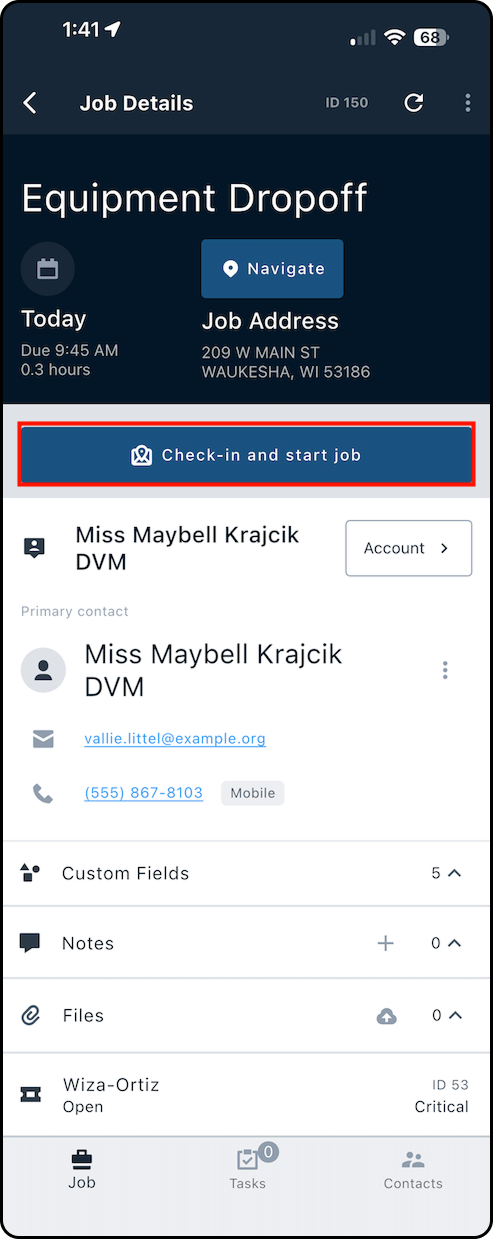
3. When you’re finished, select Complete Job (or Fail, if needed).
4. On the completion screen, find Ticket Resolution under Completion Notes.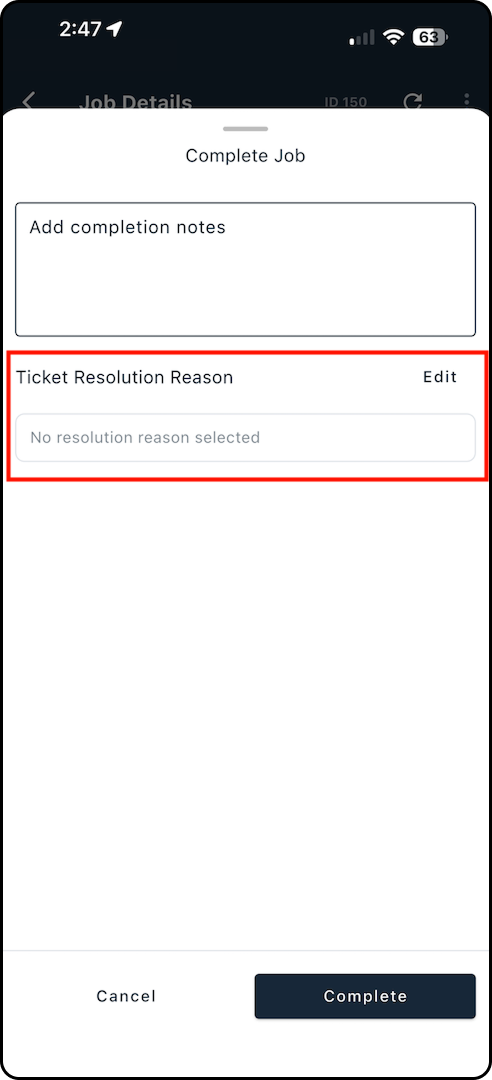
5. Tap Edit to choose a reason (or update the current selection).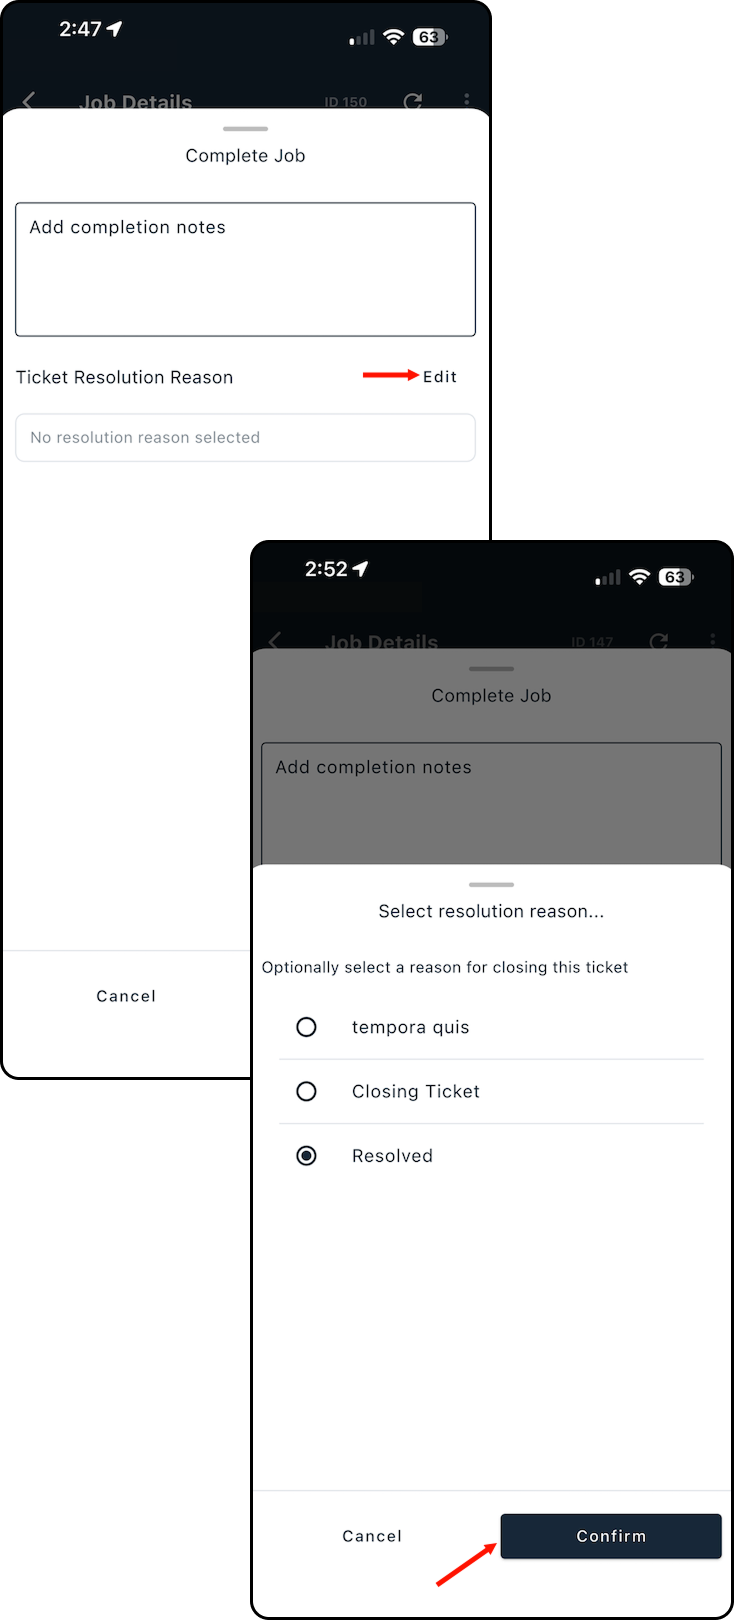
6. Enter any Completion Notes, then tap Complete to finish.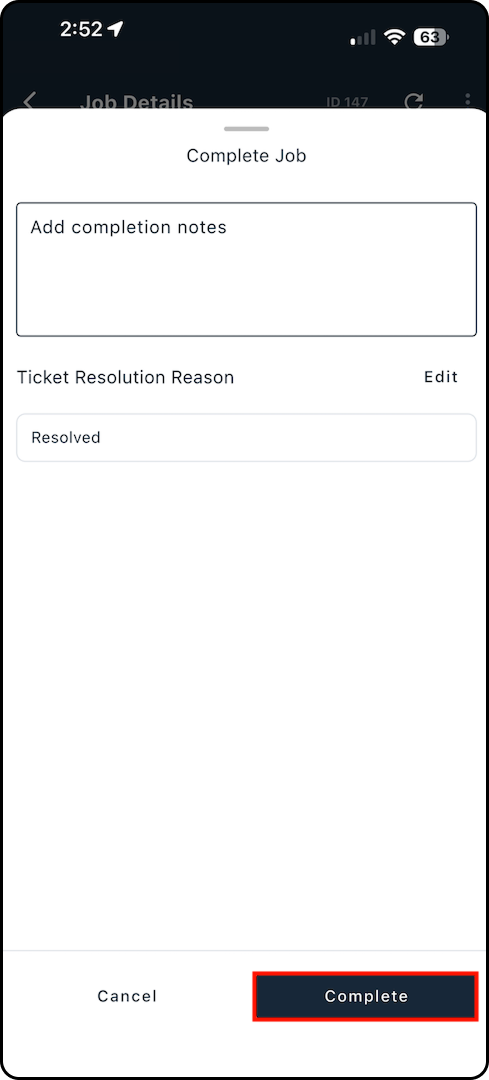
Now while viewing the job details you will find the attached ticket closed.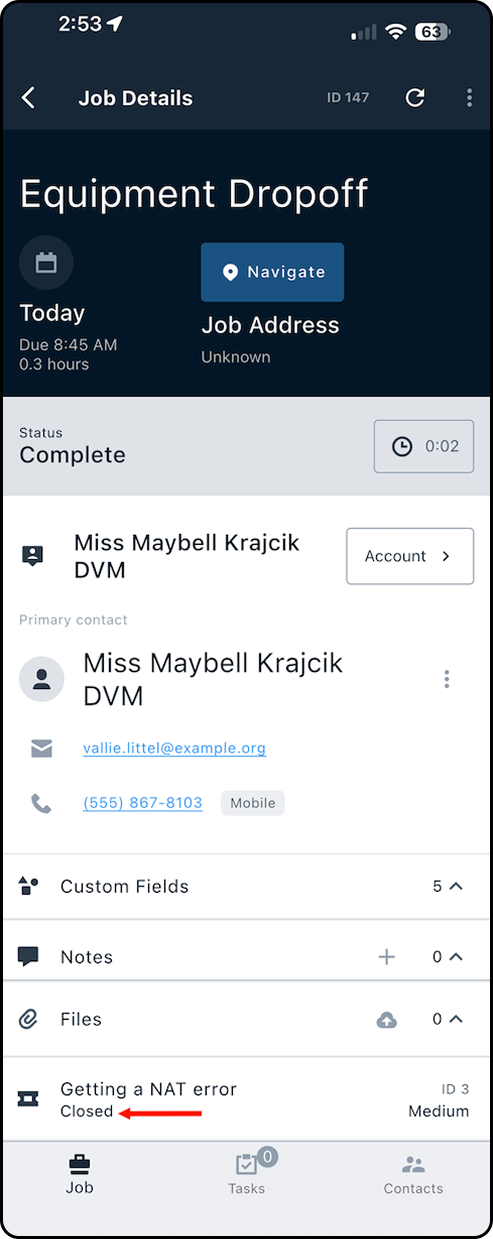
For more information on Ticket Resolutions, refer to our Ticket Resolution Reasons: Overview article.